How I Renovated My 1980’s Kitchen on a Crazy Low Budget

One of the driving forces of my blog, since its inception, has been to empower women. I want to inspire all of my awesome readers to live fulfilling, inspired lives in beautiful surroundings….. regardless of financial inhibitions (believe me, the struggle is real).
For many, the kitchen is the soul of the home where we domestic goddesses spend countless hours preparing meals for our families and entertaining guests. Today, I want to share with you how I was able to renovate my kitchen on a crazy low budget.
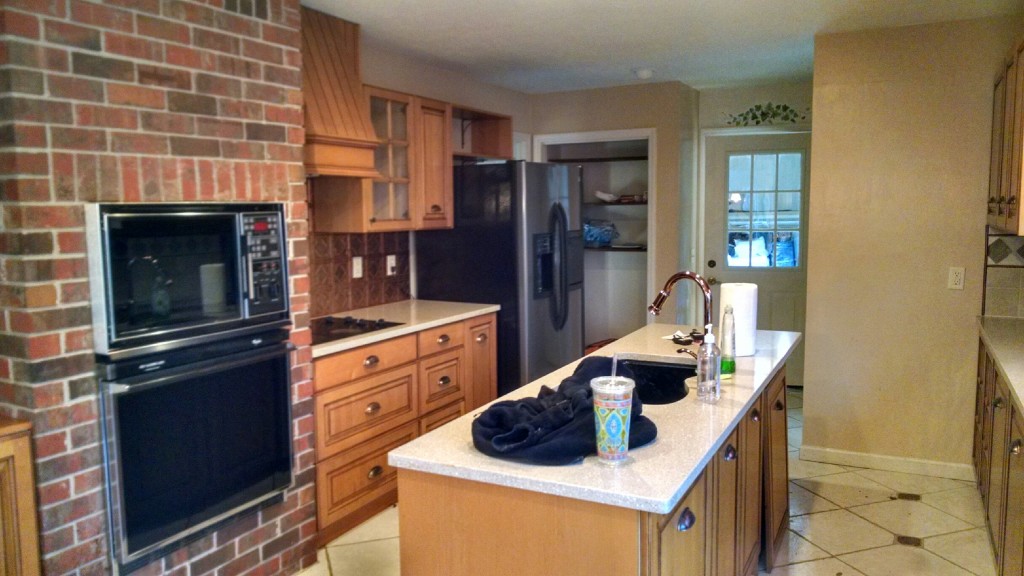
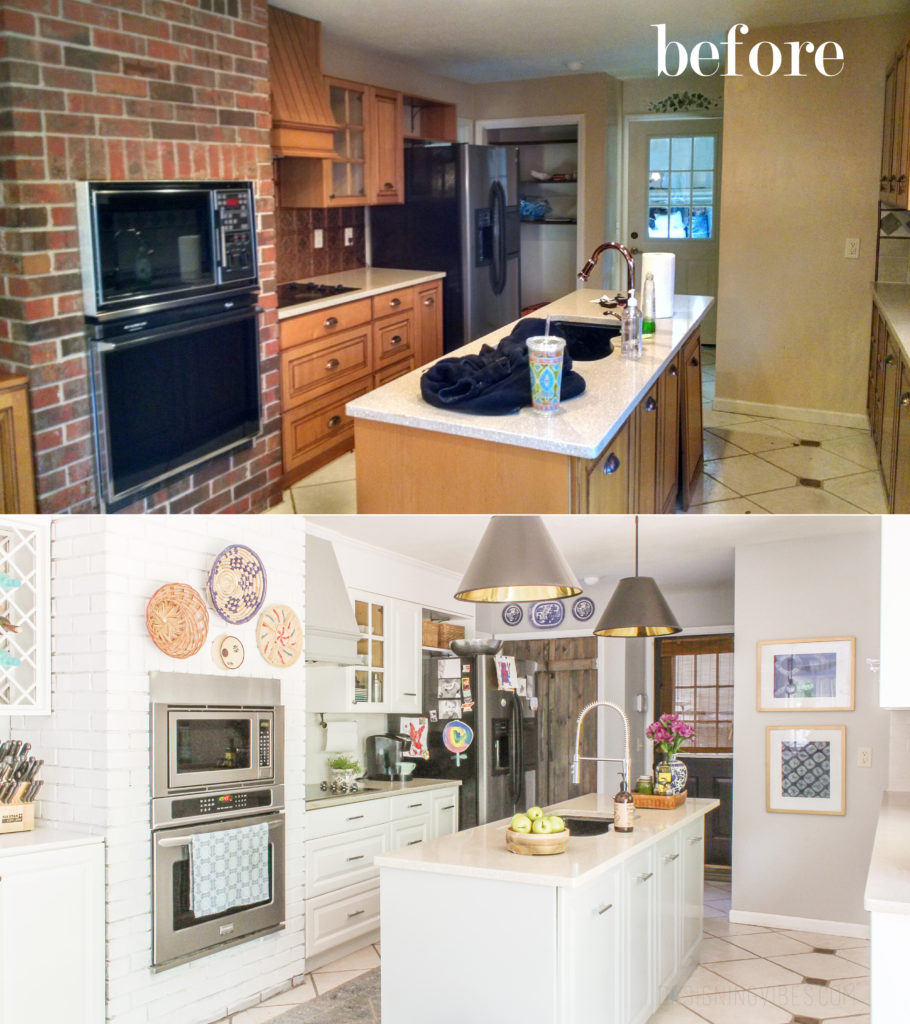
Two years ago, when we first moved into our 1980’s fixer upper, this is what the kitchen looked like …..
Before:
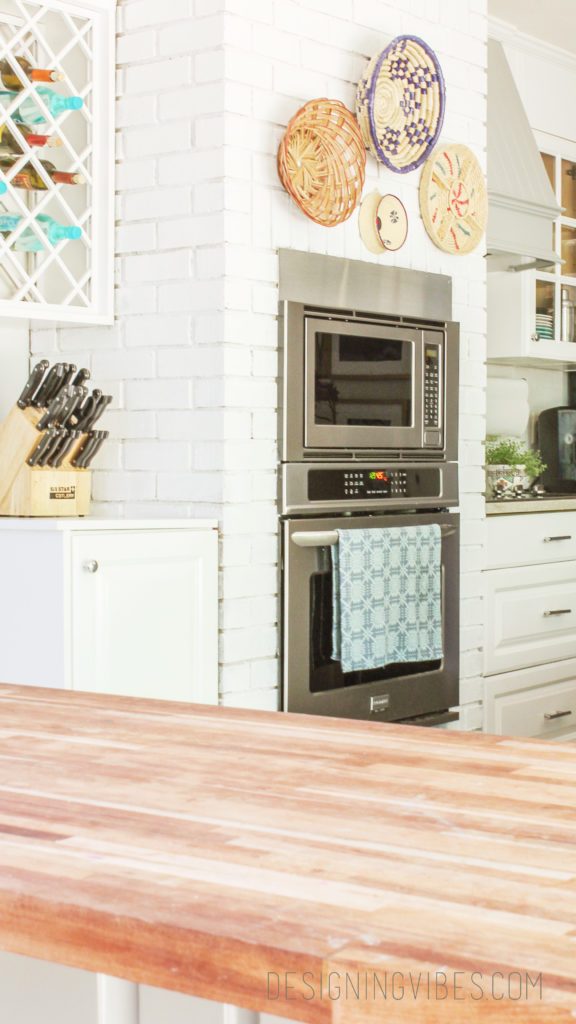
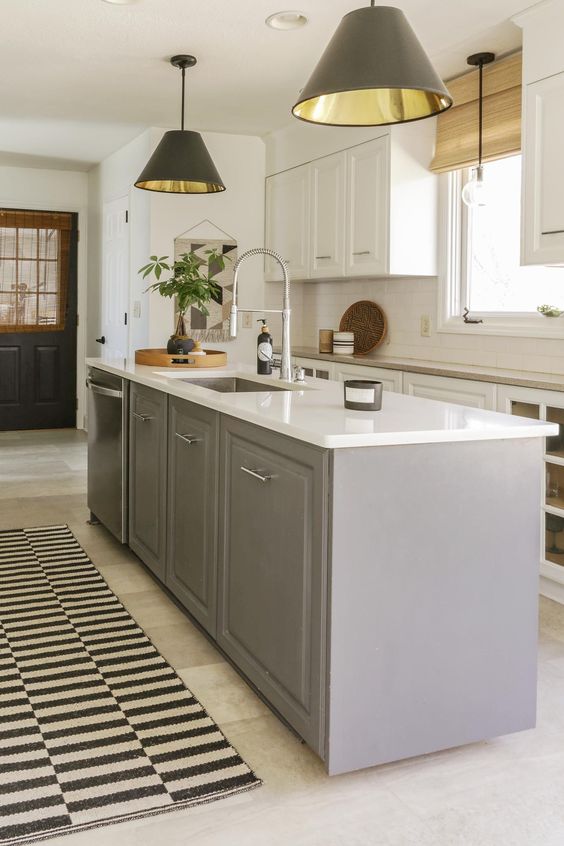
It was missing pantry and cabinet doors, the backsplash was horrid and the cabinets were too “orangey” for my taste. Nonetheless, I knew it had potential. With some major elbow grease, our kitchen was transformed into a light and airy, boho-chic inspired haven. Can you believe we were able to accomplish such a dramatic impact while only investing around $2000 (maybe a little more)? Well, here is how we did it.
Cabinets
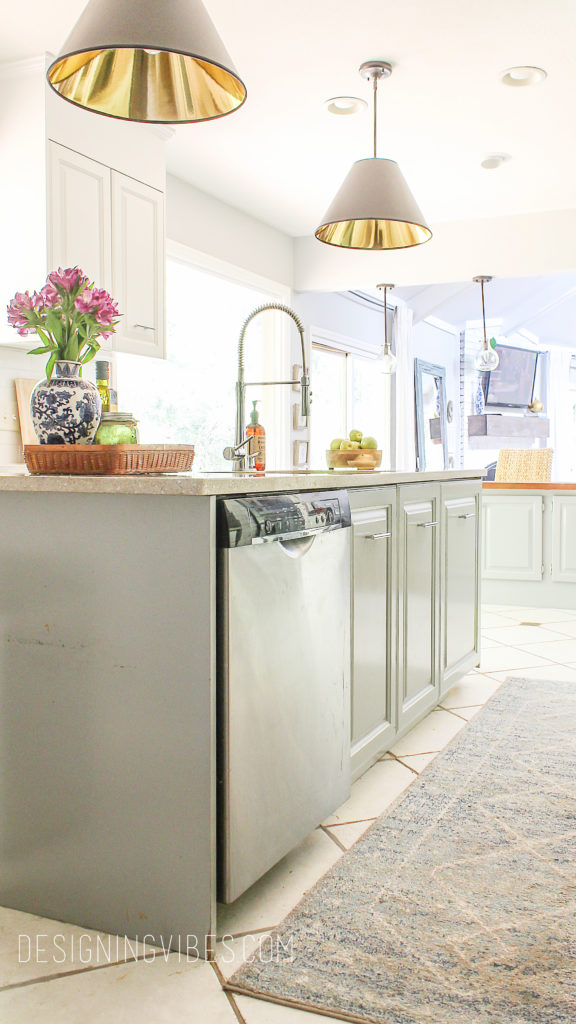
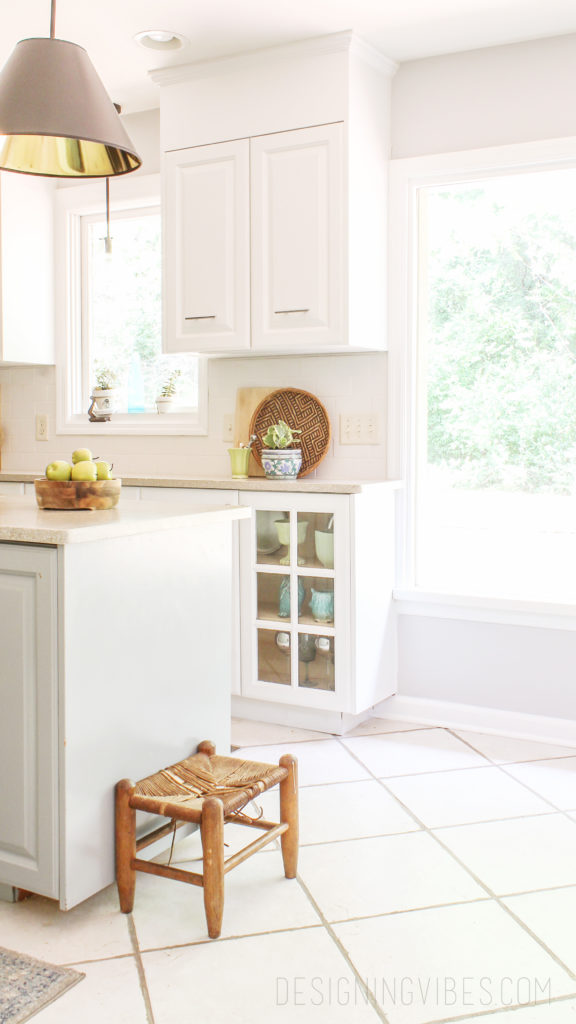
One way we saved a huge chunk of money was by keeping our existing kitchen cabinets…simply painting them white. It was about a two week process (it took several coats of oil-based paint and lots of drying time), but had such a significant impact on the space. Once the paint had cured, we put modern hardware on (which we bought at Lowes for a great price). In addition to painting the cabinets, we also made them taller by adding mdf and crown molding to the top of the cabinets so that they expand all the way to the height of the ceiling. By adding height to the cabinets, the kitchen appears larger and the ceiling looks higher. To see how we did this, click here to see the original tutorial.
fixtures
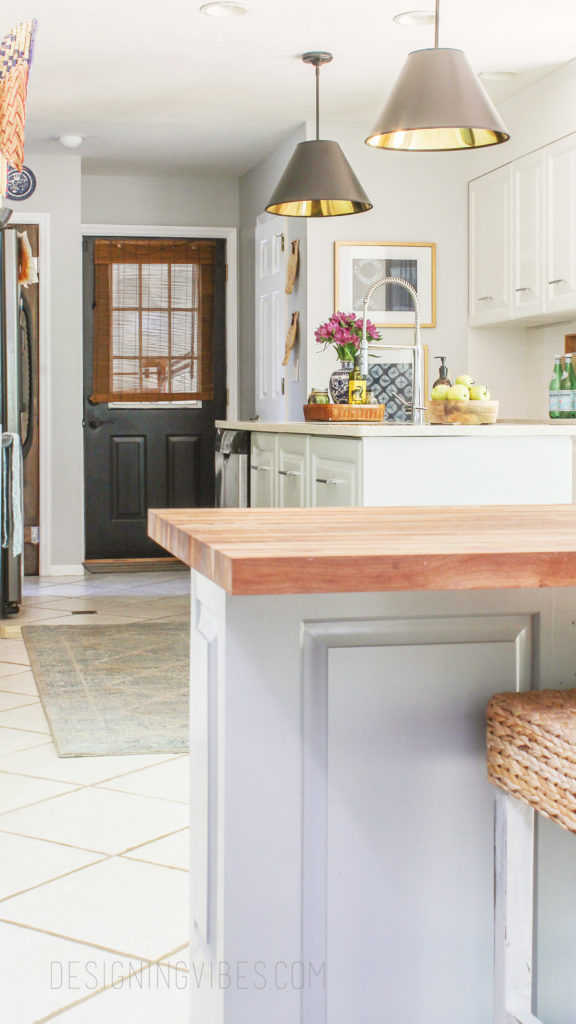
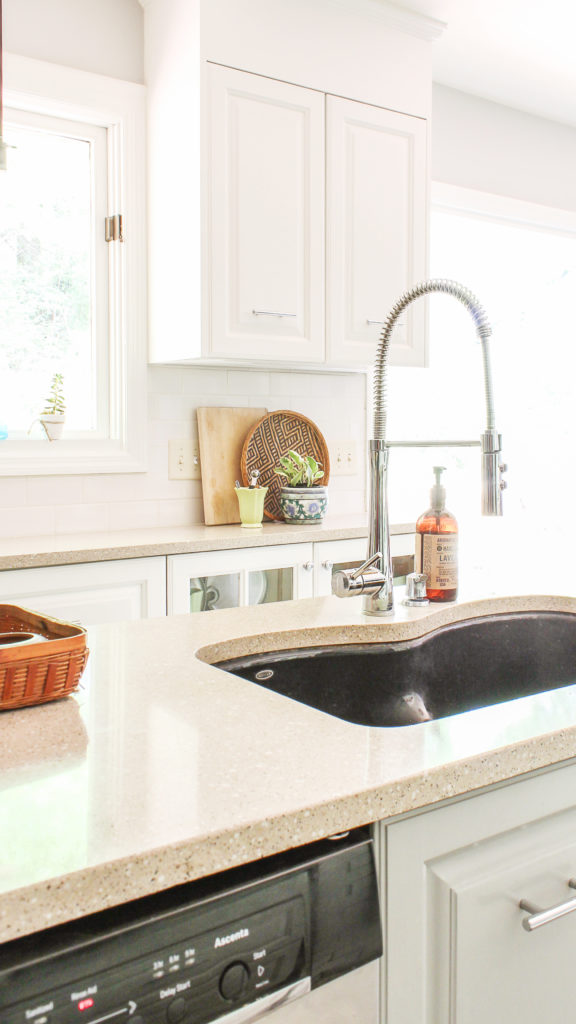
Originally, the kitchen lighting only comprised of several can lights. To anchor the island and establish a more current vibe, I decided to add two large pendants over the island. I knew I wanted cone lights after seeing them used in several of my favorite designers portfolios. However, all of the cone pendants I came across where around $600 per light. Knowing there was no way in hell I could afford to drop that kind of dough, I brainstormed and DIY-ed my pendants, only costing me $50/light. You can check out that full tutorial here. In addition, my husband did some DIY electrical work (which I don’t necessarily recommend), so that the pendants could actually be installed over the island (given there were no prior fixtures in the correct position).We also replaced the faucet with a taller, more modern one. Surprisingly, we were able to purchase the faucet for around $50.
Countertops
While I am not particularly fond of the countertops that came with the home, they are quartz. And given they are composed of such a nice material, we found it crazy to replace them ( if I could afford new countertops, I would just be replacing them with another type of quartz that resembled marble anyhow). However, we did replace the bar countertop with butcher block which we purchased at Lumber Liquidators. My husband installed them , and we only invested about $100-$200 on countertops. While I do not have the countertops of my dreams, we were able to save thousands of dollars by working with what we were given.
Flooring
Once again, the floors are definitely not what I would have chosen for my dream home, but they are large, white ceramic tiles…..a popular choice in nicer builder-grade homes. Unfortunately, I don’t believe the previous homeowners had sealed the grout…so the once white grout had turned a disgusting hue of shit brown. Doing some research on the matter, I decided to paint the grout with special grout paint. Two years later, and the dark-grey grout paint is still holding up nicely. You can check out that tutorial here.
Appliances
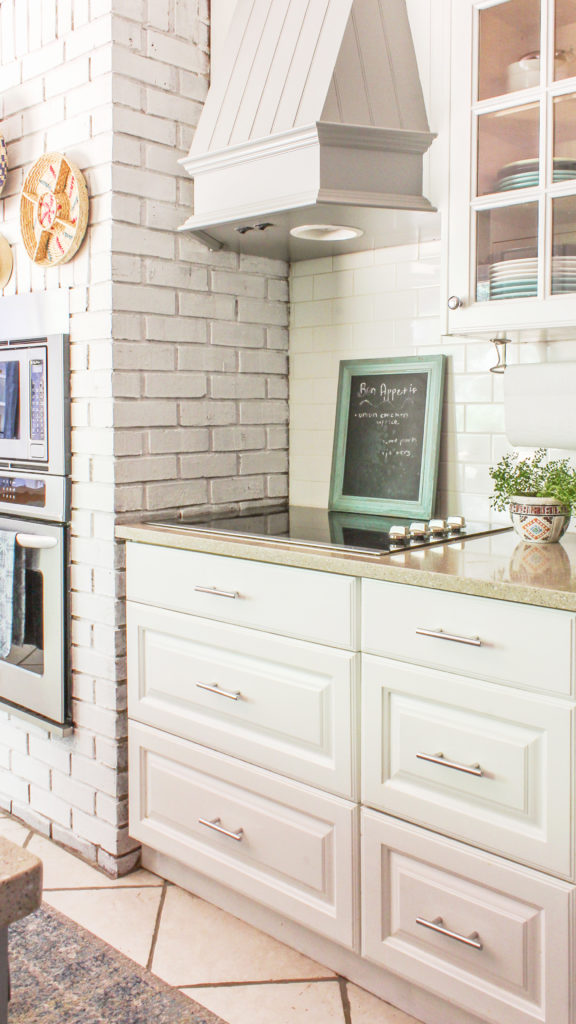
If we have had any luck at all with this house (which hasnt seemed to be much), this is where we were fortunate. The only appliances that truly needed replacing was the wall-mount oven. After searching high and low for a great deal, we ordered a refurbished oven online for a fraction of the cost. Although sometimes my oven does make a loud ticking noise, it works fine and it is pretty. So I don’t mind the occasional noise.
Doors
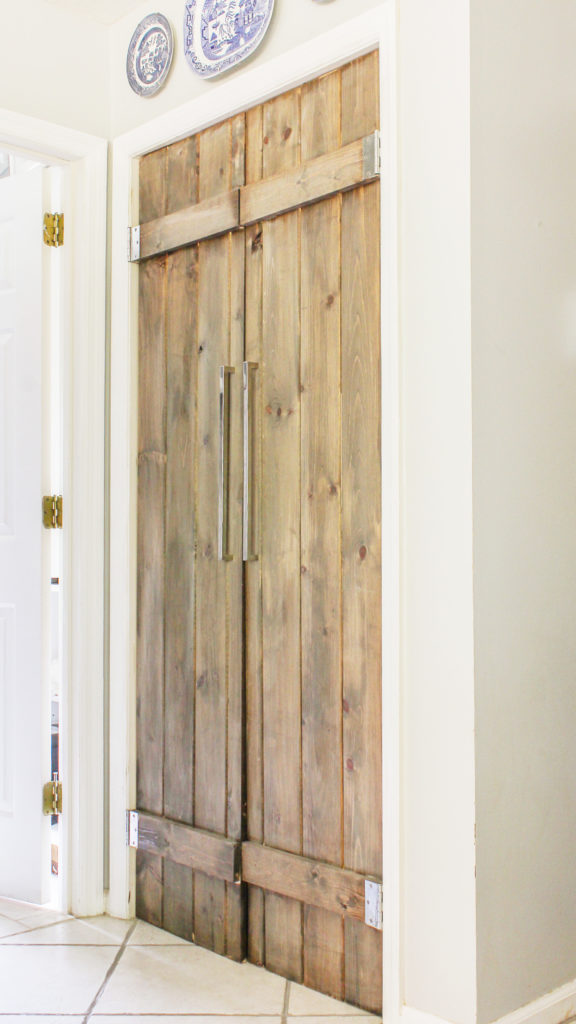
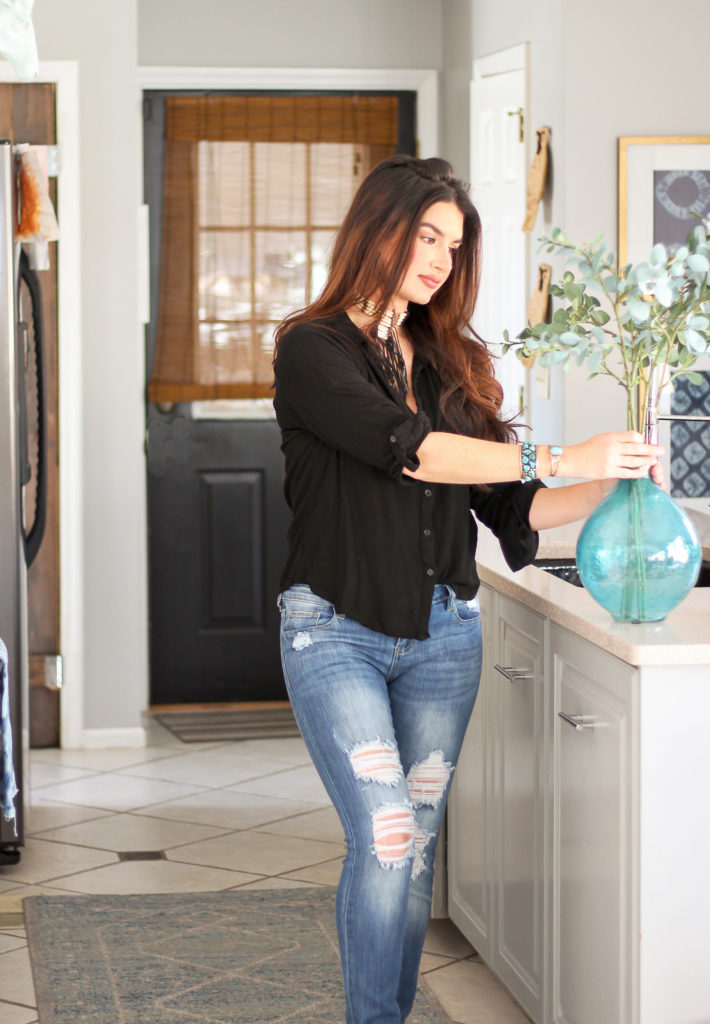
Remember how I said the home was originally missing the pantry doors? Opting to avoid boring, builder-grade bi-fold doors, we decided to make our own re-claimed wood doors. The entire project only cost $90, and you can check out the details here. I also decided to paint the entry door black, and I am so happy with my decision. I love the dramatic contrast against all of the cooler, lighter tones.
Paint Colors
As I mentioned, one of the biggest ways we saved money during the renovation was opting to simply paint over the existing cabinets. We used Sherwin Williams Trim and Door paint, white, in an oil based formula. The island , hood vent and bar is painted with Sherwin Williams Grey Matters (which was actually supposed to be a darker color, but the paint store screwed up, and I decided to just go with the flow). I also painted the brick with a white masonry paint designed specifically for brick. The walls were painted with Sherwin Williams Passive.
Backsplash
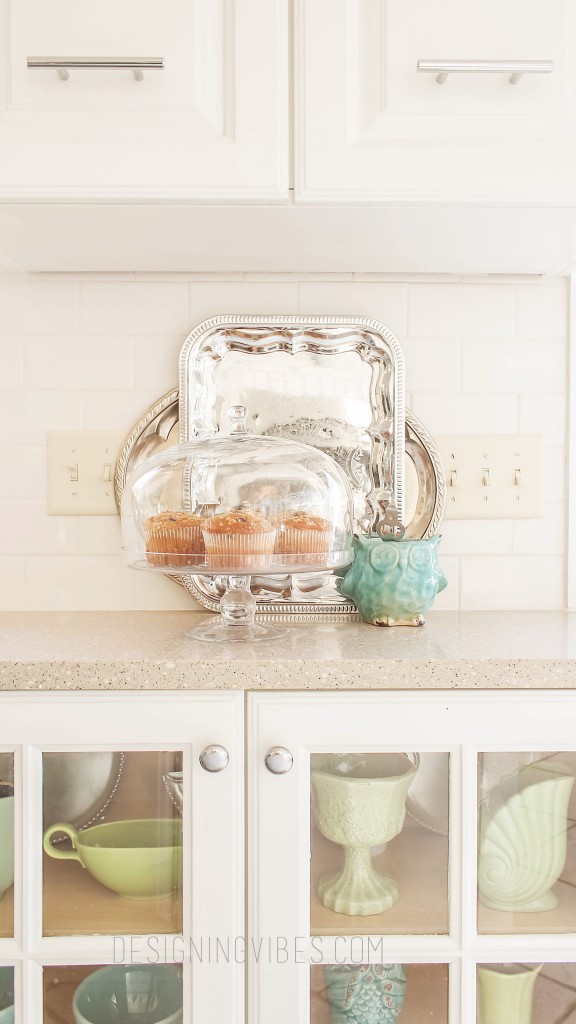
Not only is subway tile timeless and currently highly sought after in utilitarian spaces , it is one of the most affordable backsplash choices- as long as you go with a standard size and pattern. I look at our decision to use subway tile as a win-win….I don’t think it will ever go out of style, and we invested minimally in materials. Going for a more glam (non-farmhouse/industrial look) aesthetic, I opted for white subway tiles with white grout. I was afraid between the brick wall pattern and the tile pattern, a darker grout would have accentuated too many patterns and therefore might have been too busy.
So there you have it….that is how we renovated our kitchen on an insanely low budget. Is it perfect? Absolutely not. There are a few changes I would make if my budget allowed ( new countertops, counter- depth refrigerator framed in with millwork, different flooring), but it still makes me happy. I love how much brighter it is, and it is a great space for entertaining.
Moral of the story? Never underestimate the power of a little paint and elbow grease, my friends.
Now get out there and design some good vibes. Please be sure to spread the love and Pin…








Beautiful!
Thank you so much, Nancy!
Erica what an amazing transformation. I always shout from the rooftops my love of paint and your post right here shows it. It really does not look like the same kitchen at all! I think aside from the painted cabinets the paint on the brick is the most dramatic makeover. I also like your attitude of making do with what you have. Well done my friend! Now to go back to the older posts on how you made the magic happen.
Thank you so much, Mary. Yes…my point exactly- paint can work wonders!!
Oh, the power of ingenuity, creativity, and practicality… you have it! Your kitchen renovation is beautiful. Love your DIY cone fixtures. They were on my short list for our island pendants, but like you, I couldn’t bring myself to shell out the $$$ (so we still have none). The paint alone really transformed the space. It’s beautiful, Erica!
Thanks, sweet friend. I had obsessed over those cone pendants for months, but simply couldnt find any in my price range. If I want something bad enough, I will find a way by golly.
What an amazing transformation! What a big difference from before, it looks so much brighter. I love the pantry doors. Everything turned out beautiful!
Thank you so much, Linda! The pantry door project is one of my favorites to date.
Such a difference!! I was in the same boat–we had a super outdated builder kitchen and a next to nothing budget. It’s tough but rewarding when you able to make big transformations with little money 🙂
Thanks, Angela. Having no budget , equates to alot of hardwork, but you are totally right..the finished product is definitely so rewarding.
What a stunning transformation! I love everything you did. it all looks so fresh and new!
Thank you so much, Carolann. It was a process, but so worth it!
What a beautiful transformation! So bright and cheerful! Love the rustic door.
Thank you so much, my sweet friend. I really appreciate your kind words.
Erika it all looks so lovely, bright and welcoming in. I’m visiting from Anita’s and I invite you to share at my Thursday link party ( its open until Saturday at midnight.) Don’t forget to enter the giveaway. Hugs!
Thank you so much for stopping by, friend!
What a cute transformation! It’s great to find a real perspective of what it’s like to renovate on low budget. We will be deciding to budget for a kitchen renovation soon and your example is very useful for us.
Best wishes with your own renovation..and never underestimate the impact of paint. It really did wonders for the space. 🙂
WOW! what a beautiful kitchen. I love work! when ever i hit it rich, you will being doing my home! lol!
Thank you so much, friend. that is so kind of you! 🙂