
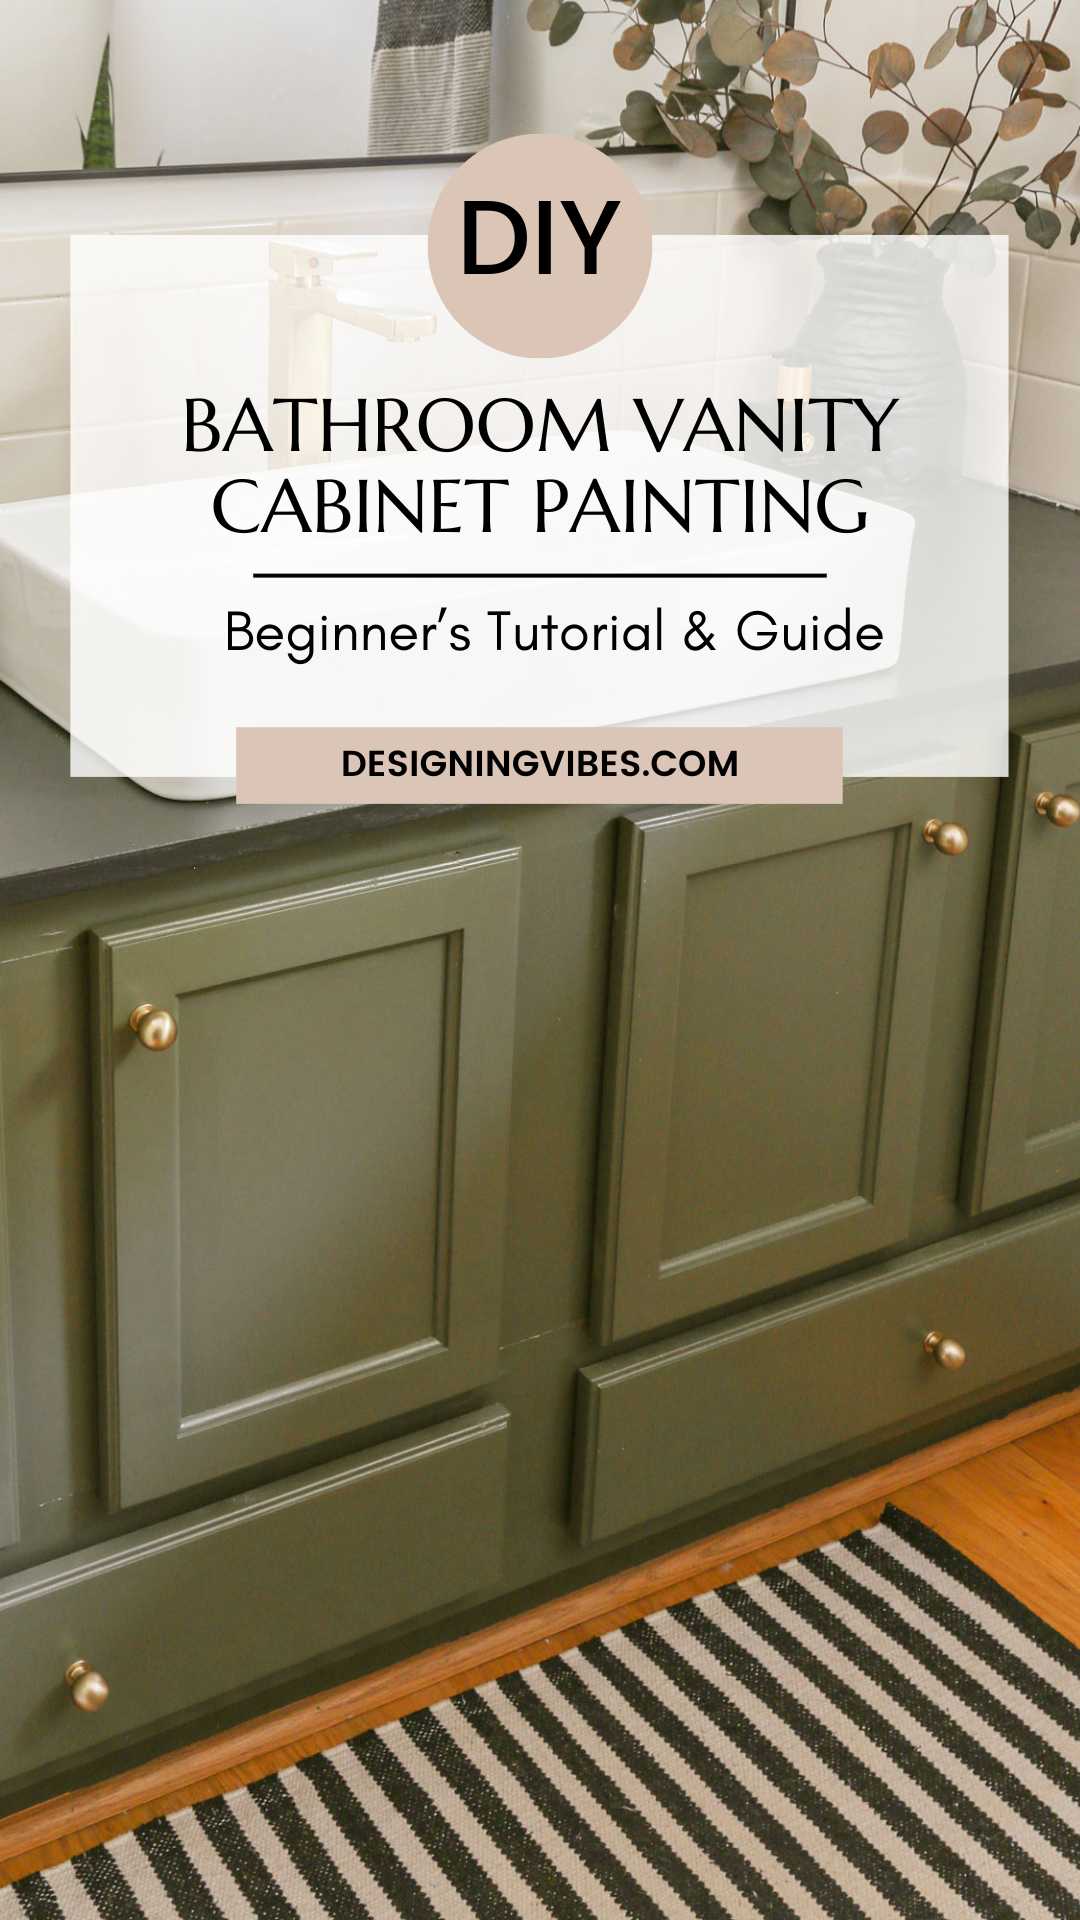
Easy DIY Bathroom Vanity Cabinet Painting Tutorial
Today, I am sharing a step-by-step DIY tutorial for painting bathroom vanity cabinets...
When your bathroom is dated, but you don’t have the budget for entirely new tile or countertops, painting your vanity cabinets is a really freakin’ great place to start.
I know to some this may seem like an intimidating endeavor, but with all of the advances in cabinet paint technology within just the last five years, this project is really no longer as daunting as it may seem.
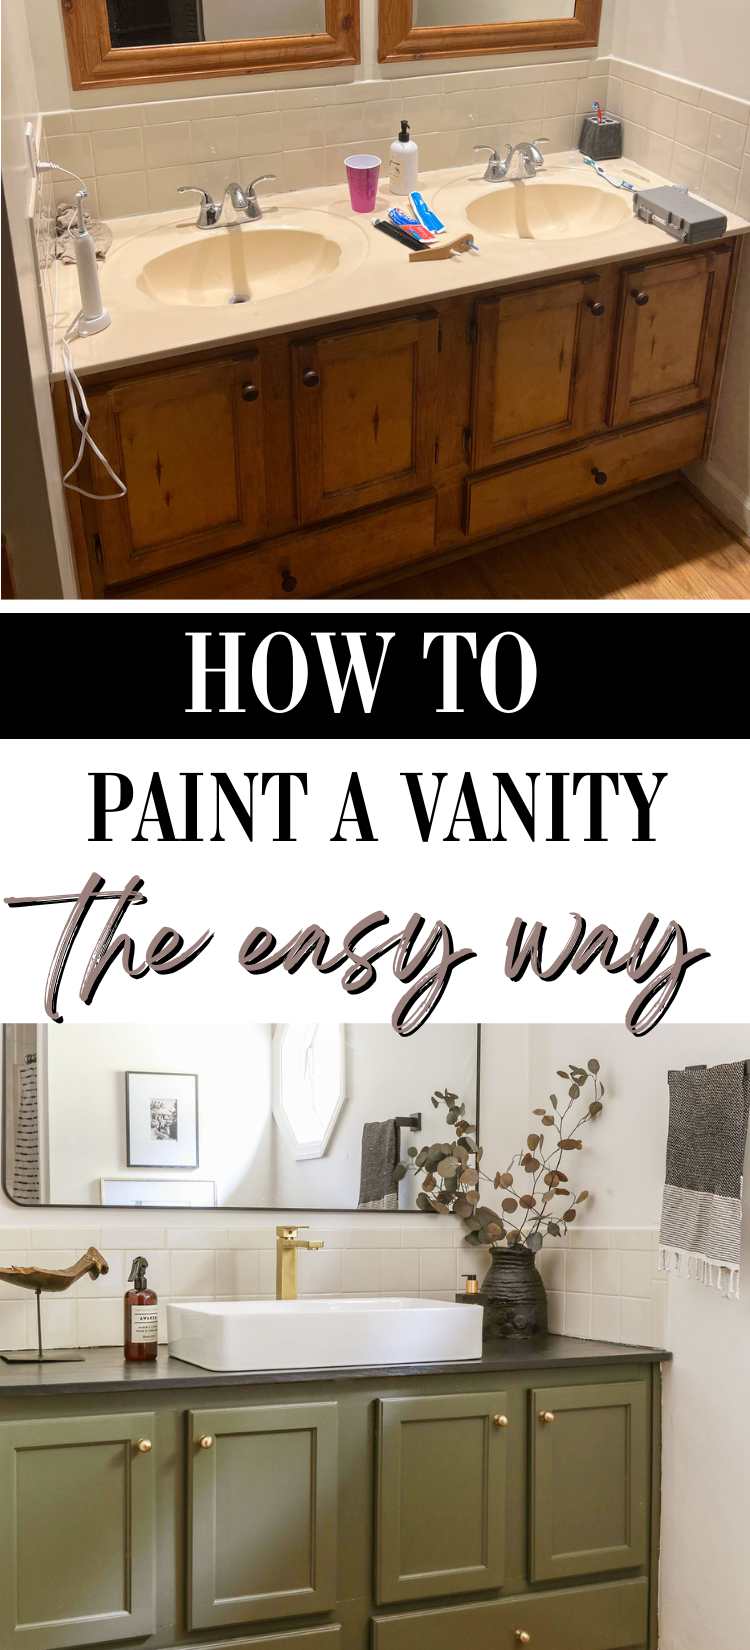
Just last week, I was determined to give my dated hallway bathroom a little love…

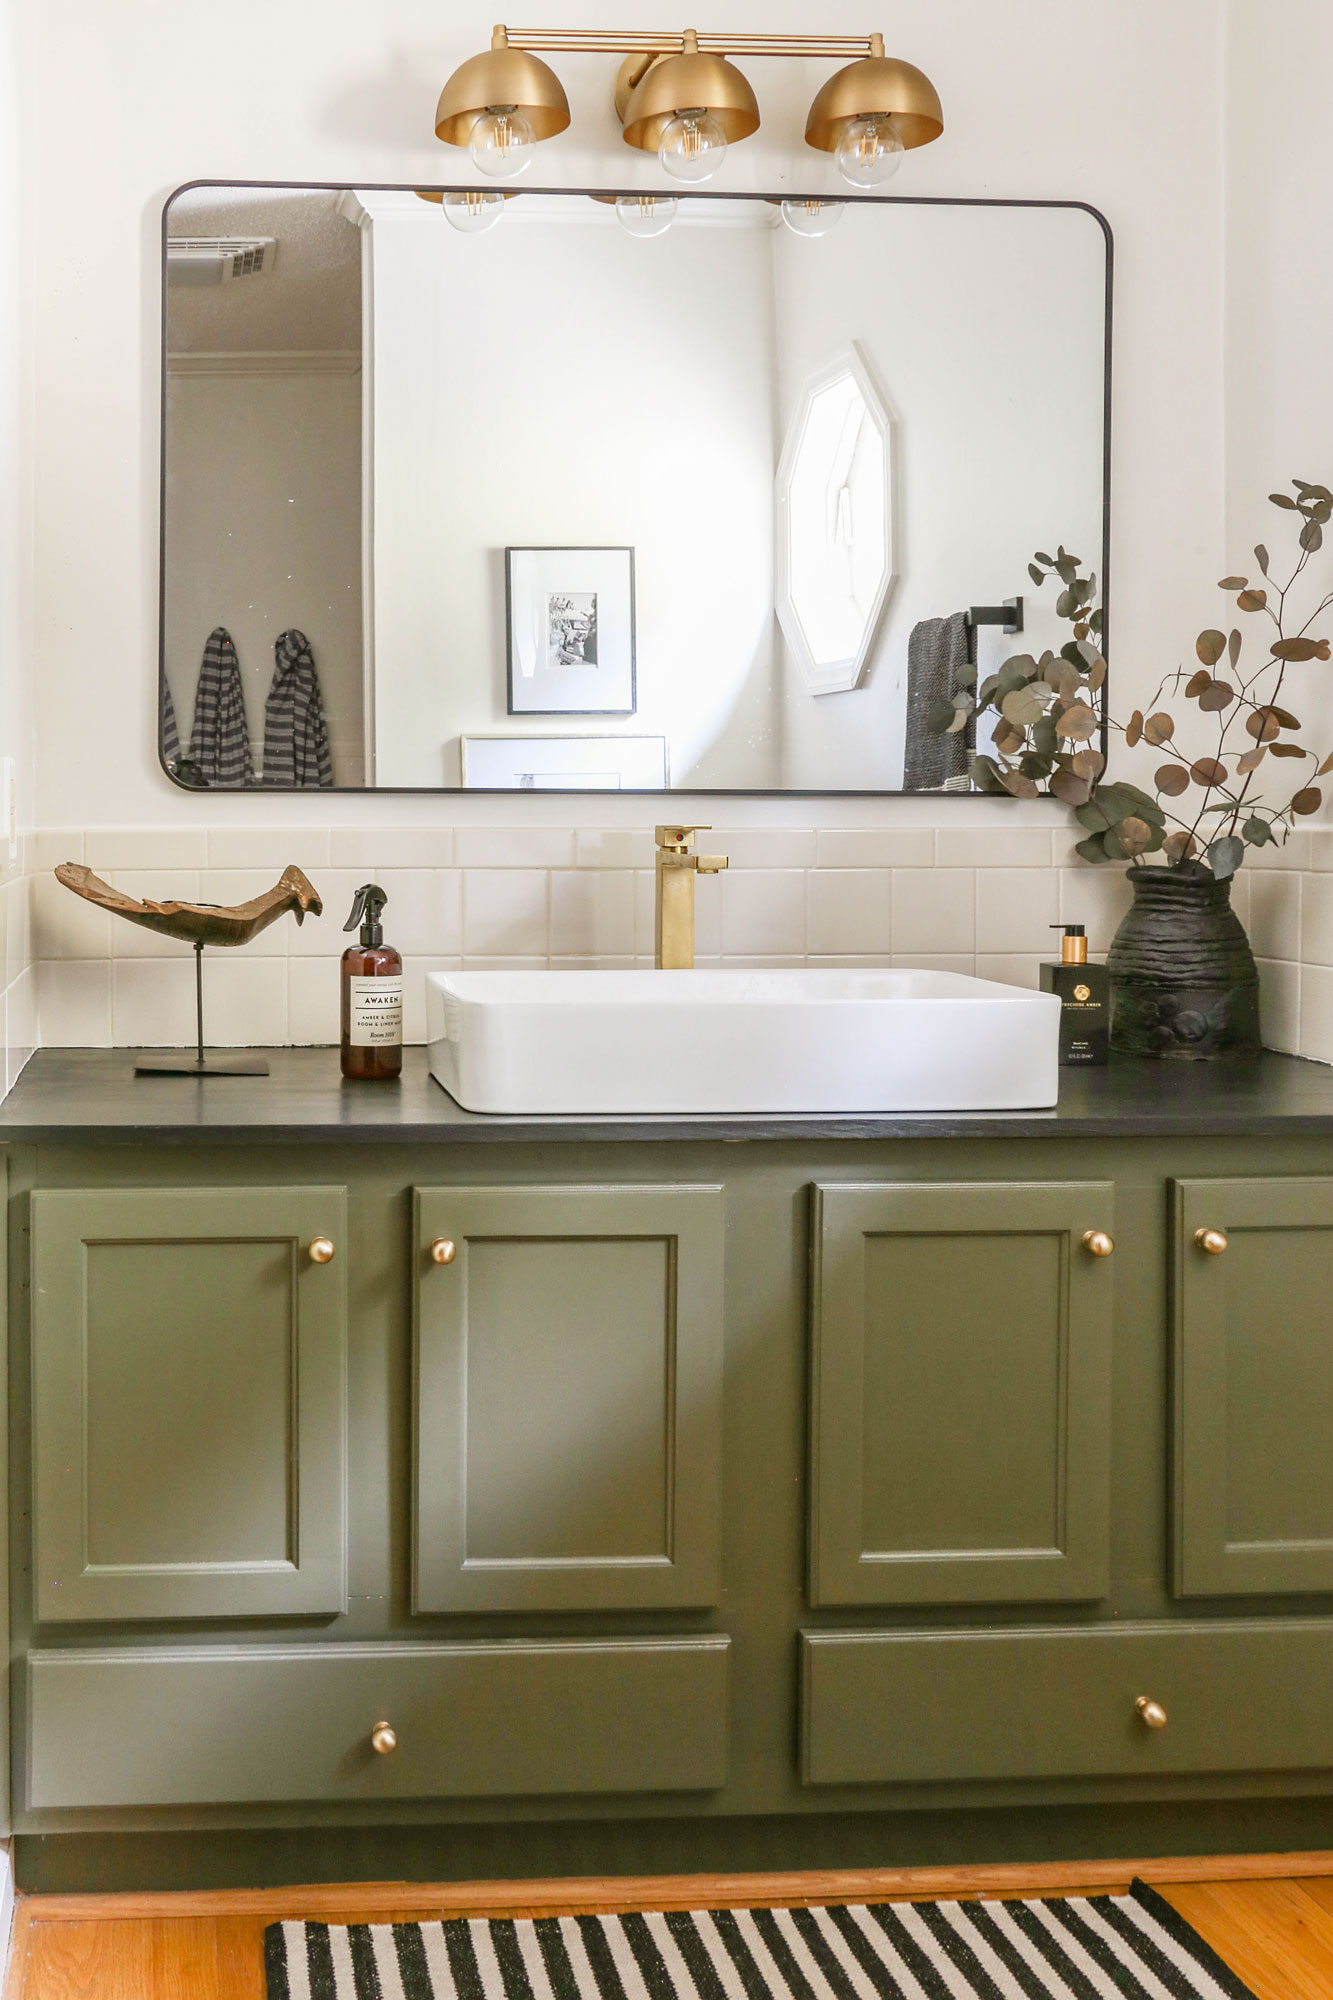
For under $400, I was able to completely transform this once dated space, and a fresh coat of paint played an integral role in this cheap a$$ bathroom makeover…

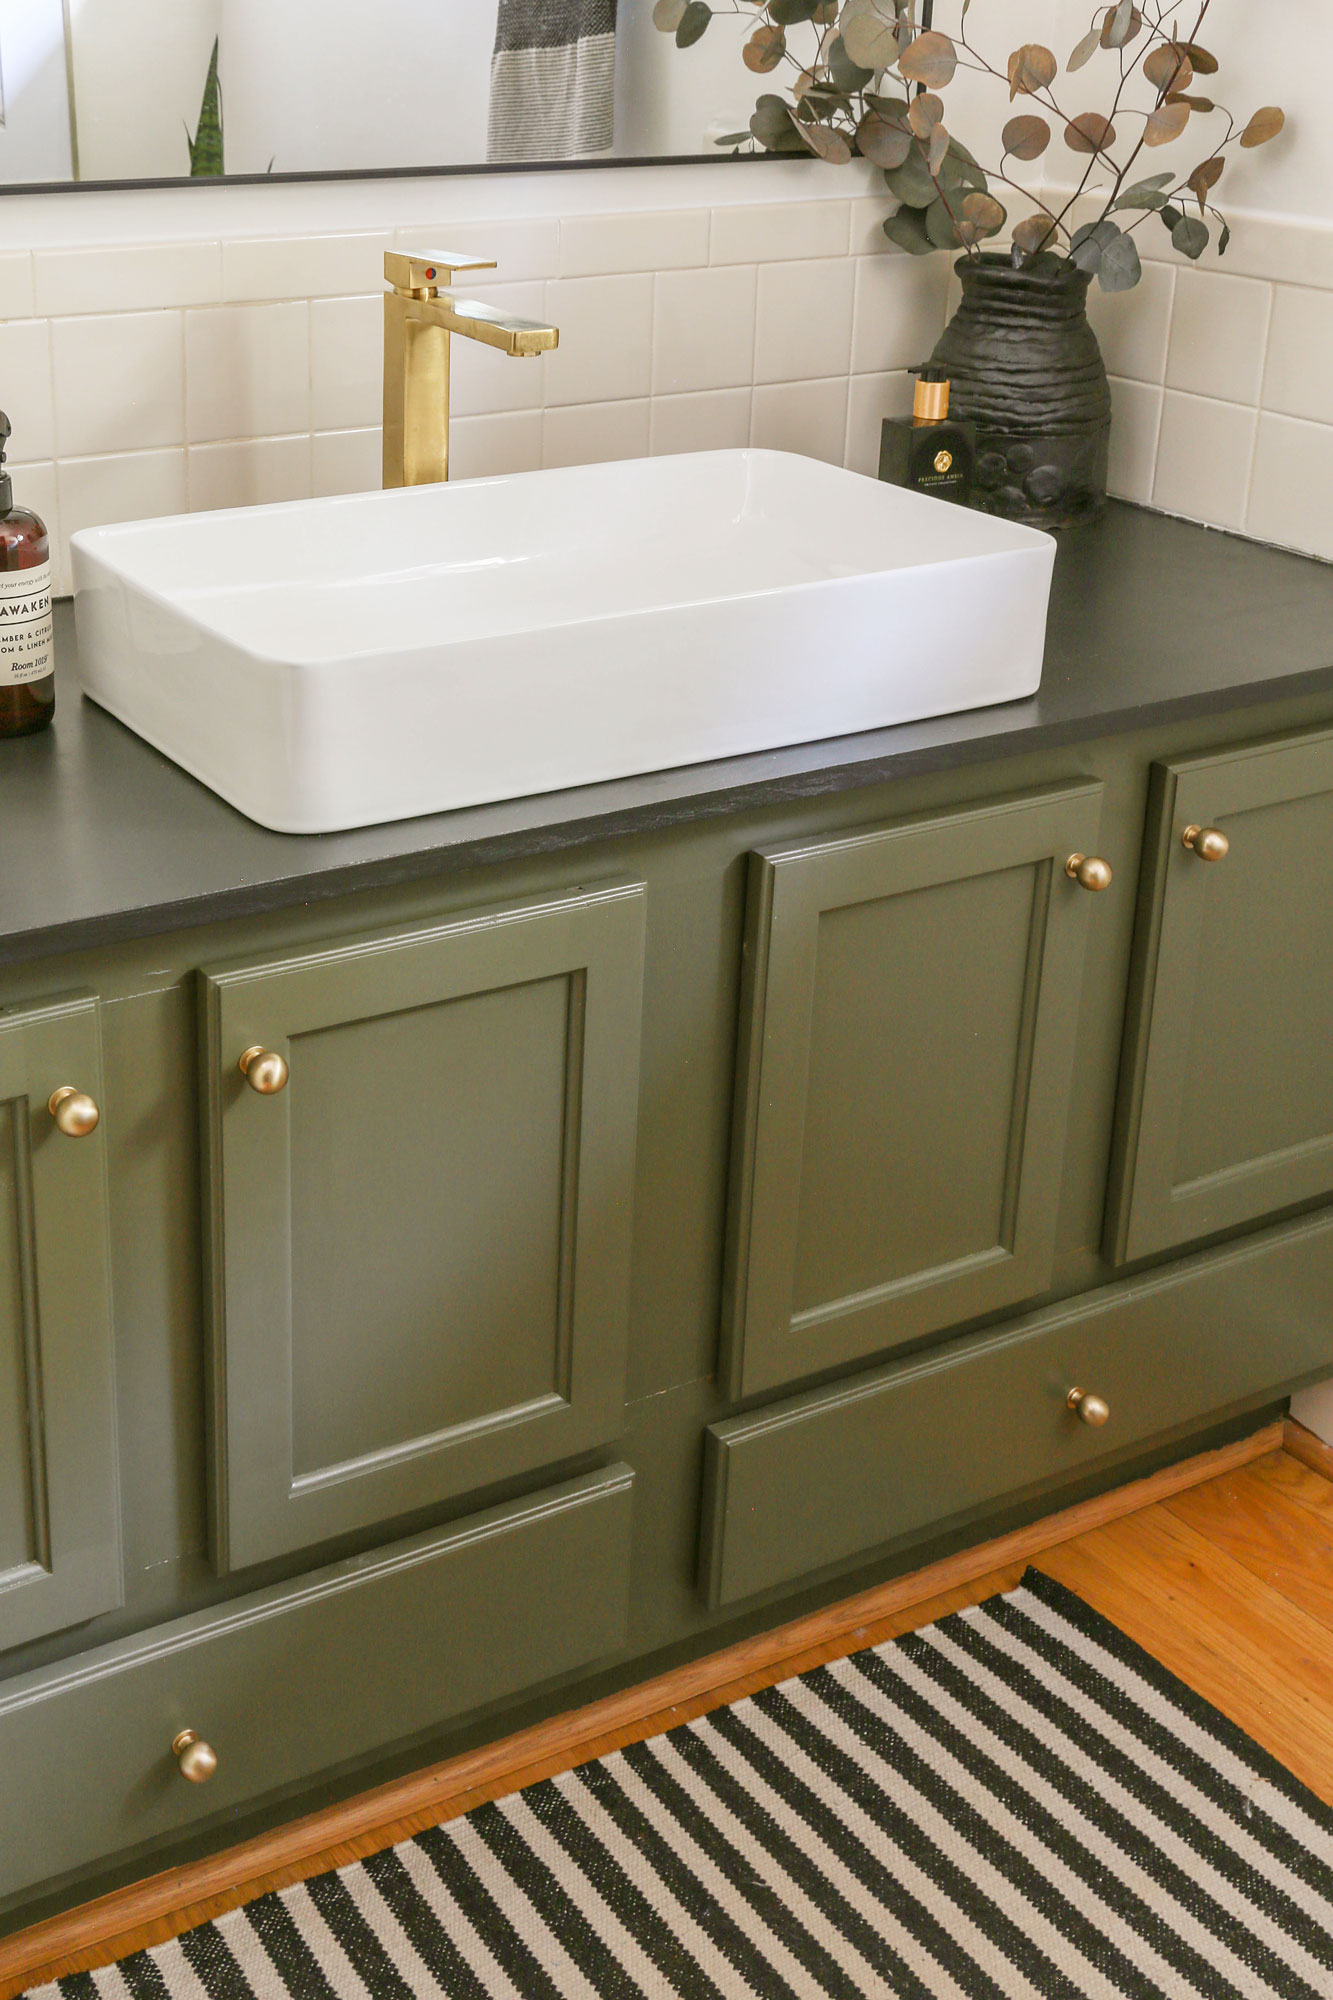
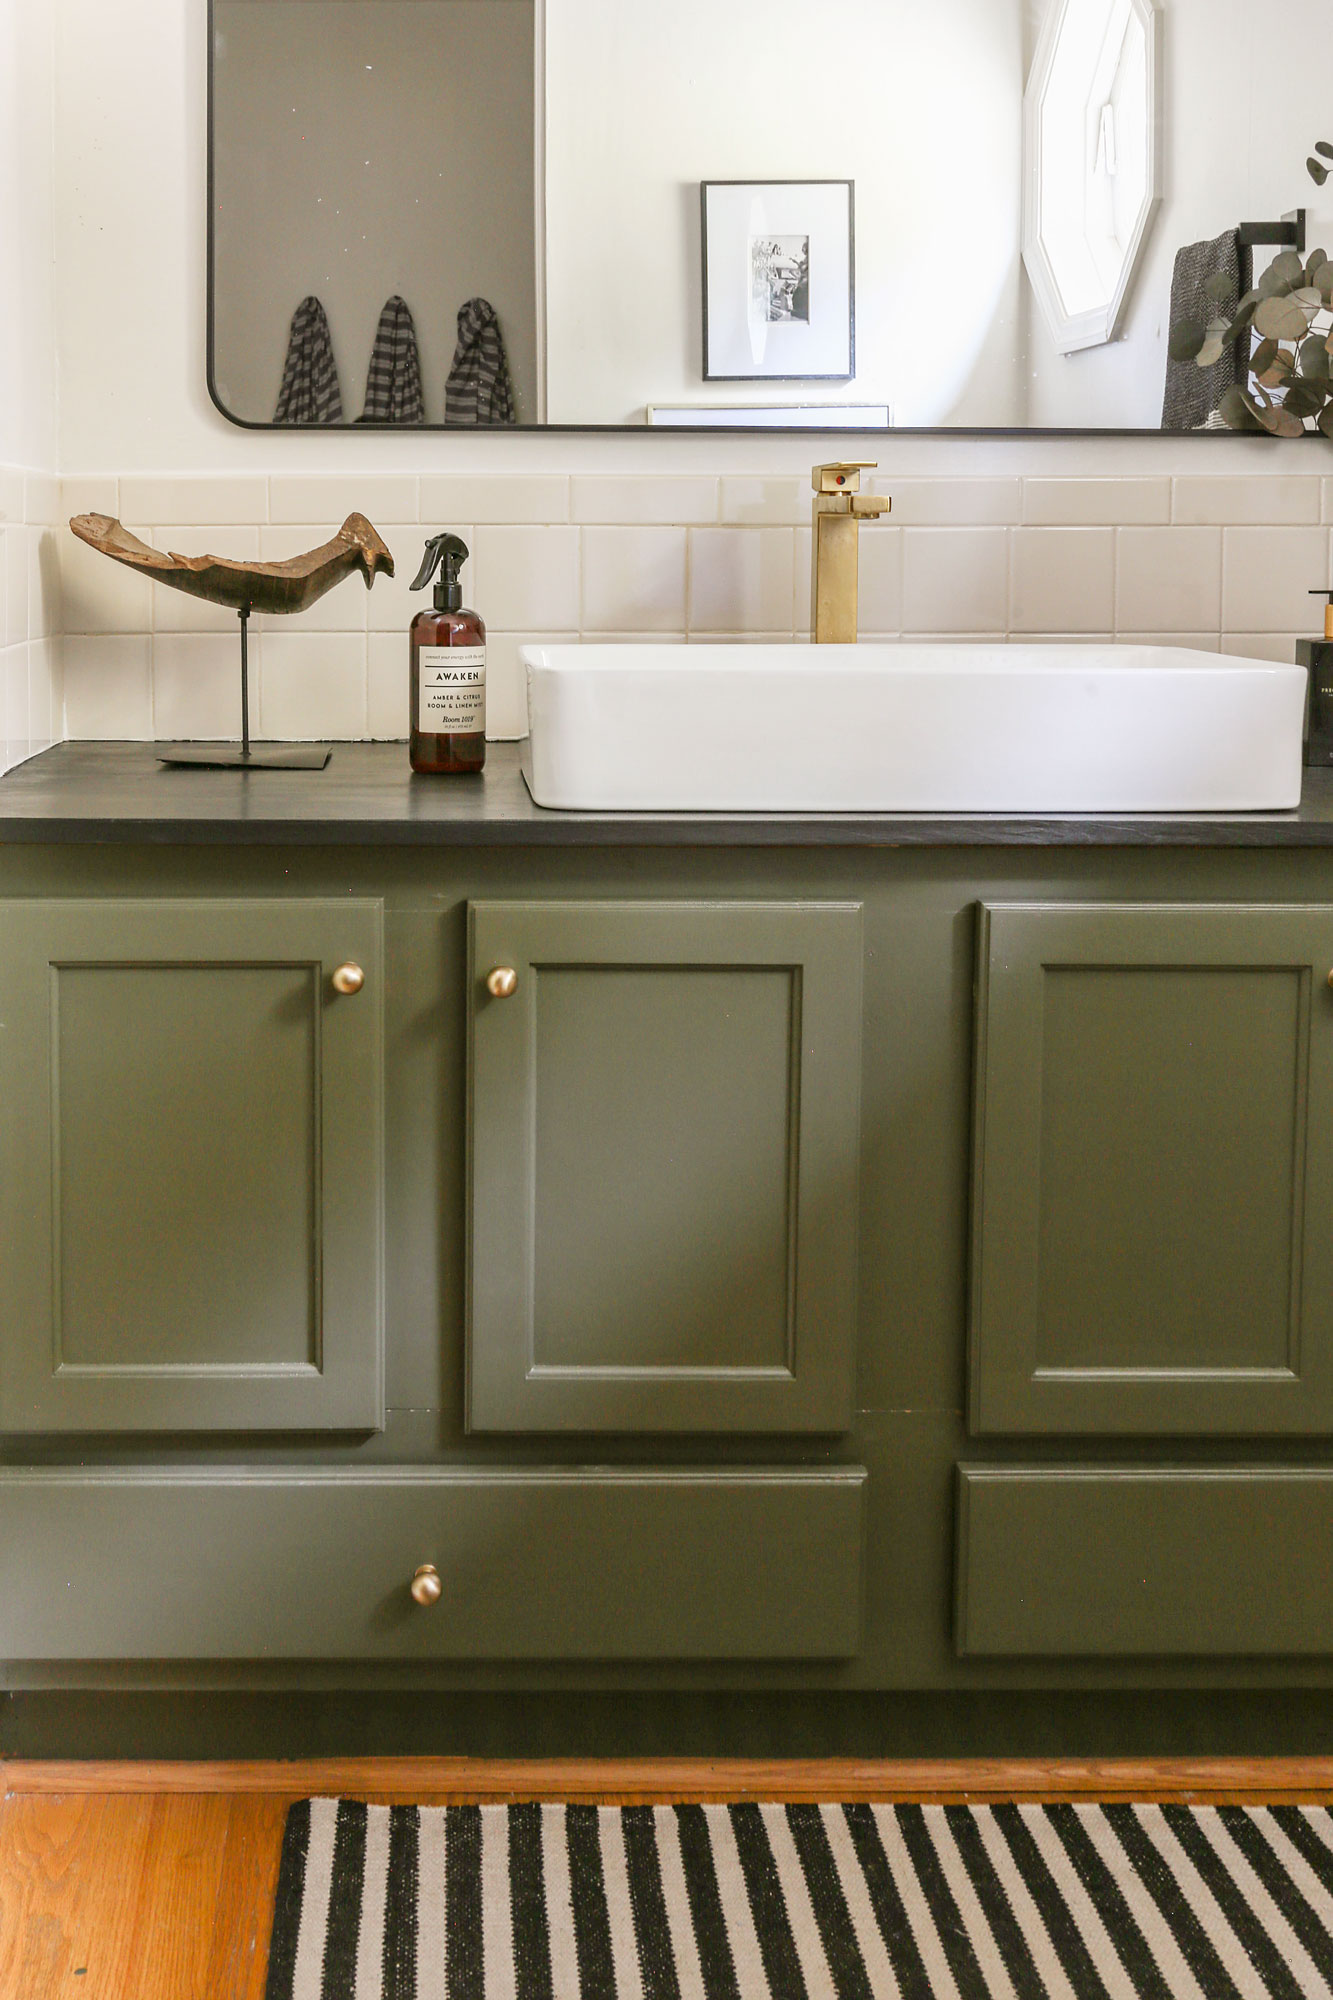
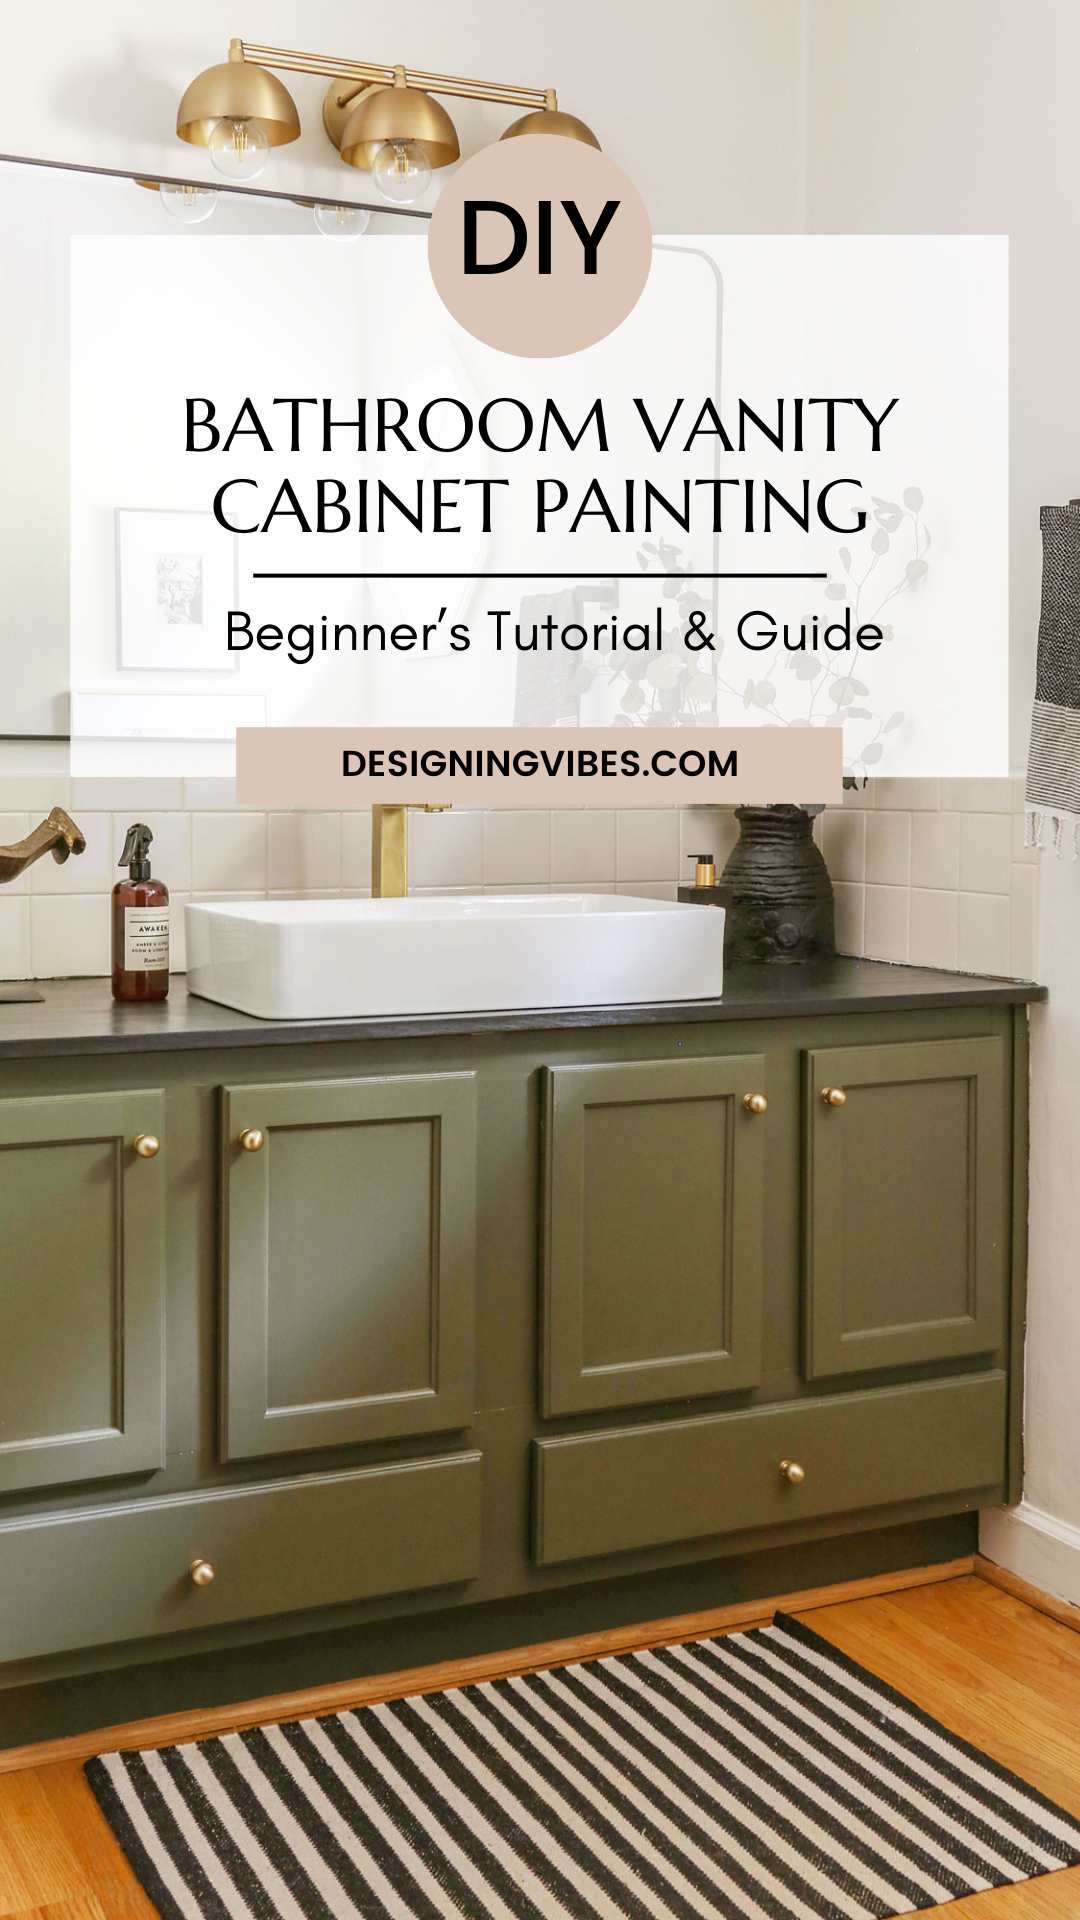
While I plan on going more into detail on this transformation in a separate room reveal post, today I am zeroing in on the most affordable design element at play here- cabinet paint (the color is Benjamin Moore Dark Olive for any of you who are curious).
With no fancy paint sprayer at my disposal, I simply used a foam roller and paint brush on my bathroom vanity and linen cabinet (not pictured).
And while I did skimp on fancy spraying equipment, I did NOT skimp on the quality of paint I used.
You see.. the key to a professional and smooth finish, is working with not only a high-quality paint, but a product that is very forgiving and self-leveling.
While you can certainly go the old school route by using oil-based paint, years ago when I painted the kitchen cabinets back at my first home, I quickly realized that oil is not only toxic AF (hello ungodly fumes), but extremely difficult to work with as it takes a painstakingly long time to dry.
Even worse, oil paint is super unforgiving to the painting newbie as it easily shows drips, brush strokes and other flaws.

What is the best type of paint to use on bathroom vanity cabinets?
So with all of that being said, if you are not a very seasoned painter, I recommend using a quality, self-leveling paint like Sherwin Williams Emerald Urethane Trim Enamel Paint in a satin finish like I did here (and no…I am not being paid to say this).
Possessing the qualities of both an oil and water-based paint, not only is this particular formulation faster drying and lower VOC than oil paint, it is durable, provides great coverage and is extremely forgiving. What I find particularly impressive about this product is the fact that it can be applied over existing finishes including oil, acrylic and latex paint.
This means that if your cabinets were previously painted or stained, you don’t have to worry about stripping off the existing finish (proving even further why I believe Sherwin Williams Emerald Urethane is the best paint for cabinets).

If you are determined to go the furniture paint route (like milk or chalk paint), from personal experience, I can tell you that milk paint is also very user-friendly, durable and forgiving but, unfortunately, it only comes in pre-mixed colors. Given I wanted a specific Benjamin Moore paint color, that simply wasn’t going to work for me.
Applying only two coats of paint to the cabinet doors and drawer fronts , I was able to upgrade my entire bathroom vanity in under three hours (thanks to the fast-drying product I used).
Let me show you how I did it..
How To Paint Bathroom Vanity Cabinets-
Materials Needed:
- 100-150 grit sanding block
- quality paint brush for cutting in details
- foam roller labeled for use on cabinets
- paint tray
- oil-based primer
- durable, self-leveling paint (I used Sherwin Williams Emerald Urethane)
- damp cloth
- painter’s tape (for frame of vanity)
- drop cloth
- screwdriver (for removing old hardware)
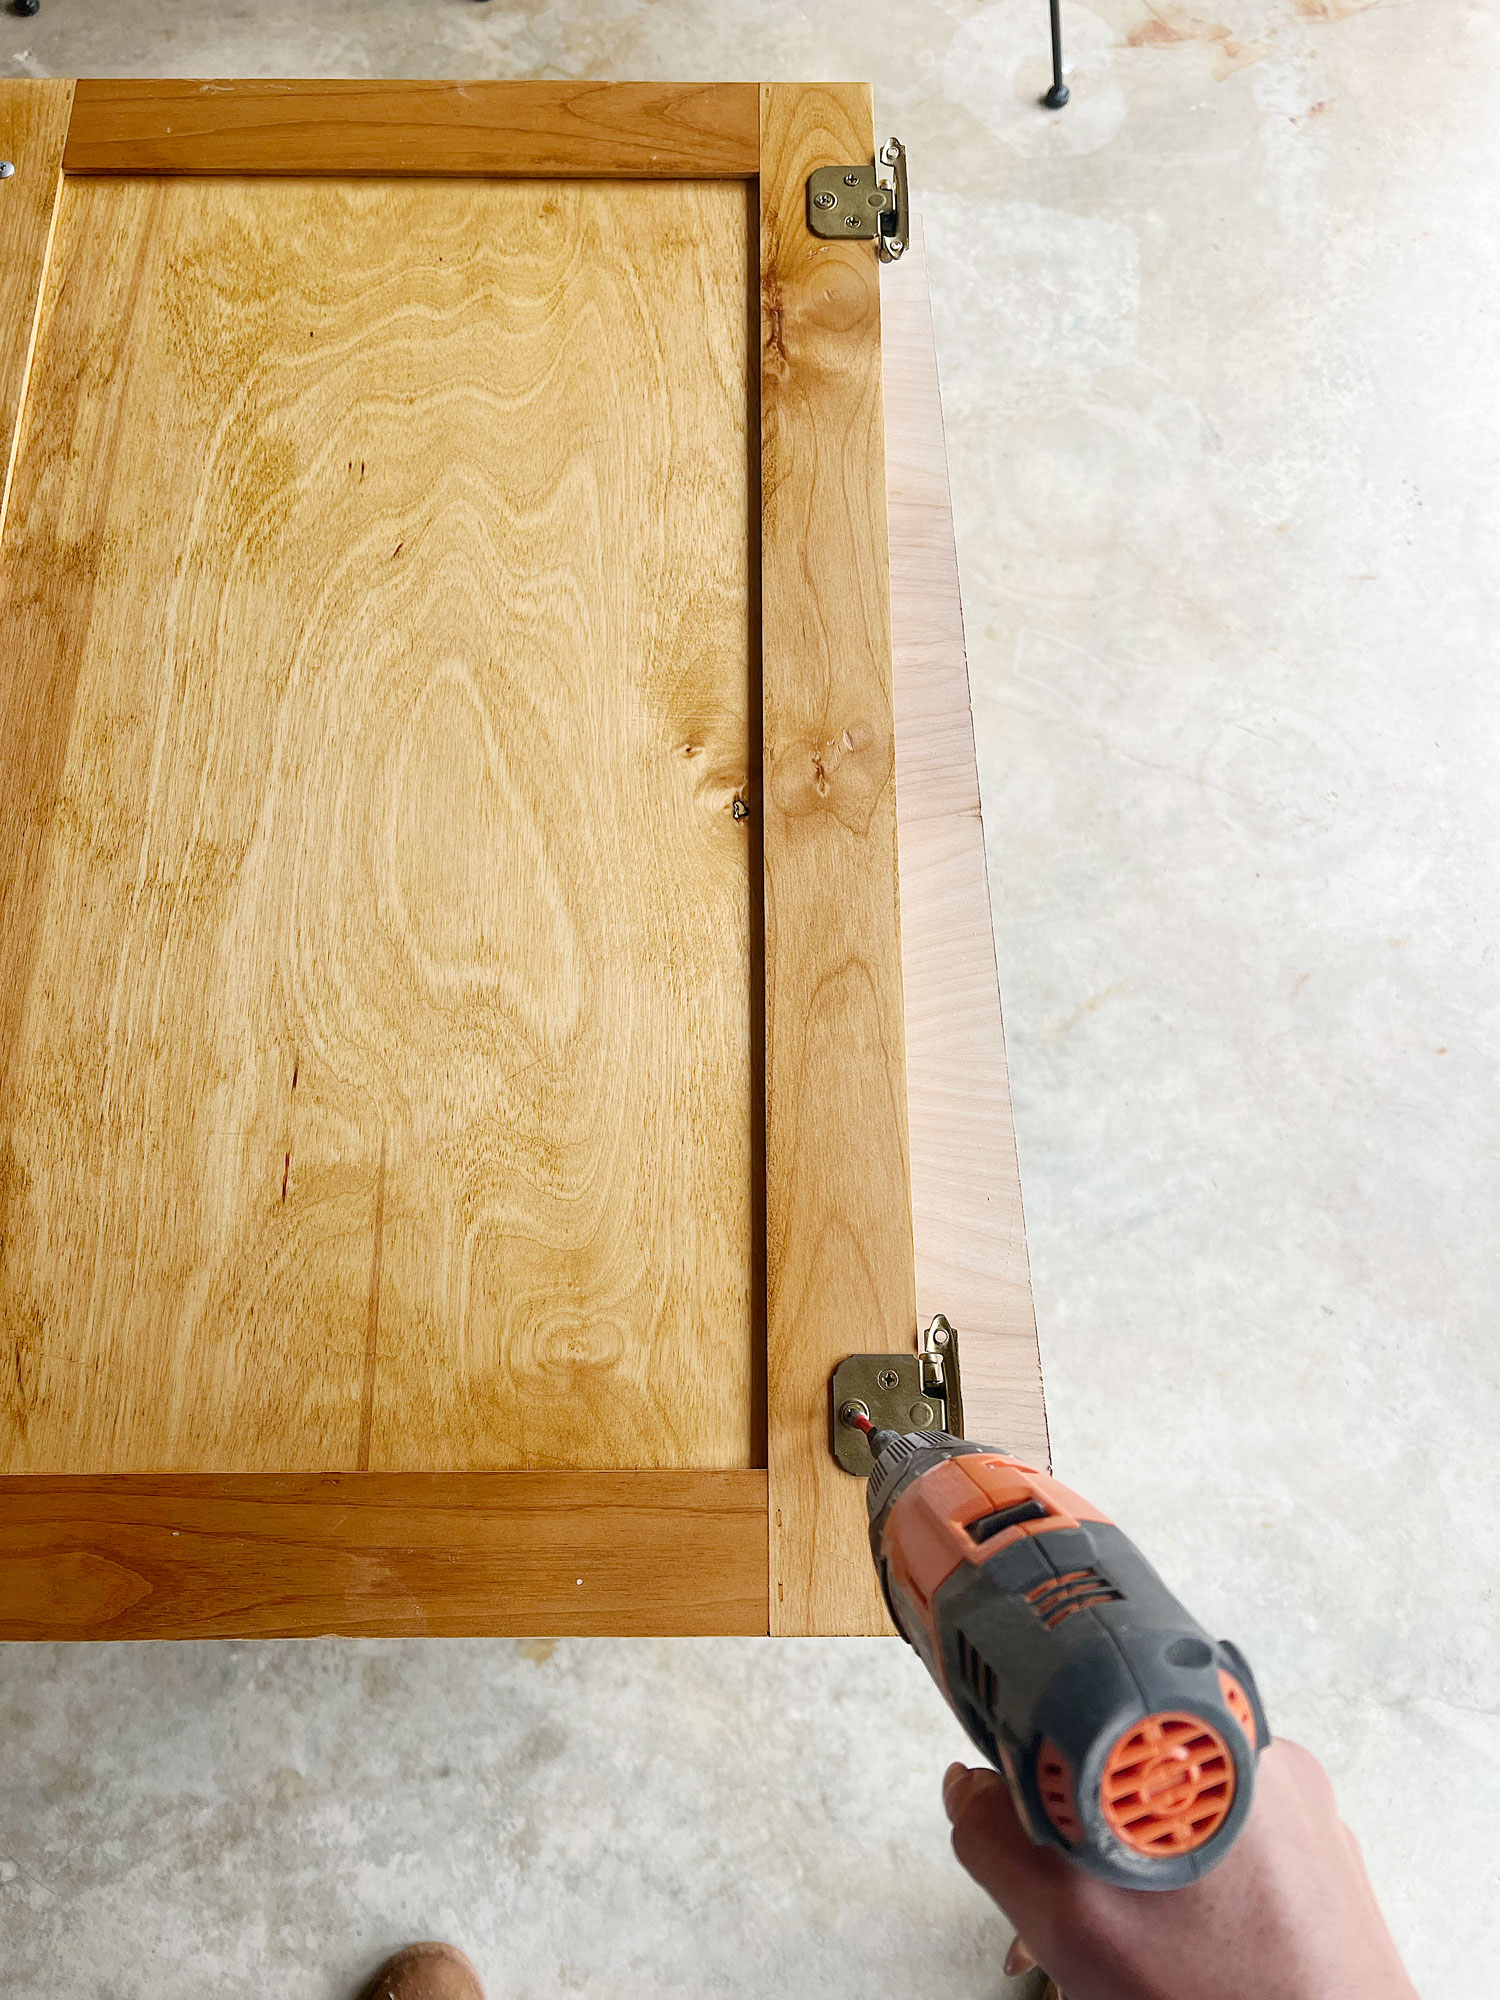
(Step 1). Using your screwdriver, remove cabinet doors from vanity frame along with the cabinet hardware.
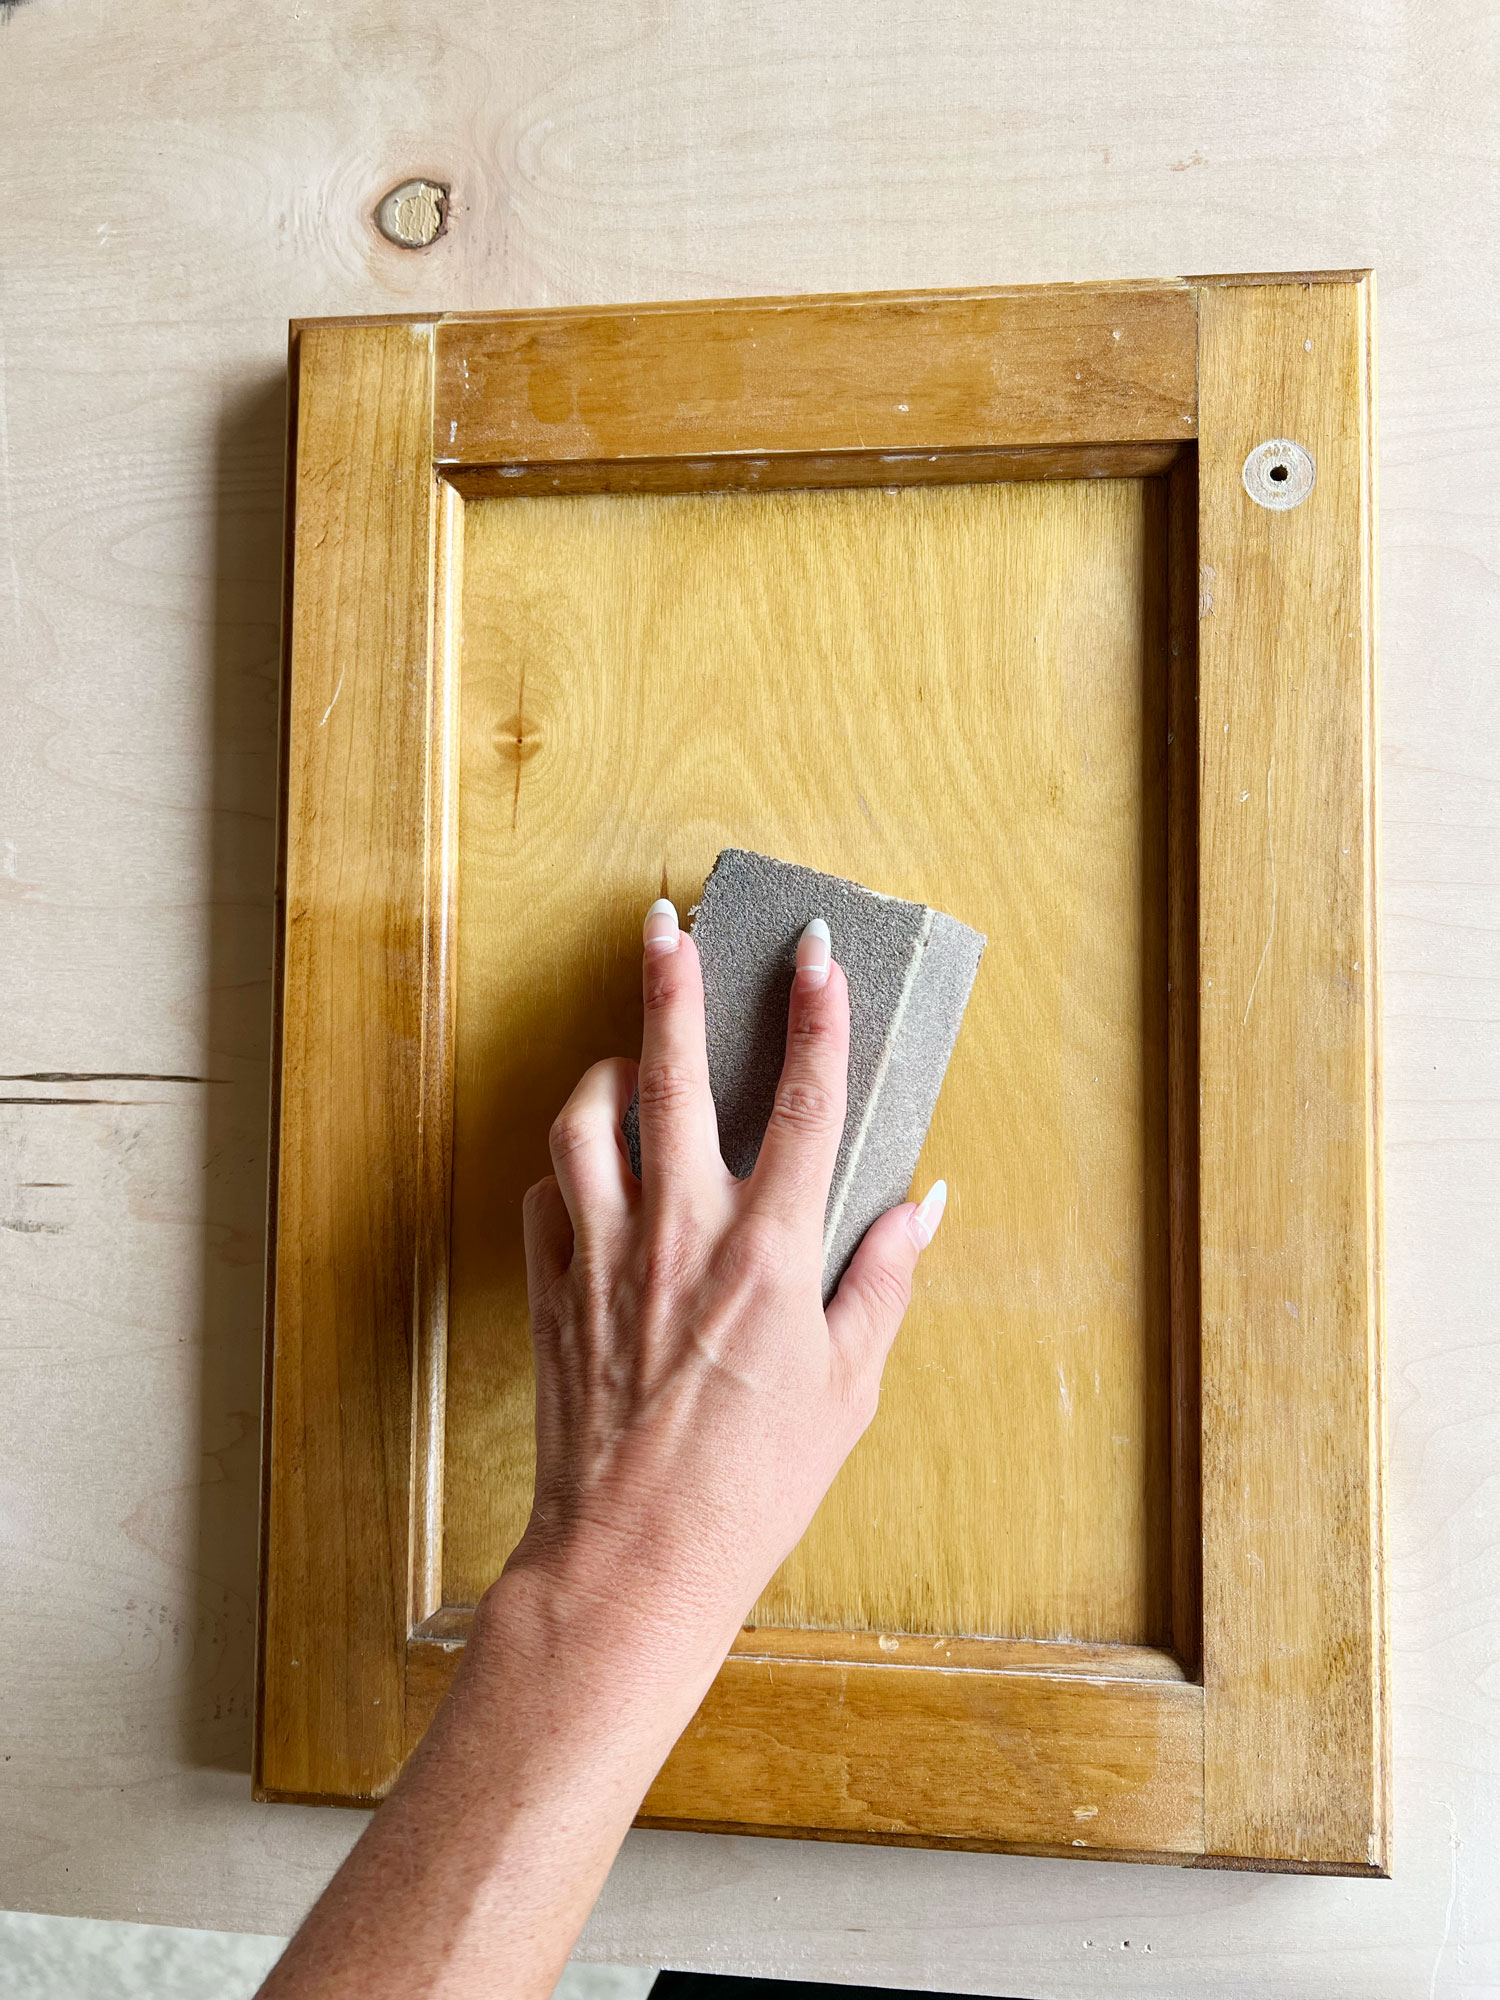
(Step 2). Because I used a paint that can be applied over virtually any sort of pre-existing finish, I only used a 100-150 grit sanding block to lightly scuff up the entire surface of the cabinets. You don’t have to entirely strip the finish- just dull the “shine”. Tip: Once you sand, be sure to clean off the sanding dust with a damp cloth and allow to dry.
(Step 3). If you are using a lighter color paint on a wood vanity or wood cabinets, you will need to apply a coat of oil-based primer/stain blocker to make sure no wood or stain bleeds thru your new paint finish. Because I was going with a very dark paint, I skipped this step.
However, if you are going with light to mid-toned colors (especially white cabinets), do NOT skip this step! I have made this mistake before and the old stain eventually bled onto the grey paint color.
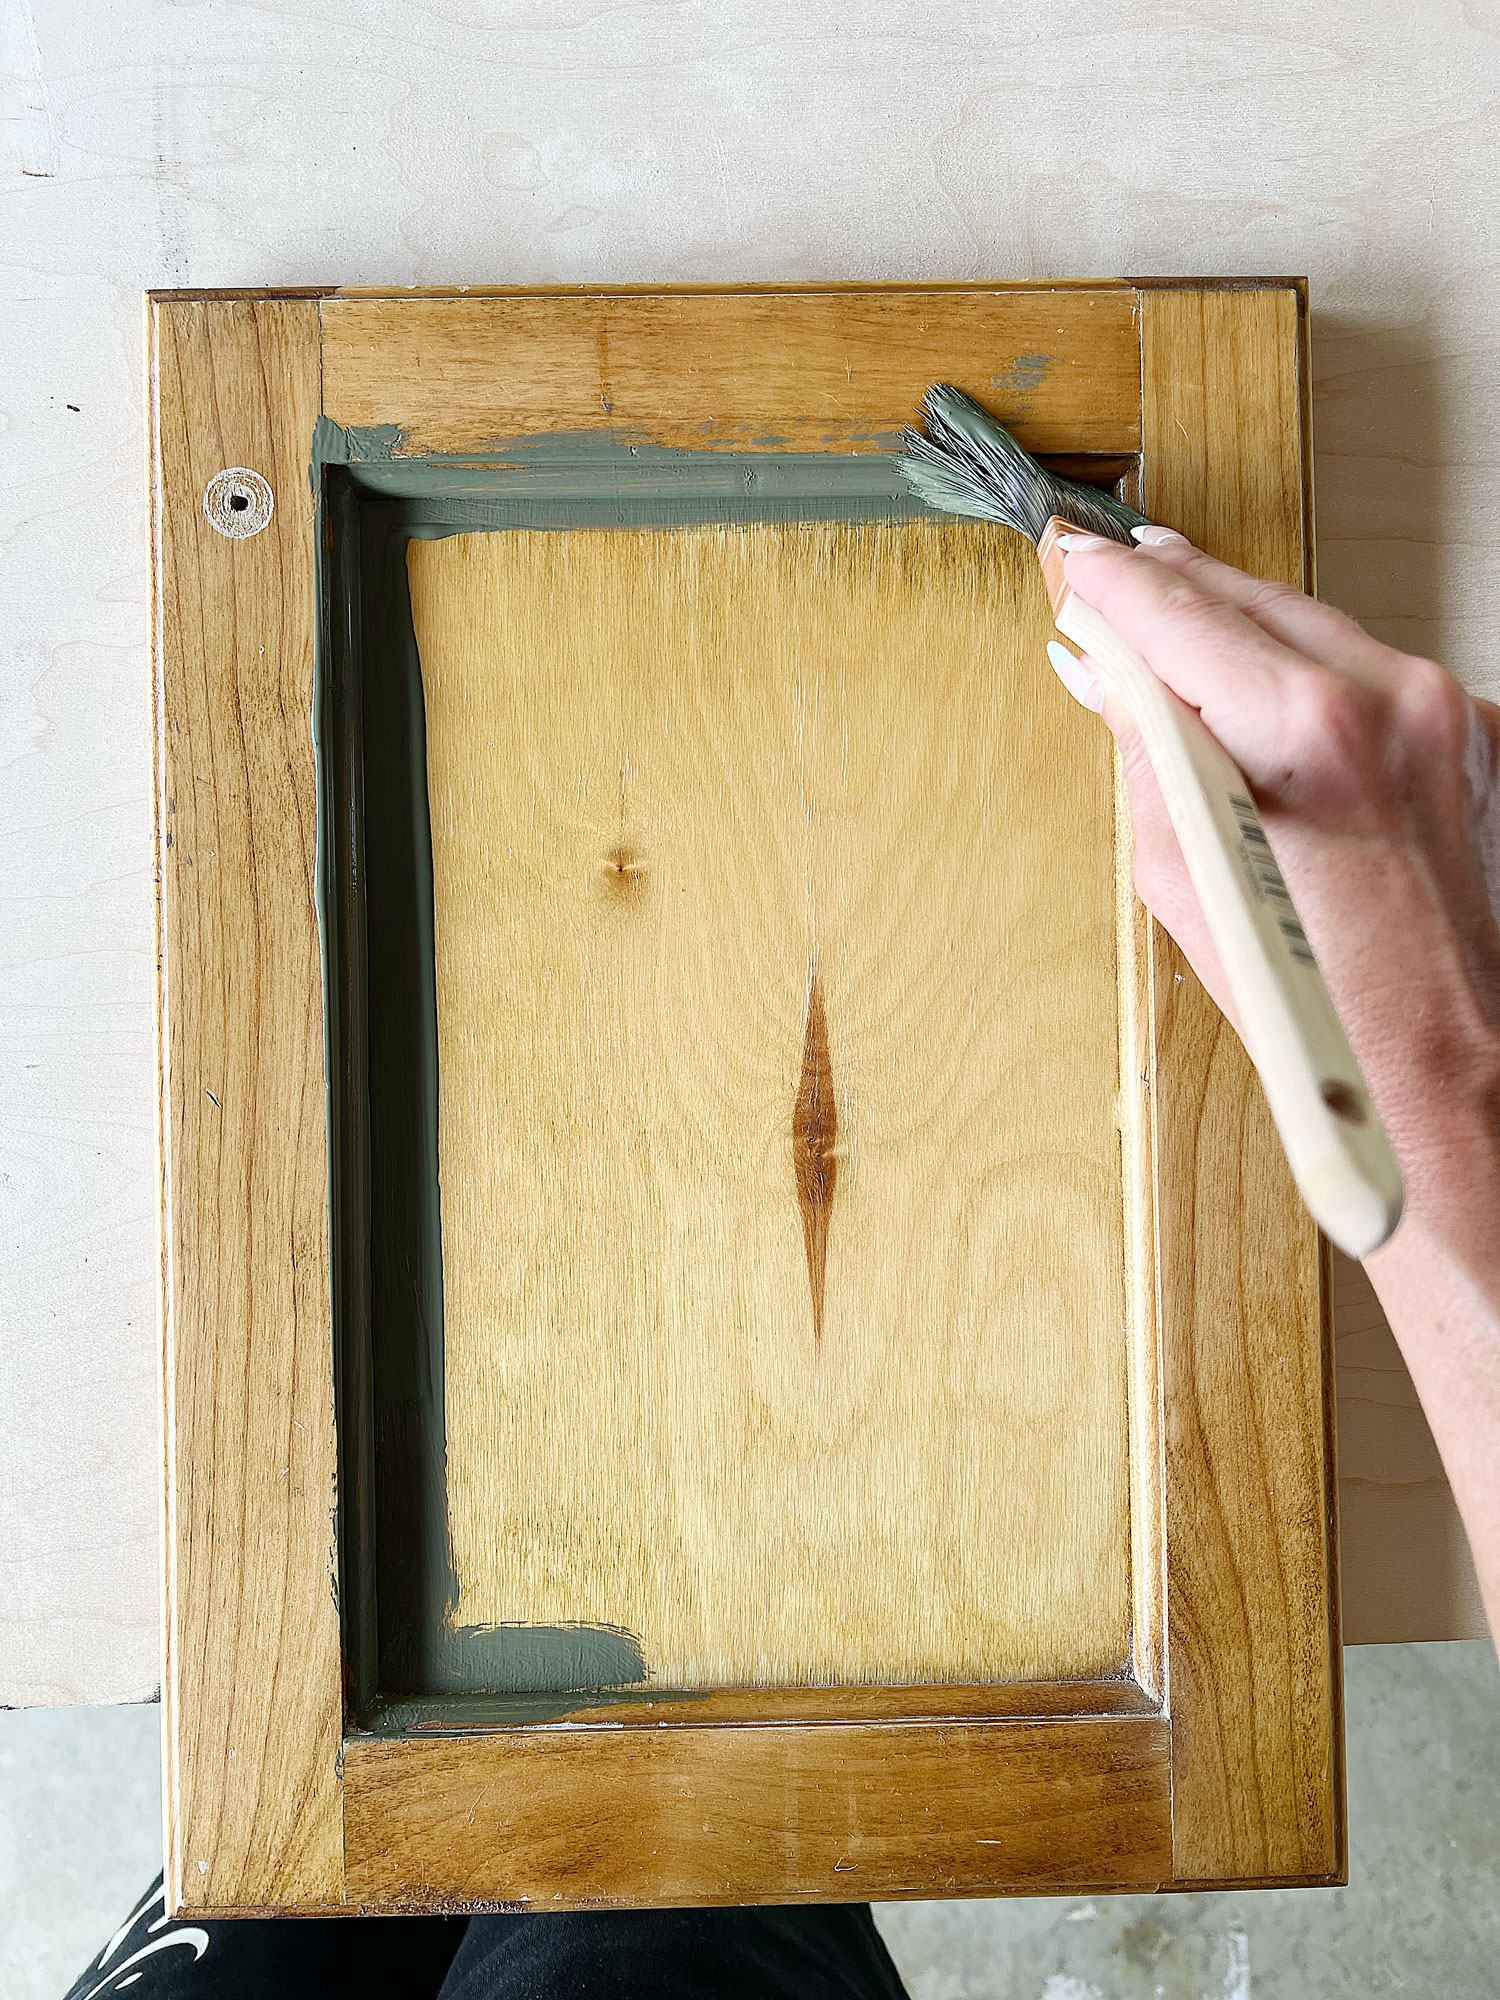
(Step 4). Once your primer has dried, using a quality paint brush (it truly makes all the difference), begin cutting in the details of your cabinets with paint.
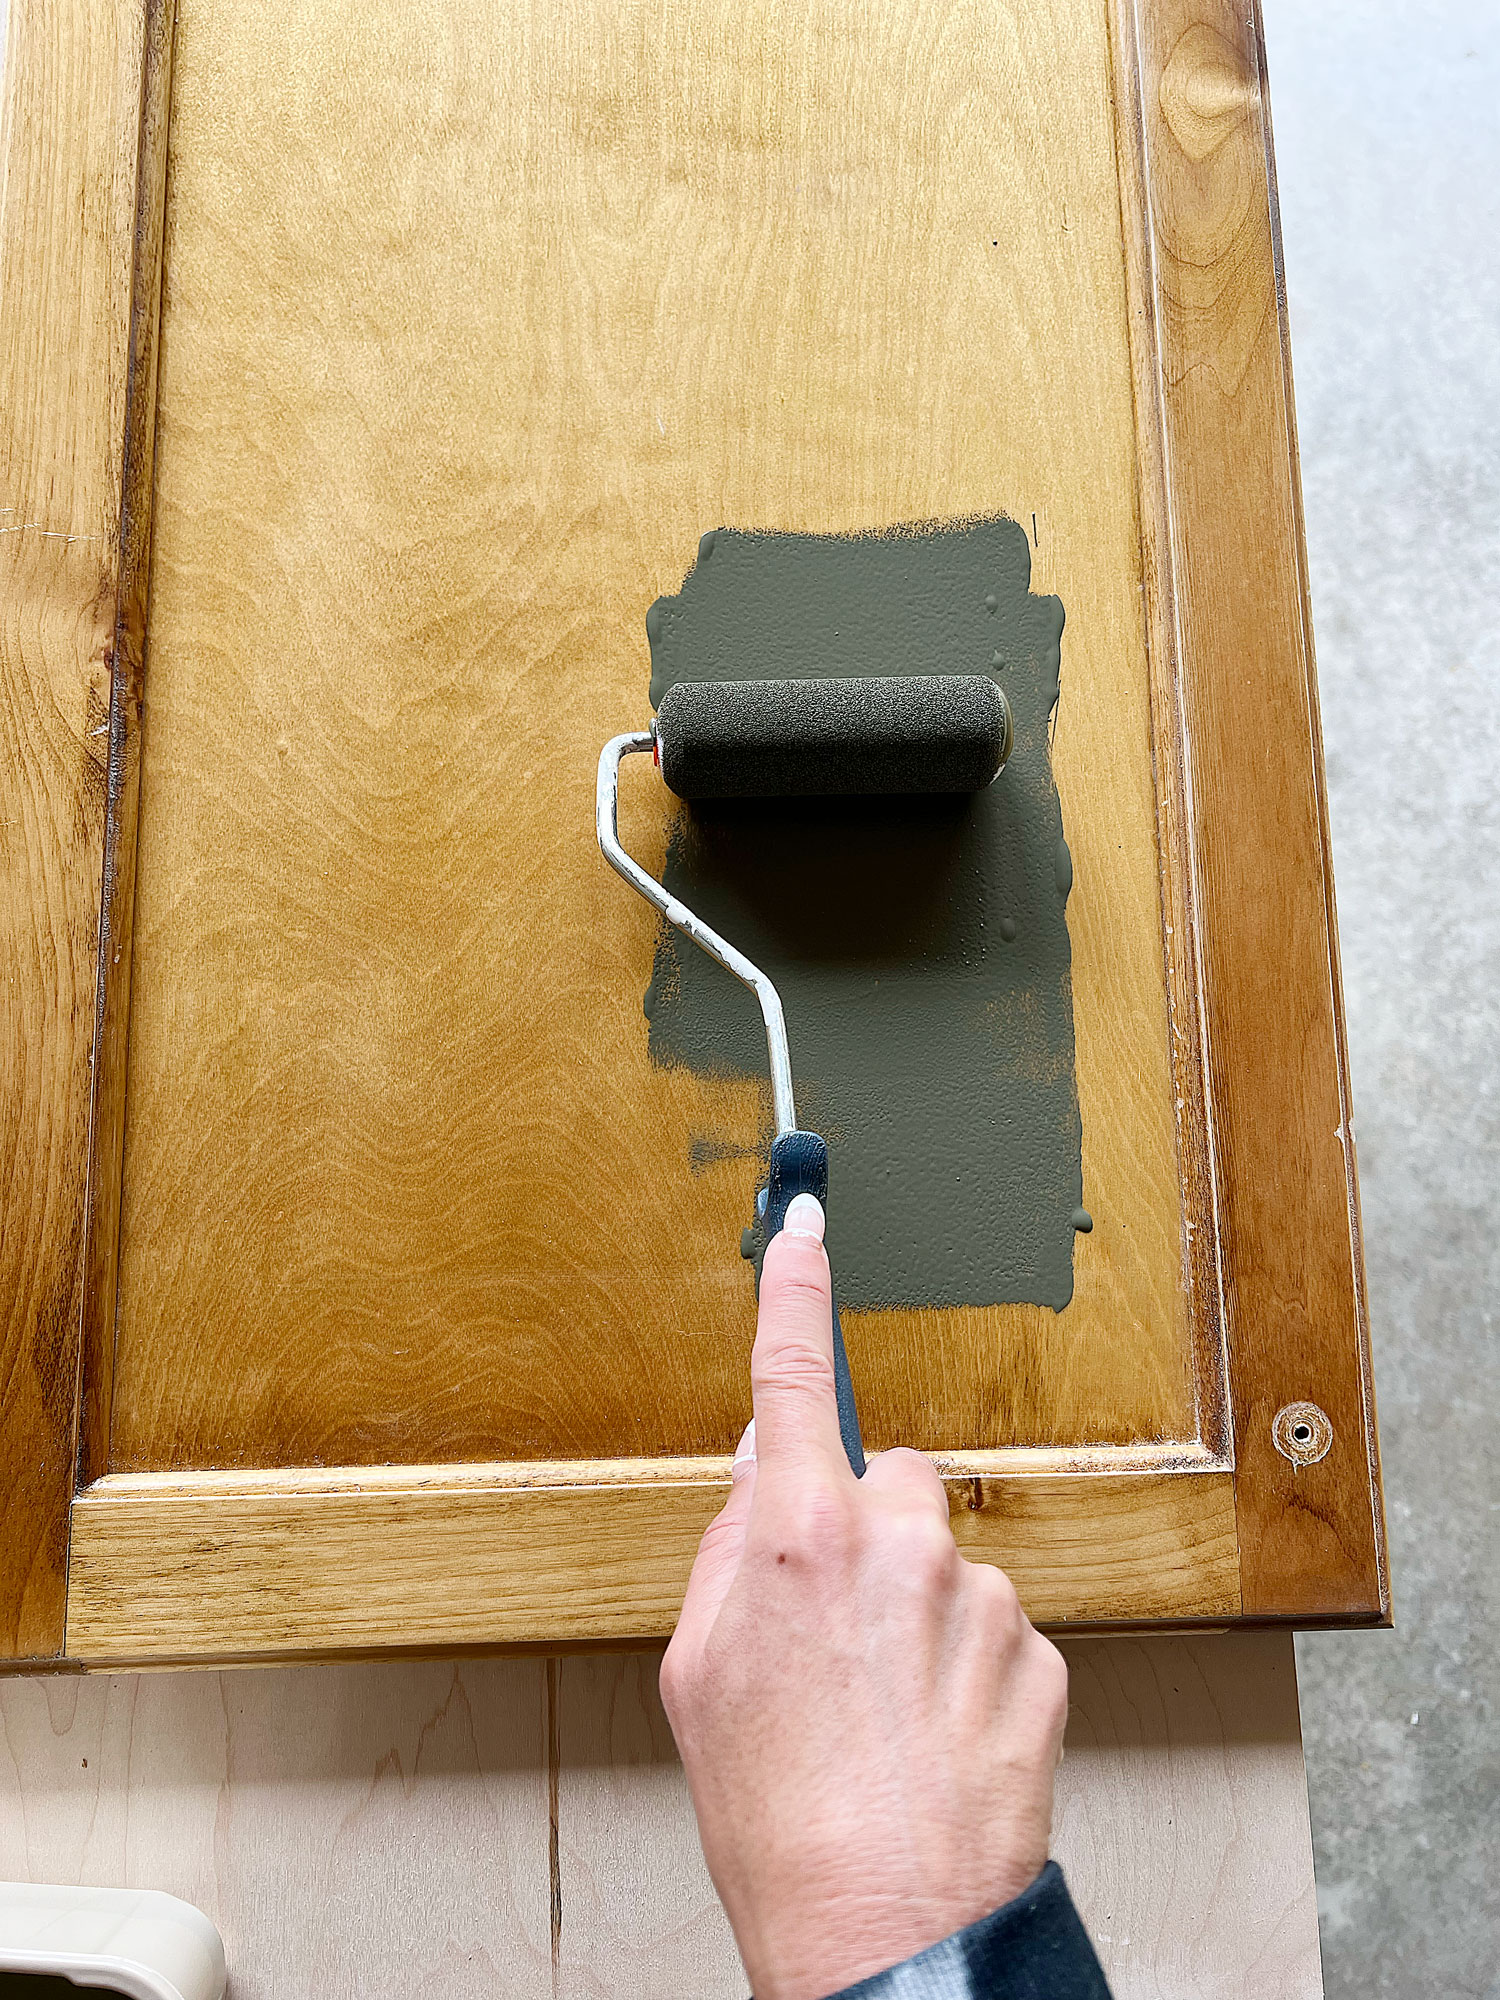
(Step 5). Once you have cut in your details and smaller surface areas with a brush, use your foam roller to apply paint to the entire surface of your cabinets and/or drawers.
(Step 6). While my first coat of paint was drying on the cabinet doors, I decided to tape off the bathroom vanity frame where it meets the sheetrock and floors and then apply my first coat of paint to it using a brush. (Don’t forget to sand and prime your frame as well!)
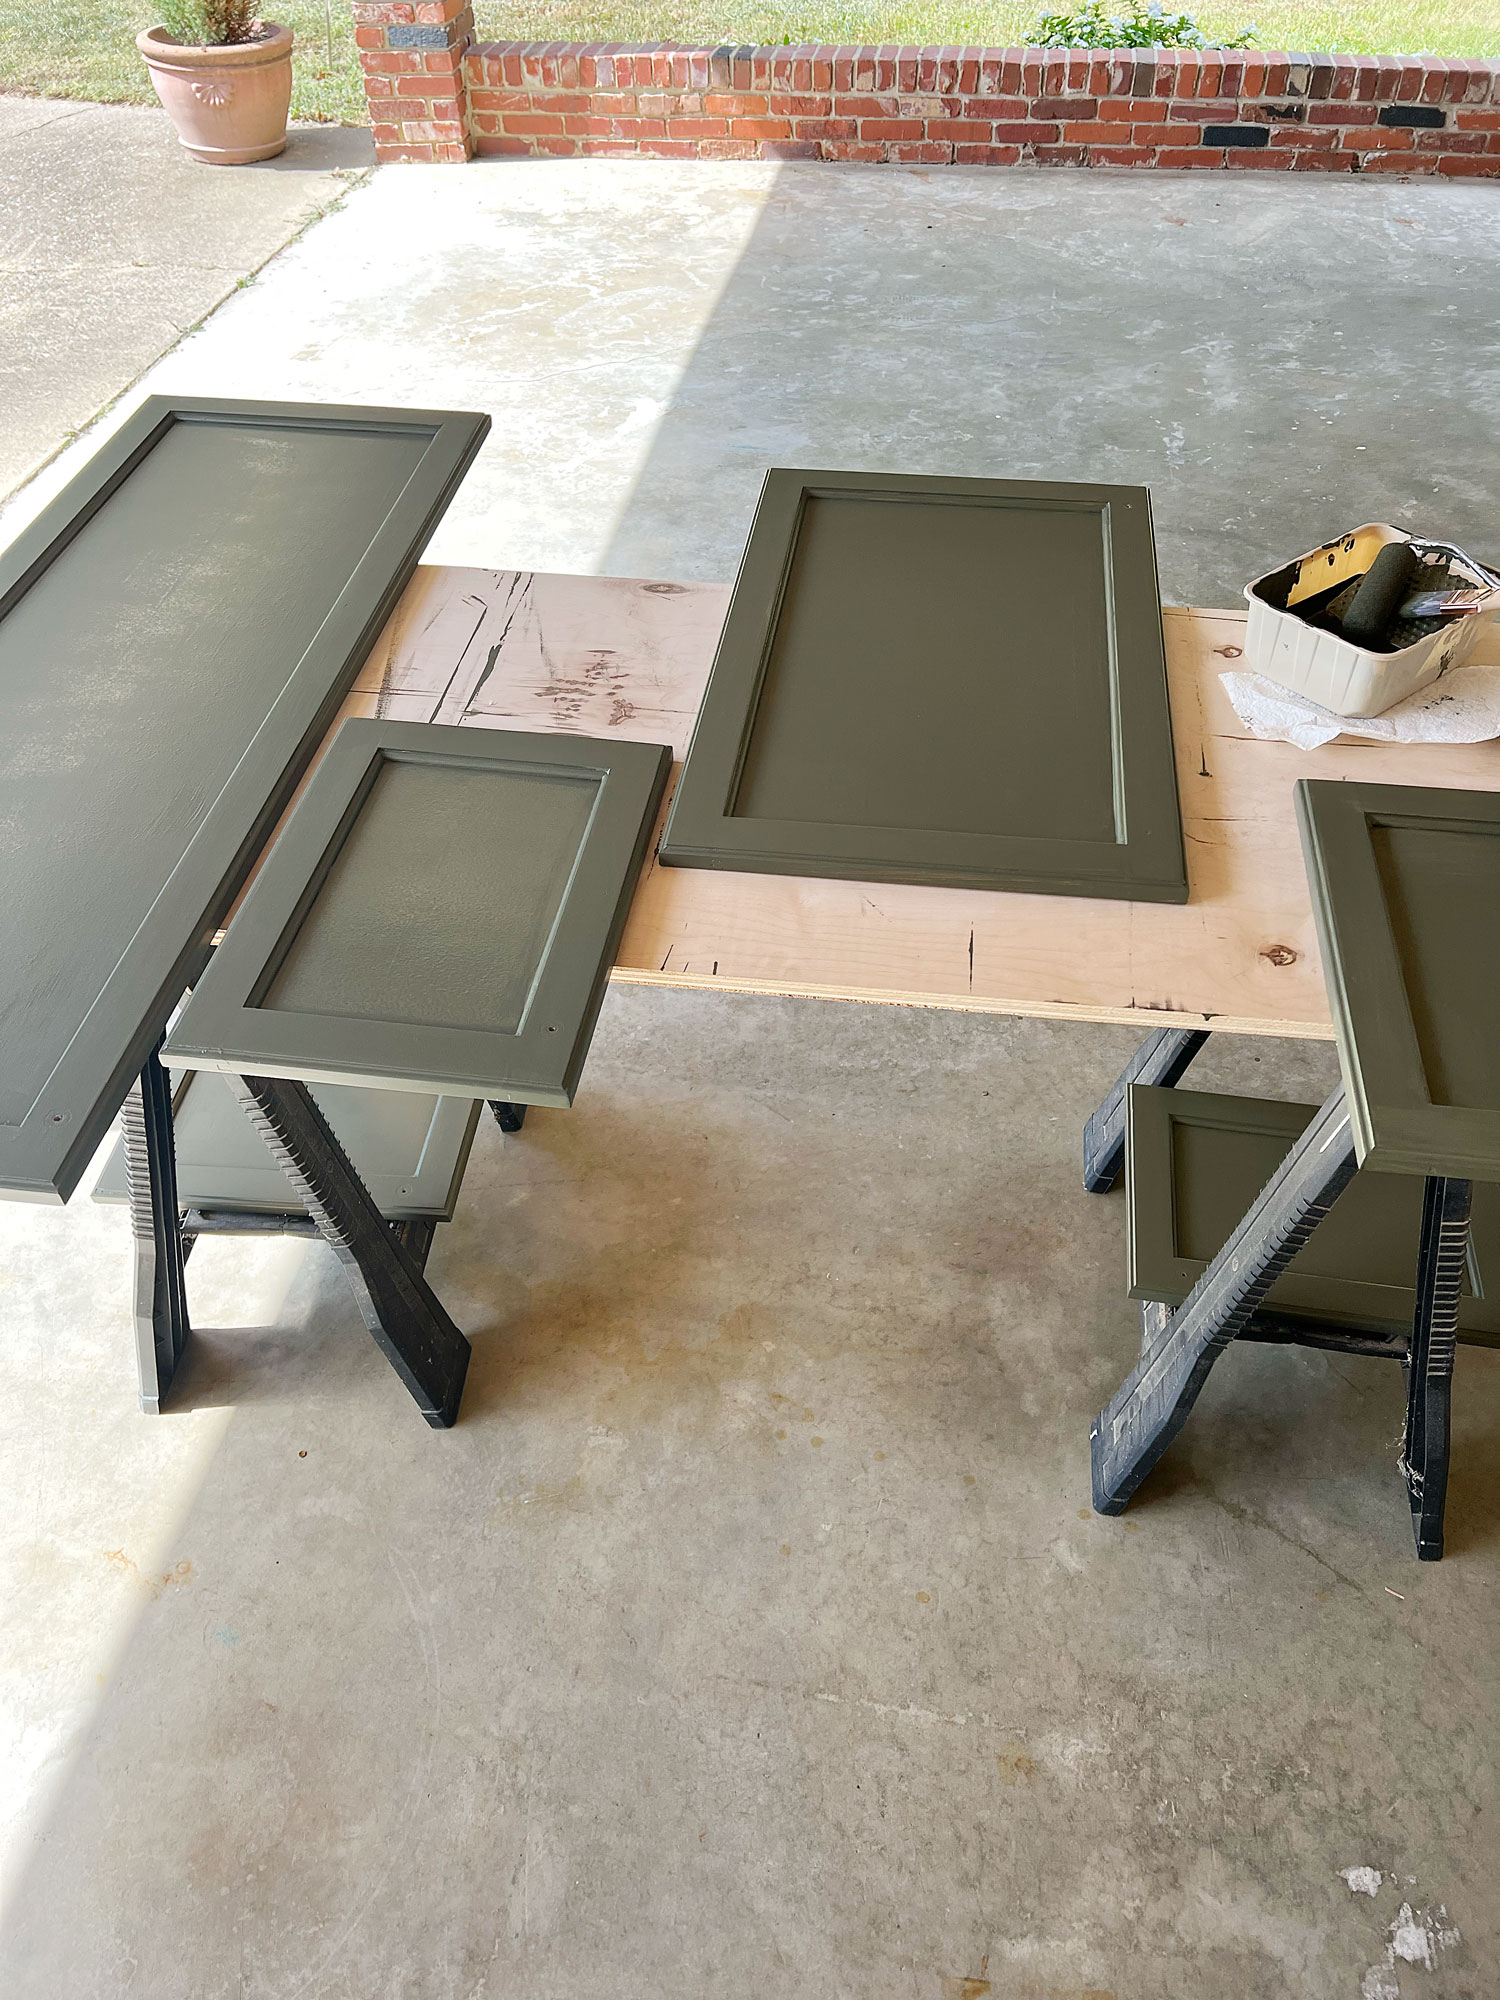
(Step 7). Once your first coat of paint has dried, if you see any drips or brush marks that bother you, you can use 220 grit sandpaper to smooth the imperfections out. Because I was working with a self-leveling paint, I was able to skip this step. Above is a picture of what just one coat of Emerald Urethane looked like while drying.
(Step 8). Once you are happy with your dried first coat of paint, you can begin applying your second coat of paint. Much to my delight, two coats was enough coverage.
(Step 9). Once you are happy with your finish, allow your paint to fully dry and cure before installing your new hardware and placing them back on your vanity frame. Just to be extra careful, I allowed my doors, drawers and framing to cure for about 3 days.
Optional:If you would like extra protection for your paint finish, feel free to use a top coat. Because I know how incredibly durable Emerald Urethane is (I have used it on my kitchen cabinets and exterior doors with great success), I did NOT apply a top coat.
And there you have it…painted bathroom cabinets that now reflect my modern organic aesthetic. Buh, bye nasty a$$ orange-stained pine!
For the price of a can of paint and three hours of my time, I am so incredibly pleased with the results of this simple DIY project.
Now ….if I were to have used the old-school technology of oil-based paint, this project would have taken me about three times as long. But with so many user-friendly paints available on the market now, painting your bathroom cabinets doesn’t have to be that big of a freakin’ ordeal.
You got this, my friend! I promise.
Thank you so much for stopping by and spending some time with me this week.
It would make all of the difference to this small business of mine if you could share this post with a friend or on social media…
Now get out there and design some good vibes along with a fabulous life!


Welcome!
My journey in interior design and home improvement began with transforming my first fixer-upper home, all while managing a budget and raising two young boys. My work, a reflection of my passion for creating beautiful, uplifting spaces, has been recognized by top publications like Better Homes and Gardens Magazine, HGTV, and more. I invite you to explore my site and witness the transformation of my home and the vibes we've designed. Read more...


File this makeover under “big impact for little money.” Love it!
Thank you so much, Nadine! I hope you are doing well. xoxo
Just wondering how you keep your foam roller from leaving tiny bubbles? I have painted many things but still haven’t mastered using the foam roller on anything.
Hi Nancy! I think the quality of paint used has a lot to do with it. Since the paint I used here is self-leveling, the bubbles will settle as it dries. That being said, if you get super duper close to the finish, you will still vaguely be able to see the texture of the foam roller. The only way to completely avoid this texture is with a paint sprayer. However, from a normal view, the finish looks nice and smooth.