
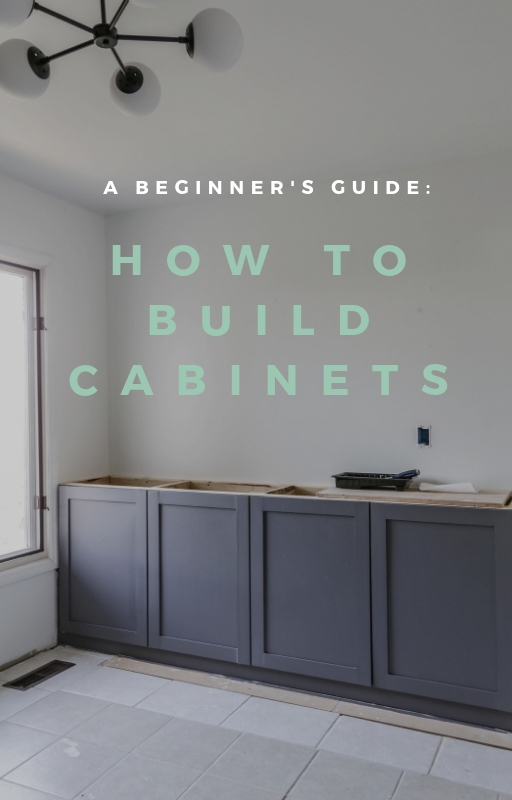
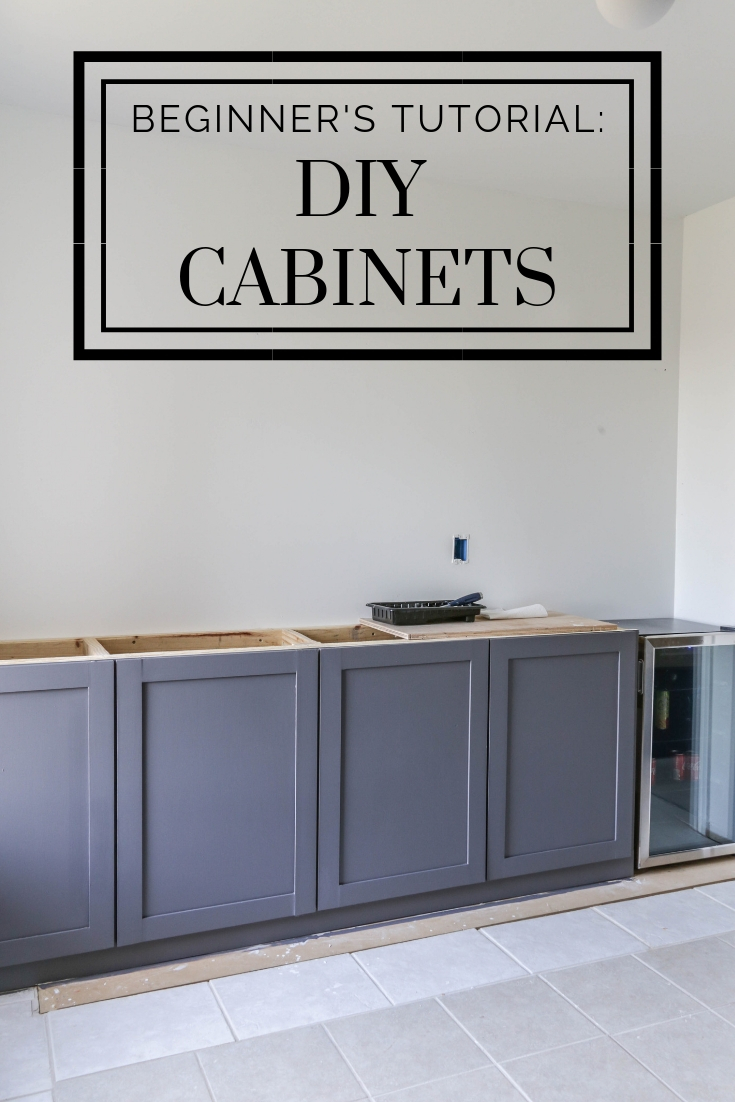
DIY Kitchen Cabinets for Under $200
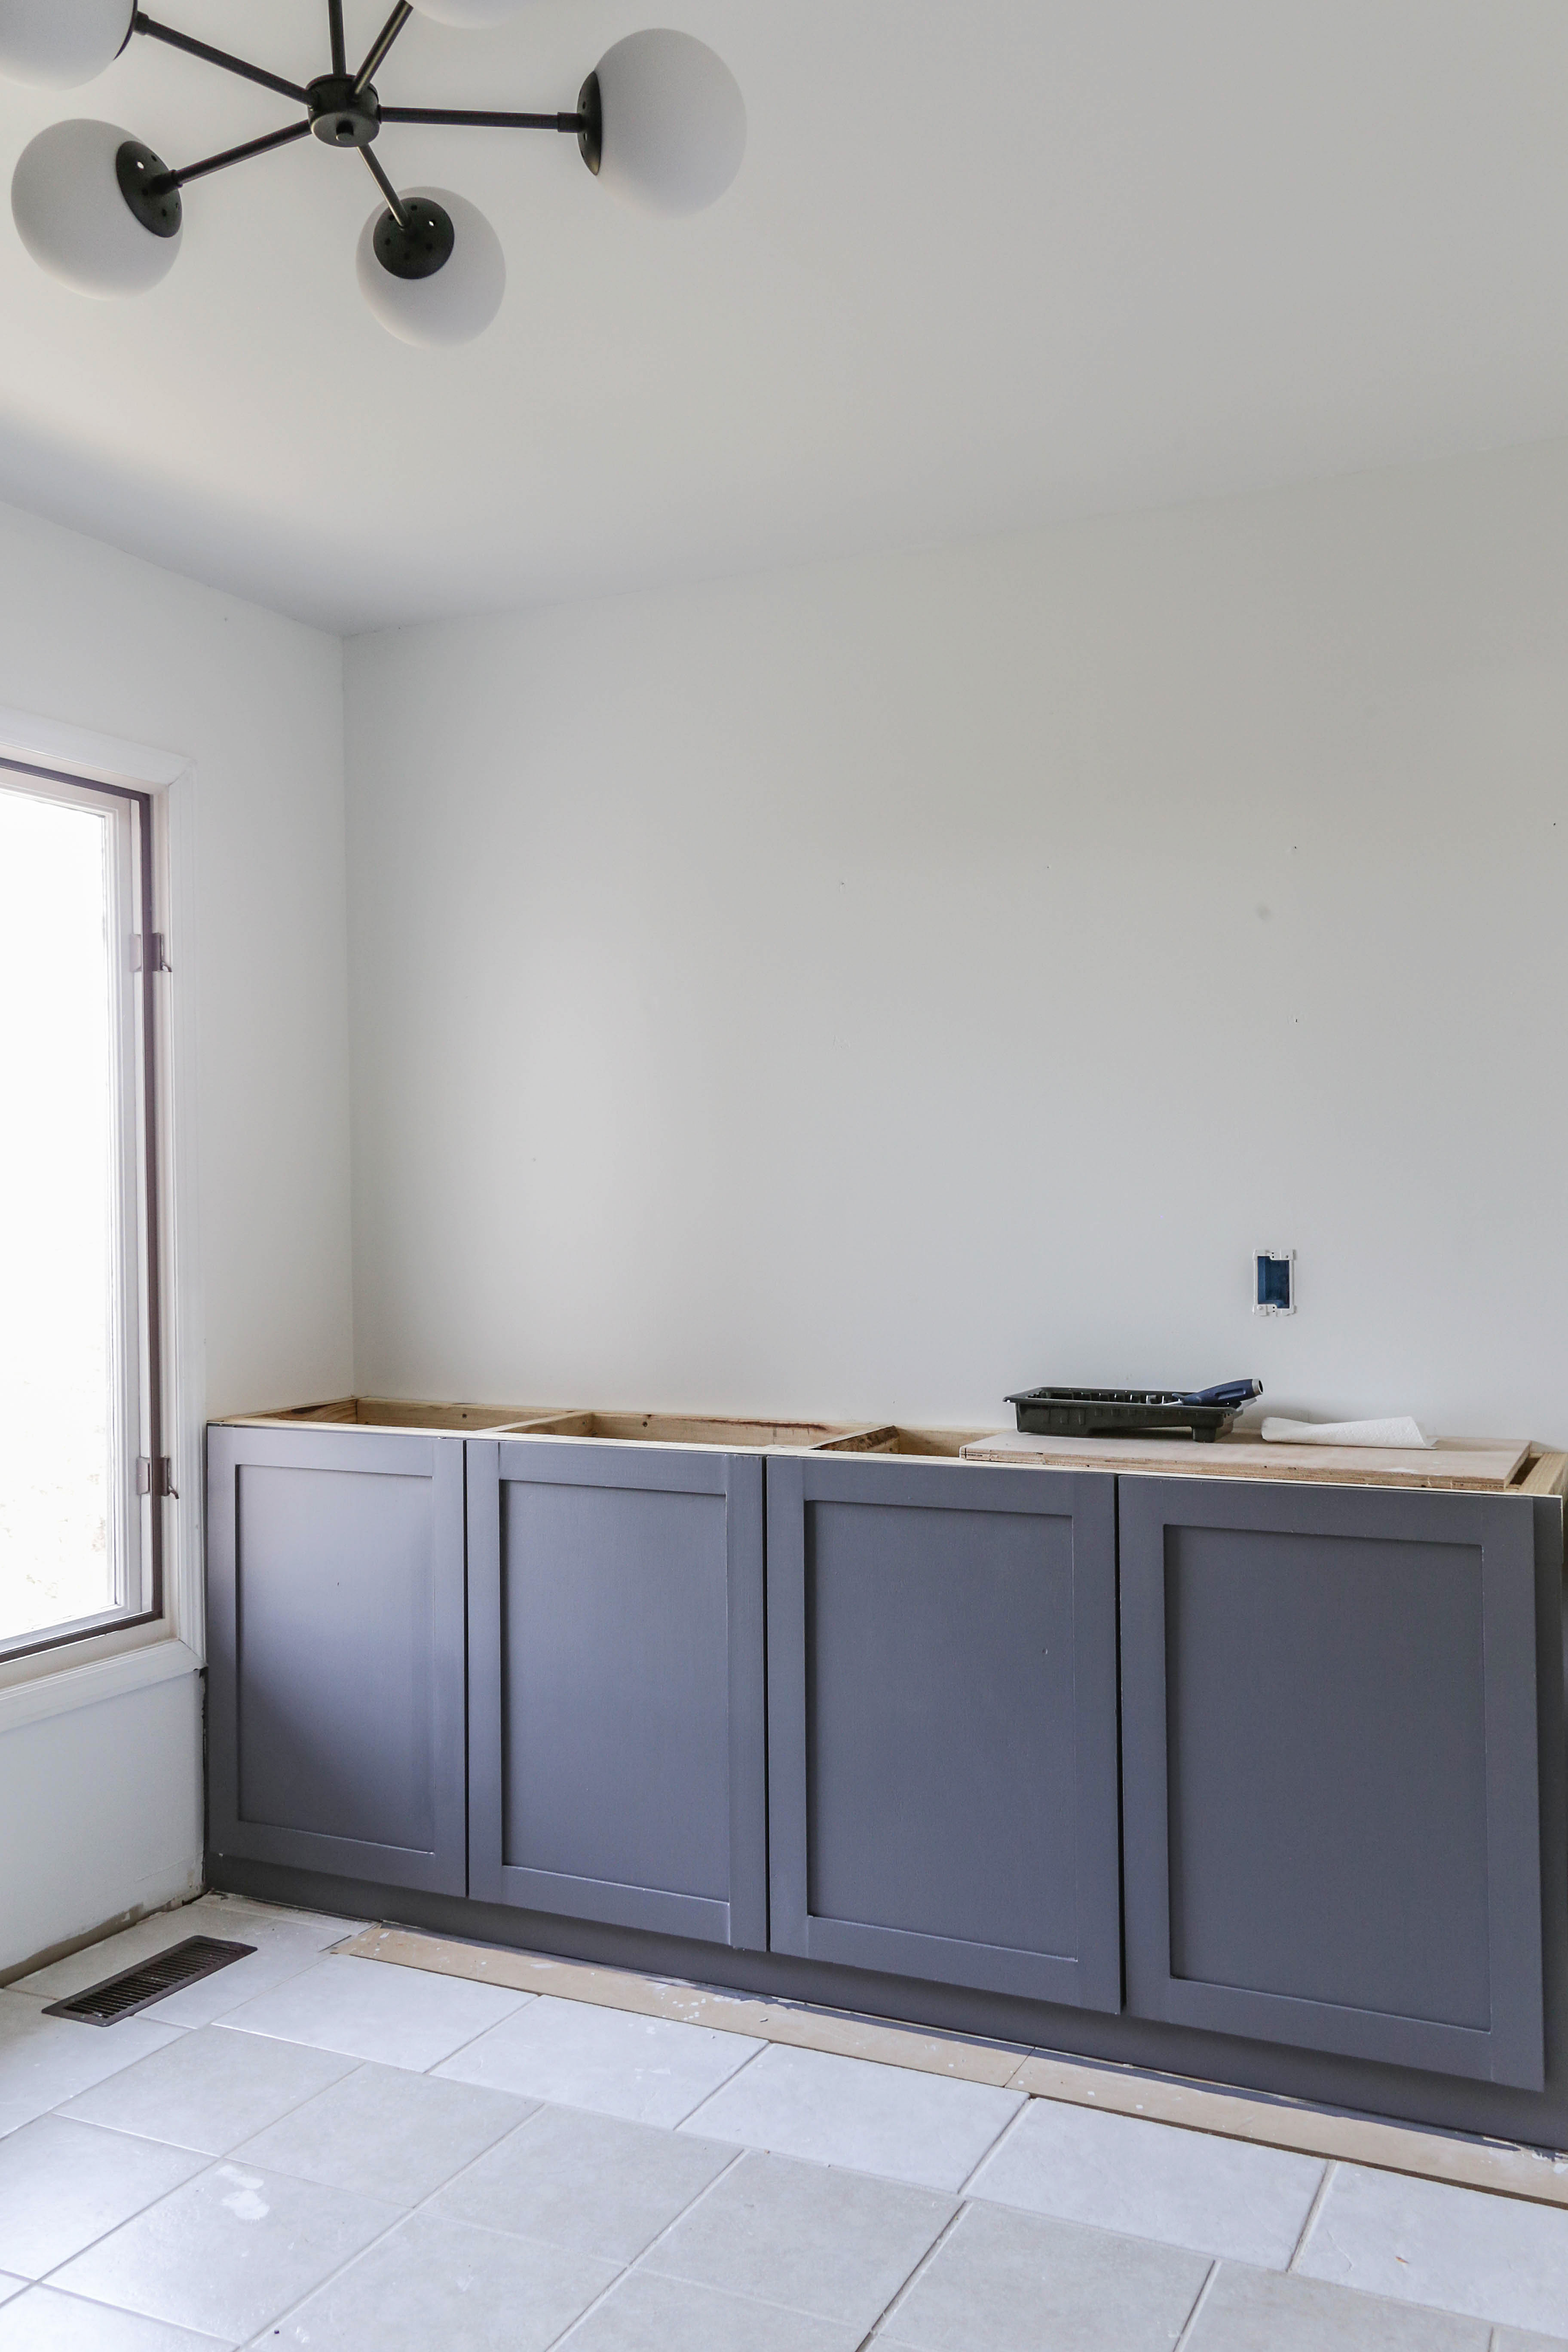
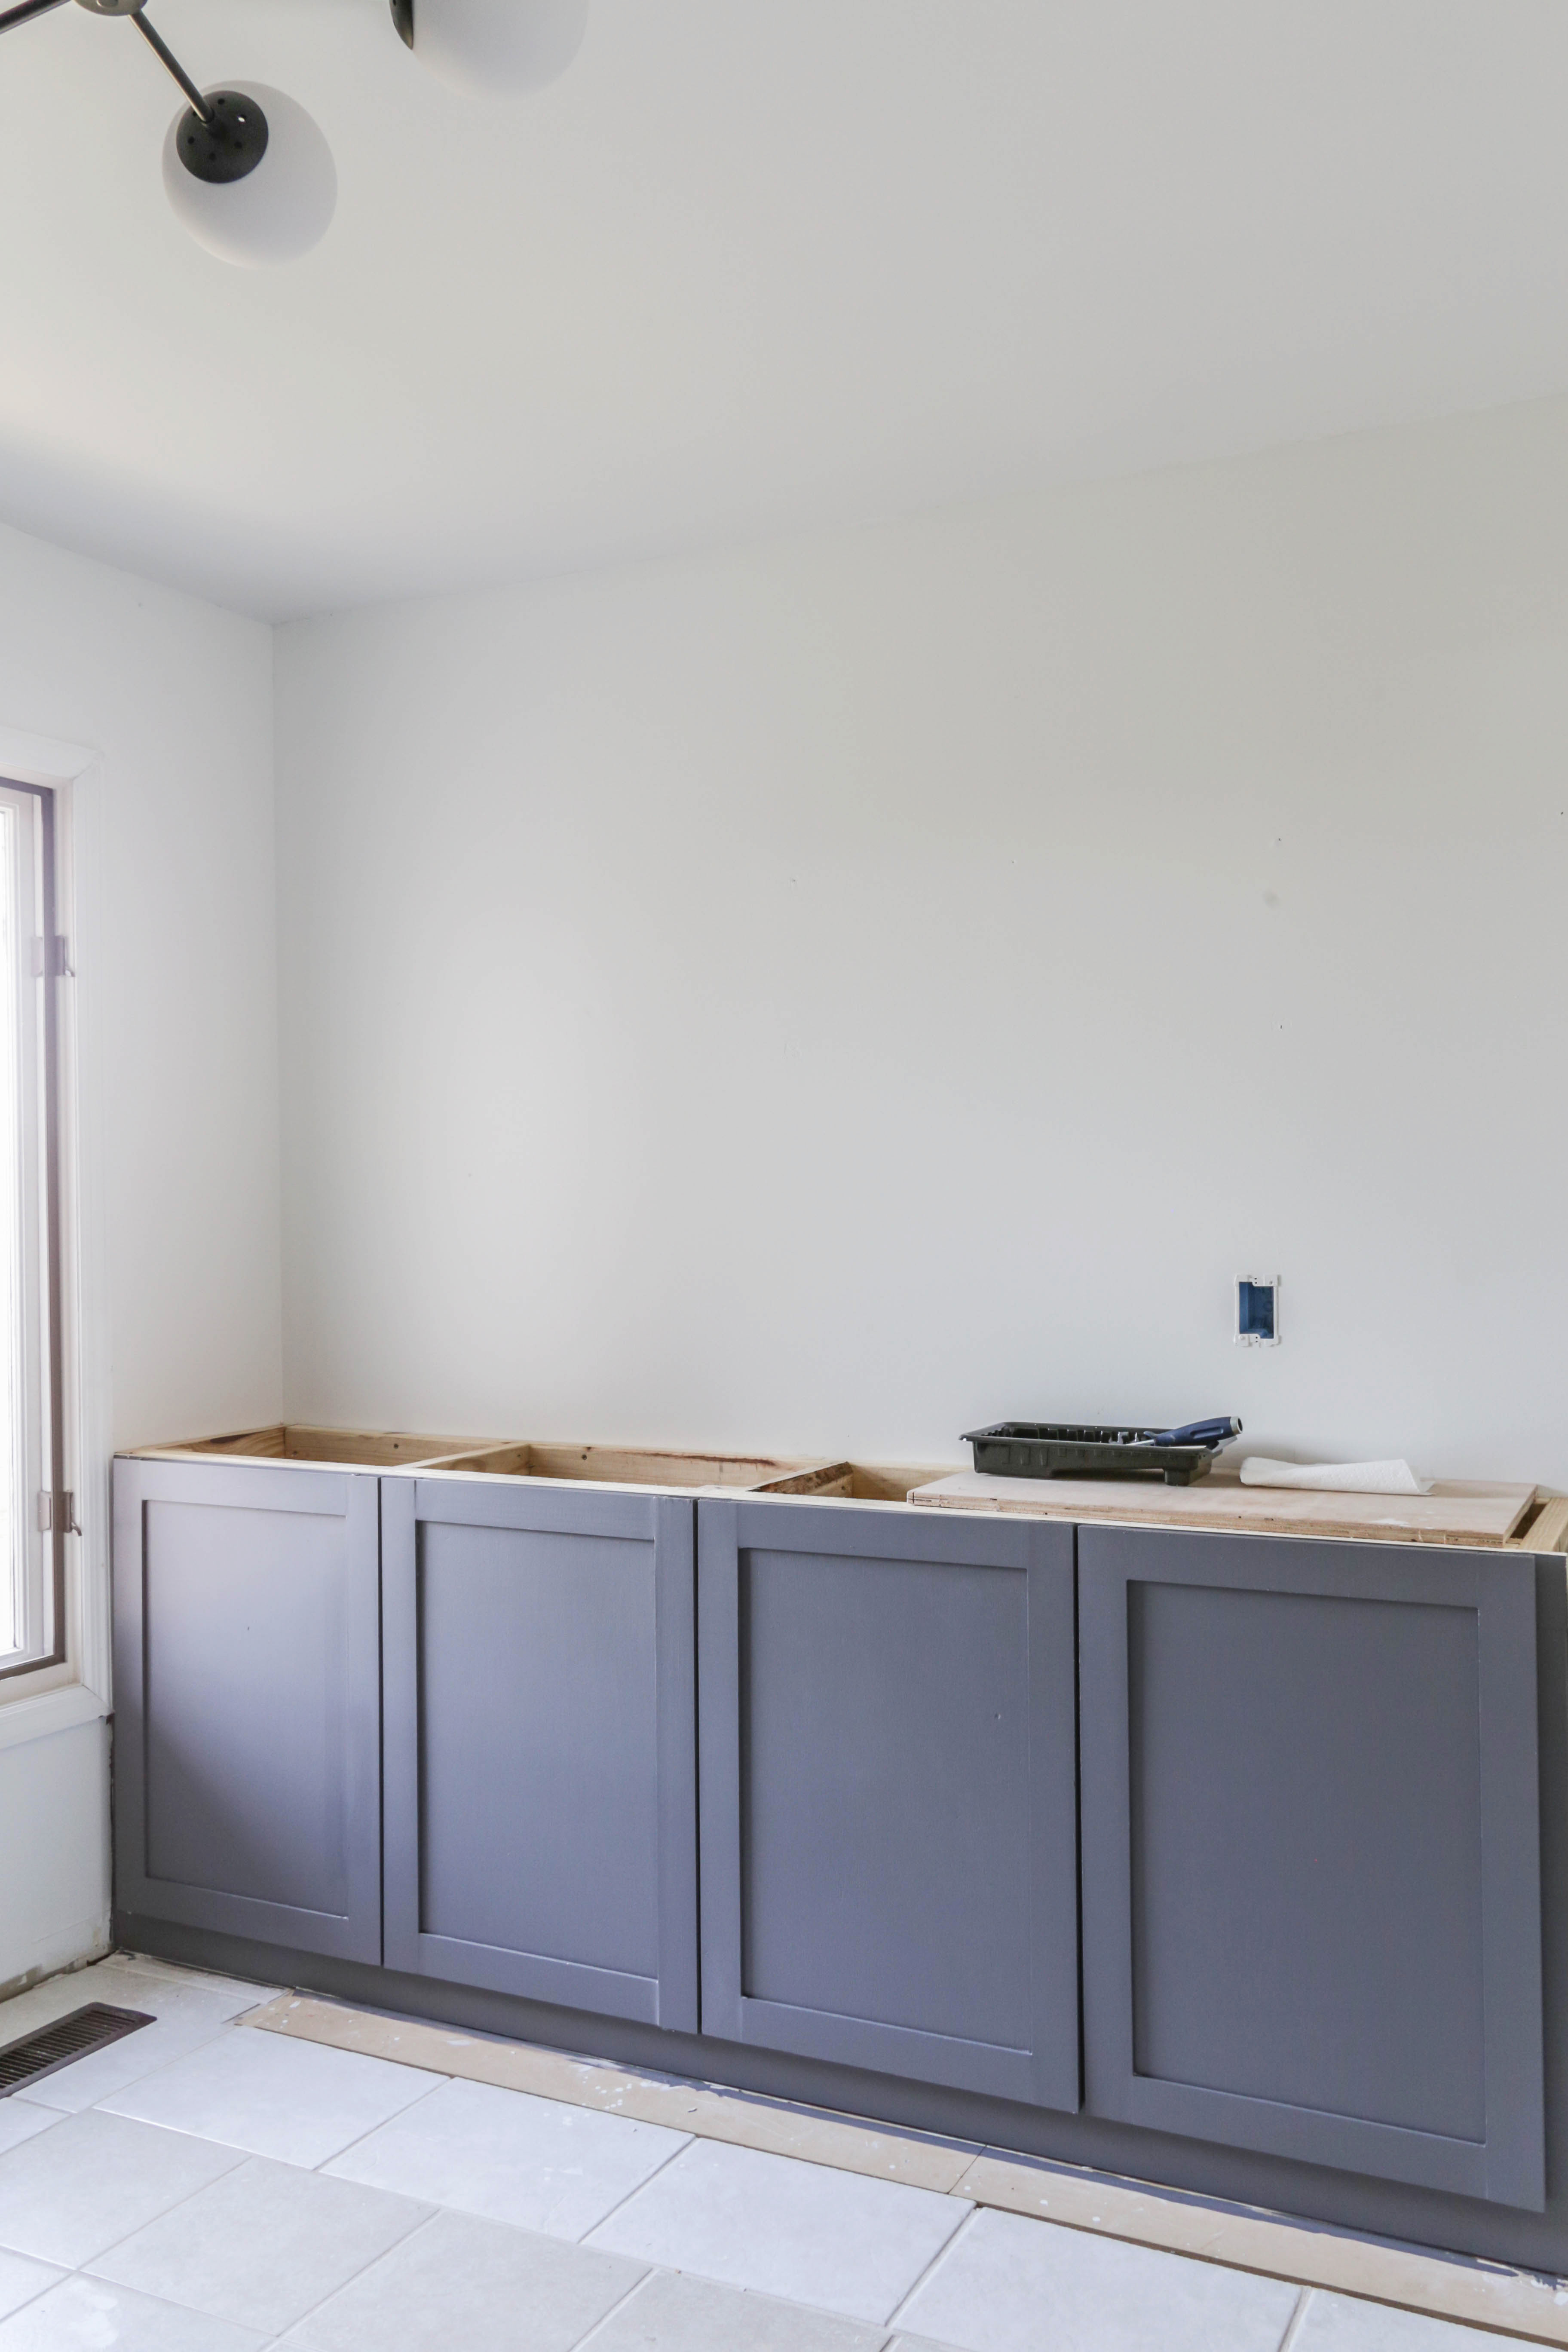
I feel like it has been a hot minute since I last reported the progress of my butler pantry build with you guys, but I am thrilled to announce that the DIY base cabinets are finally complete! Woo-freakin’- hoo!
Believe it or not, my husband, without any prior cabinetry experience (no carpentry background either!), somehow managed to construct these beauties – the cabinet framing along with the cabinet doors- for under $200. In today’s post. I am giving you a beginner-friendly, step-by-step tutorial for building these cabinets on the cheap and easy.
So….as I explained in the initial design plan (you can read the original post here), the goal of this new space is, essentially, to serve as an extension of our existing kitchen by providing more counter-top space and storage for smaller appliances.
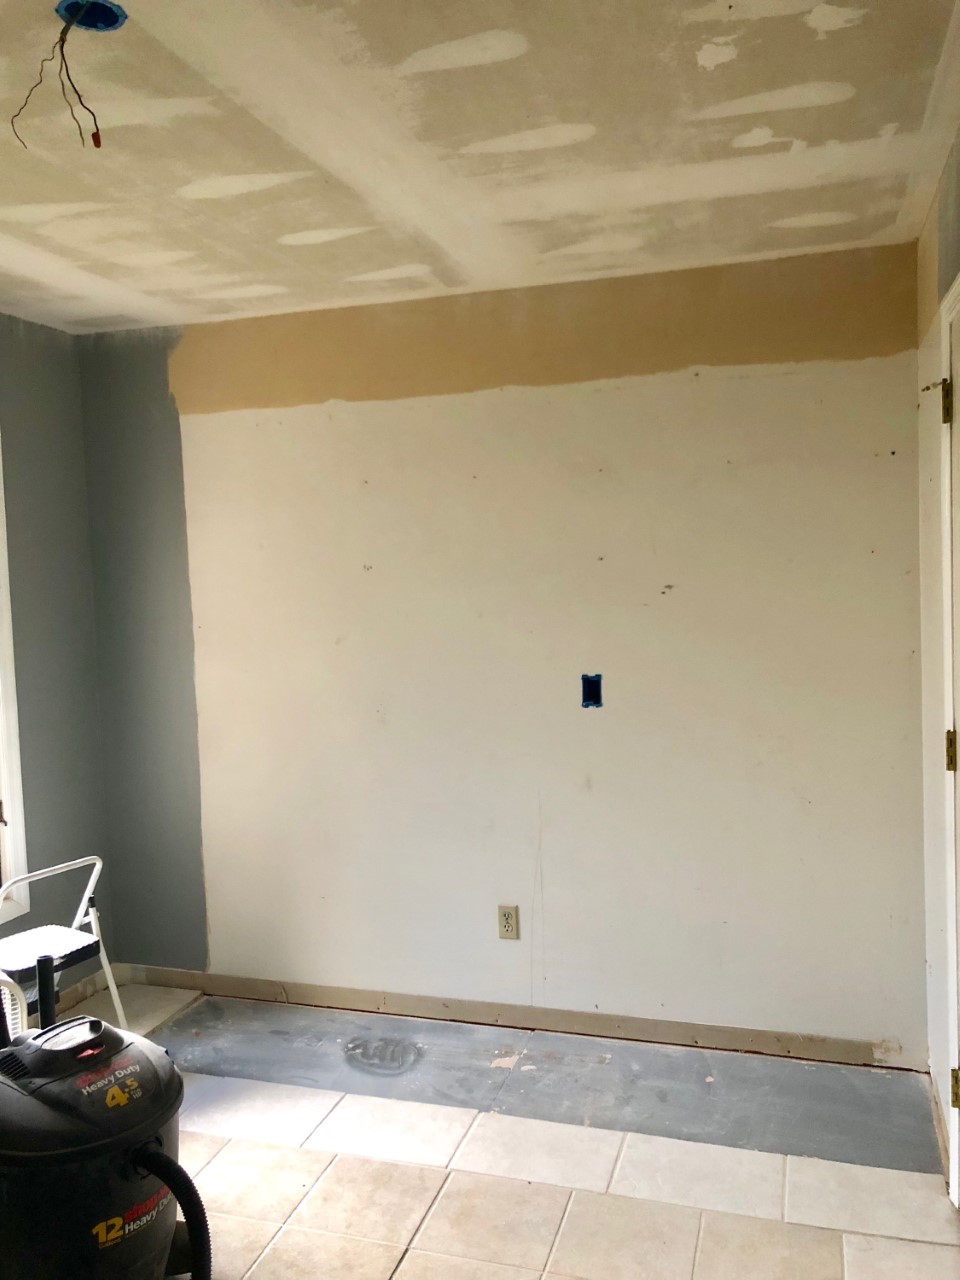
When we first moved into our home, this awkward room directly off of our kitchen came complete with a closet for a washer/dryer unit and some ill-sized shelving partially obstructed by a door (noted in the photo below)….
Before:
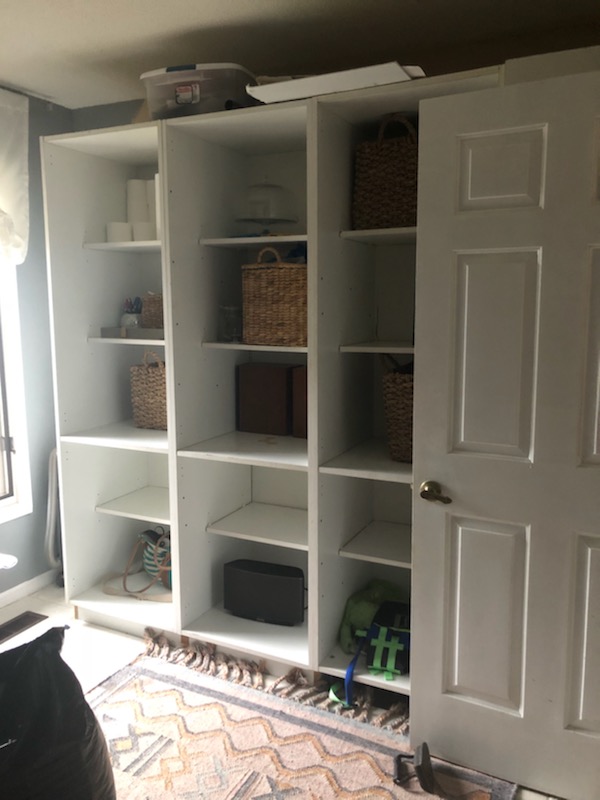
While I had already embraced this room as a mudroom/laundry room combo a few years ago (you can read about the DIY custom mudroom project here), I remained a little perplexed as to what to do about the storage/shelving dilemma on this wall.
Sure….the additional storage space was nice to have, but it wasn’t aesthetically pleasing as it completely overwhelmed the space.
Pondering the thought of a storage unit with more shallow dimensions, I began to research pre-fabricated options. After exhausting ideas of potential Ikea-type hacks, I could never find anything with the proper measurements.
Limited by such wonky dimensions, I came to the harsh realization that custom cabinetry would be our only solution. Because custom cabinetry requires such a hearty investment (upwards of $2000 for this one wall), I immediately tossed that idea in the trash.
That is…until I mentioned the idea to my husband – who was totally down for a challenge. He promised me that, with time and patience (required of me given I am horribly impatient), he could solve the carpentry quandary on his own.
I am thrilled with how the cabinets turned out and it didn’t take him all that long to complete.
Let me show you how he did it…..
Cabinet Framing Materials needed:
- 2×3 s
- 3 1/2” construction screws
- level
- face boards (we used poplar wood)
- trim head screws (we used these)
- circular saw
- table saw
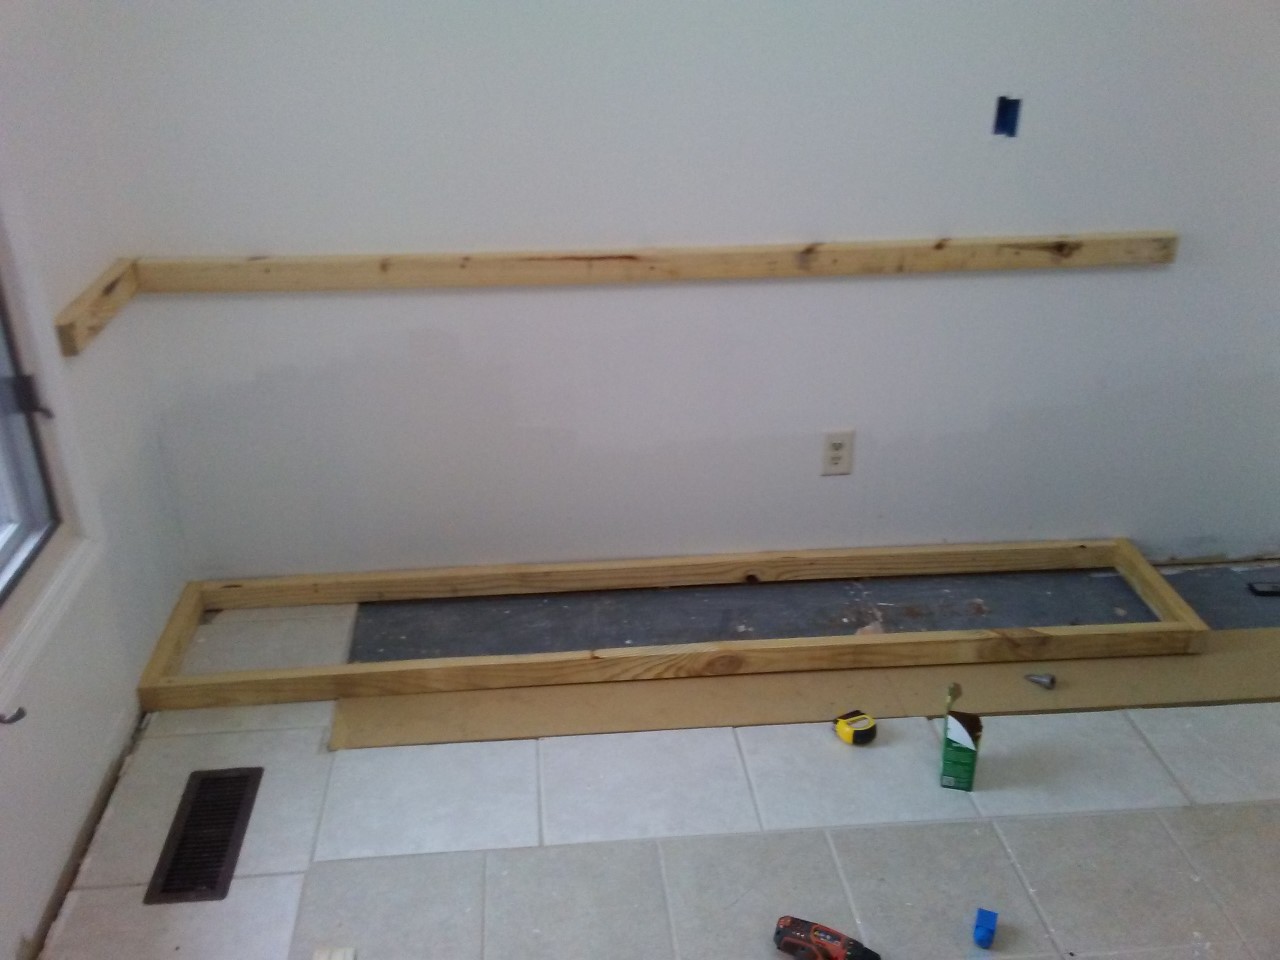
Before Cabinet Build:
If you are more of a visual person and less of a reader, I have made a simplified video tutorial embedded in this post. For the nitty gritty, detailed instructions, you should also ready the written tutorial…
How to Build Base Cabinet Frame (step-by-step):
(Step 1). Attach 2×3 (horizontally) to height measurement of cabinet dimensions. Remember to account for the counter top thickness. Example: If you cabinet height measures 35” and your counter top is 2”thick, you would place the 2×3 at 33”. Attached 2×3 to studs (every 16” O.C.) with 3 1/2” construction screws. Make sure 2×3 is level.
(Step 2). Attach second 2×3 to perpendicular wall using same technique. If building cabinet wall to wall, attach third 2×3 to opposing perpendicular wall.
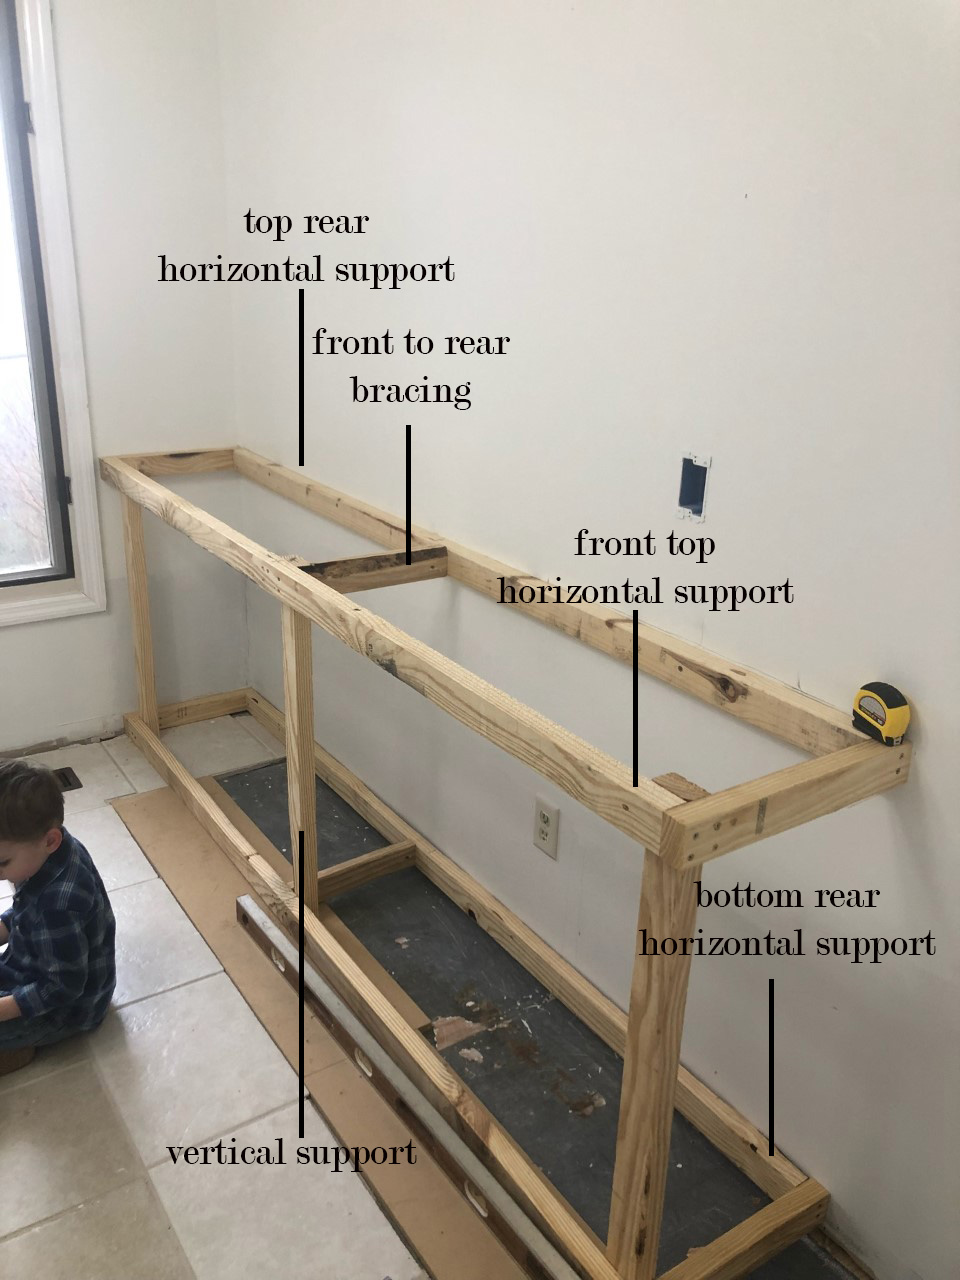
(Step 3). Build bottom section same as top.
(Step 4). Attach front 2×3 to top and bottom using same construction screws using toenail method.
(Step 5). Attach vertical 2×3’s to corners and center of front boards.
(Step 6). Attach horizontal supports between rear 2×3 to front 2×3 for both top and bottom sections (labeled as “front to rear bracing” in diagram above).

(Step 7.) Choose face boards (I used poplar because it takes paint well). Face boards should be wider than frame studs. I used 1×4 face boards.
(Step 8.) Attach face boards using trim head screws (we used these screws).
The Easiest Type of Cabinet Doors to Build
Now that the framing is complete, it’s time for the sexy part….building your cabinet doors!
As you may have noticed, we chose to go with a shaker style design for our cabinet faces.
So…why did we choose this particular cabinet design? Not only do I happen to love the clean, minimal feel of this simple aesthetic (it is perfect for the modern farmhouse vibe), shaker style also happens to be the easiest design to execute.
Lacking the fussy intricacy of many other cabinet types, this style is relatively straightforward and ideal for beginners.
How to Build Cabinet Doors
Before I get into the nitty-gritty of this process, let me just emphasize the dangers involved in this DIY project. Most cuts in this tutorial will require a table saw.
Table saws just happen to be one of the most dangerous power tools known to man. As a result, please follow manufacturer’s instructions!!!! Proceed with great caution!!!
Note: DesigningVibes.com cannot be held responsible for any injuries, loss, your personal safety or the outcome of your home improvement projects. For more information, you can refer to my website policy here.
Now that I’ve covered my a$$, let’s get down to business…
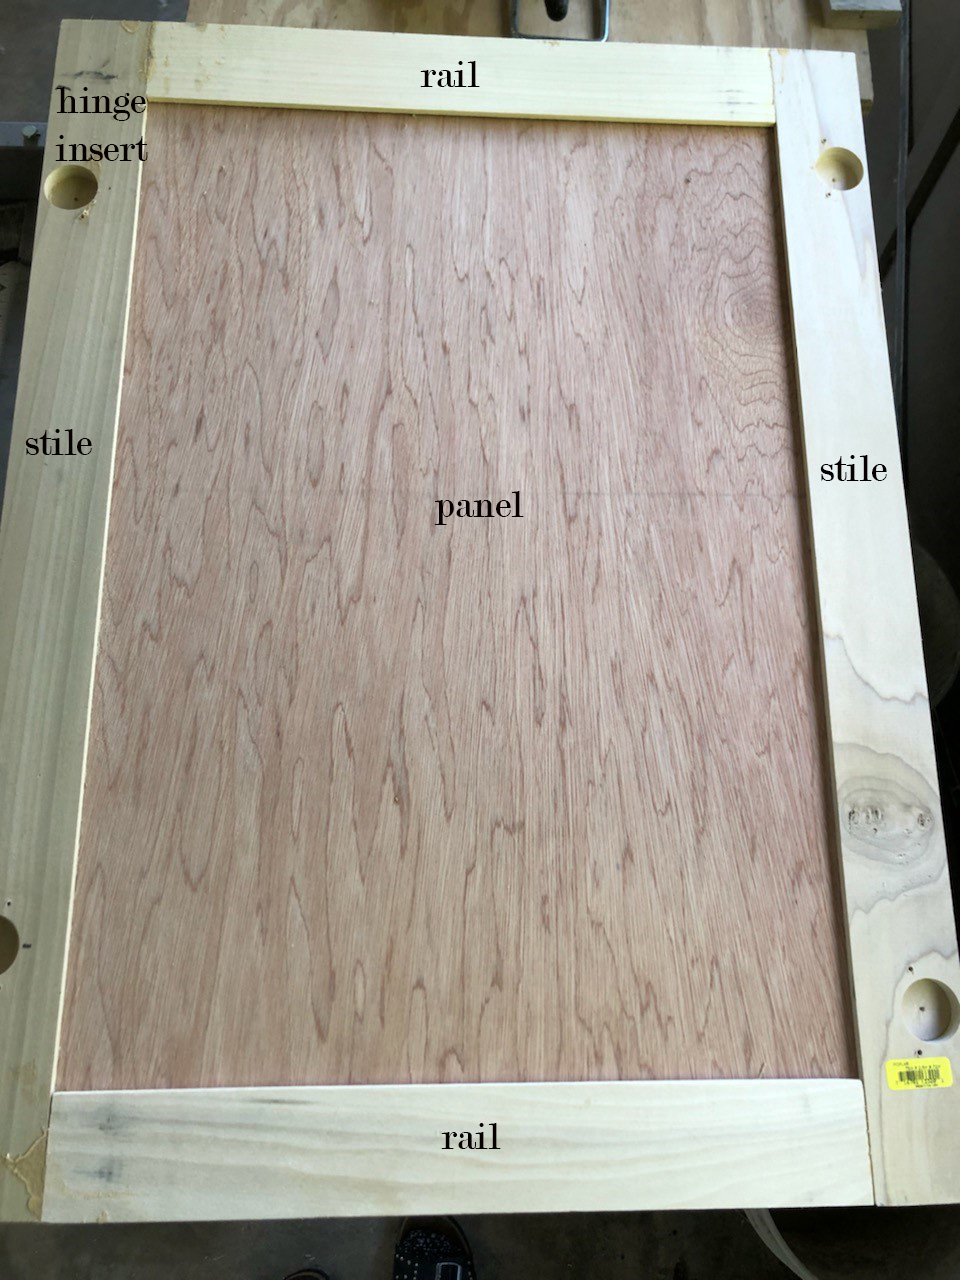
(Step 1). Cut stiles to length (height of door).
(Step 2). Cut rails to length (width). To calculate, determine width then subtract for width of stiles. Example: If desired width is 20”, then the rail would be 17”. 20”-4” (each stile is 2” wide) then add back 1” for the .5” shoulder that will fit in the groove of the stiles.
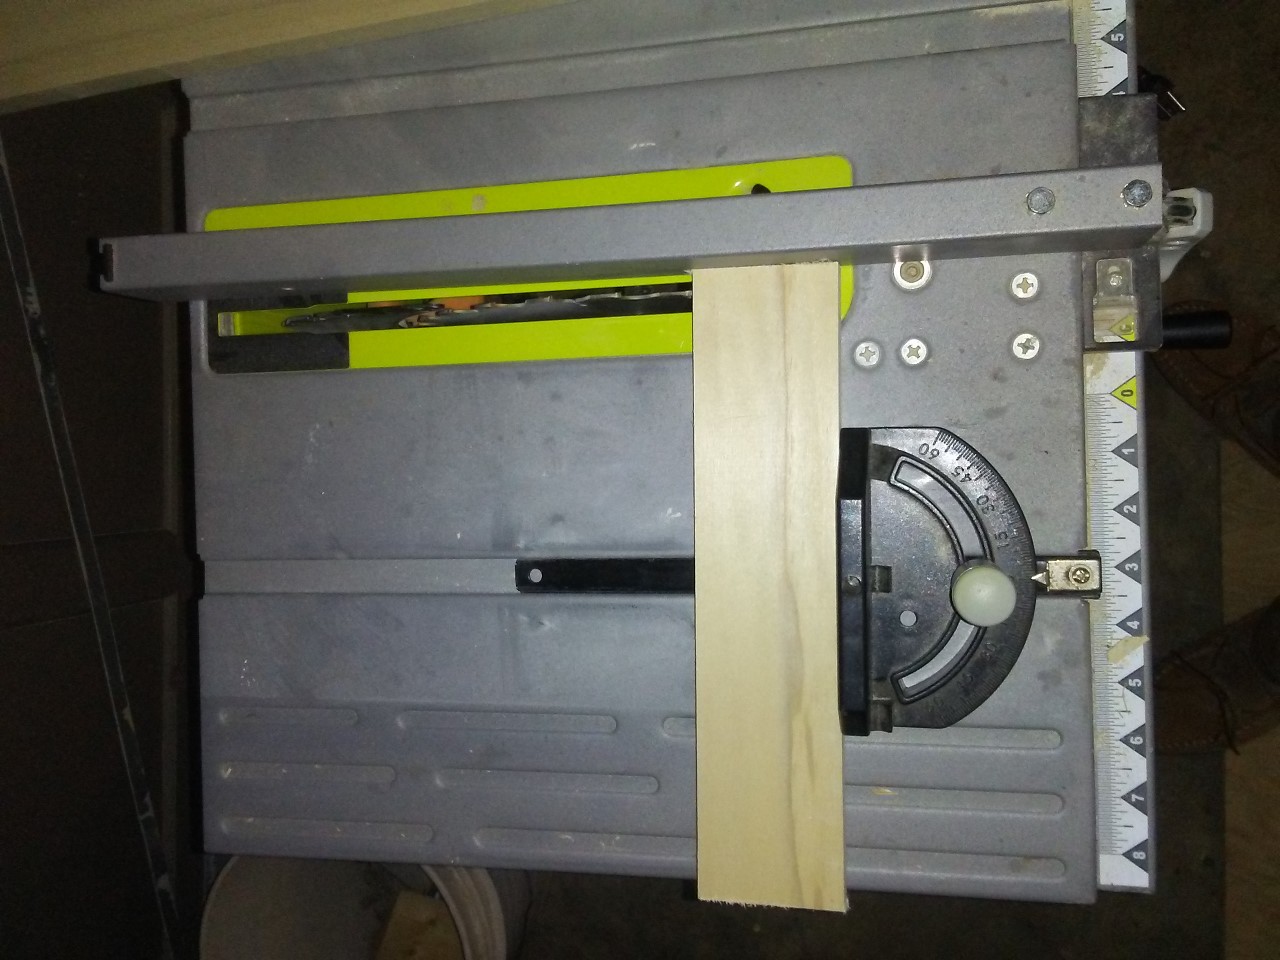
(Step 3). Cut grooves into stiles using a table saw. Mark center of stile and offset fence of table saw so the saw blade sits to one side of center mark. Next Measure height of saw blade to be ½ inch.
Run stile through, rotate stile and run through again so the blade is now on the opposite side of the center mark. This ensures the groove will be wide enough to accept the 1/4” center insert panel. Be extremely cautious using a table saw. Repeat for all stiles.
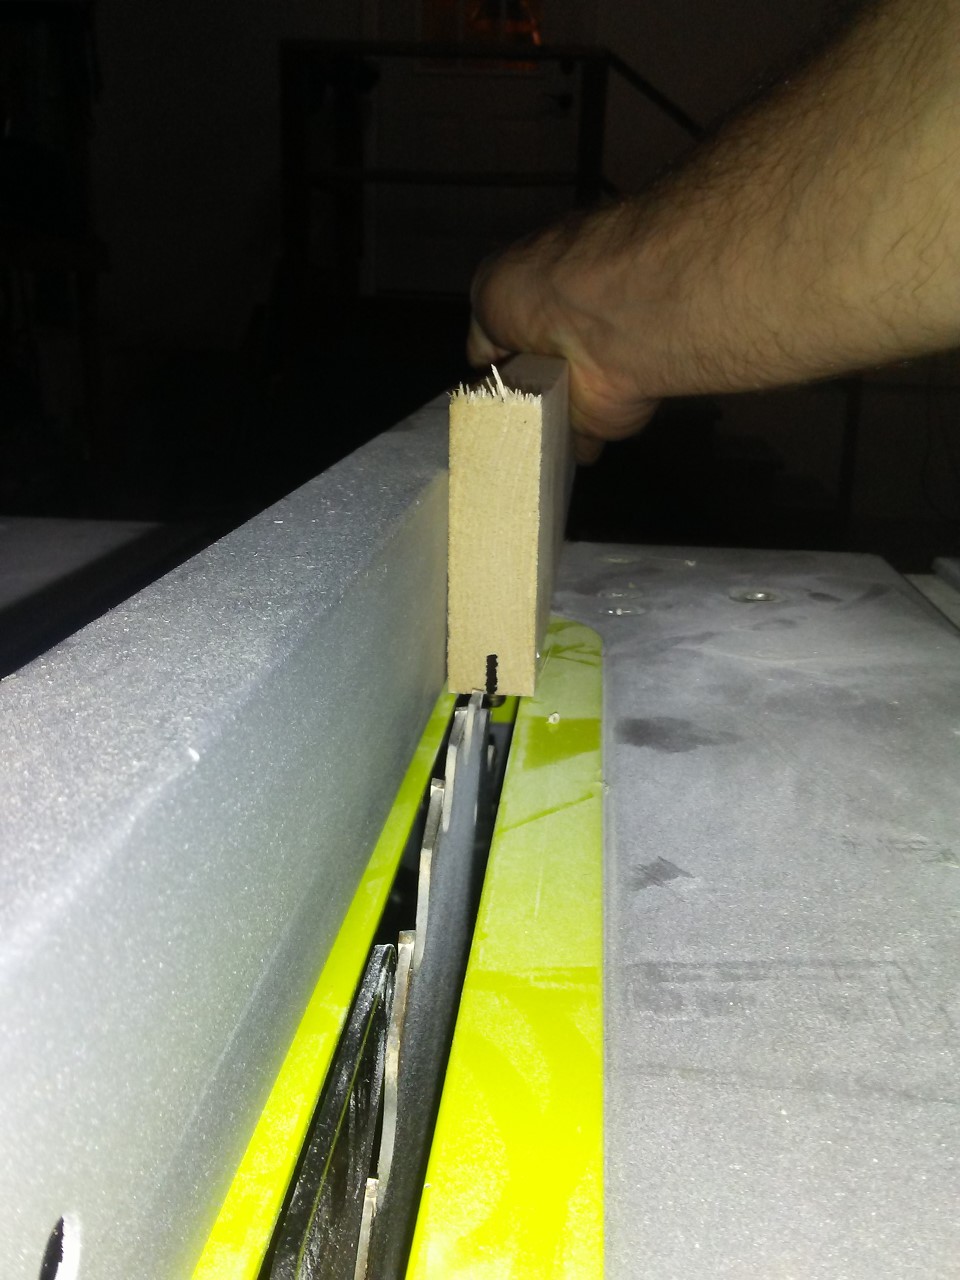
(Step 4). Cut grooves into rails exactly the same as stiles.
(Step 5). Cut shoulders into the rails. The shoulders will be 1/4” wide and 1/2” deep. You will move the rail through the table saw with it being perpendicular to the fence. You will have to make multiple passes so the blade has removed the necessary amount of wood.
Flip piece over and repeat. Now you should have a shoulder that fits into the groove of the stiles.
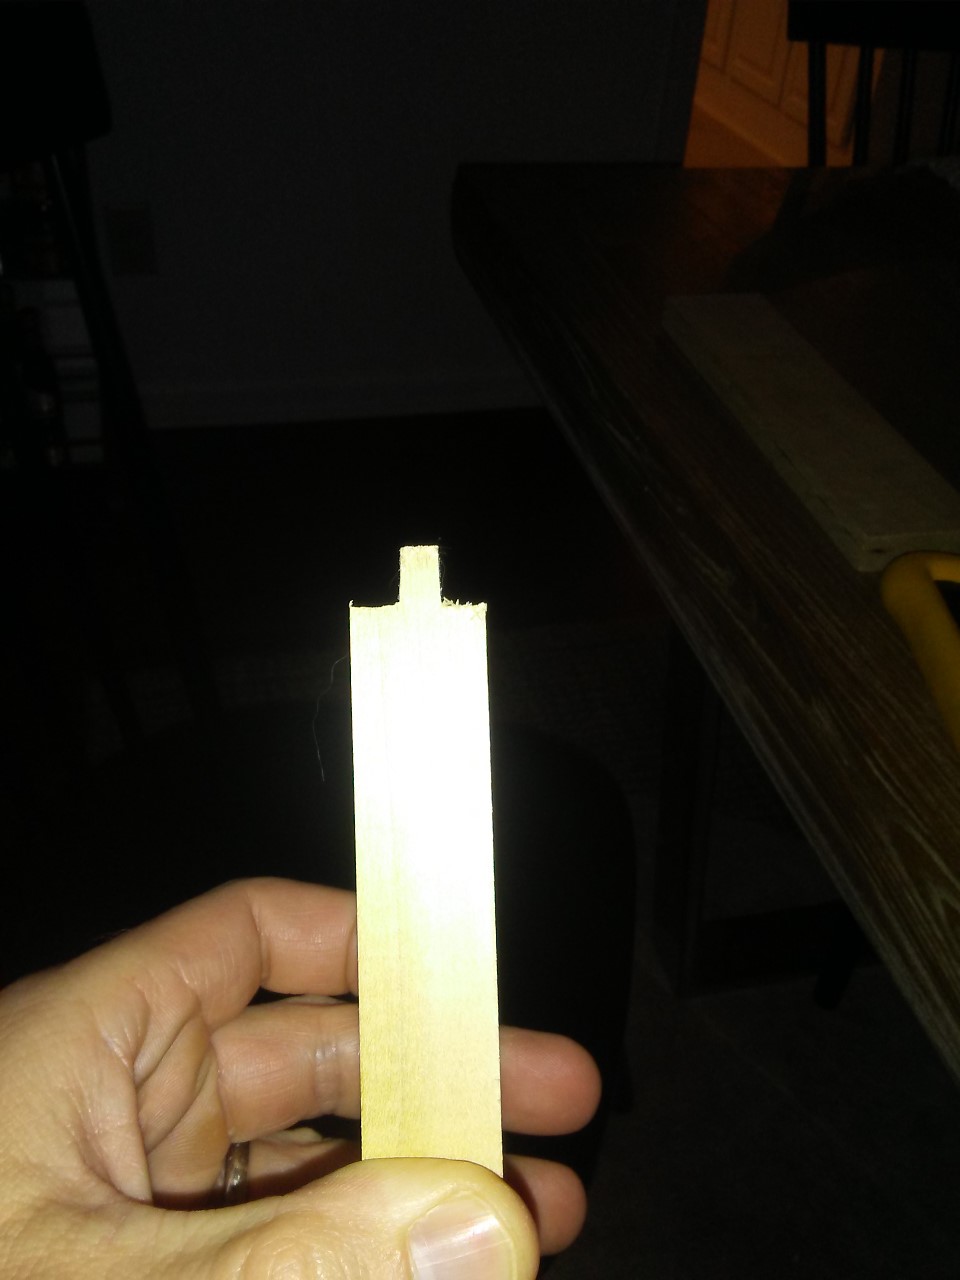
(Step 6). Only the rails should have both grooves AND shoulders.
(Step 7). Cut center insert panel 1” wider and 1” taller than center opening of doors. Remember the extra inch in width and height because the panel must sit in the grooves of the stiles and rails.
(Step 8). Test fit all pieces. After any corrections are made, use wood glue to secure the doors together. Apply glue to grooves and clamp doors (I use Bessey clamps) until glue has set.
IMPORTANT: Only plywood center insert panels can be glued into place since it does NOT expand and contract with climate. If other material is used, you cannot glue edges of panel in grooves and must use a special product that allows the expansion and contraction of panel.
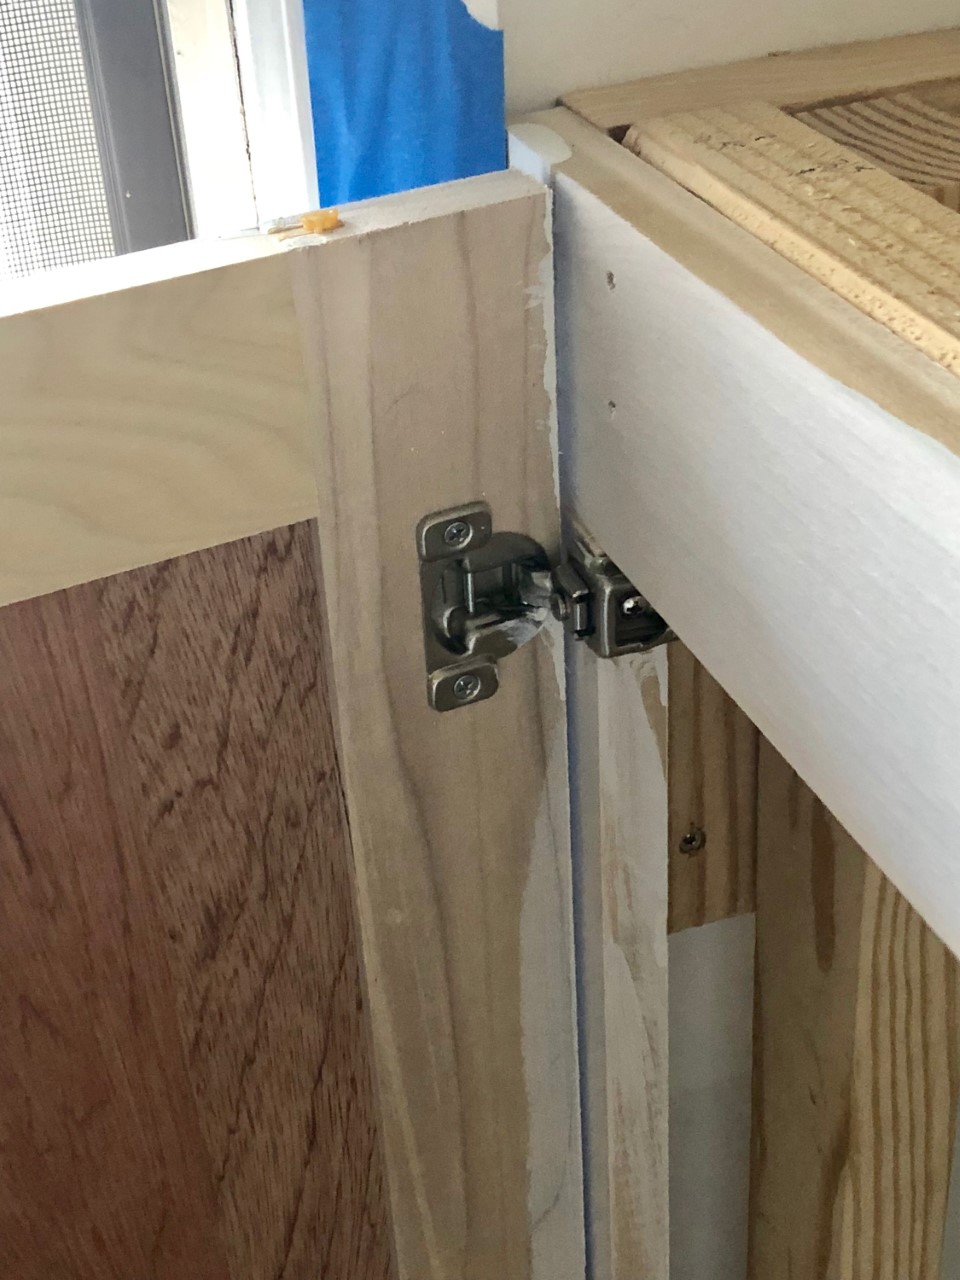
(Step 9). Choose hinge style and desired overlay. Overlay is the amount the cabinet door will overlap the face board. I used a concealed cabinet hinge and the Kreg concealed cabinet hinge jig.
(Step 10). Mount hinges to doors and then mount doors to face boards.

(Step 11). Before applying paint and primer, sand any rough areas of poplar wood for smooth finish. If desired, also apply wood filler to stile/ rail seams. Sand wood filler as necessary.

For your shopping convenience, I have included affiliate links.
(Step 12). Apply stain-blocking primer.
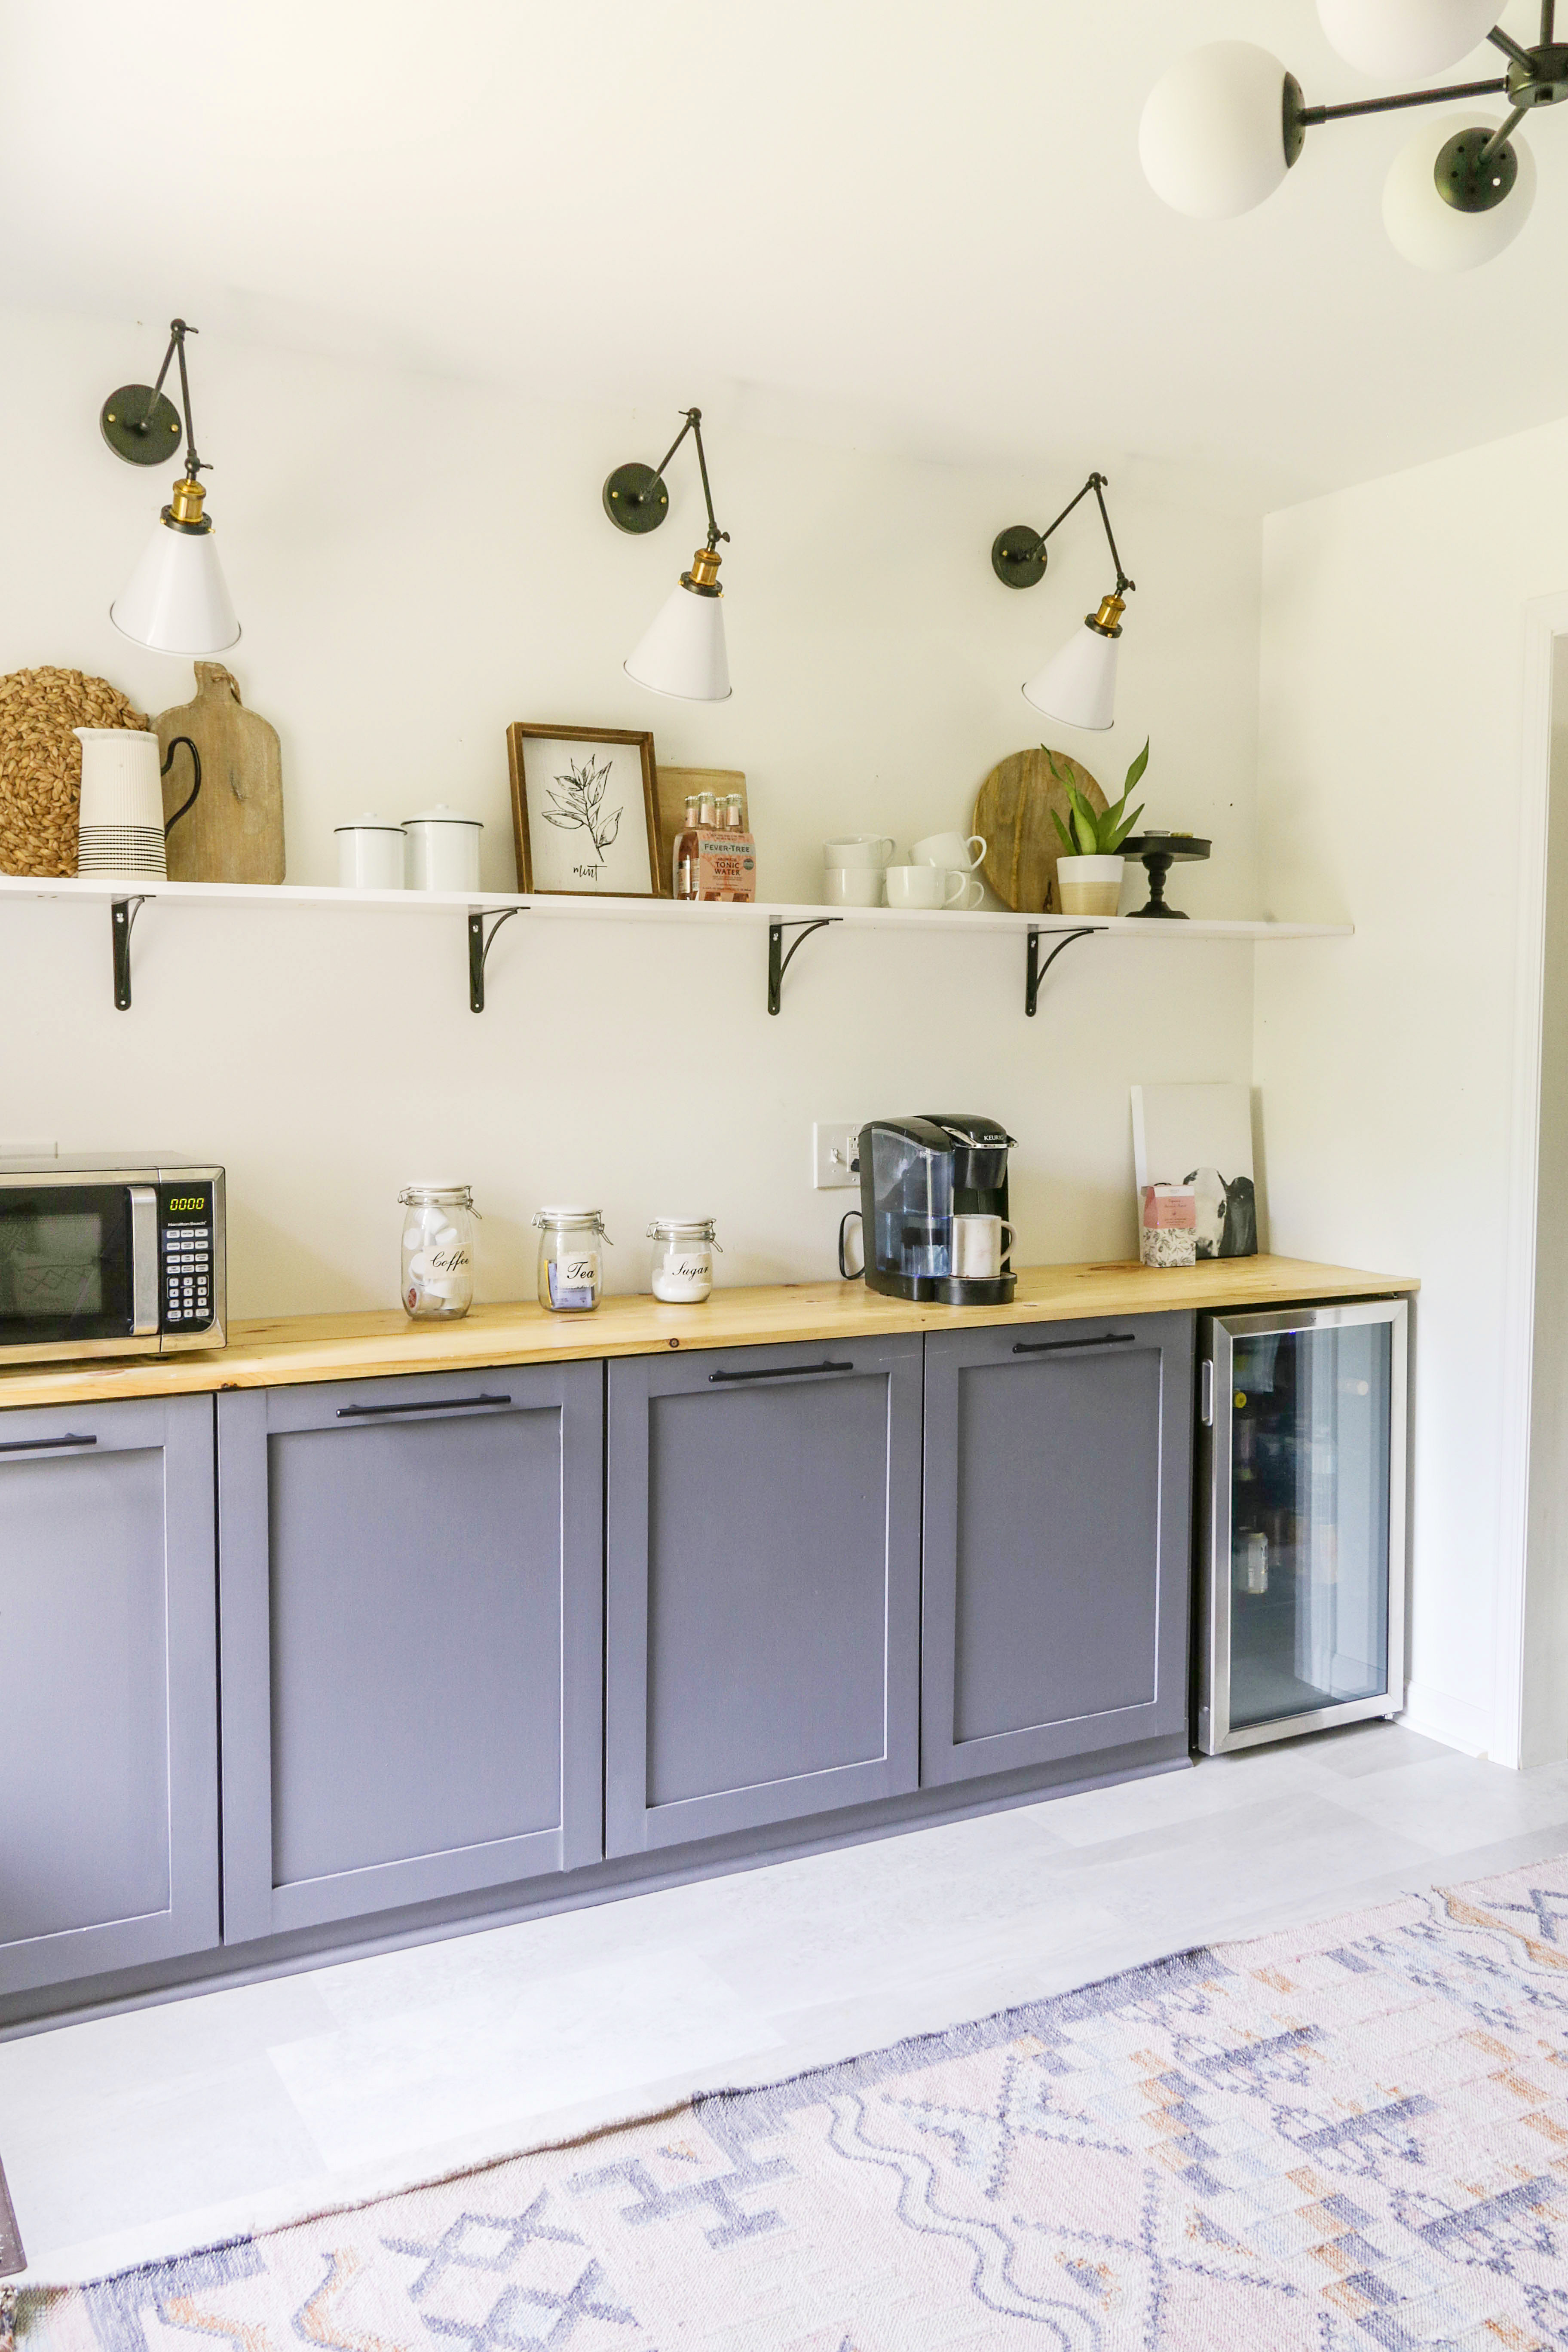
(Step 13). Apply cabinet paint of choice. ( I used General Finishes Milk Paint in the color “Driftwood” but I also love Sherwin Williams Emerald Urethane).

*UPDATED 4-14-21: Want to see how these cabinets are holding up after two years of use? Click here to see my Two Year Review post. *
So what’s next on the punch list for this space?
- Install new tile flooring (we are currently in the process)
- Choose and Install Cabinet Door Pulls
- Decide on a DIY counter-top solution. (Update: We built counter-tops for under $50. Click here for the tutorial).
- Install Upper Floating Shelves (Update: We built open shelving for $40. Click here for the tutorial).
- Add electrical for wall sconces and additional outlet
- Install new baseboard and trim
- Build new door for washer/dryer closet
My lord…will it ever end?!!!
**Update 7-6-19: The butler pantry is now complete! Woohoo! To see the finished space, click here.**
While this undertaking has definitely proven to be much more extensive and time-consuming than we had originally anticipated, now that the cabinets are complete, I can see the light at the end of the tunnel (sort of).
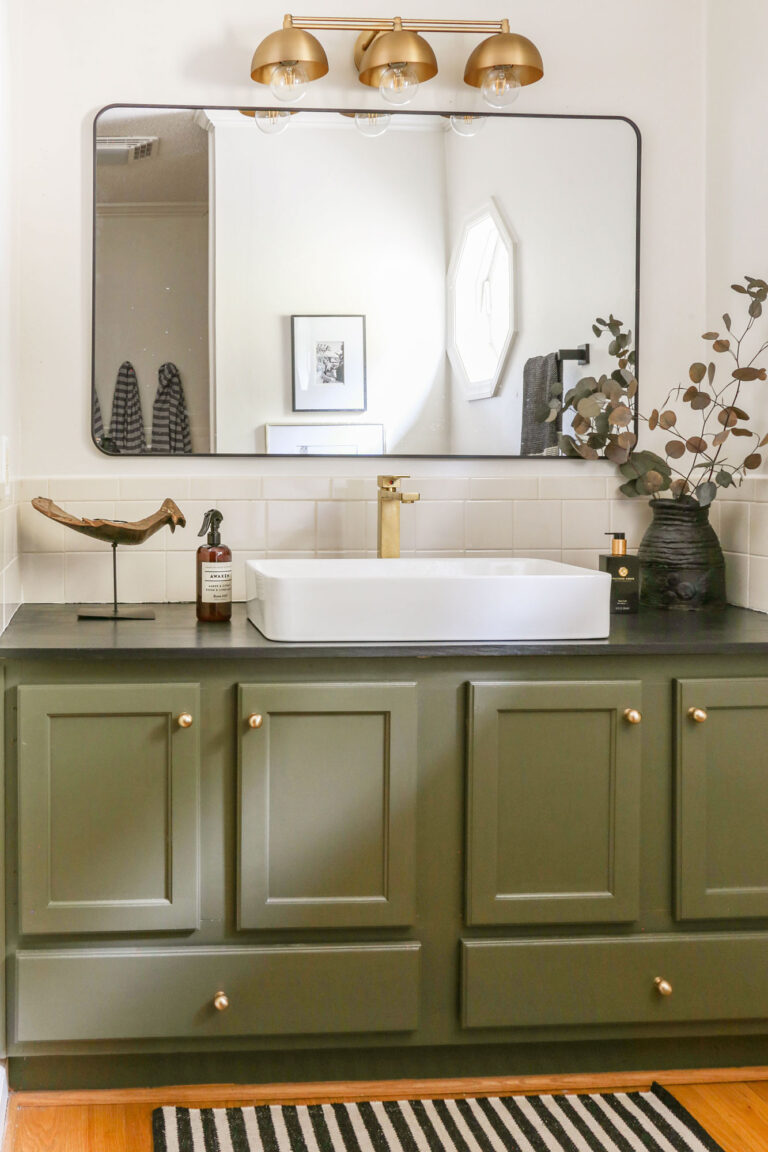
I hope this post has inspired some of you bad a$$es out there to consider building your own cabinets (this tutorial could even be applied to bathroom vanities). Why spend thousand upon thousands of dollars when you can build your own?
***Update 4-28-26: Want to know how to build drawers to go along with your diy cabinets, see my new tutorial How to Build DIY Drawers on a Budget.
Wishing all of you a fabulous week!
Now get out there and design some good vibes, and please show your support by Pinning or sharing with a friend…


Welcome!
My journey in interior design and home improvement began with transforming my first fixer-upper home, all while managing a budget and raising two young boys. My work, a reflection of my passion for creating beautiful, uplifting spaces, has been recognized by top publications like Better Homes and Gardens Magazine, HGTV, and more. I invite you to explore my site and witness the transformation of my home and the vibes we've designed. Read more...


Oh my word, they’re perfect. Congratulations to your hubby, these are amazing and I love your design too. This is going to be a fabulous space.
Thank you so much, Marty! I am pretty impressed with how well they turned out. 🙂
Wow, I’m impressed! The inset panels are pretty fancy for someone with beginner level experience – I expected you’d have just glued the frame onto the front of a door-sized plywood panel. I see a wine fridge over there on the right, yeah? 😉
He did get pretty fancy for a beginner, didn’t he? Haha!! And yes, girl… I scored that wine cooler for a bargain on Amazon. I hope you are enjoying your Spring so far. xoxo
Hi! These look great! Could you please show us how you finished the inside of cabinets? Are there drawers or shelves? Thank you!
Hi there! So we actually never got around to putting any shelves in the cabinets. Although that would have been nice, we no longer live there. 🙂