
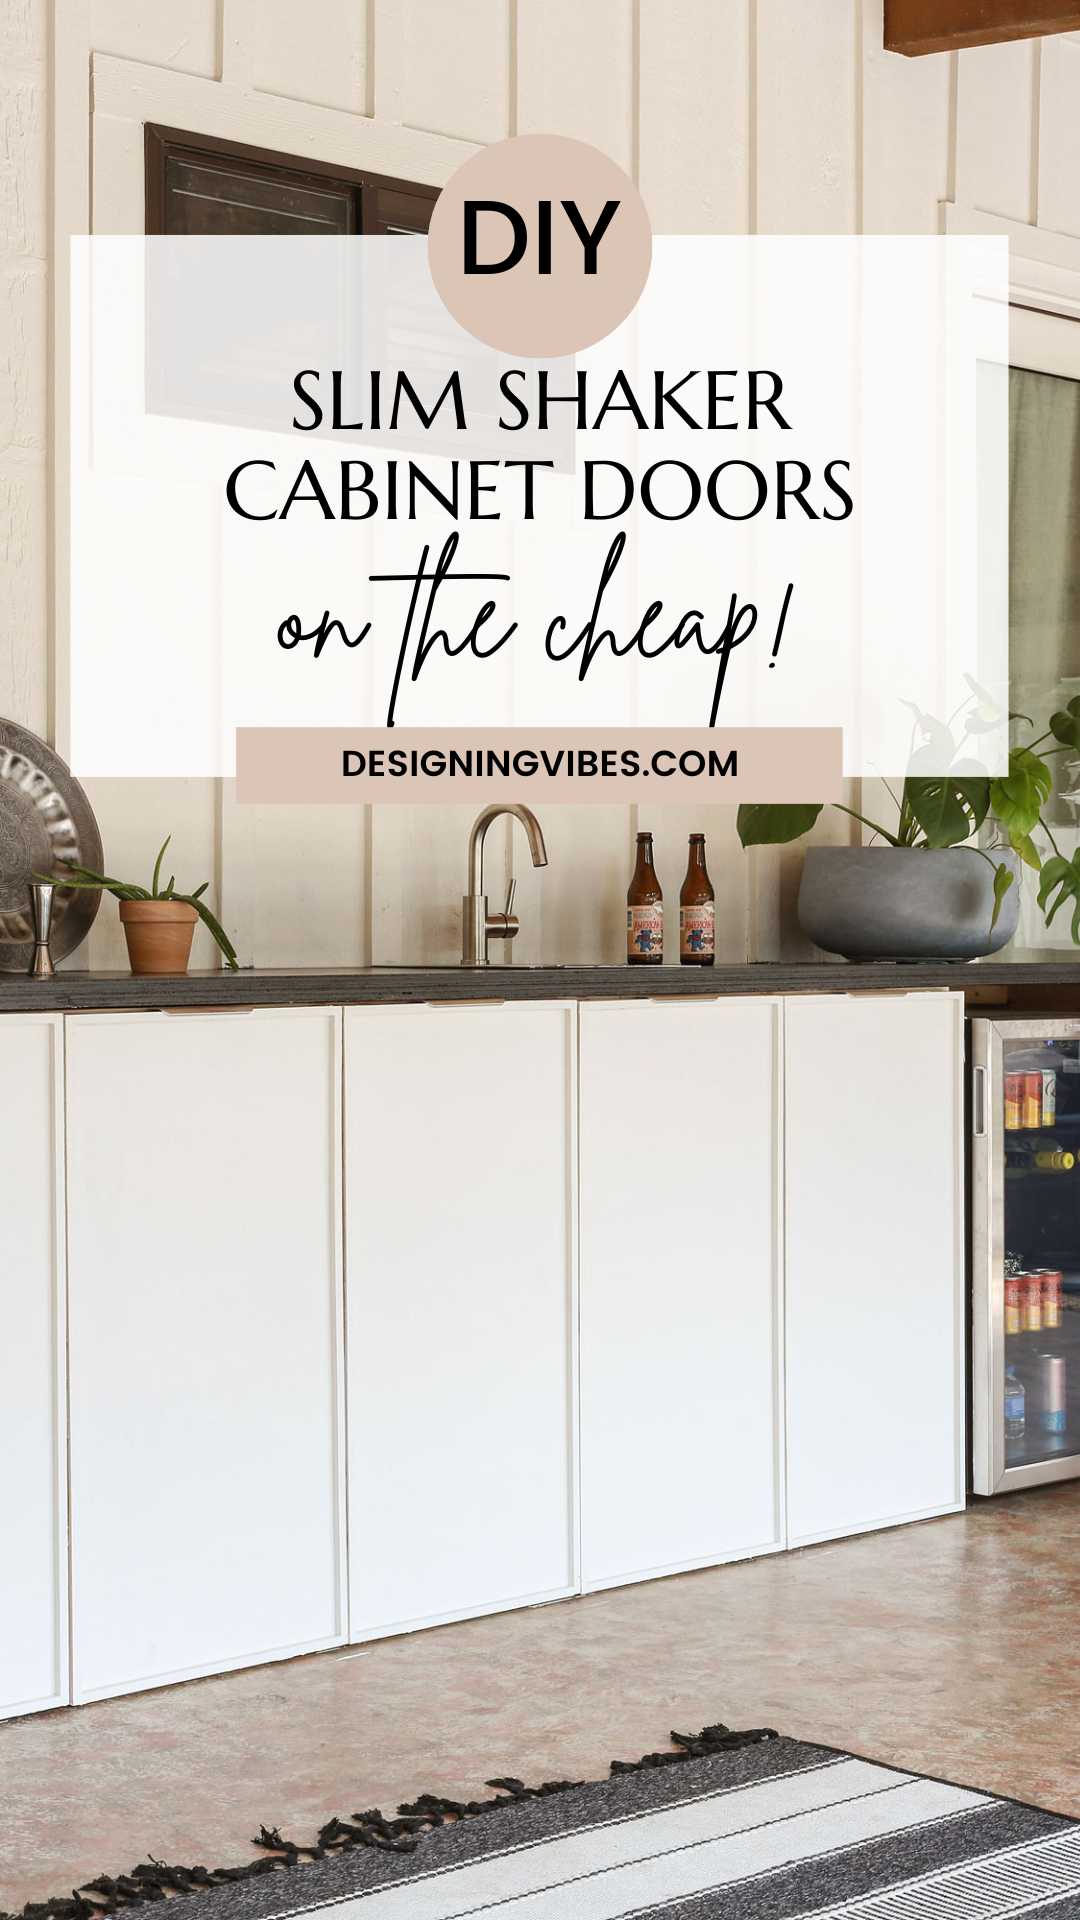
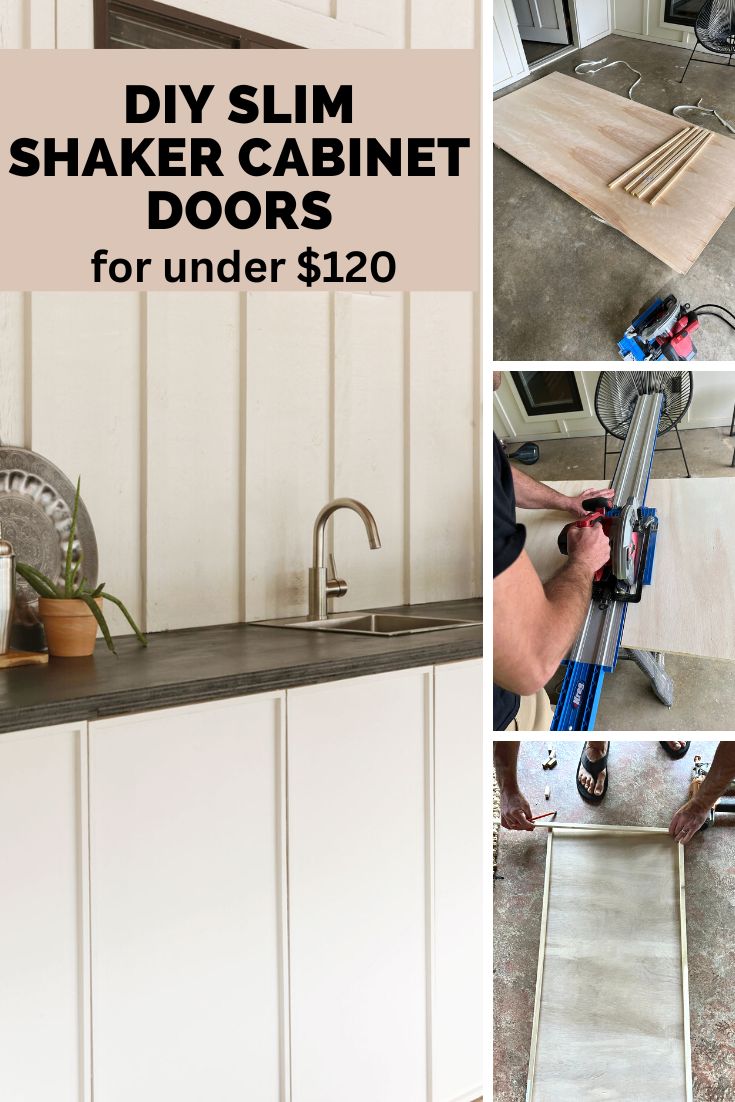
DIY Slim Shaker Cabinet Doors For Under $120
In today’s DIY tutorial, learn how I built cabinet doors with a slim shaker design for my outdoor kitchen – all on the cheap and easy- using plywood and dowels…
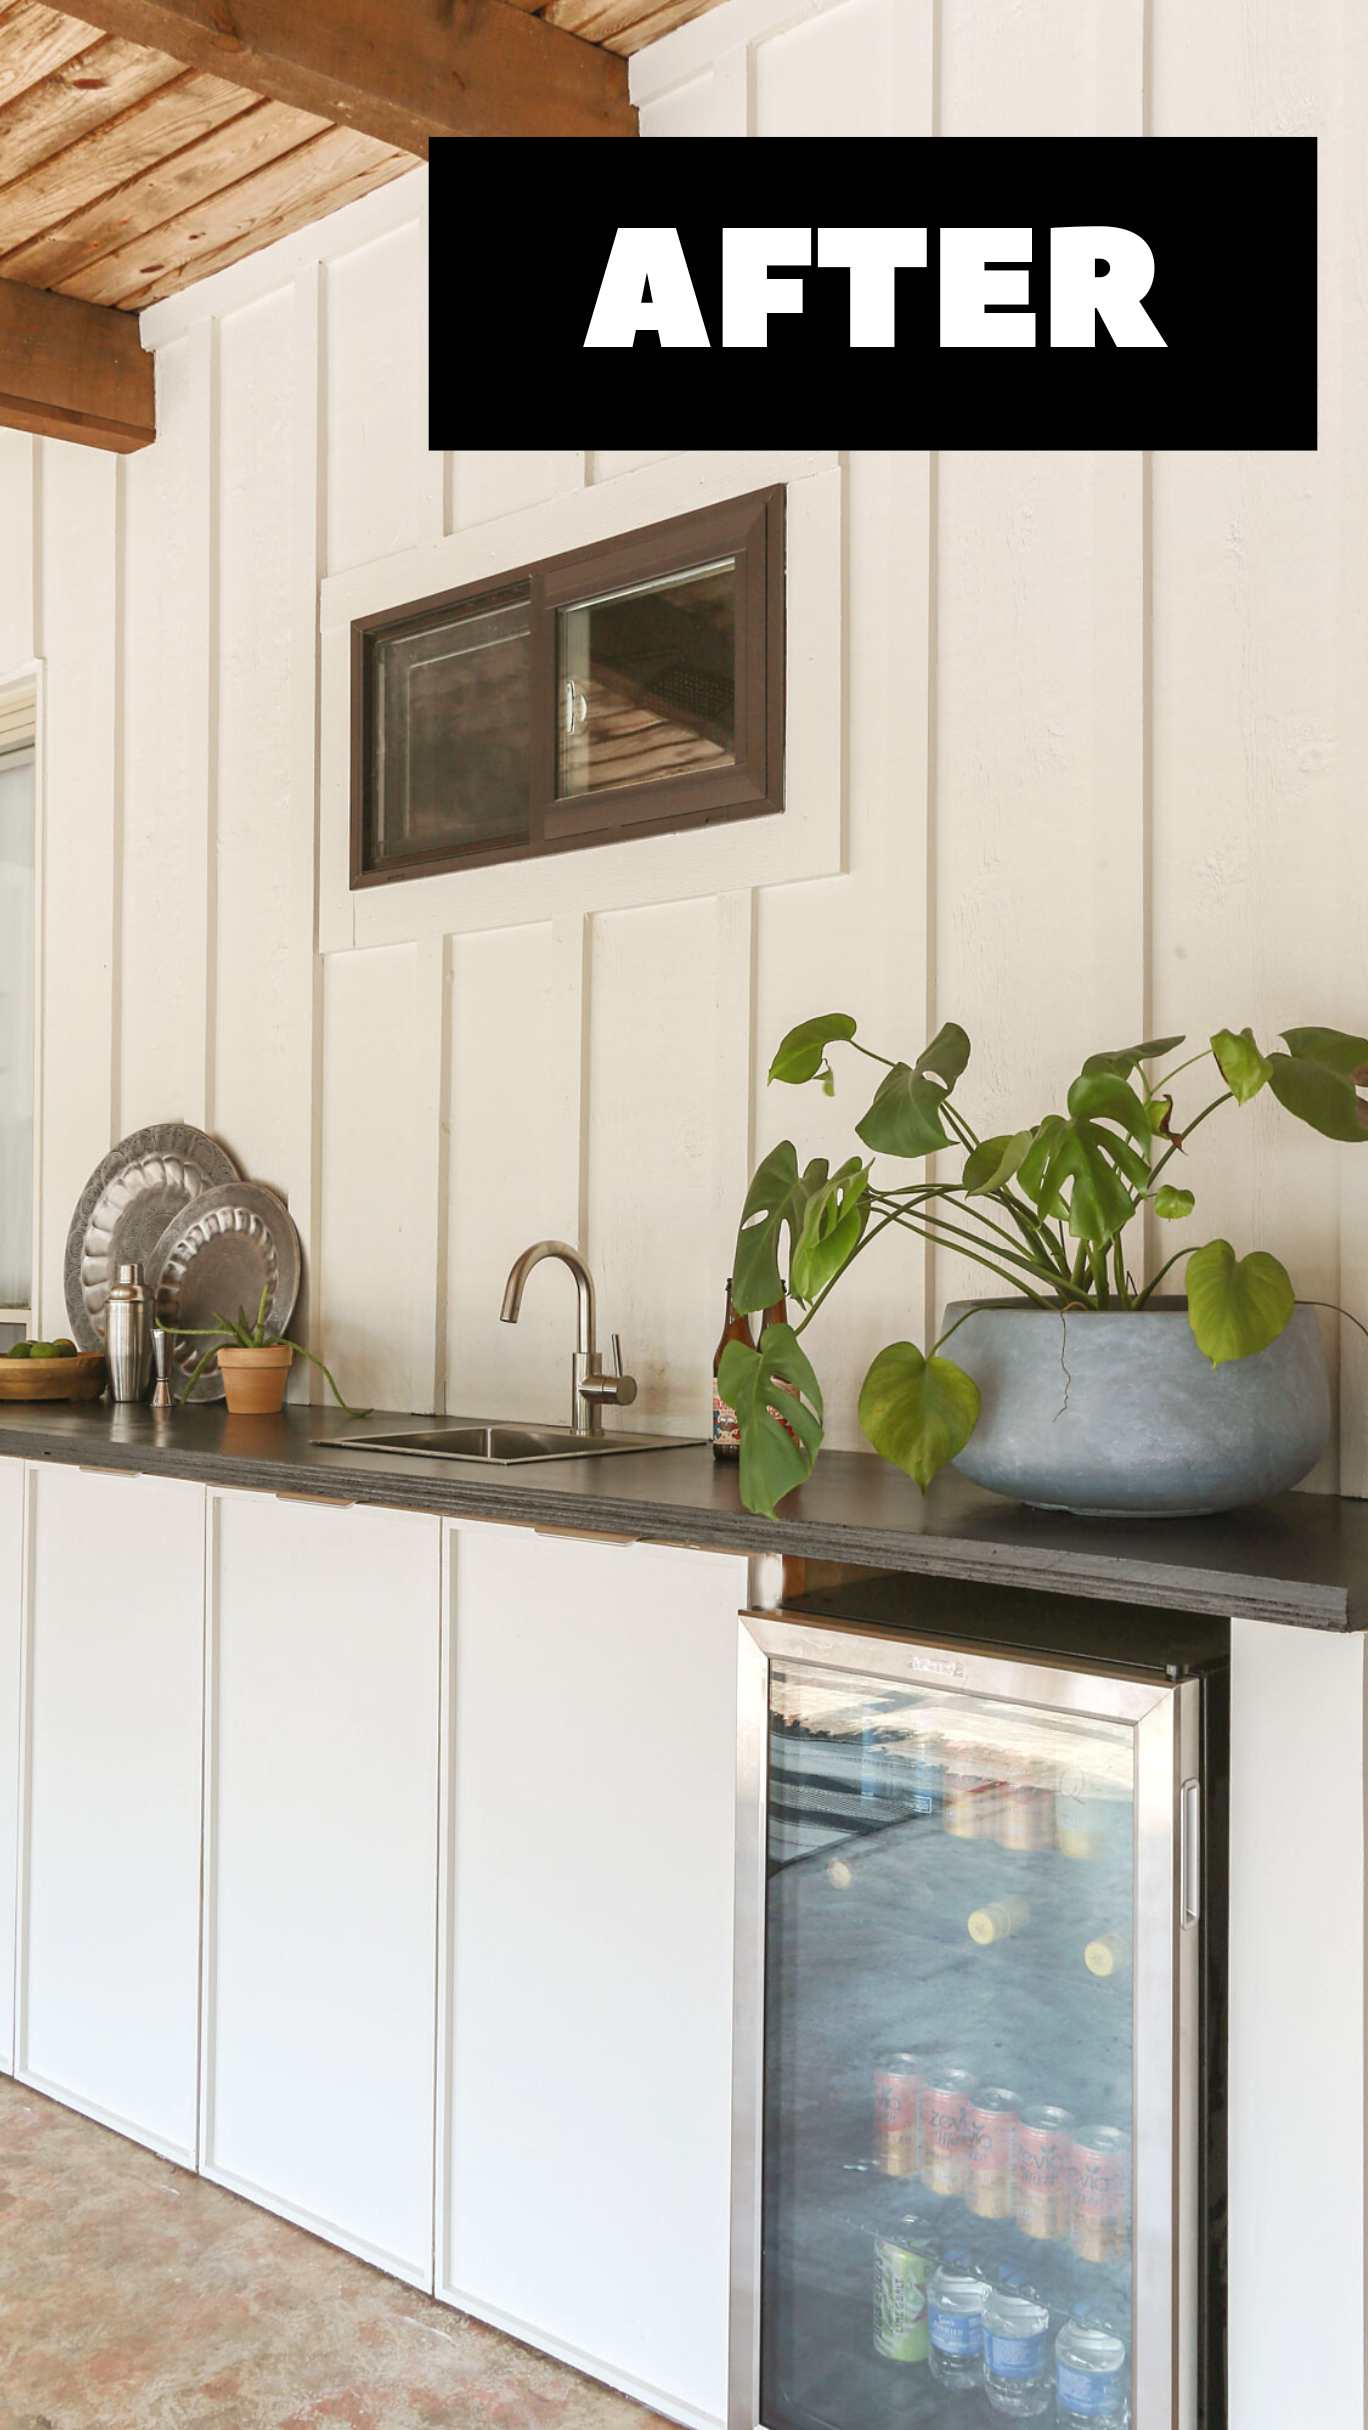
Minimalist kitchens are definitely having a moment in the world of interior design right now.
But unlike the sterile feel of yester-years (think glossy, flat panel futuristic vibes), new interpretations of minimalism are incorporating a beautiful balance of warmth, interest and impactful simplicity. This is where my obsession with the micro-shaker (or slim shaker) cabinet door design began.
While traditional shaker-style cabinets are certainly here to stay, the slim shaker is a modern adaptation of a classic – merging clean lines with just a slight infusion of ornamental mill work for elevated dimension.
So…when it came time to build my outdoor kitchen from scratch, I was eager as an effin’ beaver to experiment with this look myself (pairing edge pulls with the micro-shaker is basically the hottest combo right now FYI).
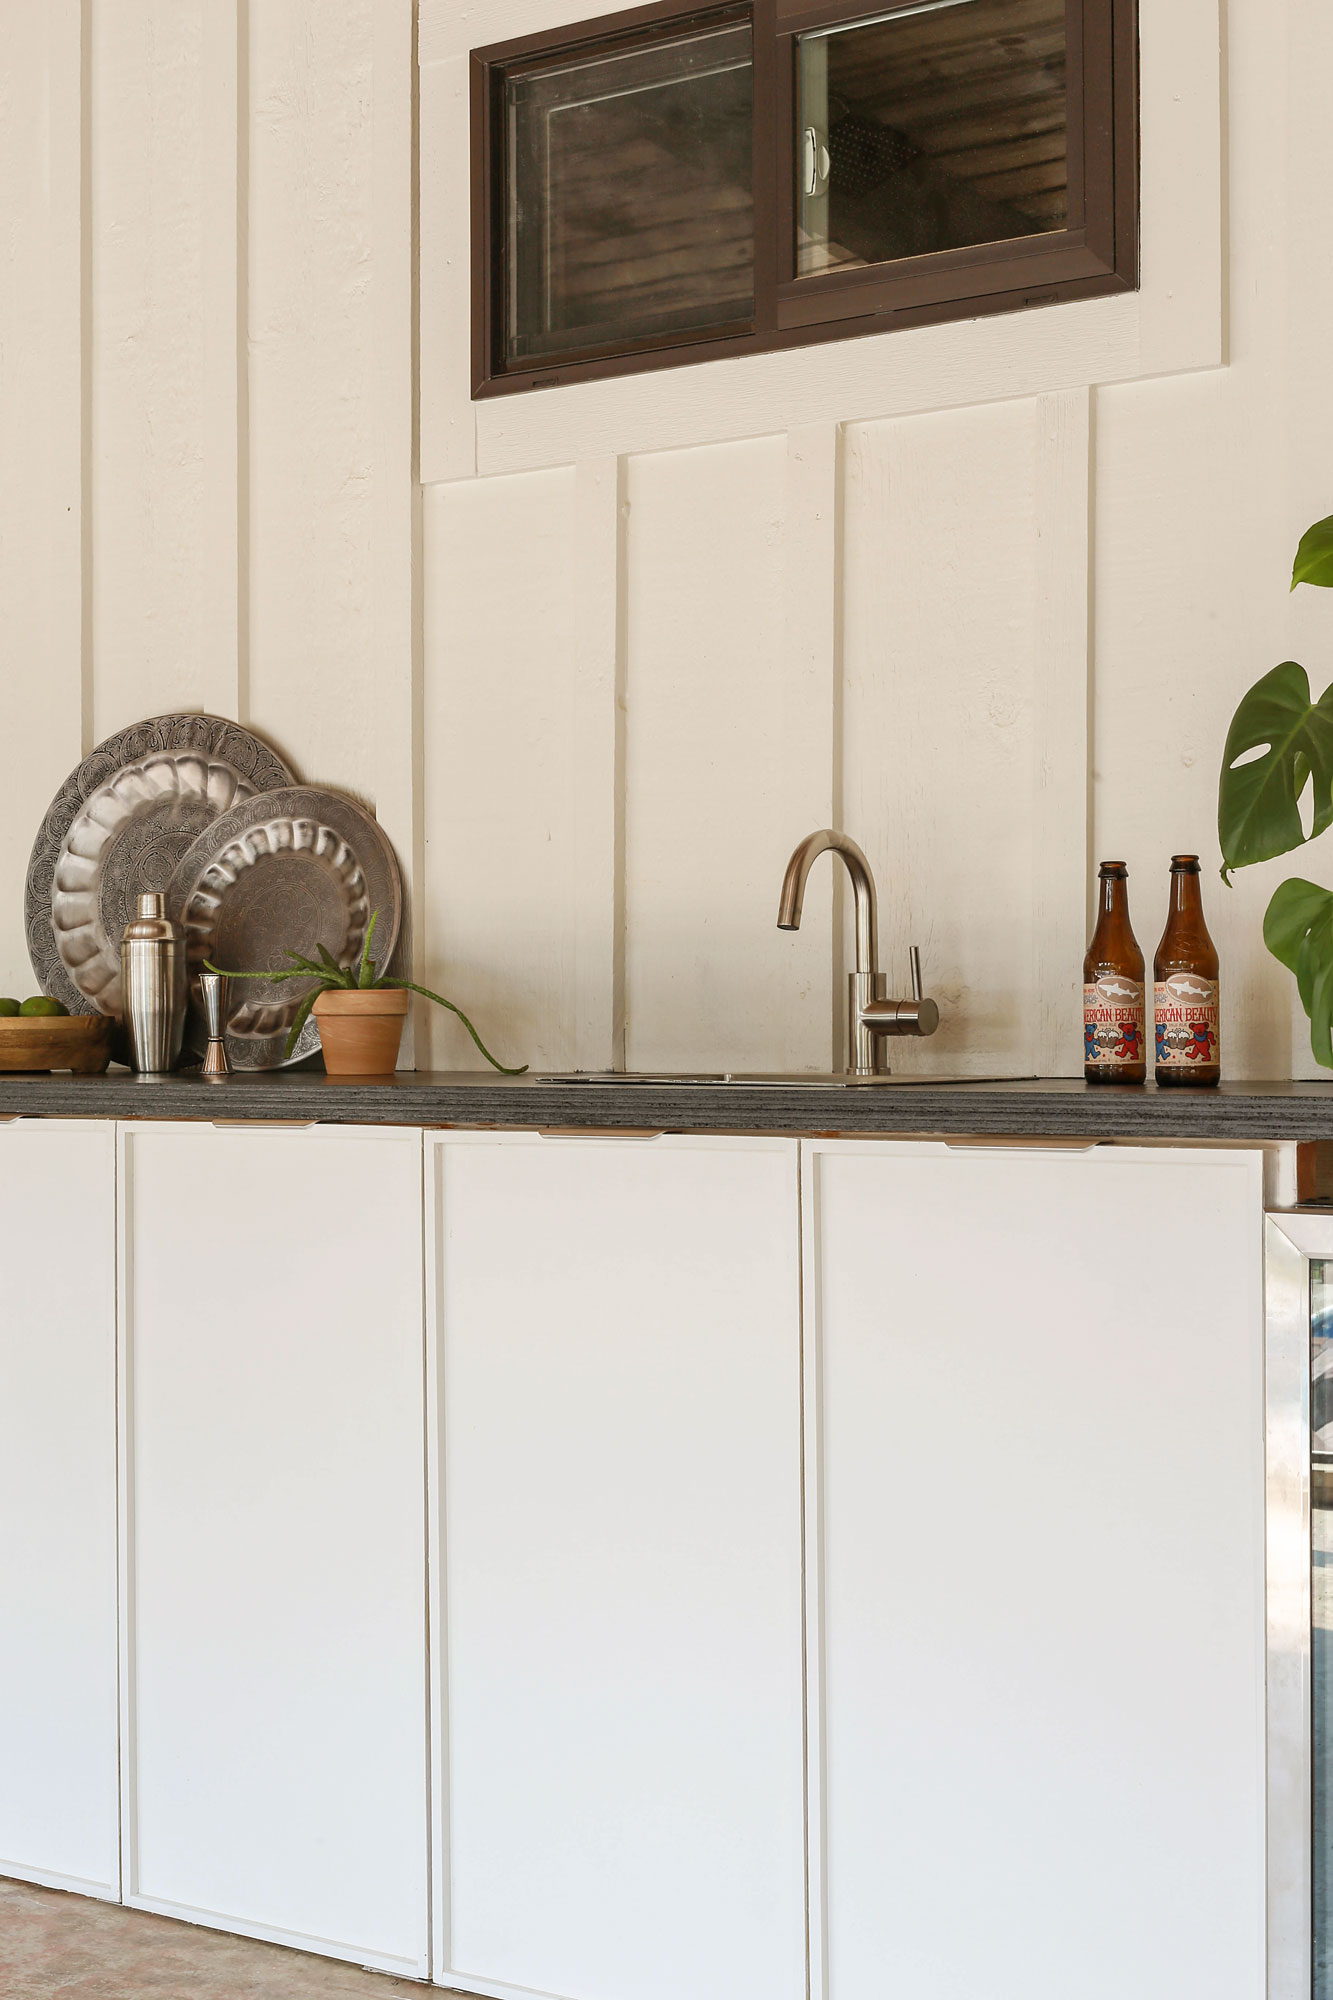
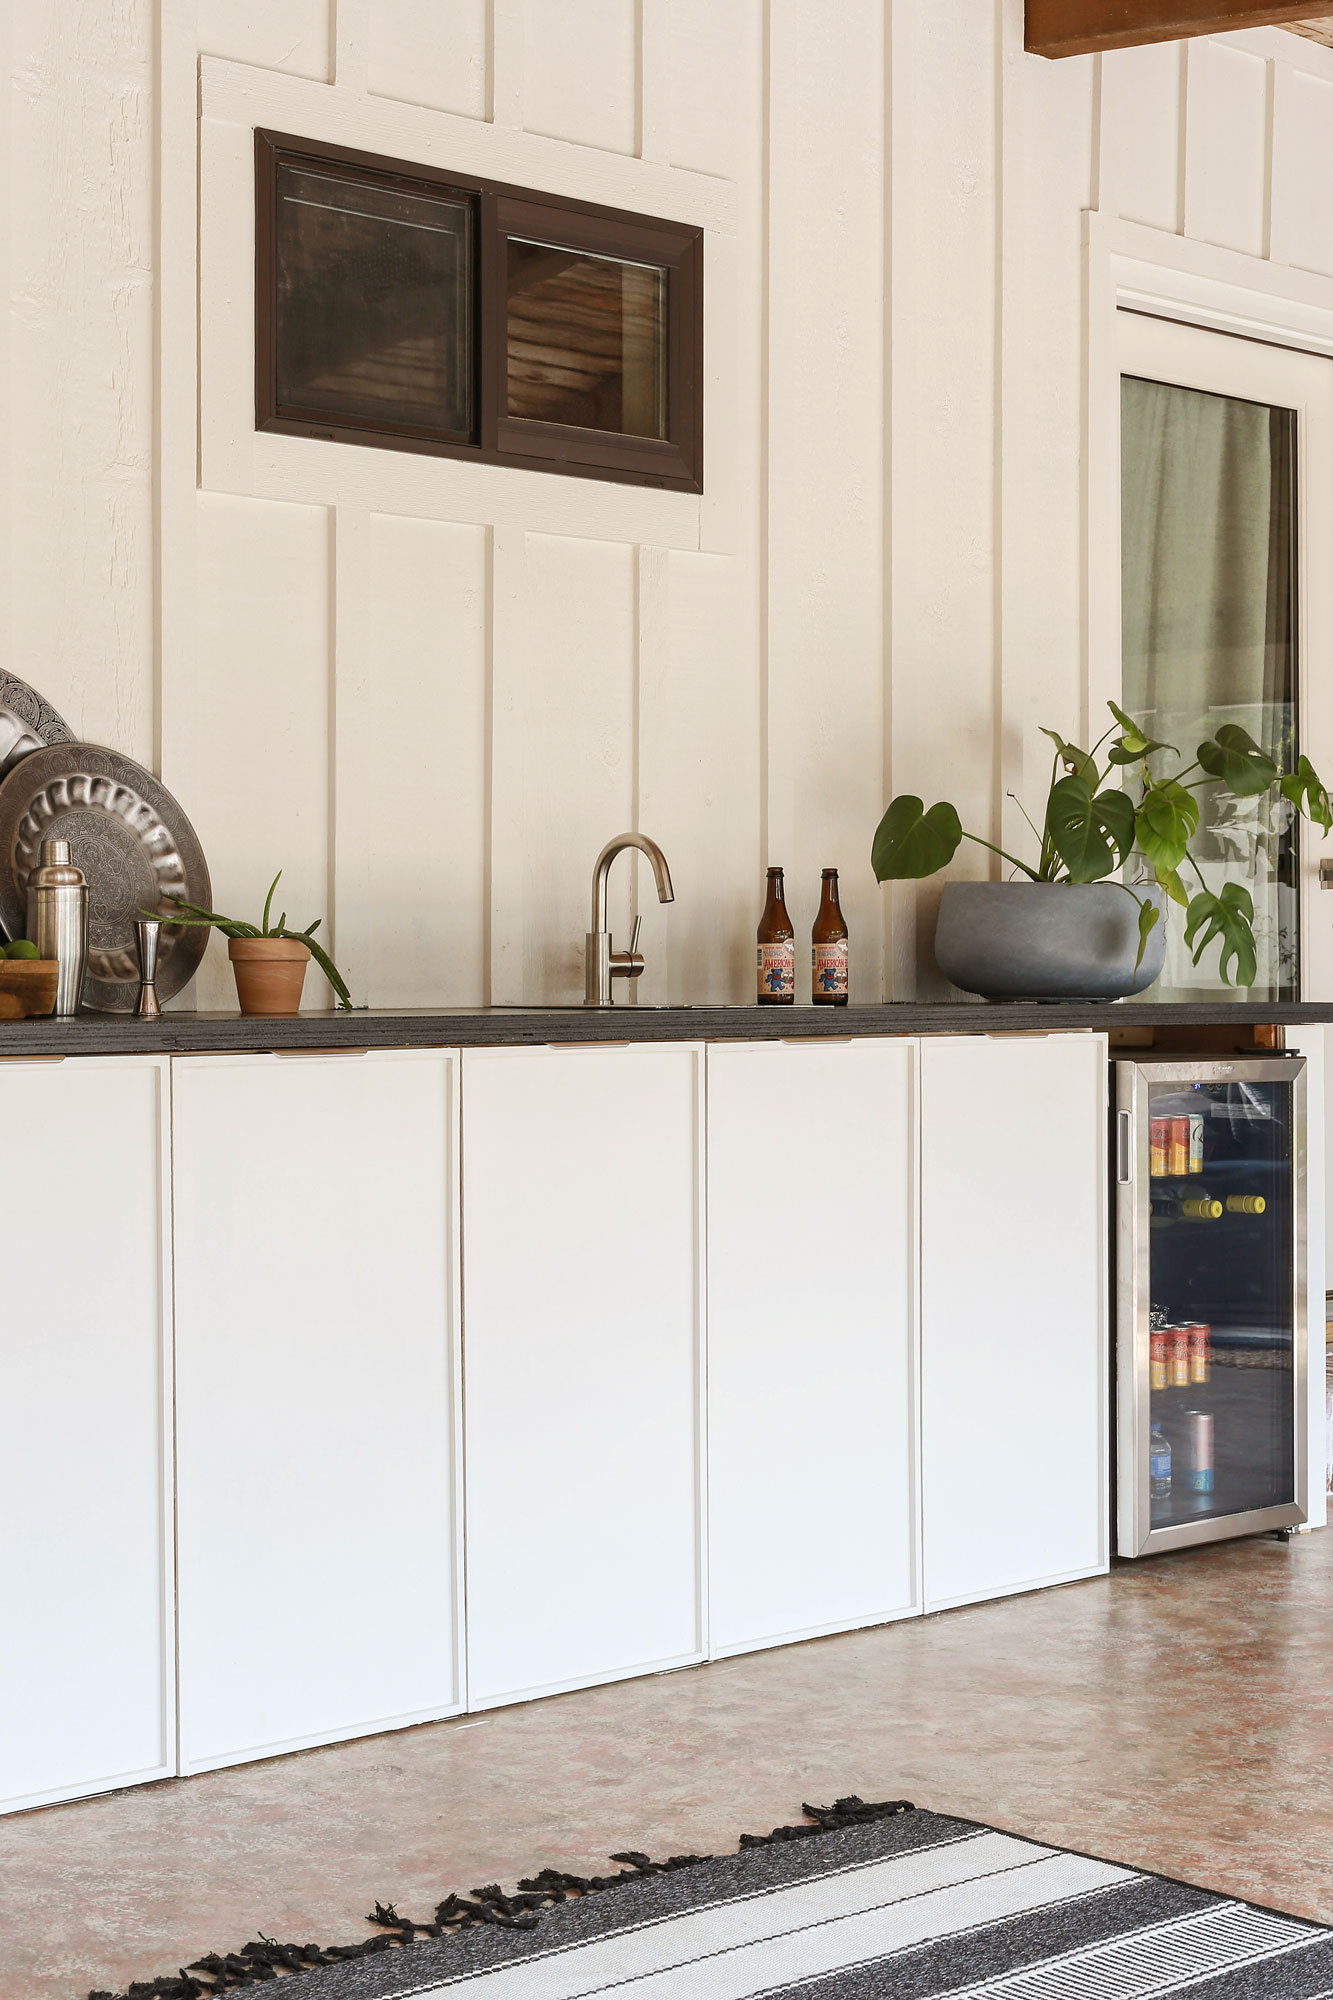
Given the exterior walls of my home already had a lot going on with the board and batten millwork, I thought the micro-shaker configuration would be the perfect antidote to all of the busyness of the surrounding patterns.
Utilizing nothing more than a sheet of sanded birch plywood ($80) and a few 1/2” square dowels ($30) for a 10 foot expanse of cabinetry, my husband was able to work carpentry miracles with a total materials cost of less than $120 for the doors alone….
But if you are still not sold on the micro-shaker trend, you should also check out my separate DIY tutorial for traditional shaker cabinets here.
For those of you looking to do something fresh and chicka chicka slim shady, keep reading along for the step by step cabinet door instructions…
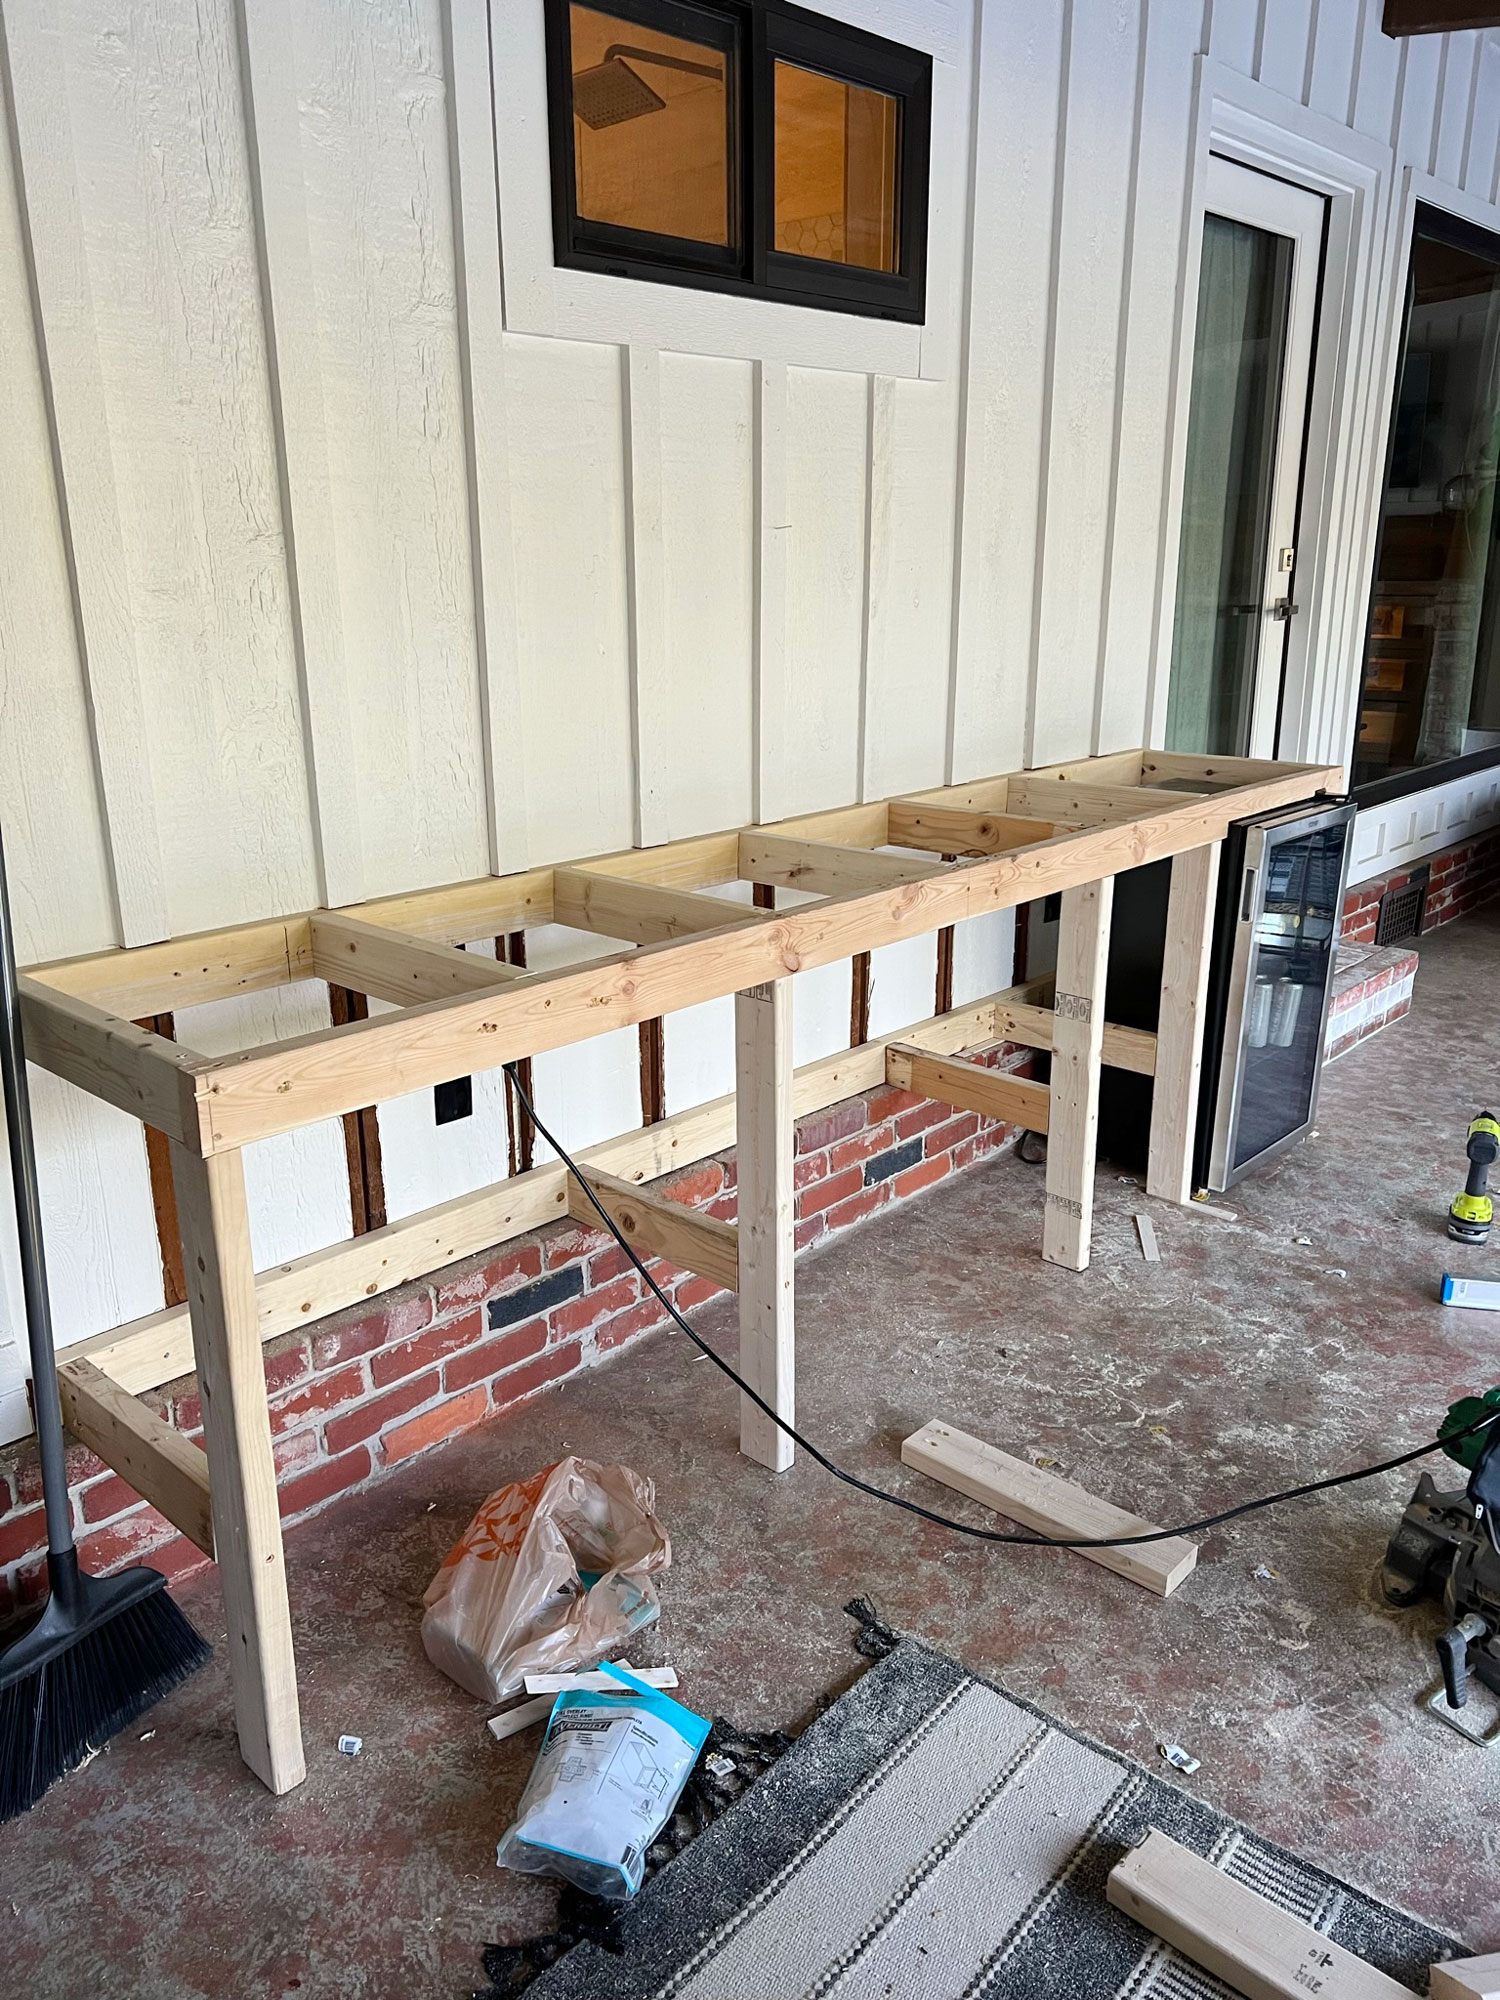
Before we get started, please note that this tutorial does not include how to build the cabinetry framing itself. For that tutorial, you can go to my DIY Cabinets on the Cheap post for full instructions on this process.
**For your shopping convenience, this post contains affiliate links. As a Reward Style and Amazon affiliate, I earn commission on sales at no extra cost to you.**
How To Build Cabinet Doors-
Supplies Needed:
- Circular saw with plywood blade
- Kreg accu-cut system (I used this one)
- Kreg concealed hinge jig (this one)
- Nail gun (I used 16 gauge)
- T-Square for marking cut lines.
- Clamps to secure the Kreg concealed jig hinge
- Clamps and glue if using that method to attach dowels
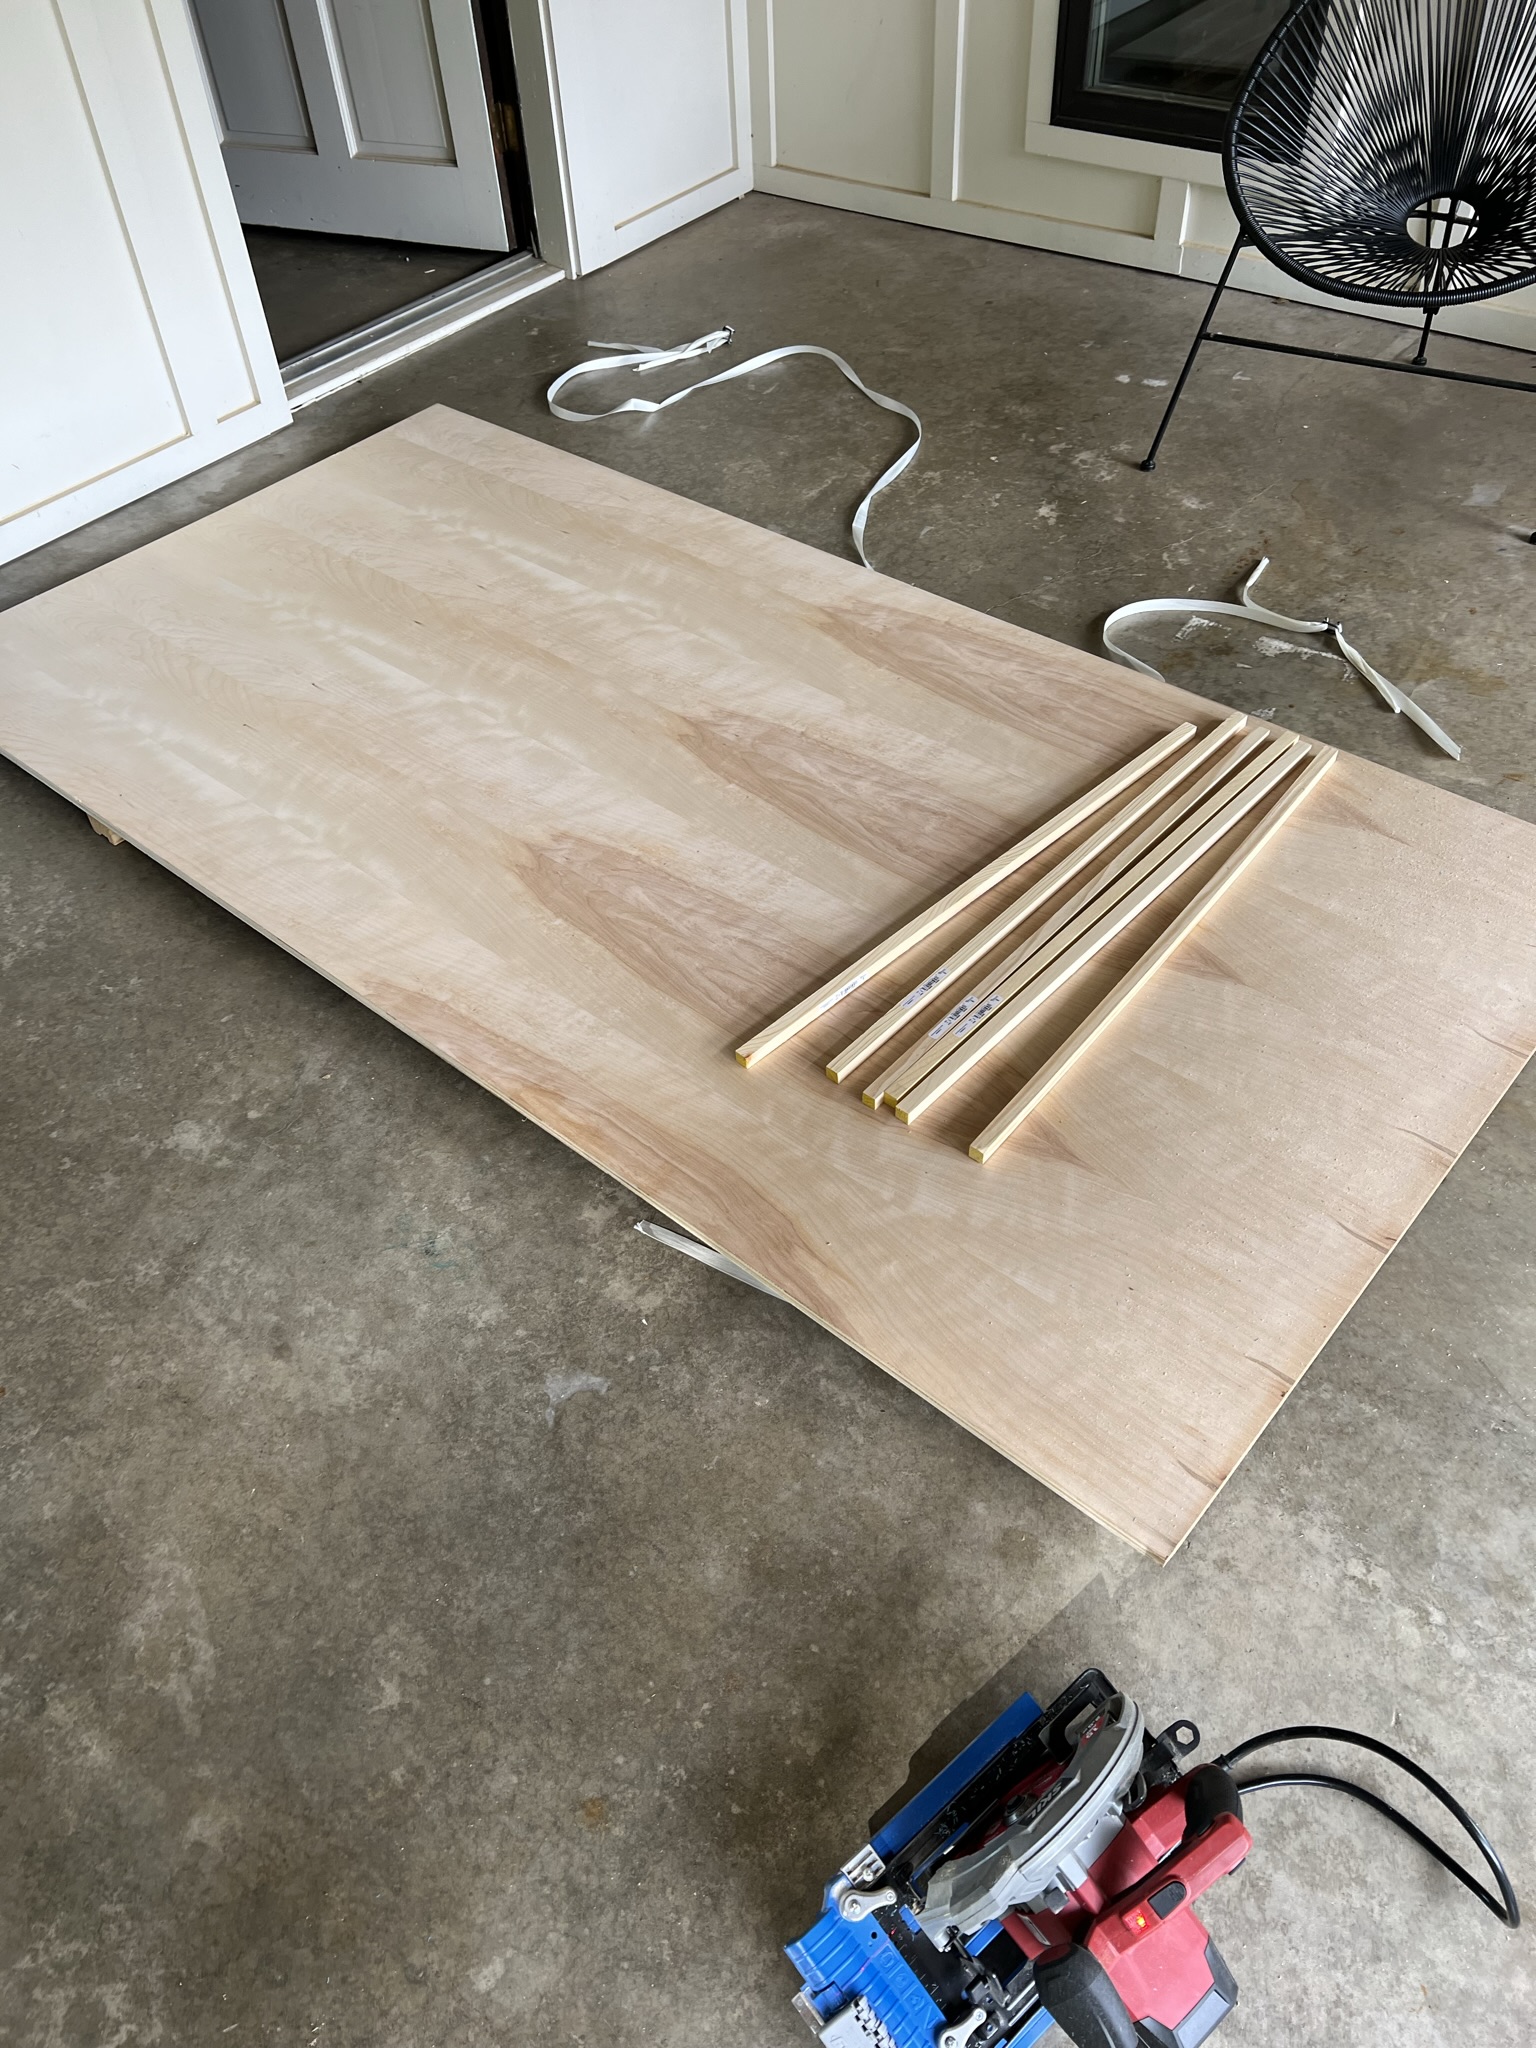
- Sanded Birch Plywood 3/4” thickness
- square dowel rods (we used 1/2” size)
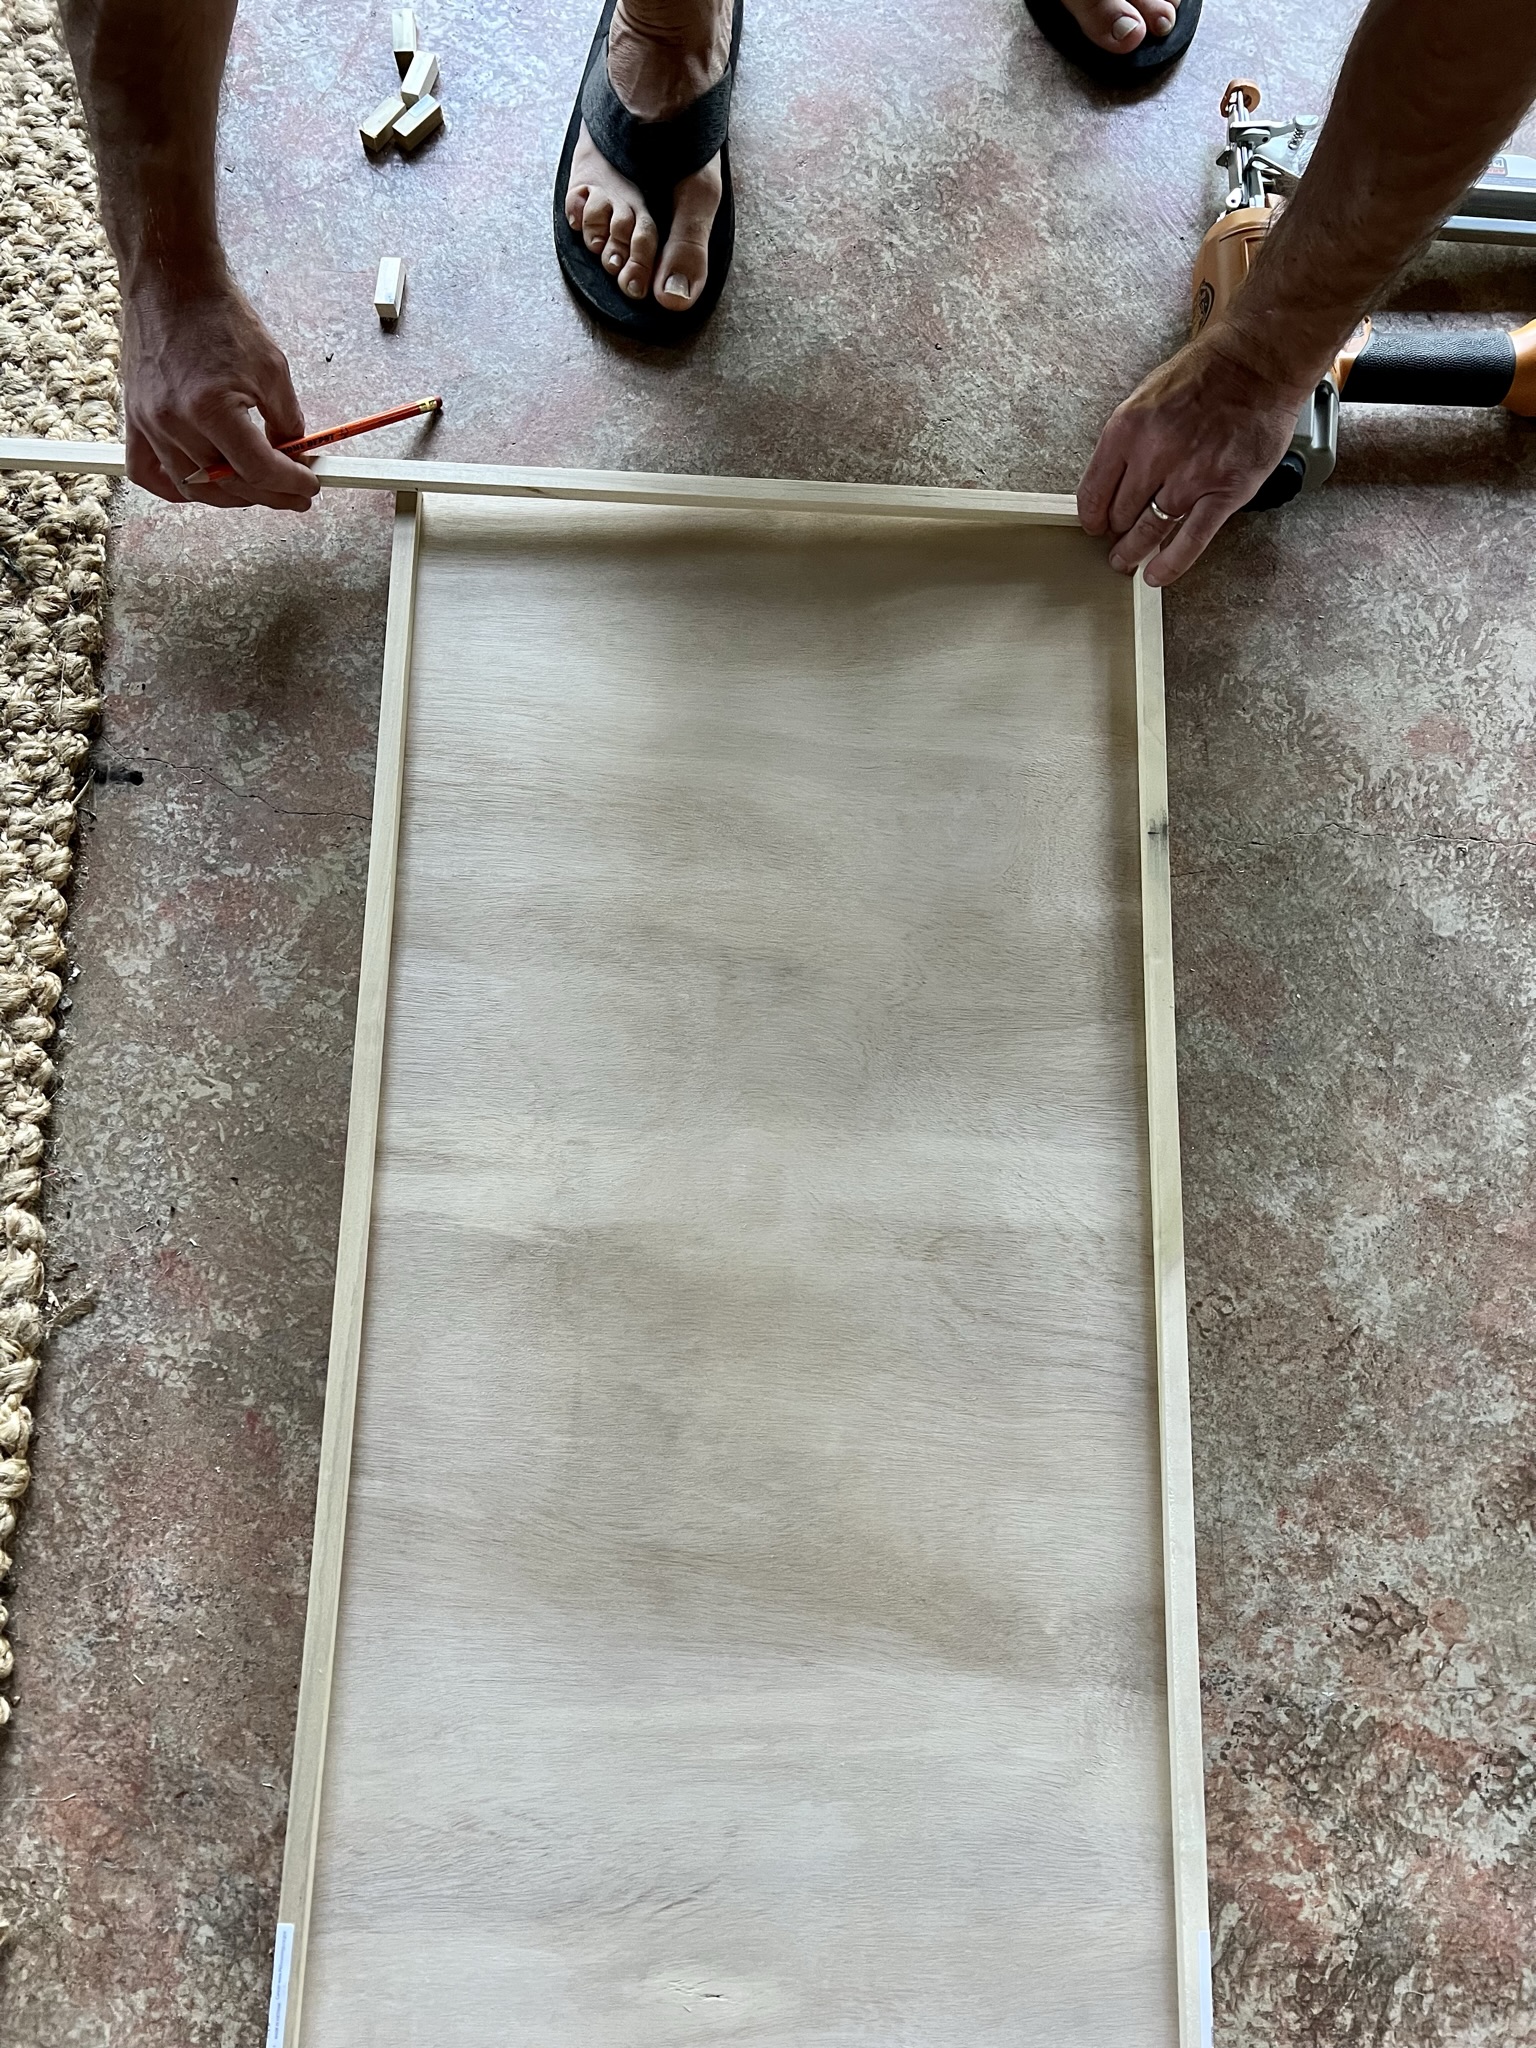
(Step 1). Determine desired size of cabinet door. Using a 4×8 sheet of veneered plywood, measure and mark your lines for one door. (The dimensions of our cabinet doors were 17.5” wide by 34.5” tall).

(Step 2). Using a circular saw with a blade designed for plywood (very important!) and the Kreg accu-cut system, cut your doors accordingly.
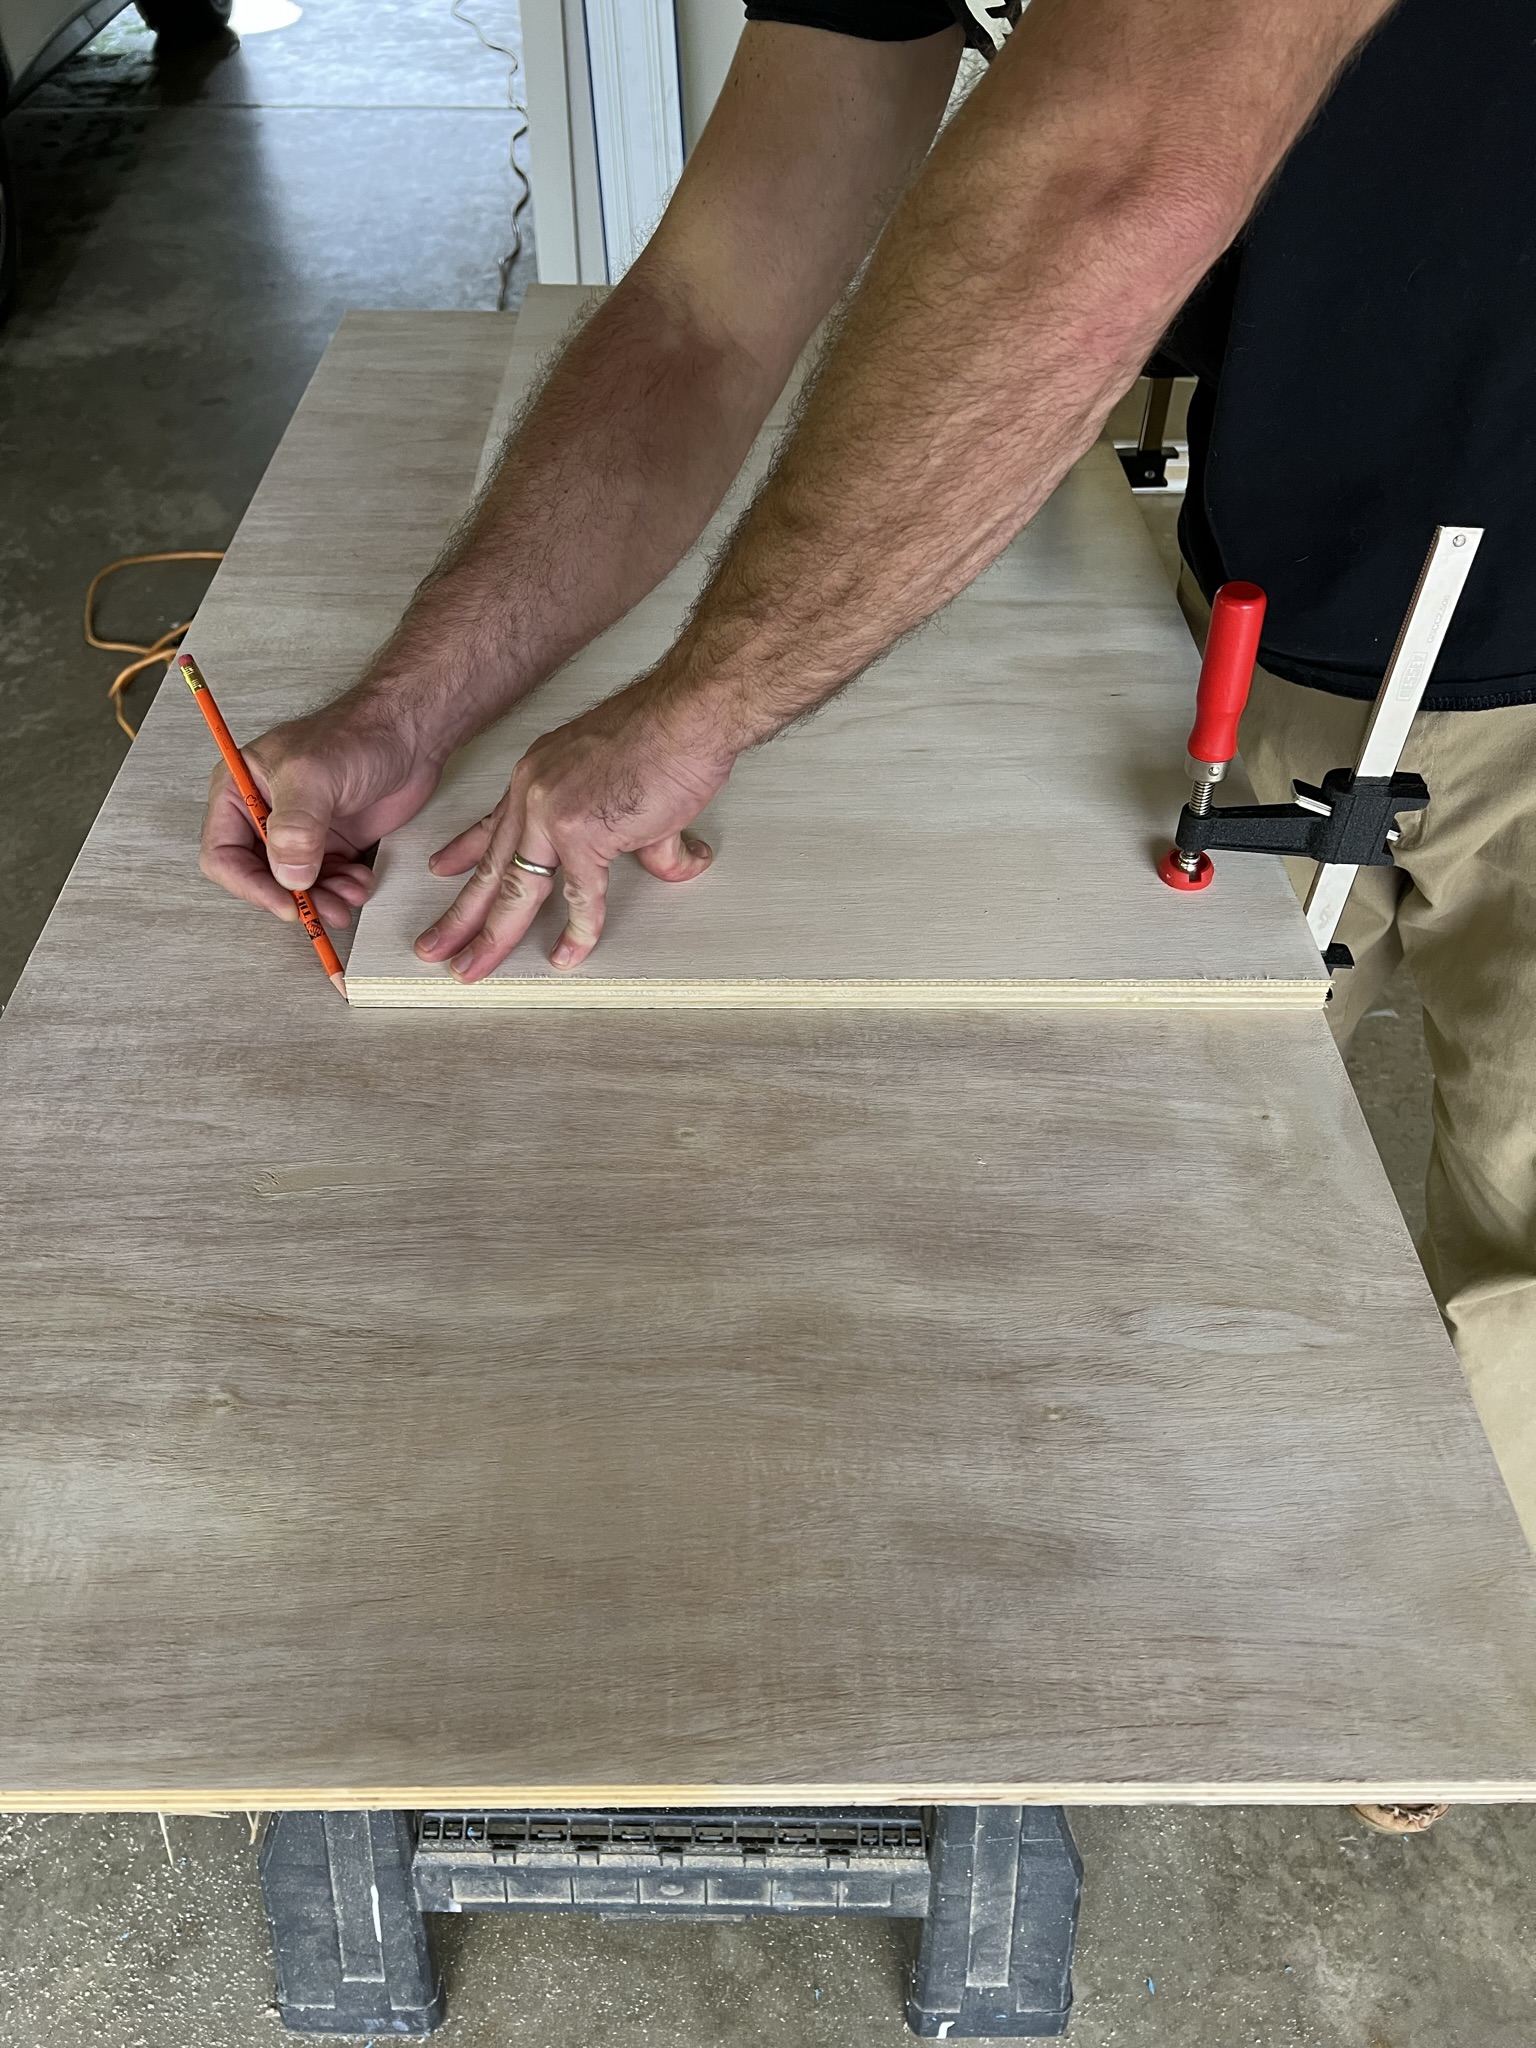
(Step 3). After cutting the first door, use it as a template for the next and cut lines (assuming all your doors will be the same dimensions.) Repeat steps until all doors are cut. We built 5.
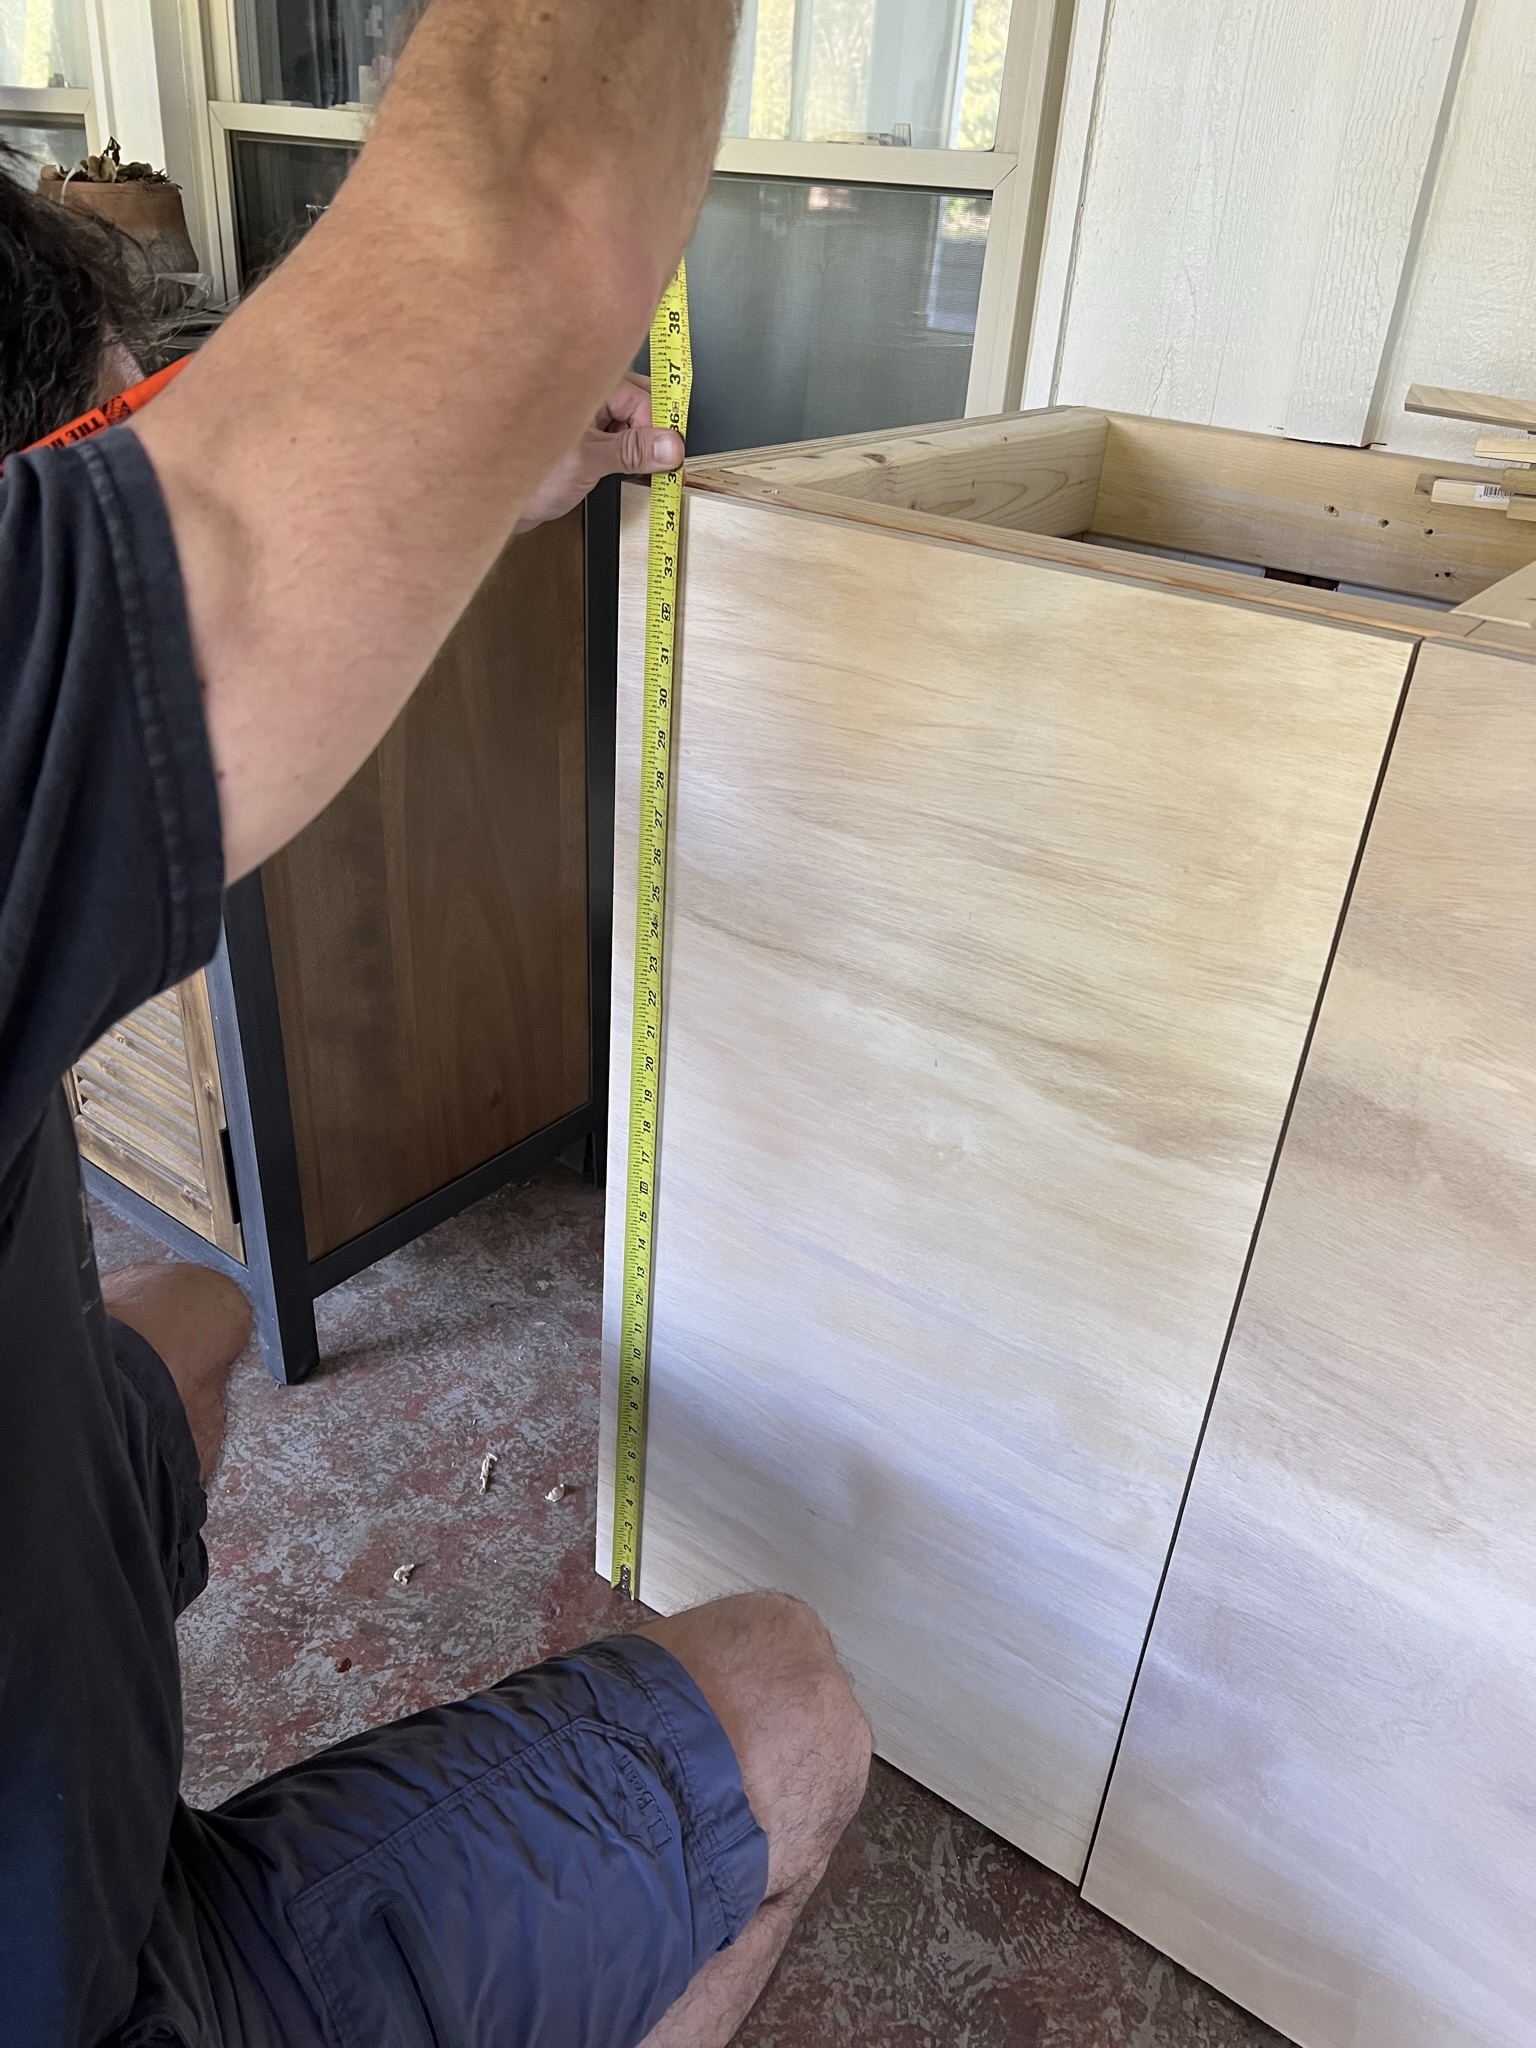
(Step 4). Now here is where we may have gotten experimental/inefficient when we decided to go ahead and put the hinge hardware on and hang the cabinet doors to make sure we liked the dimensions and that they were all even.
You don’t have to hang doors at this step. You can go right to measuring the door face perimeters for your slim shaker dimensions here instead.

(Step 5). Once you have measurements needed for the shakers, you can cut your square dowels using a miter saw or a miter box. (We ended up using the saw to speed up the process).

(Step 6). We originally used wood glue and clamps to attach the dowel shakers to the cabinet doors. However, we found this process painstakingly slow so we refined the process in the next step…

(Step 7). Given the plywood and dowel rod were thick enough for nails, we gave up on the glue method and decided to attach the dowel rods with a nail gun by flipping the door over (this prevents protruding nail heads). This approach was waaay faster.
Below is simply a progress photo with the cabinet door flipped around so that you can see the dowels…
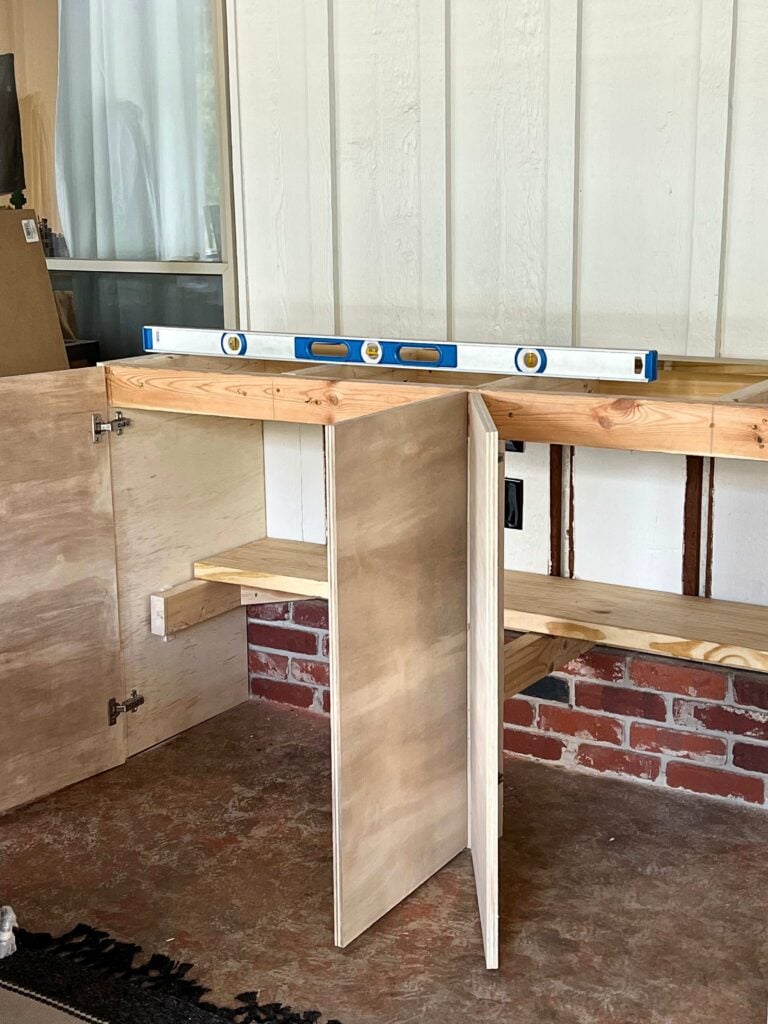
(Step 8). Attach hinges. Using the Kreg concealed hinge jig, mark location of hinges and set depth collar on jig. Drill holes for the hinges. The Kreg jig is only designed for hinge cups that area 35mm.
Note: Because your cabinet doors will be thicker than standard size, be sure to order hinges designed for thick doors! Standard size hinges will not allow for full functionality of doors. We learned this the hard way and had to buy all new hinges at the last minute.

(Step 9). Once all hinge cup holes are drilled, attached hinges and hang your new cabinet doors to the frame.

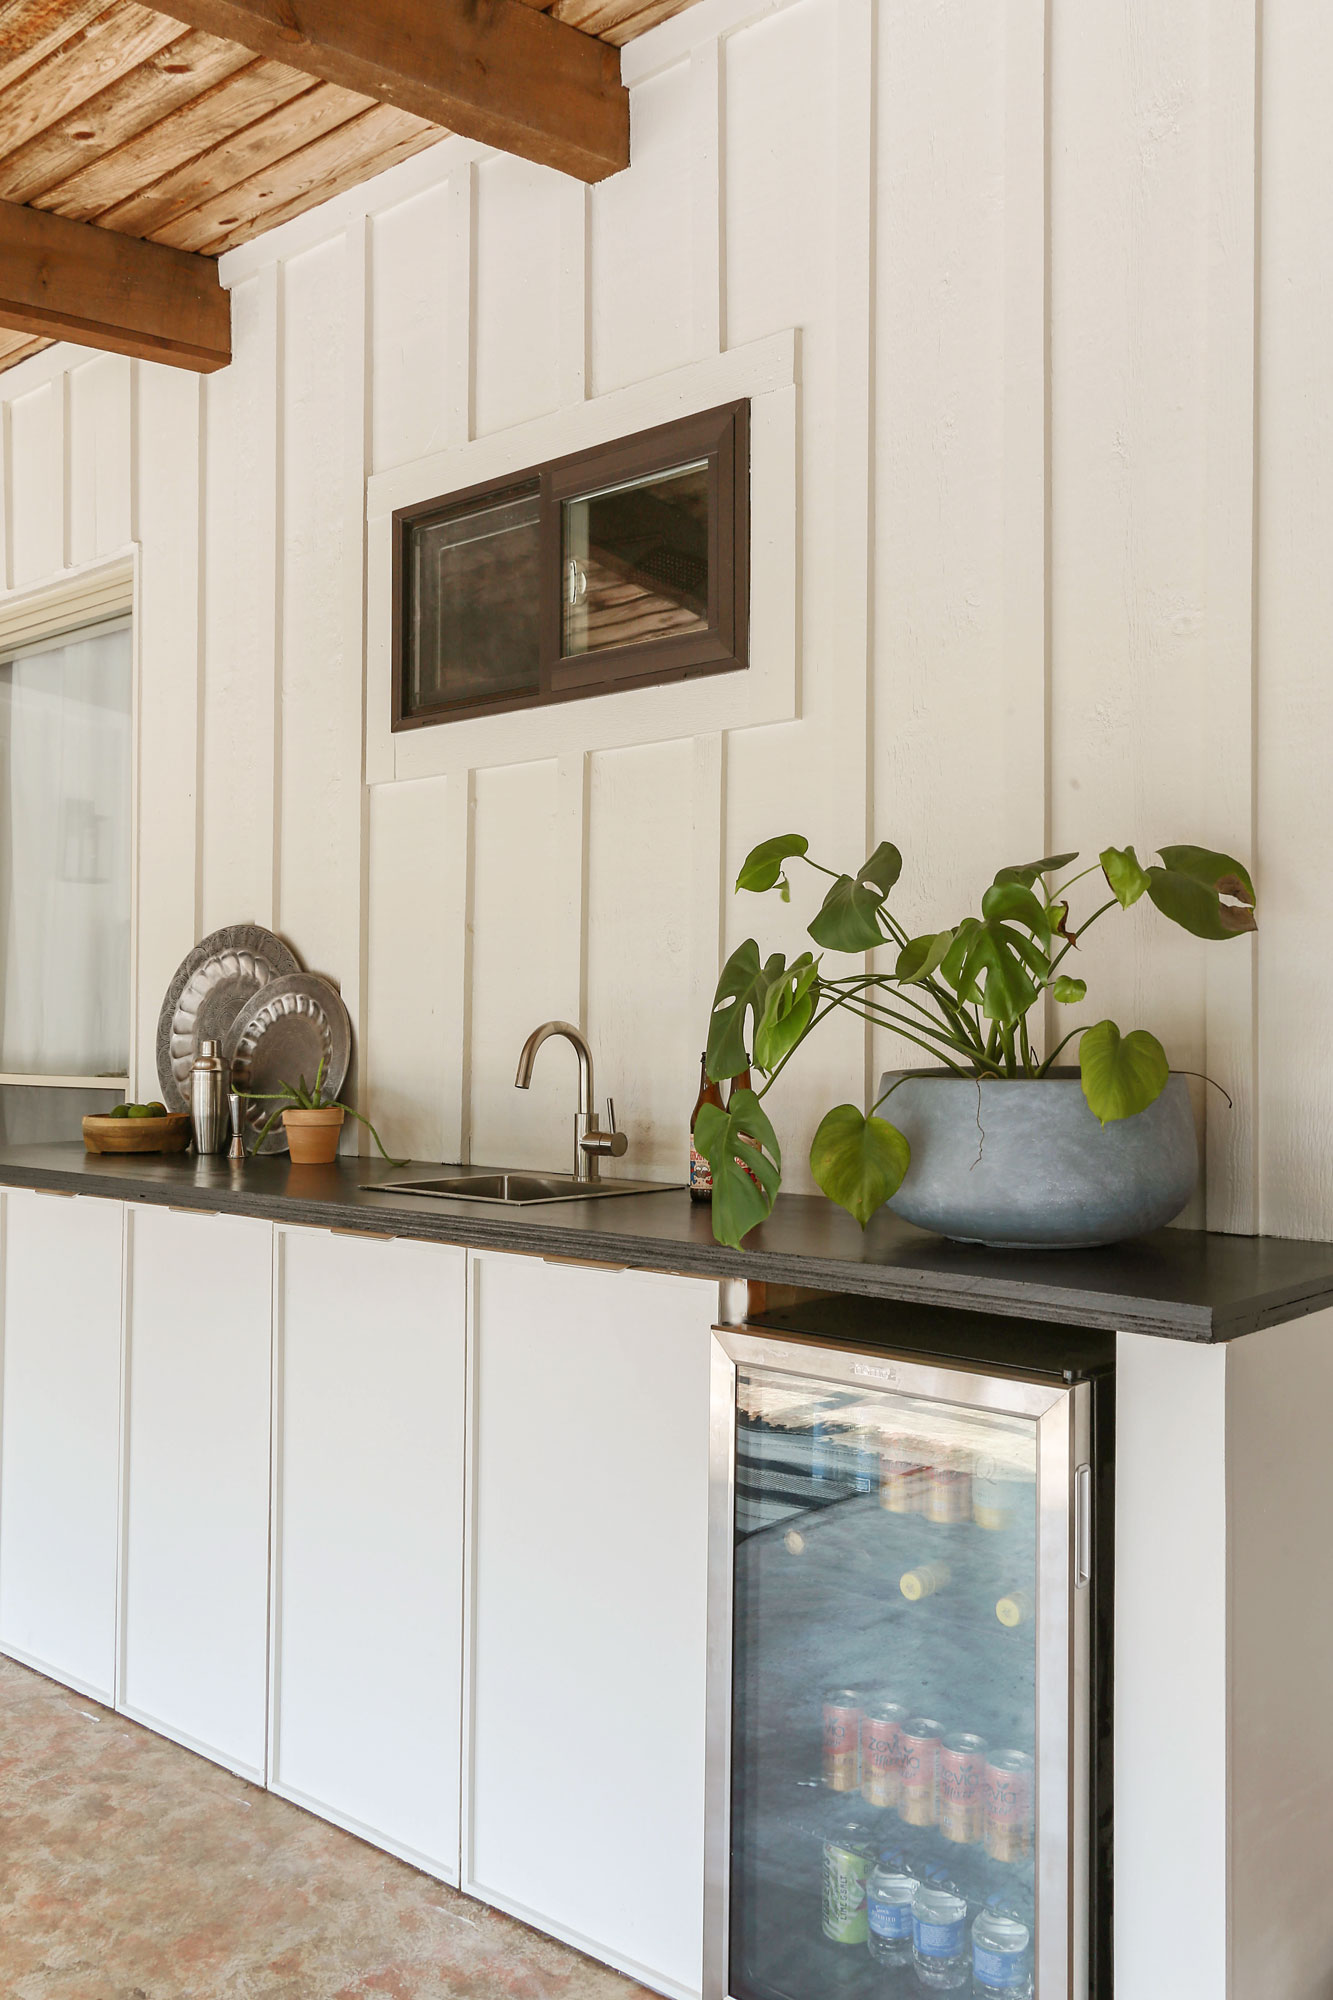
(Step 10). For a finished look, prime and paint your cabinet doors. (I used Shoji White by Sherwin Williams in the exterior/weather proof product line).
Luckily, the previous owners of our house left the paint behind from when they had painted the home’s exterior, so I didn’t have to buy any new paint. …
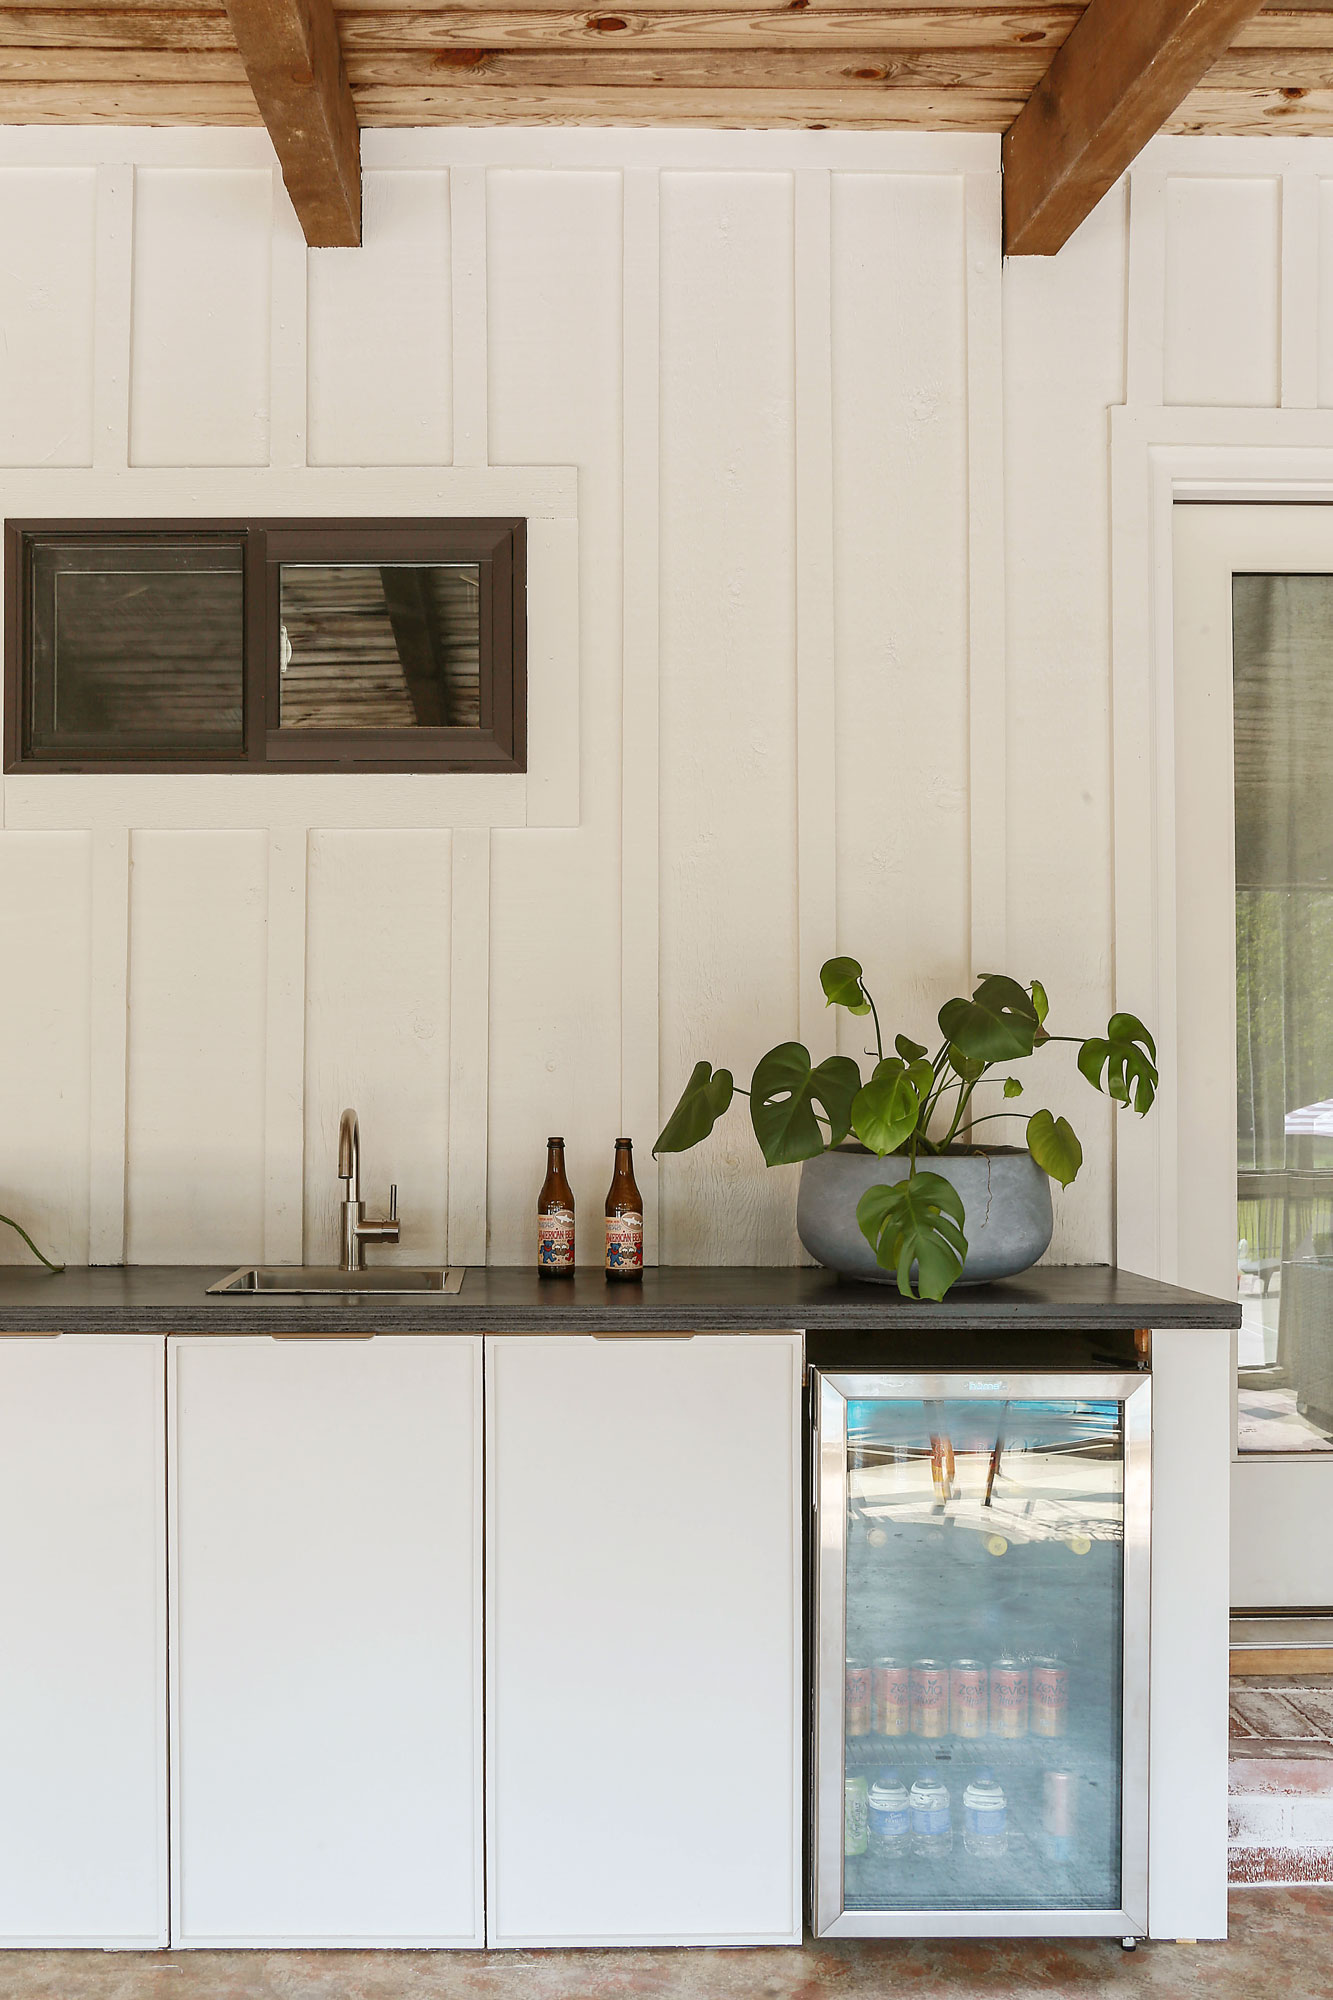
To really capitalize on the minimal modern aesthetic, I decided to go with edge pulls on my cabinet doors. Contrasting with our DIY black countertops, I went with a brushed nickel finish on the hardware.
While this whole process was a little experimental for us as amateurs, once we got a proper game plan down, the rest was all pretty straightforward .
I really love how the subtle detailing of the shaker takes this cabinet from looking like a budget-DIY project and makes it feel more custom and elevated.
Note: If you plan on using this same approach for an outdoor space, you need to be sure your cabinets are covered and safe from excessive water (our is in a covered, screened-in-porch). If your outdoor kitchen is in risk of the rain and snow, you will need to use treated lumber.
Thank you so very much for stopping by and spending some time with me!
It would truly mean the world to me if you could share this post with a friend or on social media! Thank you for supporting this small business.

Now go out there and design some good vibes along with a fabulous life!


Welcome!
My journey in interior design and home improvement began with transforming my first fixer-upper home, all while managing a budget and raising two young boys. My work, a reflection of my passion for creating beautiful, uplifting spaces, has been recognized by top publications like Better Homes and Gardens Magazine, HGTV, and more. I invite you to explore my site and witness the transformation of my home and the vibes we've designed. Read more...


Erica-
They are gorgeous and so sleek!
Thanks for sharing all the instructions.
You two have completed lots of projects in a short time- what a beautiful home!
Thank you so much, Donna! I won’t lie…I had gotten a little burnt out on projects at our old house but now that I have had a little time to recover and rest, I am getting inspired again. I hope you are enjoying your summer so far! xoxo
Do you have pictures of how they attached to the inside of the cabinet
Hi Allie! I just added a photo of what the hinges look like inside the cabinet. To see it, look directly under step number 9. Hope this helps! 🙂