
Transforming My Bathroom Vanity With Gel Stain

With outdated hardware and a yellow-ish finish, all of my bathroom vanities needed a makeover.Seeing what an ordeal it was to paint my kitchen cabinets with oil paint, however, I was looking for an easy way out.Thank goodness I stumbled upon a new product called gel stain( here is the one I used![]() ).
).
*This post contains affiliate links. That means if you click on one of those links and buy something, I may receive a small commission, but you won’t pay a dime more.As an Amazon Associate I earn from qualifying purchases.
After some intensive research and a few tutorials, I decided I would take the leap and try the gel stain![]() . So glad I did. The application was super easy and after two years, the product has not even one scratch.
. So glad I did. The application was super easy and after two years, the product has not even one scratch.
Here is what the vanity looked like before the gel stain application.

Here is the vanity after 3 coats of Java Gel Stain![]()
and some new chrome hardware.
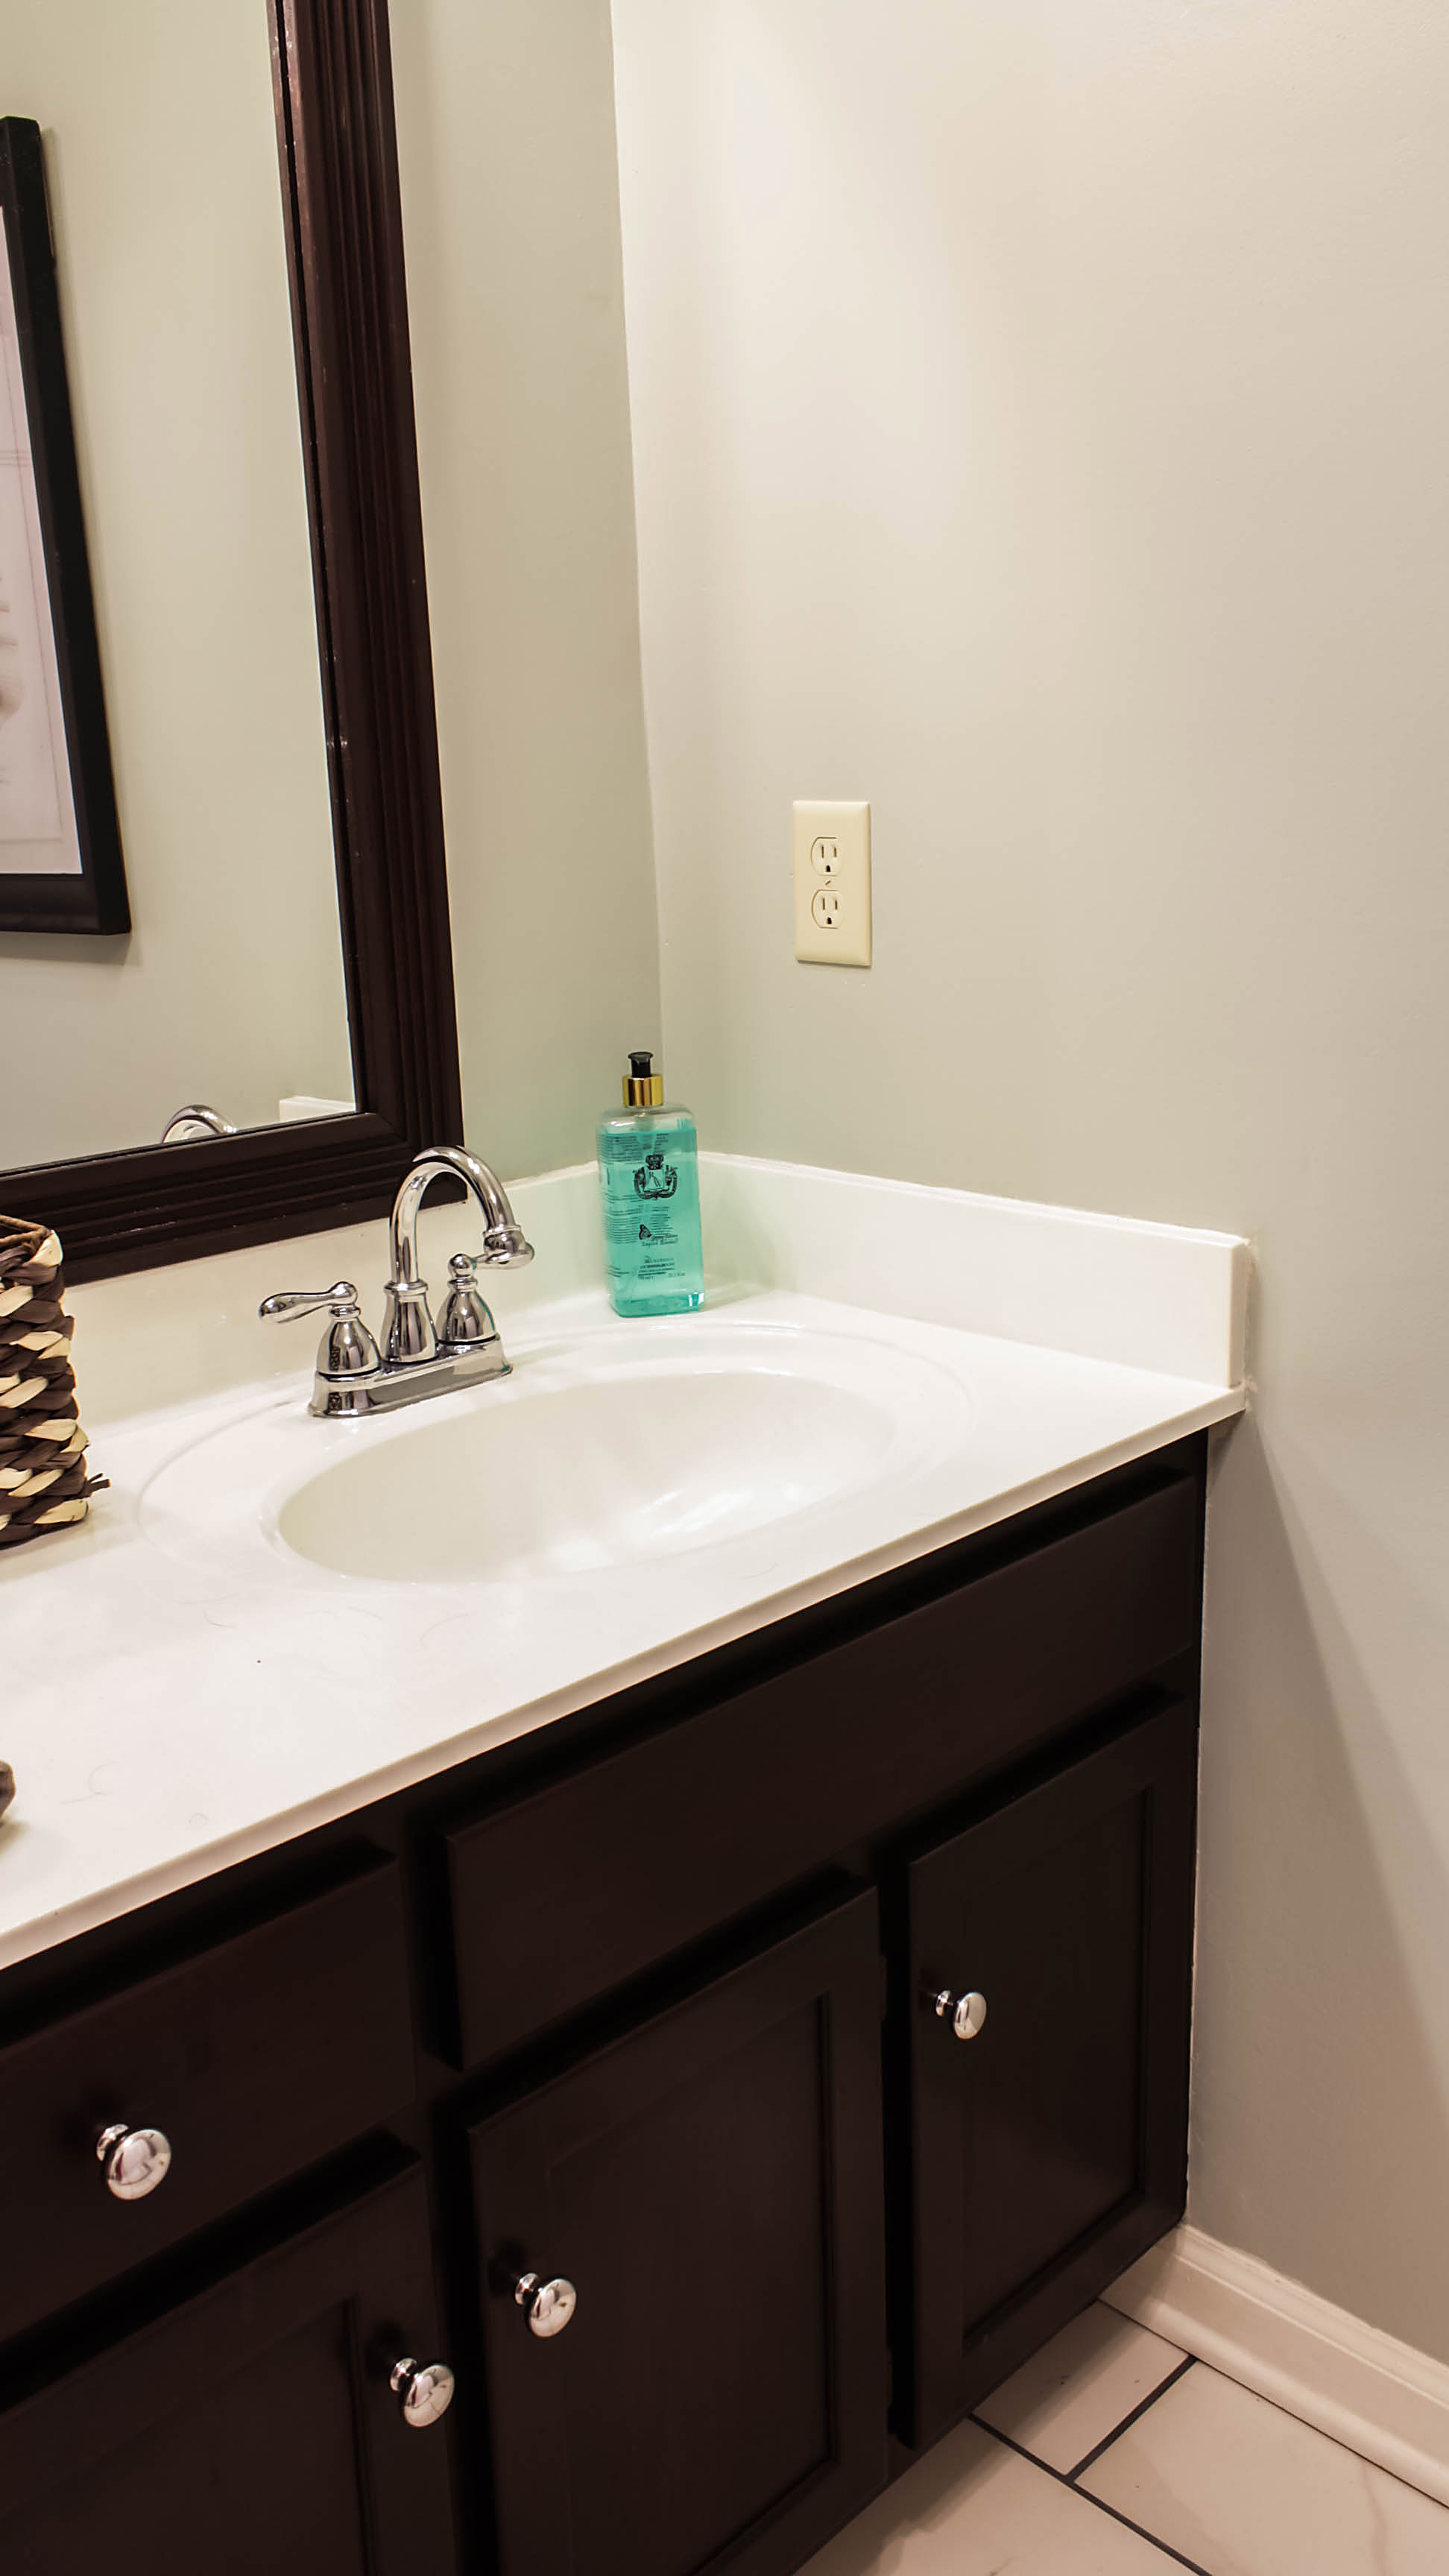
The color I went with, Java, deceptively appears as black in these photos. However, it is more like a super dark wood finish.
Materials Needed
-
- Gel Stain (here is the one I used
 )
)
- Gel Stain (here is the one I used
- small foam brush
- latex gloves
- multiple socks
- 120-180 grit sand paper
- painter’s tape
- Minwax Wipe-On Oil-Based Poly
How I Gel Stained My Vanity
1. Remove existing hardware and tape off your working area.
2. If desired, remove doors and drawers. I took the lazy way out and omitted this step.
3. Lightly sand your surface with sandpaper. The beauty of gel stain![]() is that you don’t have to make a big to-do of this step.
is that you don’t have to make a big to-do of this step.
4. Put latex glove on your working hand (hand you want to apply stain with). Then, place sock over your latex glove and start applying your stain![]() . I know it sounds weird, but application of the stain with old socks is really the easiest way I found. Because the stain will bleed through your sock, latex glove is necessary to avoid getting stain on your hand.
. I know it sounds weird, but application of the stain with old socks is really the easiest way I found. Because the stain will bleed through your sock, latex glove is necessary to avoid getting stain on your hand.
5. Don’t freak out after your first or second coats! It will look ugly AF at first. Here is how mine looked after the second coat. Also, be sure to let each coat dry completely between application.

6. Use small foam brush for touch ups or hard to reach areas.
[embed_popupally_pro popup_id=”2″]
8. After you are happy with the finish, let dry overnight. Then apply wipe on polyurethane. It is best to apply 2-3 coats. I only applied one coat and I still havent had any dings or scratches.
9. Re-install hardware and enjoy your new vanity!!!
Here is the finished product.
Like I said, I would highly recommend this particular gel stain ![]() and no one is paying me to say so. I found it so much easier than using actual paint.
and no one is paying me to say so. I found it so much easier than using actual paint.
In fact, I have found gel stain to be so durable, I even applied it on my front exterior doors which you can read all about in this tutorial.
Update 6-8-2018: My gel stain cabinets are still holding up beautifully, but I also recently discovered a cutting-edge paint product that I used to paint my kitchen cabinets with- by the same company- (and no…I am not being paid to endorse this product). To read my hack for painting your cabinets or bathroom vanity the easiest way possible, click here to read the post. This type of paint is particularly useful if you cannot find the gel stain in your desired color or if you need a product that will go over cabinets that have already been painted . Good luck, babes!
Now get out there and design some good vibes !!!


Welcome!
My journey in interior design and home improvement began with transforming my first fixer-upper home, all while managing a budget and raising two young boys. My work, a reflection of my passion for creating beautiful, uplifting spaces, has been recognized by top publications like Better Homes and Gardens Magazine, HGTV, and more. I invite you to explore my site and witness the transformation of my home and the vibes we've designed. Read more...


I like the way your vanity turned out, was looking at it and was thinking the sink looks new, then I went on and realized you painted it. Is it holding up well? I am definitely drawn to your taste, classic with a the pop of color. You have done some really nice work!
Thank you so much Joan. So far the sink has held up, but then again we have not even been in our home for a year. We shall see how it does. I think the painting over the sink is really just a temporary fix until we can afford to replace the countertops, but it works for now. Thank you so much for the kind feedback!!!
It looks great! How long was the wait between the coats?
Thank you so much, Henry! I waited a few hours between coats.
How many cans of paint did you use?
Hi Beth! I just used one can of stain. Hope this helps!
Has this Gel stain been around for very long? 16 years ago I tried stripping my kitchen cabinets. (I don’t recommend anyone try stripping they kitchen cabinets.) The door and drawers ended up being from different types of wood. I tried to stain them dark, but nothing worked. So I painted them. This would have been so much easier.
Forgot to add that this looks great and thank you for sharing. I’m going to try this at my mothers home in her kitchen.
Thank you so much, Jean. Honestly, I am not sure how long it has been around but I am pretty sure it is a relatively new product.
Did you not clean the cabinets before starting? And if you did, what did you use to clean them?
I just wiped them off with a damp rag after I lightly sanded them.
What size can of java gel stain did you use? 1/2 pint, pint, quart???
Thanks!!!
Hi Sue. I bought the quart, but it was enough to use on all three of my vanities and I still have some left over. Thanks!
OMG This was amazing. Such an inexpensive do it yourself project. Along with the garage door makeovers, this was, by far, the best thing I’ve seen in recent time.
Thank you so much, Dan. Yes, it is a very simple, inexpensive solution and I am thrilled with how it has held up. I love hearing you found this useful.
It looks beautiful! I would like to redo my stairs which are hardwood, do you know if this would work? I do realize I would need a harder finishing coat, any suggestions??? Thanks in advance. ?
I am not sure, Lisa. I am sure it could work, but it may be easier just to use a stain specifically for flooring. Thanks for stopping by!
We just recently did this for our stairs! We painted white risers and gel stained the treds. 🙂 Turned out fabulous!
That sounds gorgeous! I am so happy with how ours has turned out and held up. 🙂
Absolutely stunning! Our vanities are painted. Would the paint need to be stripped prior to applying this gel? Or will a light sand work?
Thanks, Mimi. I am honestly not sure how the stain would do on a painted surface, but I would think the surface should be stripped before application.
Hi! This looks amazing! What kind of polyurethane did you use on top? Thanks!
Thanks, Melissa! I used Minwax’s Wipe-On Poly. Hope this helps!
Looks great! Is the vanity real wood or laminate?
Thanks, Tanya! The vanity is real wood. Hope this helps.
Great job – you’ve given me the solution for our master bathroom!
Thank you , Sadiya. So glad I could help!