DIY Bathroom Makeover on the Cheap

Is your bathroom in need of an update? Today, I am sharing some of the budget-friendly DIY hacks I used to makeover my bathroom for under $450.
After almost two full years of harboring resentment for my kiddos’ unsightly bathroom , a few months ago, I finally decided to put on my big girl panties and get scrappy AF .
With virtually no budget for a proper bathroom renovation, I was essentially forced to think outside of the box. Flexing my DIY skills, for only a few hundred dollars, I was able to give this small space a much more updated look.
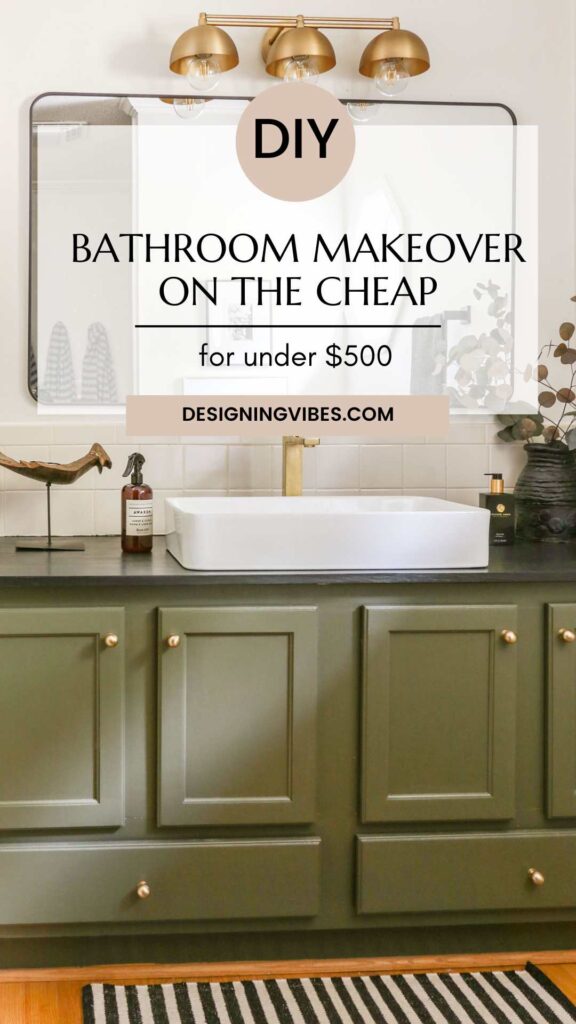
If you too are tired of resenting the f*ck out of your dated bathroom but only have a small budget to work with, let me share some of the cheap ways I gave my once cringe-worthy space a whole new look for NOT a whole lot of money.
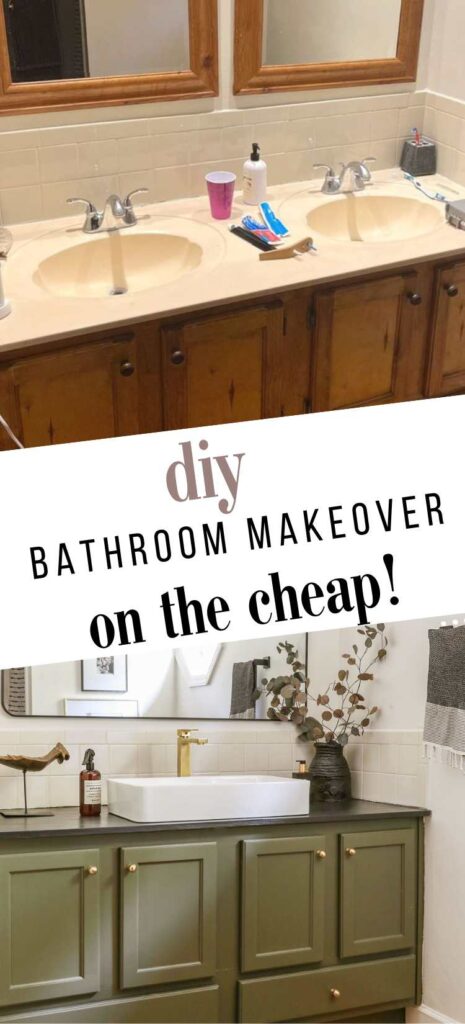
To appreciate just how far this old bathroom has come, let me first give you a bit of context in the form of a “before” photo..
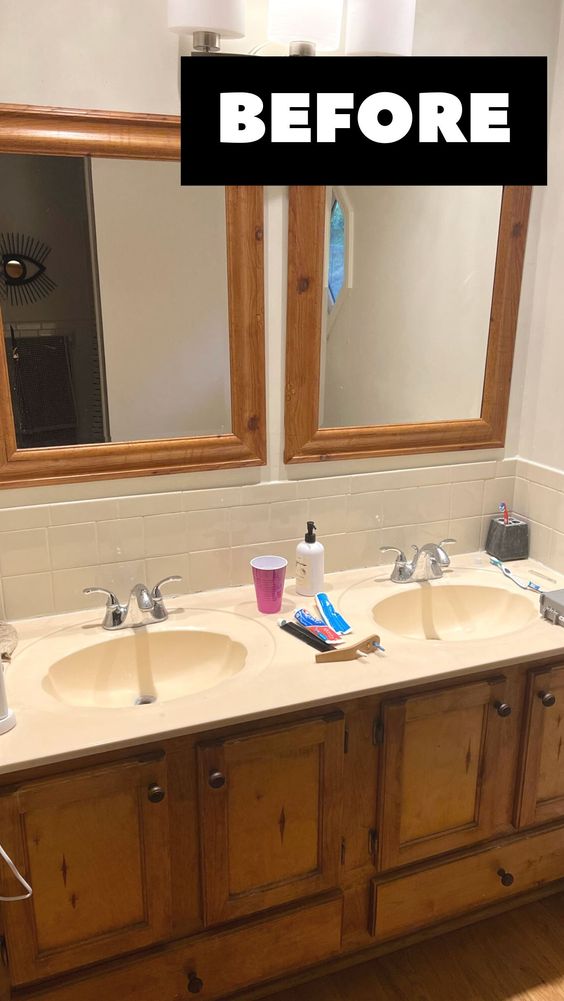
If the overkill of wood tones wasn’t enough of a design offense for you, I am sure the seashell sinks clued you in on just how damn dated this room truly was. As a result, the first step in this small bathroom makeover was addressing the vanity.
Bathroom Vanity Update-
If you are working with a super tight budget, a fresh coat of paint on your bathroom vanity will go a long way. No need to spend hundreds of dollars on a new one!

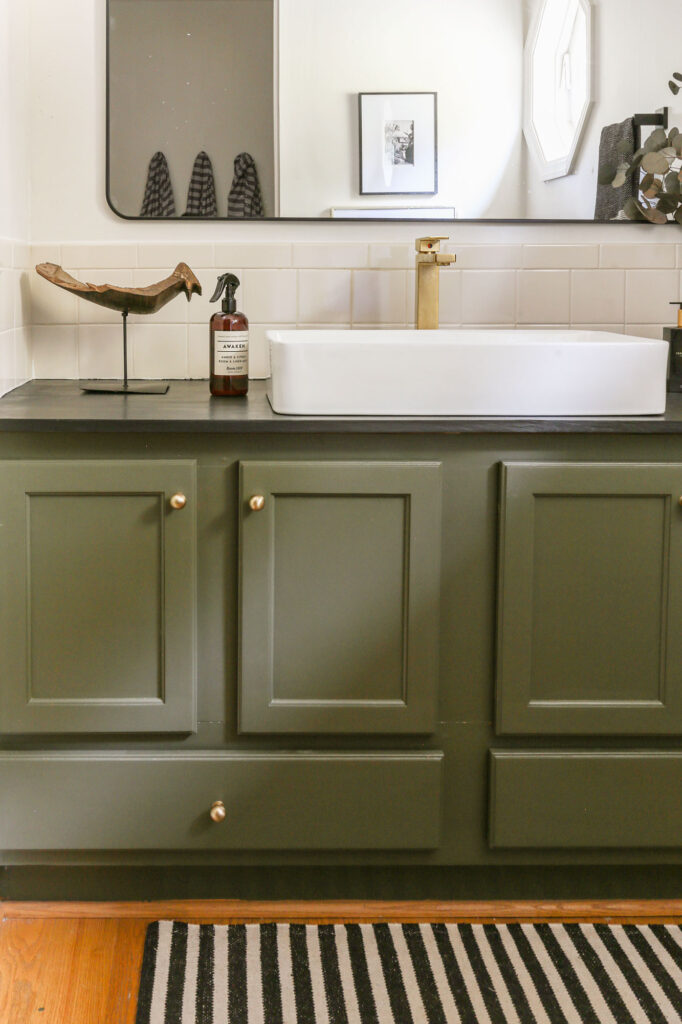
For five hours of labor and the cost of a gallon of paint (I used Dark Olive by Benjamin Moore), I was able to incorporate some much needed color into the space – breaking up the monotony of all the wood tones.
Taking the vanity makeover a little further, I found beautiful new hardware on Amazon for under $20. I love how the brass adds a pop of bling and dimension to the mix.
Wall and Tile Paint-
One of the cheapest ways to freshen up the look up your bathroom is to paint the walls either in a hue of white or, if you prefer drama, moody tones of black or charcoal.
Lucky for me, these walls were already painted in Shoji White by Sherwin Williams by the previous owners.
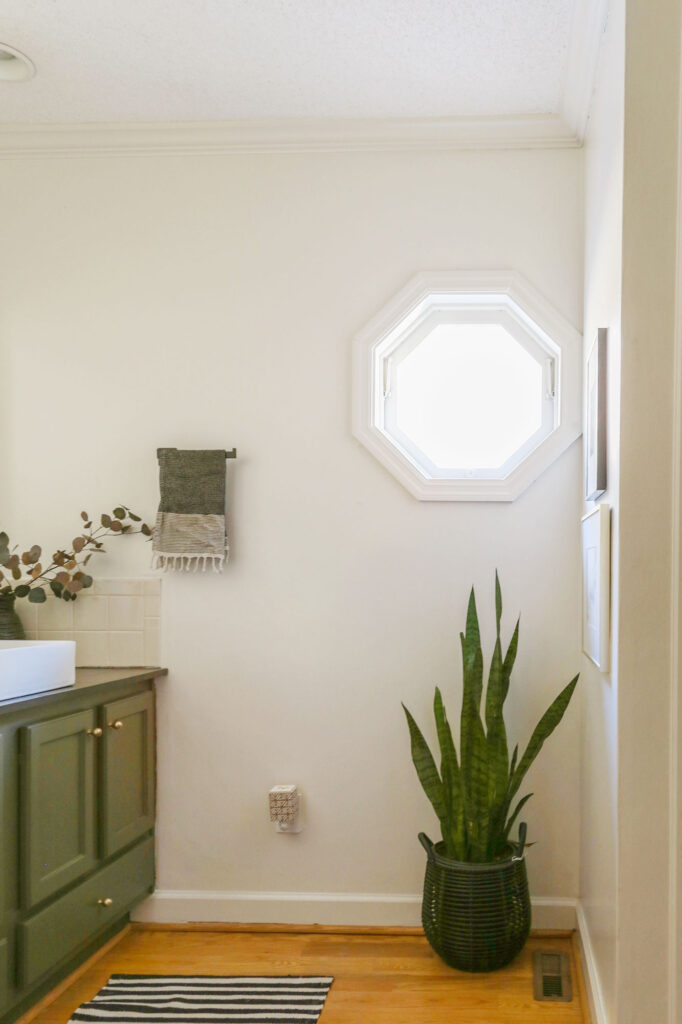
Because Shoji White is a warm, off-white, it did not clash too horribly with the existing tiles on the wall (gotta love the whole almond ceramic tile trend..not!). That being said, if you find your backsplash appearing dingy after painting your walls, you can always use white epoxy paint on them.
While new tile would of course be ideal, just the idea of demo alone sounds not only pricey, but messy, inconvenient and overwhelming. Maybe one day I’ll get the Zellige backsplash of my dreams!
DIY Bathroom Countertops-
While I have used epoxy paint to resurface existing countertops in the past, given the obnoxious shell design on these particular sinks, I knew I was going to have to start from scratch…
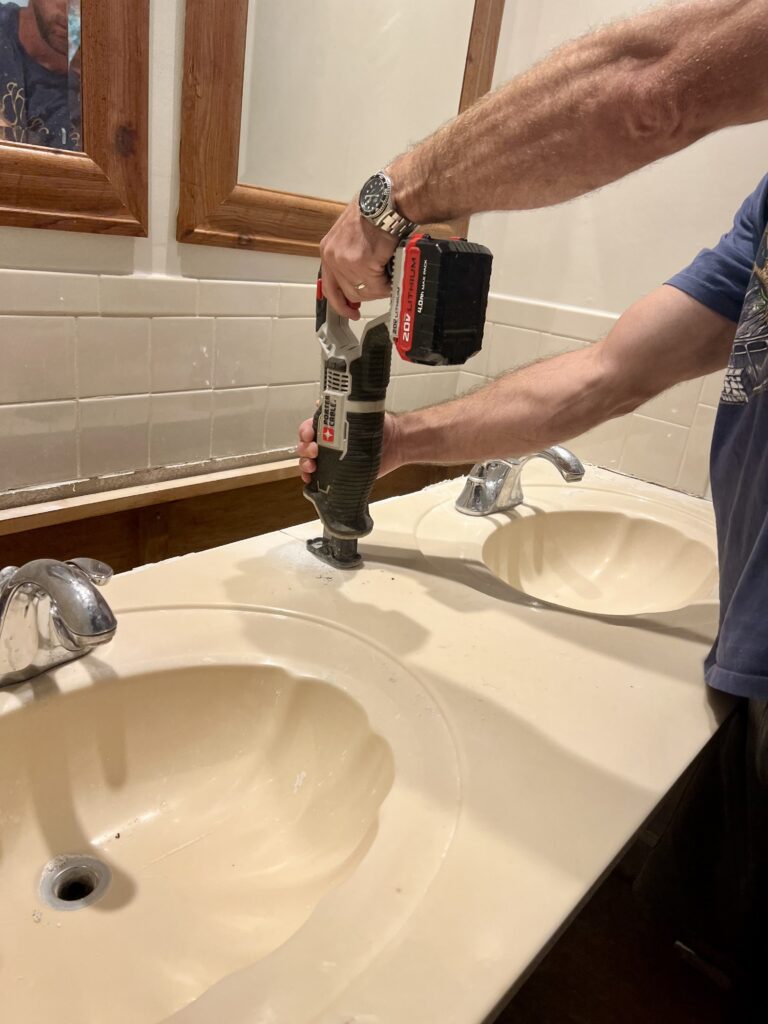
And so… my husband removed the dated cultured marble countertops and we built entirely new countertops from a sheet of plywood I had left over from another project. To protect the DIY countertops from water damage, I sealed them with black stain and multiple coats of poly.
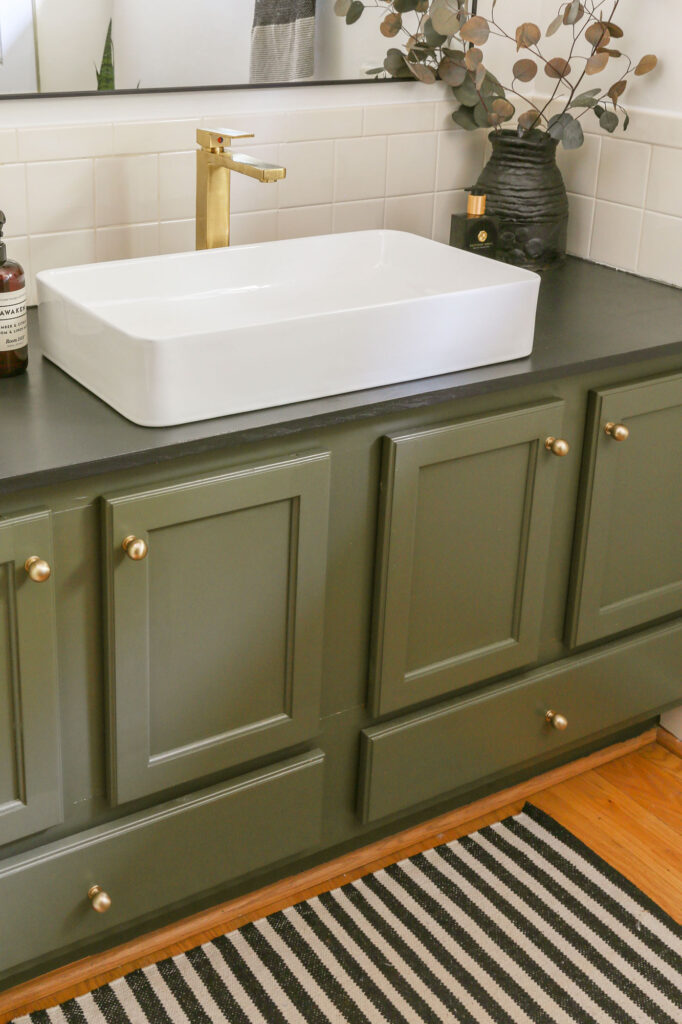
We then installed a modern basin sink and faucet on top of the new counter.
While the sink and faucet ate up a big chunk of my budget, the $160 invested on the items made such a big difference that it was well worth it.
New Lighting-
Playing off of the vintage feel of the old tile design on the walls, I replaced the builder-grade bland light fixture with this beauty from Amazon (which was less than $50).
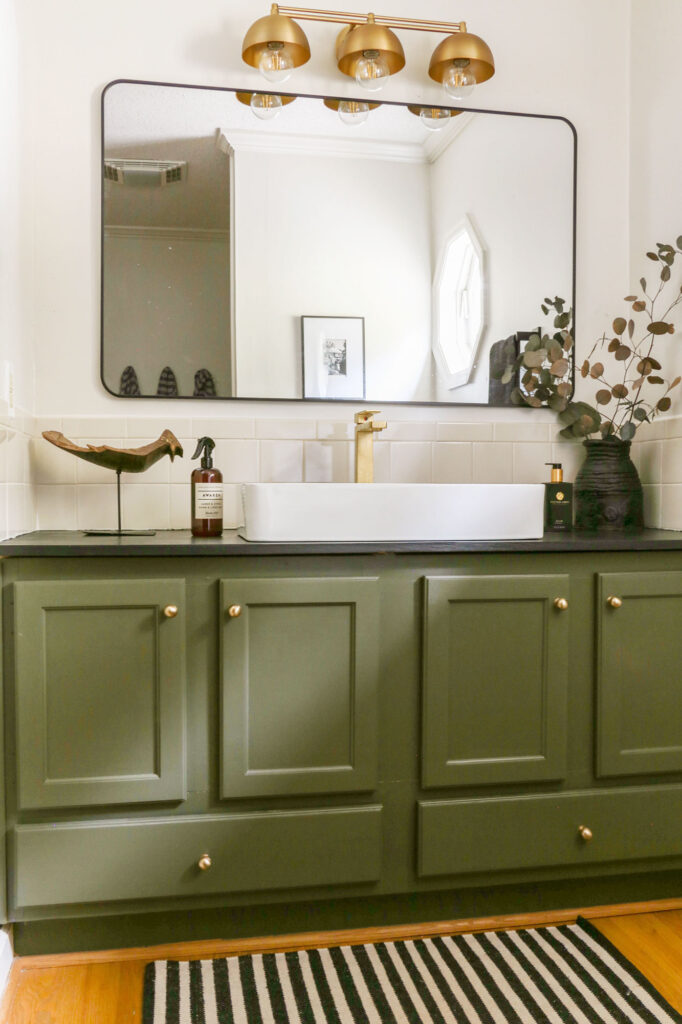
Going with a brass finish, the lighting now ties in with the cabinet hardware and faucet. With so many affordable options available from big box retailers nowadays, new fixtures can still fit comfortably into a budget bathroom makeover.
Extra Long Shower Curtain-
While all new shower tile was not in the cards for us- considering our very limited budget- I did purchase a new shower curtain to hide all of the ugliness behind it.
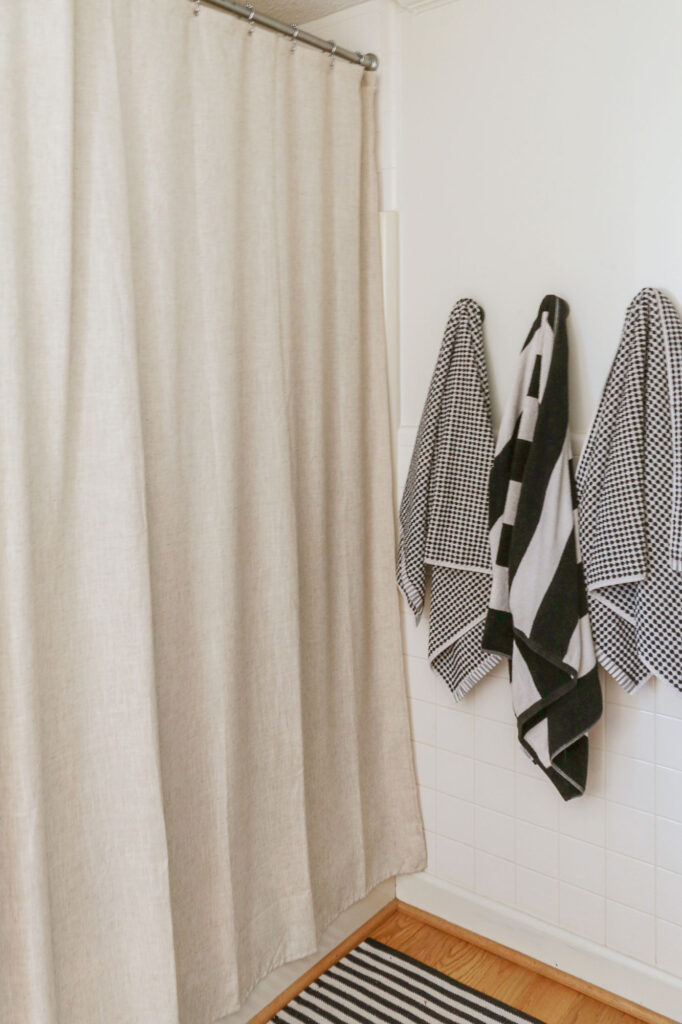
While I have seen plenty of bloggers who have successfully painted their shower surrounds and plumbing fixtures, given I never use this shower myself, I did not feel it necessary to invest the time into such a tedious endeavor. Being too lazy to actually transform the area, I reasoned that concealment was my next best option.
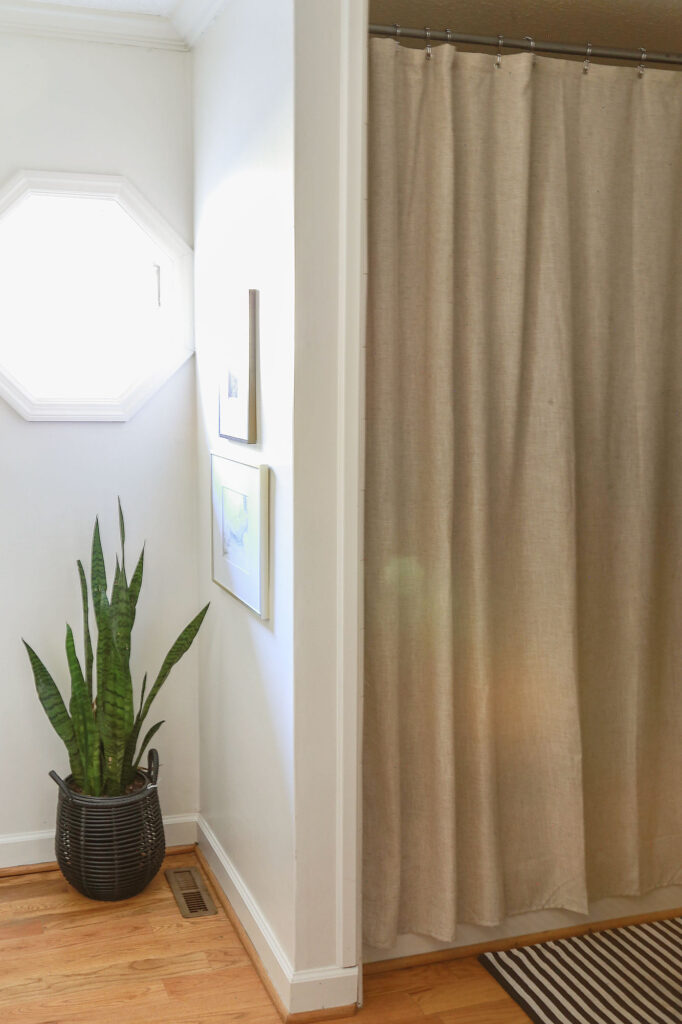
To create the illusion of added height in a relatively small bathroom, I went with an extra long linen shower curtain (84” long). Looking back at this purchase, I wish I would have actually gone with the longest option available (96” long). At any rate, the extra long dimensions still look more elevated than a standard shower curtain length.
(For a source list, be sure to scroll to the bottom of this post!)
Bathroom Decor-
Just because you can’t afford the bathroom of your dreams doesn’t mean you should neglect your space entirely! Whether it be a new mirror, a pretty soap dispenser or hand towels, home decor is a super cost-effective way to elevate the the look of your bathroom.
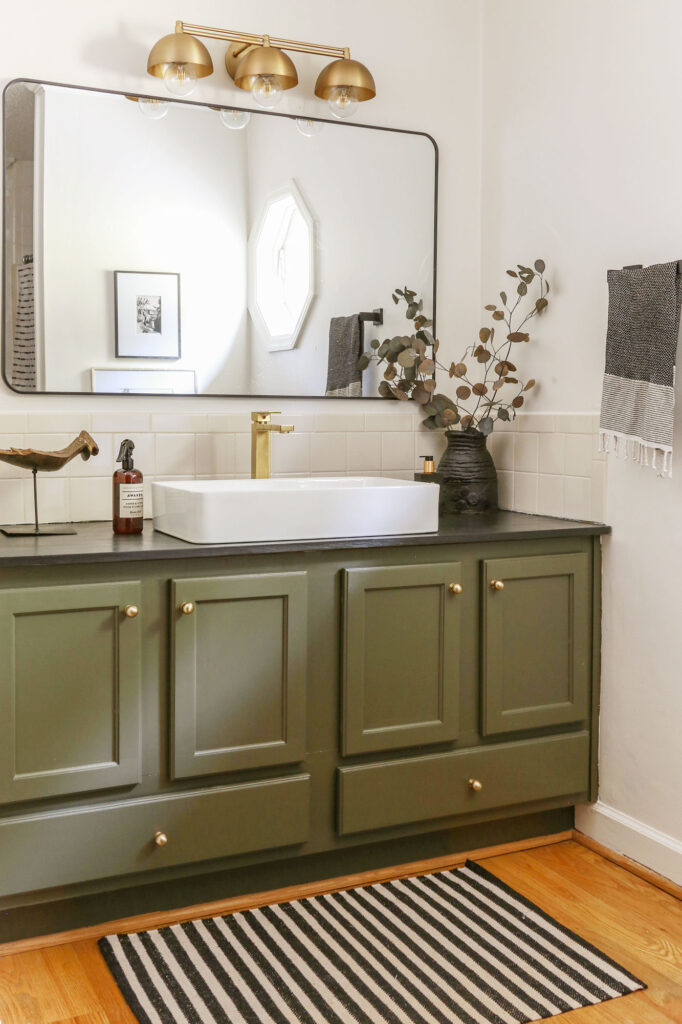
To give this vintage-inspired bathroom a bit of a modern edge, I incorporated some graphic details with budget-friendly rugs and towels. Not only are these items decorative, they are essential!
Using greenery and artwork I already owned, I was able to make this once stale, outdated bathroom feel alive and relevant again (without having to spend any additional money).
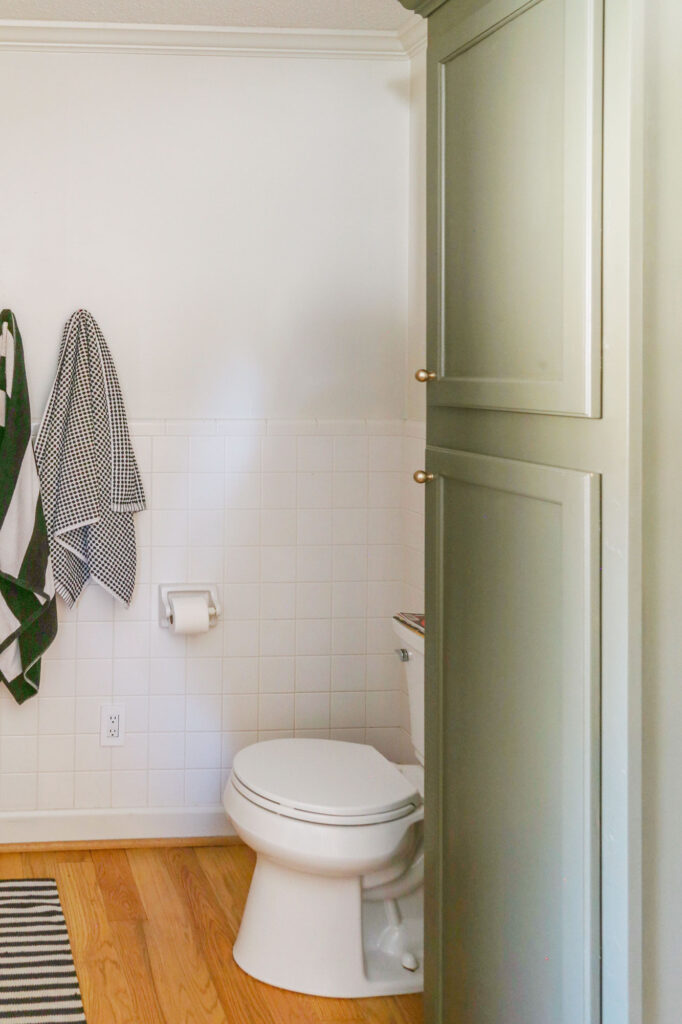
And in case you haven’t checked out my recent post about using bathroom towels as decor, go check that tutorial out now ! I mean…you are going to need towels anyhow so you might as well spend a little extra to ensure they are visually appealing.
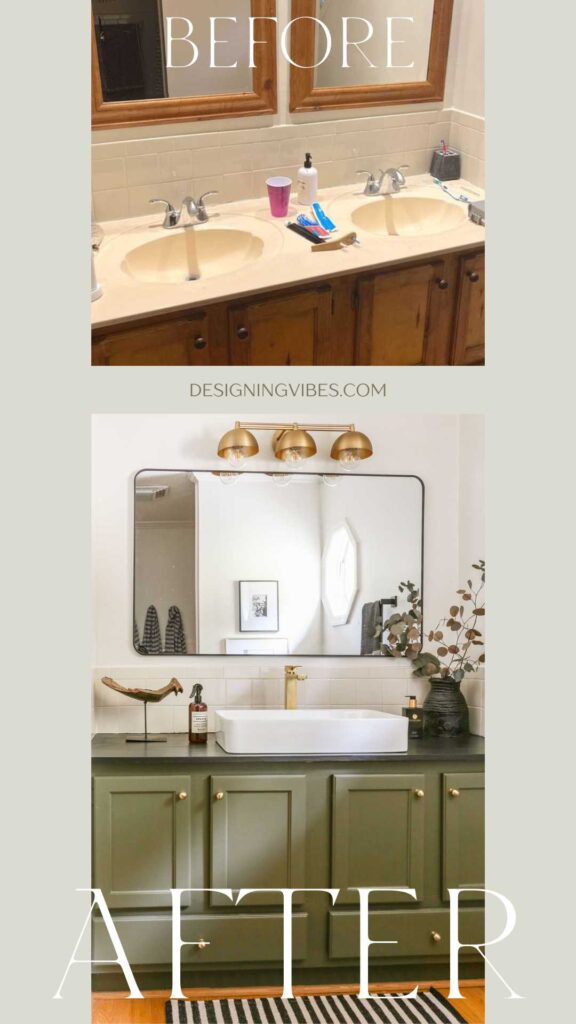
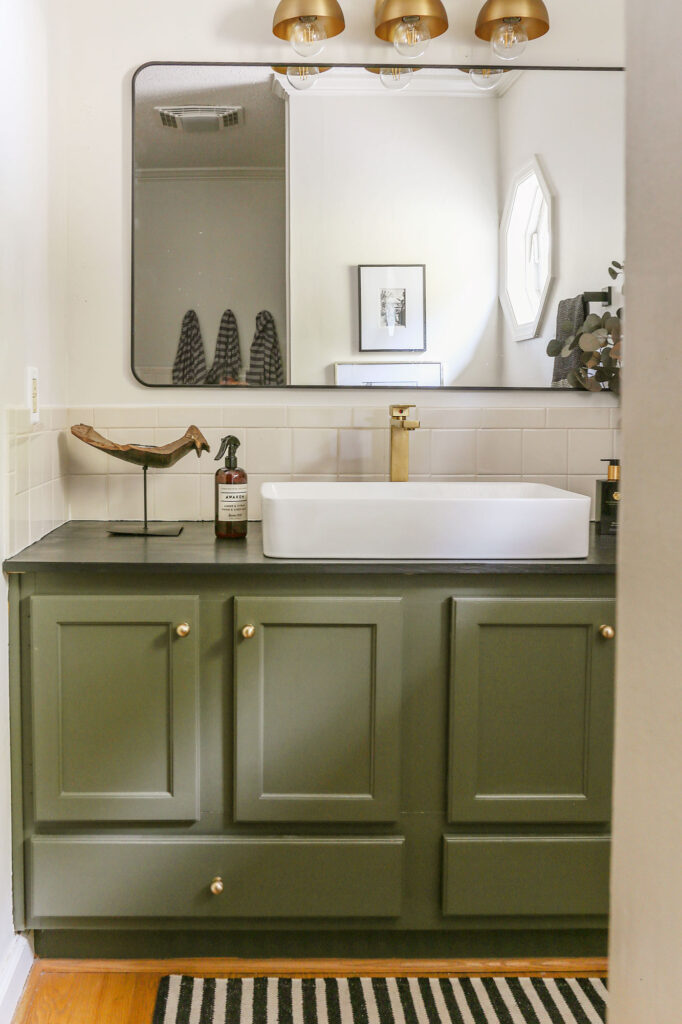
Although this budget bathroom remodel doesn’t look like something straight from the pages of my favorite design publication, it is still a vast improvement from where it began.
And while I may eventually get around to installing luxury vinyl tile floors in here (my boys are not very kind to these original hardwood floors), I would rather save my monetary resources for areas I use on a daily basis (like my kitchen).
After all, my little crumb snatchers have no regard for design or cleanliness (you don’t even want to see how badly trashed out this space gets in real life).
To conclude this post, I wanted to give you an itemized budget breakdown and shoppable source list directly below …
**For your shopping convenience, this post contains affiliate links. As a Reward Style and Amazon affiliate, I earn commission on sales at no extra cost to you.**
Cheap DIY Bathroom Makeover Budget Breakdown and Source List:
- Wall Paint – Sherwin Williams Shoji White – $0
- Vanity Paint– Benjamin Moore Dark Olive (in Sherwin Williams Emerald Urethane line)- $70
- Mirror- Home Depot – $100
- Light Fixtures- Amazon– $50
- Vanity Hardware- Amazon – $20
- Basin Sink- Amazon – $80
- Faucet- Amazon– $80
- Extra Long Shower Curtain- Amazon– $30
- DIY Countertops Tutorial– $0 (leftover supplies)
- TOTAL INVESTMENT= $430
**Updated: 10-10-24: I finally got around to refreshing my bathroom flooring. Using these peel-and-stick luxury vinyl tiles from Lowes, I was able to complete the flooring project for $100….
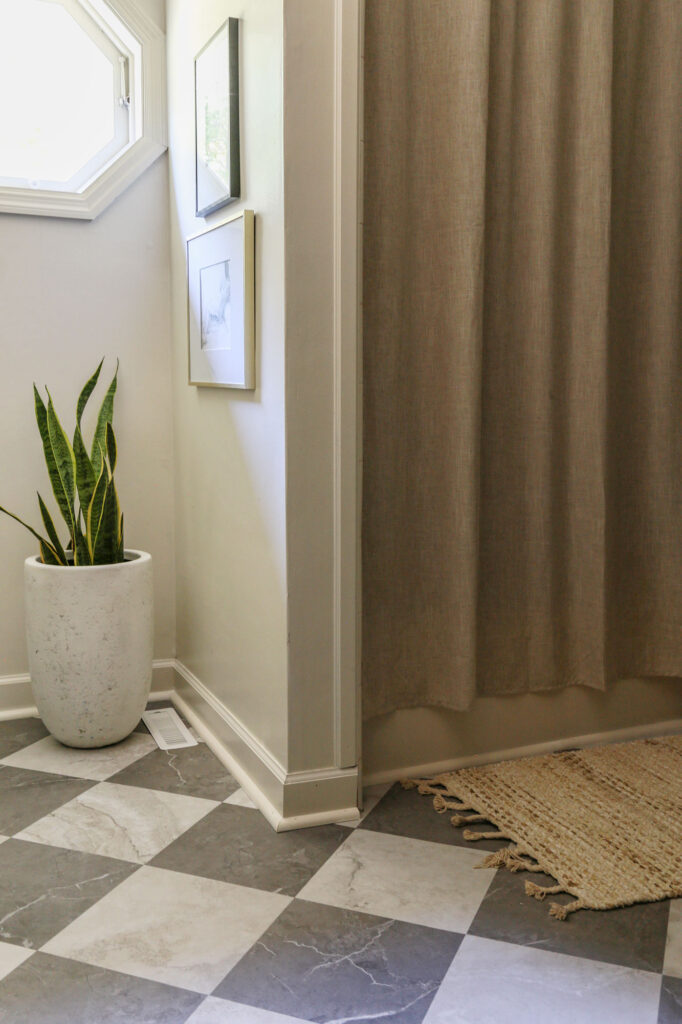
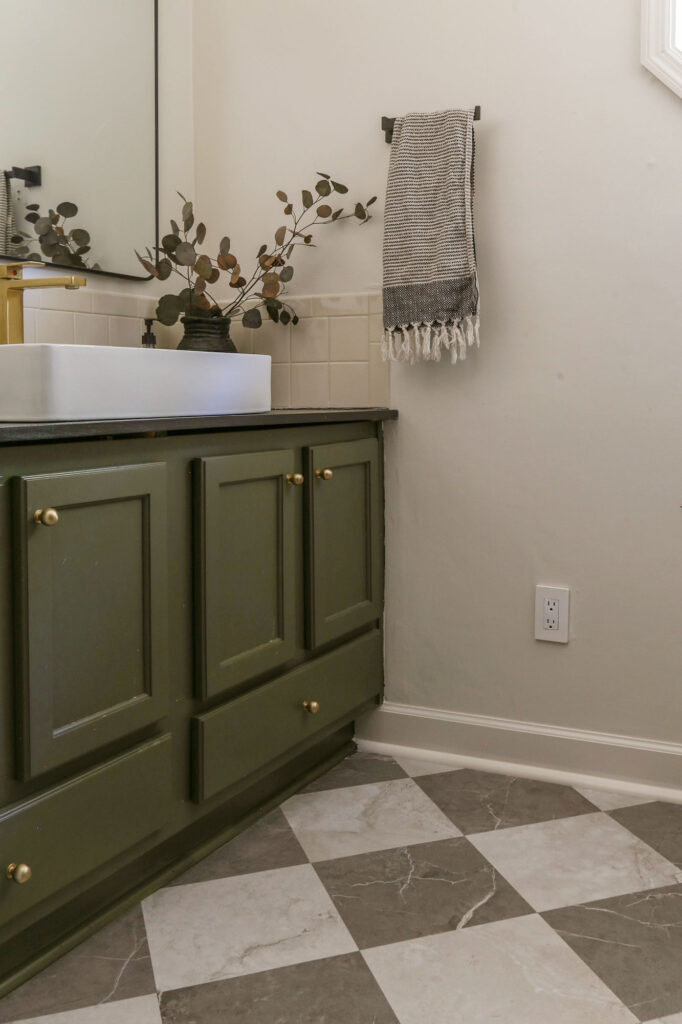
Ultimately, increasing the total cost of this entire bathroom makeover project to $530.
I hope that my cheap bathroom remodel empowered you to take charge of your outdated space. With just one DIY project at a time, you can make miracles happen, my friend!
Thank you so much for stopping by and spending some time with me. It would mean so much to this small business of mine if you could share this post with a friend or on social media..

Now get out there and design some good vibes along with a fabulous life!
