
Beginner’s Guide: DIY Kitchen Remodel on a Budget
While it would certainly be ideal to have tens of thousands of dollars available to invest into a kitchen renovation, that simply wasn’t the case for my husband and I.
With over $40,000 worth of more pressing, surprise projects surfacing during the first two years of our fixer upper journey (not to mention a baby on the way), it quickly became apparent that my “dream kitchen” was not going to be feasible.
If I wanted to make any cosmetic updates to our 1980’s home at all, I was going to have to get scrappy .
In today’s post, I am sharing some clever hacks (and products) that we utilized for staying within a restrictive budget while transforming our outdated kitchen.
the power of paint
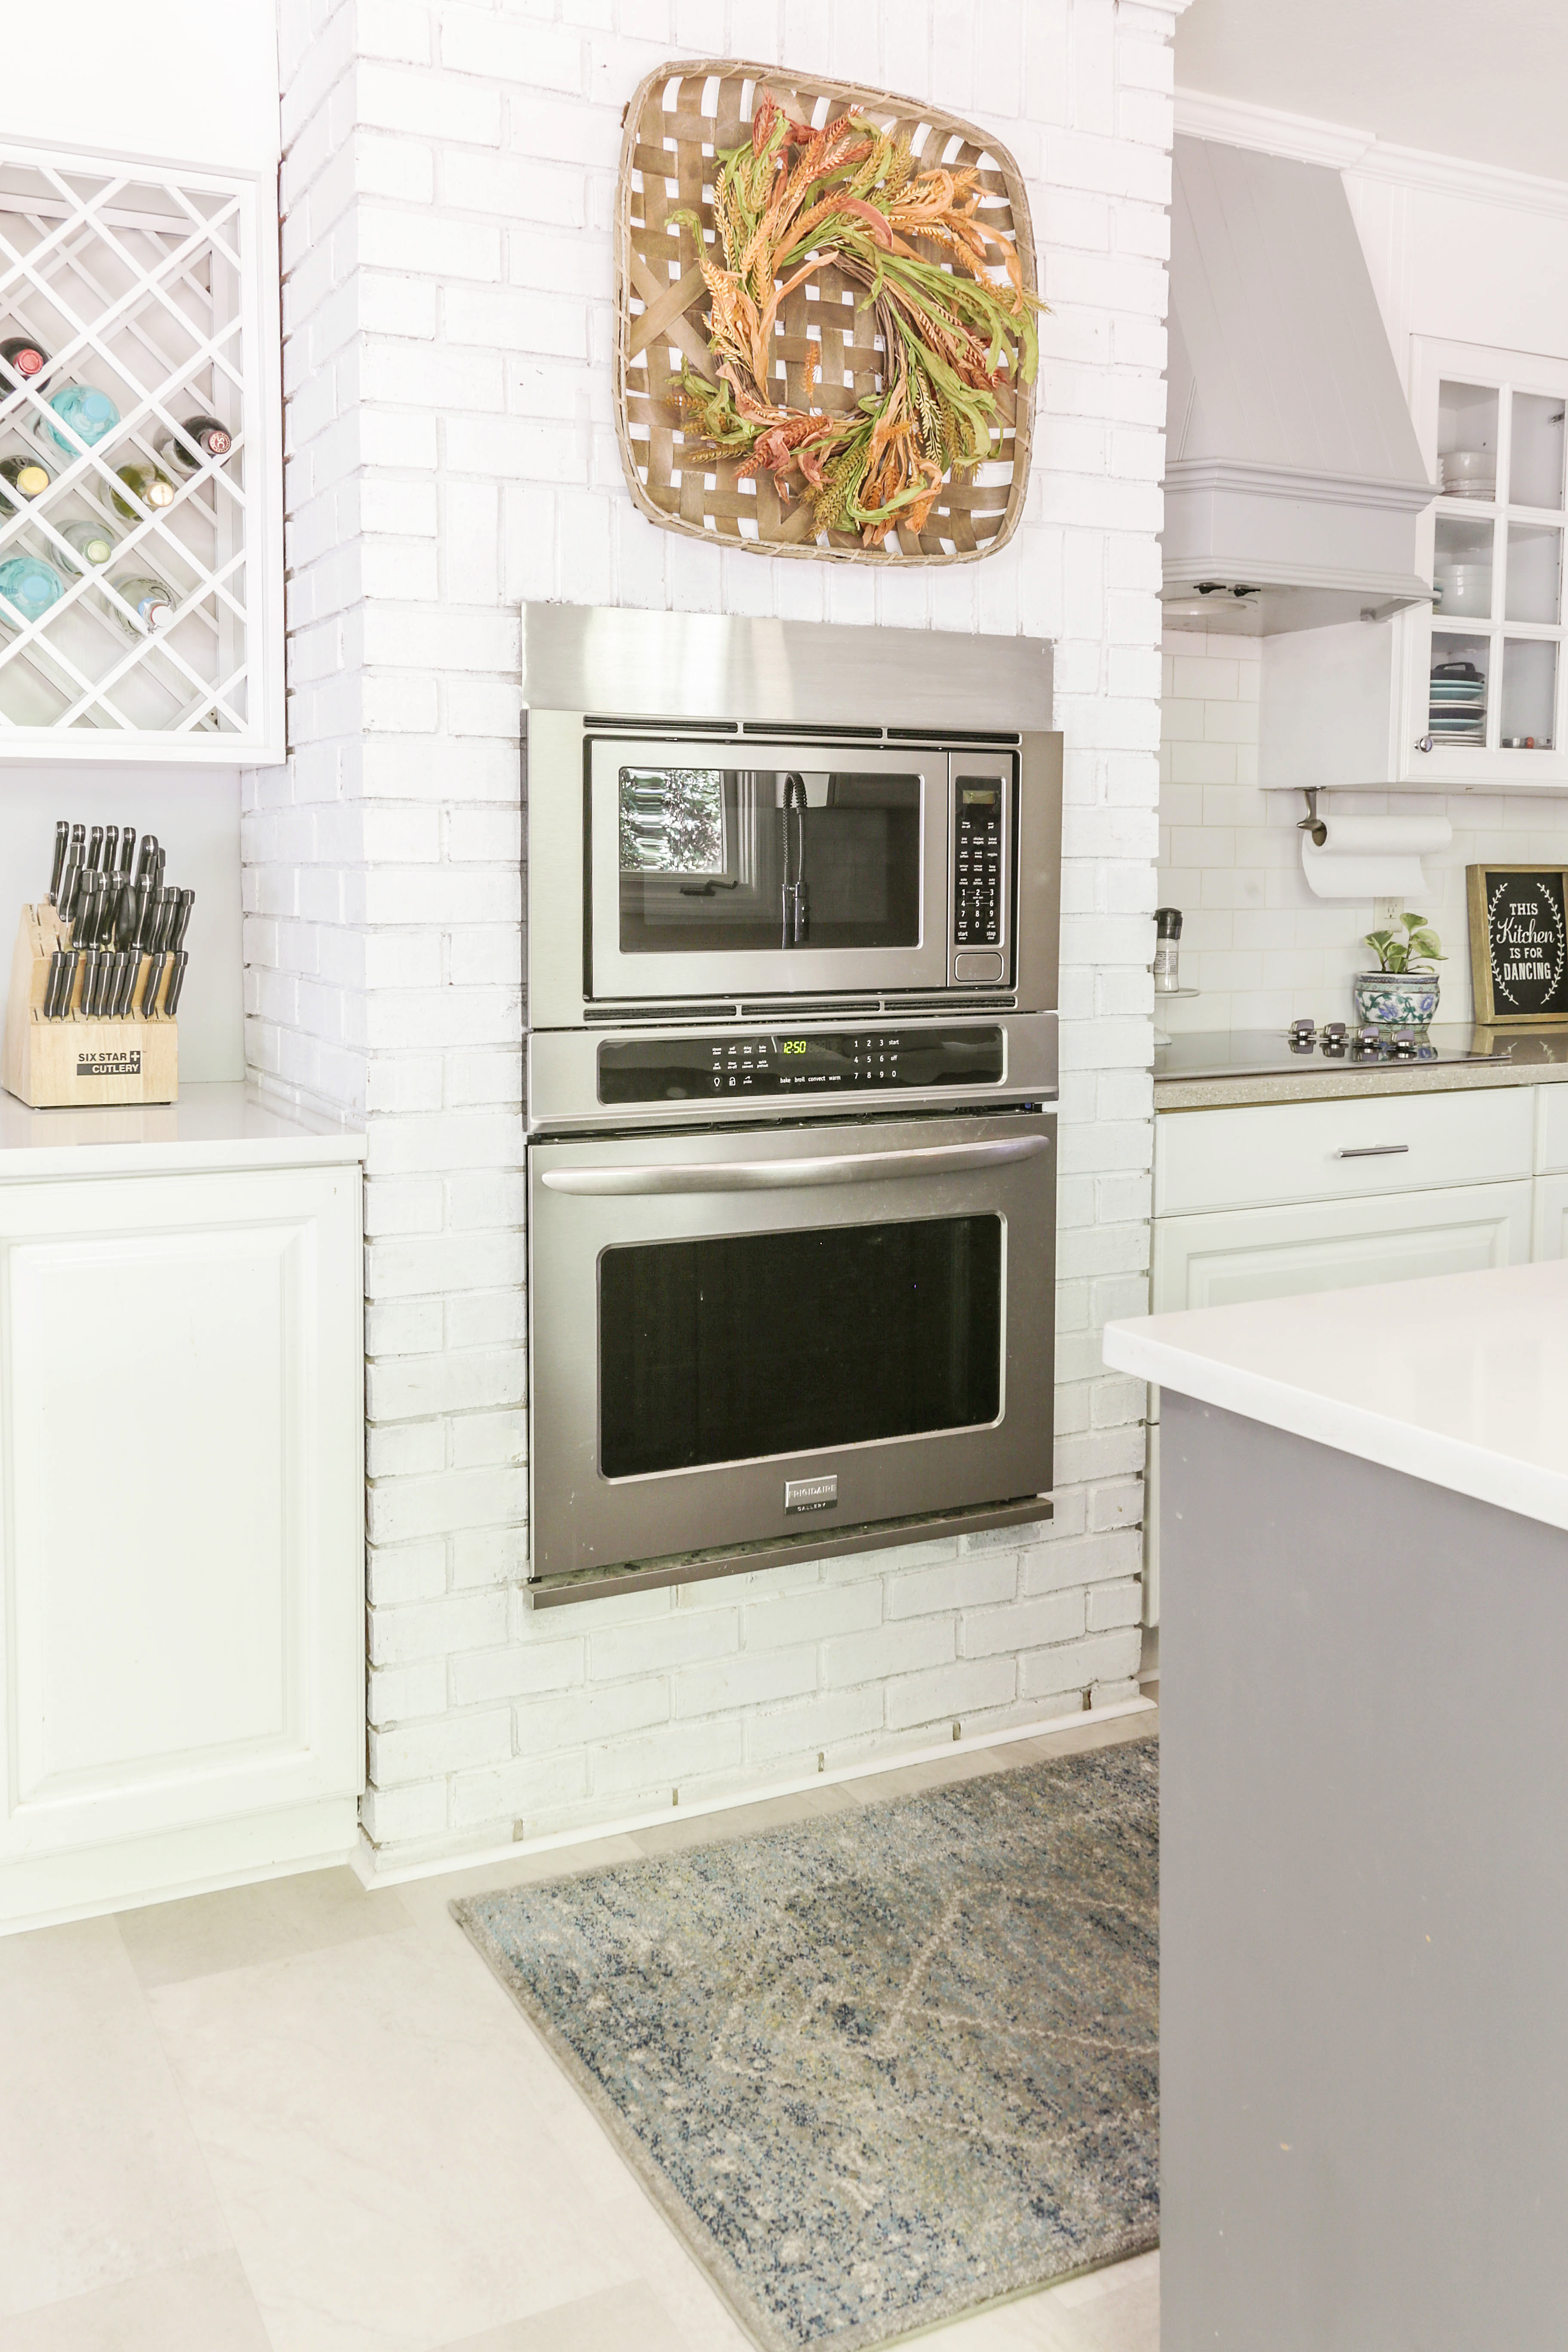
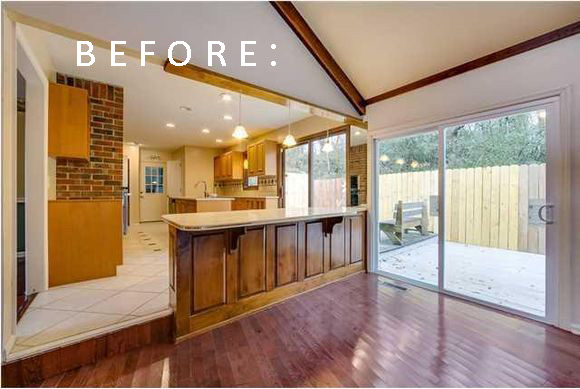
When we moved into our neglected ranch home almost 5 years ago, all we could really afford in this space was new paint (and a new wall oven unit).

I know this is probably not a mind-blowing revelation for you, but paint can truly work wonders for a space…

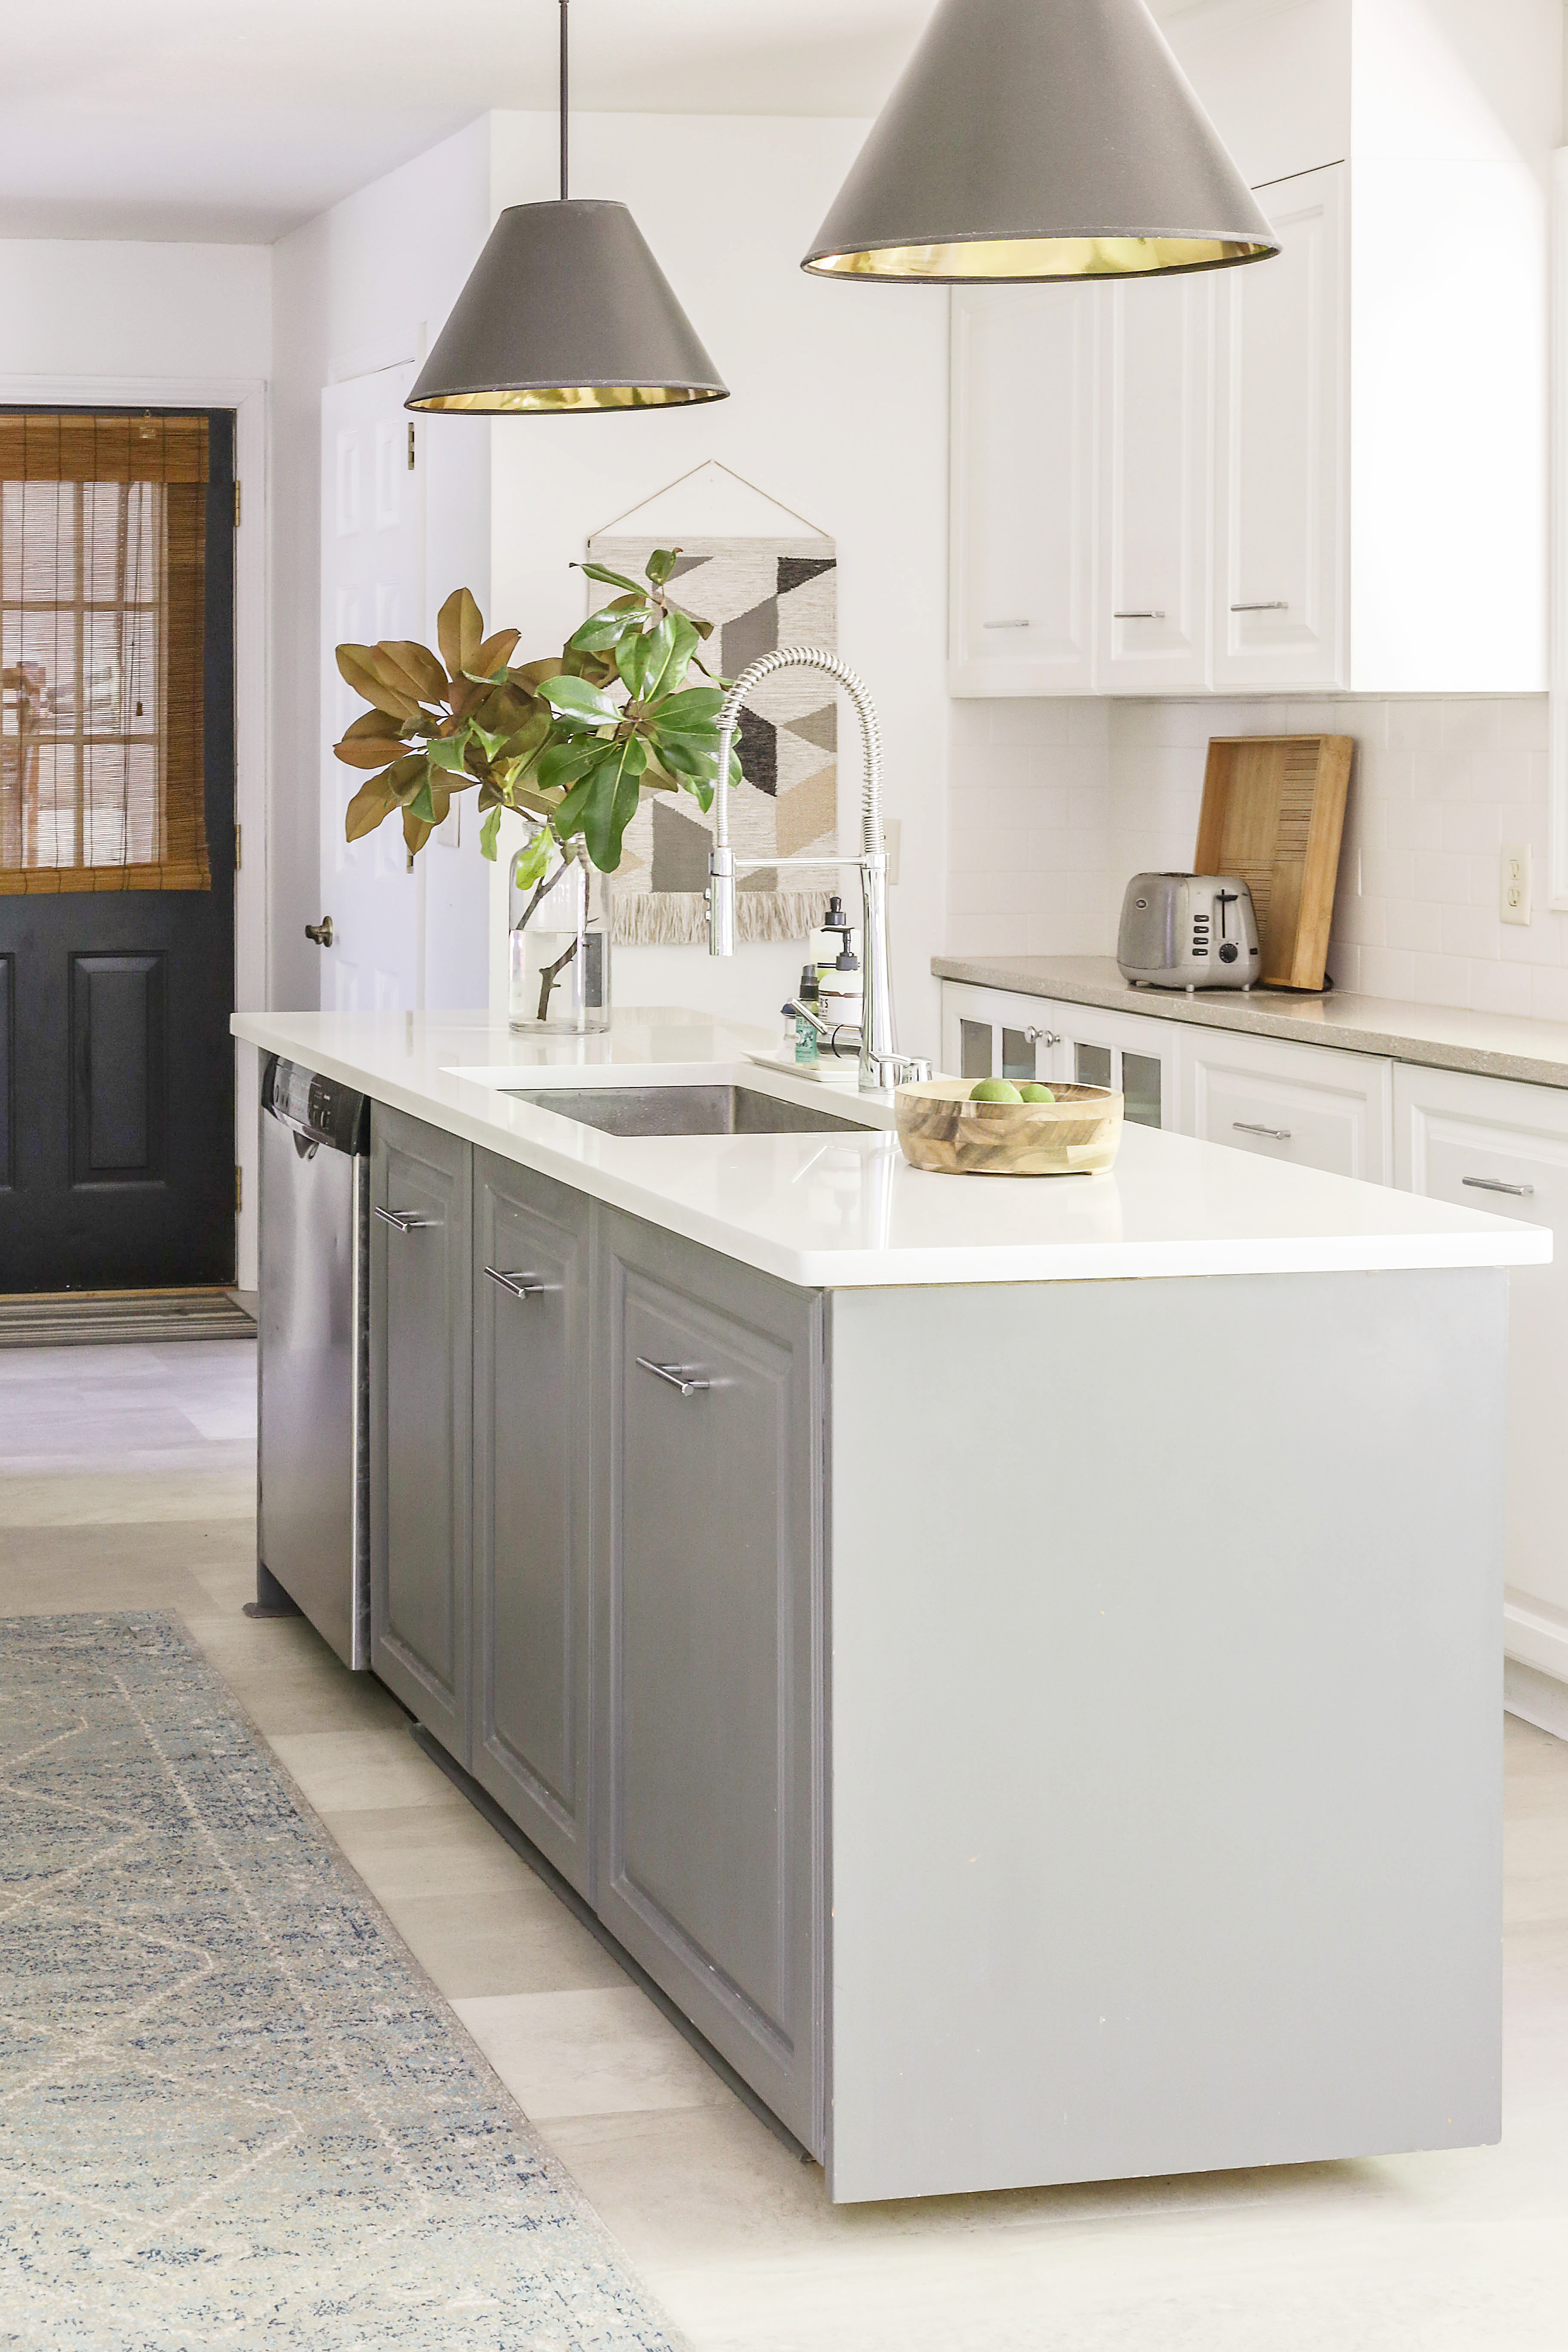
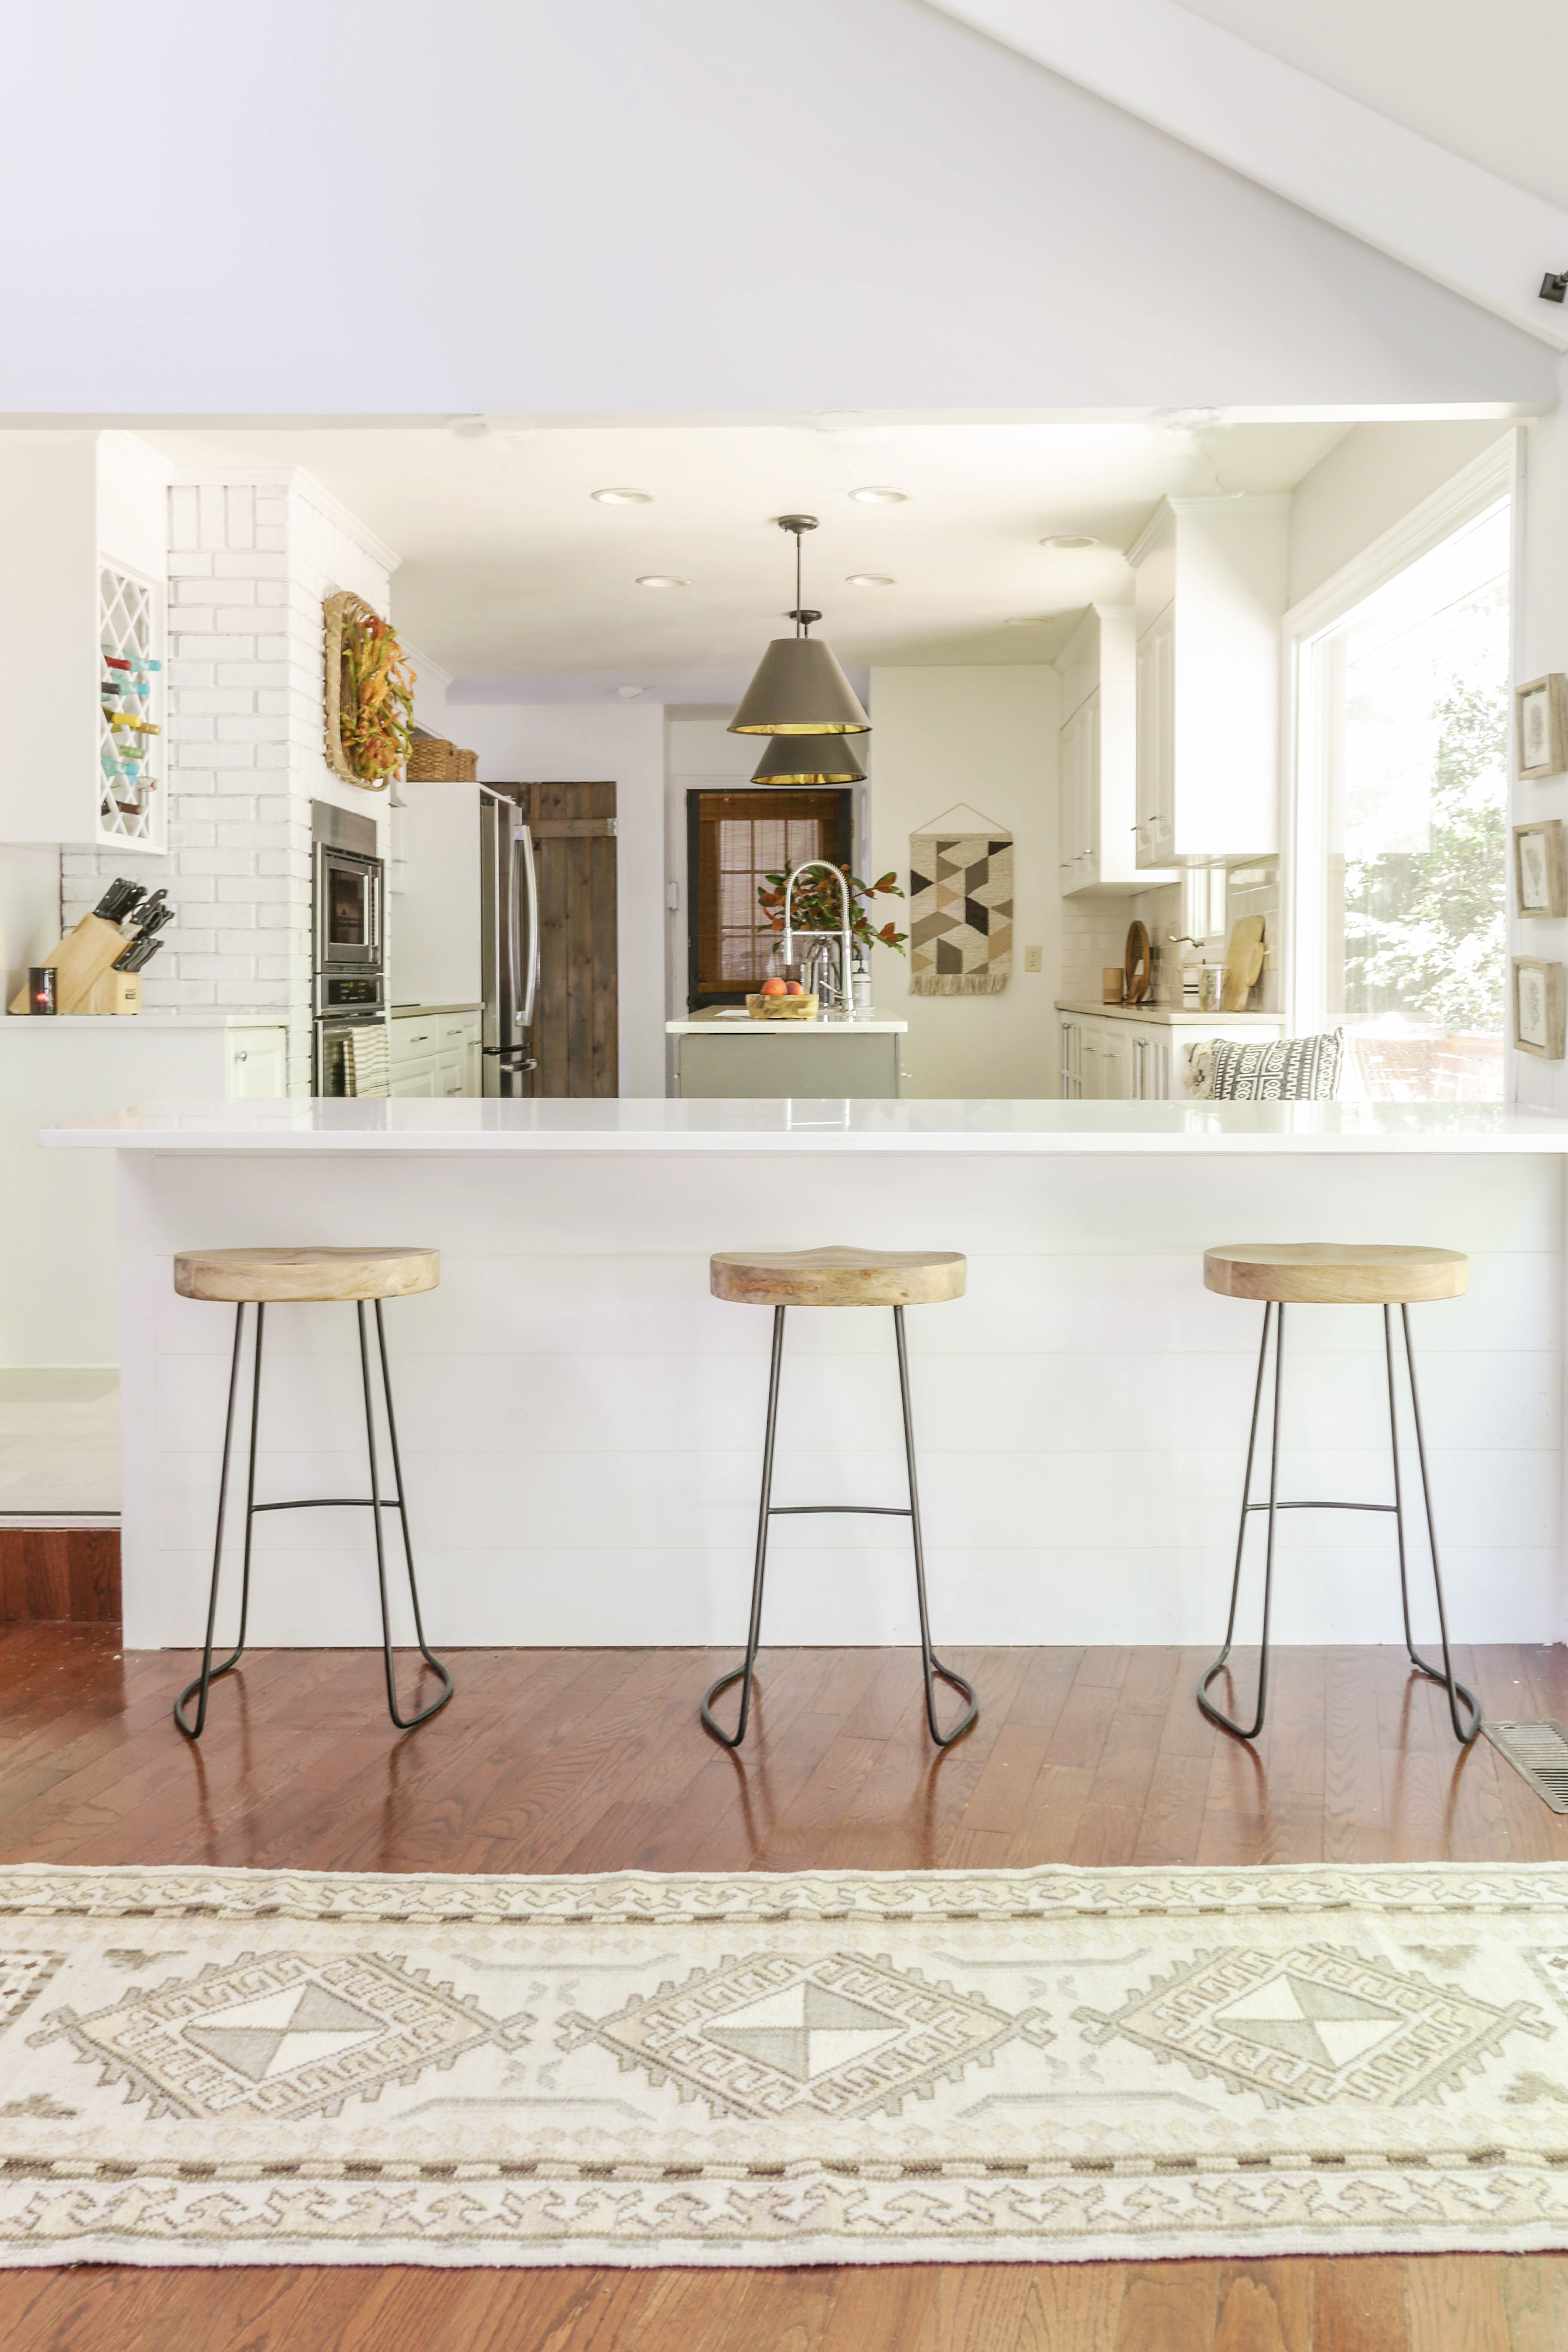
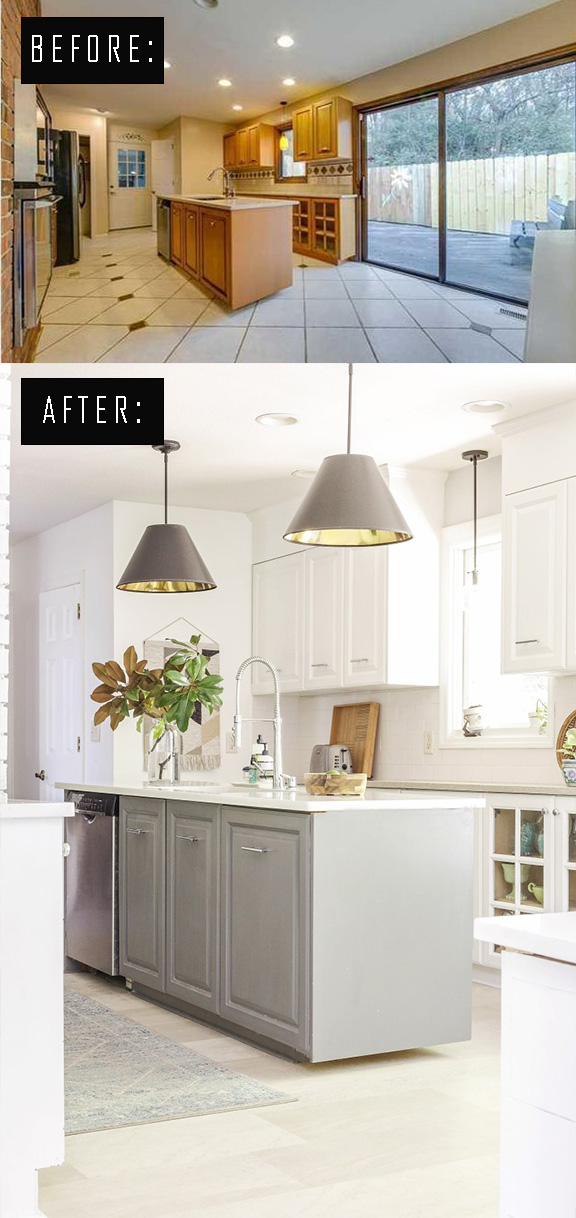
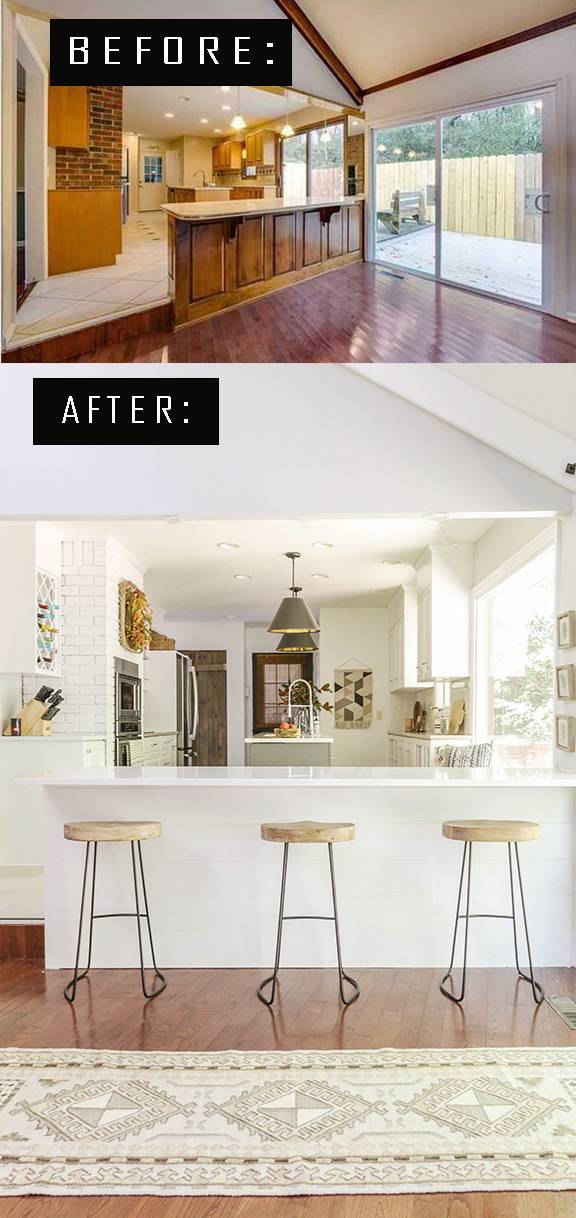
If you are on a highly-restricted budget, I suggest first starting with paint. Not only did we paint the walls (Benjamin Moore’s “Chantilly Lace”) and the cabinets, we also painted the entry door, the brick oven surround and the hood vent…
And while we did originally hire a professional to paint the kitchen cabinets (this was about a $1200 investment), after discovering a product known as Milk Paint (you can read the full tutorial on using Milk Paint here), I am confident I could have painted all of the cabinets myself.
In fact, I have painted several cabinets with Milk Paint since discovering the product (and you can read my review for it here), and the finish is super forgiving. Not only is the product very forgiving, it has proven to be just as durable as the oil-based paint applied by the professional.
Bottom line: Never underestimate the transformative powers of paint, my friends!
DIY Flooring Hacks
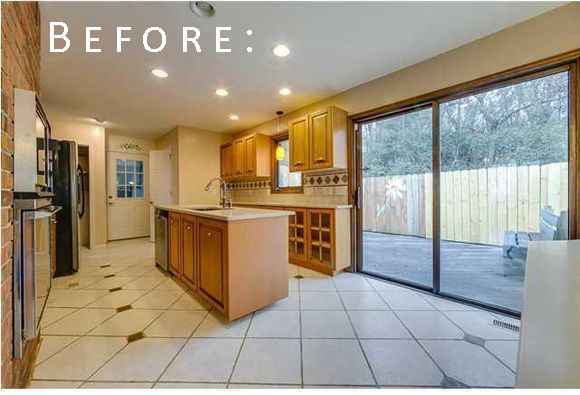
While fresh paint alone was enough to keep me content for a year or so, the original ceramic tile flooring was in pretty bad shape.
Although I was able to deep clean the filthy tiles and restore the grout (you can click here for that tutorial), I have never been a fan of grout lines. Not only that, but with an all-white kitchen, I really wanted the flooring to provide a bit of warmth and texture.
Curious to know just how much new ceramic tile flooring would cost, I received some quotes. Just to demo the existing tile, I was looking at $1000 (this was not even including installation of the new tile or product costs).
Feeling hopeless, I resented the hell out of my tile floors for months until I started to think outside of the box- researching how to install tile over existing tile. That is when I came across a life-changing product known as Luxury Vinyl Tile.
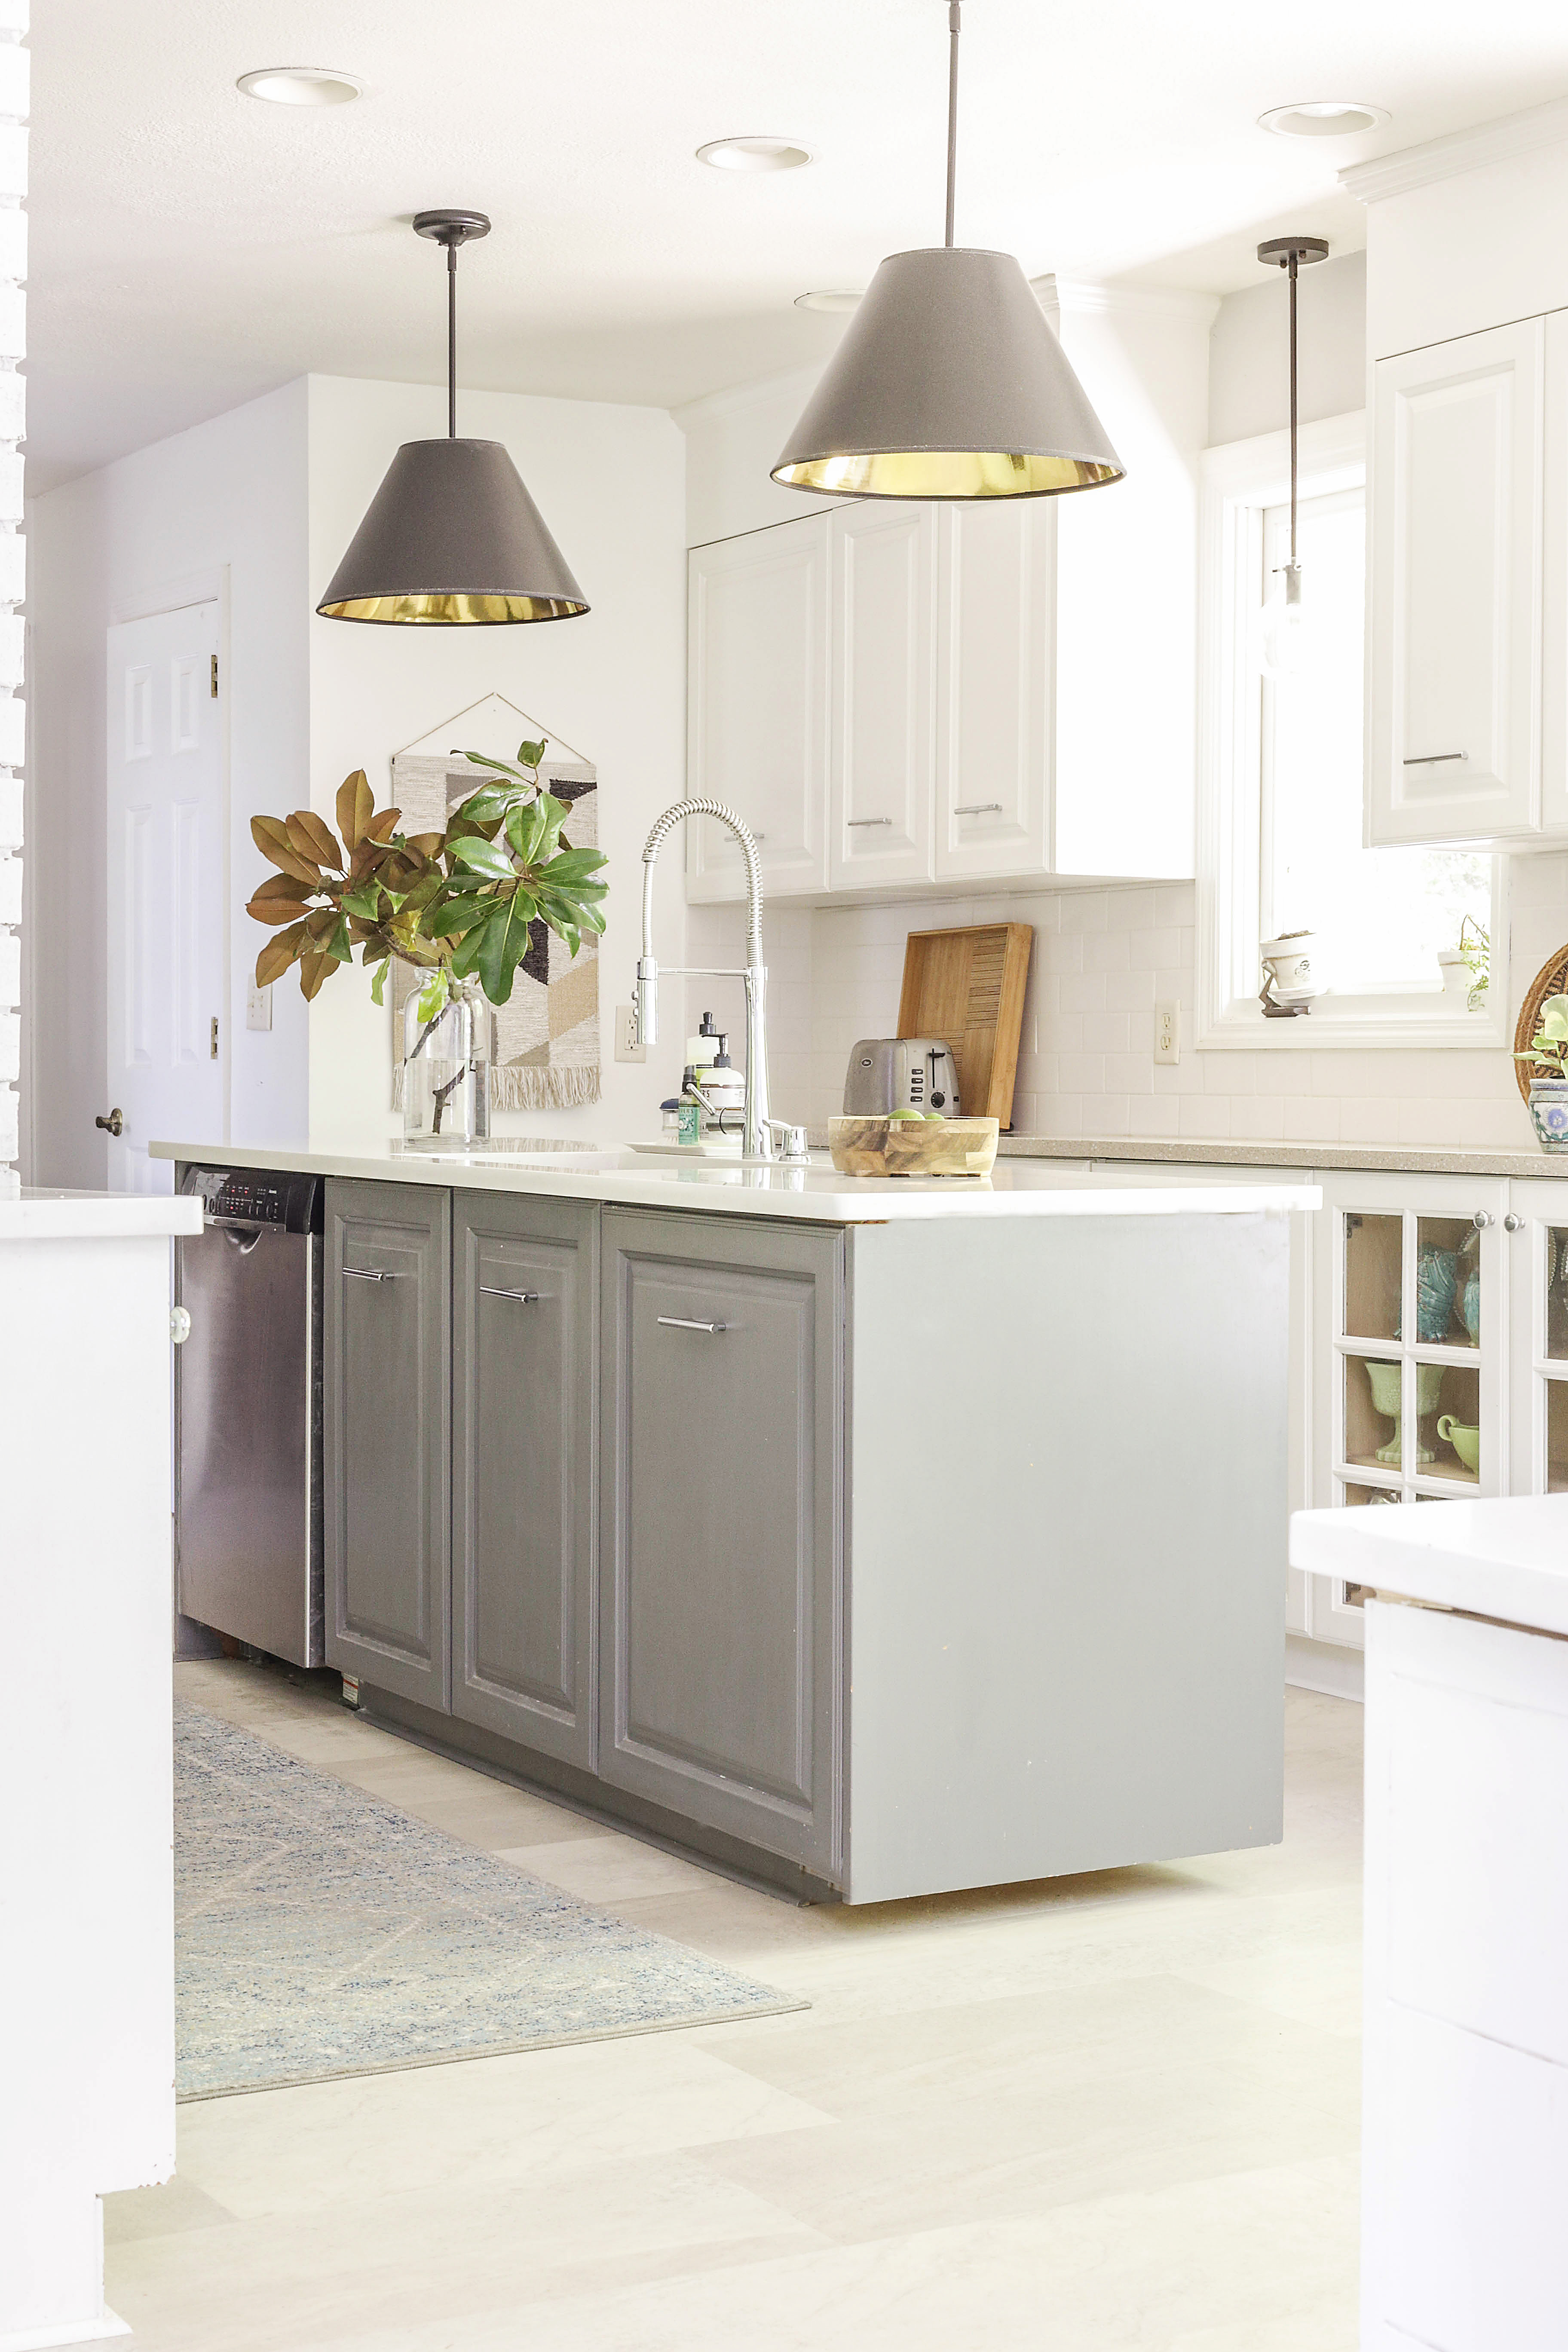
Lacking any prior experience installing floors, my husband was able to install the floating LVT over the existing tile floor in only one weekend (all for under $1000)…
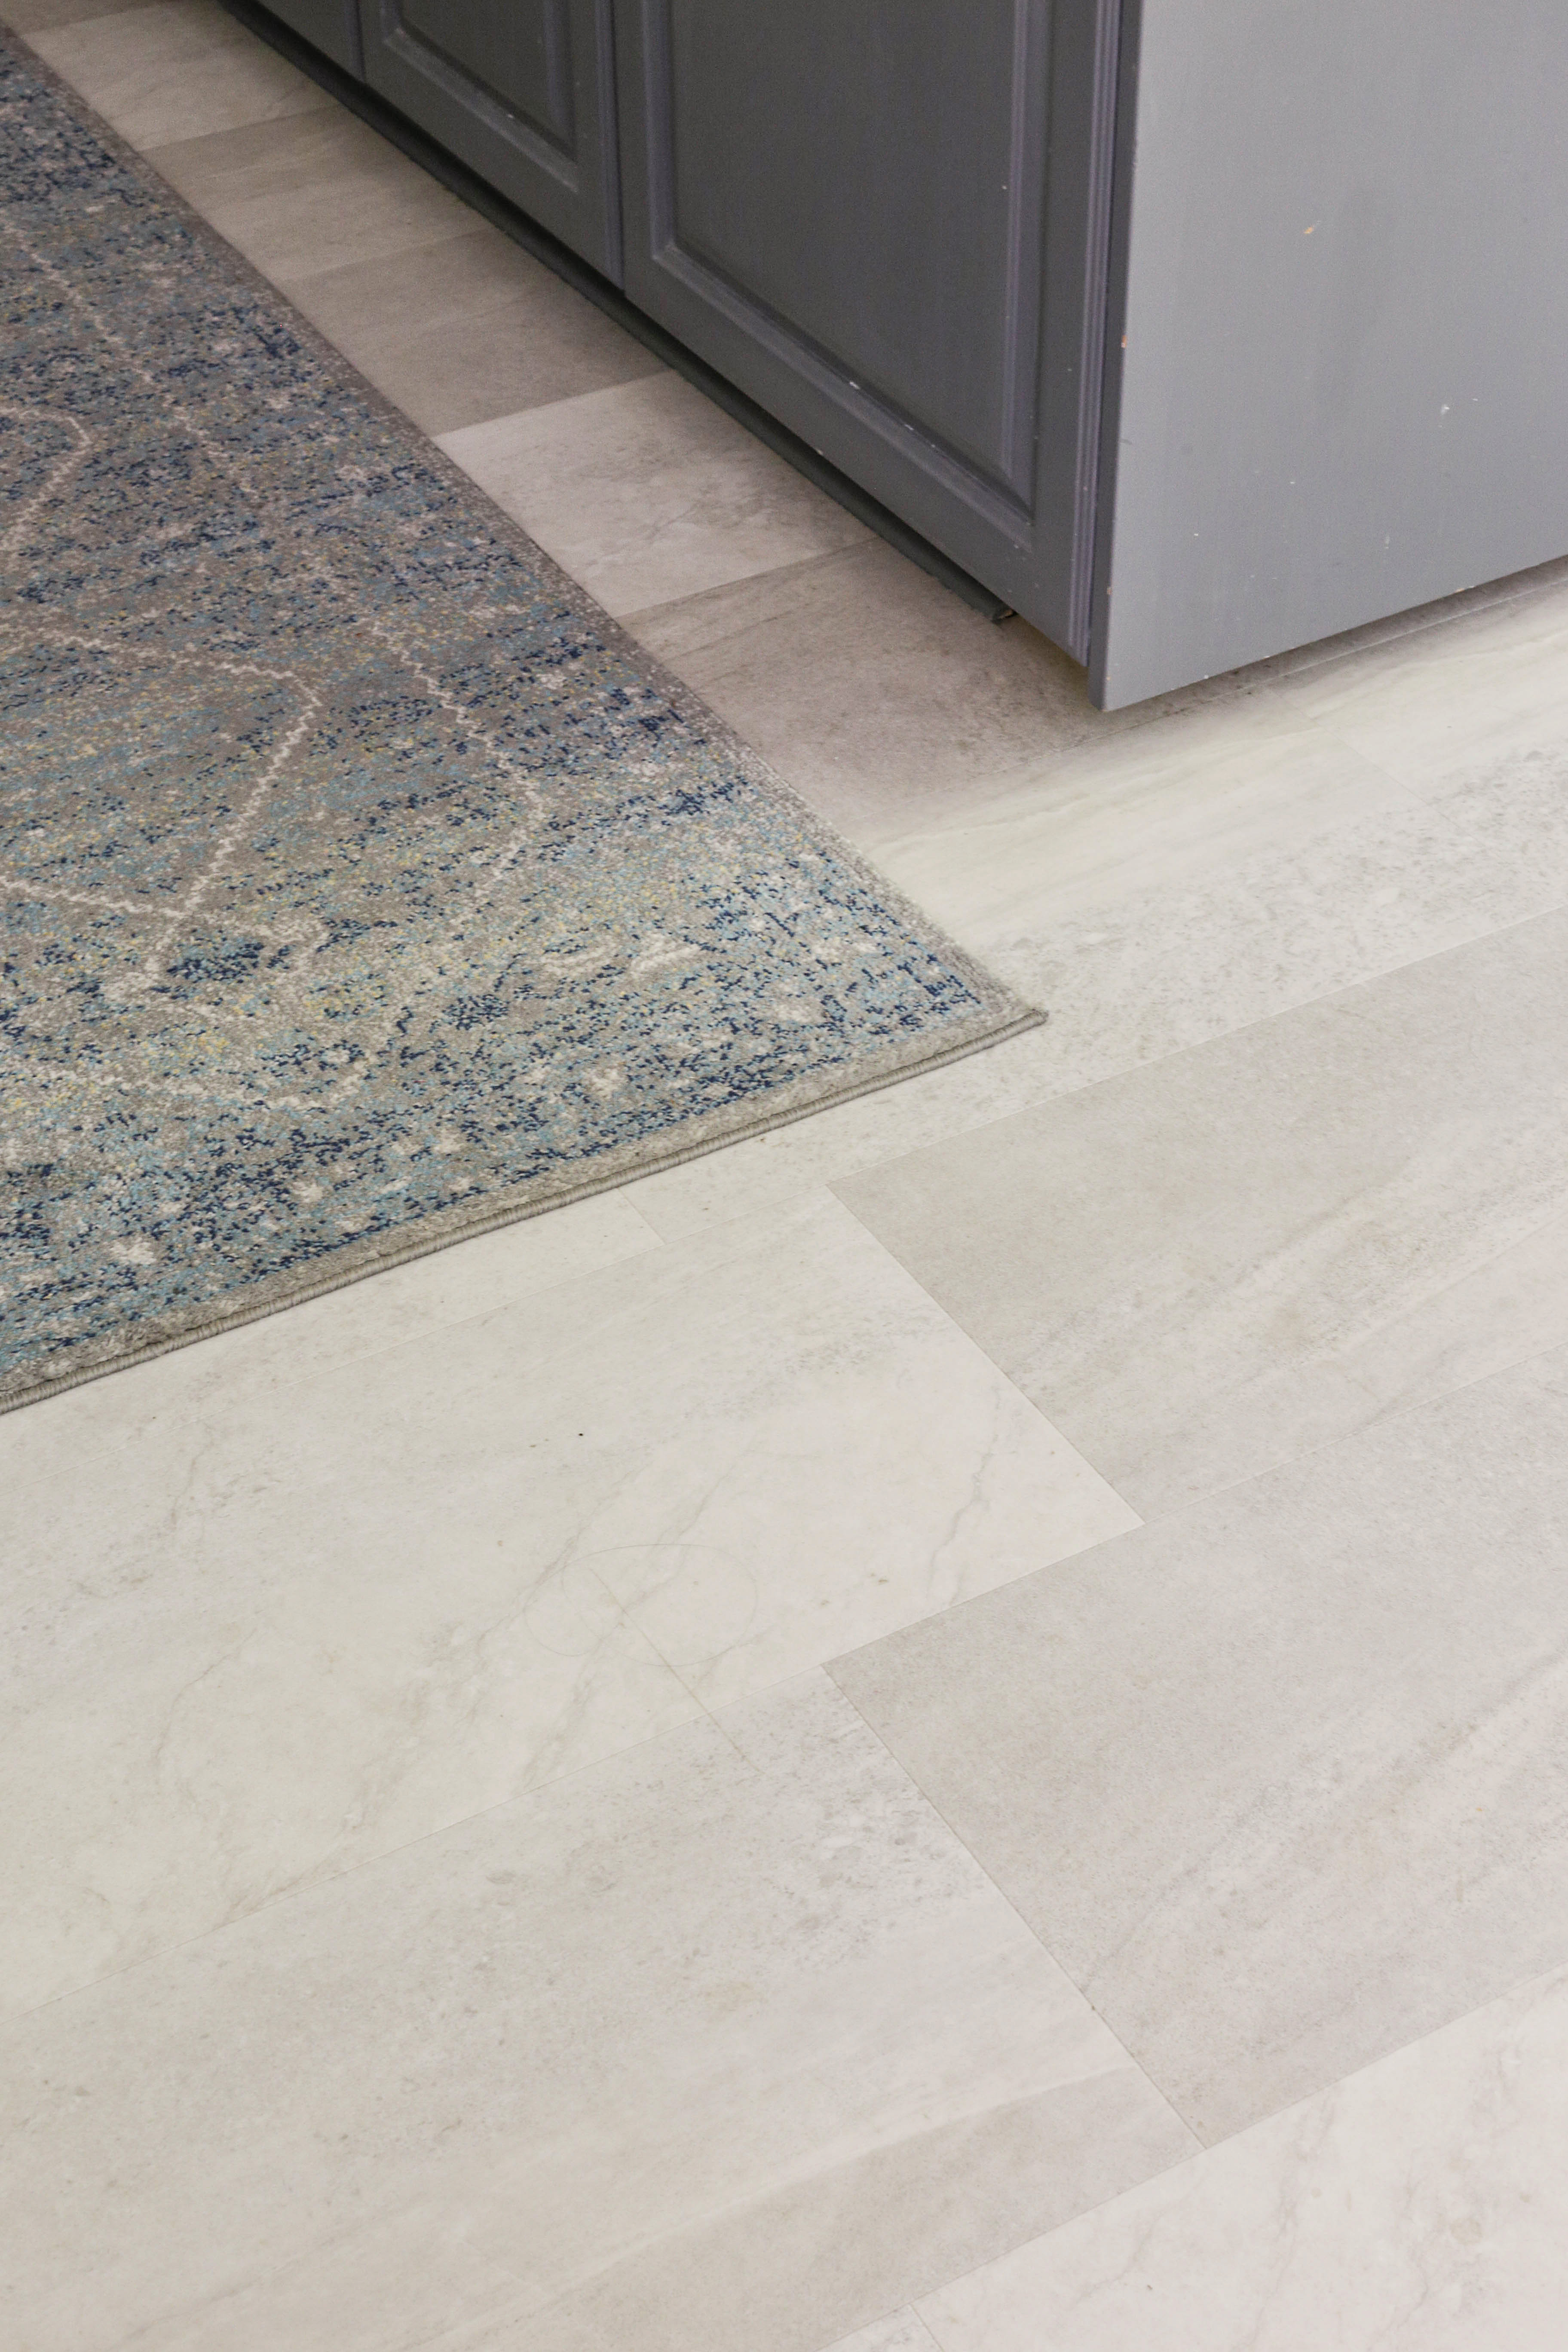
After almost two years, I am happy to say that we are still extremely satisfied with our decision. Not only is it easier to clean and more comfortable to walk on, the click and lock LVT brought our 1980’s kitchen into the 21st century.
Bottom line: If you are too intimidated at the thought of installing ceramic tile yourself, click and lock flooring is much more user-friendly and approachable for beginner to intermediate DIY-ers.
DIY Woodworking Hacks
One major way we not only infused character into our kitchen, but elevated some of the design details, was through the use of some clever, DIY carpentry.
In fact, our Modern Farmhouse pantry door was the first woodworking tutorial I ever shared on this little blog of mine (to read the full tutorial click here). For less than $100, we gave the space some much-needed character….
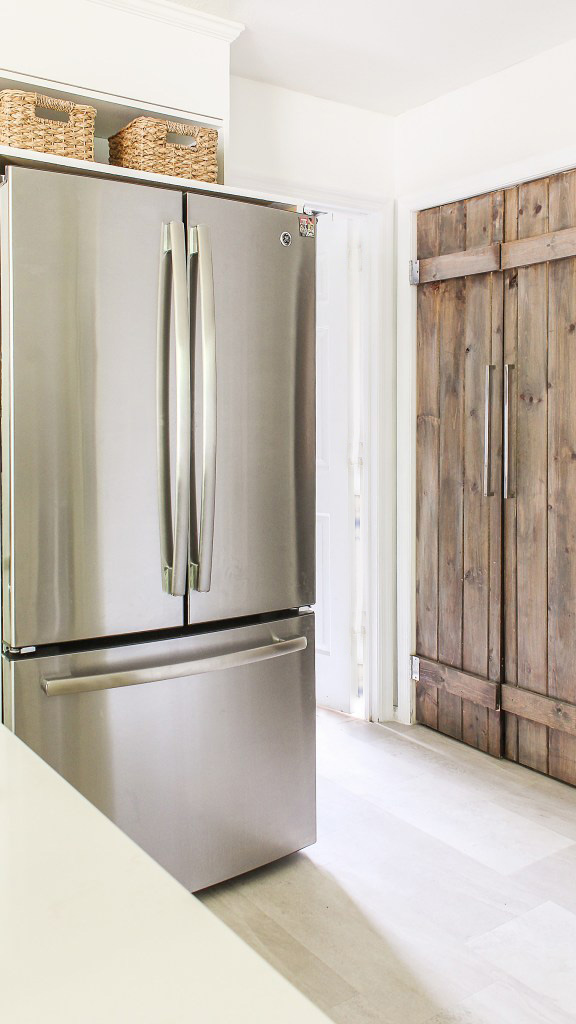
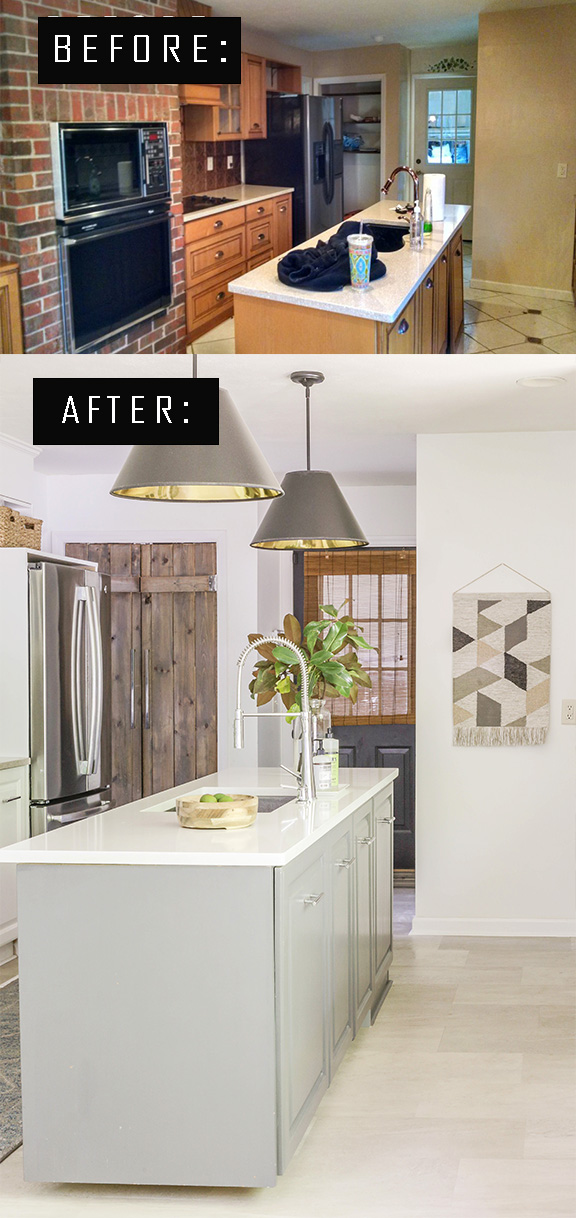
To elevate the aesthetics of our layout, my husband found a clever way to frame in our refrigerator. (You can read that tutorial here). To give the illusion of taller, grander cabinets, we added mdf and crown molding to the top of our existing cabinets.
As the years have gone by, I am happy to say that we have grown much more confident in our DIY skills. So much, that my husband was actually able to build a large section of kitchen cabinetry for under $200 (we did this for our butler pantry, but you could totally apply it to a kitchen in need of cabinets). You can read the DIY kitchen cabinets tutorial here.
Bottom Line: If you are a DIY-er, look for opportunities to incorporate your woodworking skills (or use others’ tutorials). This not only comes in handy for matters of function, but can be used as a tool to inject character on the cheap.
How to Save on Counter-tops
Once this blog of mine finally started to bring in some income, I decided to gift myself with new quartz countertops. Come to think of it, the bulk of our remodel expenses were actually a result of our new counters.
So why did I specifically decide to go with a quartz material? Well… not only is quartz more cost-effective (I have Silestone’s Statuario Quartz) than Marble, it is way more durable than other materials as well. (The stuff is basically indestructible).
In an effort to save on materials, I decided to only replace the countertops on the island and the bar (the perimeter of my kitchen is still the original quartz countertops, but they look like concrete, so I didn’t really mind them).
Not to worry… if you don’t have upwards of $3000 to spend on new quartz countertops, there are plenty of more affordable alternatives (think butcher block or concrete). In this separate tutorial, you can read how I made inexpensive wood countertops for under $50
Another tip I have for you newbie remodelers…be sure to shop around when selecting your materials. I was actually able to score the best deal when Home Depot was having a special promotion on Silestone products. A local competitor offering the same product was considerably more expensive.
Bottom Line: To cut back on counter-top expenses, invest in a more show-stopping stone for your island. Then go with a more modest and budget-friendly material for the perimeter.
Backsplash Hacks
While there are plenty of alternatives to traditional tile backsplash (think shiplap and beadboard), I was absolutely determined to have white subway tile in my kitchen.
Lucky for me, standard subway tile is relatively budget-friendly. For less than $400, we were able to supply the materials for our subway tile backsplash.
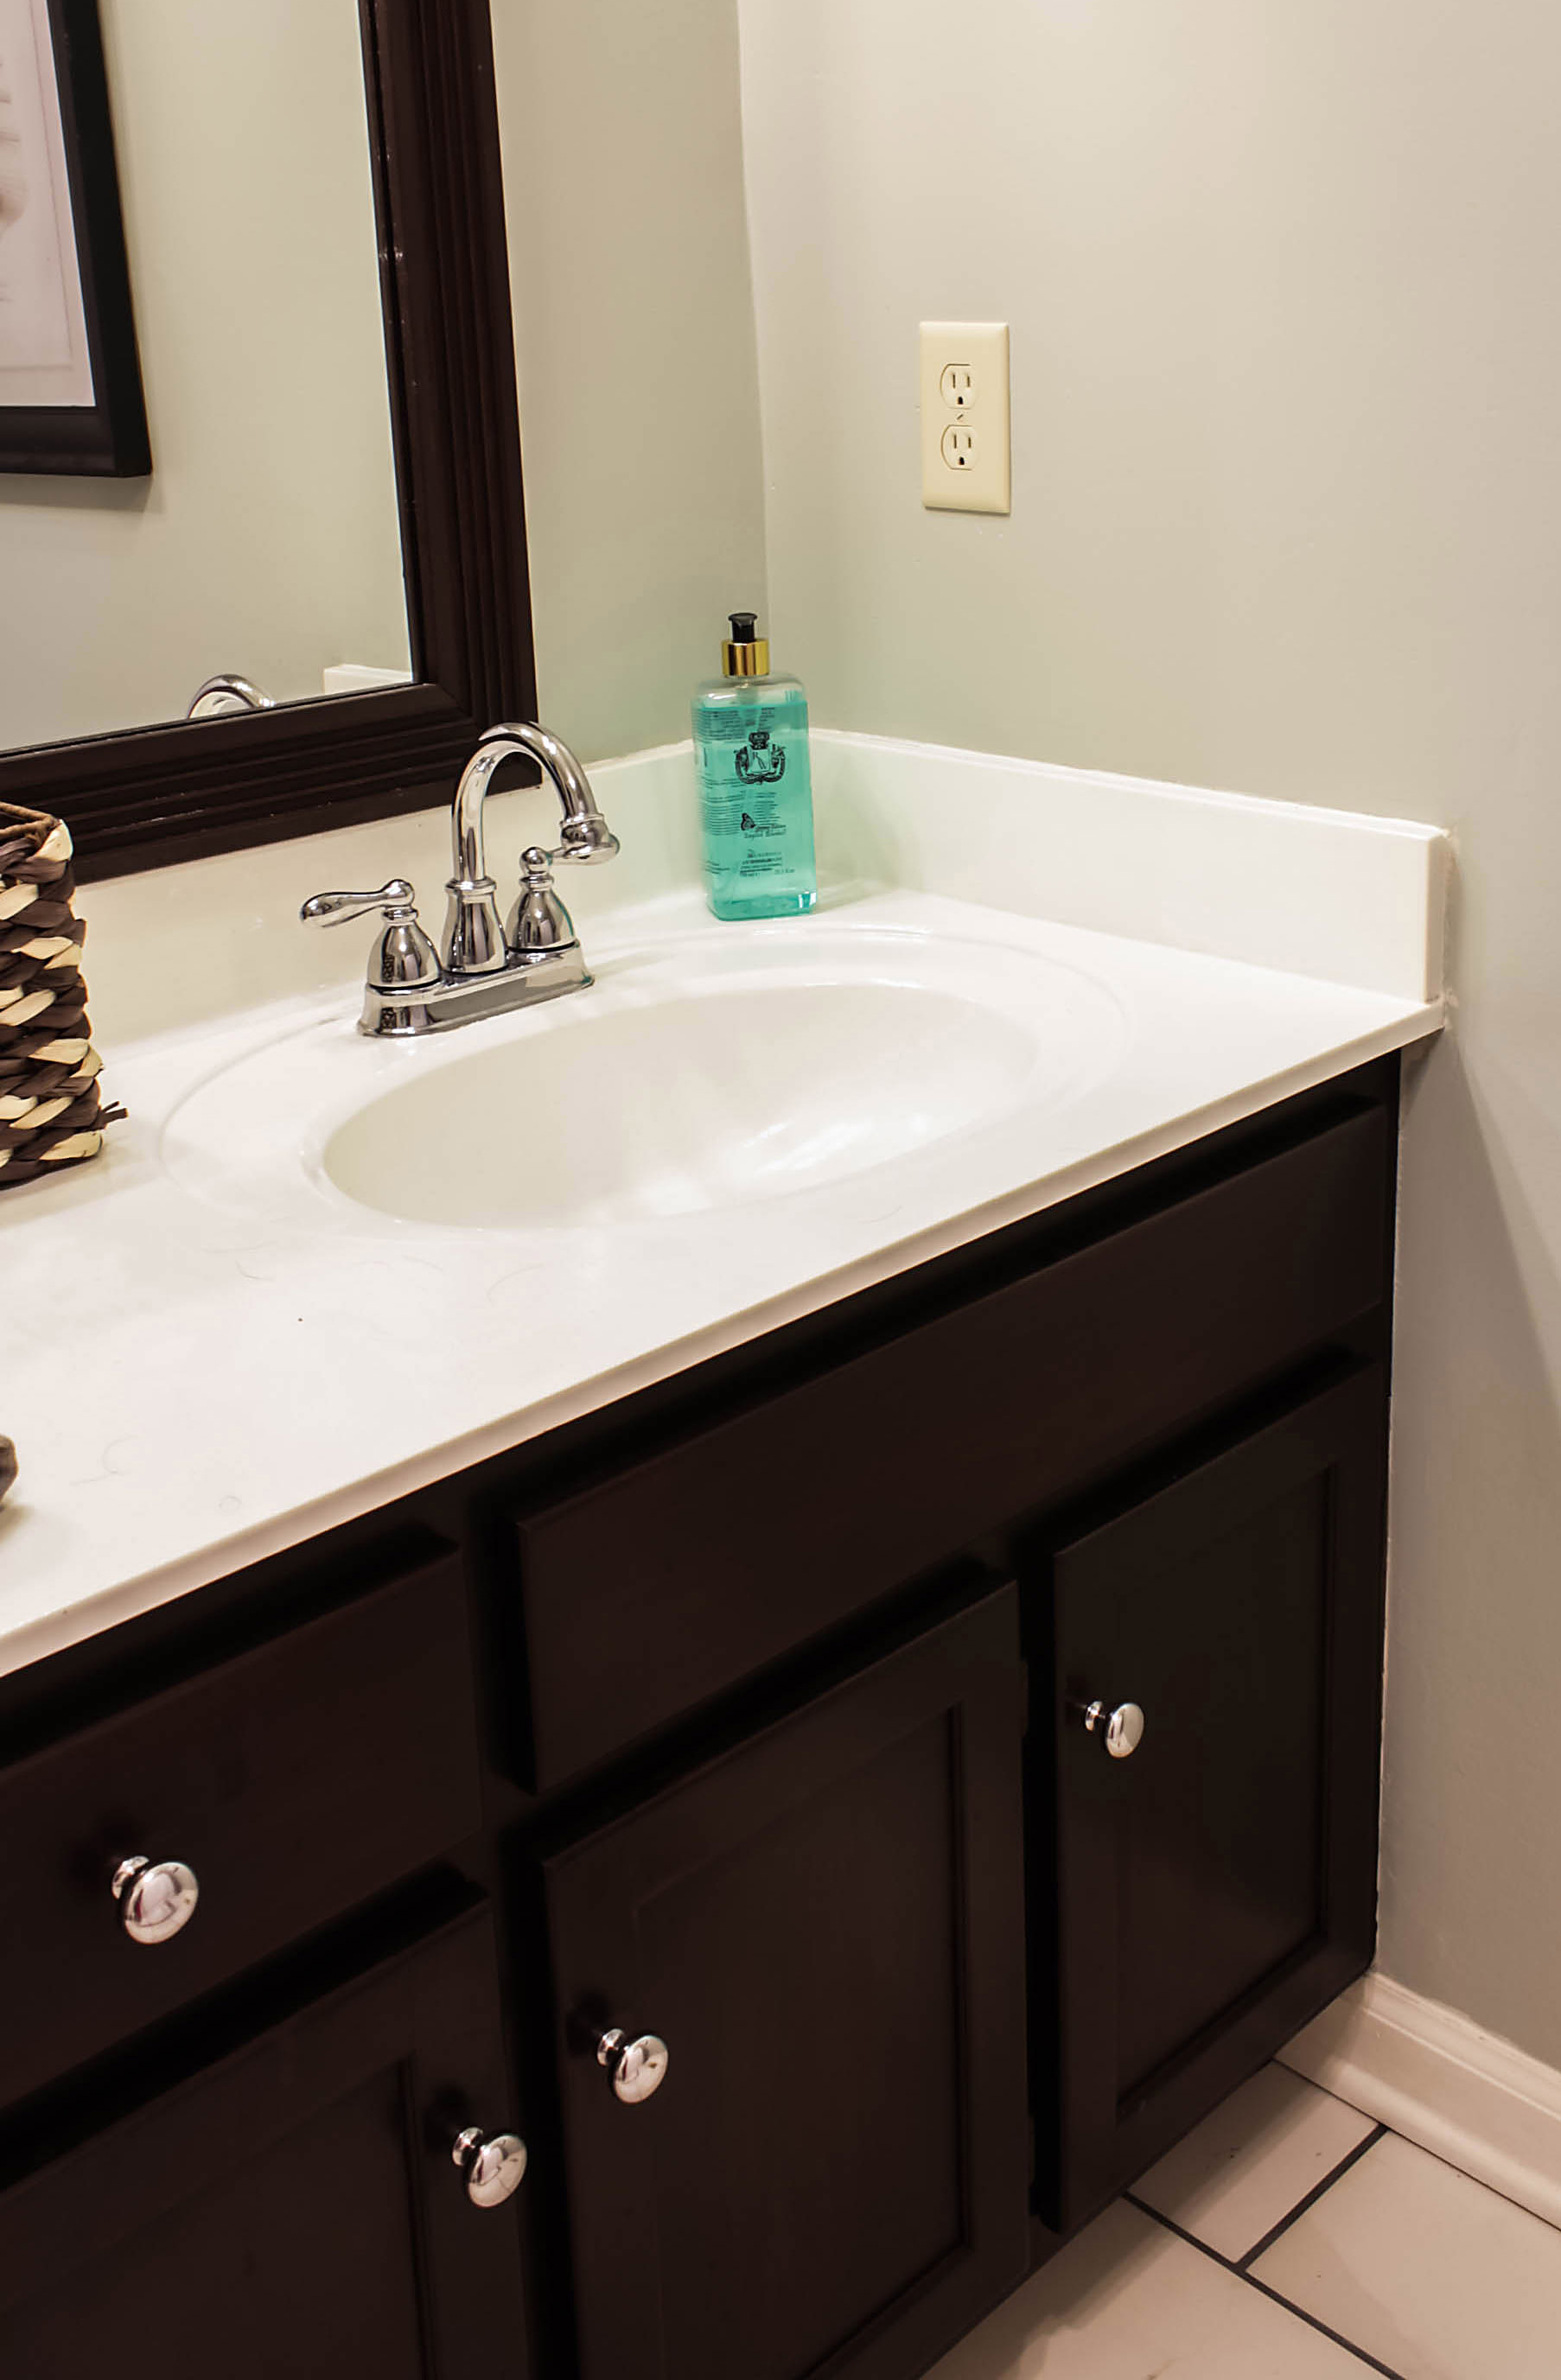
If you don’t feel comfortable installing real tile backsplash yourself, peel and stick vinyl backsplash is an alternative to consider. We actually installed a peel and stick tile in my powder room, and I am still pleased with the appearance of it. (You can read my review on the peel and stick backsplash here).
Bottom Line: There are plenty of DIY beginner-friendly backsplashes on the market. Consider shiplap or peel and stick vinyl tiles if you aren’t up to the challenge of installing real tile.
Be sure to scroll to the bottom of this post, for a list of relevant DIY tutorials and kitchen resources.
Hopefully the low-budget transformation of my 1980’s kitchen has given you some useful hacks to apply to your own fixer upper. Have I achieved the kitchen of my dreams? Not exactly. Have I worked wonders on an outdated space without going into massive debt? Hell yeah!
Now get out there and design some good vibes, and please share with a friend or on social media if you found this post helpful(it makes all the difference. Thank you!).

Be sure to scroll to the bottom of this post, for a list of relevant DIY tutorials and kitchen resources.

Kitchen Resources:
Wall Paint- Benjamin Moore “Chantilly Lace” (You can read my review on the color here)
Kitchen Cabinets- Sherwin Williams Oil-based paint in a white-white (no tint)
Island- Painted in Milk Paint color “Driftwood” (You can read the tutorial for the milk paint here)
Flooring- Mannington’s Adura Max Merdian in the color “Stucco” (You can read the tutorial for the LVT install here)
Countertops- Silestone Eternal Statuario Quartz (read more about it here)
Lighting – DIY Pendants (read tutorial here)
DIY Pantry Door – Read Tutorial Here
DIY Refrigerator Framing – Read Tutorial Here
DIY Kitchen Cabinets – Read Tutorial Here


Welcome!
My journey in interior design and home improvement began with transforming my first fixer-upper home, all while managing a budget and raising two young boys. My work, a reflection of my passion for creating beautiful, uplifting spaces, has been recognized by top publications like Better Homes and Gardens Magazine, HGTV, and more. I invite you to explore my site and witness the transformation of my home and the vibes we've designed. Read more...


These are such amazing tips for the average person to renovate without spending a fortune! I am super interested in the milk paint since we will be painting our kitchen cabinets soon. 🙂
Thank you so much, girl. And milk paint is basically one of my favorite discoveries ever! It is so much easier to work with than the traditional oil-based crap.