
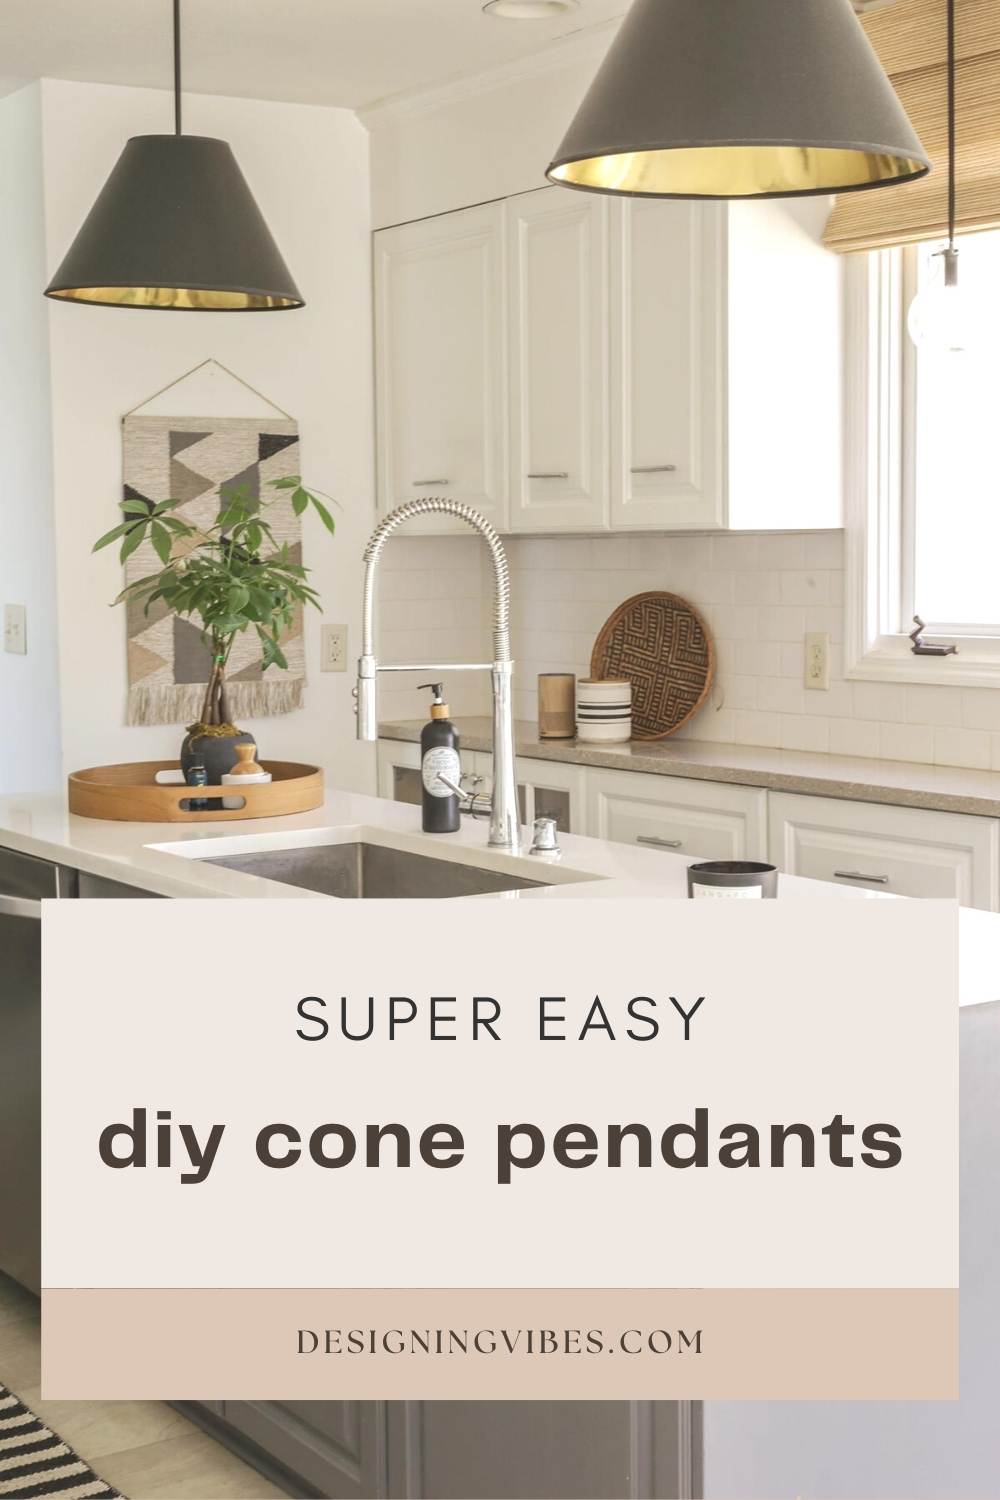
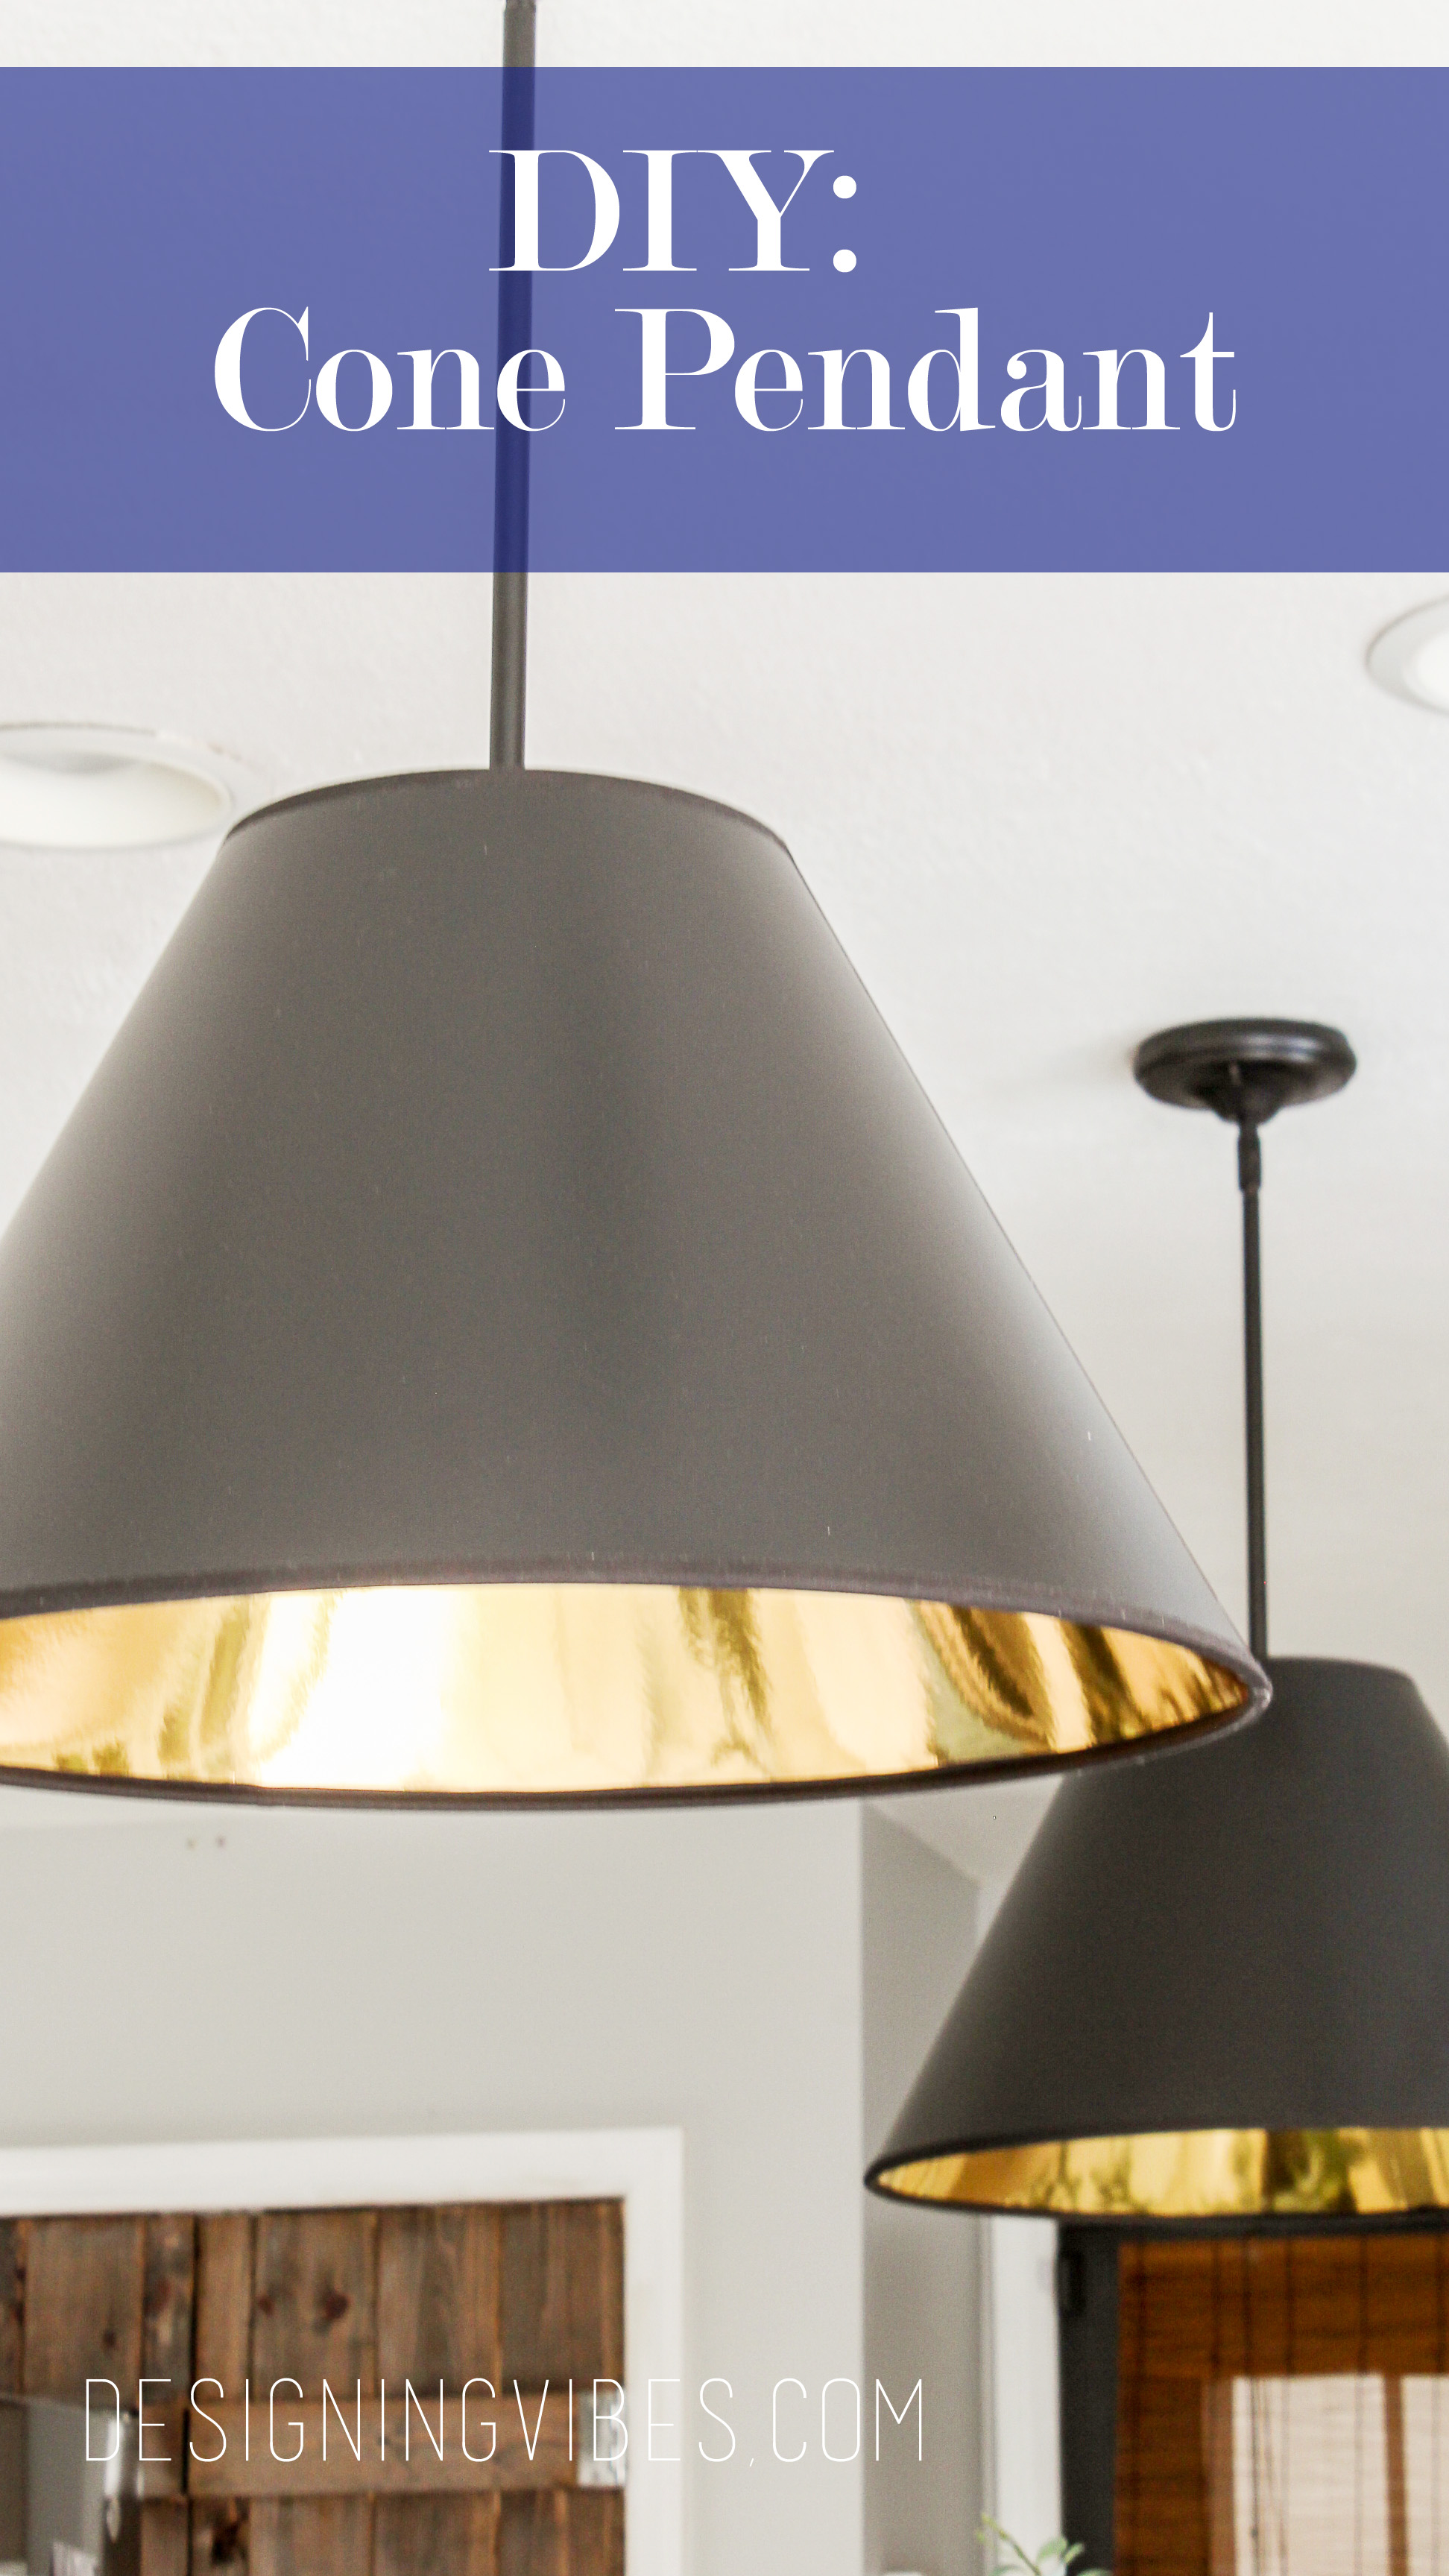
DIY Cone Pendant Lights
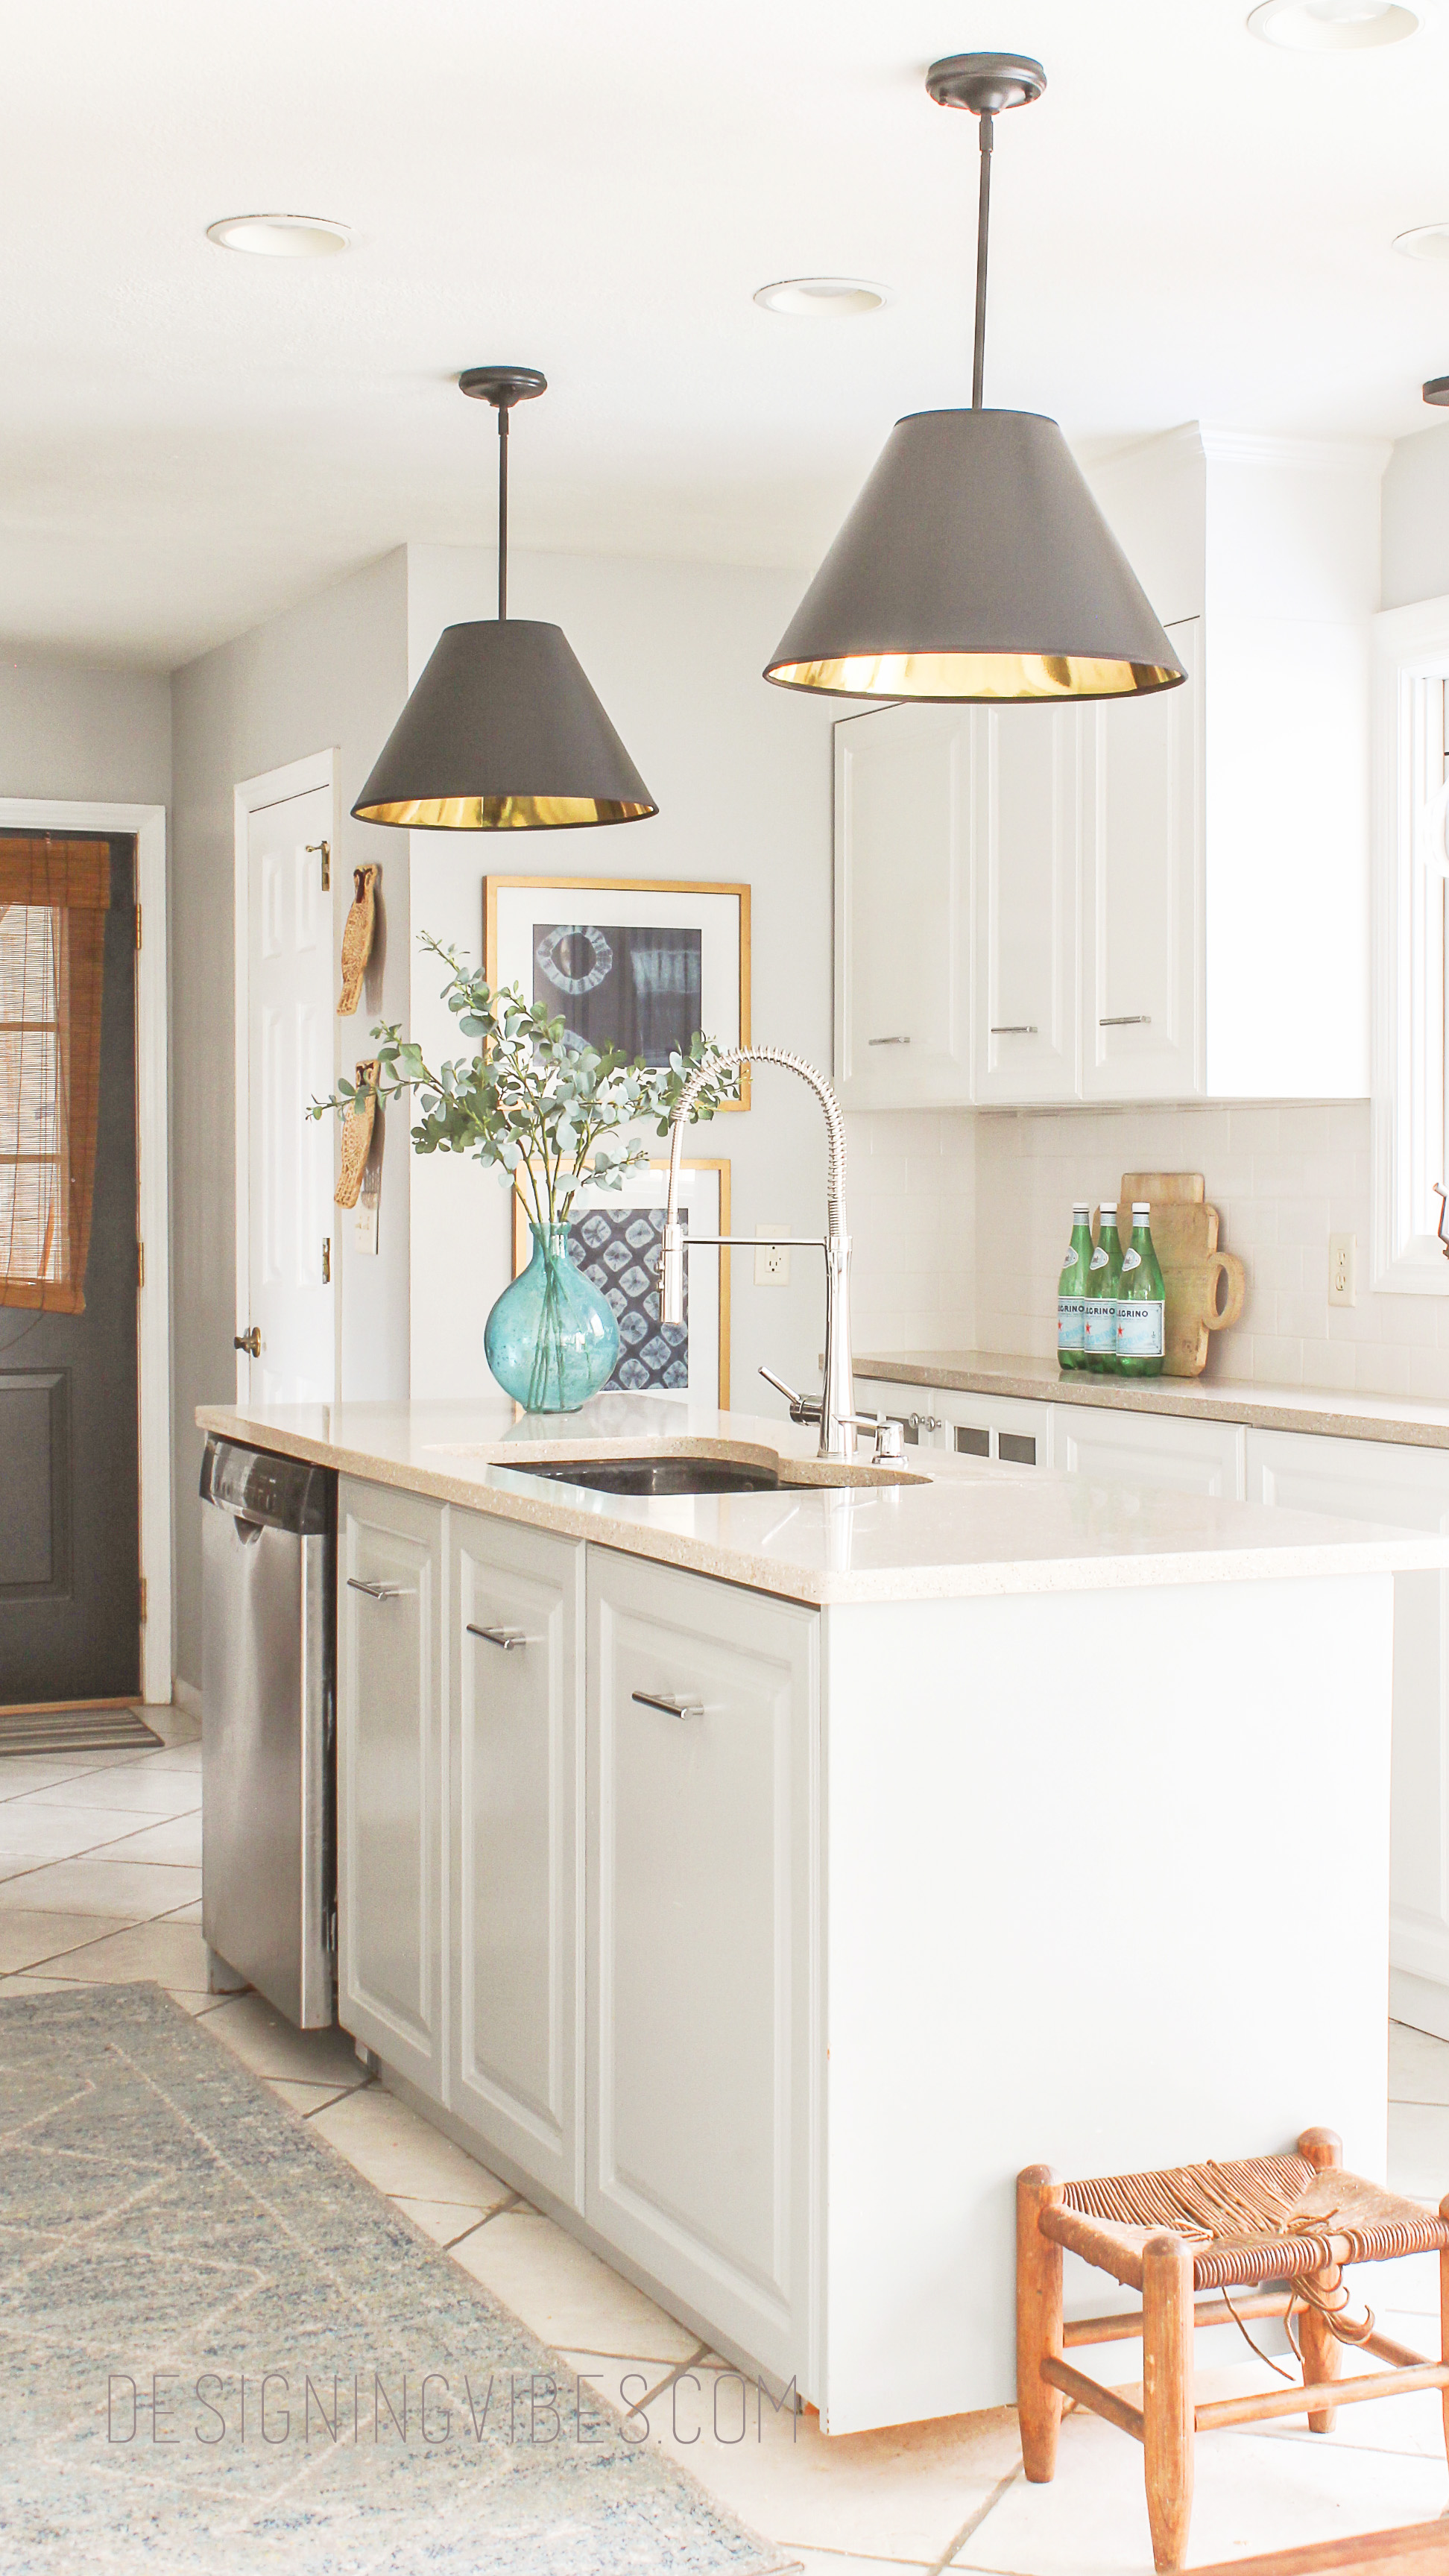
I am super stoked to be sharing these DIY cone pendants with you guys today. Not only were they super easy to make, I was able to purchase the materials for only $50 per pendant.
In the world of interior design, cone pendants are definitely all the rage right now. I keep seeing the light fixtures used by all of my favorite interior designers, but I was having no luck finding any within my meager budget. In fact, the cheapest I could find them, in the 18” wide size, were around $300 per light.
With all of the other projects under way in our home, I simply did not have the money to allocate towards kitchen lighting. That is when a light went off in my head (forgive the cheesy wordplay). Let me share with you how I achieved this super fresh, upscale look on a super restricted budget.
*This post contains affiliate links. That simply means if you click on one of the links and buy something, I receive a small commission, but don’t worry… you won’t pay a dime more.*
Materials for DIY Cone Pendant Lights:
- lampshade (i used this one)

- pendant light kit ( i used these)
- couplings/Portfolio 2-Pack Antique Brass Lamp Pipes (i got these from lowes)
My husband acted as a hand model while I snapped some photos for you guys.
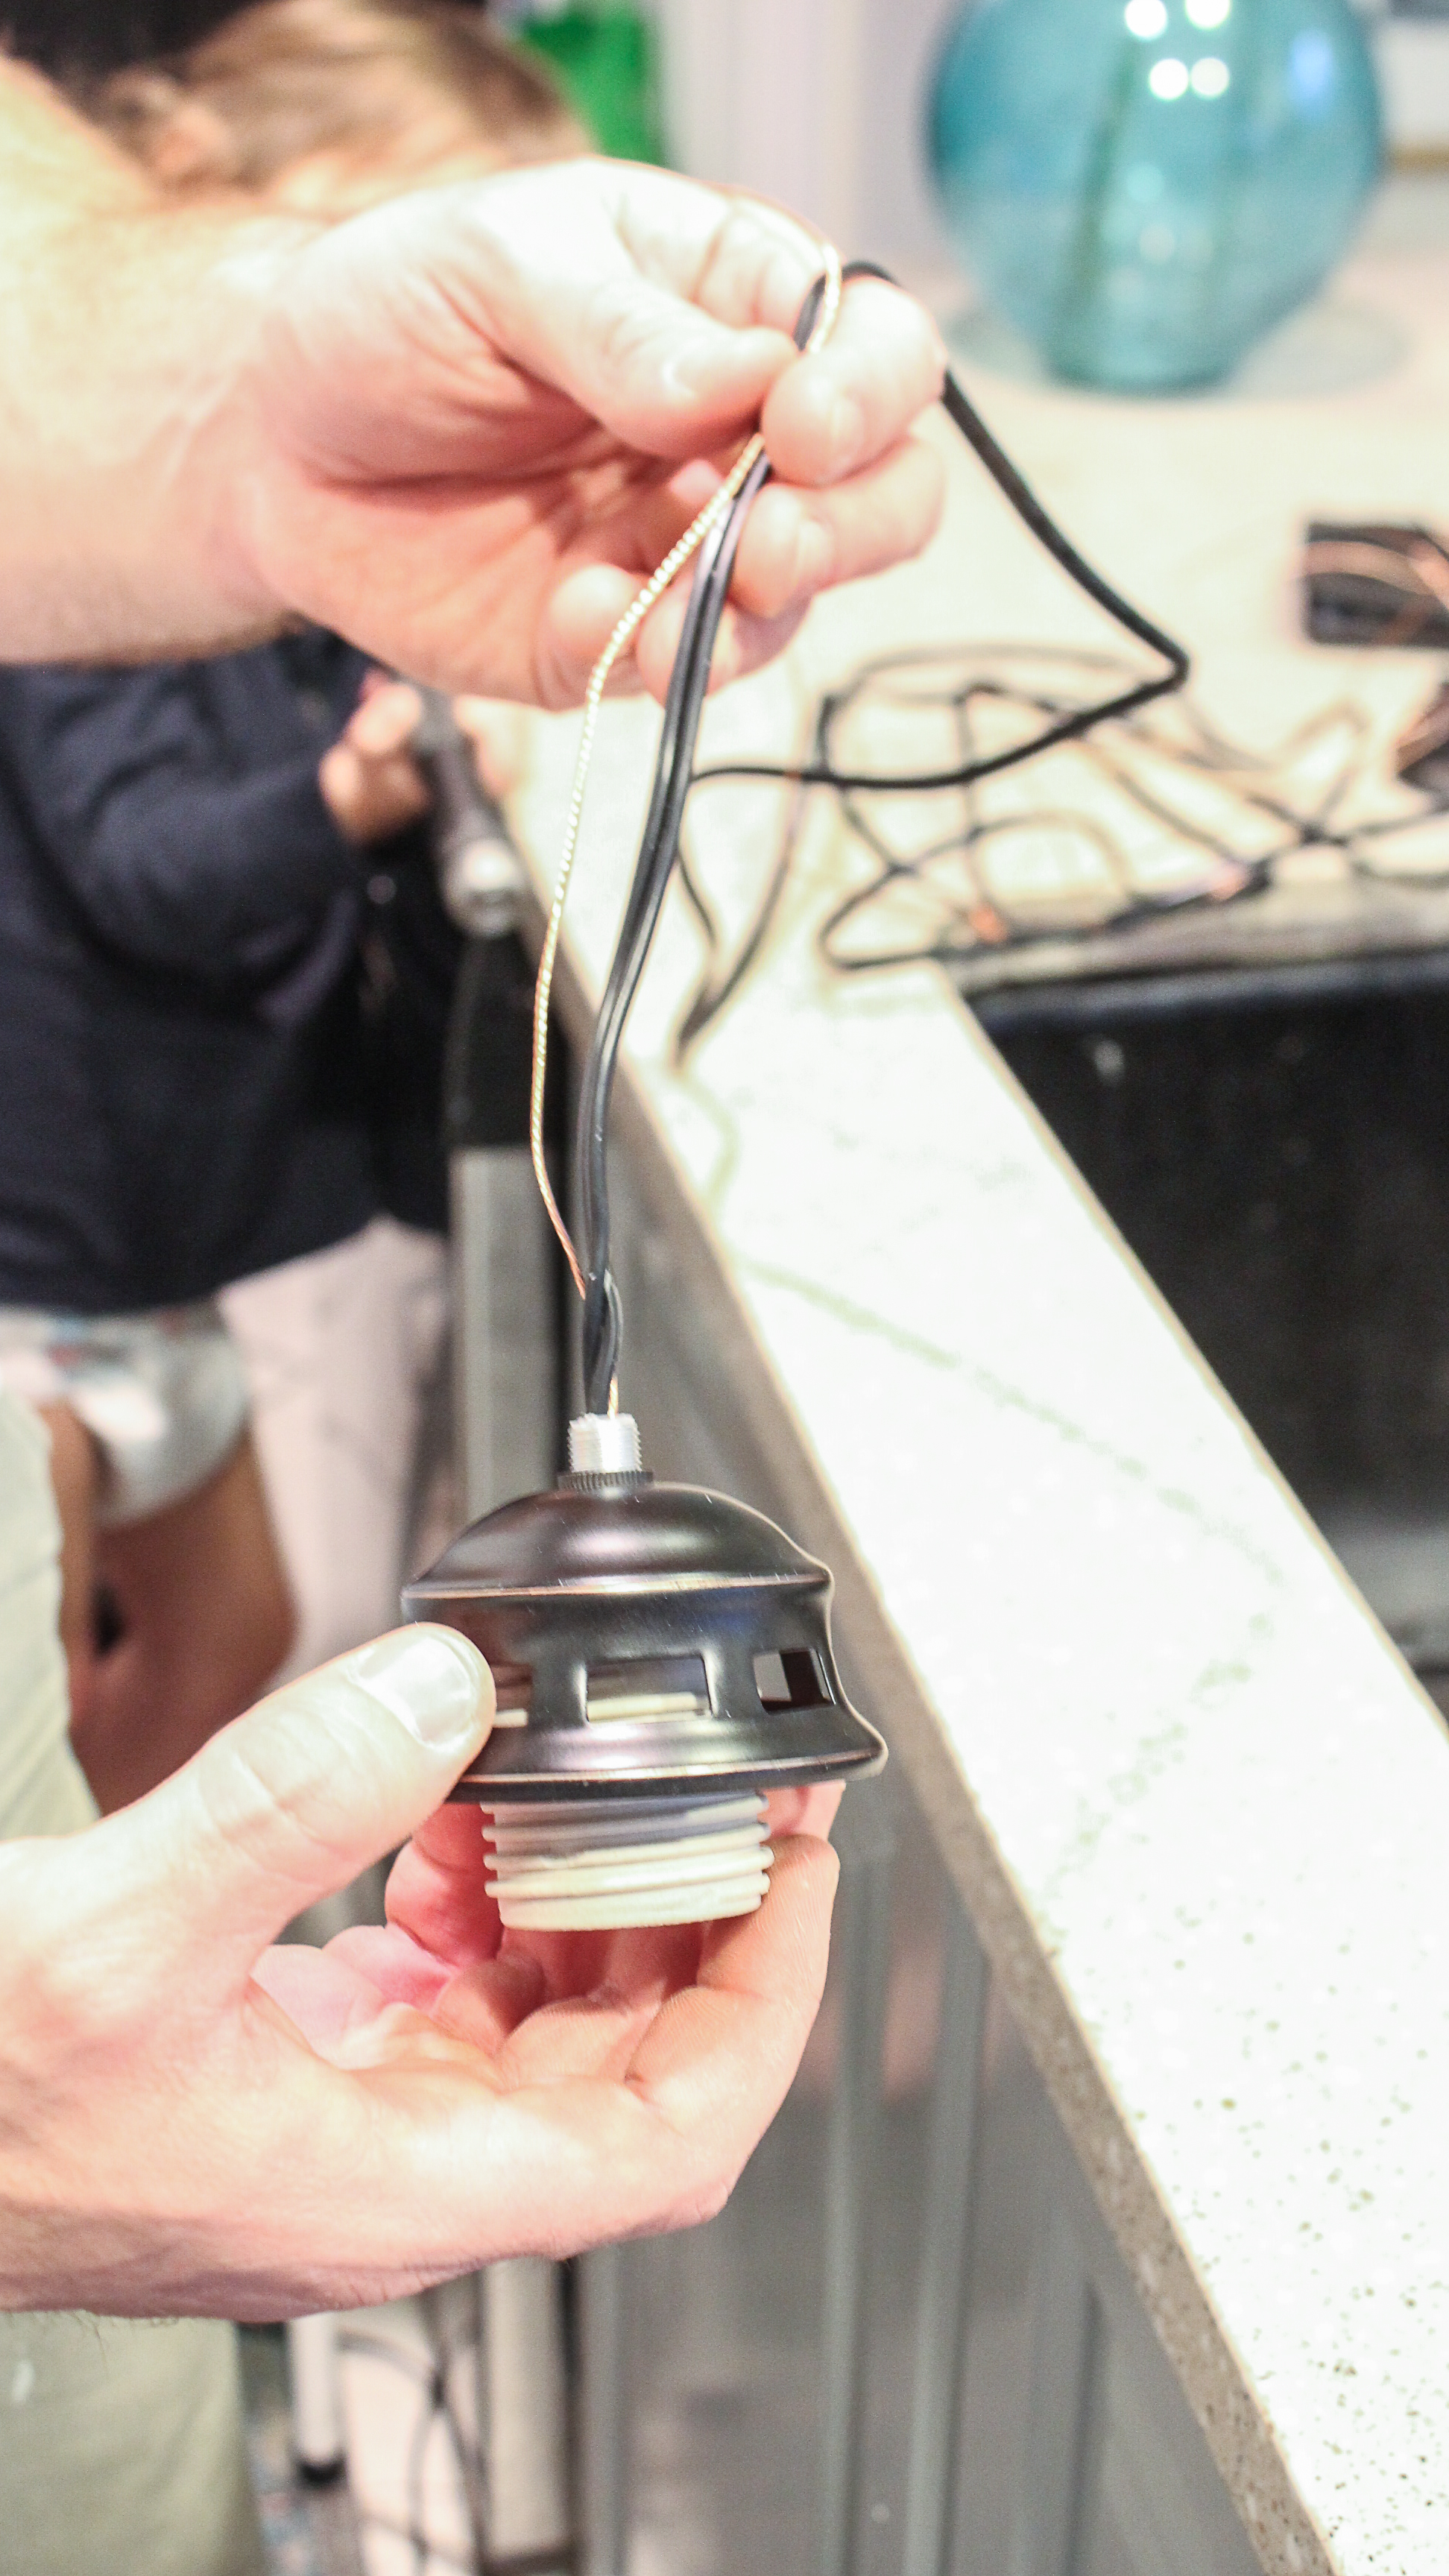
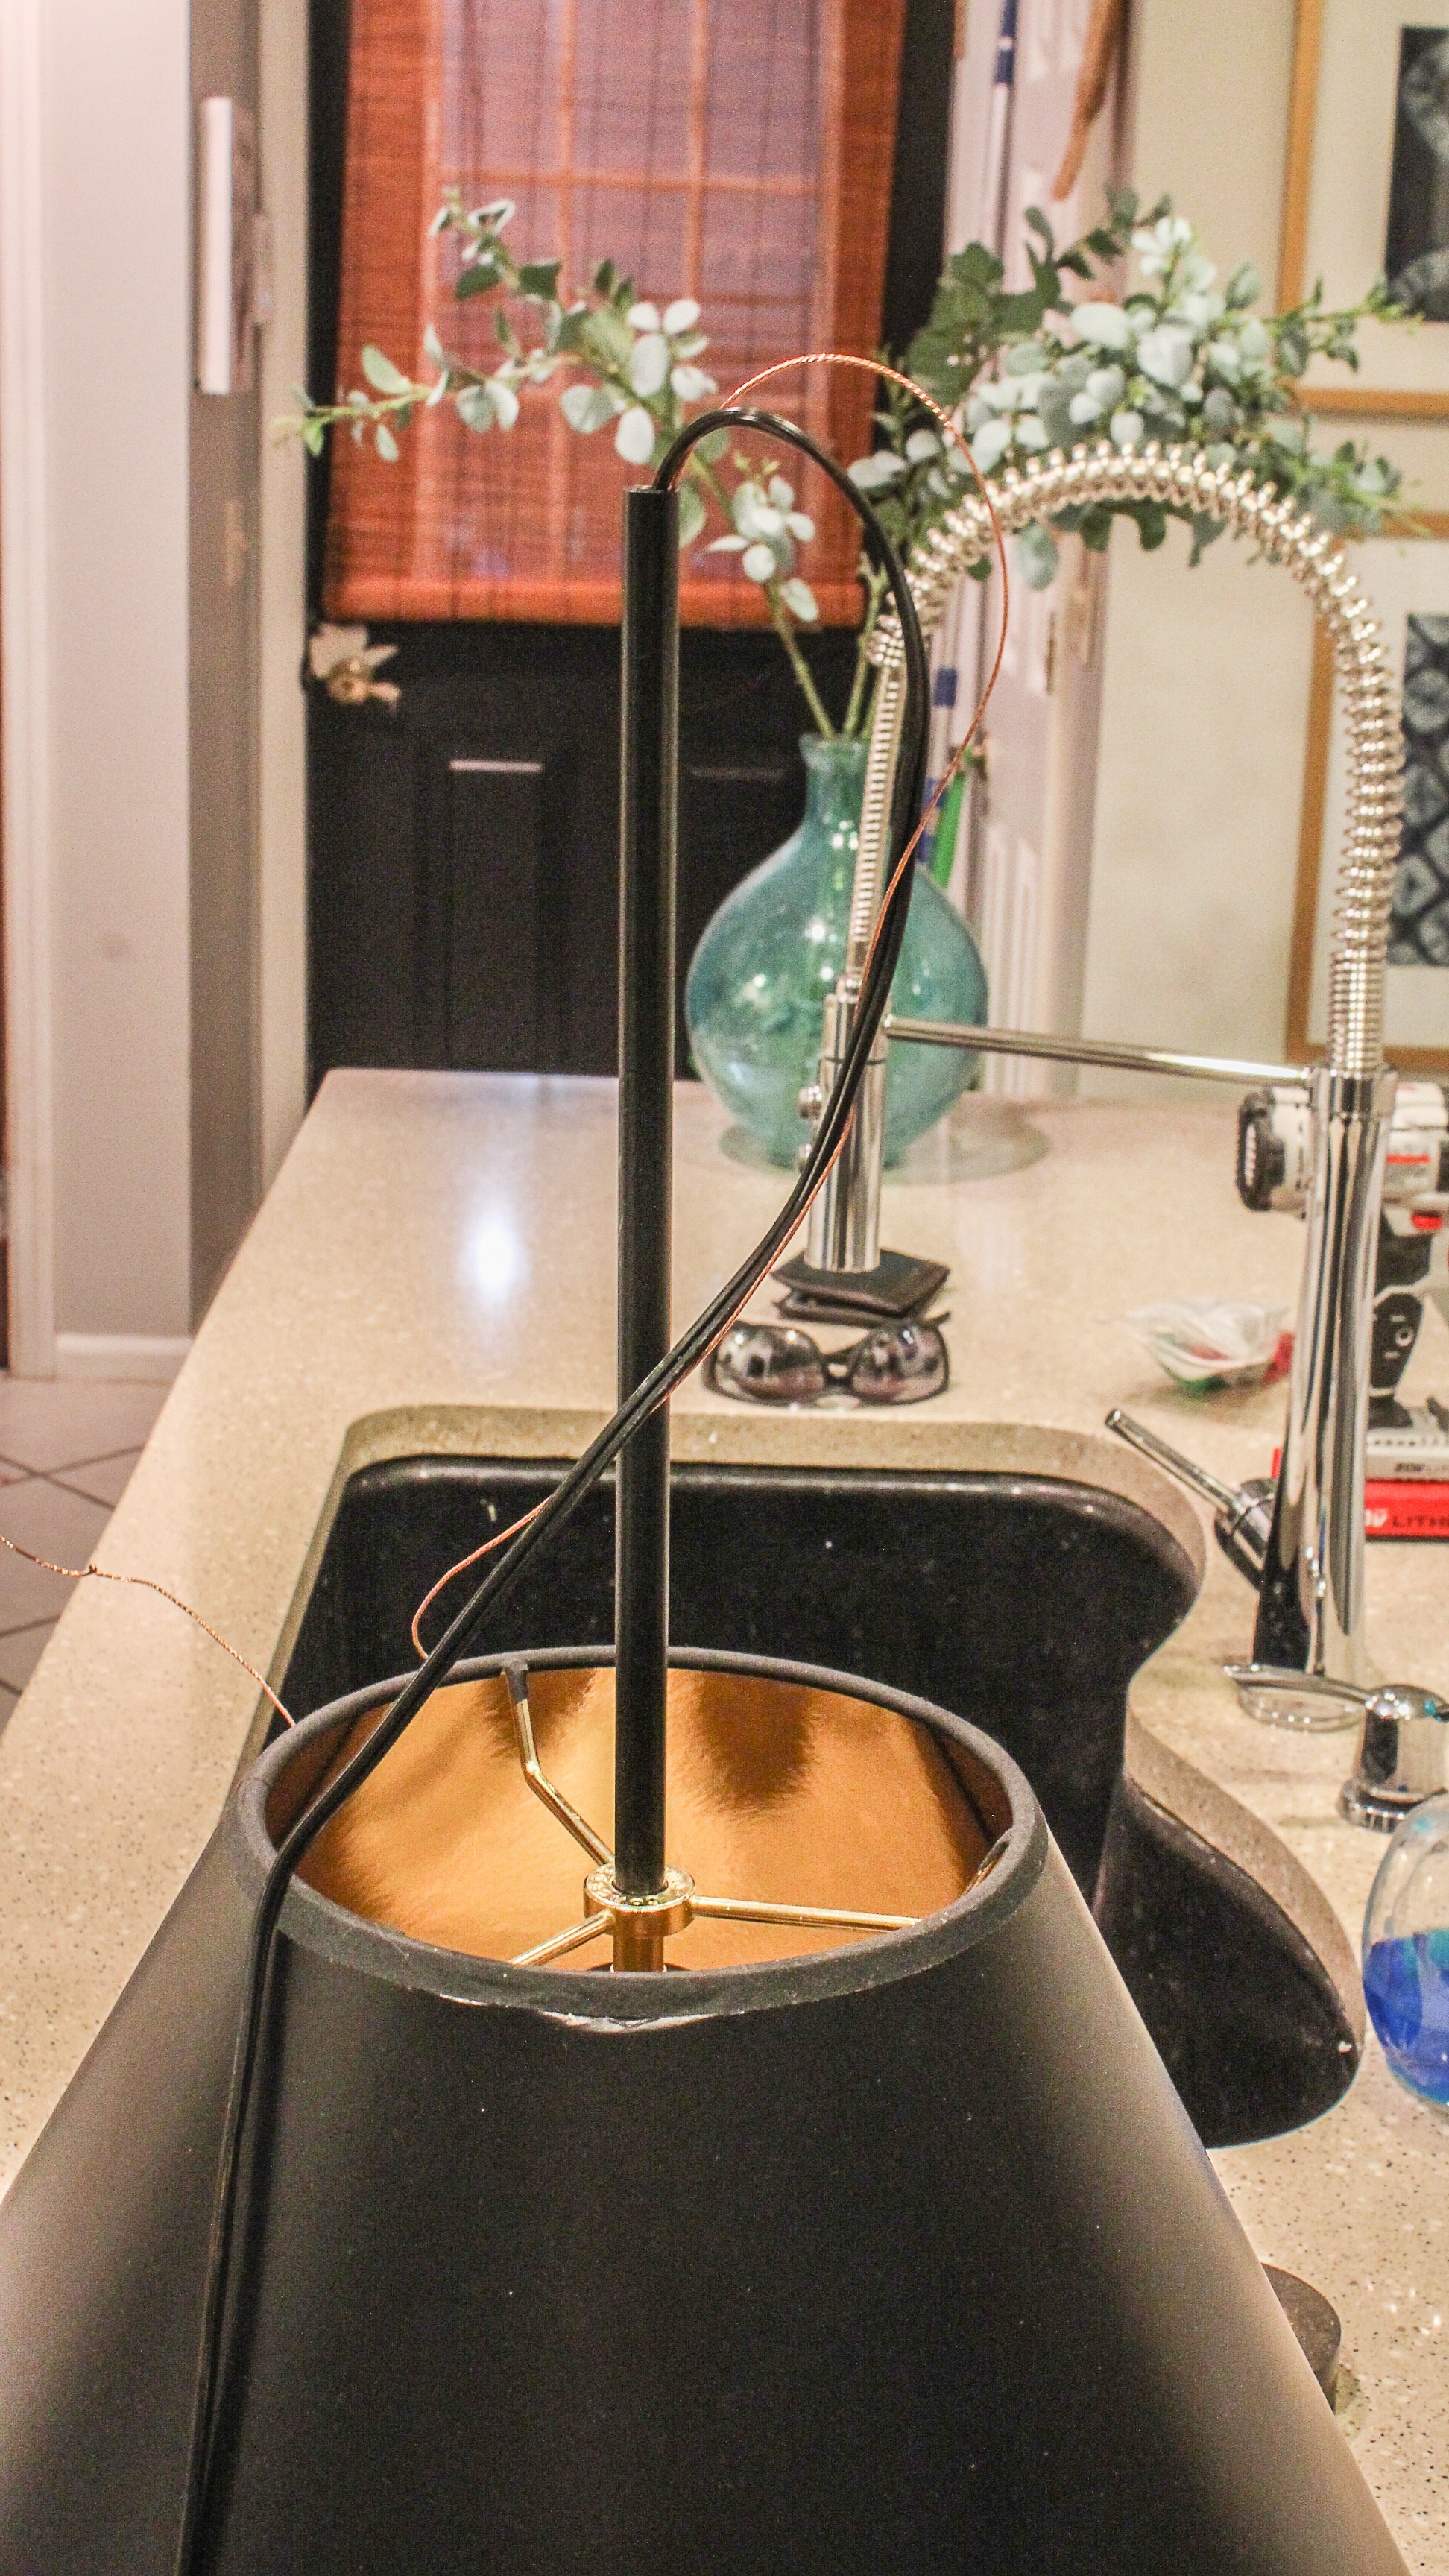
Here is the light kit you will be attaching the lamp shade to. (don’t mind my pants-less toddler in the background)
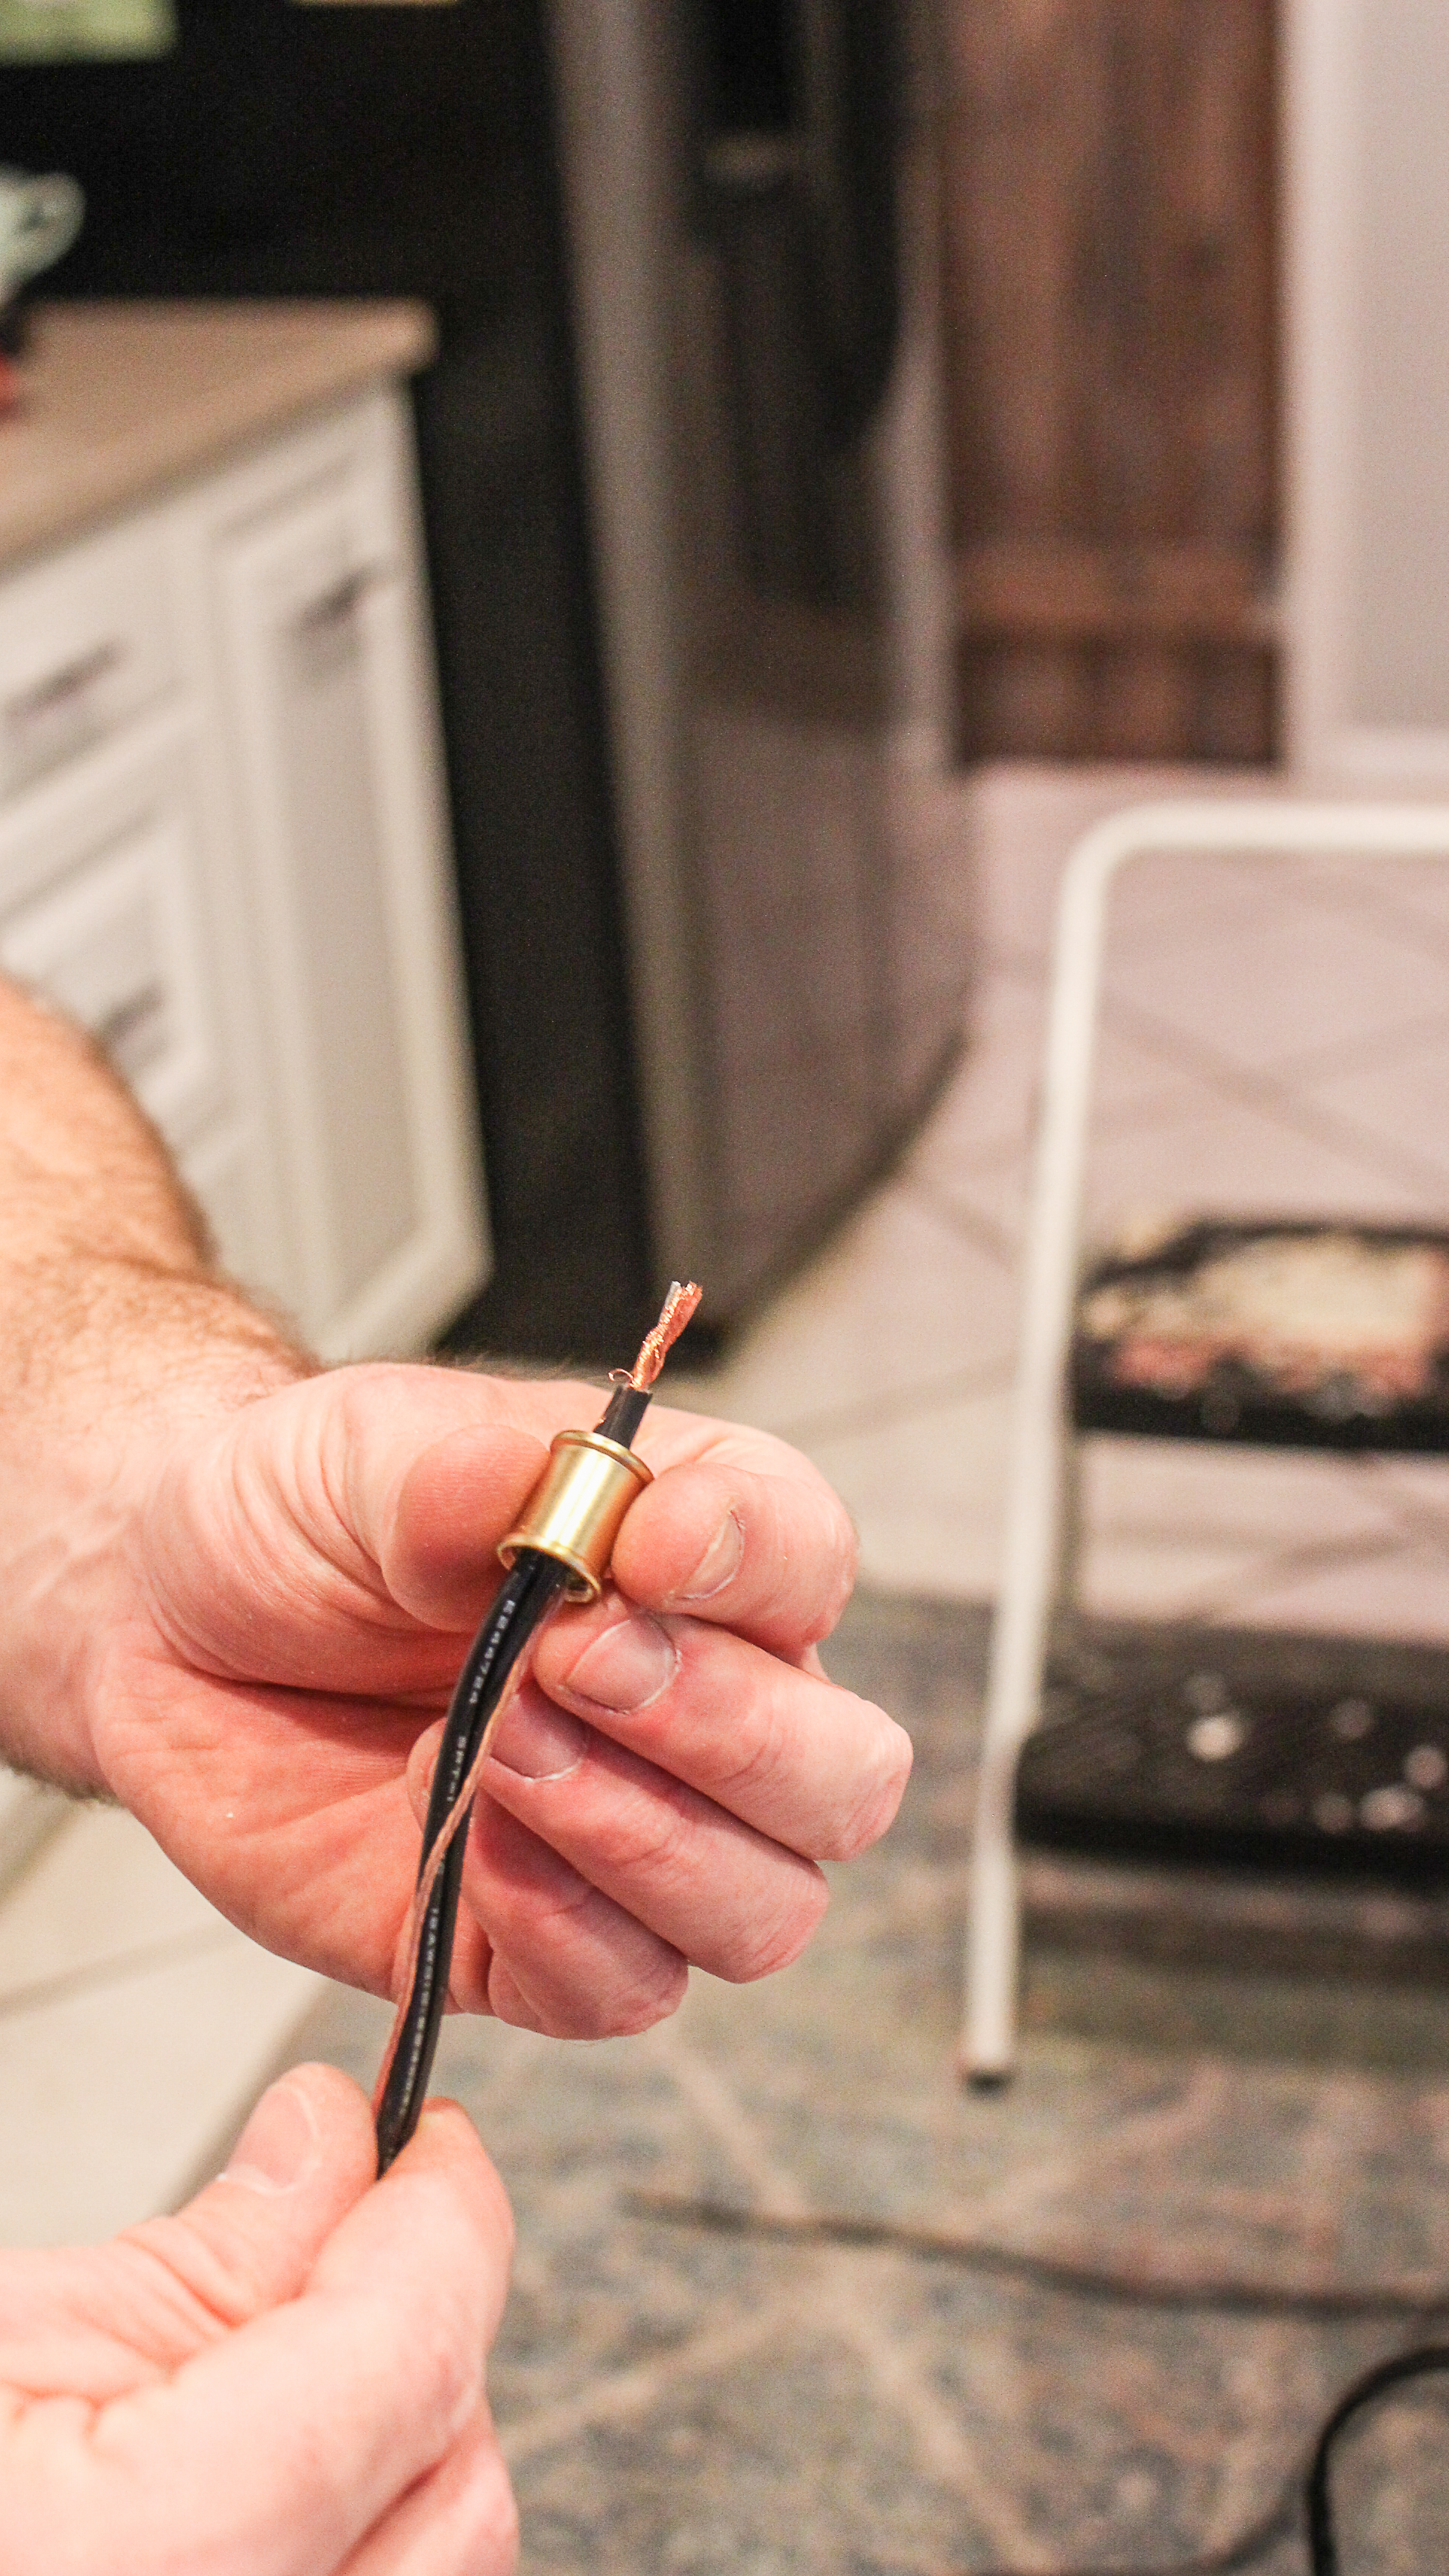
Slide female coupler over light cord. (In case you are wondering, a coupler was used because threads on the top of the light pendant are not long enough to expose thread when putting lamp shade on).
Now, screw coupler onto threaded stem.

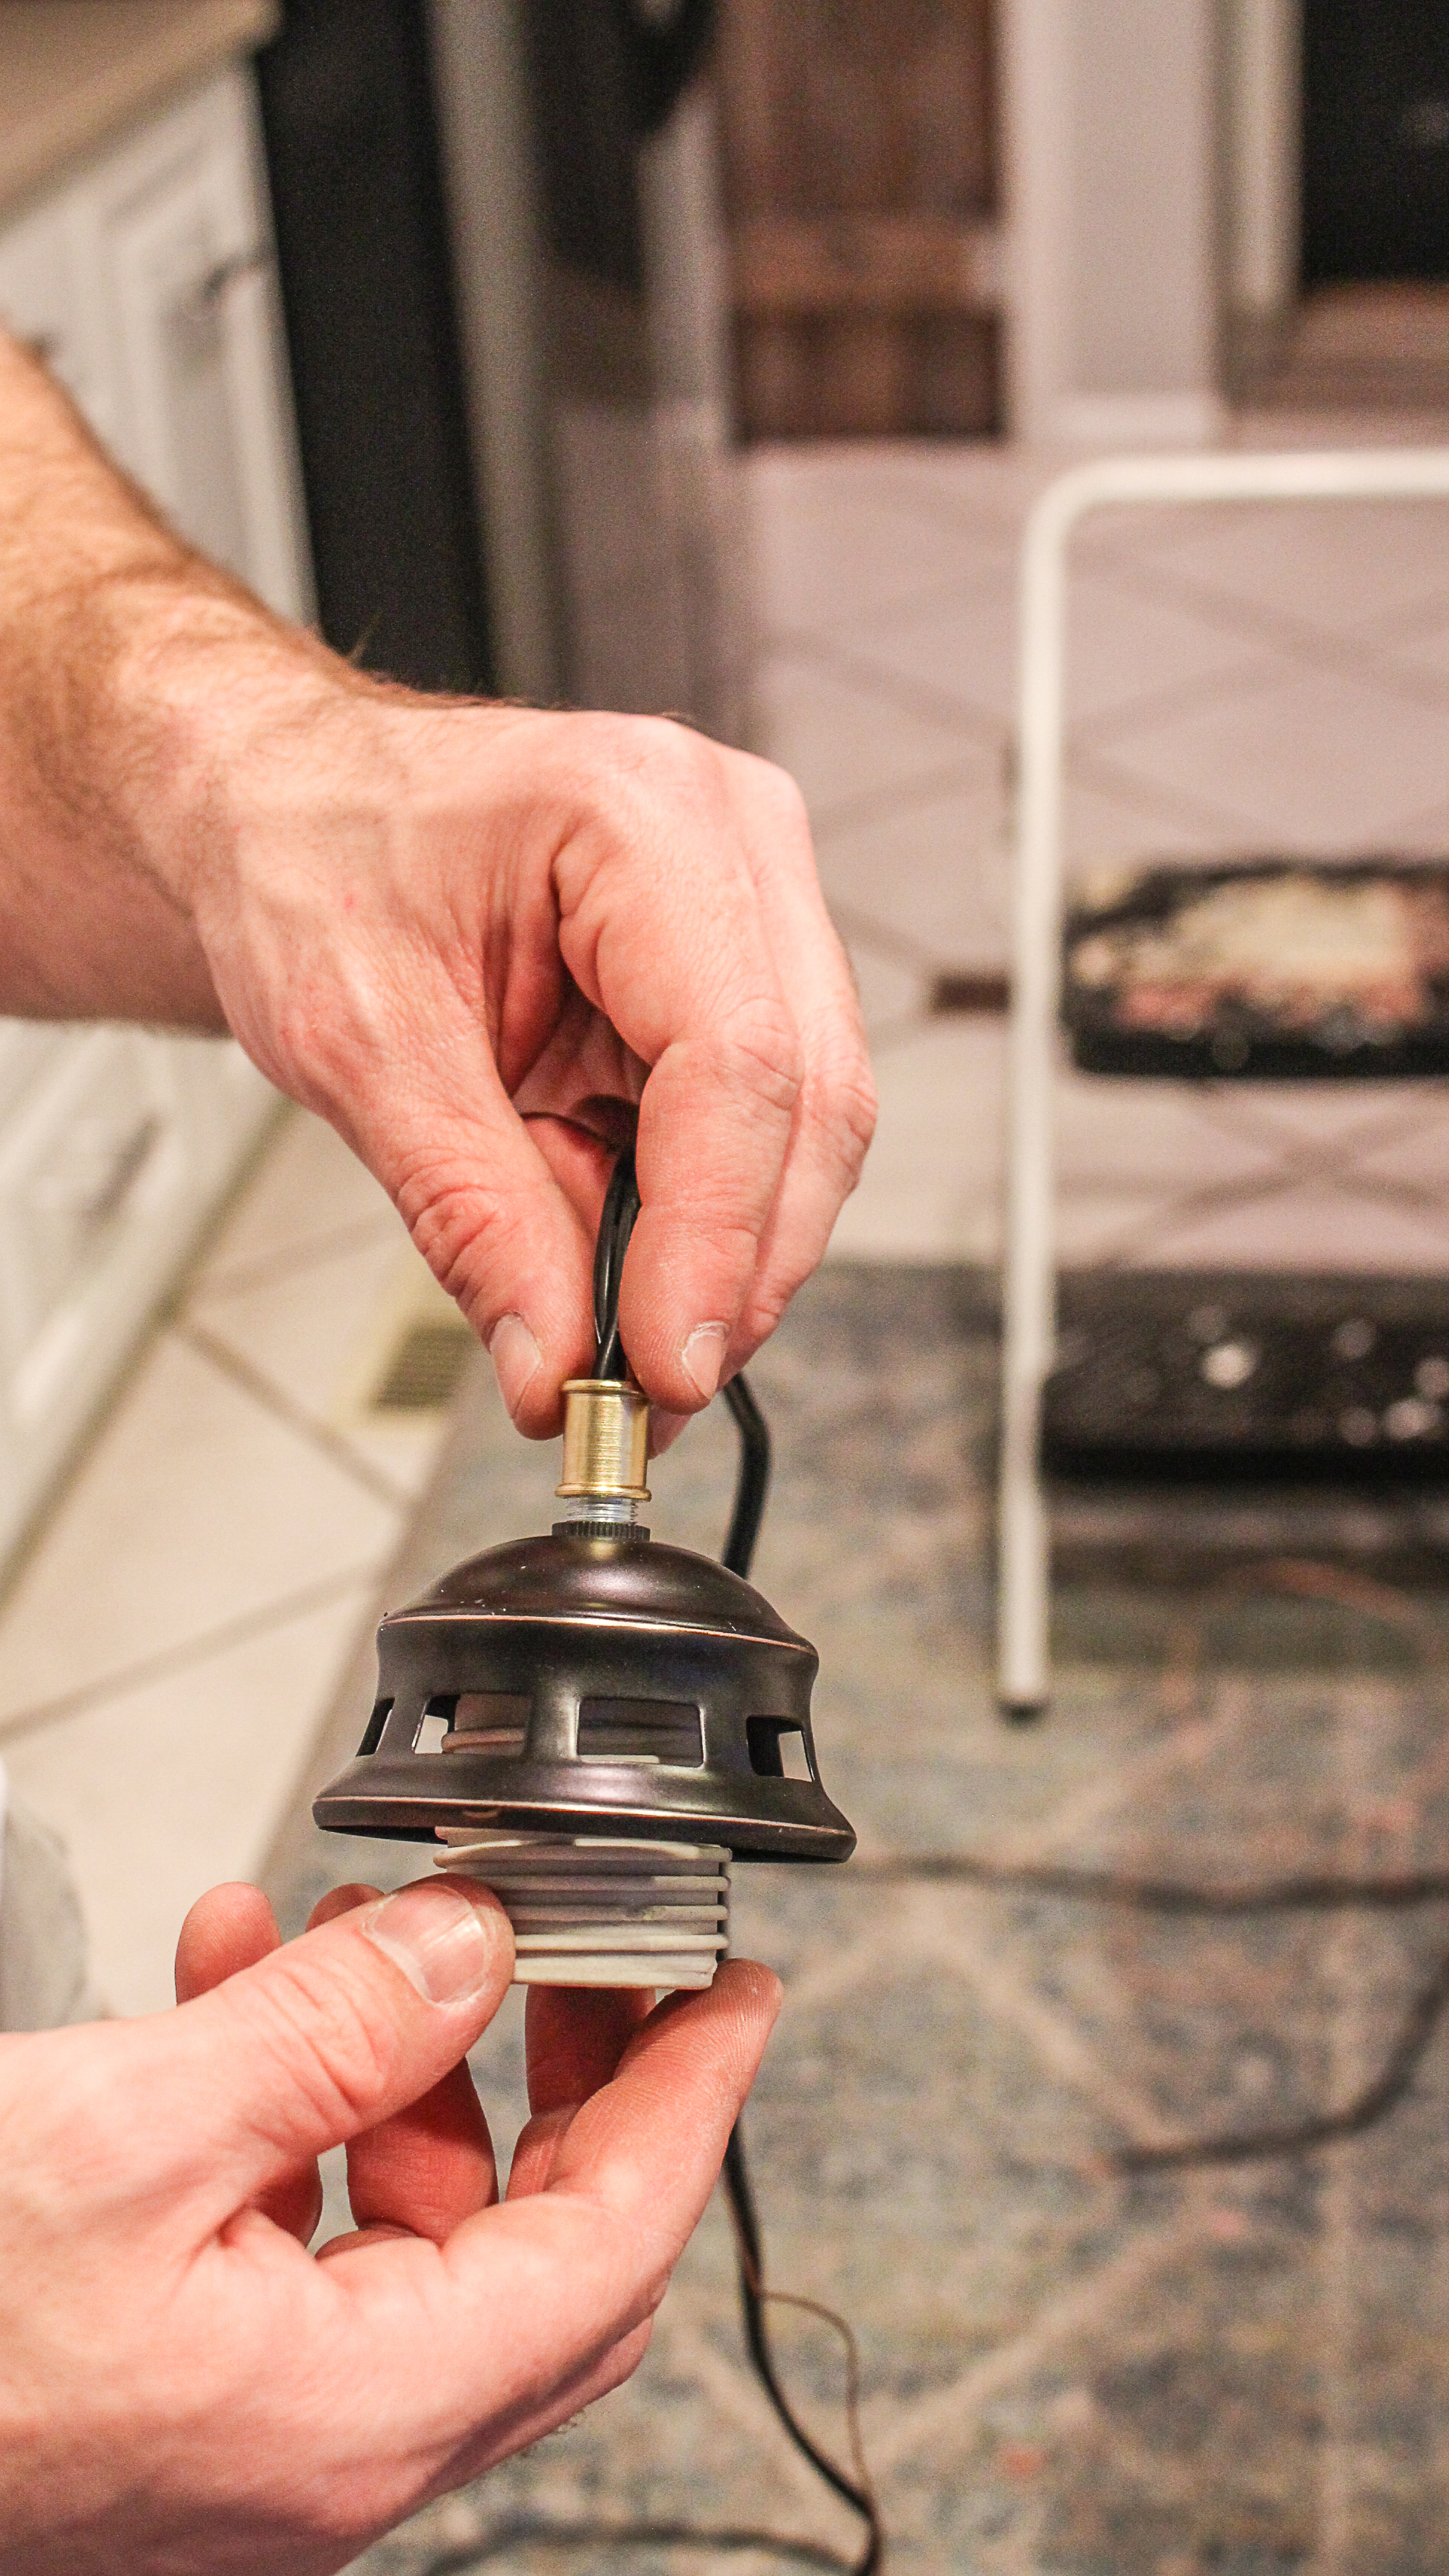
Slide the threaded extension/male coupler, which comes with light kit, over the cord.
Slide lampshade![]() over cord.
over cord.
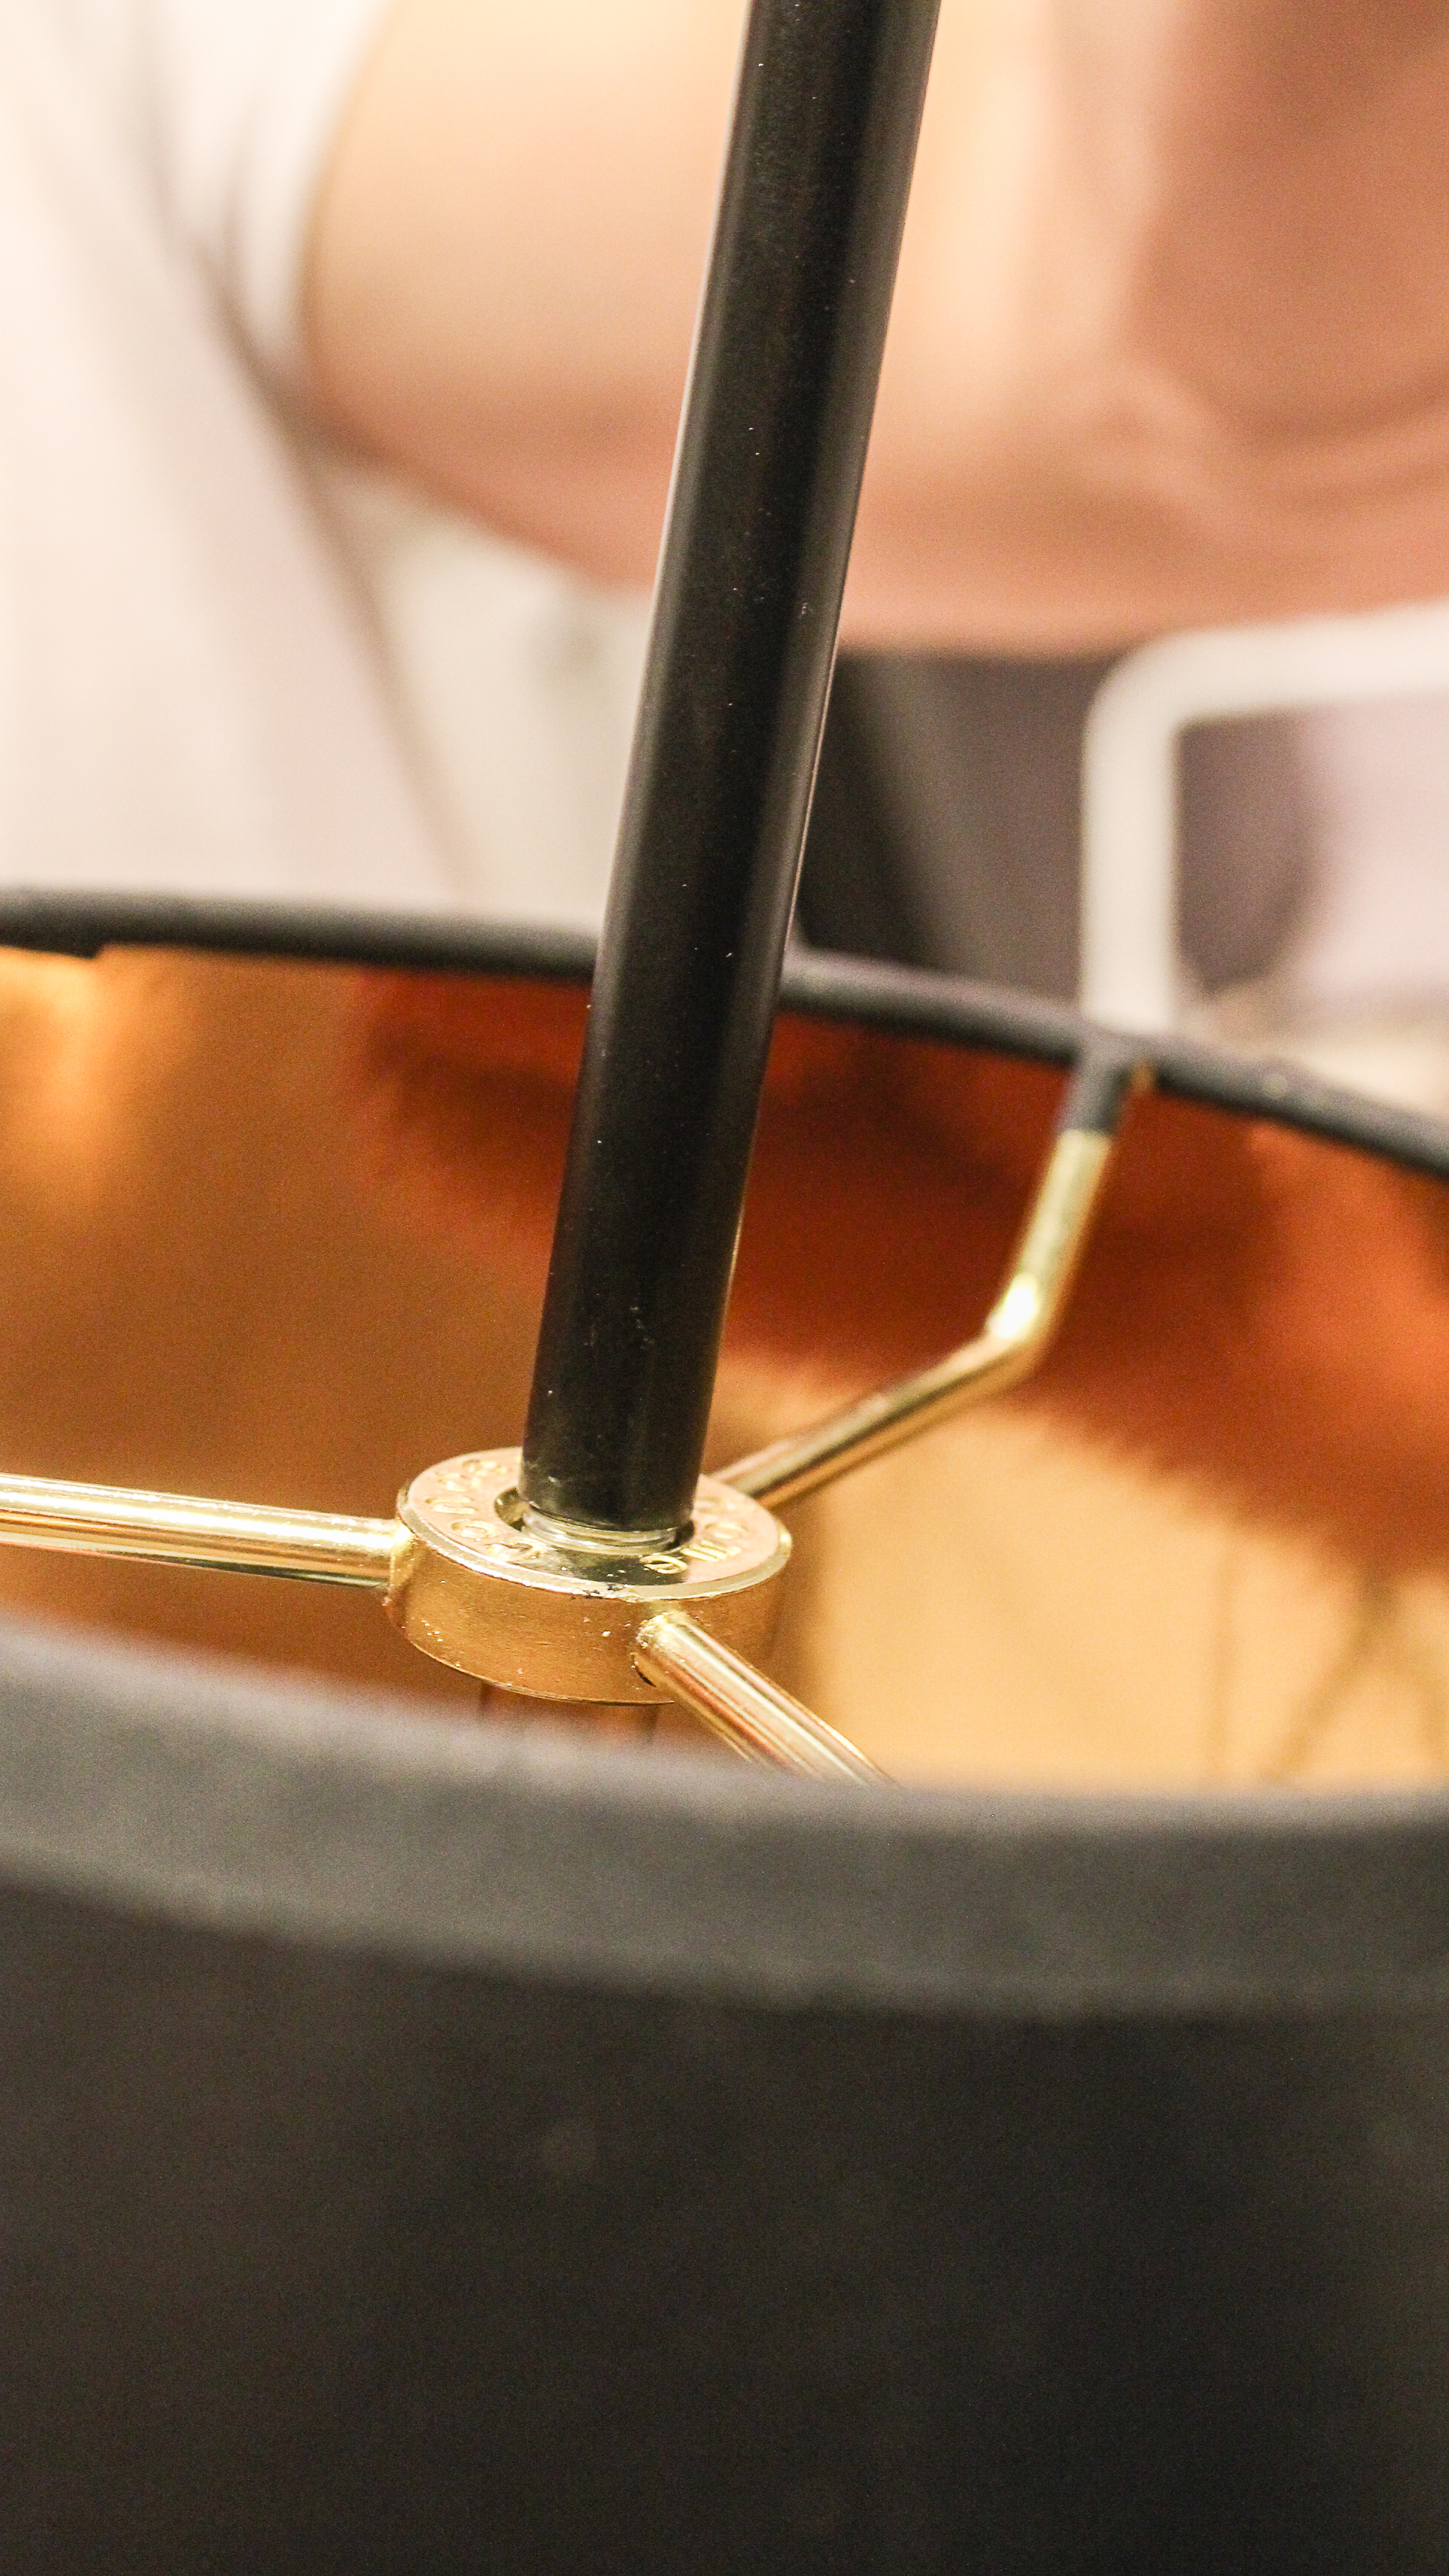
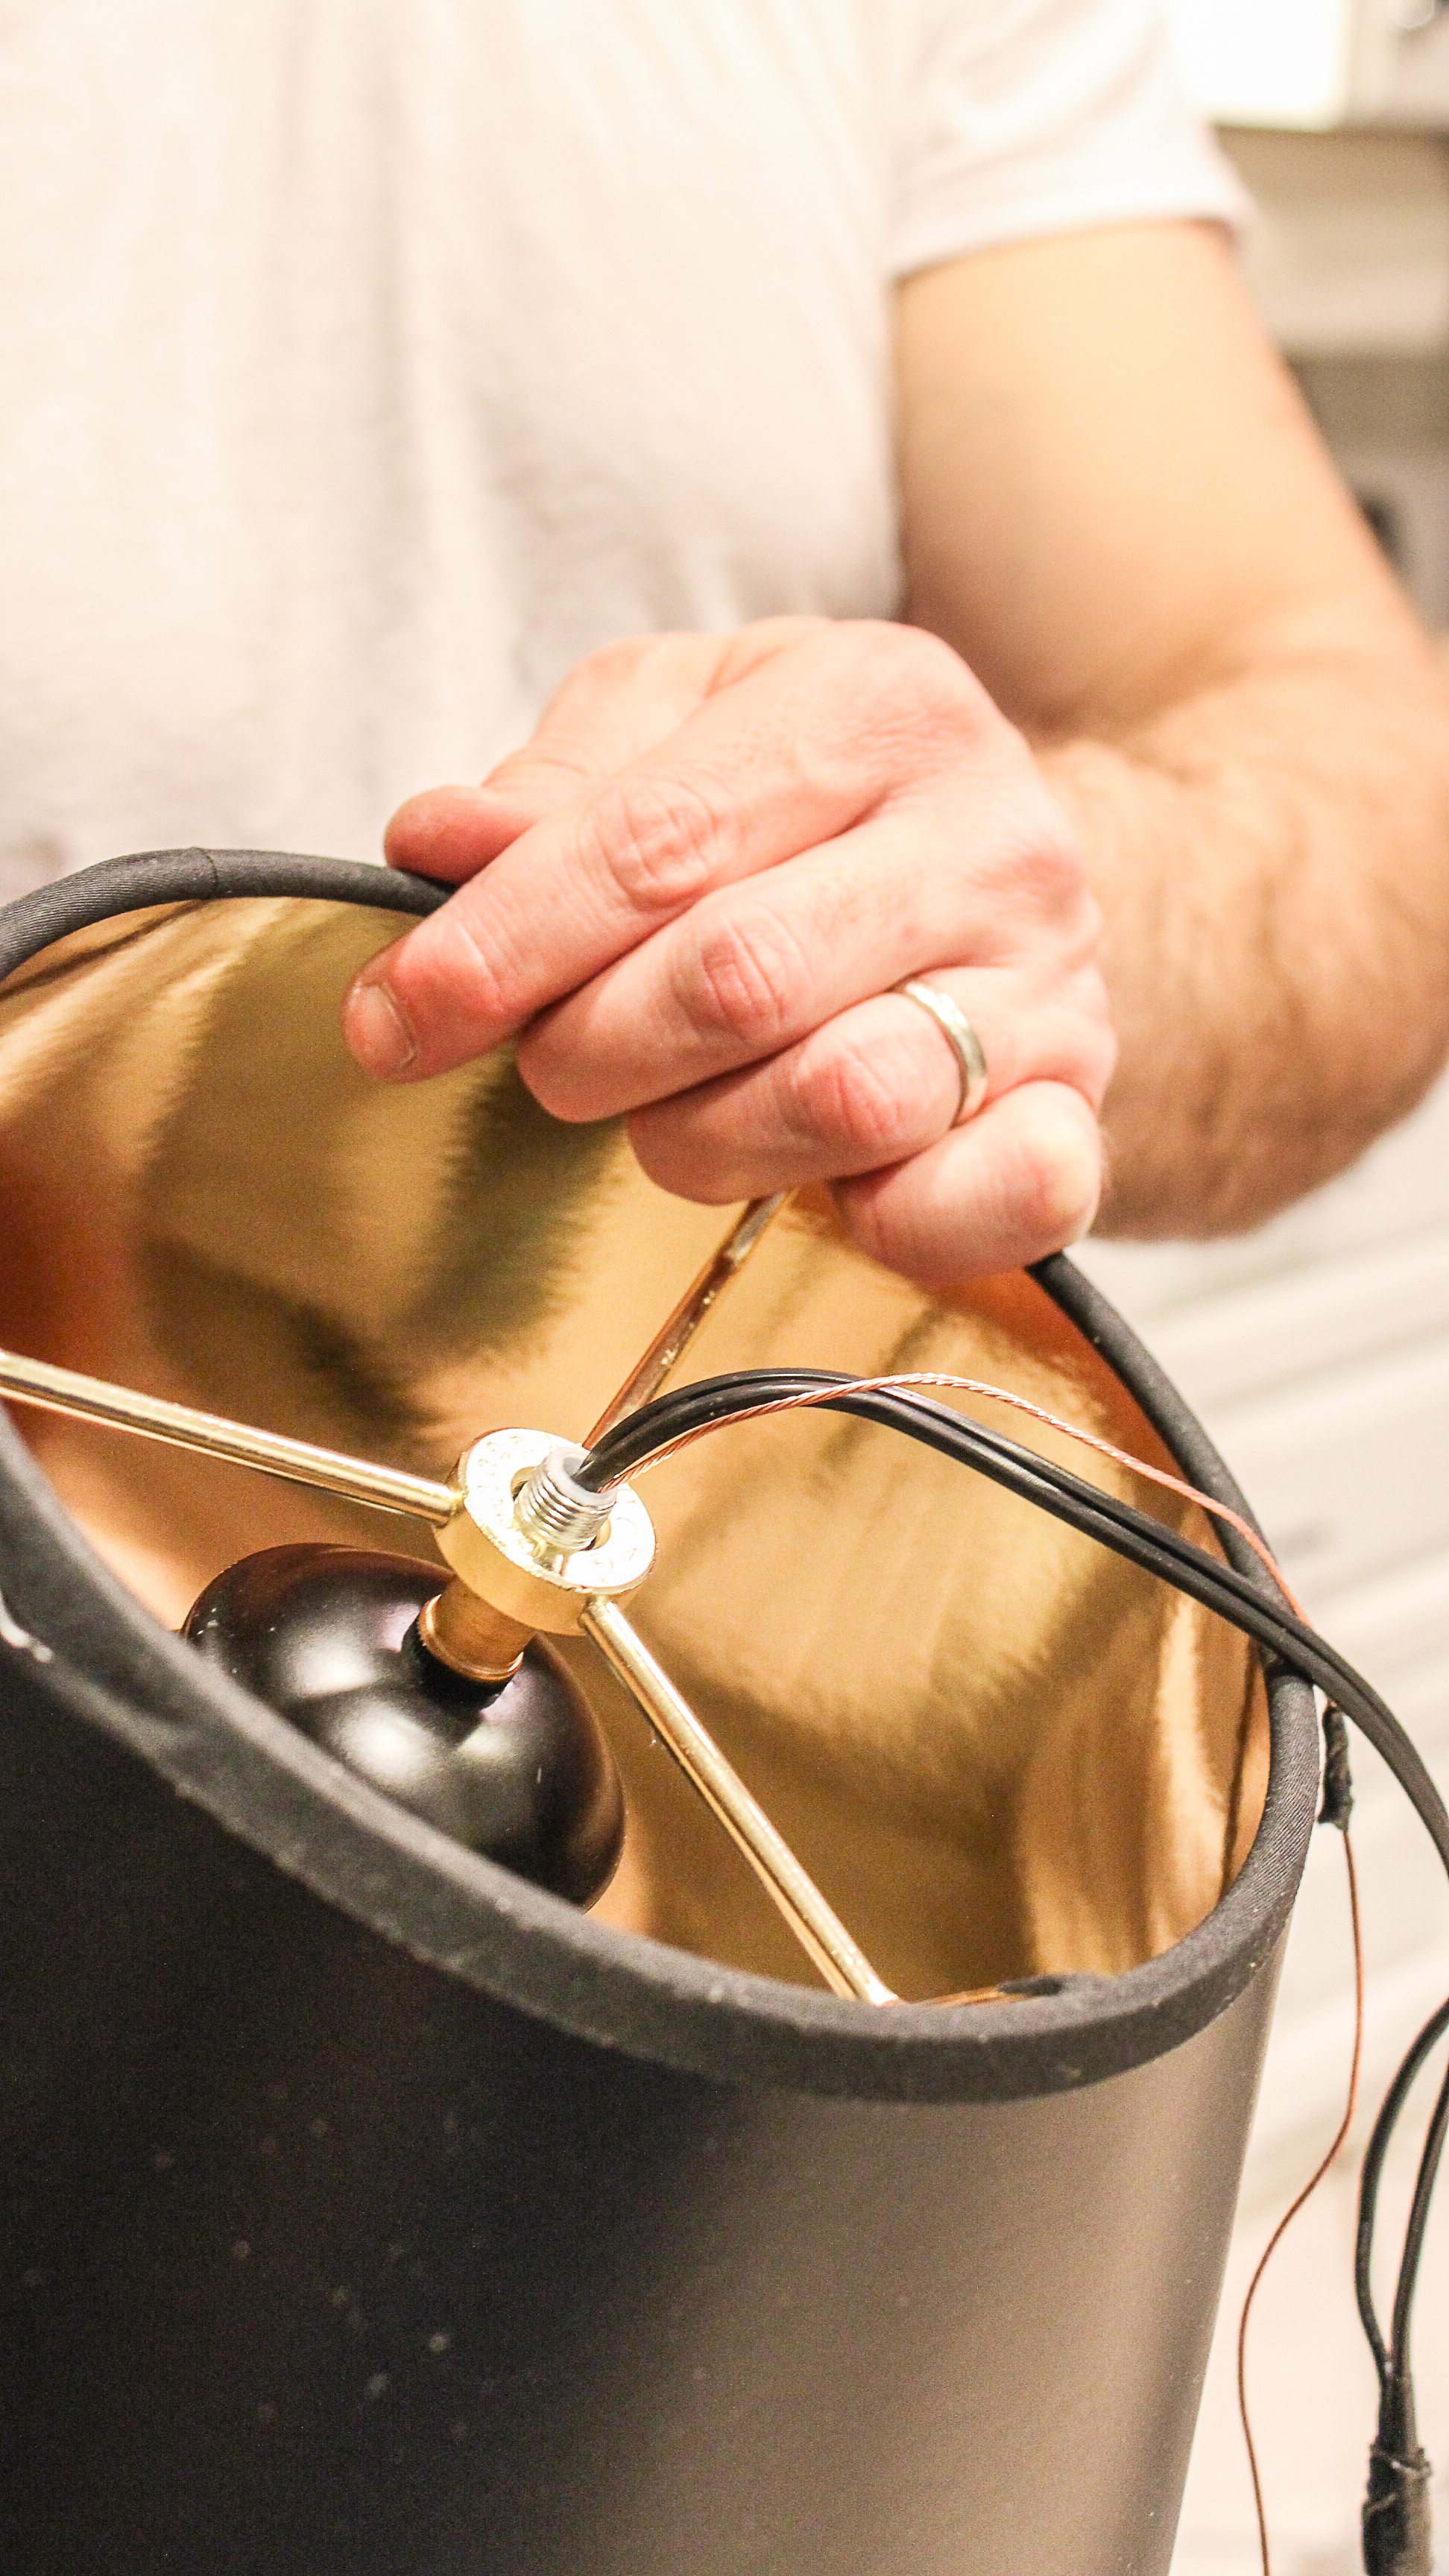
Slide rod/rods (depending on how low you want your light pendant to hang) over cord and screw onto exposed threads.
Now you are ready to install your beautiful, cone light pendant. We actually had to create fixtures as there were no preexisting fixtures where we needed to mount the lights, and I will be sharing that in a separate tutorial.
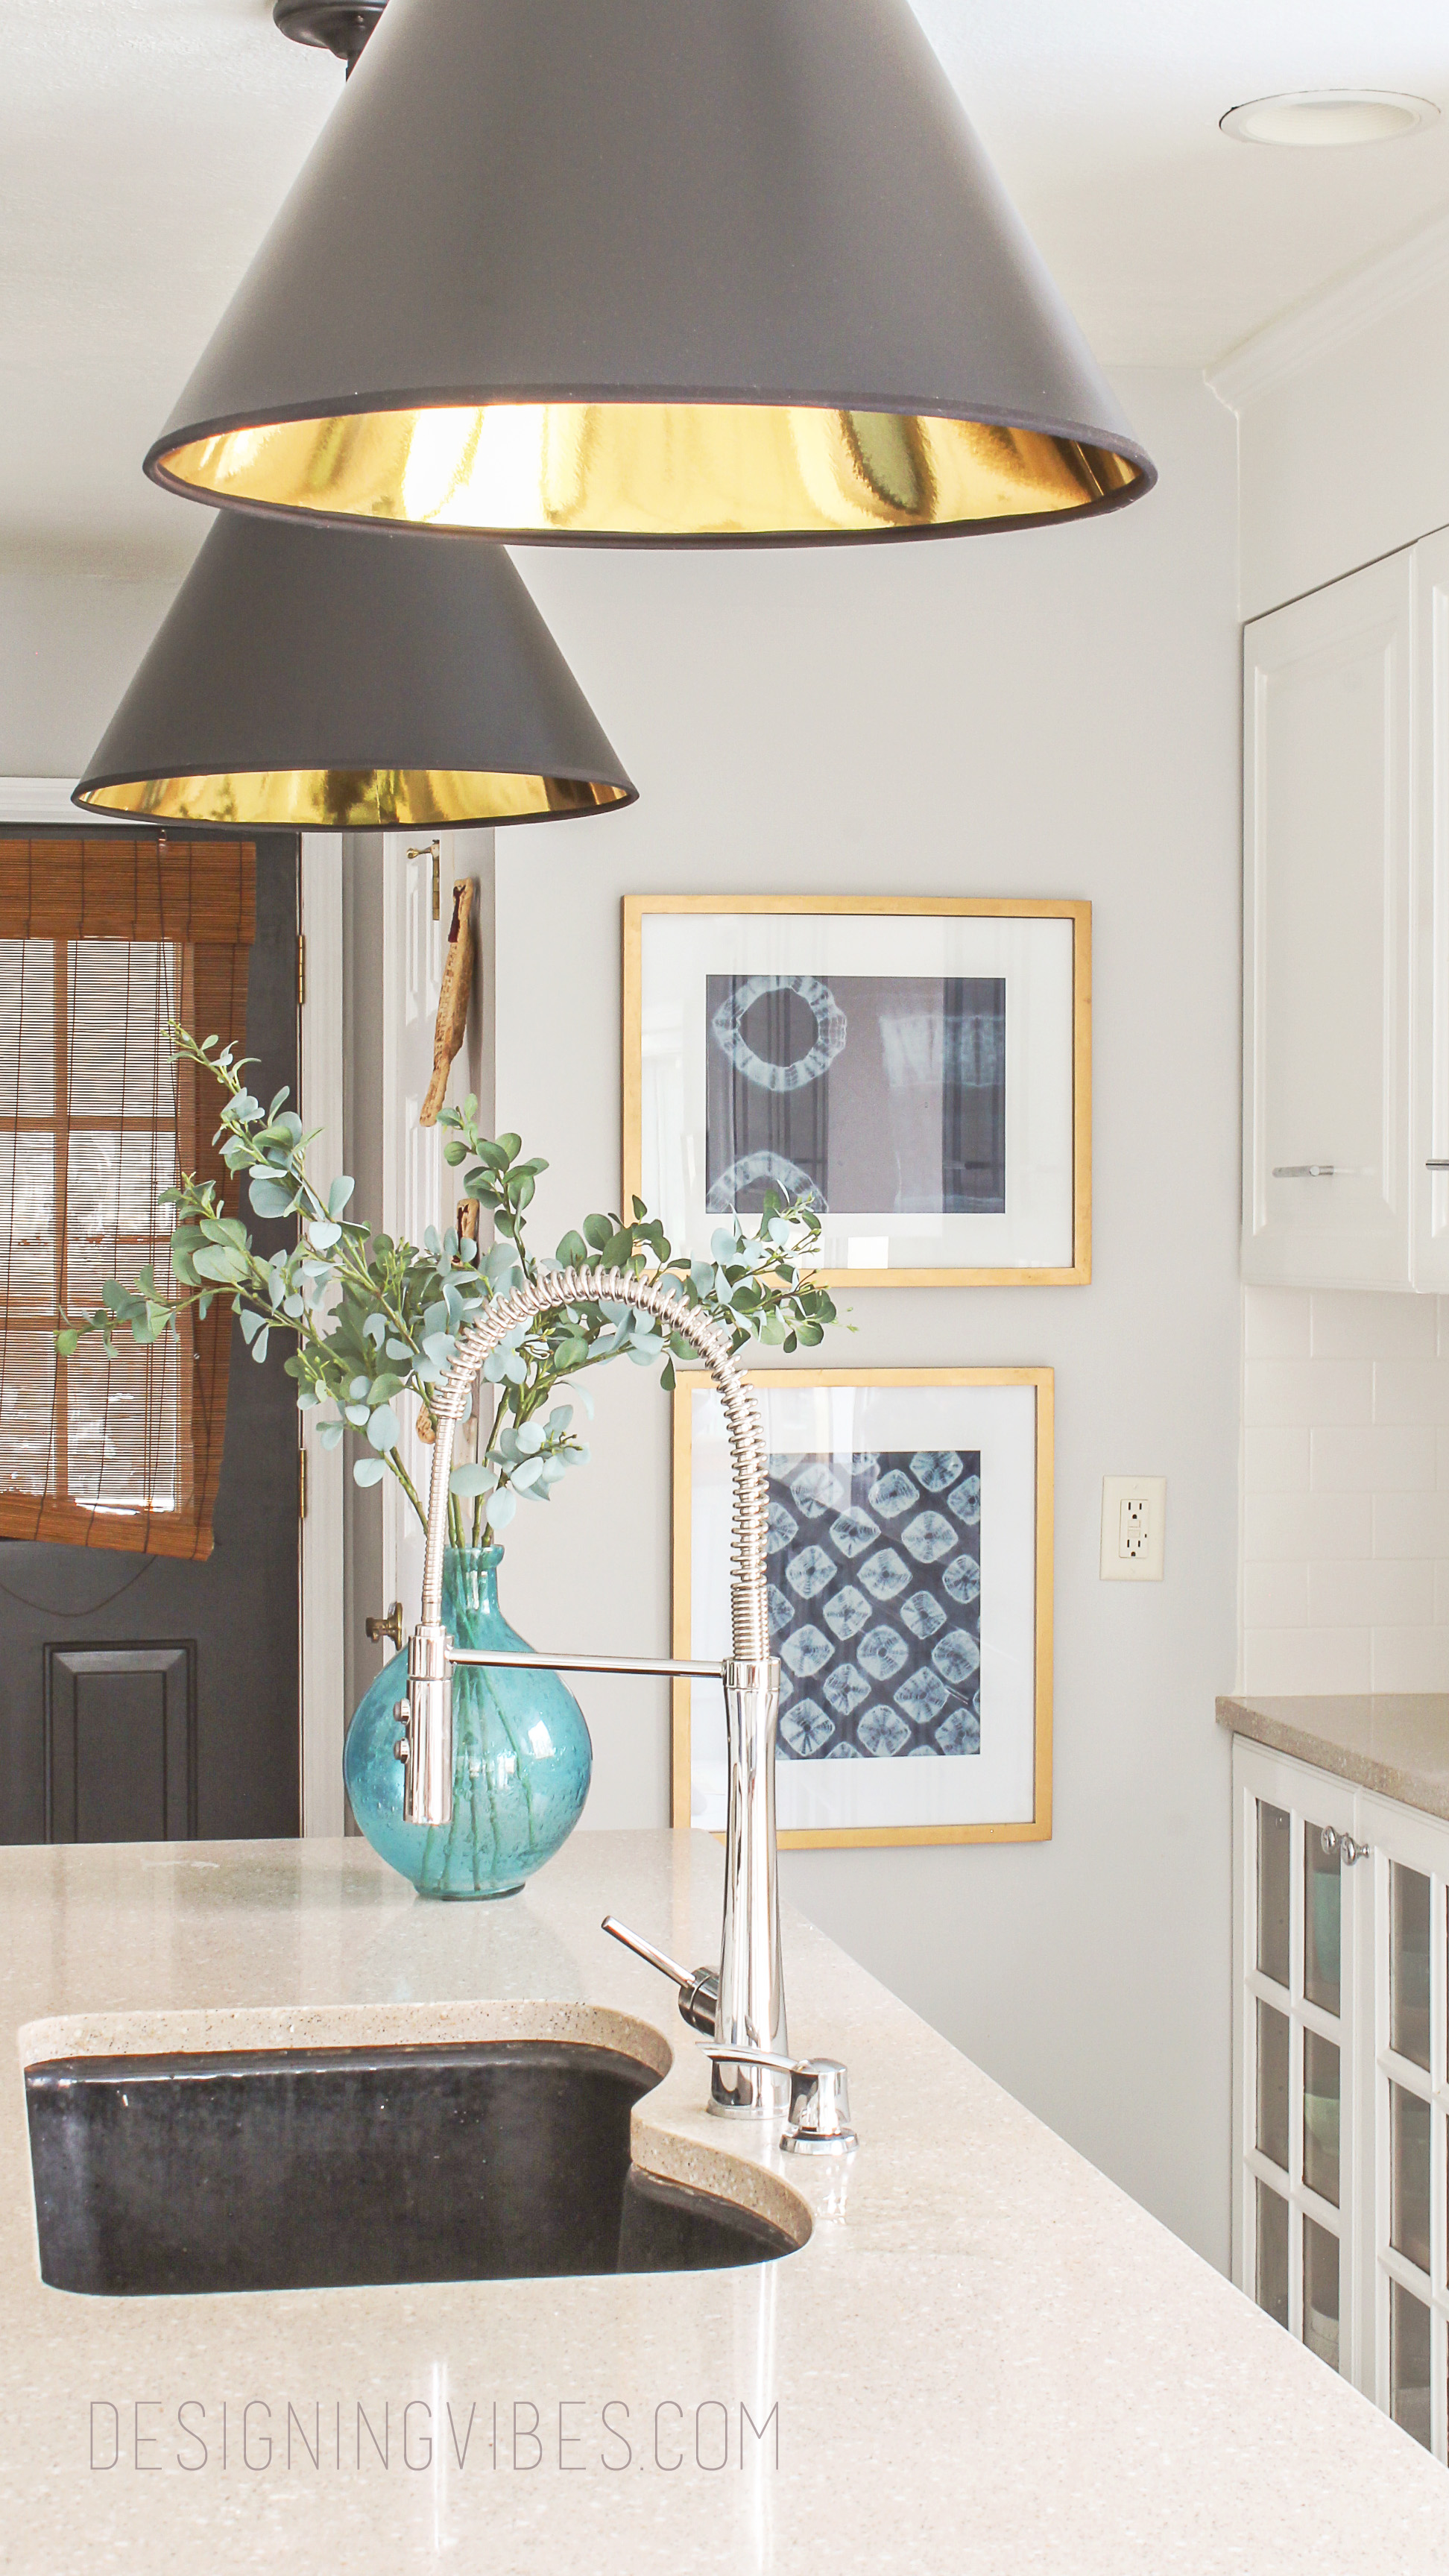
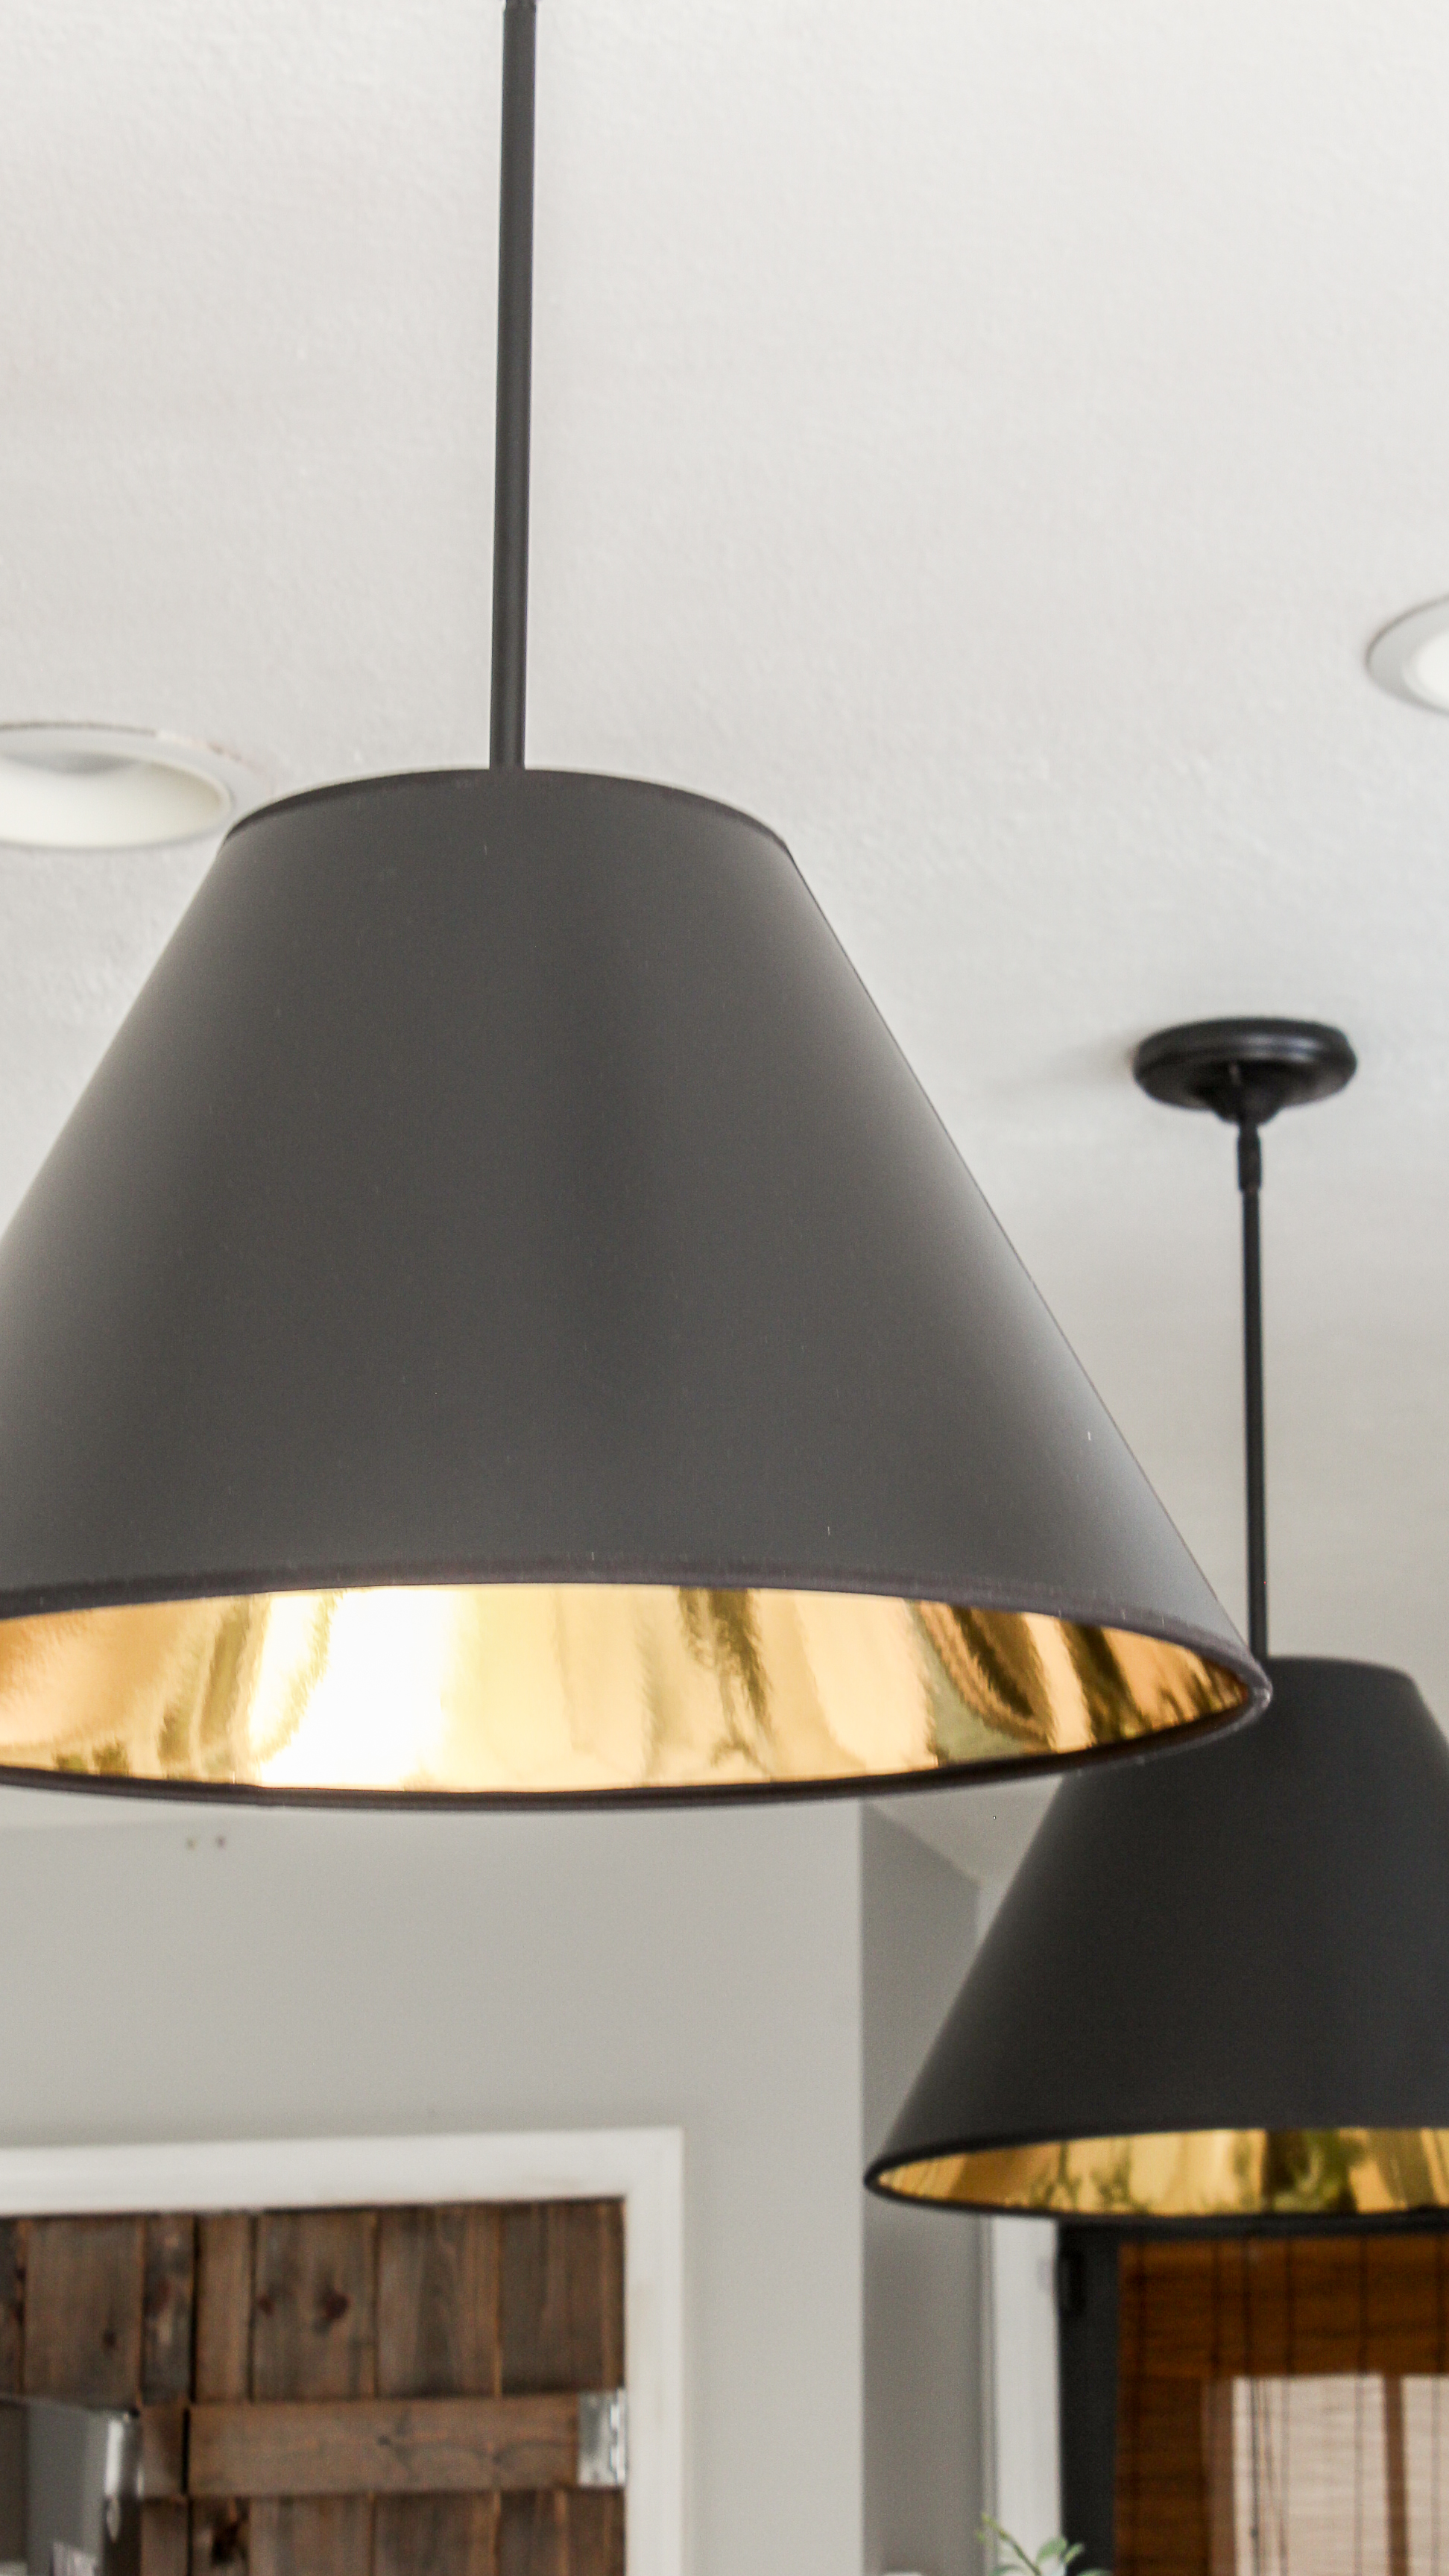
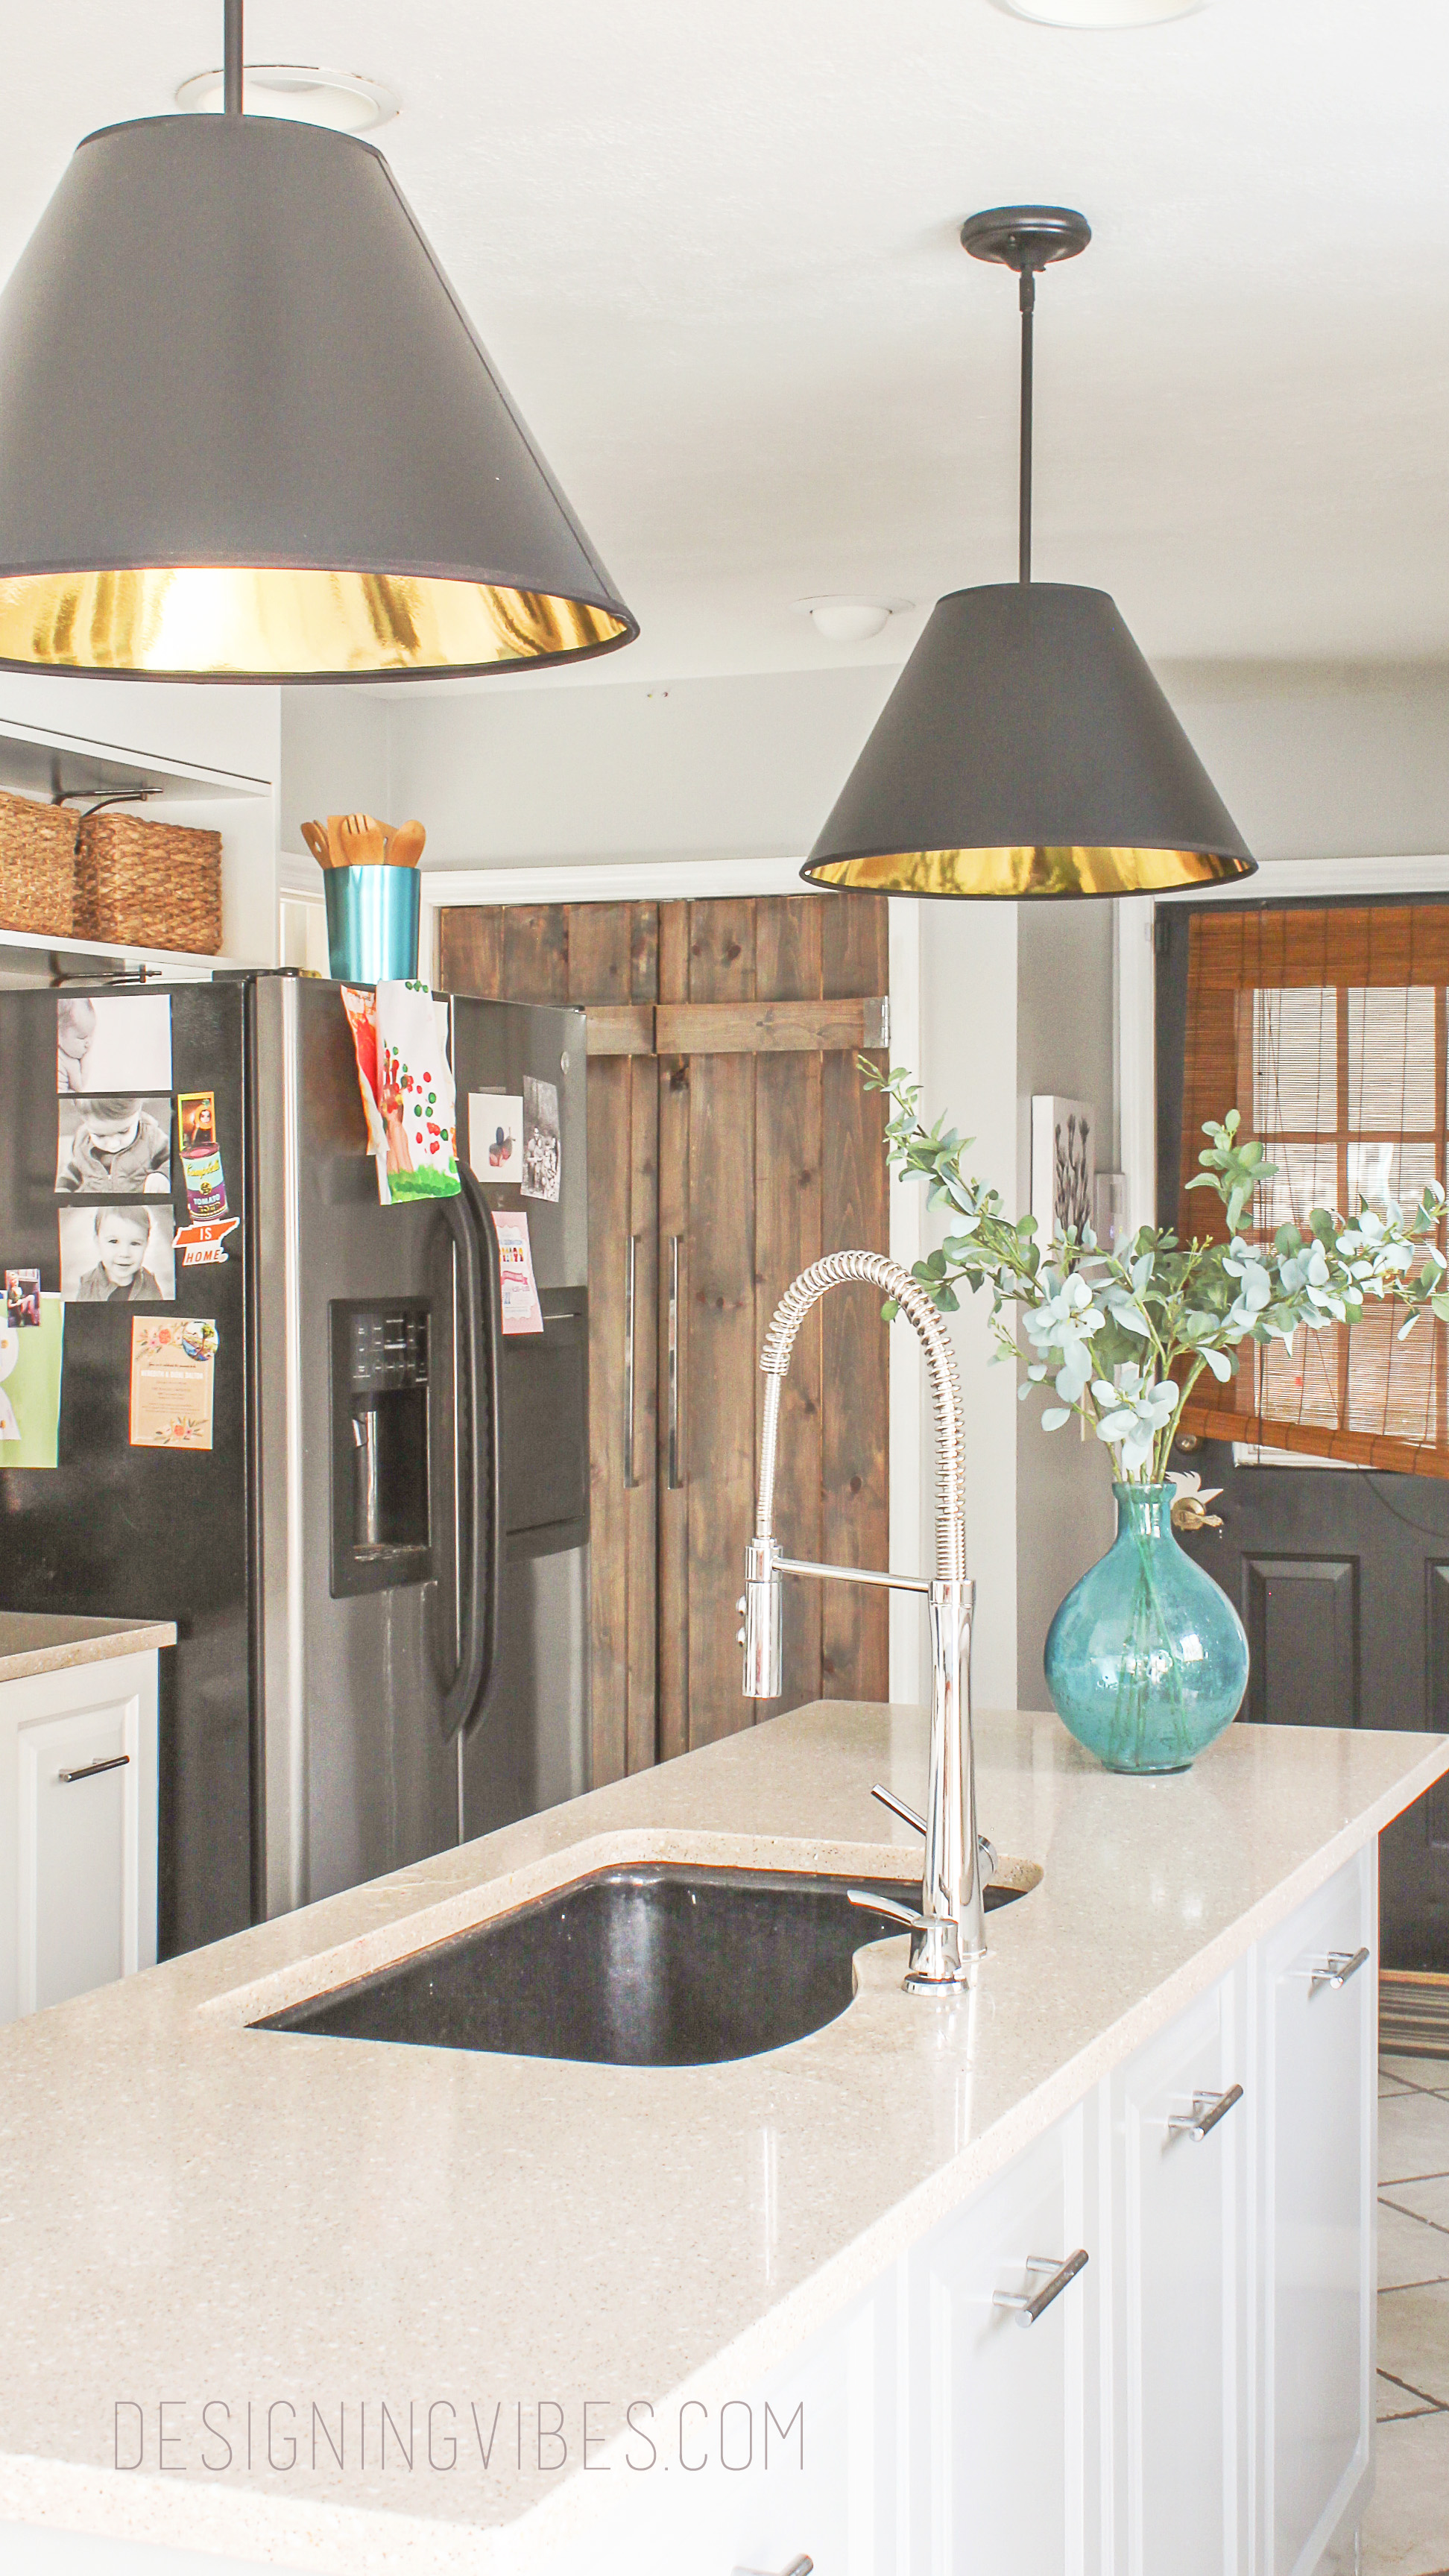
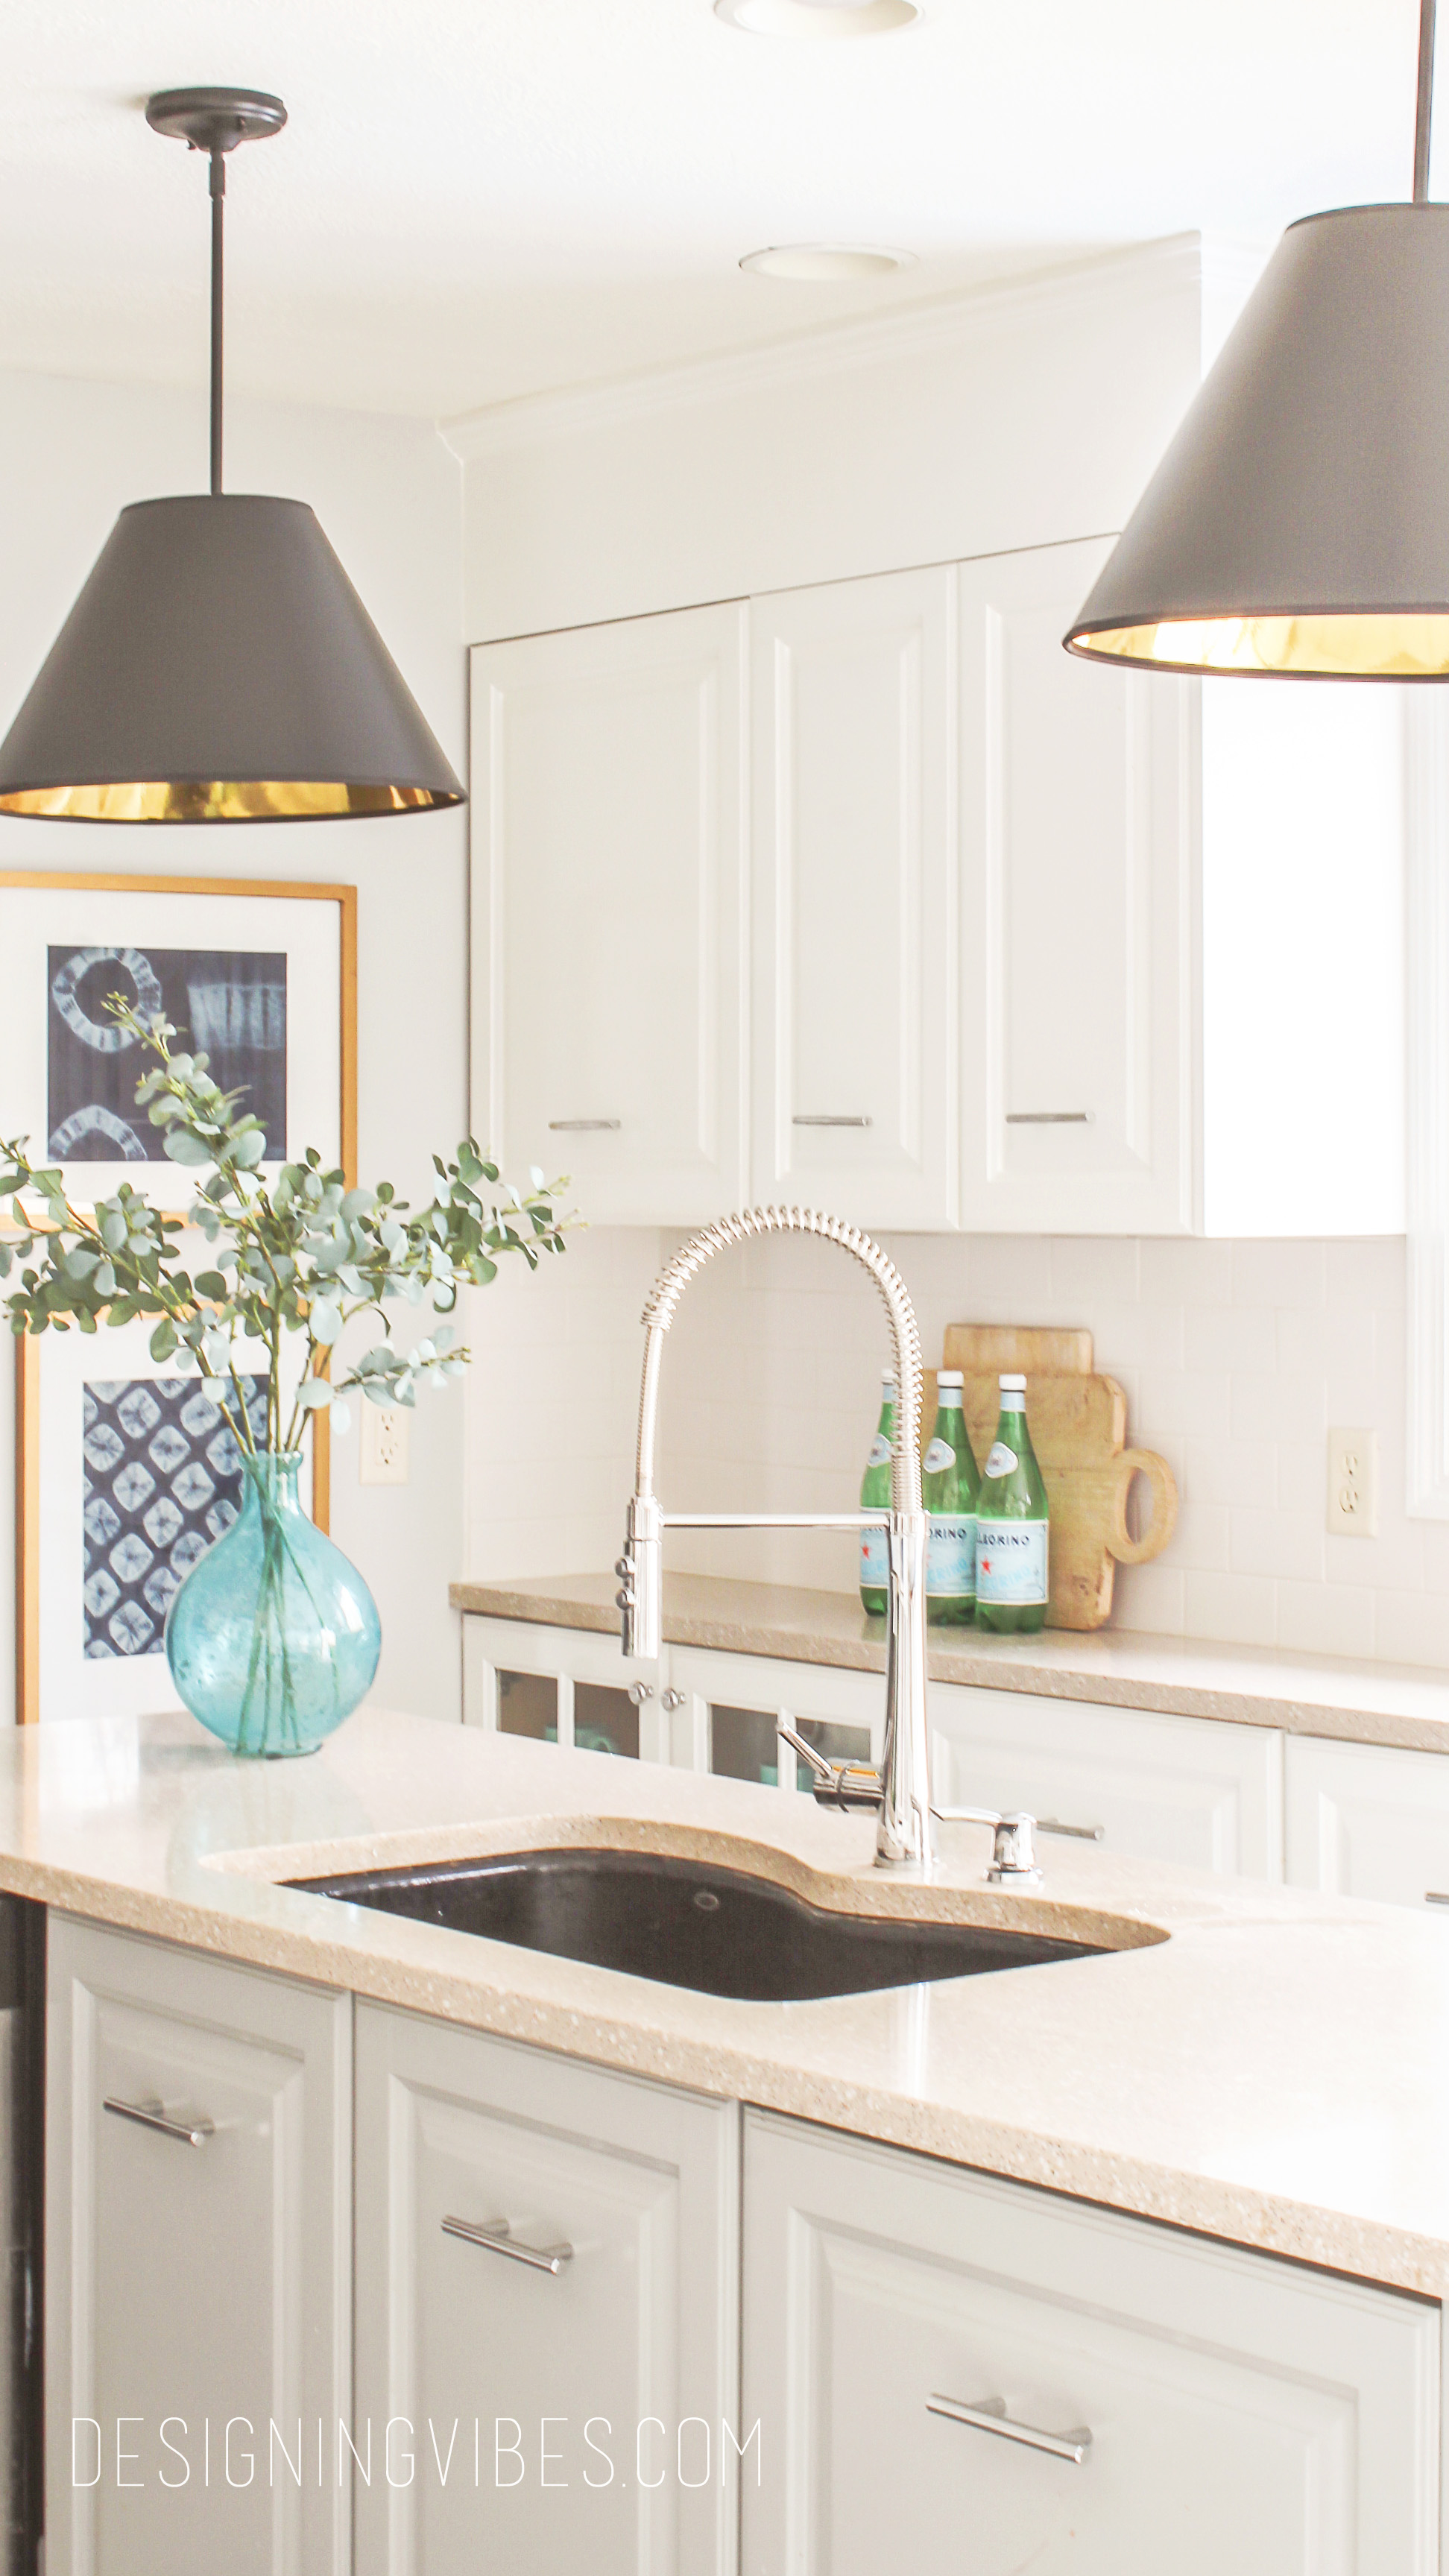
I love how the cone pendants anchor my kitchen island and give my kitchen a more custom look. The gold on the interior of the shade gives my kitchen a nice pop of glam and warmth. Not to mention, it matches beautifully with my gold frames.
Just note that if you are using the gold-lined shades![]() , I don’t recommend using a CFL bulb- it emits too much of an orange glow(beam me up Scotty!). I know the environmentalists are going to hate me, but I opted for ultra-soft incandescent bulbs. Don’t worry guys….I recycle.
, I don’t recommend using a CFL bulb- it emits too much of an orange glow(beam me up Scotty!). I know the environmentalists are going to hate me, but I opted for ultra-soft incandescent bulbs. Don’t worry guys….I recycle.
See how easy that was?
Now get out there and design some good vibes, and please be sure to spread the love by pinning…..


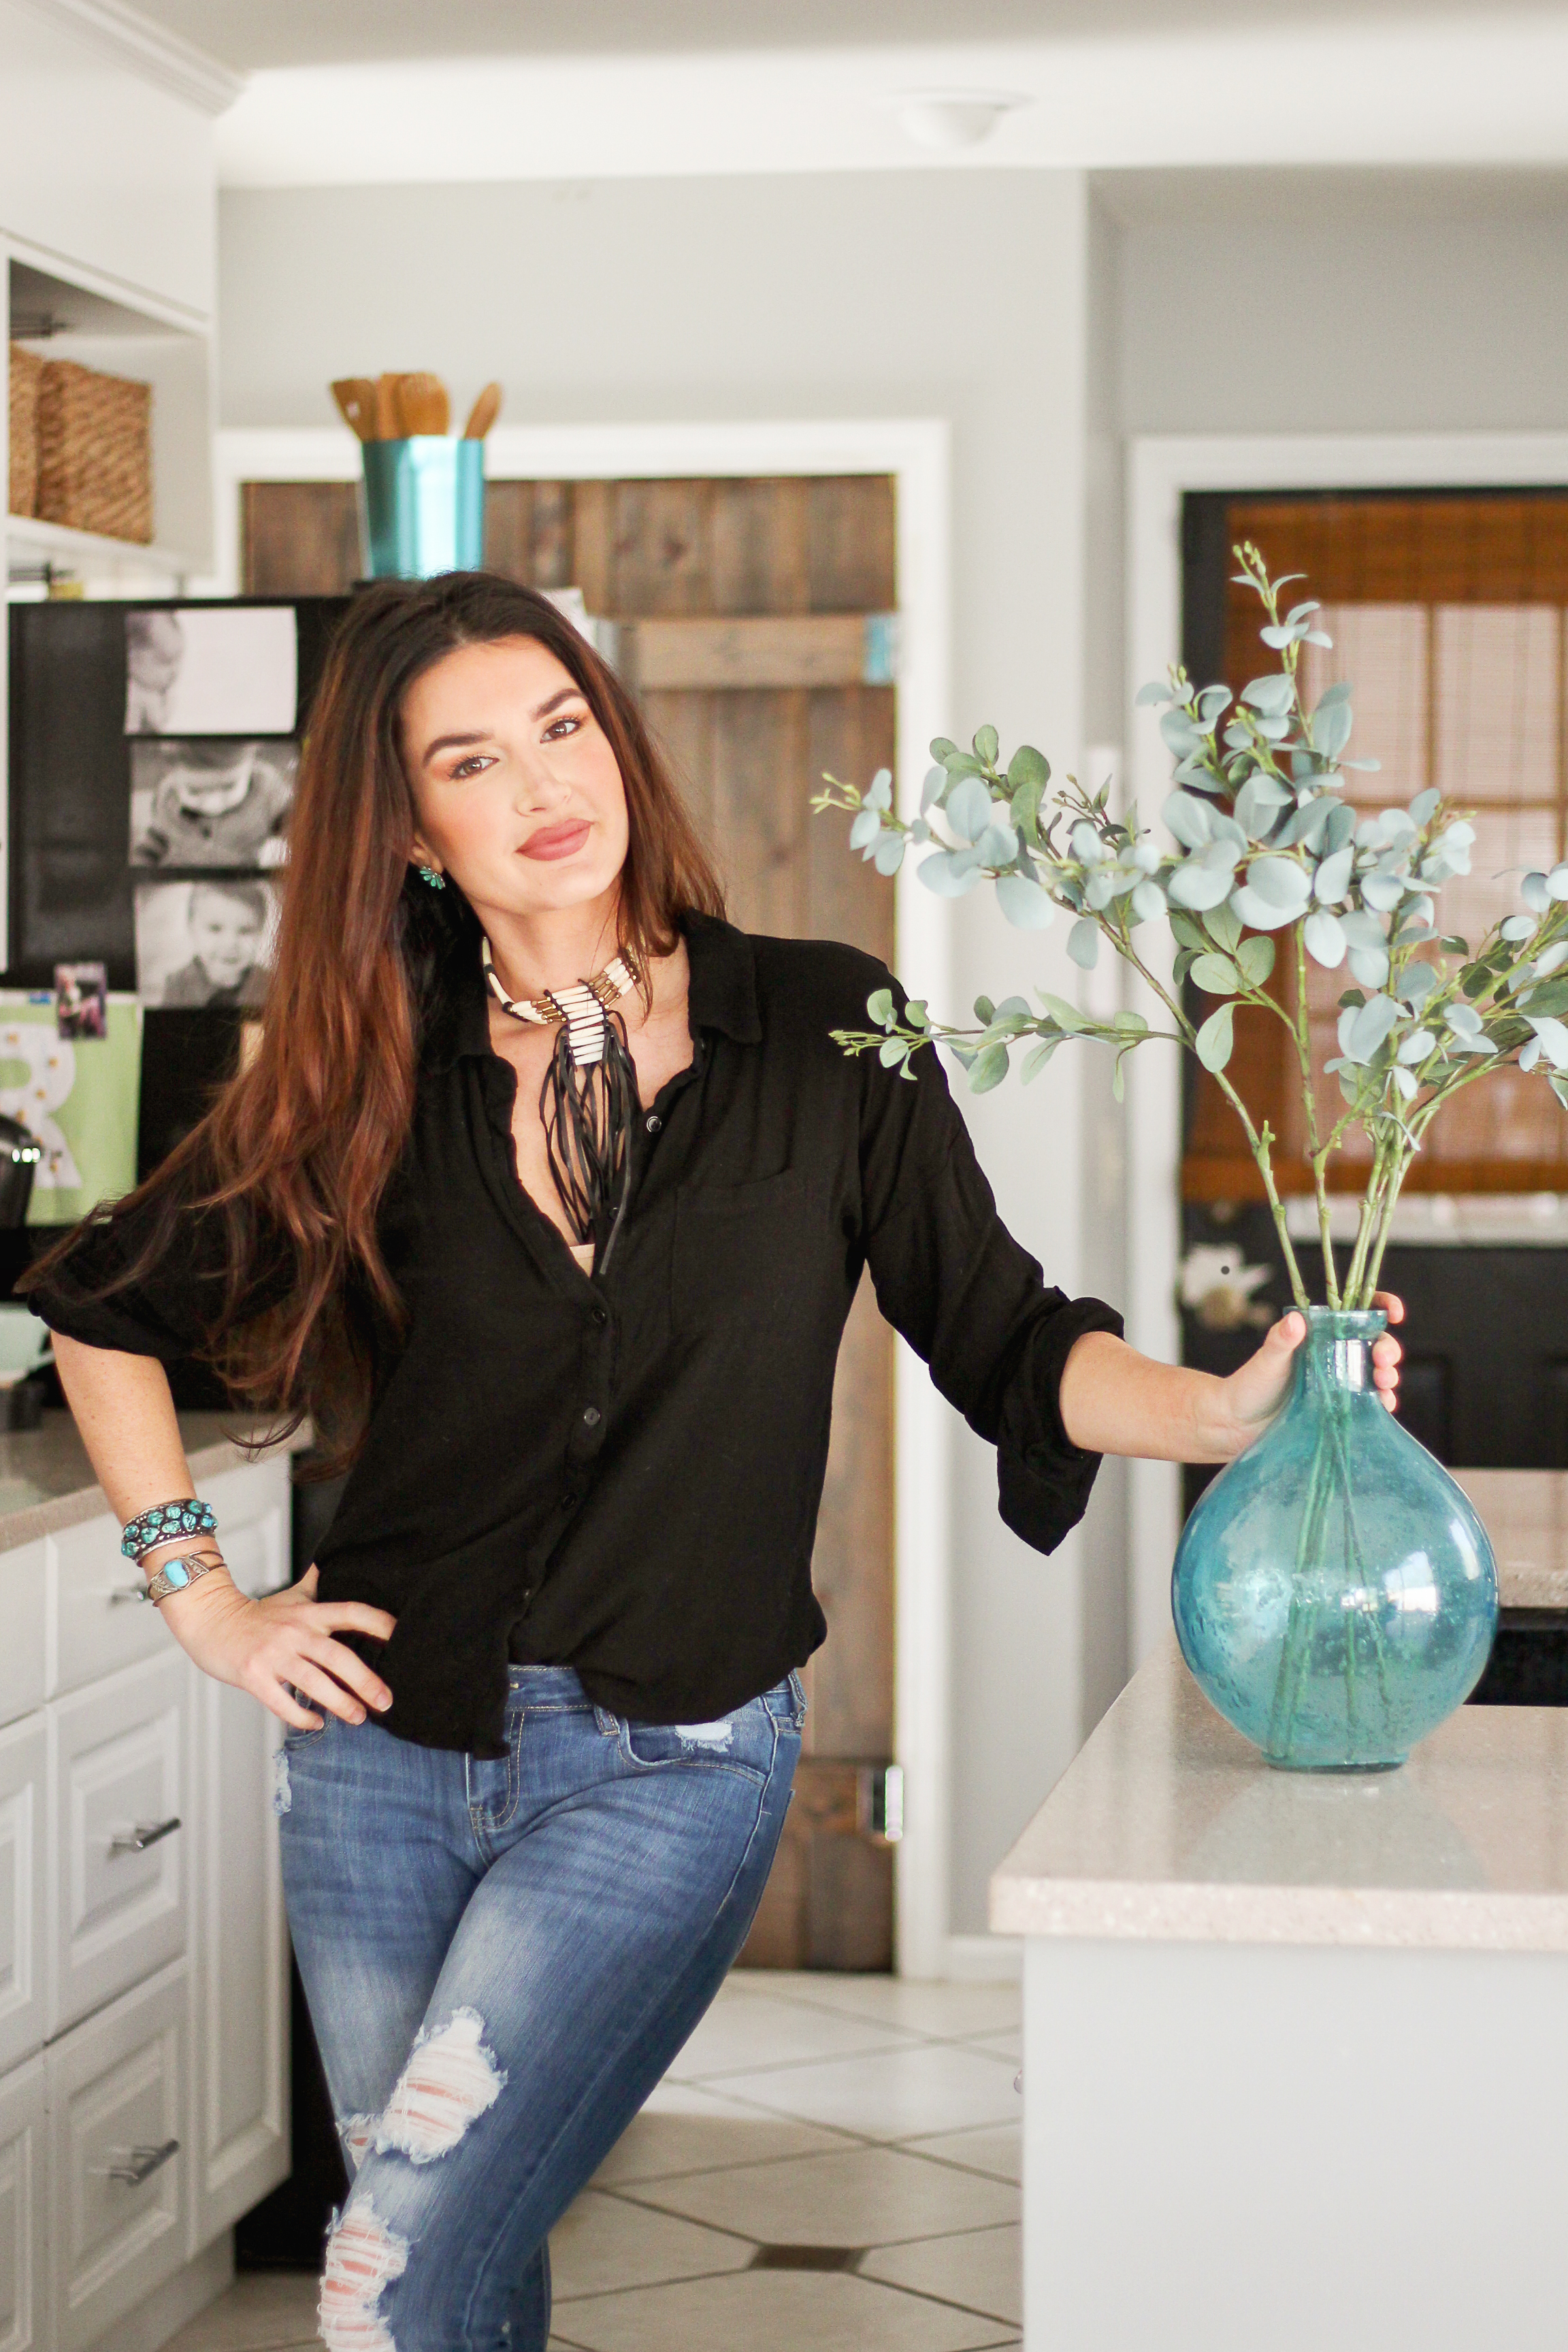

Welcome!
My journey in interior design and home improvement began with transforming my first fixer-upper home, all while managing a budget and raising two young boys. My work, a reflection of my passion for creating beautiful, uplifting spaces, has been recognized by top publications like Better Homes and Gardens Magazine, HGTV, and more. I invite you to explore my site and witness the transformation of my home and the vibes we've designed. Read more...


Oh I love them. So pretty.
Thank you so much, Marty!!!
Gorgeous girl! You nailed it!
Thank you so much, Karrie! I really appreciate it. 🙂
Looks great! I’m loving the grey and spot of aqua you’re using.
Thank you so much, Jules! 🙂
Love it!! Great job and VERY cost effective. Now where do I need one. Hmmmmm?
Thank you so much, Ricci! 🙂
Once again you’ve nailed it.Love to see what your doing.I have just the place to put these,thanks the for the DIY and ideas.
Thank you so much, sweet friend!
Hi Erica,
I just discovered your blog and I feel like I found my design soul sister who “gets” me! I love your aesthetic and your charming fixer-upper home. Now I have to add you to my vision board…next to my someday Florida home. ♡
Hey TJ! That makes me so incredibly happy to hear. Thank you so much for the sweet words. 🙂
I really love these! I have a chandelier in my dining room with a shade around it. I loved it when I purchased it and still do. The shade is an off white and I have been wanting to change it to black on the exterior and gold on the interior. I think it will make the crystals pop! I have commented on your site before and stated I am going for a similar room to you LR but with Orange, very dark/indigo blue, silver black white gold and not sure if I mentioned teal. I have been on this mission of pulling everything together for about 8 months now, only in my thoughts and have just started executing the work. It is coming together nicely and I will share when I finish.
Love that you did this over your island it has a much homier look now!
Thank you so much for the sweet feedback! Cannot wait to see how things come together for you….isnt it so exciting and rewarding? Much Love!
I am in the process of a kitchen mini-remodel and I needed to know how to make diy pendant lights where there is no existing light. And here it is! Can’t wait to see the fixture process; I need someone to make it not scary for me! I have given up on the ugly light from CFLs, but I encourage you to try the new LEDs that are made in standard bulb sizes. You can get any color from daylight to warm white. I’ve been very pleased with mine. Thanks again (to you and your talented hand model) for your tutorial! And can I just say that having a pants-less toddler photobombing the background is truly endearing and makes you “real” to me.
haha! I am so glad you got a kick out of the pants-less toddler. haha I will be posting the “electric” aspect of the project really soon…promise! Much love, Erica 🙂
Love those light fixtures! I do a similar thing with our flush mount ceiling lights. I especially love the gold inside the shade
Thank you so much, Ariel! I was determined to have gold-lined shades.
Flat out FANTASTIC! One of those, ‘why didn’t I think of that?’ moments! And your hubby…the perfect hand model, and handy man.
Thanks for the tutorial.
Lynn
haha. thank you so much, Lynn. I was so proud of myself for finding a way to achieve the look i wanted for way less.
These add the perfect touch! Love them!
Thank you so much, Leanne!
Great project Erica! I pinned for later. We’ll need pendant lights in our kitchen…at some point! Also, your photos are always so beautiful.
Thank you so much, Brittany!!!:)
Those are lovely, and the interior shimmer is beautiful! I’m all about saving money and these DIY’s look just like they came form a store, great job!
Thank you so much, Toni. There was no way I was going to pay full retail on these babies.