
How to Remove Popcorn Ceilings Like a Pro
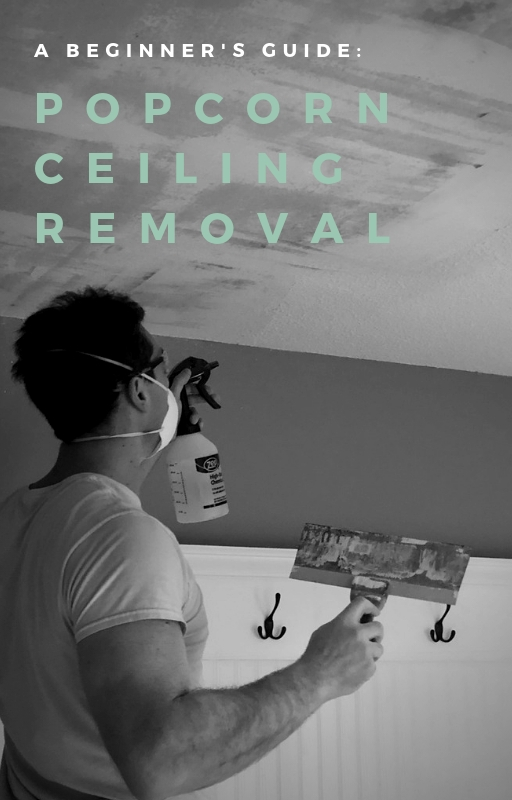
Looking for the most efficient way to remove dated, popcorn ceilings? You are in luck, because today I am sharing a step-by-step tutorial for smoothing out those textured ceilings.
**Note: If your home was built between the 1950’s thru the mid 1980’s, you will want to test your ceilings for asbestos before disturbing any of the popcorn material on your ceilings. **
So I realize it has been a hot minute since I have shared my butler pantry progress with you (you can read the original design plan post here). And while it seems the progression on this project is moving at a snail’s pace, I am also relieved to say that one of the most daunting parts of the renovation is complete…. the popcorn ceilings are gone!!!! Bye, Felicia!
Now this isn’t our first rodeo with the design atrocity that is acoustical ceilings. In fact, not only do we have experience smoothing textured ceilings…we have also covered popcorn ceilings altogether (you can read that tutorial here).
Knowing what a pain in the a$$ this project was going to be (not to mention messy), I did consider covering the ceiling with planks as I did in my dining room, but ultimately decided against it in an effort to save a few hundred bucks on materials.
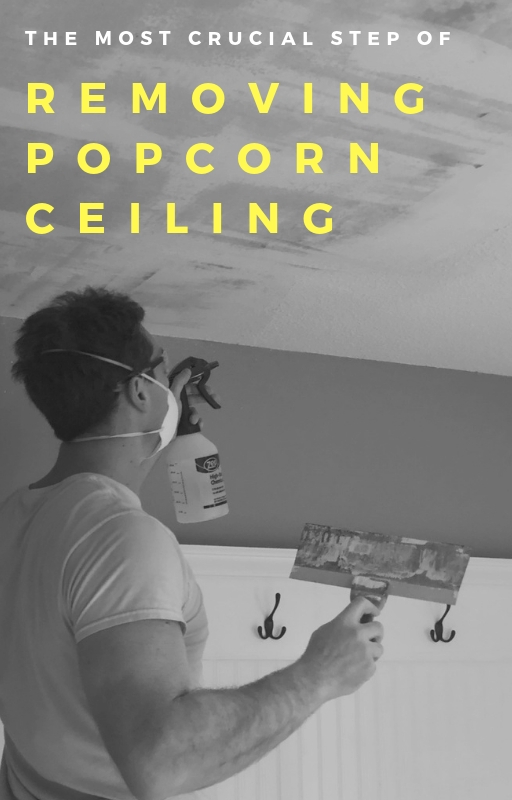
Ya see…all you really need when removing popcorn texture is a good ol’ spray bottle of water and a tape knife. It really doesn’t get much simpler than that.
Much to my surprise and delight, the ceiling only took 1 hour to scrape ( I think that’s because of a little trick we learned this time around which I will disclose below).
Just for reference, below is what the ceiling originally looked like..
Ceiling Before:
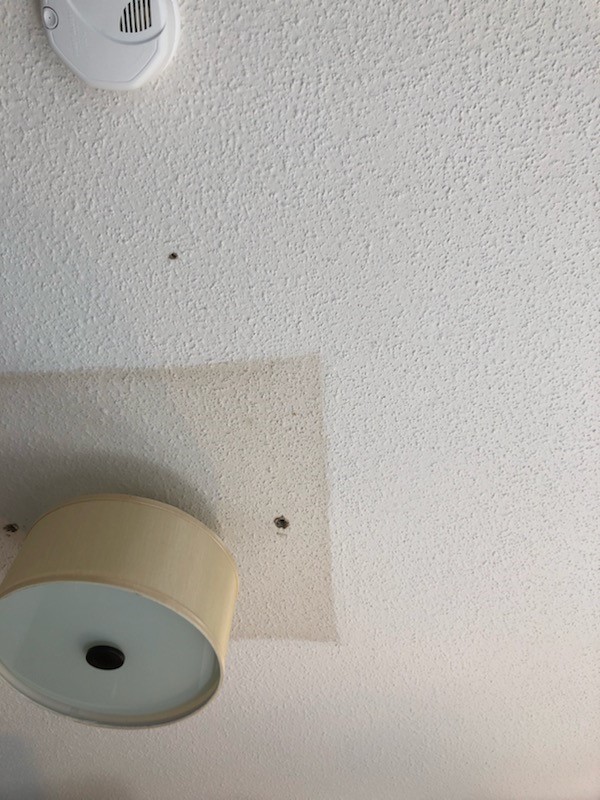
We believe the dingy square patch is actually the original color of the ceiling (that was also the original paint color of the trim and baseboards in the house…vomit!) Someone must have eventually painted the ceiling white (the square formation was where another light fixture had been).
Below is what the ceiling looks like now (along with my brand new light fixture)…
Ceiling After:
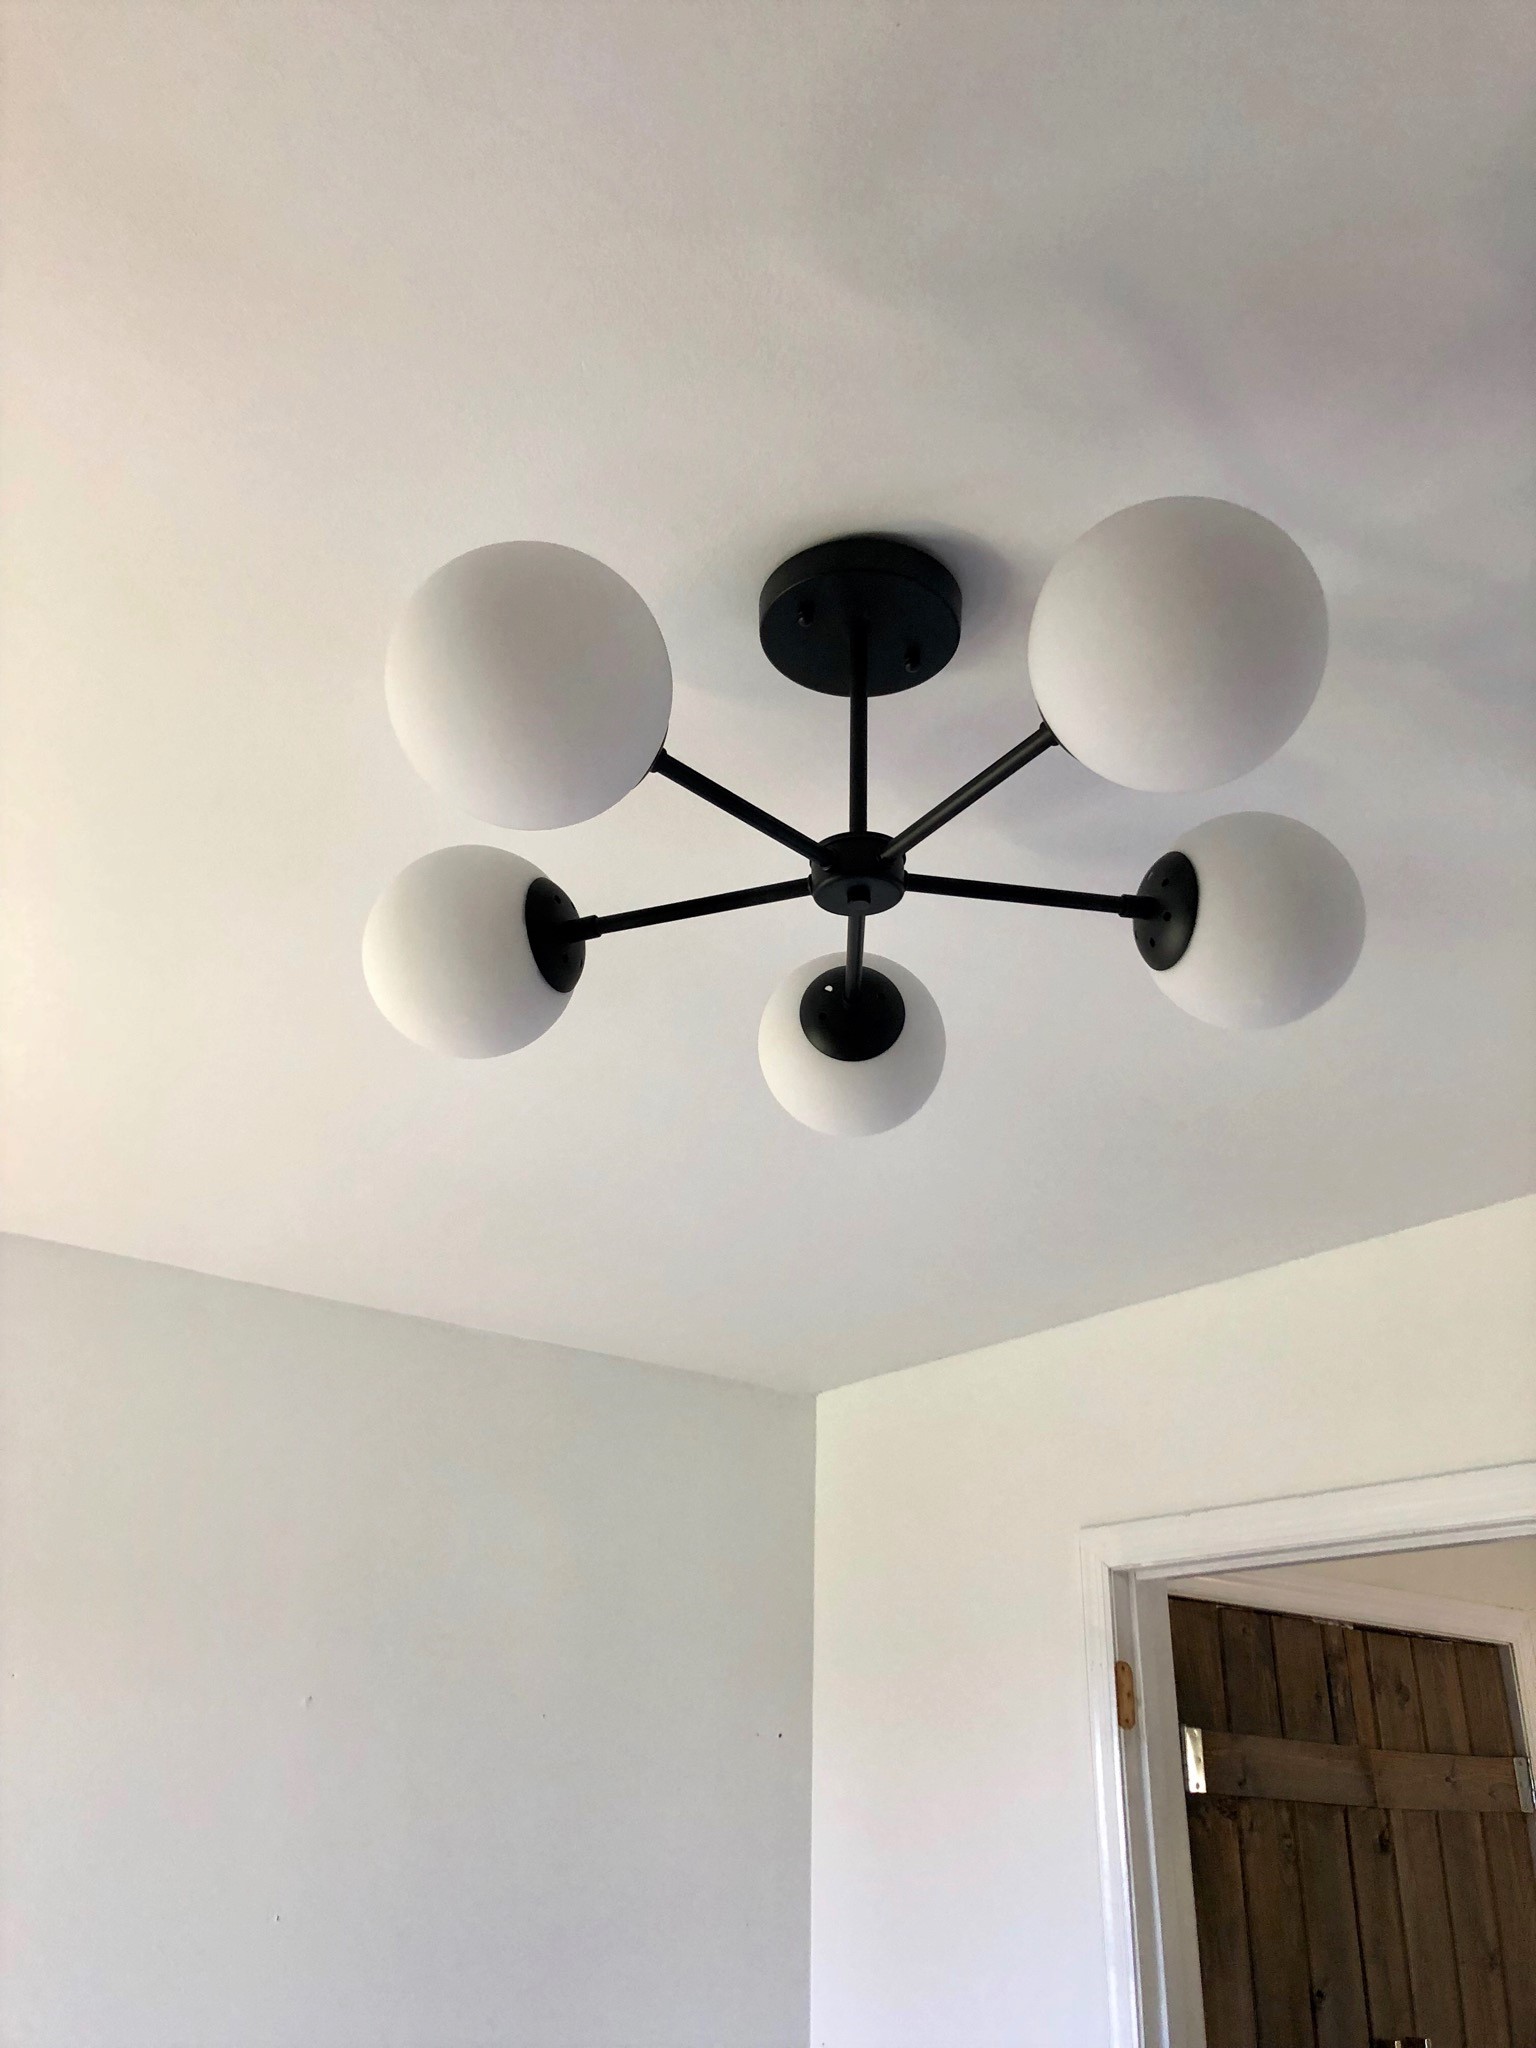
Look at that ceiling….smooth as a baby’s bottom.
Now let me show you how we (and by “we” I mean my husband) got them looking that way…
For your shopping convenience, I have included affiliate links in this post.
Materials Needed to smooth Popcorn Ceilings:
- dust mask
- spray bottle
- tape knife (we used this size)
- plastic sheeting *optional*
- joint compound
- 180 grit sanding sponge (like this one)
Directions for Acoustical Ceiling Removal:
**Warning: If your home was built before 1978, your popcorn ceiling may contain asbestos. Do not complete this project yourself if your home was built before 1978.**
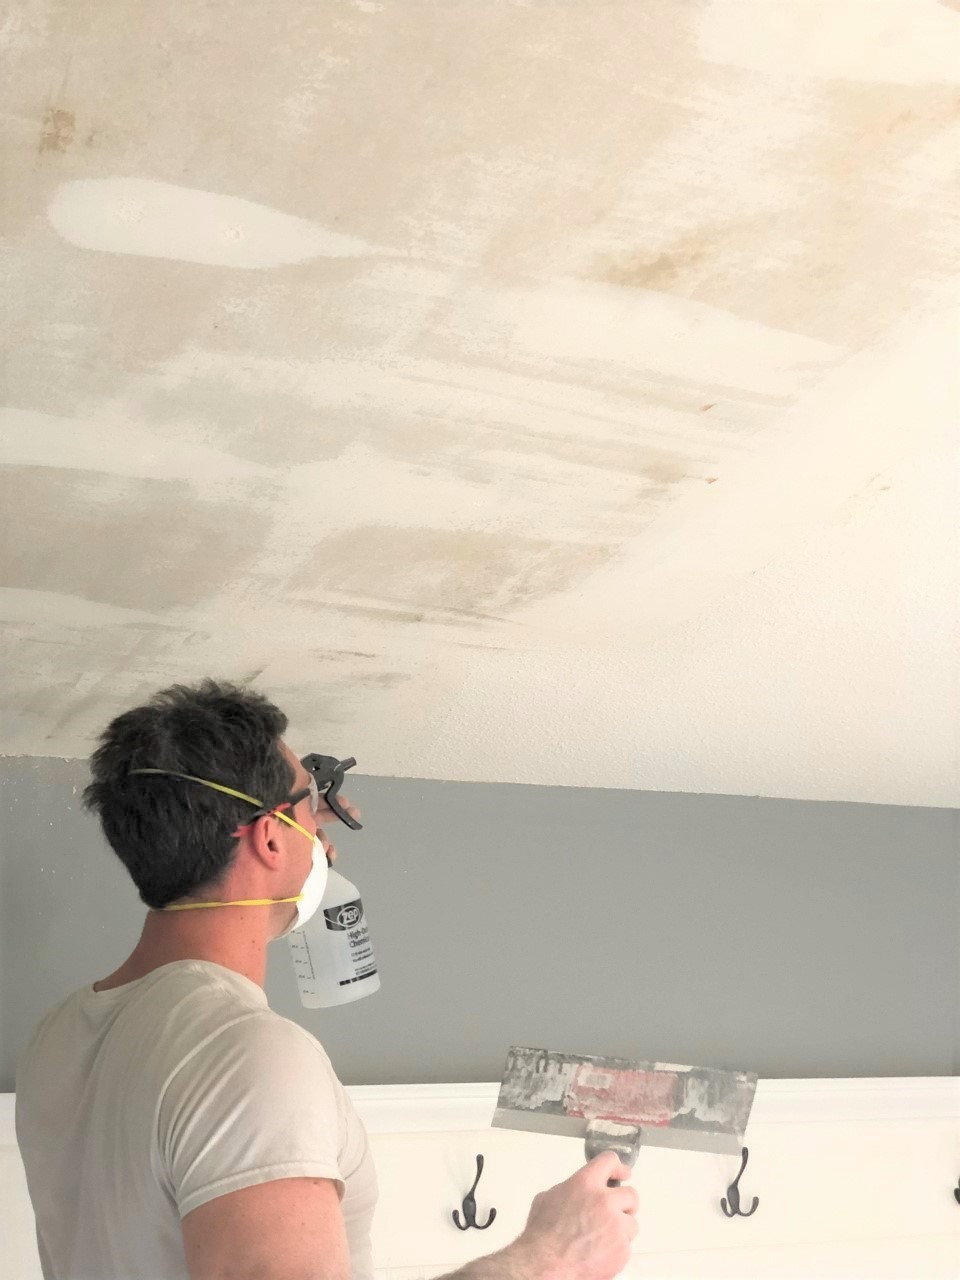
(Step 1.) Prep the space for a big freakin’ mess. Lay plastic on the floors and tape plastic to the walls if desired. Be sure to cover any vent registers! It’s about to get super dusty, folks.
(Step 2.) Using a bottle sprayer full of water,wet a 4X4 FT section and let it set for 3-4 minutes (This part is crucial to making the whole process easier. It was the trick I was referring to earlier.) DO NOT SCRAPE IMMEDIATELY AFTER SPRAYING, AS IT WILL BE MORE DIFFICULT!!
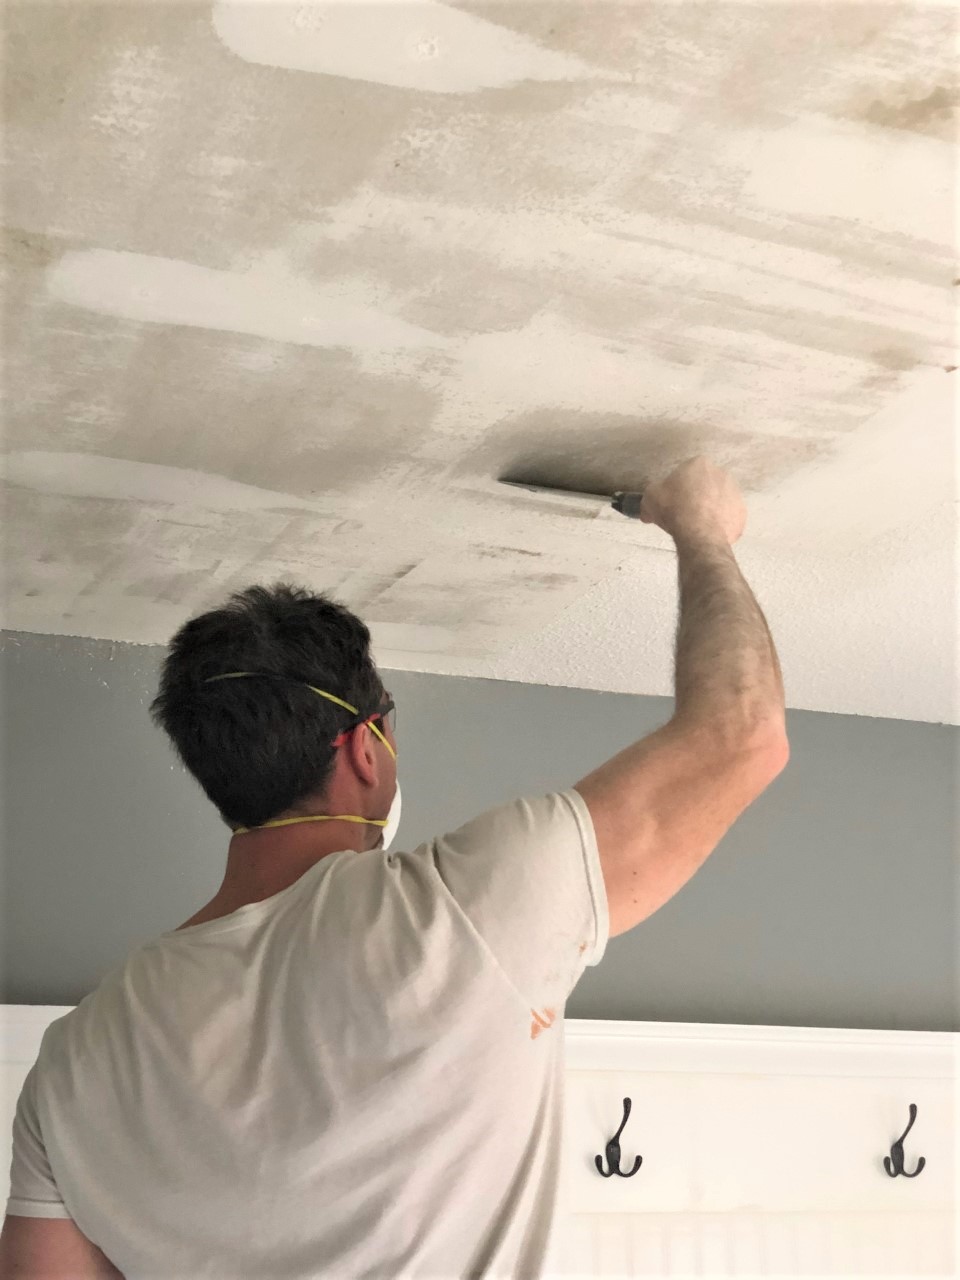
(Step 3.) Wearing a dust mask, begin scraping (I used an 8 inch tape knife). You can purchase a scraper designed specifically for this job (with a bag attached to collect drywall debris), but we did not have the best experience with it in the past. We found that the bag gets heavy super fast. Not to mention, the bags fill fast and you go through the bags too quickly. Whatever you decide to go with..DO NOT USE AN ACTUAL SCRAPER AS THE SHARP CORNER WILL GOUGE THE DRYWALL.
(Step 4.)After all scraping is complete, you will need to fill in any imperfections (mainly where the drywall screws are located) with joint compound. If you don’t want the hassle of mixing the compound yourself, you can buy the premixed variety.
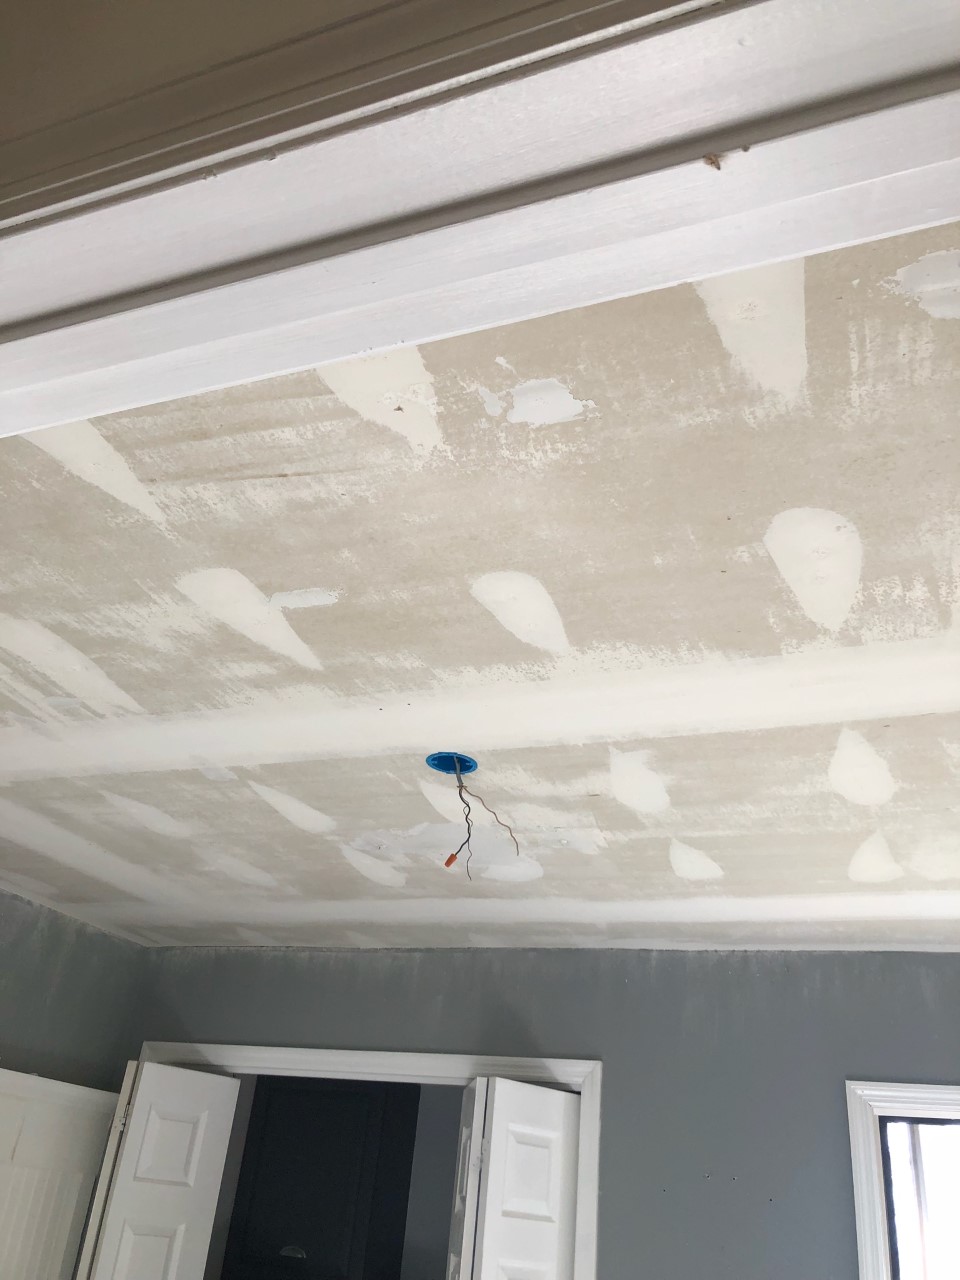
(Step 5.) Once joint compound is dry, sand patches with 180 grit sanding sponge or hand sander. You don’t have to use a fine grit because ceiling paint is designed to hide imperfections.
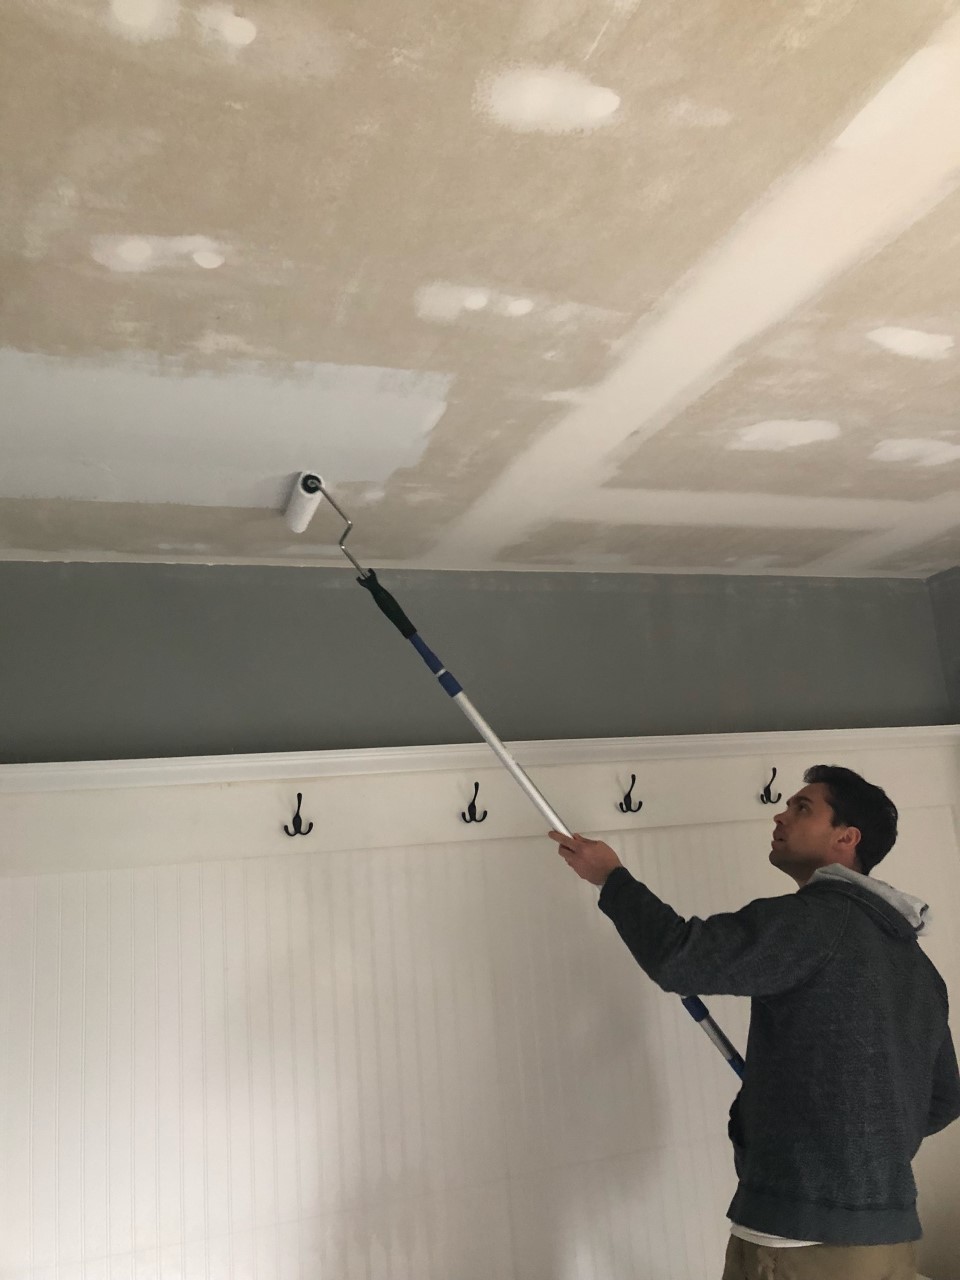
(Step 6). Prime and paint ceiling with a paint specifically designed for ceilings. Always remember: the more matte the paint, the more forgiving of any imperfections.
While the job was undeniably messy, the transformation was totally freakin’ worth it…
And here is a progress shot of the butler pantry…
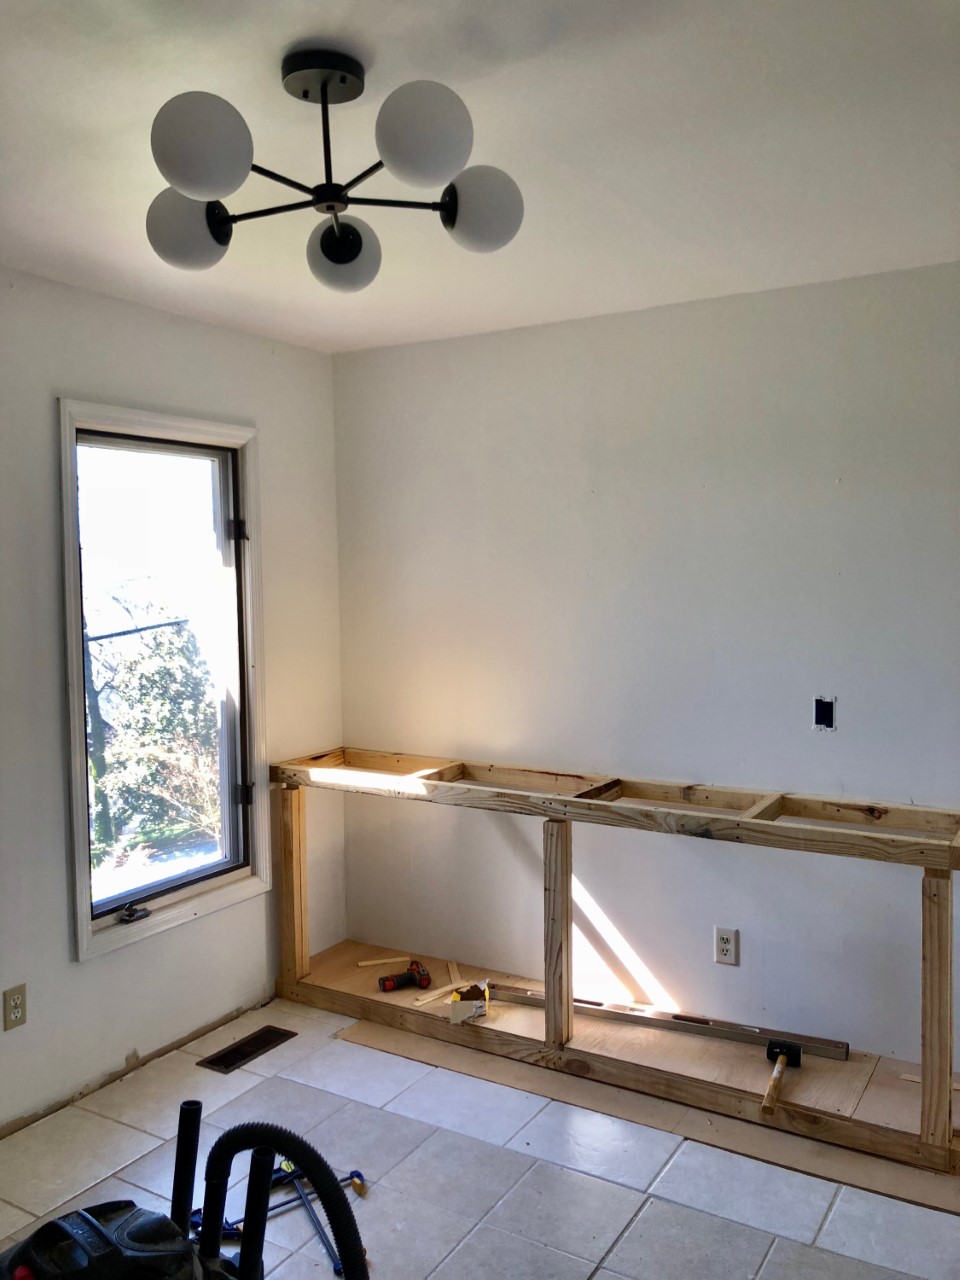
The lower cabinetry framing is complete. We have painted the walls white. and installed a new chandelier (we also relocated the light receptacle to the center of the room).
Next, we have to build the cabinet doors, install floating shelves and sconces, install new flooring and baseboards and figure out the whole countertop situation.
This room transformation is taking a bit longer than I had intended, but I know we will get there eventually.
Wishing all of you babes a fabulous week!
Now get out there and design some good vibes!
PS> It means the world to me when you share this post with friends, on social media or Pinterest. Your support is integral to the growth of this little blog. Thank you so much! xoxo
More tutorials related to popcorn ceilings:


Welcome!
My journey in interior design and home improvement began with transforming my first fixer-upper home, all while managing a budget and raising two young boys. My work, a reflection of my passion for creating beautiful, uplifting spaces, has been recognized by top publications like Better Homes and Gardens Magazine, HGTV, and more. I invite you to explore my site and witness the transformation of my home and the vibes we've designed. Read more...


Oh wow, that’s a big job. Your ceiling looks fabulous
Thank you so much, Marty! Thankfully all of the mess was worth it.
Easy but messy. I’ve done ceilings in my home and whatever came off the ceiling I ended up wearing! Your husband looks exceptionally clean 🙂
That is the perfect description, my friend: easy but messy! haha! Wishing you a fabulous rest of your week.
I only wish I could have this done. Our ceilings have paint over the popcorn and they feel like stucco.
Oh…that is probably a sketchy situation. We have that in our master bathroom as well and we will probably end up covering it with planks or beadboard. Here is a tutorial for using that method: https://designingvibes.com/beadboard-planks-popcorn-ceiling-diy/
Hopefully this gives you some hope. Good luck with everything, Jean!