
Vinyl Flooring Installation the Easy Way
As much as I like to b*tch about technology overtaking society, I sure do love when I find a game-changing advancement in the home improvement sector. Case in point?….luxury vinyl tile.
Also known as LVT, luxury vinyl tile is not your mama’s vinyl flooring. Not only is it waterproof (making it ideal for kitchens and bathrooms), many of the click and lock varieties can be installed directly over existing flooring with little to no prep. If you are sick of your boring builder grade flooring, follow me along as I show you how we installed vinyl flooring directly over ceramic tiles with minimal prep work.
For your shopping convenience, I have included affiliate links to the products I mention in this post.
LVT Flooring – Why I chose it
So a few months ago, I wrote a post on how I cleaned the nasty ceramic tile I inherited when I bought my 1980’s fixer upper, and while my cleaning method was highly effective at whitening grout lines and removing years of filth from the crevices in the tile, I have always had major beef with ceramic tile.
Not only do I think it appears cold, sterile and a bit builder-grade, I think it is way too high maintenance for my dirty life (kids, pets, laziness). Not to mention, I freaking despise grout lines!!
In all honesty, I have pretty much lusted after new kitchen flooring from the moment we moved in to our outdated rancher, but a few factors hindered me from taking action. Like most design dilemmas in my life, budget was a major factor.
If I had it my way, I would have light hardwood flooring installed in my kitchen, but because my kitchen opens into the living room (where I have dark stained wood floors), it would look pretty darn bonkers to have two different wood stains side by side.
My design instincts told me to refrain from the idea of “matching” the stains as I knew the kitchen was not bright enough to handle such a dark finish. So …my remaining options were concrete, tile (and did I mention I effing hate grout?!) or some sort of miracle.
As my husband and I began pondering our options a little more seriously, we noticed all of the tile had been placed under the cabinetry and the island …so demolishing the existing flooring was basically out of the question.
After extensive research, I stumbled upon a promising product called click and lock vinyl flooring. Not only was it waterproof, I didn’t have to worry about annoying grout lines and some styles are actually designed to be placed over most existing subfloors.
Even more convenient, I wouldn’t lose my kitchen during the installation process. If we were to choose concrete or ceramic tile, my kitchen would have been off limits for days (which would be almost impossible with a 2 year old and a 4 year old).
After we decided that demoing the existing tile flooring was not an option, my next task was finding a click and lock vinyl flooring product that was thick enough for use over tile floor – with no potential risk for telegraphing issues (telegraphing is when the vinyl flooring begins to show imperfections in the subfloor or grout lines from below the surface).
When I found this modern yet classic collection of click and lock LVT plank flooring from Mannington, I was super excited. Not only was it beautiful, it was 8mm thick (the thickest click and lock flooring I had ever come across).
Just to give you a little “thickness” perspective, most of the cheaper vinyl you find at big box stores is only around 2-4mm thick- definitely not conducive for installation over existing tile flooring.
** Click here for the product I used. I got the color Stucco.***
In addition to being 100% waterproof, this specific line of LVT is scratch resistant and comes with a built in barrier for foot comfort and noise reduction. I was also pleased to see that all of the reviews I found on the product were positive.
It comforted me to see written, explicitly in the product details, that it could be installed directly over tile without any concern for grout line telegraphing. While this line of vinyl plank flooring is almost $4 per square foot, comparable to builder-grade ceramic tile, the savings come from forgoing labor and demo costs. In fact, it cost about $1000 of product to compete my entire kitchen.
It would have been more than double that cost if I would have invested in a professional to install ceramic tile. Not only that… I would have had to endure days of someone tearing apart my kitchen in the demolition process(ain’t nobody got time for that!). So let me show you how we installed this vinyl flooring over existing tile.
Vinyl Flooring Installation
While the manufacturer’s instructions for installing this floating vinyl plank flooring were pretty sufficient, I wanted to share some additional tips and lessons we took away from the process along with a summary of the basic steps we took to install the LVT flooring.
*Updated 3-15-22*- I just published a helpful checklist to go over before installing your LVT over existing flooring. Be sure to read that separate post here.
Materials Needed:
- this luxury vinyl plank flooring (I used a 12×24 size in color Stucco )**Whichever LVT product you choose, if you are going over existing tile, make sure the product info specifically says that it is ok for use over tile** Be sure to tack on an additional 10-15 square feet of product for waste.
- utility knife
- jigsaw with fine tooth metal cutting blade (for intricate cuts)
- measuring tape
- speed square
- pencil
- *optional- oscillating tool with grout removal blade and Quickcrete (if you have some obviously uneven existing tile)
(Step 1). Allow the vinyl plank flooring to acclimate for at least 48 hours before installation.
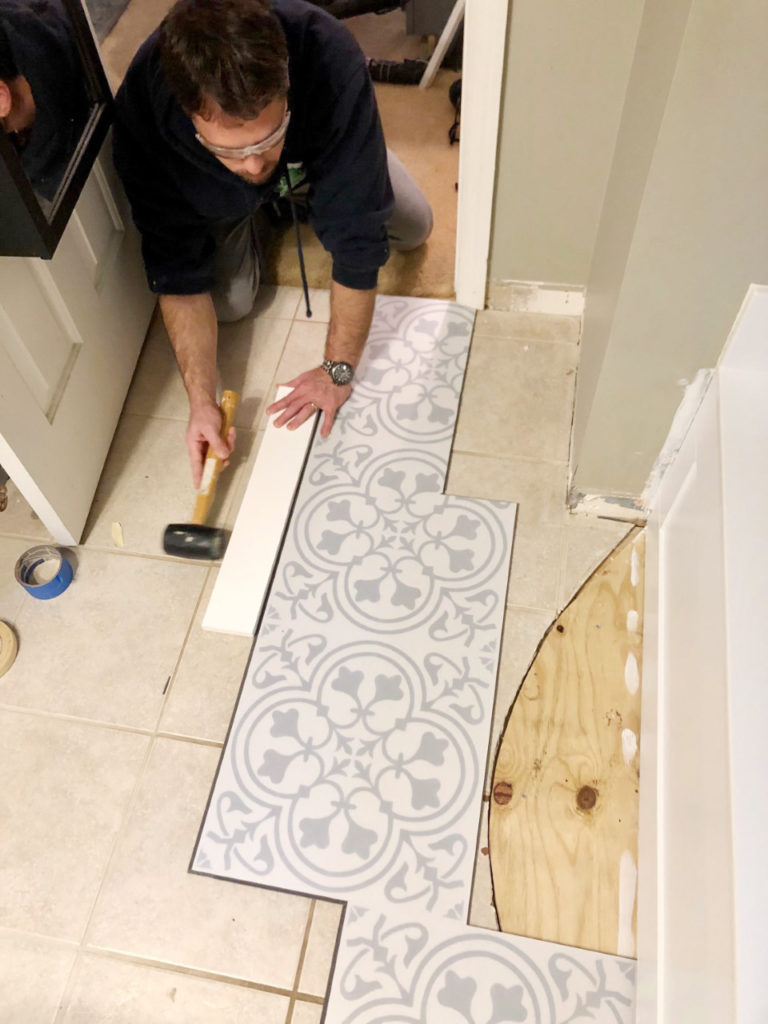
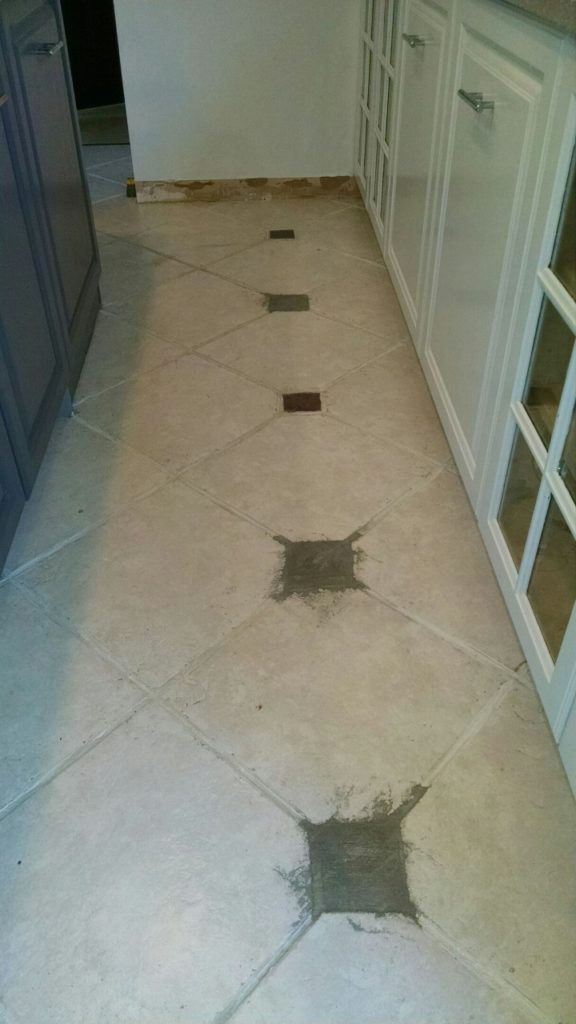
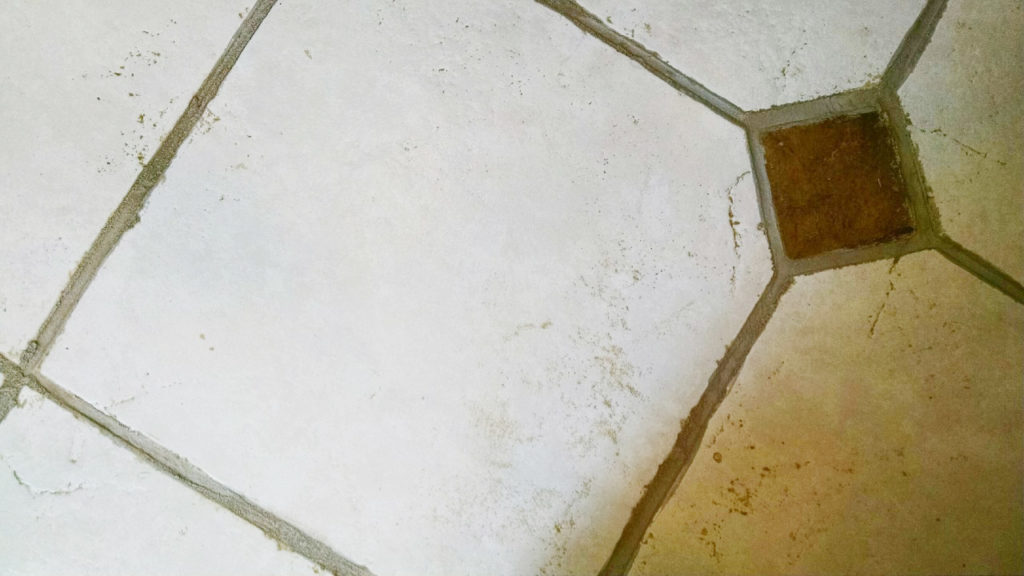
(Step 2). While this product is thick enough for use over grout lines, we had a few tiles that were obviously uneven (you could feel them underfoot). So, using an oscillating tool with a grout removal blade, we removed the protruding tiles.
We then filled the empty space with Quickcrete and allowed it to dry before proceeding. (pictured above). Your floors don’t have to be perfectly even, but these few mosaic pieces felt like freaking rocks under our feet…pretty shoddy tile work.
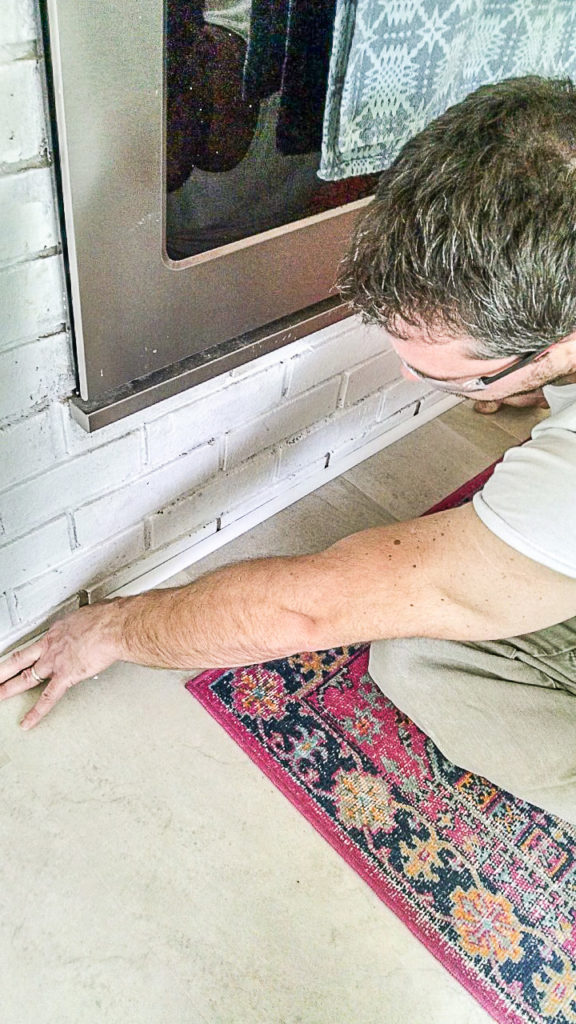
(Step 3). Because our baseboards were installed improperly (as in they were never removed when the original ceramic tile was installed) , we decided to remove them. While removing the baseboards are not necessary, you will need to remove any shoe molding or quarter round at the bottom of the baseboard. You will also need to remove transition pieces like reducers.
Because we were tiling over existing flooring, we also had to remove our pantry door as there was no longer adequate clearance because of the additional thickness of the flooring. Using a circular saw, we were able to trim the pantry doors so that the length was suitable for the added flooring thickness. Luckily the other doors had enough space to still open and close with the new height of the flooring.
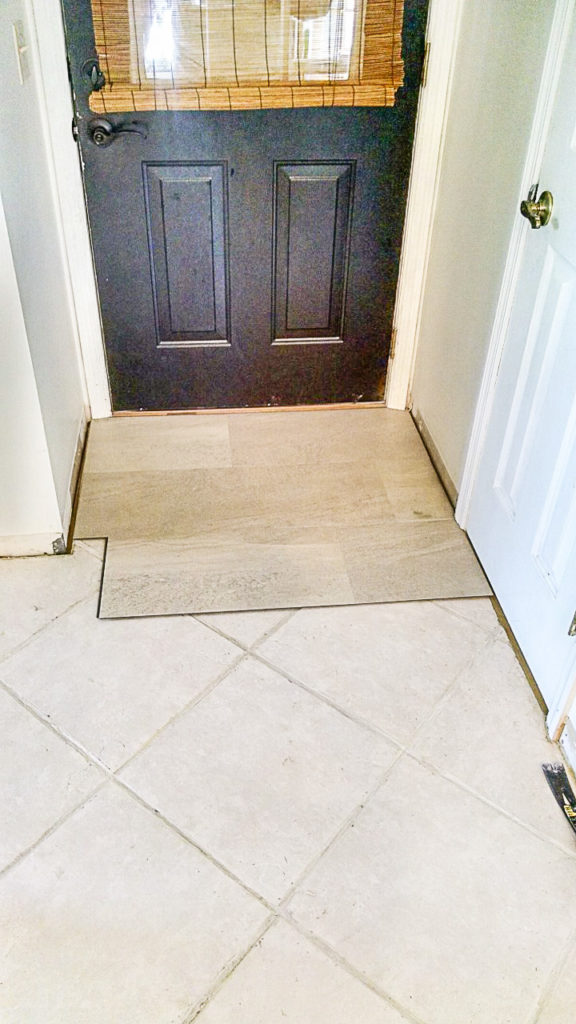
(Step 4). Moving from left to right, work in rows to install your click and lock vinyl flooring (literally clicking and sliding grooves into place). You need to maintain a minimum 1/4” expansion gap around the perimeter of the room. We began in the toughest corner of our kitchen (this is where the most intricate cuts were located, because this is where all of the doors are located).
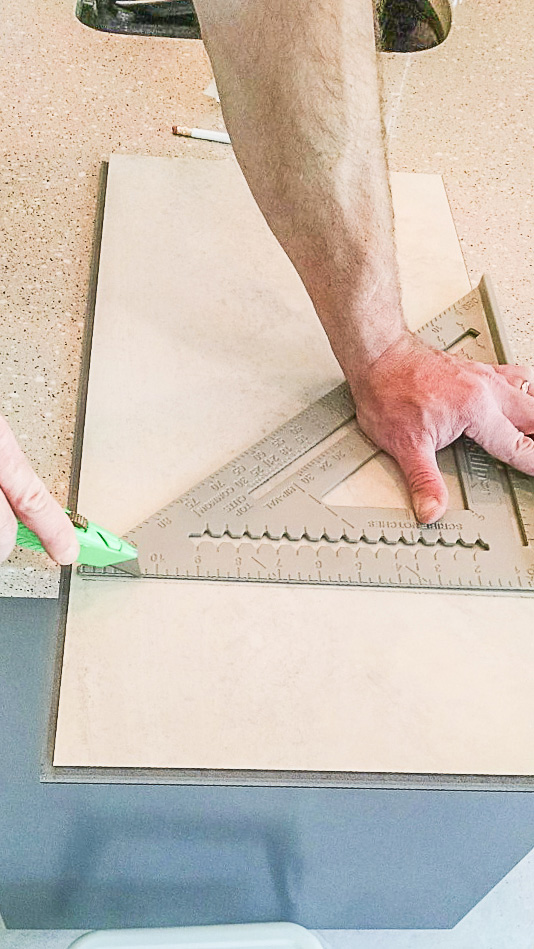
Using a utility knife, pencil and speed square, the score and break method is sufficient for most cuts. For more intricate cuts around doors and door trim, however, you will need to use a jigsaw with a fine tooth metal cutting blade.
Lesson Learned: Complete each row of LVT before proceeding to the next row. Originally, we had left a few small pieces out and went on to the next row. When we went back to prior rows to place some of the small pieces, it was a pain in the a$$ to “click and lock” into place. It was doable….but it was tricky.
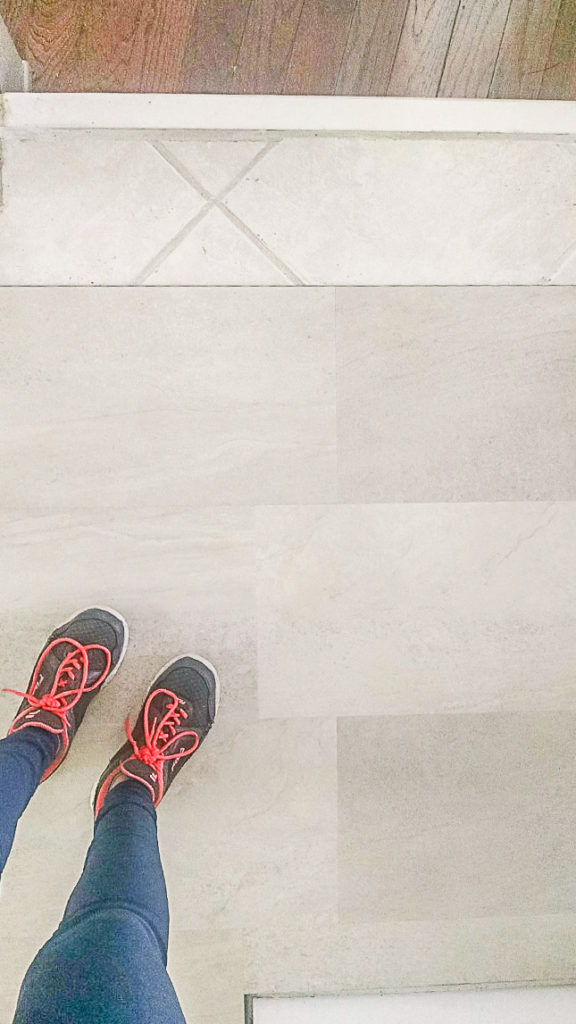
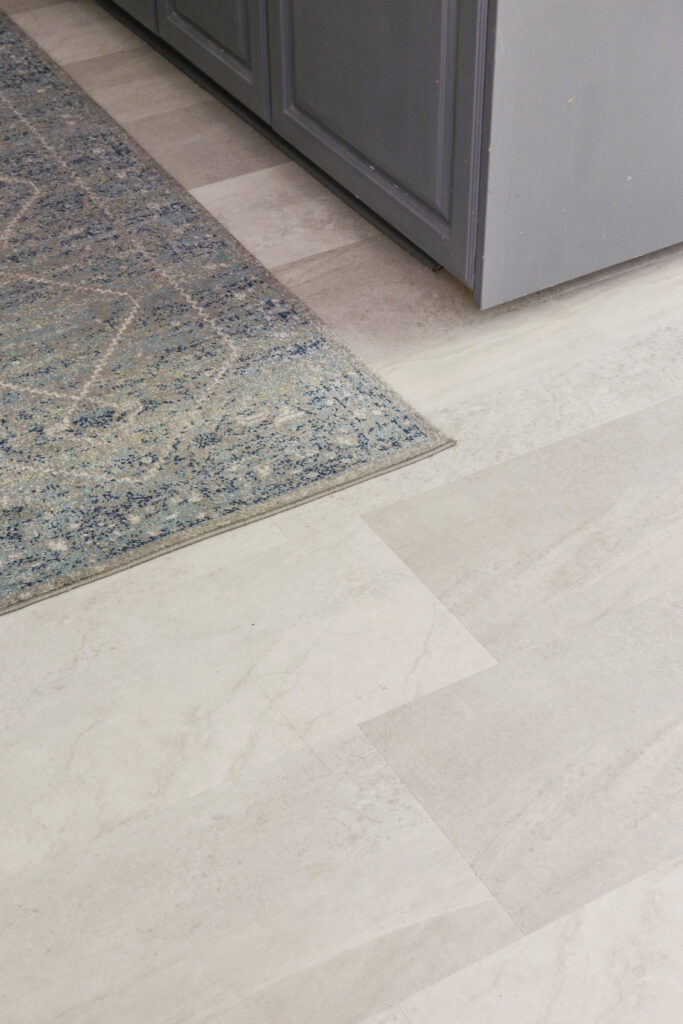
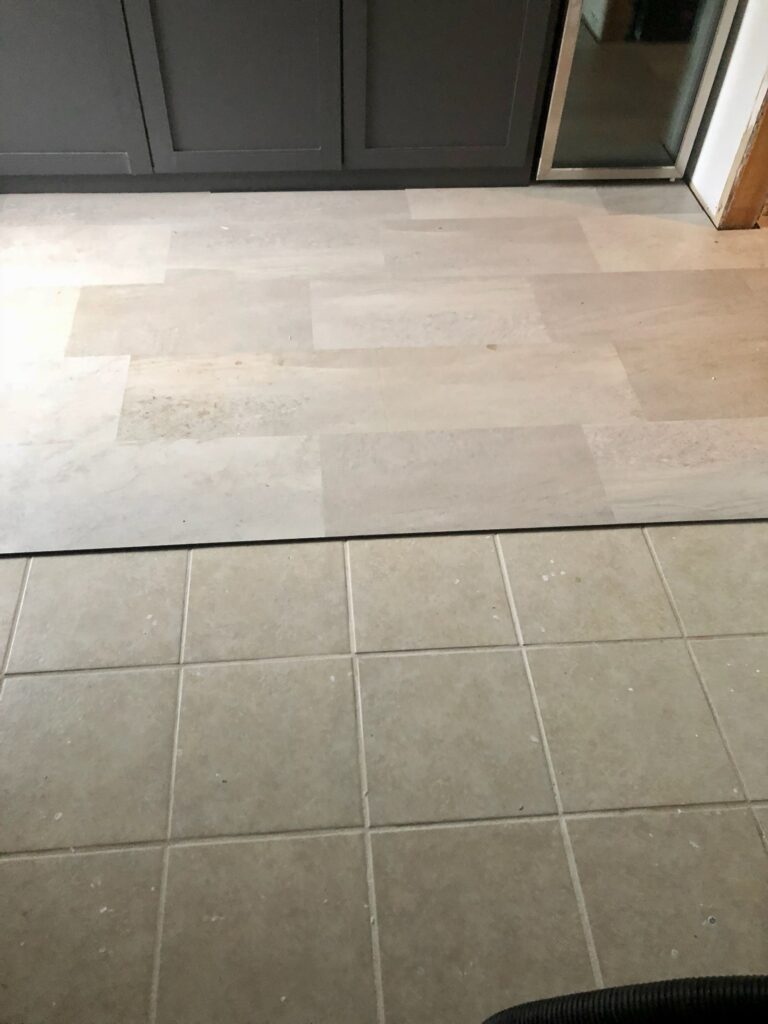
After the vinyl flooring installation is complete, there will be visible seams where the tile meets the cabinets and floors as photographed below….
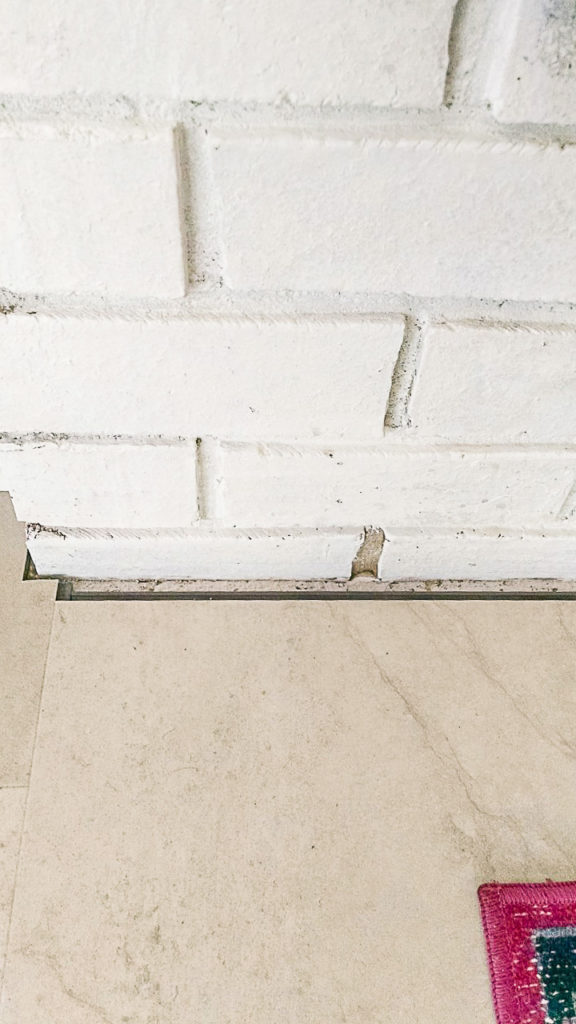
To cover these seams, we installed shoe molding around the cabinets where the seams met the walls. While you could use quarter round, we found that shoe molding was more flexible and therefore concealed the unevenness of our floors better (requiring less caulking). At this time we also reinstalled our baseboards.
For those of you needing transitional pieces like floor reducers, the manufacturer does sell matching reducers.
Buying Tip: When ordering your LVT, be sure to purchase an additional 10 -15 square feet to account for product waste. We ordered an additional 15 square feet and had plenty left over.
Here is a close up of the click and lock tile we went with…..
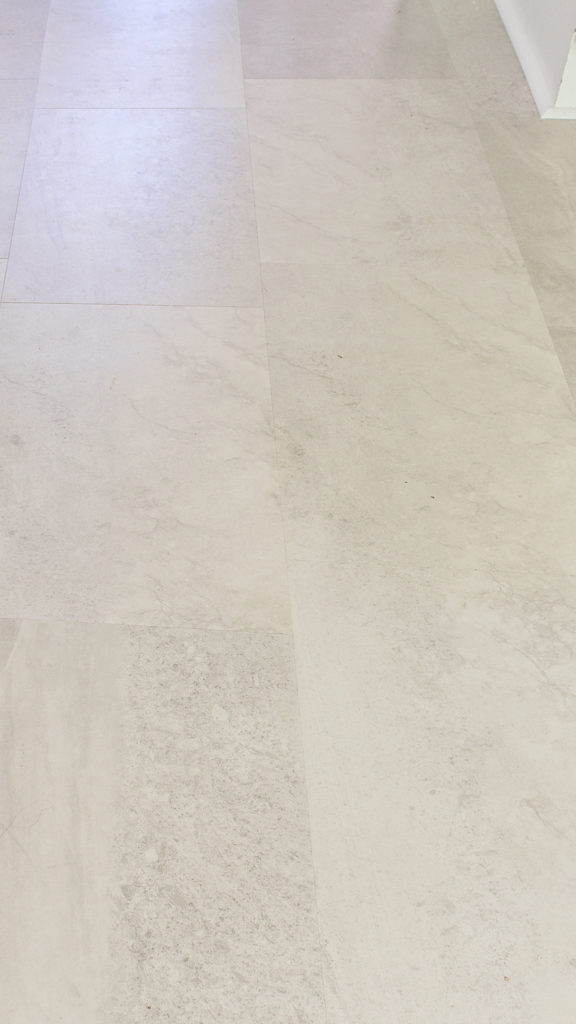
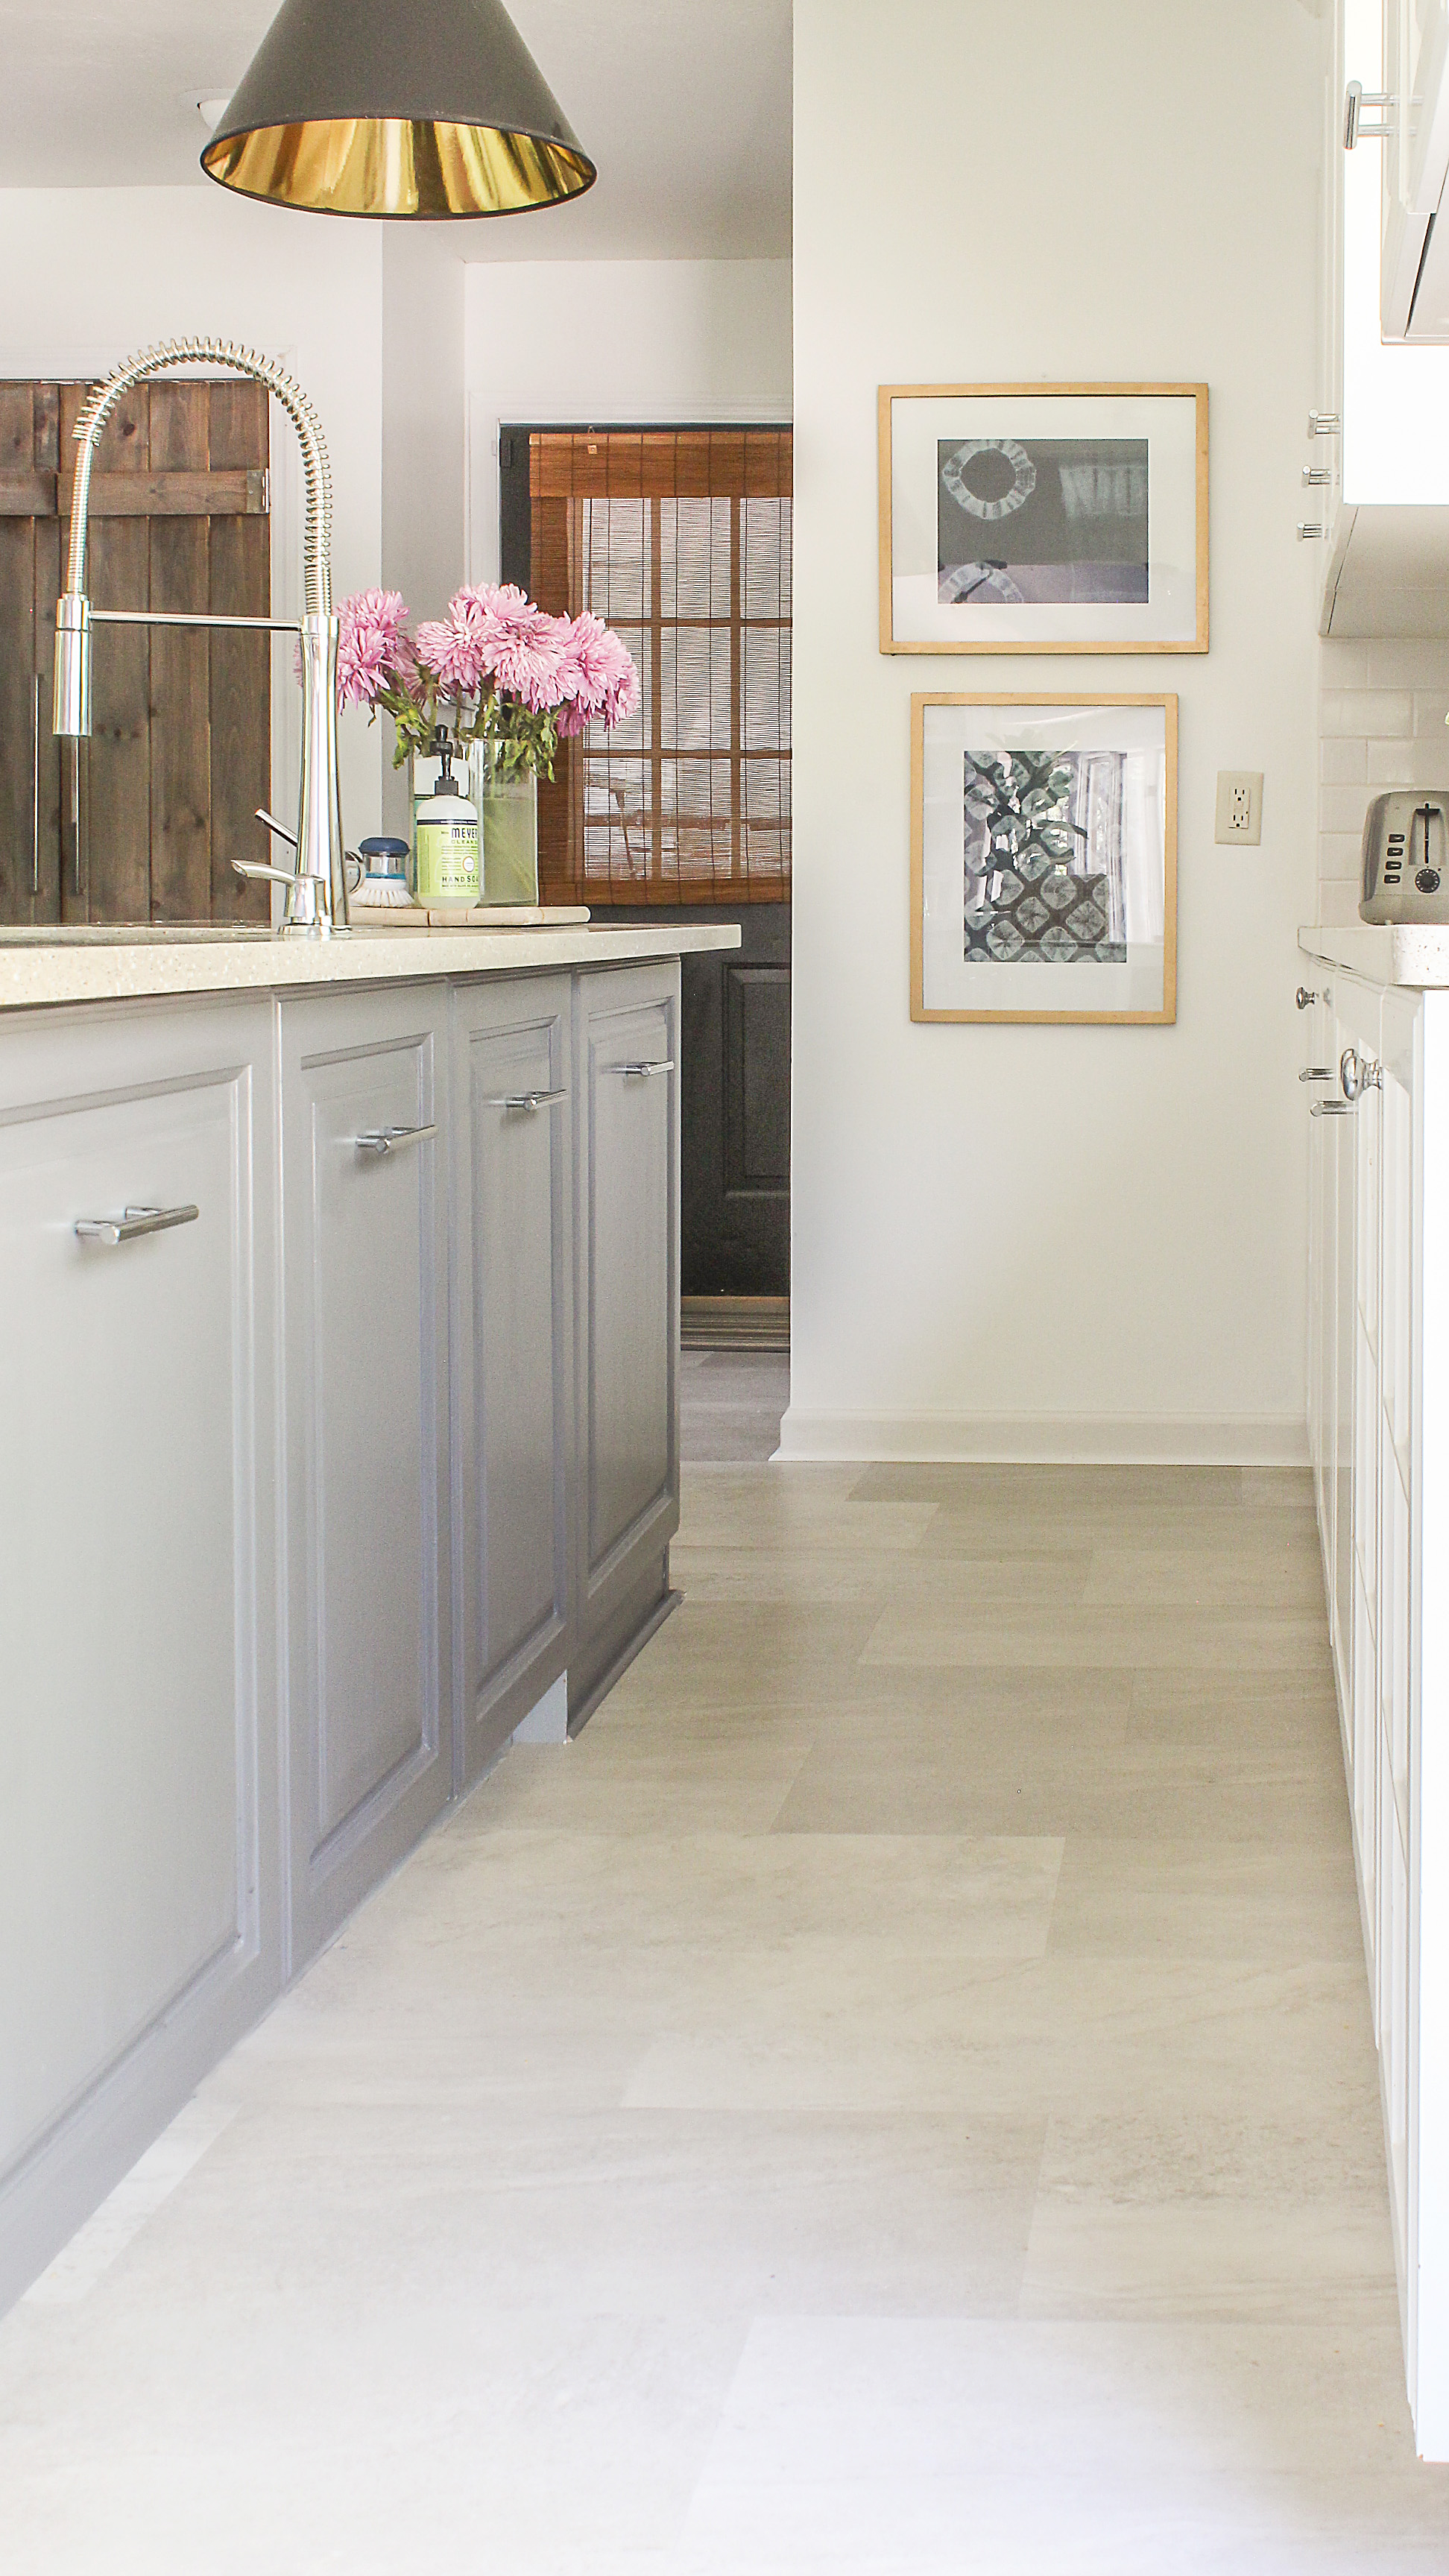
It looks a lot like concrete but it has more of a warmth to it which I love. It is a mixture of dark grey, light grey and warm notes of beige. The 12×24 shape is modern, but I believe the flooring is so neutral and subtle it will stand the test of time and trends.
I can already tell it hides dirt so much better than our previous flooring. While moving our refrigerator, we unintentionally tested the scratch-proof theory…luckily, we found that claim to be accurate.
Video of My Luxury Vinyl Tile with a Review
Install tip:Another tip for you guys…. I recommend working from multiple boxes of LVT at a time so that you create a natural pattern with the variations as each piece is colored slightly different.
If this particular tile is not your cup of tea, I have rounded up a few other luxury vinyl tile flooring options below including vinyl plank. For those of you interested, the flooring I purchased is the Mannington Adura Max 12×24 tiles in the color Stucco. You can click here to view the product.
***As I mentioned, if you are ordering online, just be sure to add on 10-15 square feet to your total square footage to account for waste. ***
More Luxury Vinyl Tile Flooring Options:

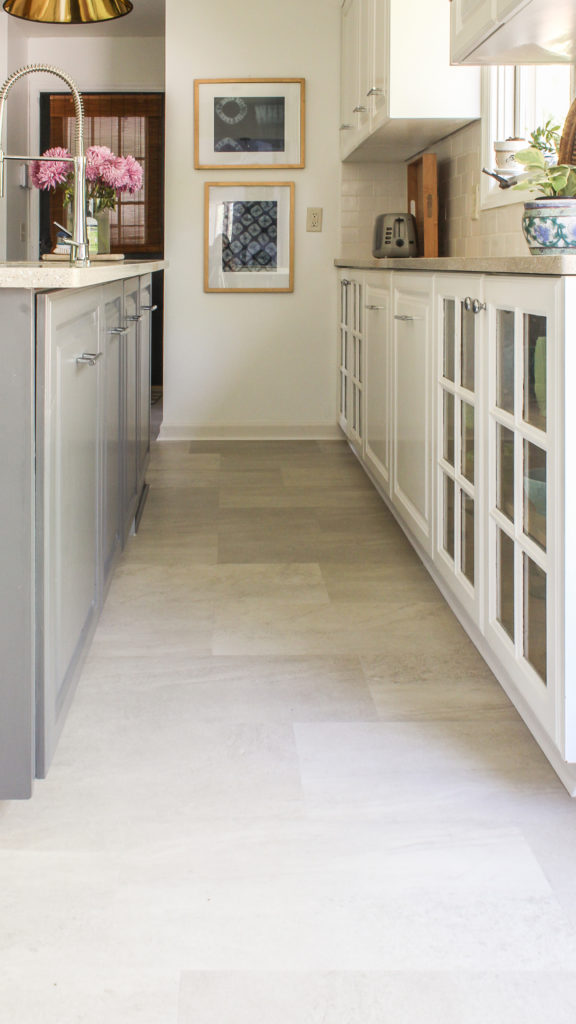
All in all, our new vinyl flooring has done wonders for the way I feel about my kitchen. Although the LVT flooring is slightly darker than the white ceramic tile we originally had , I feel like the new flooring actually makes the kitchen feel brighter.
Updated 6-19-18: If you would like a 3 month follow-up of this product, click here to read my honest review and see how everything is holding up.
Updated 4-23-19: To see how my floors are holding up after one entire year, click here to read my one year review.
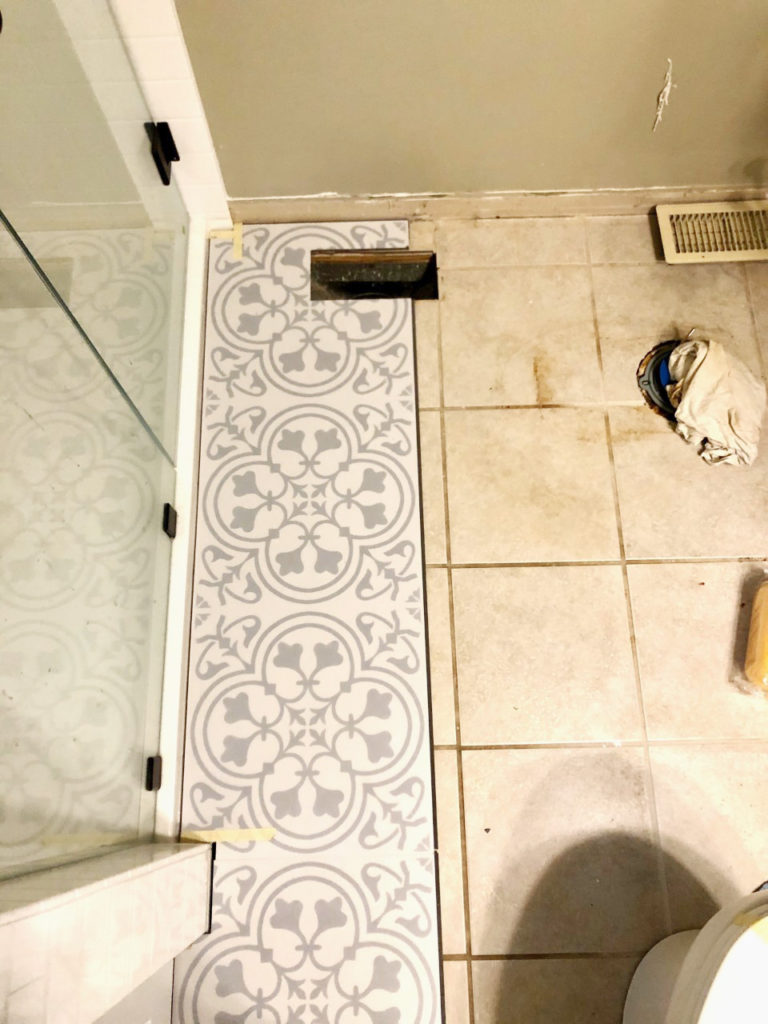
Updated January 2020: We have been so happy with the luxury vinyl tiles in our kitchen that we decided to use them when it came time for our master bathroom remodel as well. Below is a picture of the LVT floors in our bathroom remodel (to read the full bathroom reveal post, click here)…

Just to summarize the dramatic impact our new flooring has had on our home, I am going to give you a little before/after action..
Kitchen Flooring Before:
Investing $1000 in materials and one weekend of our time was so incredibly worth it. Even better? I no longer have those pesky grout lines to obsess over.
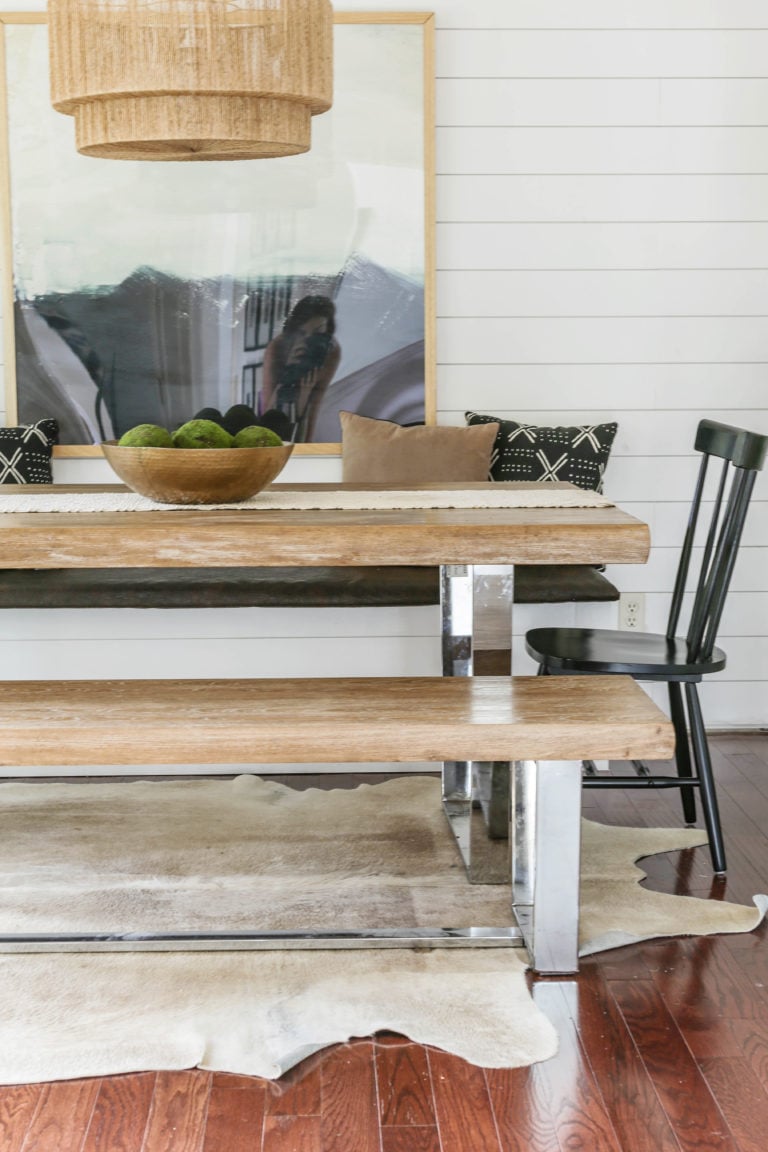
Kitchen Flooring After:
For any of you on the fence about click and lock vinyl flooring, I say go for it. I think if you have any sort of DIY skills (even entry level), this project is totally doable and so much more manageable than ceramic tile. Just be sure to invest in a thick, quality product with great reviews.
**Updated June 2022** This DIY tutorial has become one of the most popular tutorials to date. Below, I have addressed some more frequently asked questions….
Is luxury vinyl tile easy to install?
After watching my husband install luxury vinyl tile and luxury vinyl plank in our kitchen, bathrooms and mudroom, I can confidently say that LVT and LVP are both beginner/intermediate level projects.
From experience, I will say that the LVP we used in our bathroom was slightly more challenging to install than the LVT that we used in our kitchen. Ultimately, it depends on the product you use and the space your are installing it in.
To our surprise, we found that it was more time consuming to install the flooring in smaller spaces than in larger rooms. This is due to all the cuts you will have to make to your tiles or plank when you are working in tight spaces like bathrooms.
Regardless of the product you choose, there will be just a bit of a learning curve initially. However, once you get used to interlocking the products, it’s easy to get in the groove and breeze through your install.
Do you have to grout luxury vinyl tile?
No, you do not have to use grout for luxury vinyl tile, and this was actually one of the main reasons I decided to install LVT in my bathrooms and kitchen. The grout lines on our old tile floors were so unsightly, that I made the conscious decision to never have to contend with dirty grout again.
In fact, I have used three different types of interlocking (click and lock) flooring systems, and have never had to use grout on any of them.
How Much Does It Cost for Luxury Vinyl Tile Installation?
If you don’t feel up to the challenge of installing LVT or LVP DIY style, you can always hire it out to a subcontractor or handyman. The beauty of the click and lock mechanism means you can still save big in labor costs since you aren’t having to pay for any demo.
My friend recently paid someone to install luxury vinyl planks in one large room, and it cost her $500. If you were to hire someone to lay actual ceramic tile, the cost would have easily been double. So even if you do outsource this job, you will still be saving money.
Below I have listed more posts and tutorials related to LVT and LVP flooring…
Related Flooring Posts:
- The One Year Review of My LVT
- 5 Things to Consider Before Installing Floating Flooring Over Existing Tile
- What Type of Flooring Can you Install Over Ceramic Tile?
- Luxury Vinyl Tile for Bathroom Floors


Now get out there and design some good vibes. Please also be sure to spread the love and Pin!


Welcome!
My journey in interior design and home improvement began with transforming my first fixer-upper home, all while managing a budget and raising two young boys. My work, a reflection of my passion for creating beautiful, uplifting spaces, has been recognized by top publications like Better Homes and Gardens Magazine, HGTV, and more. I invite you to explore my site and witness the transformation of my home and the vibes we've designed. Read more...


We installed this type of flooring in our kitchen 2 (maybe 3) years ago. I love it! Like you said it feels warmer and it is so easy to clean. It has held up beautifully with our two dogs and the regular abuse in a kitchen. Your floors look fantastic and have really made a huge difference. It looks stunning!
Thank you so much, Barb. I am glad to know yours are holding up well. I truly think this stuff is a game-changer. 🙂
It turned out amazing Erica and what a great idea! This will open the door for many that probably thought anything other than a complete demo was out of the question. Great post friend 🙂
Thank you so much, friend. This stuff is basically fool proof.
What a GREAT solution. We are about to install some nice LVP in our rental house and I’m interested to see what it’s like in real life. I am extremely picky about how floors feel under bare feet so I expect not to like it on that account, but I am definitely curious since I’ve been hearing more and more about the product. I like that you picked a tile-look rather than wood-look since it will be next to real wood in the other room.
I think you are going to love it, Julie. It feels so much better under my feet than the tile did. The underlayment that comes attached to the product is so comfy. Good luck! xoxo
It looks awesome, Erika!! I’m totally with you on that – I’d have chosen light wood (or light faux wood tile) throughout our entire home, too. You guys did a great job!
Thank you so much, Jessica!
Do you think this could be used to go over a laminate counter? It would obviously need something to finish the front edge – maybe a wood trim piece?
Hey Michelle! I don’t see why you couldn’t use it that way. But as you said, you will have to trim the edges somehow.
Love you help we are wanting to have this installed (we are in our ’70’s and can’t really do it ourselves. My problem is the kitchen and entryway (with 1/2 bath) would all need to be done. Currently we have marble squares in the entry and hardwood bamboo in the kitchen. We want to make it all the same with this. Had Home Depot come out and measure and said about 350 is what we would need. Problem is the colors they have and the tiny little selection. We are very tradition these area have the living and dinings rooms on one side and the family room on the other which are still both done in the bamboo and we didn’t intend to replace it. Actually all is still in good condition in the rooms to be done but at our age we need something safer. We liked the advertising of no slippery, easy to clean etc for this product. Our current are at least 25 years old and dangerous for our age. The kitchen had some water damage when an old dishwasher leaked and I even have a burn spot from where a lamp fell over and the light bulb burned the wood. So that’ another reason we want to replace. Really need help picking a color. Kitchen has white cabinets, brown/gray/white granite and I collect Mackenzie Childs to lots of black/white everything. Can you make a suggestion. Thank you so much, I really don’t want to make a mistake on this.
Hi Mary!
Thank you so much for your thoughtful message. It sounds like you’ve been through a lot with your current floors, and I totally understand wanting something safer and easier to maintain at this stage of life.
Based on your white cabinets, brown/gray/white granite, and all the gorgeous black-and-white Mackenzie Childs pieces, I actually think the Meridian Stucco LVT I used in my own kitchen (from Mannington) could be a great fit for you. It has a nice mix of greige tones—so it doesn’t lean too warm or too cool—and pairs beautifully with mixed finishes. It also has that slightly textured finish that makes it feel safe underfoot and easy to clean.
That said, I always recommend ordering a few large samples to see how they look in your own lighting and next to your existing bamboo floors. That way, you can feel more confident before making the leap!
Hope this helps—and I’m cheering you on as you update your space!
Much love,
Erica