
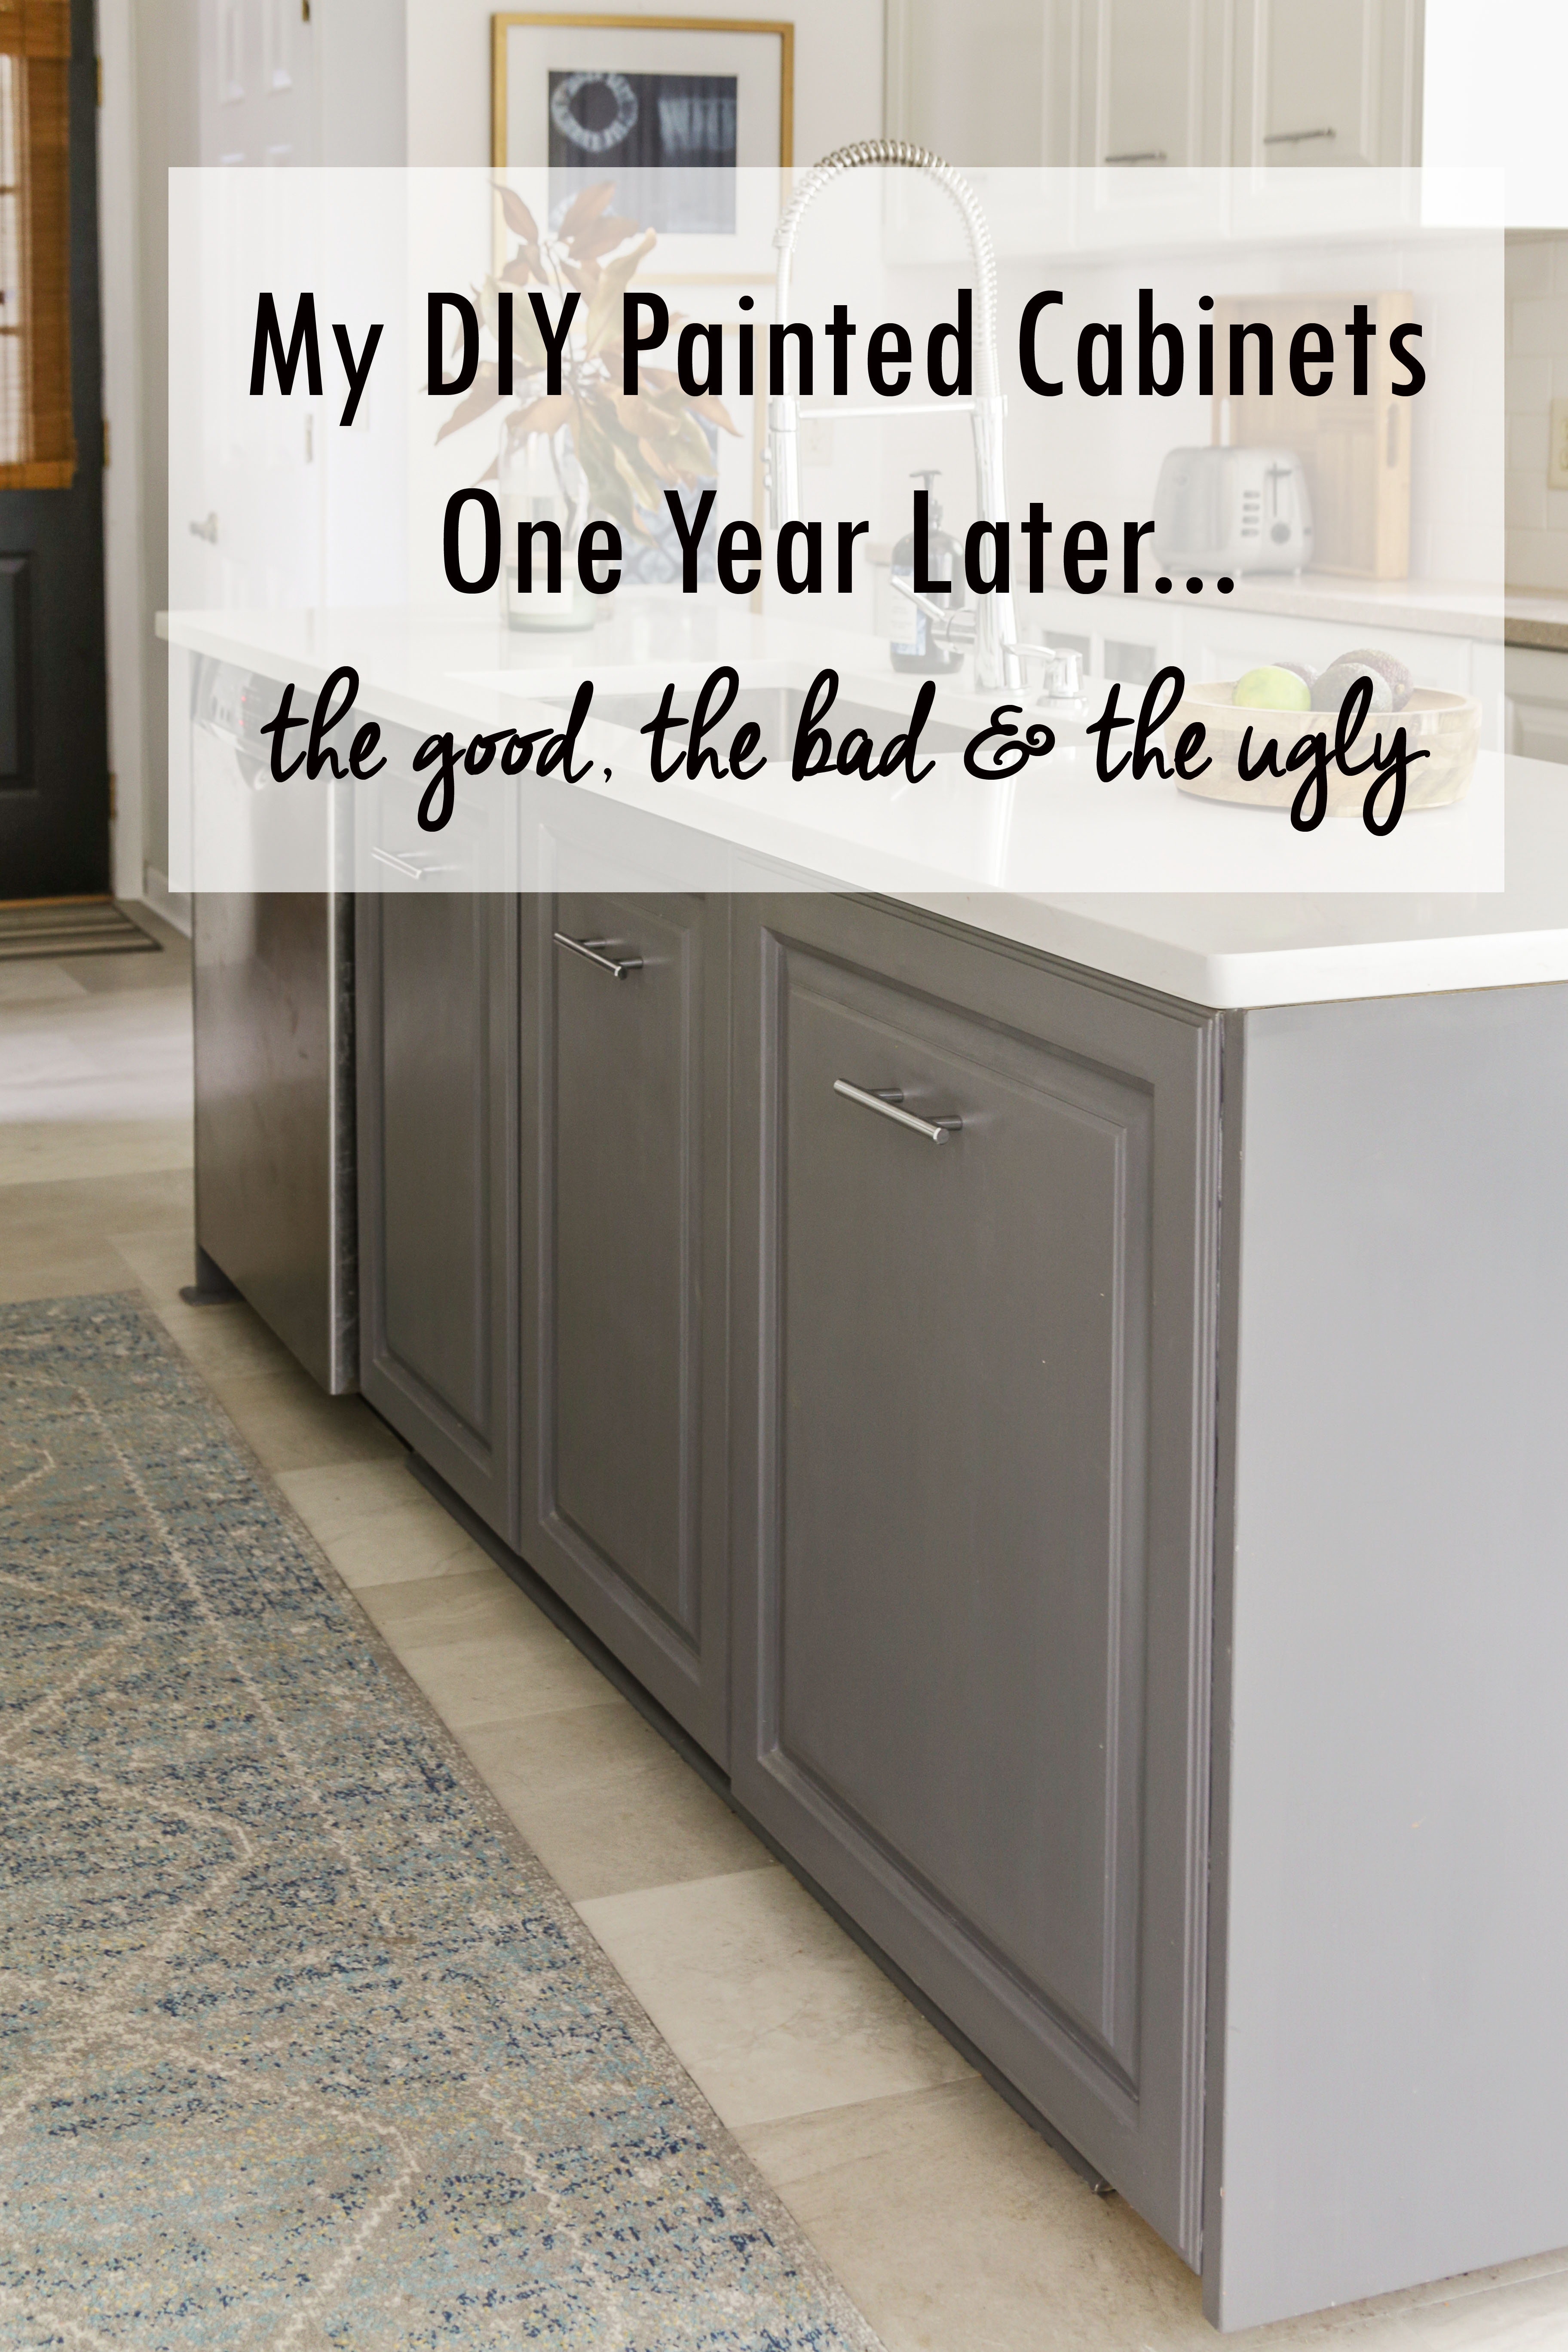
My Milk Painted Kitchen Cabinets – One Year Later
Sorry for going MIA on you guys last week, but I was living it up in New York City- celebrating with Better Homes and Gardens for the annual Stylemaker honor. And while I will definitely share a re-cap of the event with you guys soon, today I wanted to share a review of my milk painted kitchen cabinets and how they are holding up after one full year.
My original tutorial on how to paint your cabinets with milk paint (which you can read here) has generated lots of interest within the past year, and is actually becoming one of my most popular posts. So I assume that many of you would like to know how durable they have proved to be over the course of 12 months.
But first… a little recap…
My Kitchen Cabinets Before Paint
When I moved into my 1980’s rancher three years ago, one of the first major projects I invested in was painting my kitchen cabinets. They were originally a very “orangey” wood finish, and I am quite the sucker for white kitchens. So…white it had to be!
While I am an avid DIY-er out of sheer necessity ( I didn’t marry a sugar daddy, land a prestigious career, or win the lottery), I was terrified of screwing up my kitchen cabinets with an amateur paint job.
From first hand experience, I know what a pain in the a$$ the entire process can be, and I had heard some horror stories involving DIY painted cabinets gone bad. So… my husband and I decided to hire a professional painter to transform our existing cabinets. After all, $1200 is waaaay better than having to shell out $12,000 or more for entirely new kitchen cabinetry.

While painting the cabinets did do wonders for the kitchen, after living with the paint scheme for about two years… I decided I wanted to add some contrast to the kitchen island with a darker color. After seeing what a time-consuming process the traditional painting technique was (it took about two weeks for the painter to complete our kitchen cabinets), my lazy rear continued to delay the project and resent the hell out of my island.
That is…until I read about a “magic paint” which required no prep and minimal dry time. So after a little research, I decided to buy some milk paint and go for it (here is the paint I used). While I am not going into the full details of the painting process in this post, if you want the full tutorial for the milk paint application, be sure to check it out here.
(For your shopping convenience, affiliate links may be included in this post).
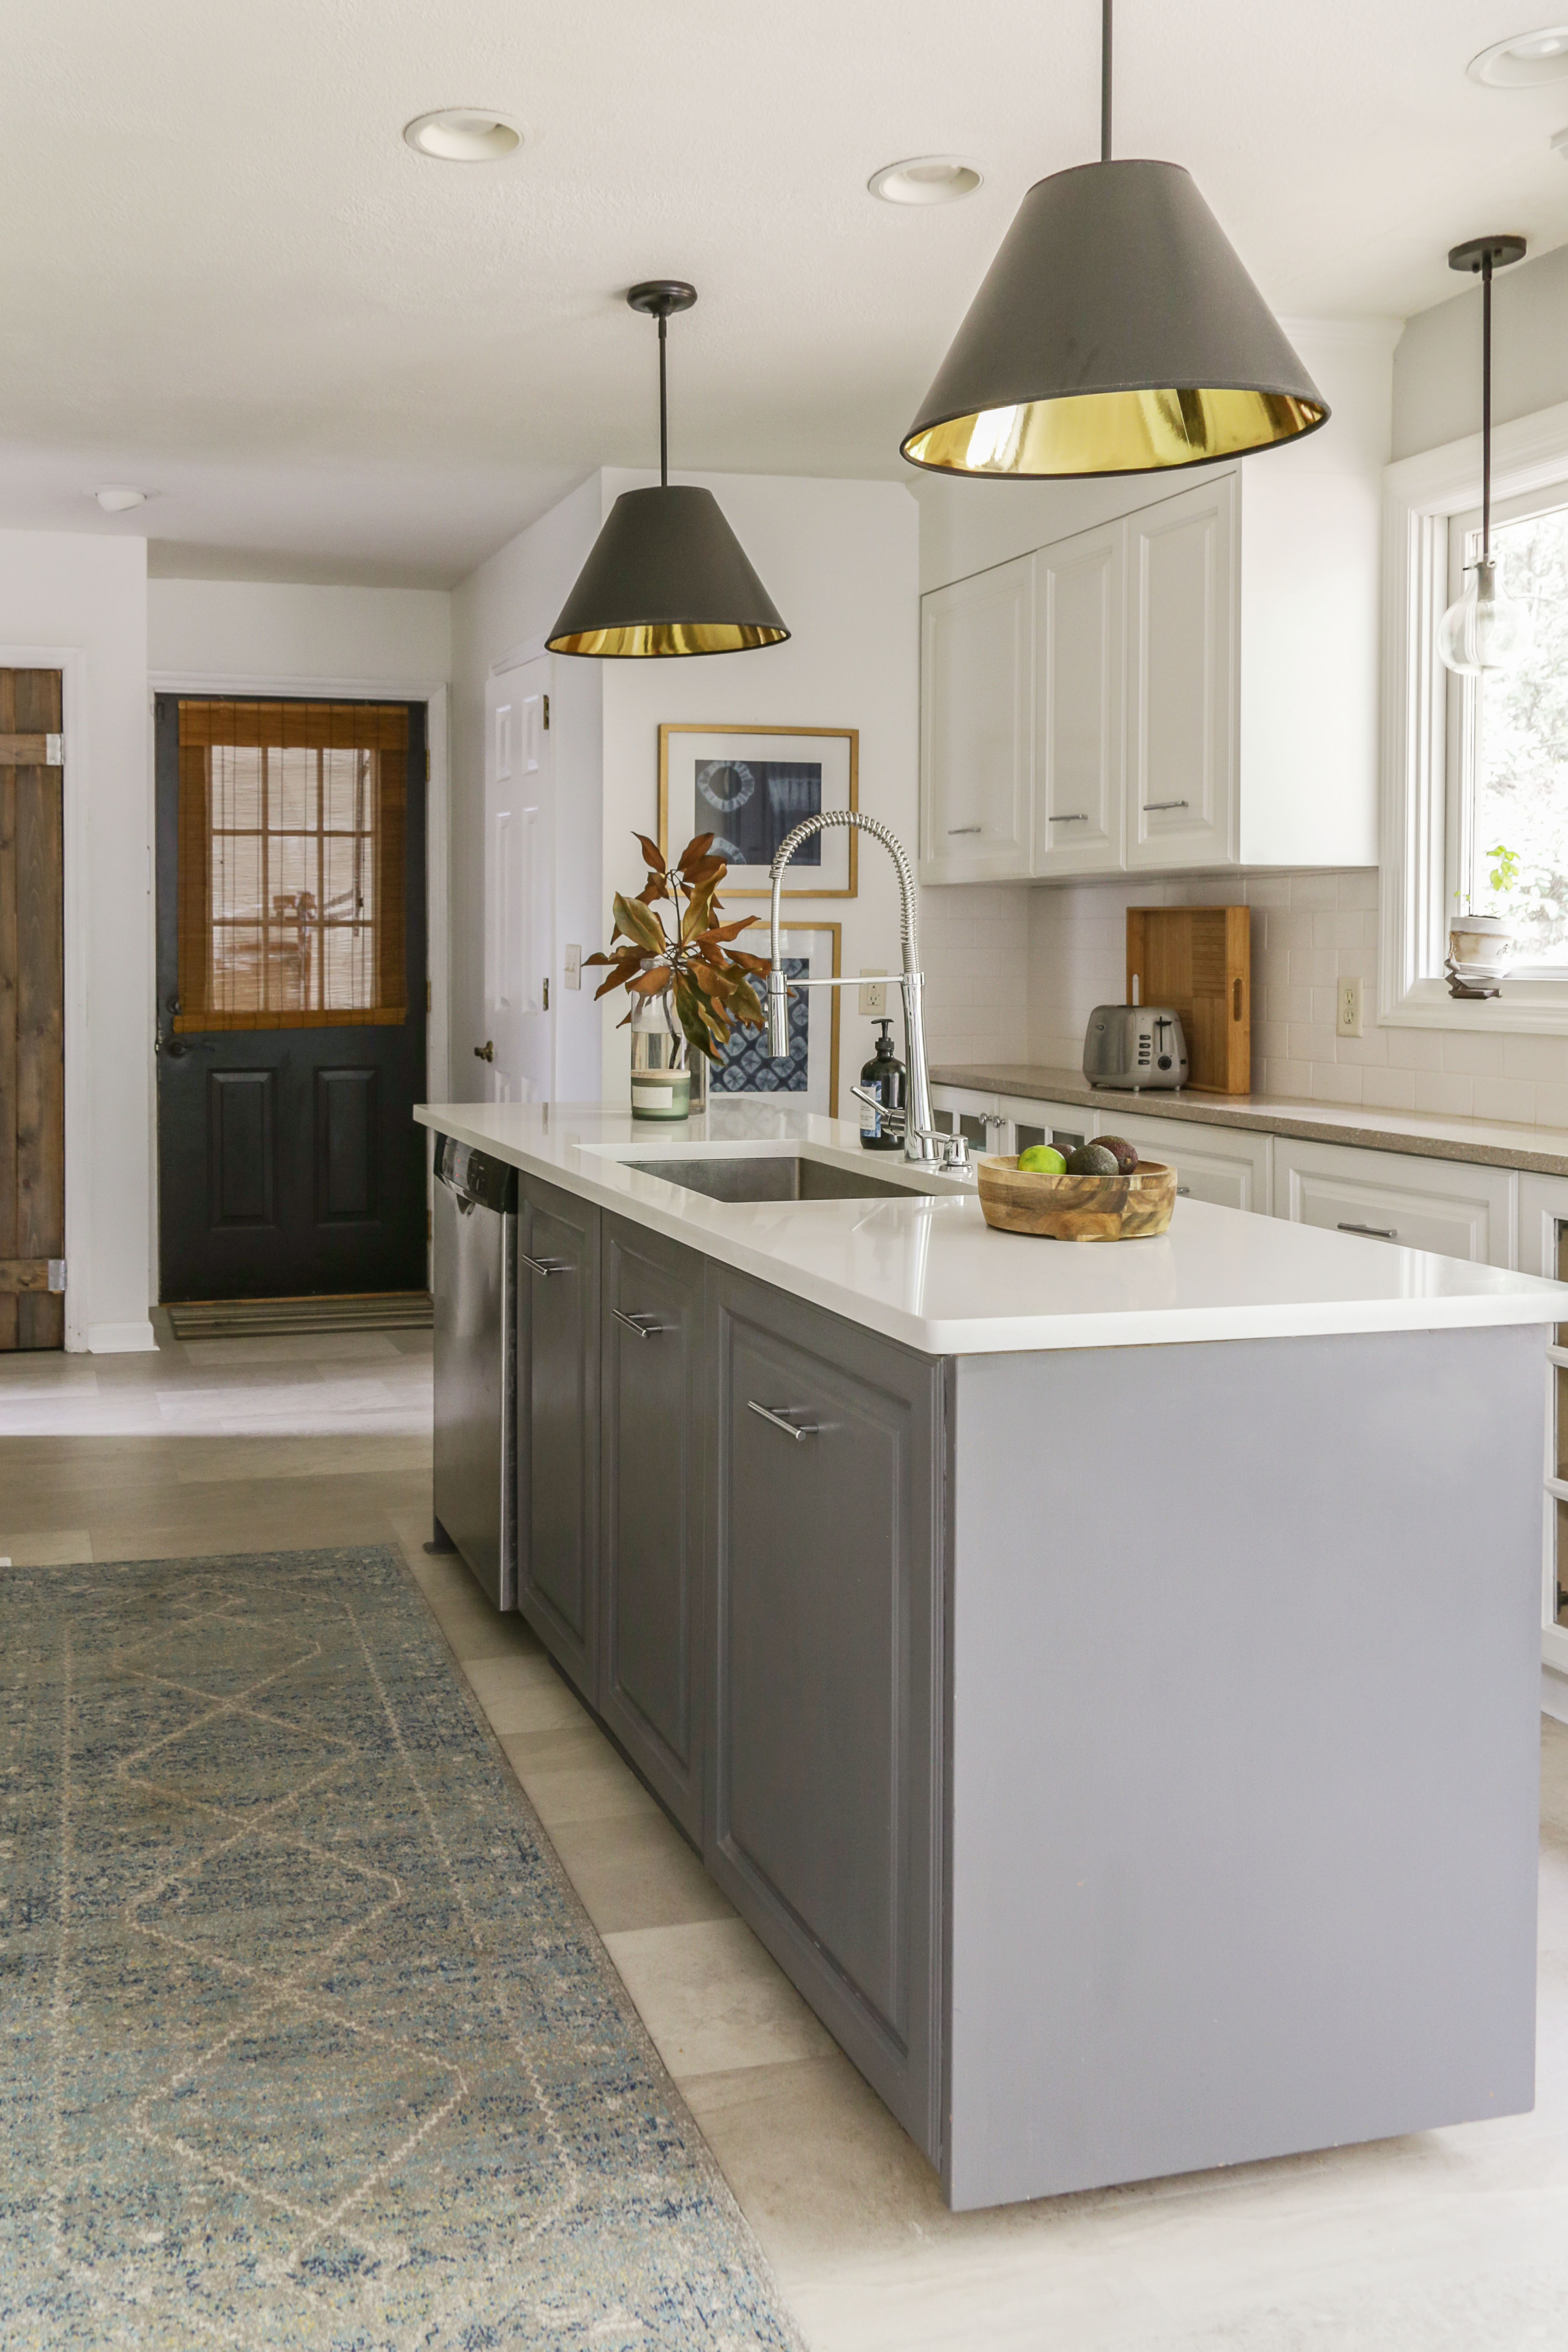
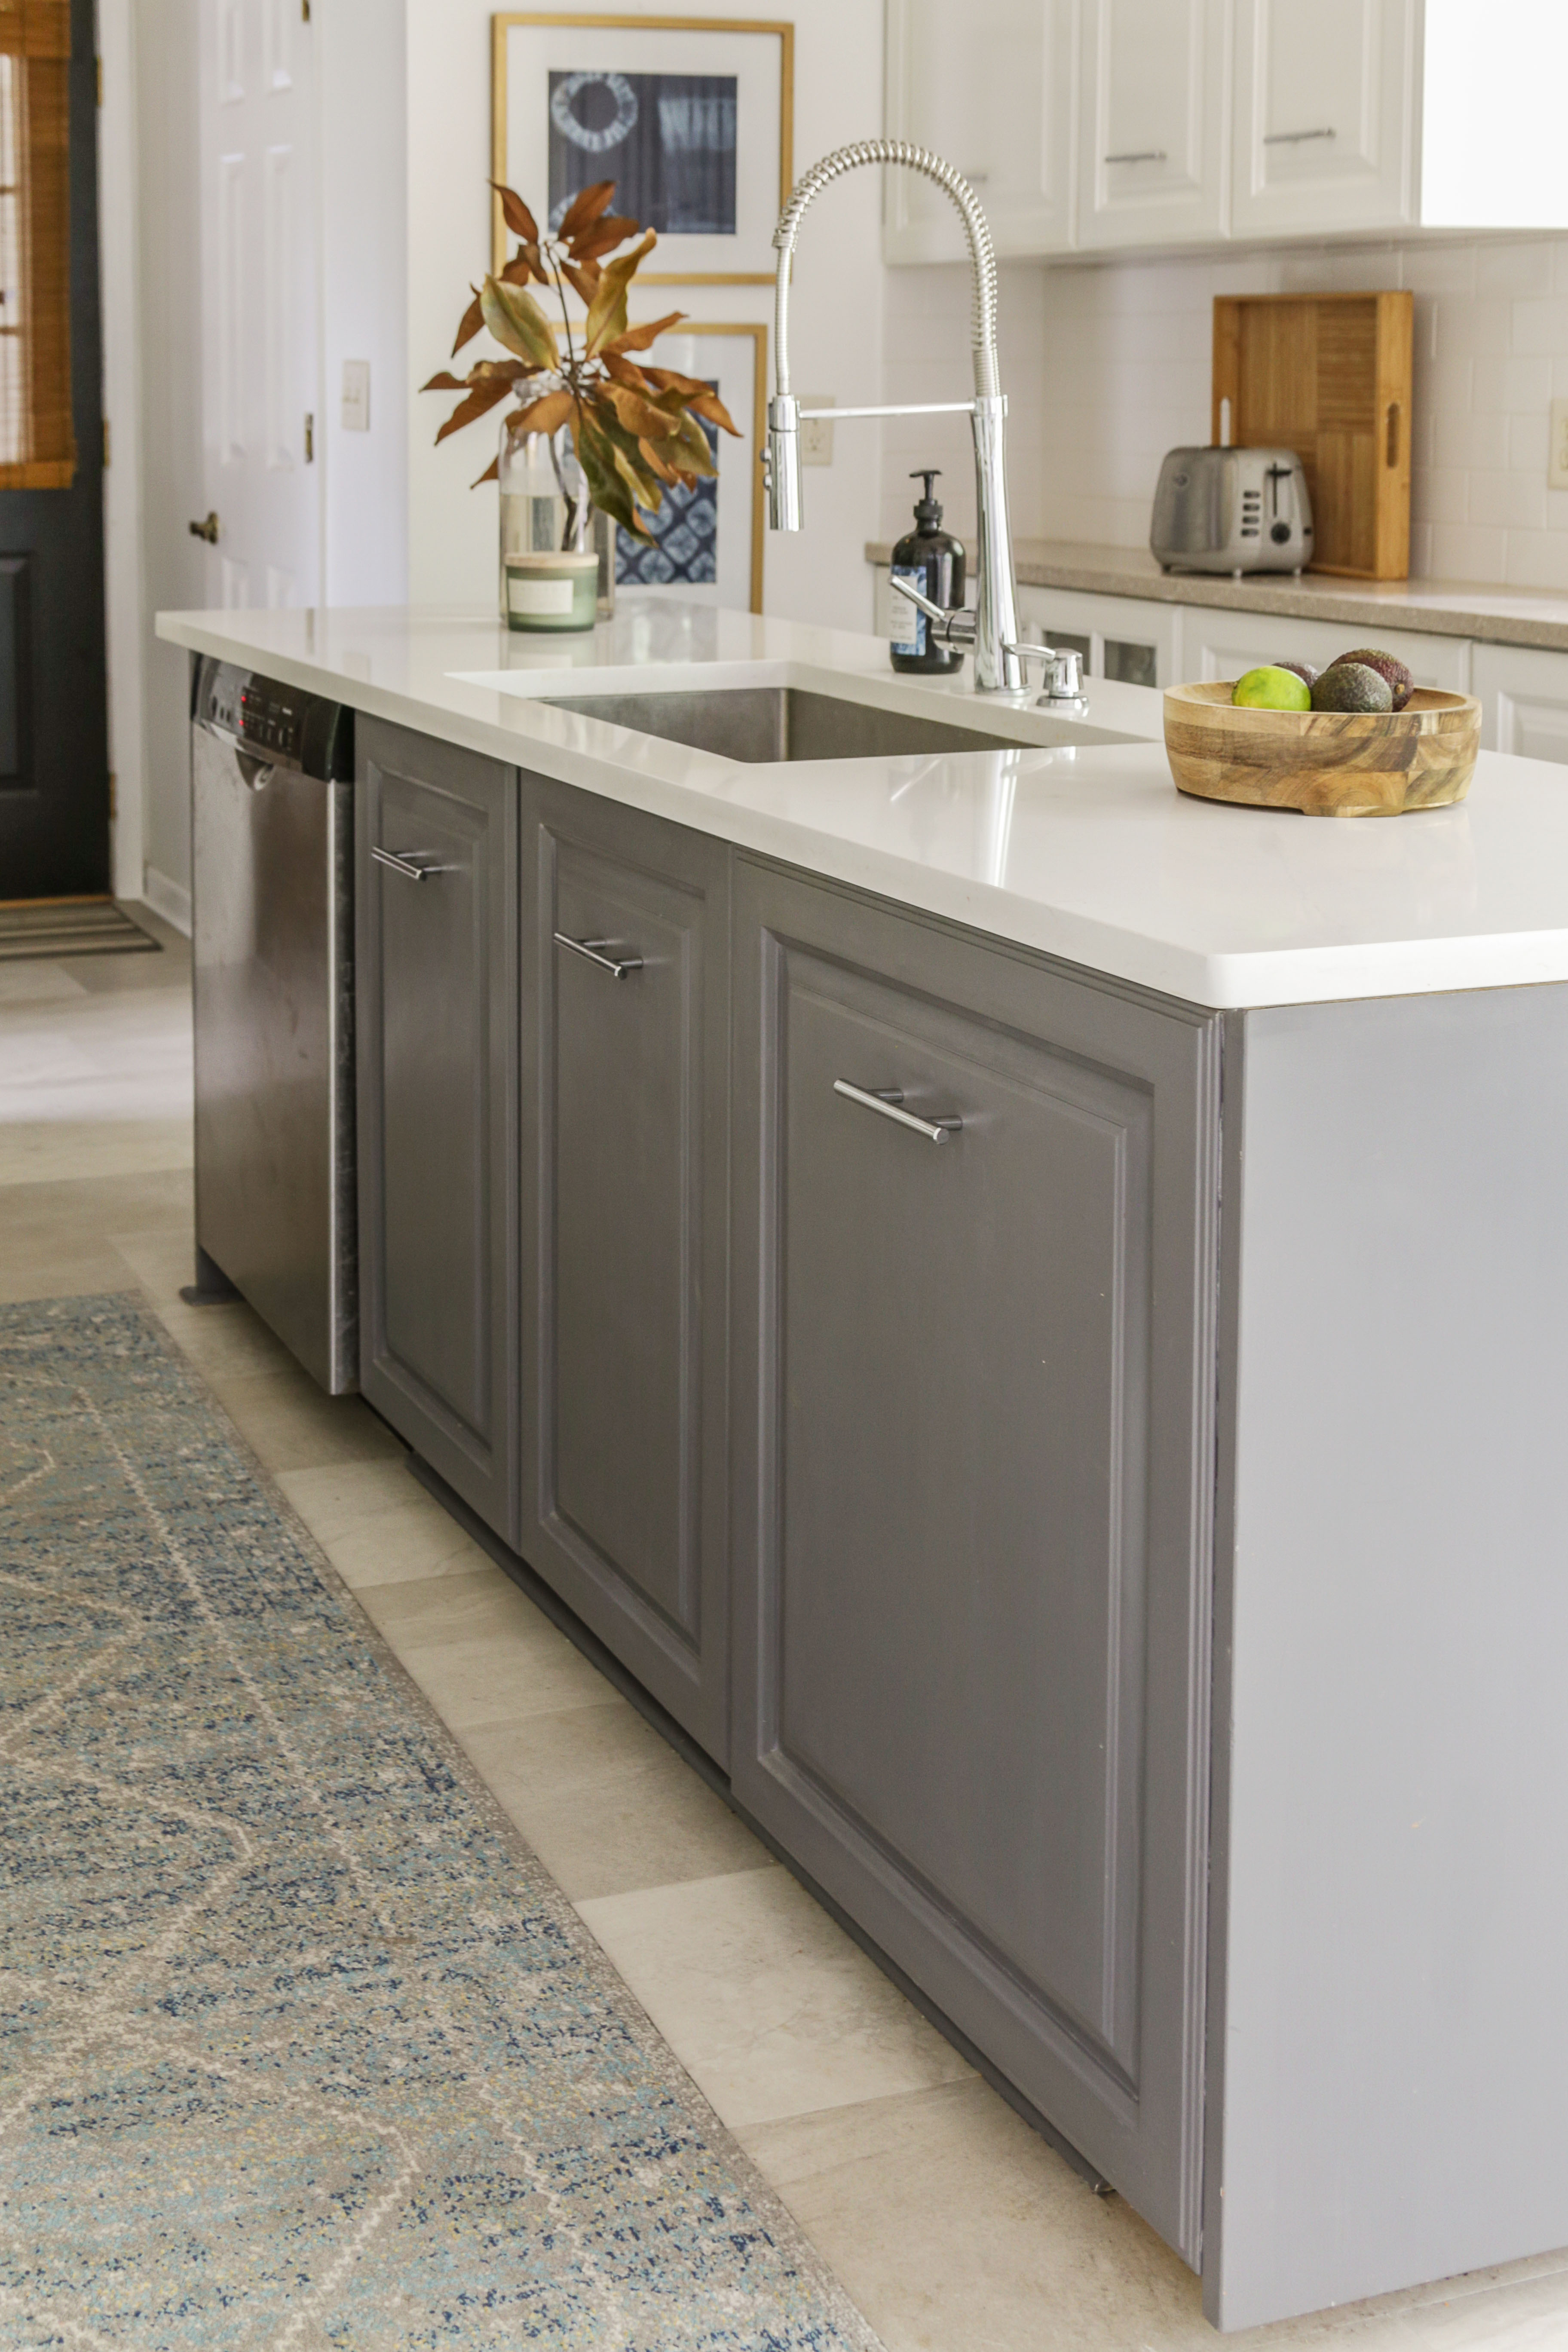
My Milk Paint Cabinets After One Year
If you happened to read my six month follow up , I was happy to report only one small chip in the paint after half of a year. This small chip had actually penetrated through the original oil paint as well- exposing the original wood. I speculated that the blemish was most likely due to a foot stool I had positioned in the area for my kiddos (they like to help me cook).
Fearing any further damage, I quickly became paranoid and decided to apply a top coat to my entire island (this is what I used). Seeing just how rough my toddler can be on my cabinets (he likes to sometimes bang toys and other objects against the surface), I was sure to apply two coats.
* Please note that I used a Satin finish which gave the matte finish of the milk paint a bit of a sheen. However, there is also a matte finish available by the same manufacturer.*
So here is what the area looks like after 12 months (and yes…there are crumbs in the floor. Don’t judge!)…
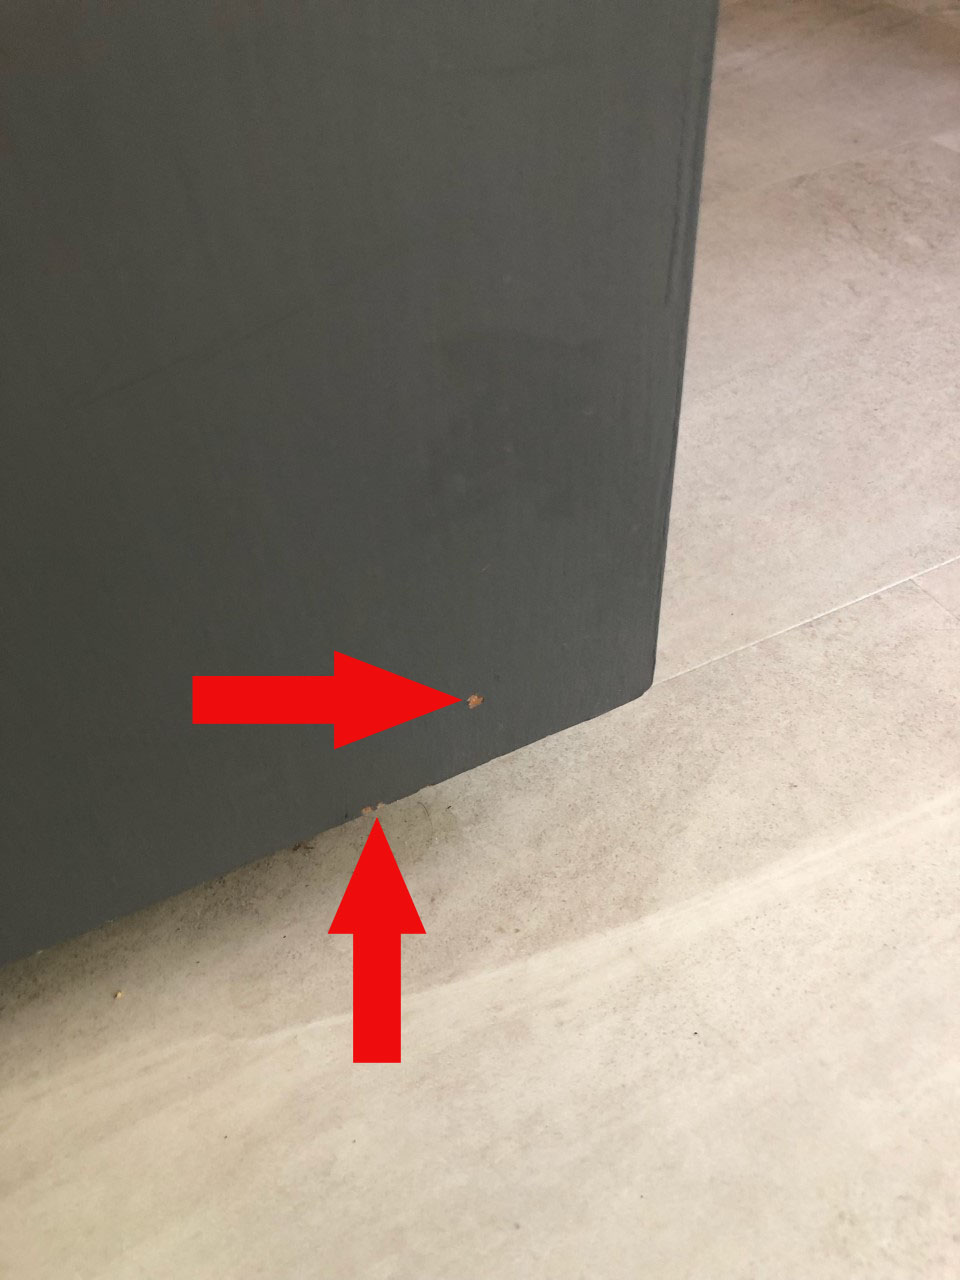
As I mentioned, the top blemish appeared pretty soon after I painted my island. Just recently however, I am also noticing some chipping at the very bottom of the cabinetry. Keep in mind, however, that this particular region receives lots of abuse from my babies and their foot stool which bangs up against the surface here.
One other problem area which just recently surfaced is the face of the cabinet where I store my pots and pans as pictured below…
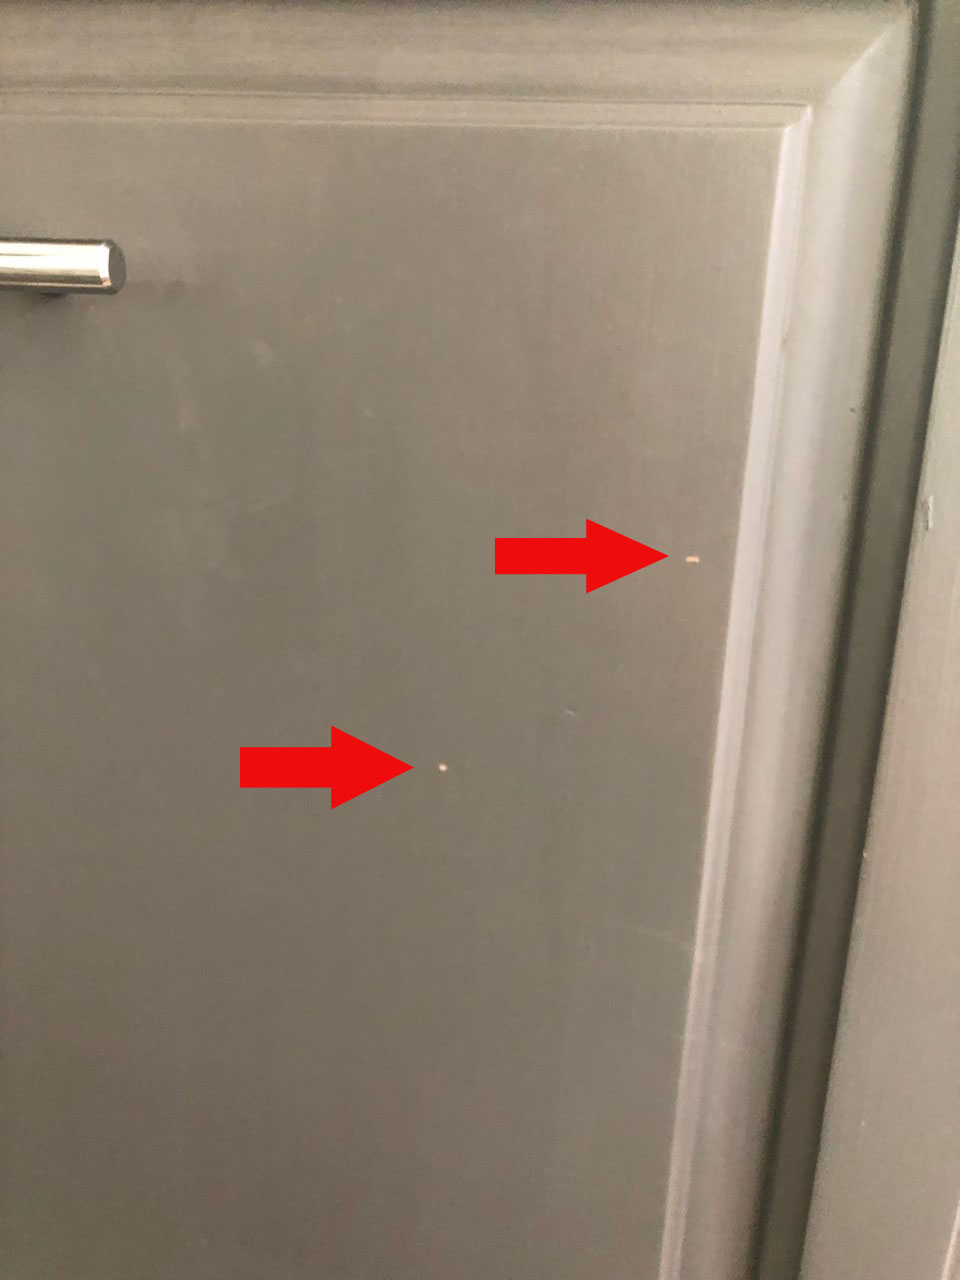
While extremely small, if you observe the chipping carefully, you will notice where it also penetrated through the original oil paint layer-revealing the original wood surface.
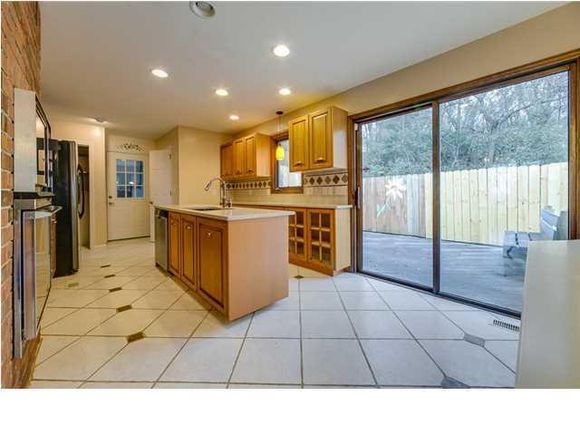
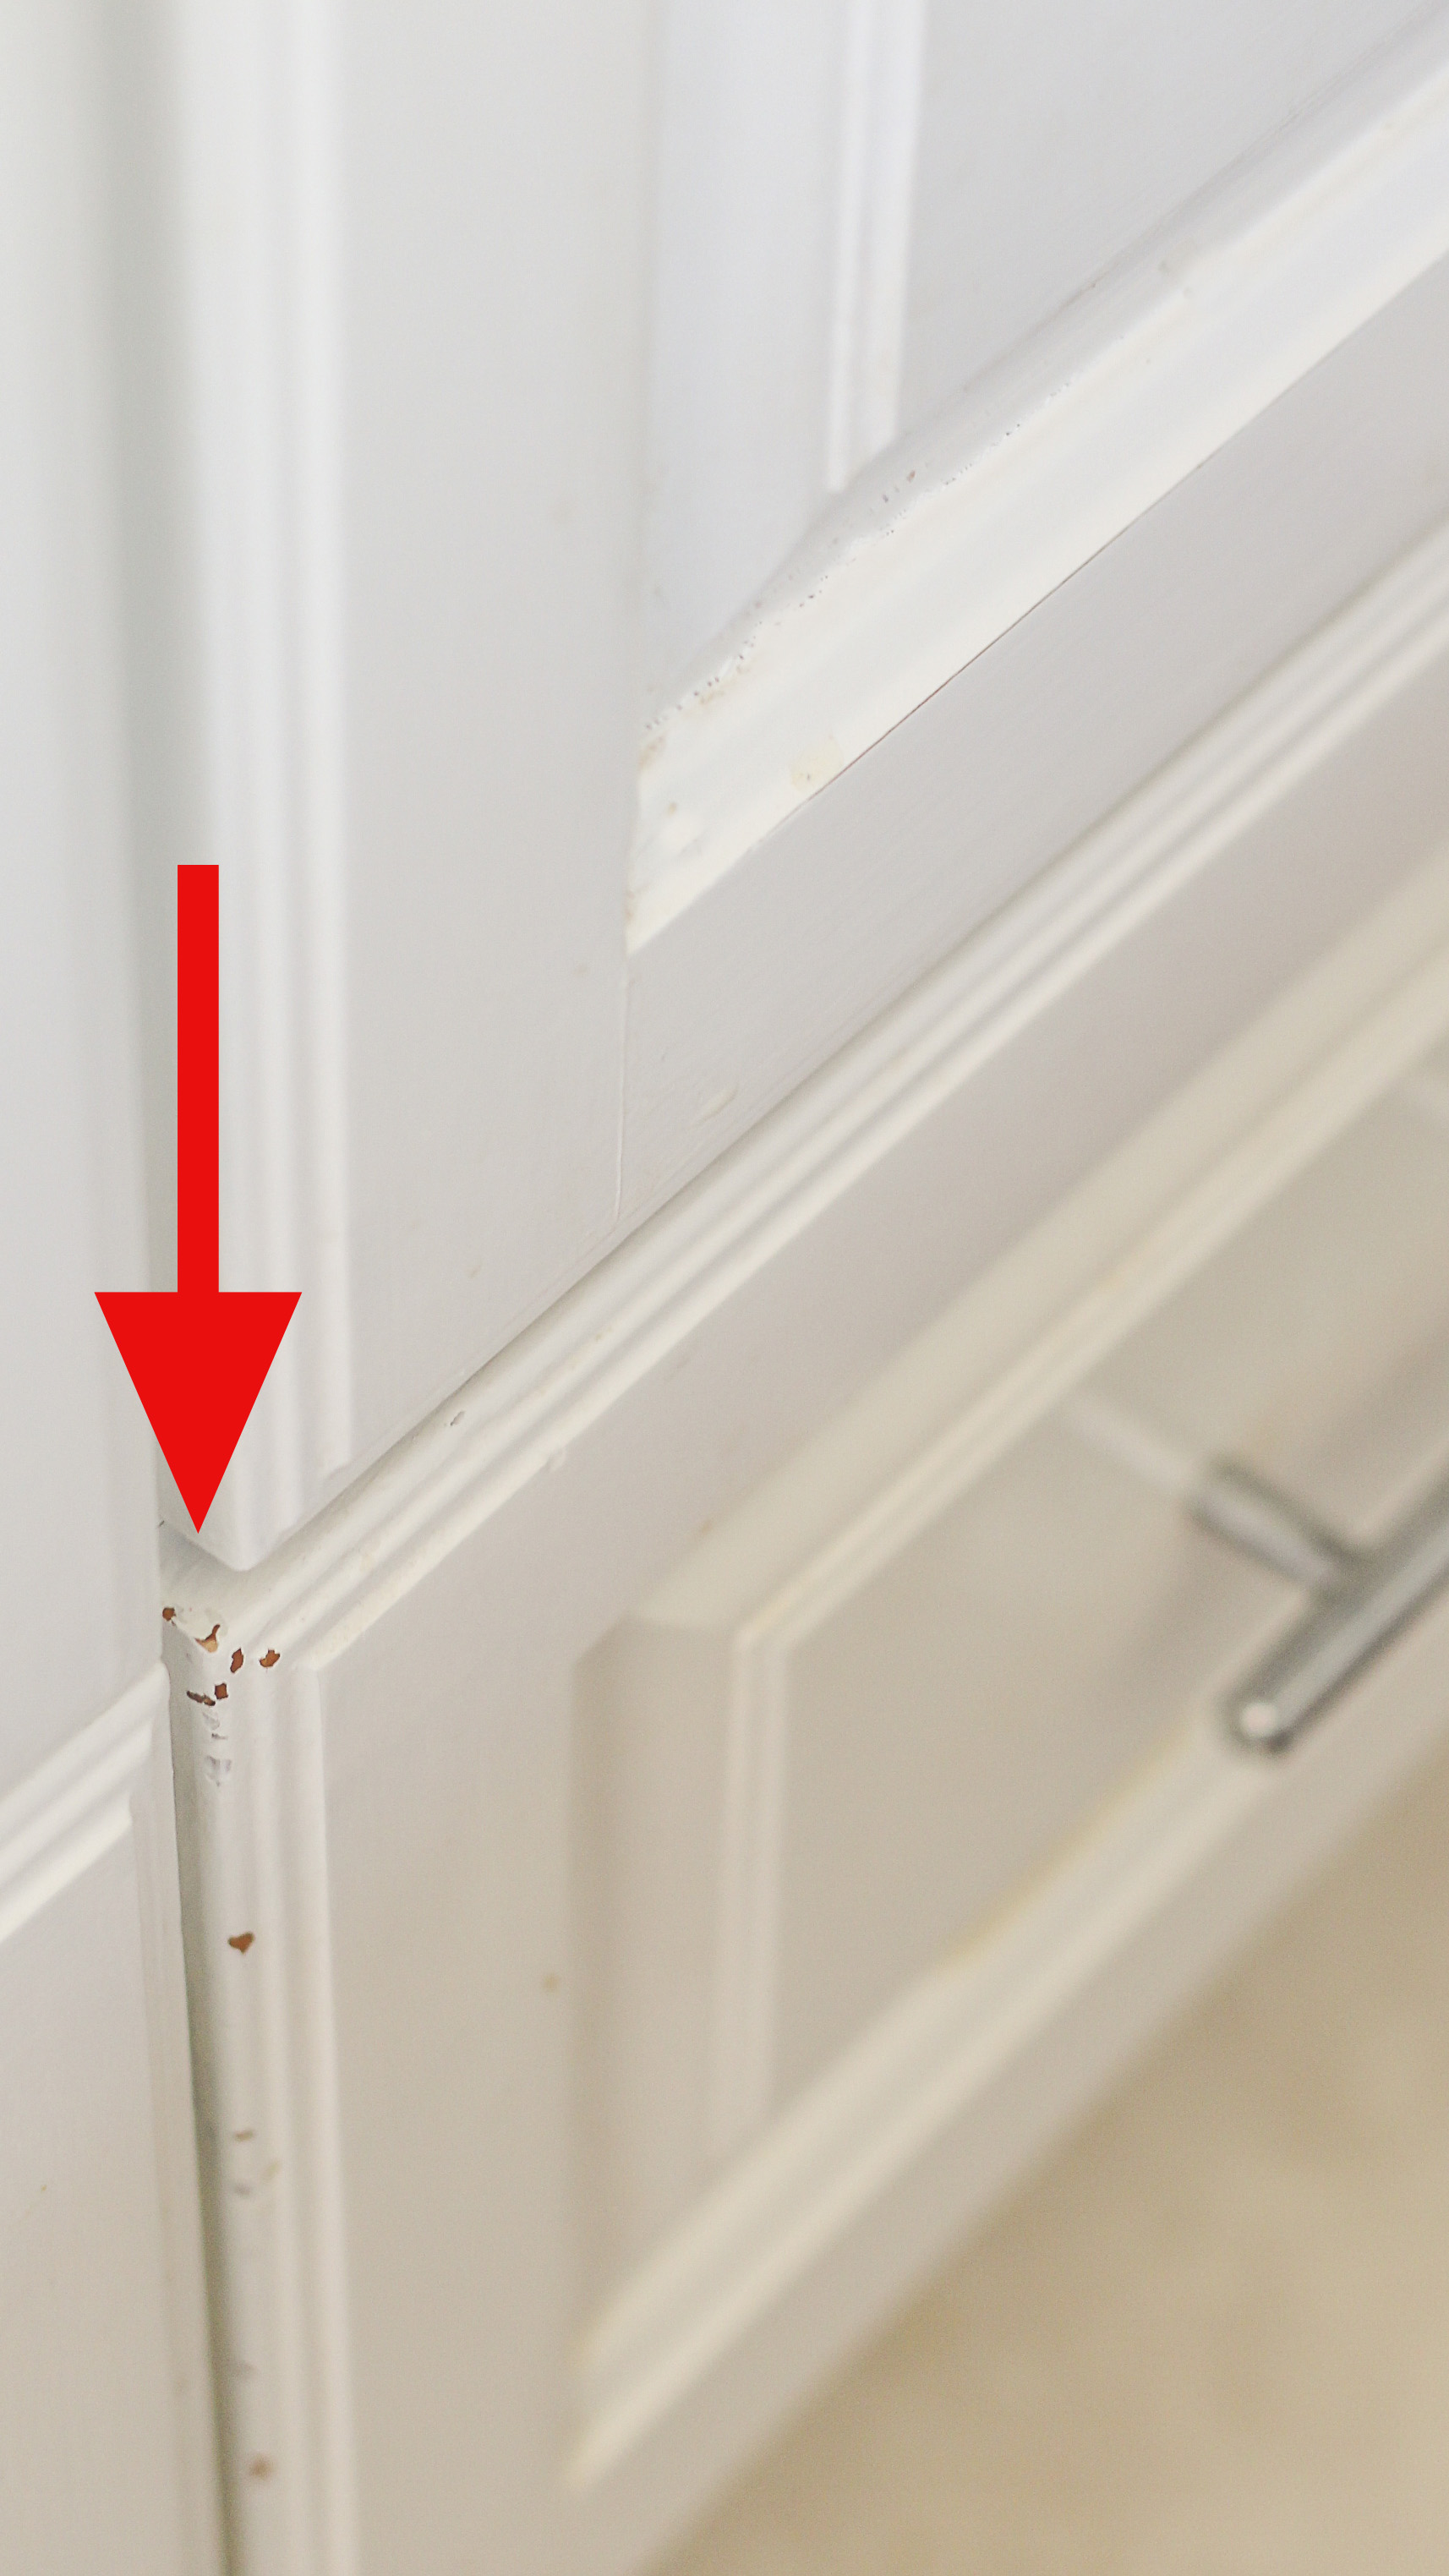
Just to give you better context , I wanted to show you what my professionally painted (oil-based paint) cabinets look like after three years….
Given those are my only trouble areas with the milk paint, I would say it is pretty dang durable.
My Milk Paint Review Video
So…you can take it for what it’s worth, but I am actually very pleased with how my milk paint has held up.
Could my milk paint success have something to do with the fact that it was applied over oil-based paint – which may have acted as a priming agent? I have limited experience with milk paint, so I cannot say, but I have also tried milk paint on a stained bathroom vanity, and it seems to be very durable in that particular application as well.
All in all, my milk paint experience has been a very positive one, but please do not confuse “milk paint” with “chalk paint”….I really cannot vouch for the chalk variety, and many people seem to confuse the two.
Thank God for advances in home improvement technology! I am such a slacker- preferring the “easy way” of doing things.
Now get out there and design some good vibes! Please be sure to spread the love and Pin..


Welcome!
My journey in interior design and home improvement began with transforming my first fixer-upper home, all while managing a budget and raising two young boys. My work, a reflection of my passion for creating beautiful, uplifting spaces, has been recognized by top publications like Better Homes and Gardens Magazine, HGTV, and more. I invite you to explore my site and witness the transformation of my home and the vibes we've designed. Read more...


I think they look amazing. Love your kitchen. I have two vanities to paint so I might take a look at milk paint.
Thank you so much, Marty! I think it is much easier to work with than oil paint.
I have been planning to paint my bathroom vanity but I am lazy but milk paint sounds wonderful. What color did you use?
Haha! I feel ya! Painting cabinets is truly a pain in the rear, but I found milk paint much easier to work with. I used General Finishes in the color “Driftwood”. Good luck!
It seems to me that if the chips expose the original stained wood, then it’s the oil paint chipping off, not the milk paint. I love the gray!
That is a really good point, Judy. With the way we abuse our kitchen cabinets, a little chipping is inevitable (unfortunately). I need to get around to doing some touch-ups. Wishing you a wonderful week.
Thanks for the reminder about milk paint. I have a dated hall bathroom where I intend to paint the orangey stained vanity until the time we have saved enough to remodel it. Milk paint seems to fit my laziness/durability requirements very well!
haha! Girl…I am all about cutting corners (as long as structure or safety isnt compromised of course). Good luck. xoxo
Love your kitchen runner! Where did you find it?
Thank you so much, Susie! I got it from Overstock.com a few years ago. It has held up beautifully.