
DIY Floating Bathroom Vanity
Today I am giving you a little sneak peek of my powder room progress by sharing this DIY floating vanity tutorial.
While I wish I was sharing the full reveal of my bathroom today given most of it is complete, I am still waiting on two pieces of decor to arrive (I suppose that’s what I get for ordering cheap sh*t from China). Nevertheless, I am so happy with how all of the elements are coming together and I am so proud of myself for taking a design risk with this custom vanity design.
To refresh your memory, this floating vanity was built for what I consider to be the world’s smallest bathroom ever. Given it sits directly off of the kitchen and mudroom, it is the most utilized bathroom for guests and although it is teeny tiny, I was determined to make it special (because our friends and family deserve a special place to take a poo of course)
Here is what the powder room and vanity looked like before……
Before:
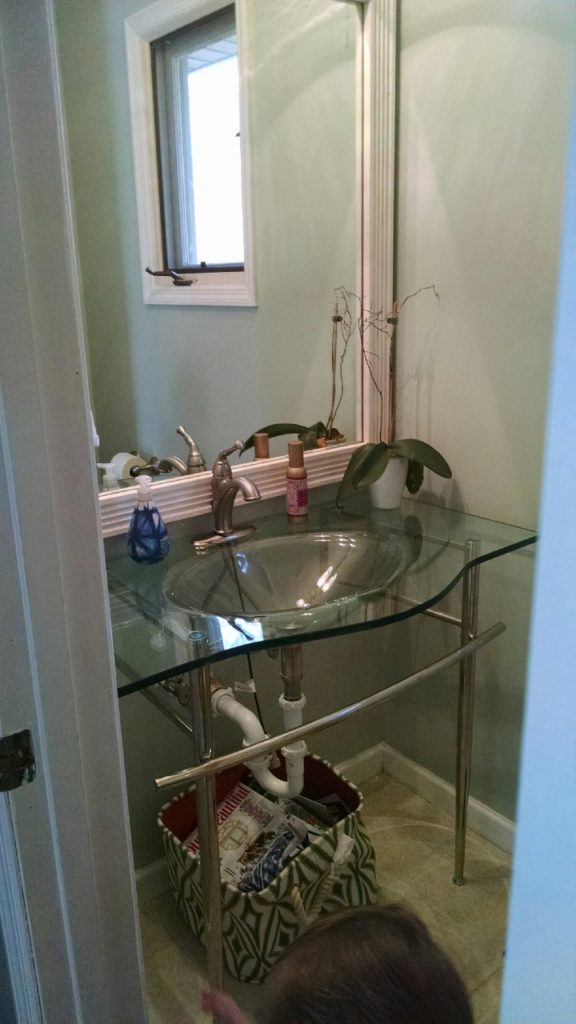
While it may be hard to tell from the photos, this vanity was too deep for the small confines of the space. Building a custom, floating design allowed us to enforce specific dimensions which are much more suitable for the area.
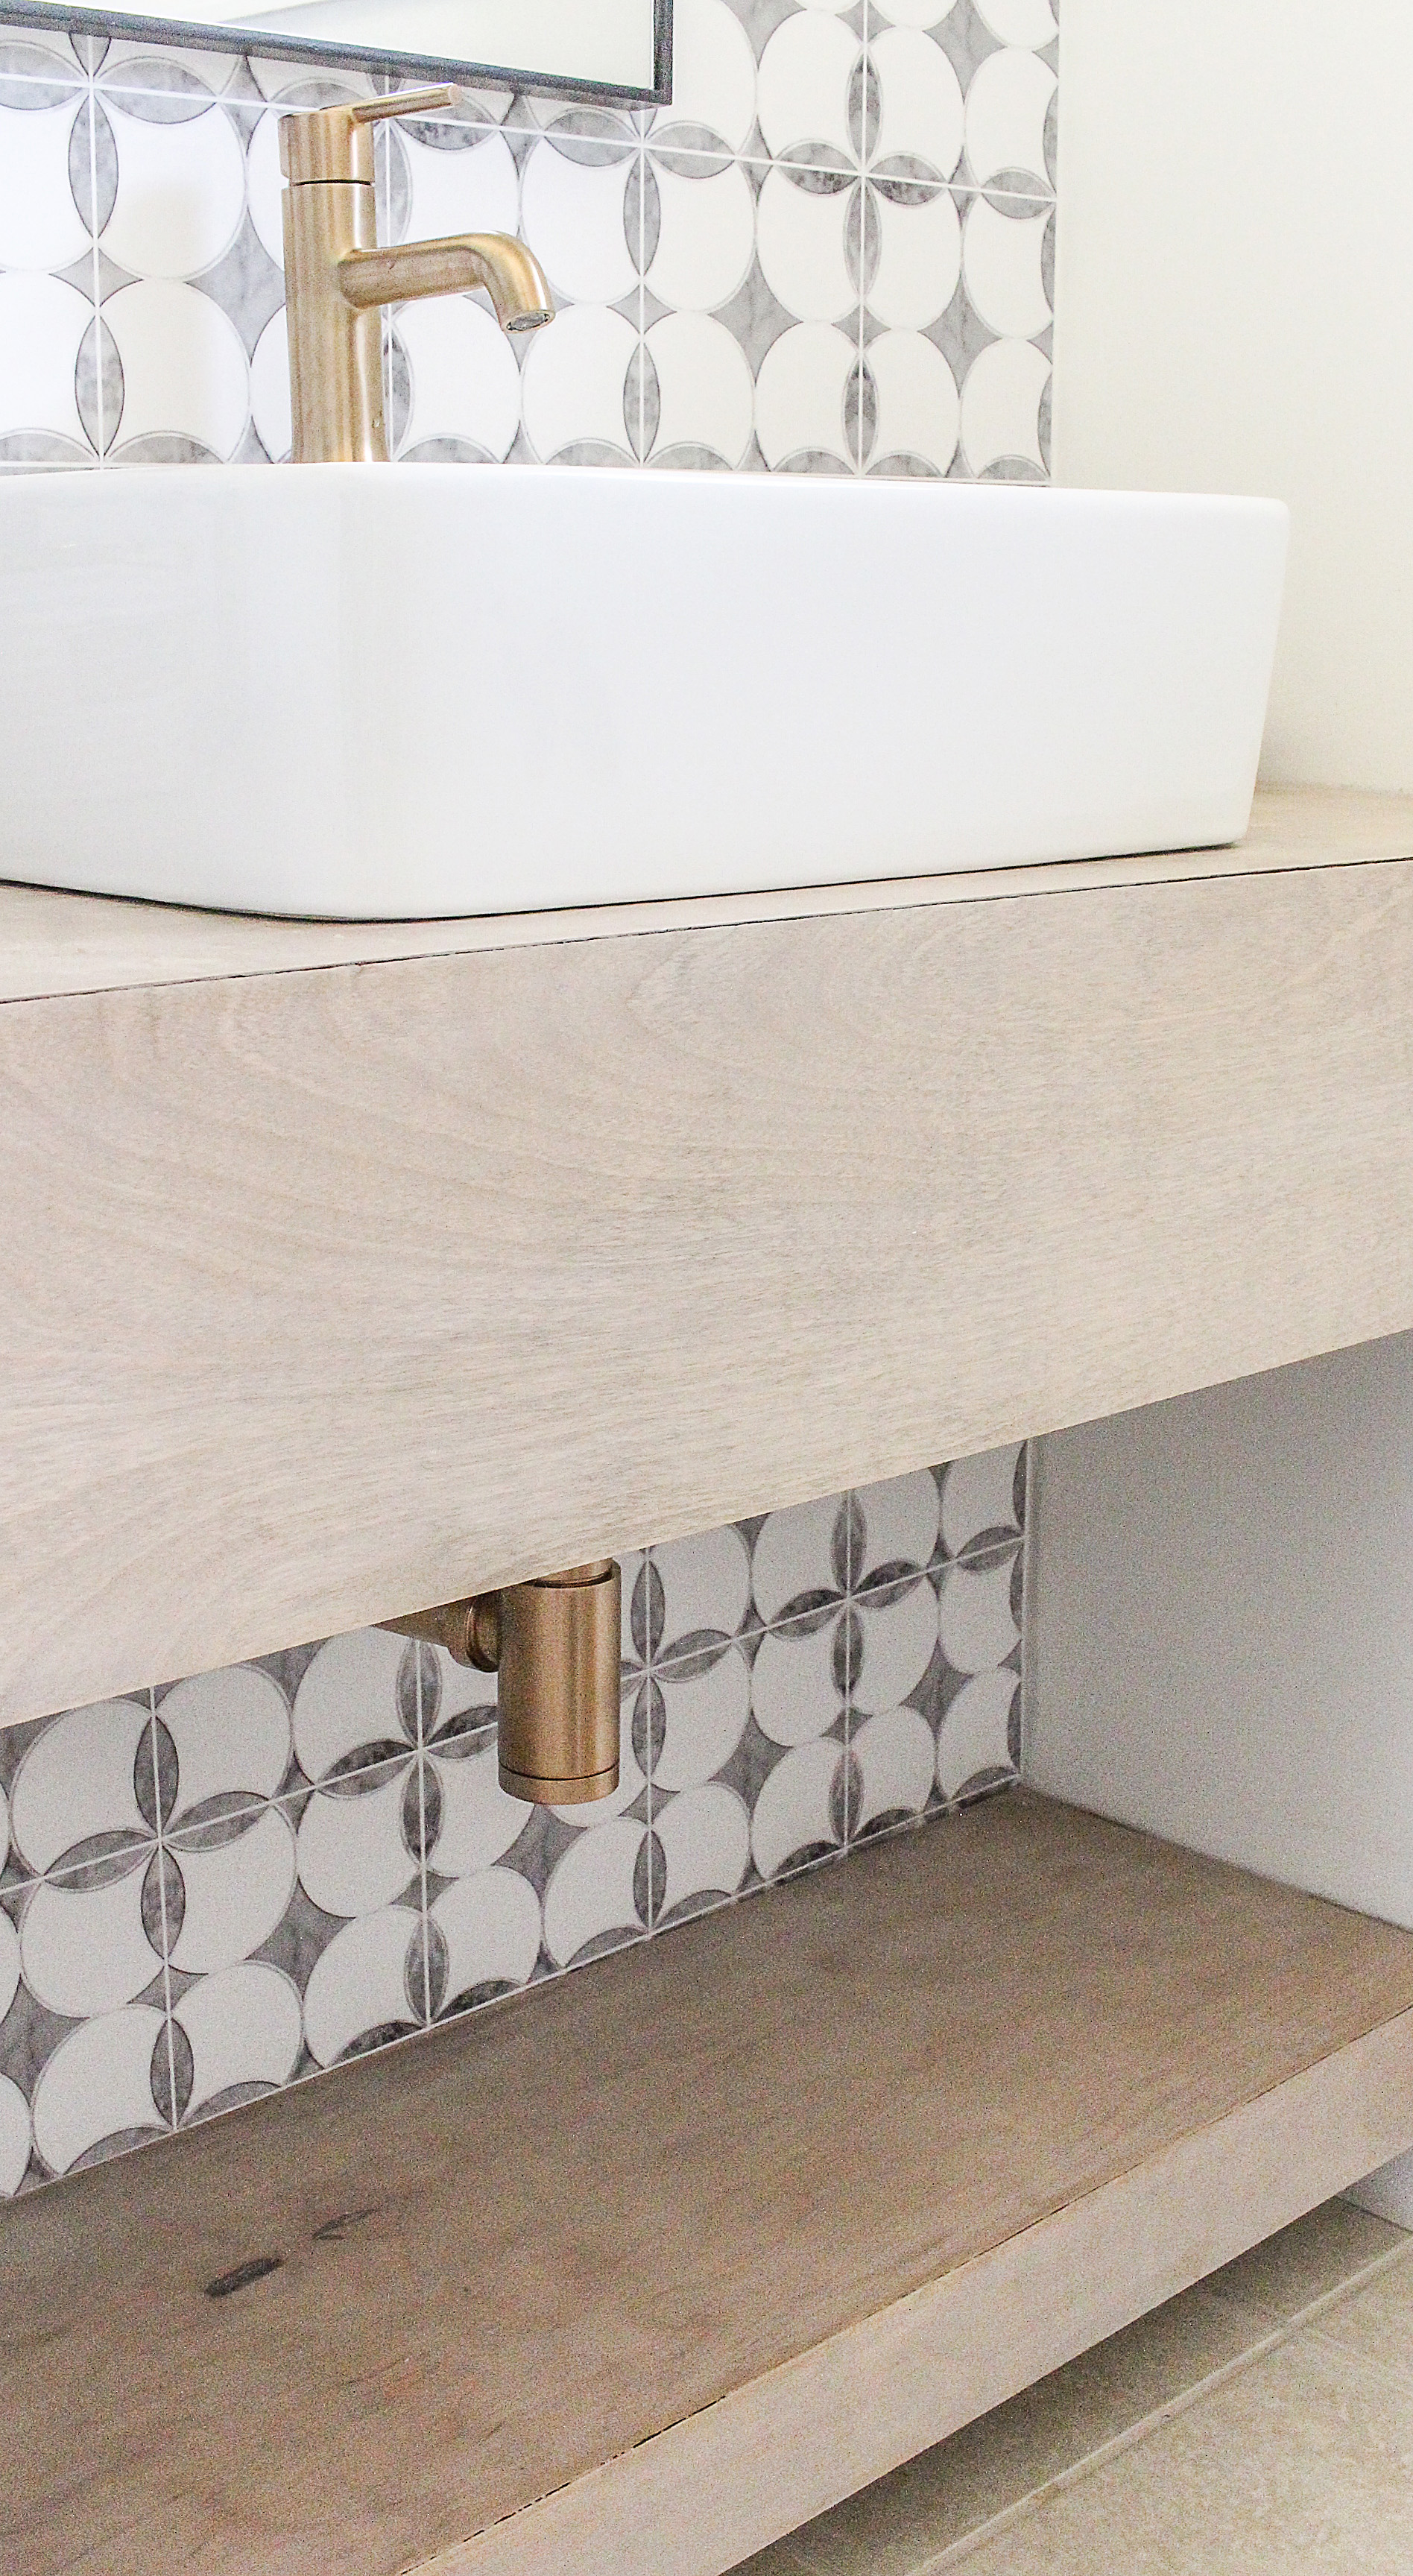
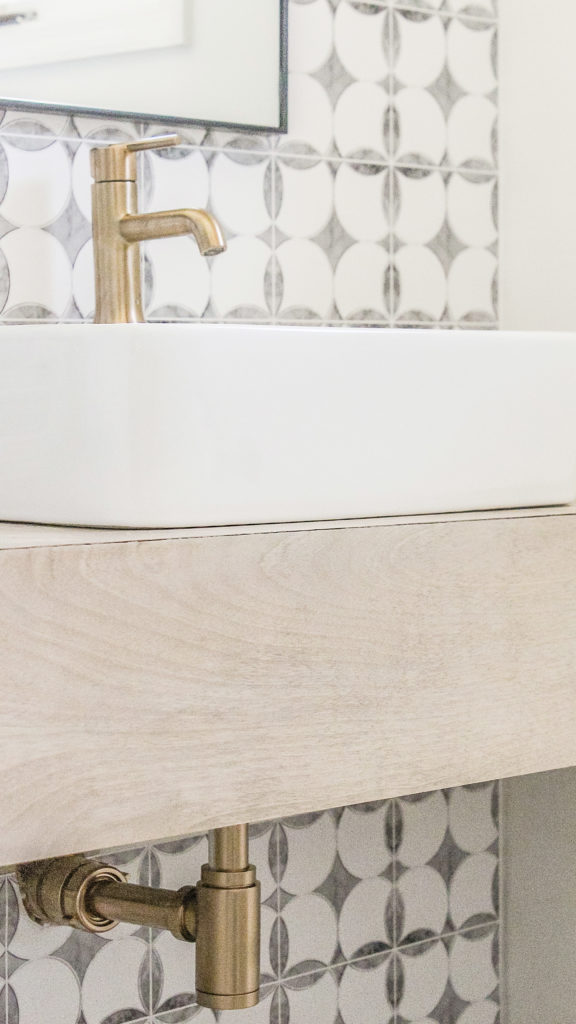
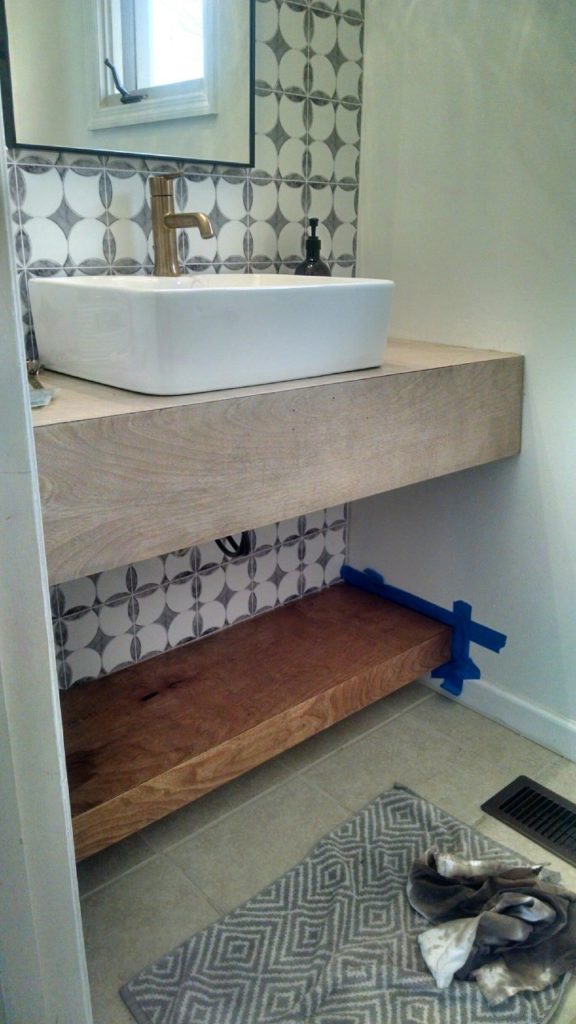
Now:

These are the only views of the room I am showing today, friends. For more photos, you will have to tune back in for the full reveal in a week or so.
Okay…
So, let me show you how my amazing husband built this fabulous floating wood vanity.
For your shopping convenience, I have included affiliate links.
Rustic Floating Vanity Materials
- 2×3’s as needed (we used 4)
- 3” wood screws
- Birchwood veneer plywood
- 18 gauge brad nailer and brads
- compressor
- jigsaw
- circular saw with plywood blade
- shims
- orbital sander
- level
- 1” spade bit
- oil-based wood protectant
- desired stain (I explain what I used below)
- rag and paint brush to apply stain and protectant (you can get wood protectant here
 )
)

Before heading to the hardware store to get supplies, I first calculated my desired dimensions. I based the dimensions off of the depth of the sink I had ordered and also on the width of the powder room (from wall to wall). Thankfully the babes waited patiently as I decided on what type of wood to use. In the interest of avoiding tantrums, I came across some Birchwood plywood and decided to just roll with it. Not to mention, plywood is very cost-effective.
DIY Floating Bathroom Vanity Steps
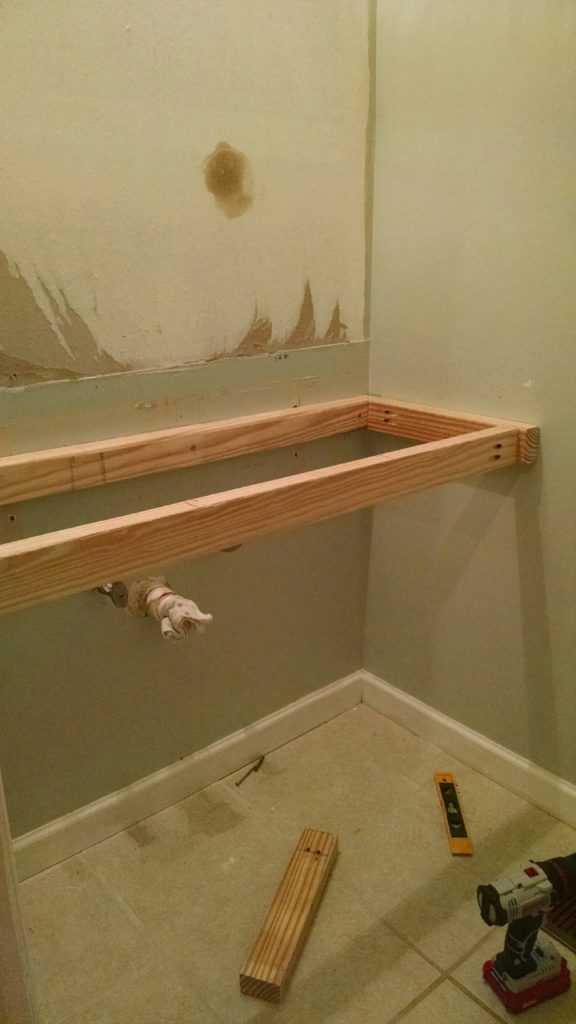
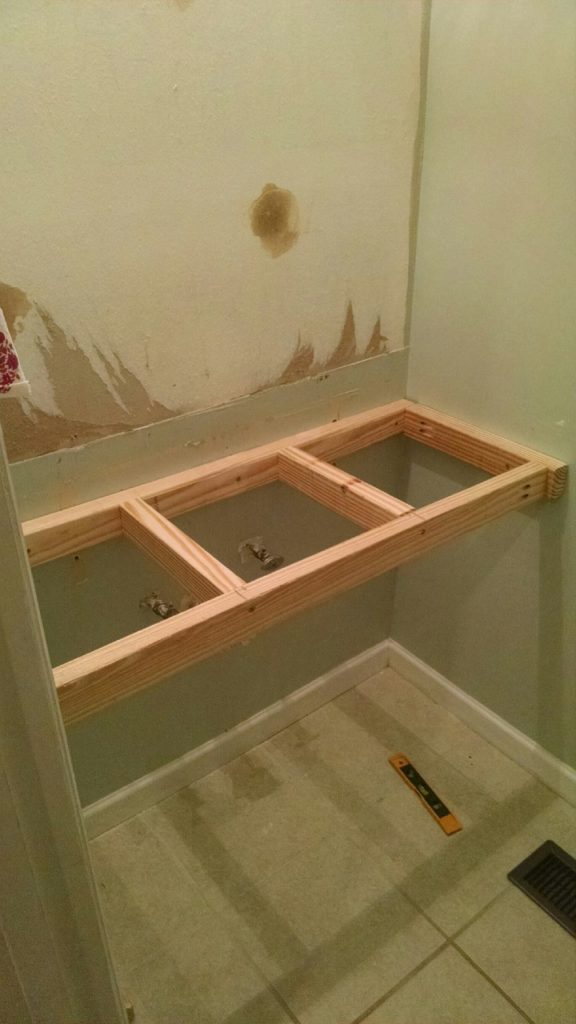
- Locate studs as you will be anchoring the framing to.
- Using 2×3’s and 3” wood screws, build the frame and anchor to studs. Make sure to level.
3. Cut plywood to desired width.
4. Measure desired depth (which I based off of the sink I was going to use) and cut plywood using a 45 degree cut. The excess piece will make the face of the shelf.
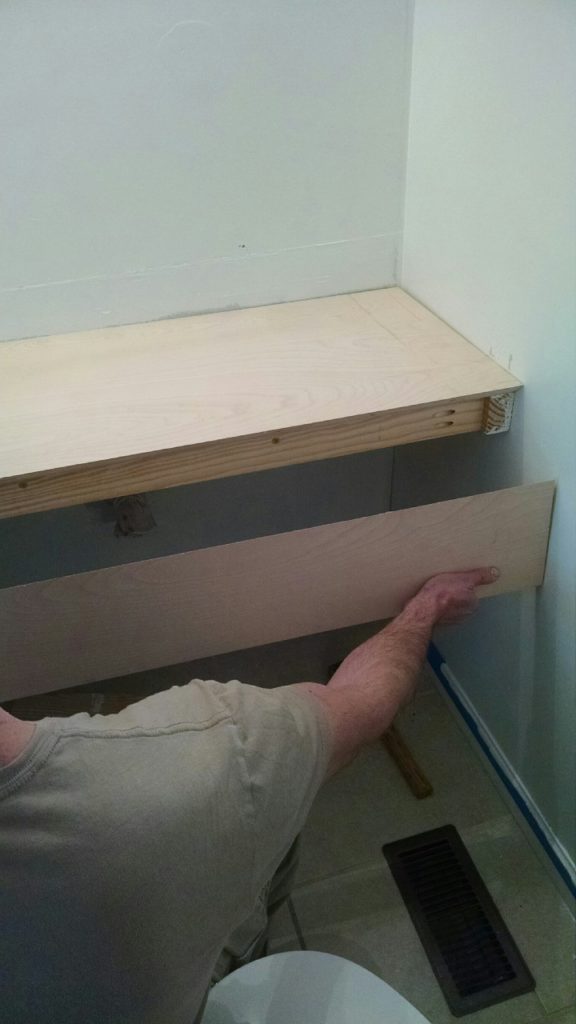
5. Anchor the top using 18GA nailer and brads. Shim as necessary (for level surface).
6. Anchor face using 18GA brads making sure 45 degree cut matches top 45 degree so that no edge is visible.
7. Sand plywood, clean surface and stain as desired. Note: If you want a seamless effect, you can use a wood filler prior to staining. The seams didn’t really bother me so I left them as is. After allowing stain to dry, I used three coats of this oil-based wood protectant![]() .
.
Wood Stain
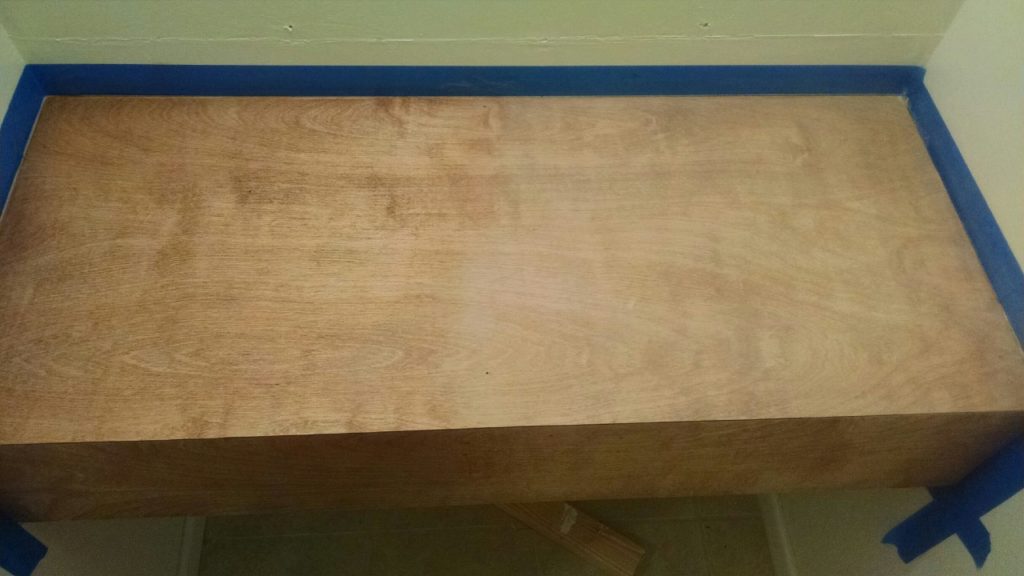
A side-note on the stain: Above is the vanity after one coat of wood conditioner, a light coat of Special Walnut stain (which you can get here![]() ) and a more thorough coat of Weathered Oak (which you can get here
) and a more thorough coat of Weathered Oak (which you can get here![]() ). On the right side of the vanity, where it appears lighter, is where I began applying a whitewash over the two subsequent stains. I used a combination of water and light grey latex paint (Benjamin Moore Gray Owl) as I was trying to achieve more of a weathered look. I first applied the whitewash with a paint brush and then used a cotton rag to blend the mixture into the wood.
). On the right side of the vanity, where it appears lighter, is where I began applying a whitewash over the two subsequent stains. I used a combination of water and light grey latex paint (Benjamin Moore Gray Owl) as I was trying to achieve more of a weathered look. I first applied the whitewash with a paint brush and then used a cotton rag to blend the mixture into the wood.
As you may recall from my design plans, I was trying to achieve a very specific aesthetic: California-Modern meets Mediterranean spa. I wanted the wood to resemble that of driftwood versus barn wood. Fearing a darker stain would result in more of a farmhouse vibe, I continued to grey wash the shiznit out of this baby until I captured the coastal vibes I was looking for.
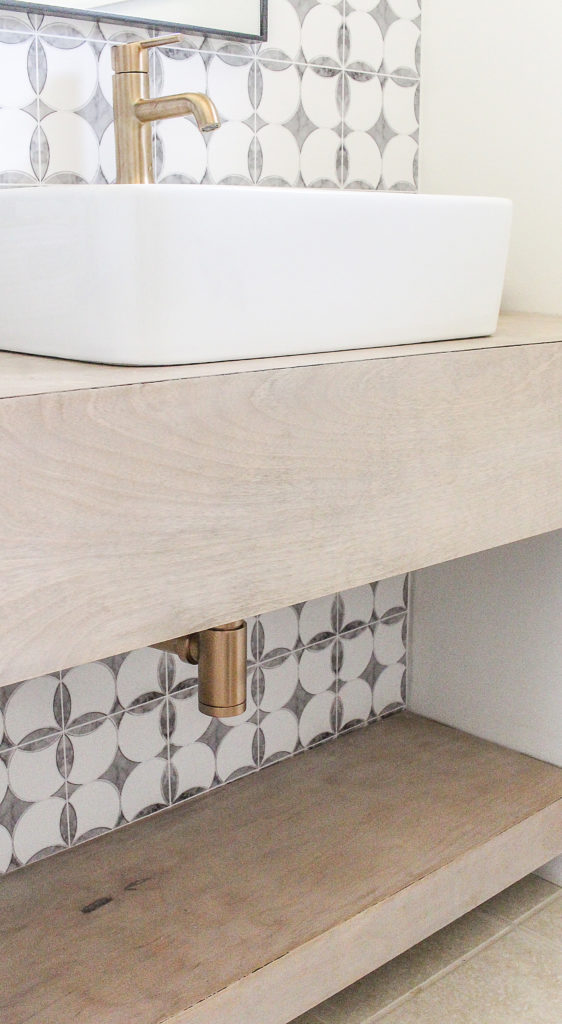
Below you will see the top shelf stained and whitewashed to my liking, while the bottom shelf shows the stain combination before I applied the whitewash…….
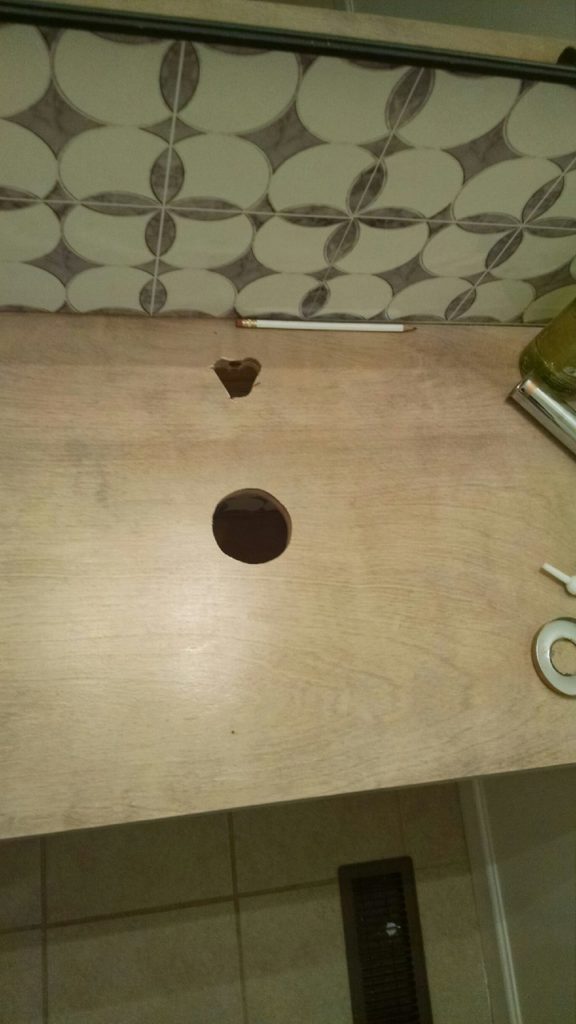
To install sink……
8. Mark areas where supply lines and drain will extend through top.
9. Drill 1 inch hole in two areas.
10. Use jigsaw to cut larger holes for supply lines and drain.
For bottom shelf…..
If a lower shelf is desired, repeat steps 1-7. Note, we decreased the depth of the bottom shelf slightly.
Hopefully within the next week or so, my cheap sh*t from China will arrive and I will be able to share the full reveal of our powder room.
Updated 6-13-18: You can now view the full reveal of my DIY powder room by clicking here to be directed to the post.
Update 7-21-20: Curious to see how my DIY vanity is holding up after over two years? Check out this follow-up review here.
If you enjoy wood working projects, you may also want to check out my DIY floating wood shelves tutorial by clicking here.
Until then, get out there and design some good vibes. Please also be sure the spread the love and Pin…


Welcome!
My journey in interior design and home improvement began with transforming my first fixer-upper home, all while managing a budget and raising two young boys. My work, a reflection of my passion for creating beautiful, uplifting spaces, has been recognized by top publications like Better Homes and Gardens Magazine, HGTV, and more. I invite you to explore my site and witness the transformation of my home and the vibes we've designed. Read more...


Looks amazing so far. Can’t wait for the complete reveal. And those babies? Totally adorable!!!
Thank you so much, Carol. I can’t wait to share the rest. 🙂
This is going to be freakin amazing! I love the whitewashed color of the vanity and that wallpaper has my heart!
You don’t even know how much your sweet words brighten my day. This was my first experience with wallpaper, and although I love how it turned out it was sort of a pain to put up. I guess practice makes perfect.
It looks awesome!! And, totally DIYable!! I can’t get over the perfect finish that you got with the whitewash! Looks amazing! Can’t wait to hear more about the pattern behind the the sink and see the whole reveal!
Thank you so much, my beautiful friend. I think my husband was a little disappointed with how light I made the stain with my excessive whitewashing but I like it. haha
It is absolutely gorgeous!!! can you please tell me the thickness of the vanity and the space between the bottom shelf and the top. thank you
Thanks, Jackie! I wish I could give you the answer to that, but I no longer live at that house. Sorry I could not be of more help. 🙂