
My DIY Wood Floating Vanity- 2 Years Later
While I was really hoping to have my living room makeover complete and ready to share with you guys this week, unfortunately, I am still waiting for a few key items of decor to arrive. Nonetheless, I thought this week would be the perfect chance to do a DIY project follow-up post.
Recently, I have had a few readers reach out and ask me how my DIY floating wood vanity is holding up after over two years of water exposure. So, I thought I would give you an honest review today.
*For your online shopping convenience, I have included affiliate links in this post. That means if you click on one of those links and buy something, I may receive a small commission, but you won’t pay a dime more. As an Amazon Associate I earn from qualifying purchases*
Before I get into the review however, let me refresh your memory a bit..
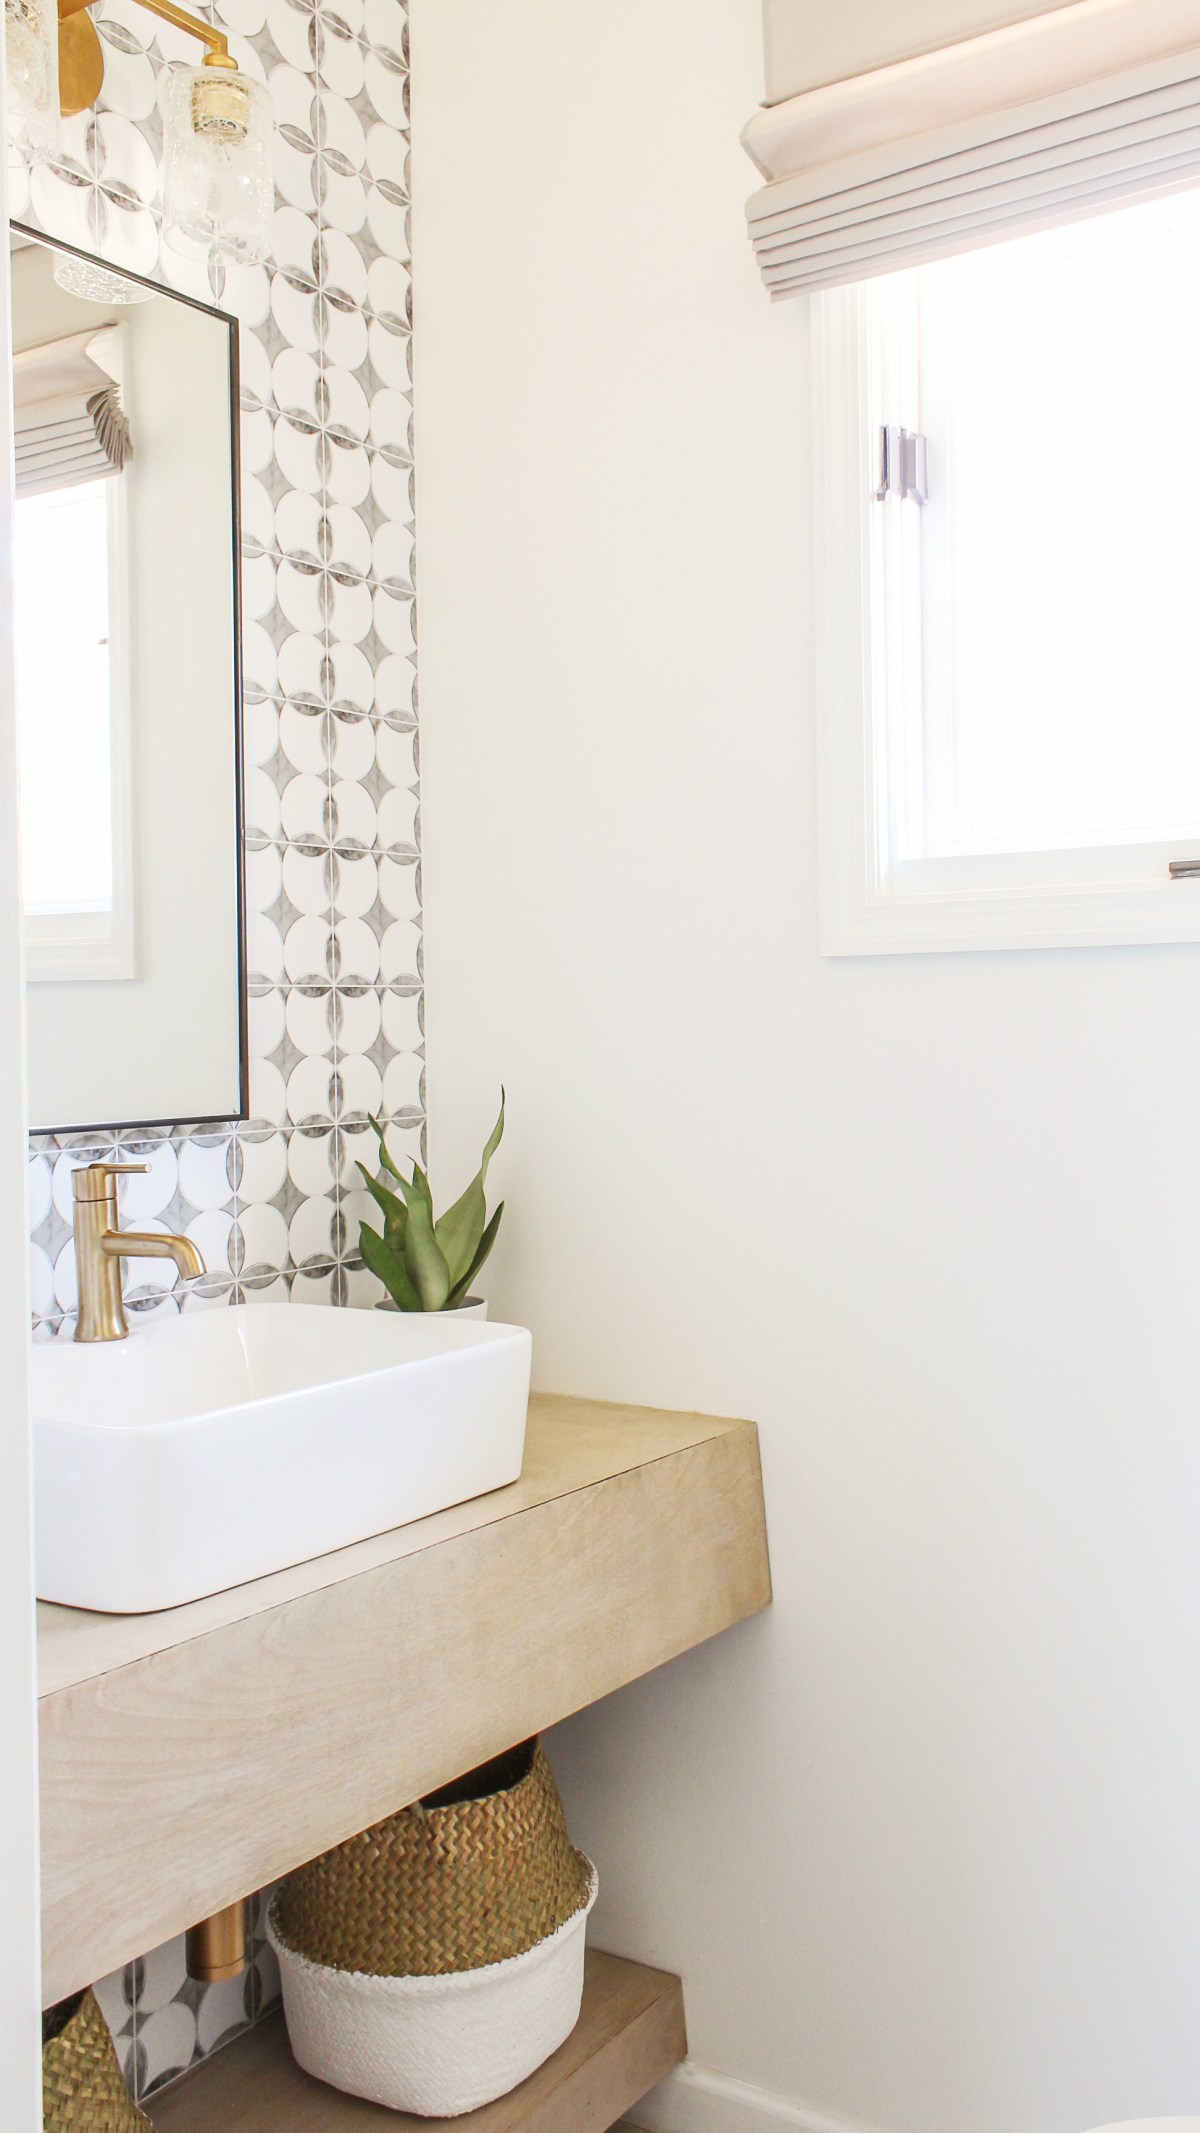
Back in January of 2018, my husband and I decided to upgrade our powder room.
Not having much of a budget to work with, we wanted to find an affordable way to pack major character into a teeny tiny space.
We first turned our attention to the sink area.
You see…the original vanity in the bathroom was too deep.
In fact, if one wasn’t careful (or perfectly sober for that matter), a simple trip to the crapper could result in beat-up forehead…

See the protruding glass in the center of the old vanity? I cannot tell you how many times I almost hit my noggin while rising from my porcelain thrown.
Unable to find any pre-fabricated options that suited our unique needs (we needed something super shallow), we decided our best and most affordable bet was to make a floating vanity of our own. This way we could maximize what little space we had while also incorporating a custom, modern farmhouse vibe.
While you can read the full vanity tutorial here, we essentially constructed the vanity from 2×3’s and Birchwood veneer plywood. I then stained the veneer and sealed it with two coats of this weather-resistant top-coat.
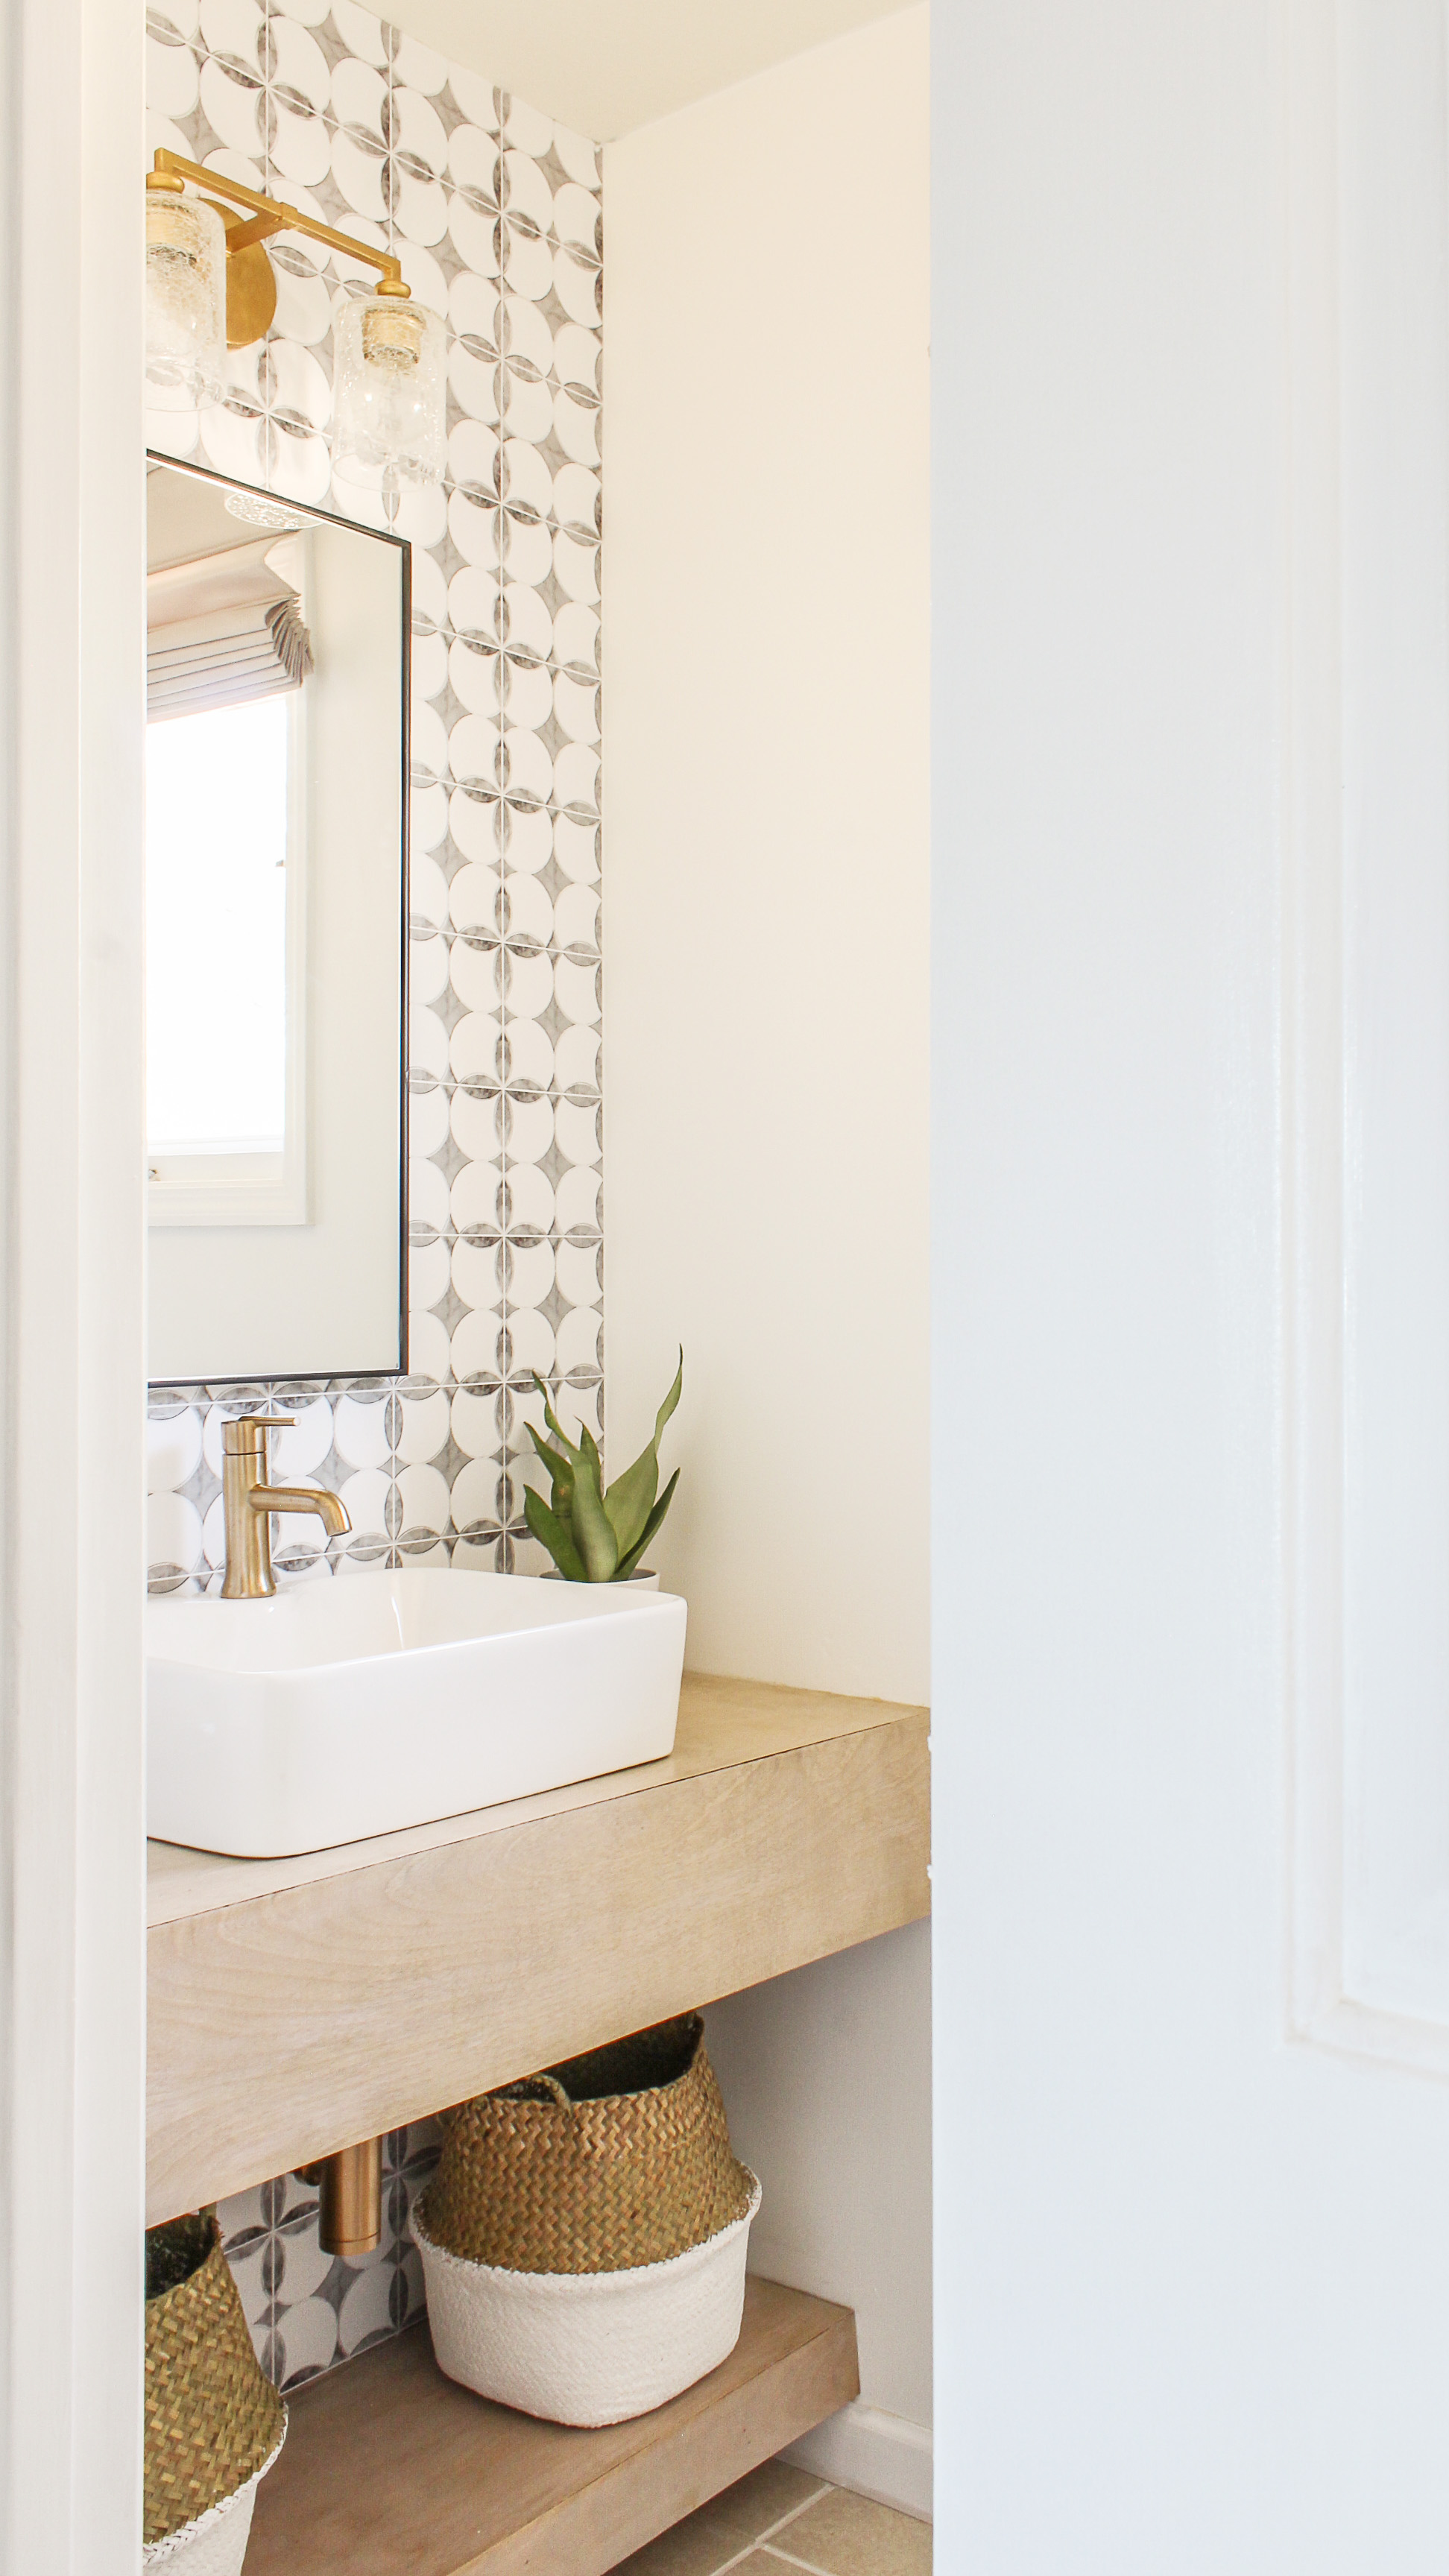
So…how has it held up over the past two and a half years?
My DIY Floating Vanity Over Two Years Later:
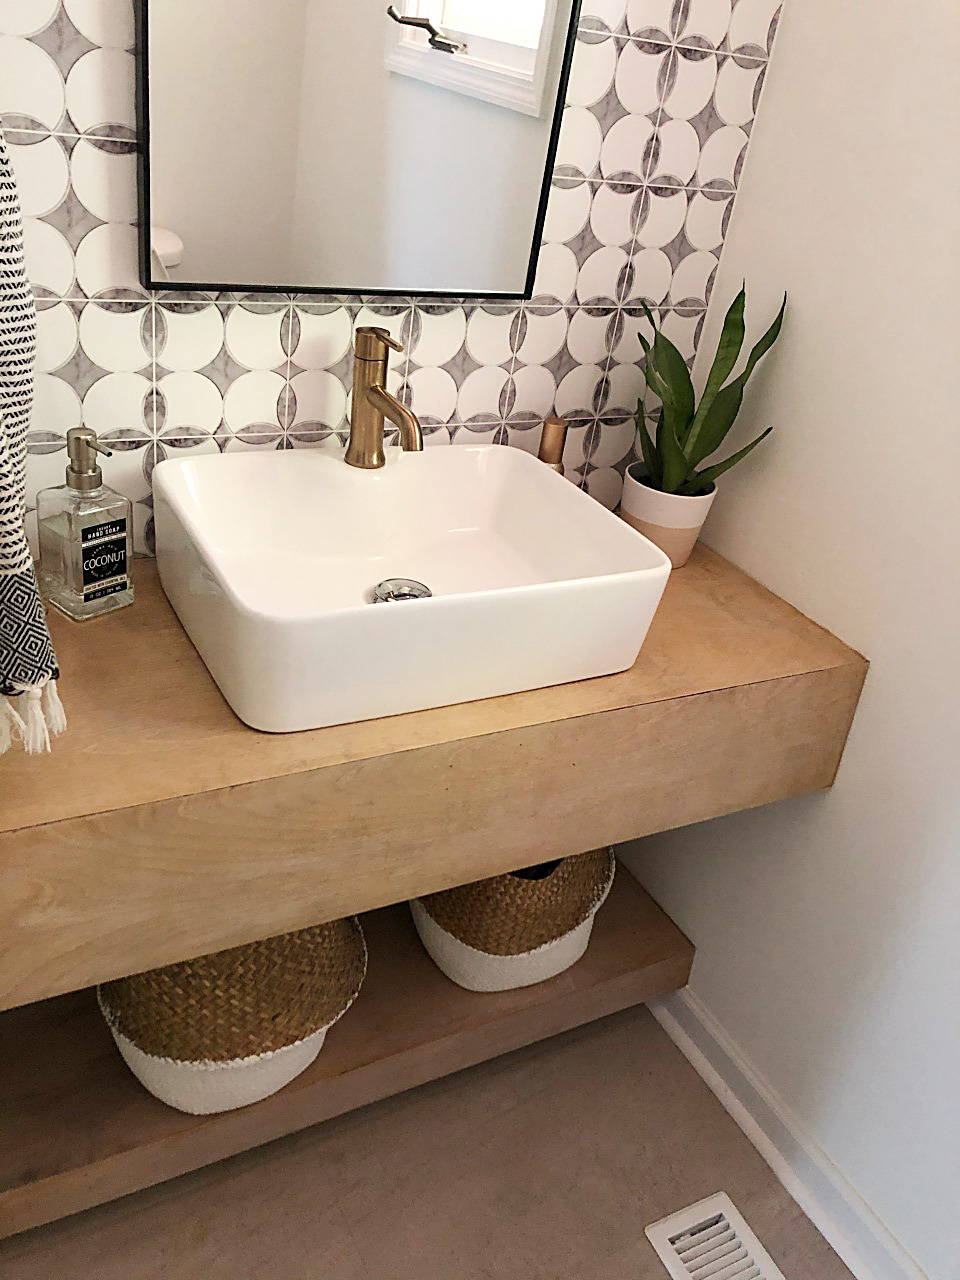
This is super anti-climatic, guys. I have had no issues with the wood whatsoever. And if my unedited photo above is not convincing enough, be sure to watch the short video clip I have included in this post .
To summarize this review, I think there are three key factors to the proven durability of my wooden bathroom vanity:
- To protect the wood veneer, I used two layers of a water resistant top coat.
- Given this is only a powder room, the vanity has never been exposed to steam or humidity.
- I don’t really clean-clean the wood top (I know ..gross!). I simply dust it with a dry rag and a gentle wood cleaner.
For any of you considering this DIY wood tutorial for your own powder room, I hope this gives you a little extra push in the rear along with some reassurance.
Now get out there and design some good vibes along with a fabulous life.
If you found this post helpful, please support this small business by sharing with a friend or on social media…


Welcome!
My journey in interior design and home improvement began with transforming my first fixer-upper home, all while managing a budget and raising two young boys. My work, a reflection of my passion for creating beautiful, uplifting spaces, has been recognized by top publications like Better Homes and Gardens Magazine, HGTV, and more. I invite you to explore my site and witness the transformation of my home and the vibes we've designed. Read more...


Looks lovely. Is the backsplash a wallpaper or vinyl tile? I love the look!
Thank you so much, Christine. It is actually a vinyl, removable wallpaper . I have a whole blog post on it here https://designingvibes.com/an-honest-review-of-my-peel-and-stick-tiles-one-year-later/
How did you get the gold drain? I love it but unsure how to get that look!
Thank you! I bought a cheap “bottle trap” from Amazon and spray painted it gold.