
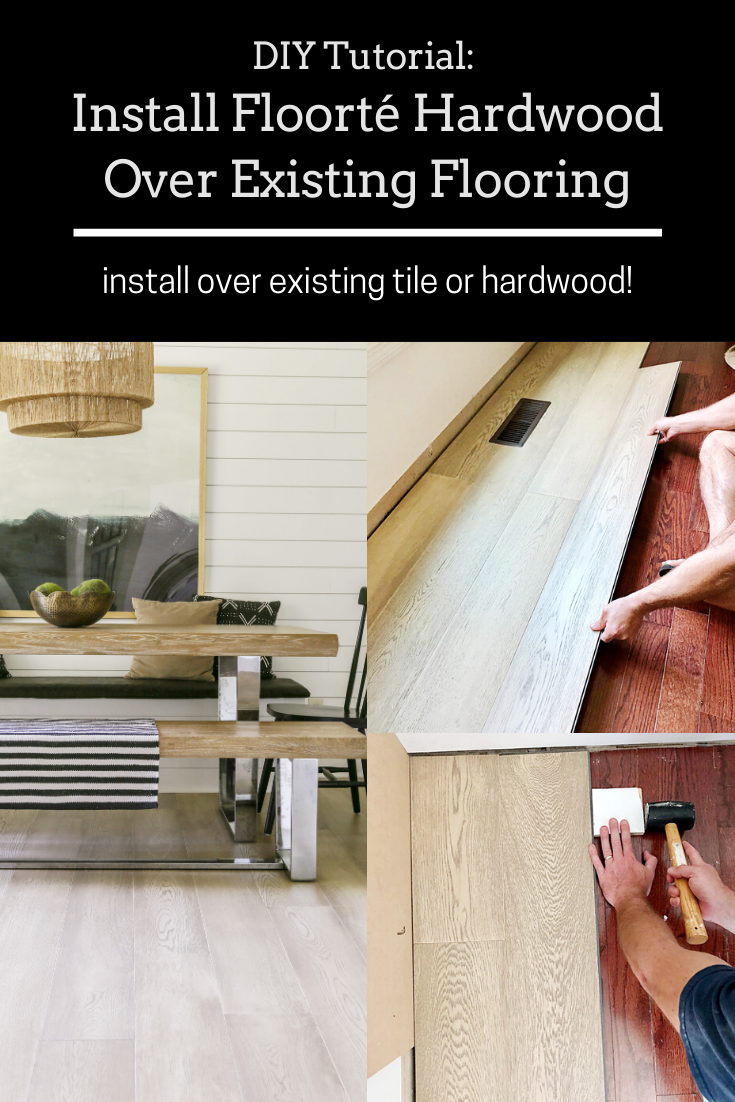
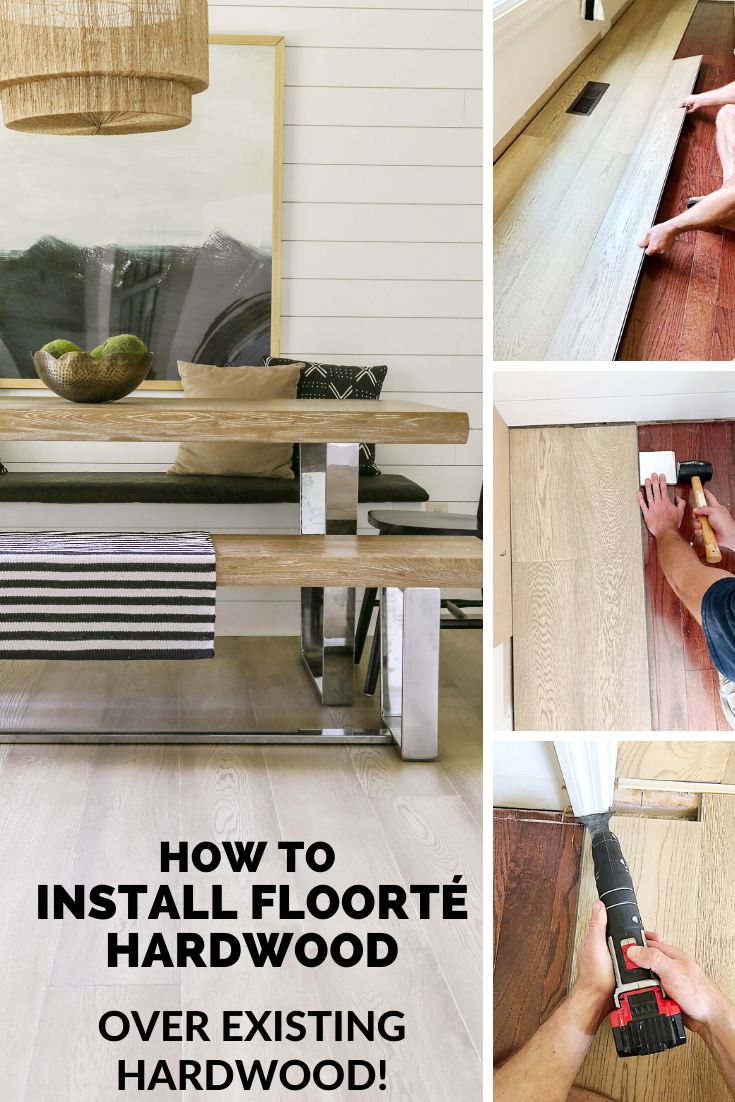
How To Install Floating Hardwood Directly Over Existing Flooring
Longing for new hardwood flooring in your home, but not ready to tackle the hassle and expense which inevitably comes with the demolition or refinishing of your existing wood flooring? Today, I am going to share how I installed Floorté Hardwood Series directly over my existing hardwood and tile flooring.
I cannot believe the day has finally come, my friends!
This exciting partnership with Shaw Floors has been a long time in the making, but I can now proudly say that all of the flooring in my 1980’s fixer upper is brand, spanking new.
This post is sponsored by Shaw Floors, however all opinions are 100% mine.
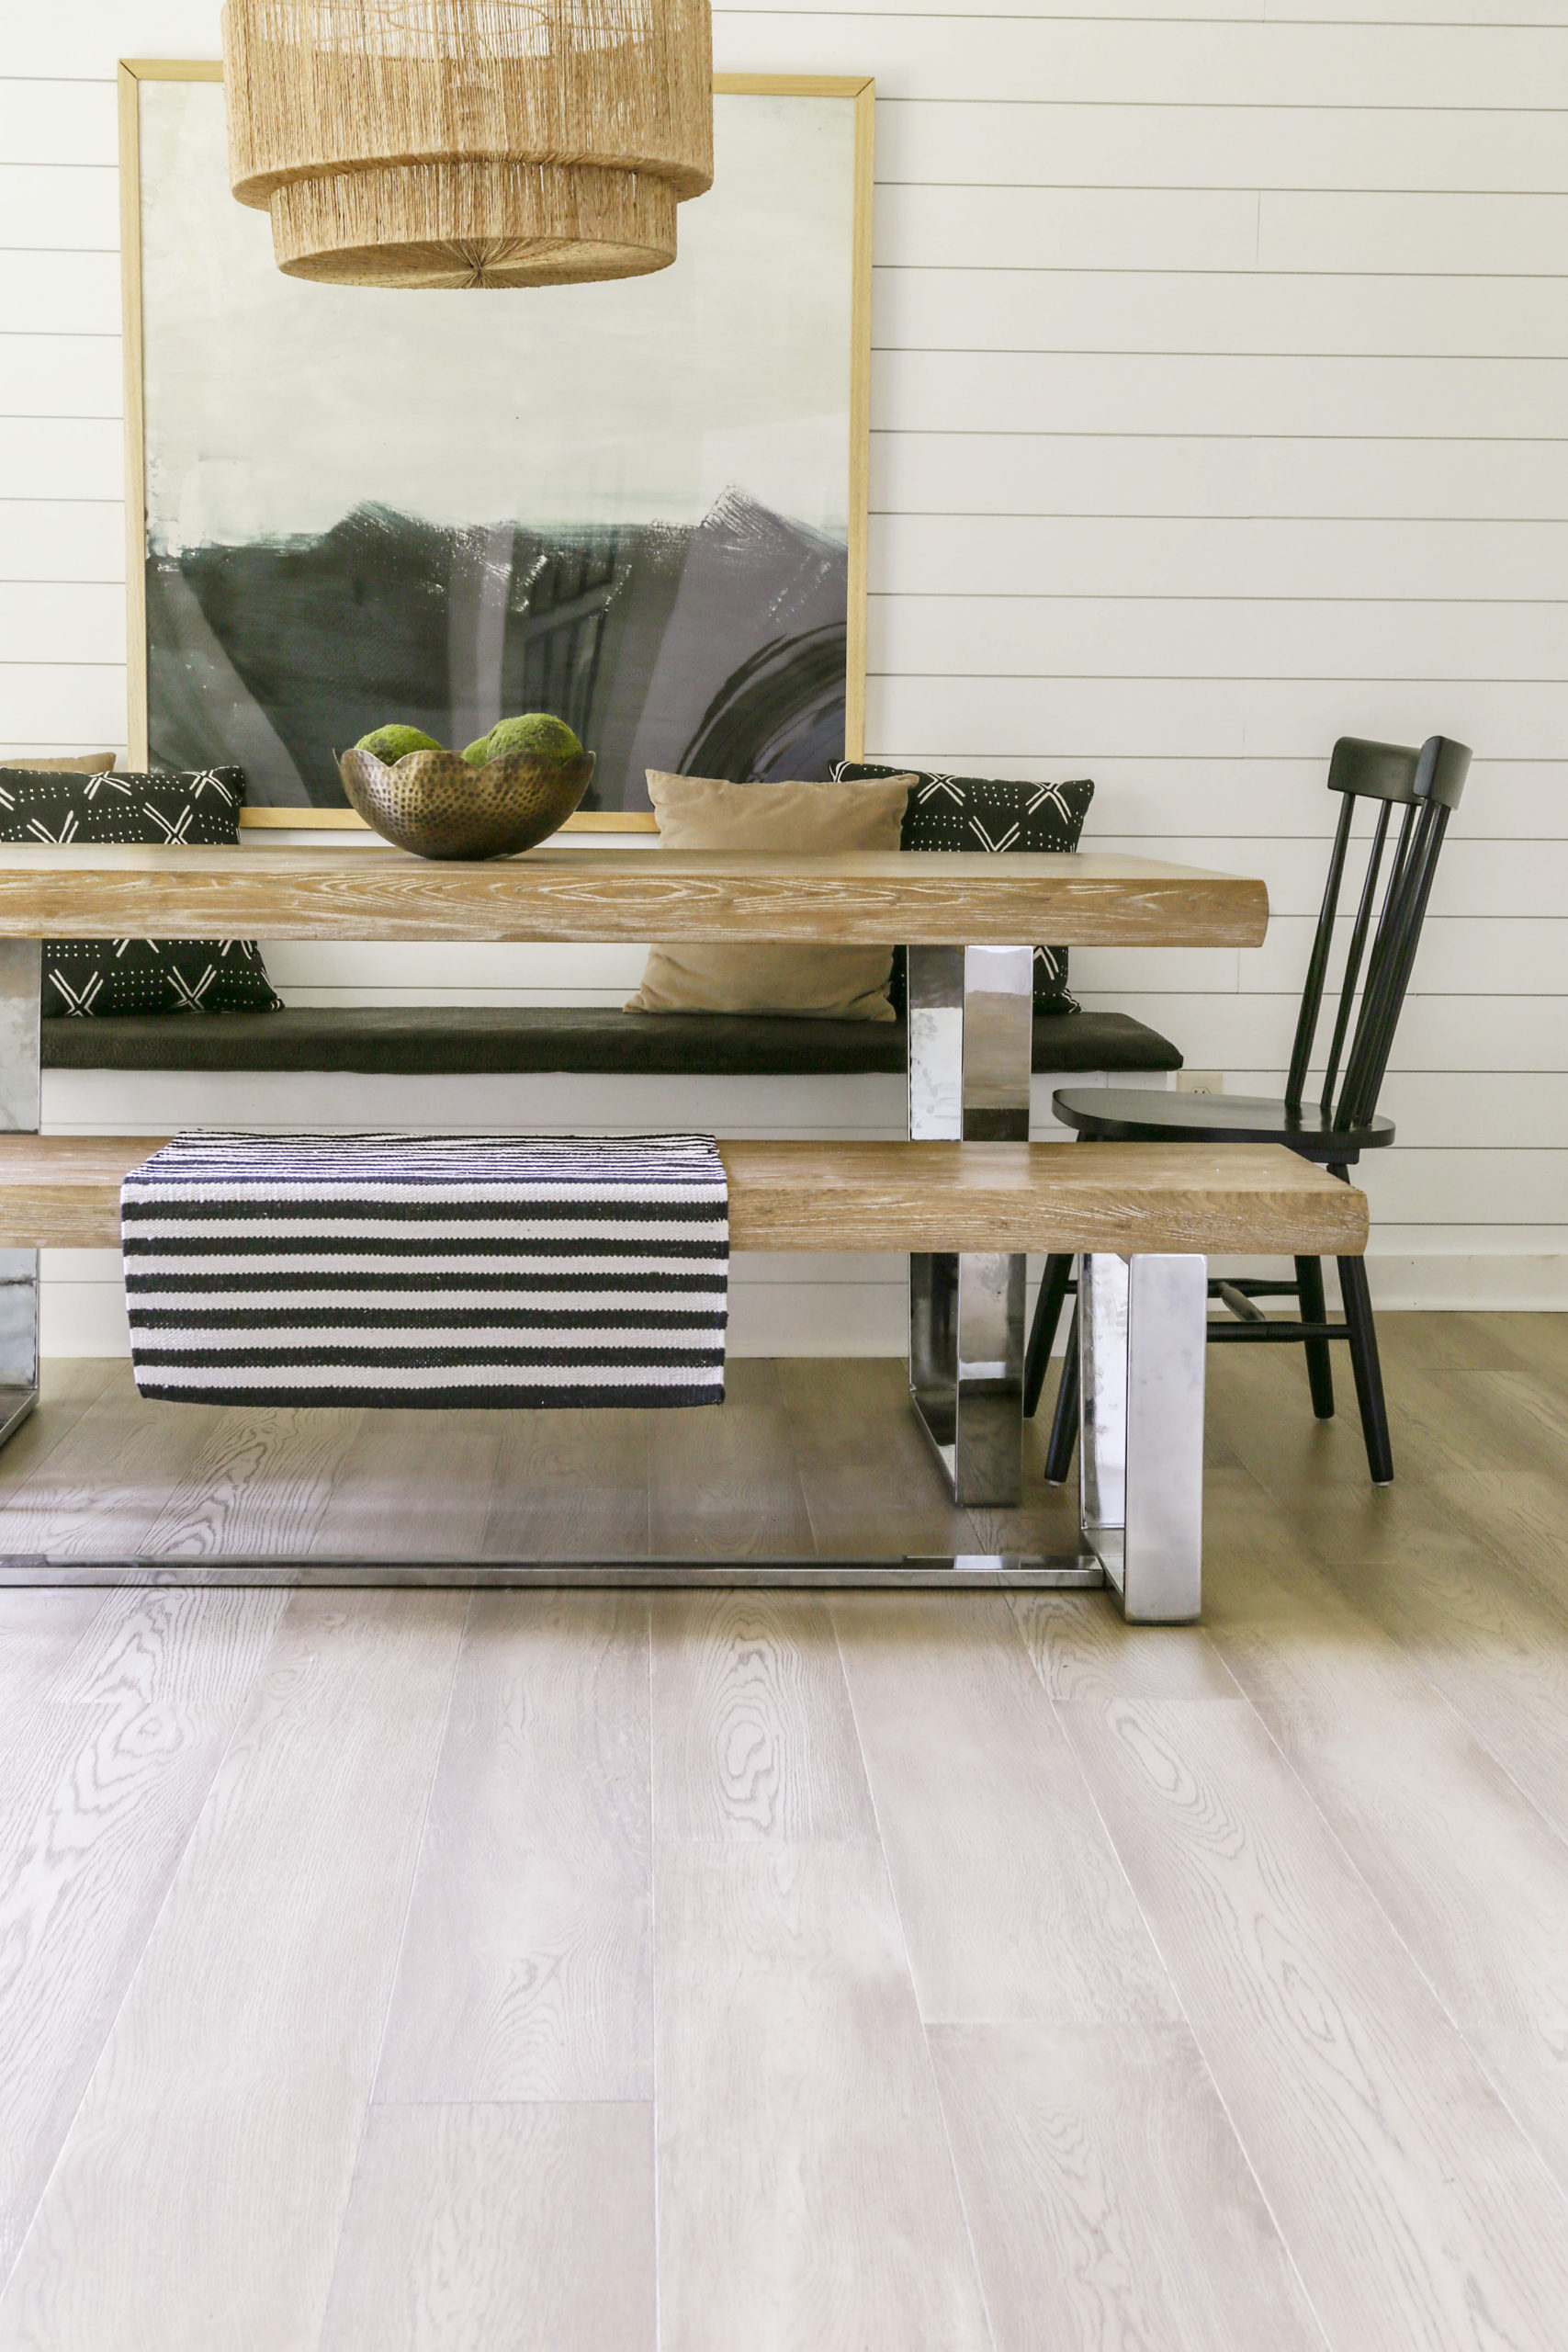
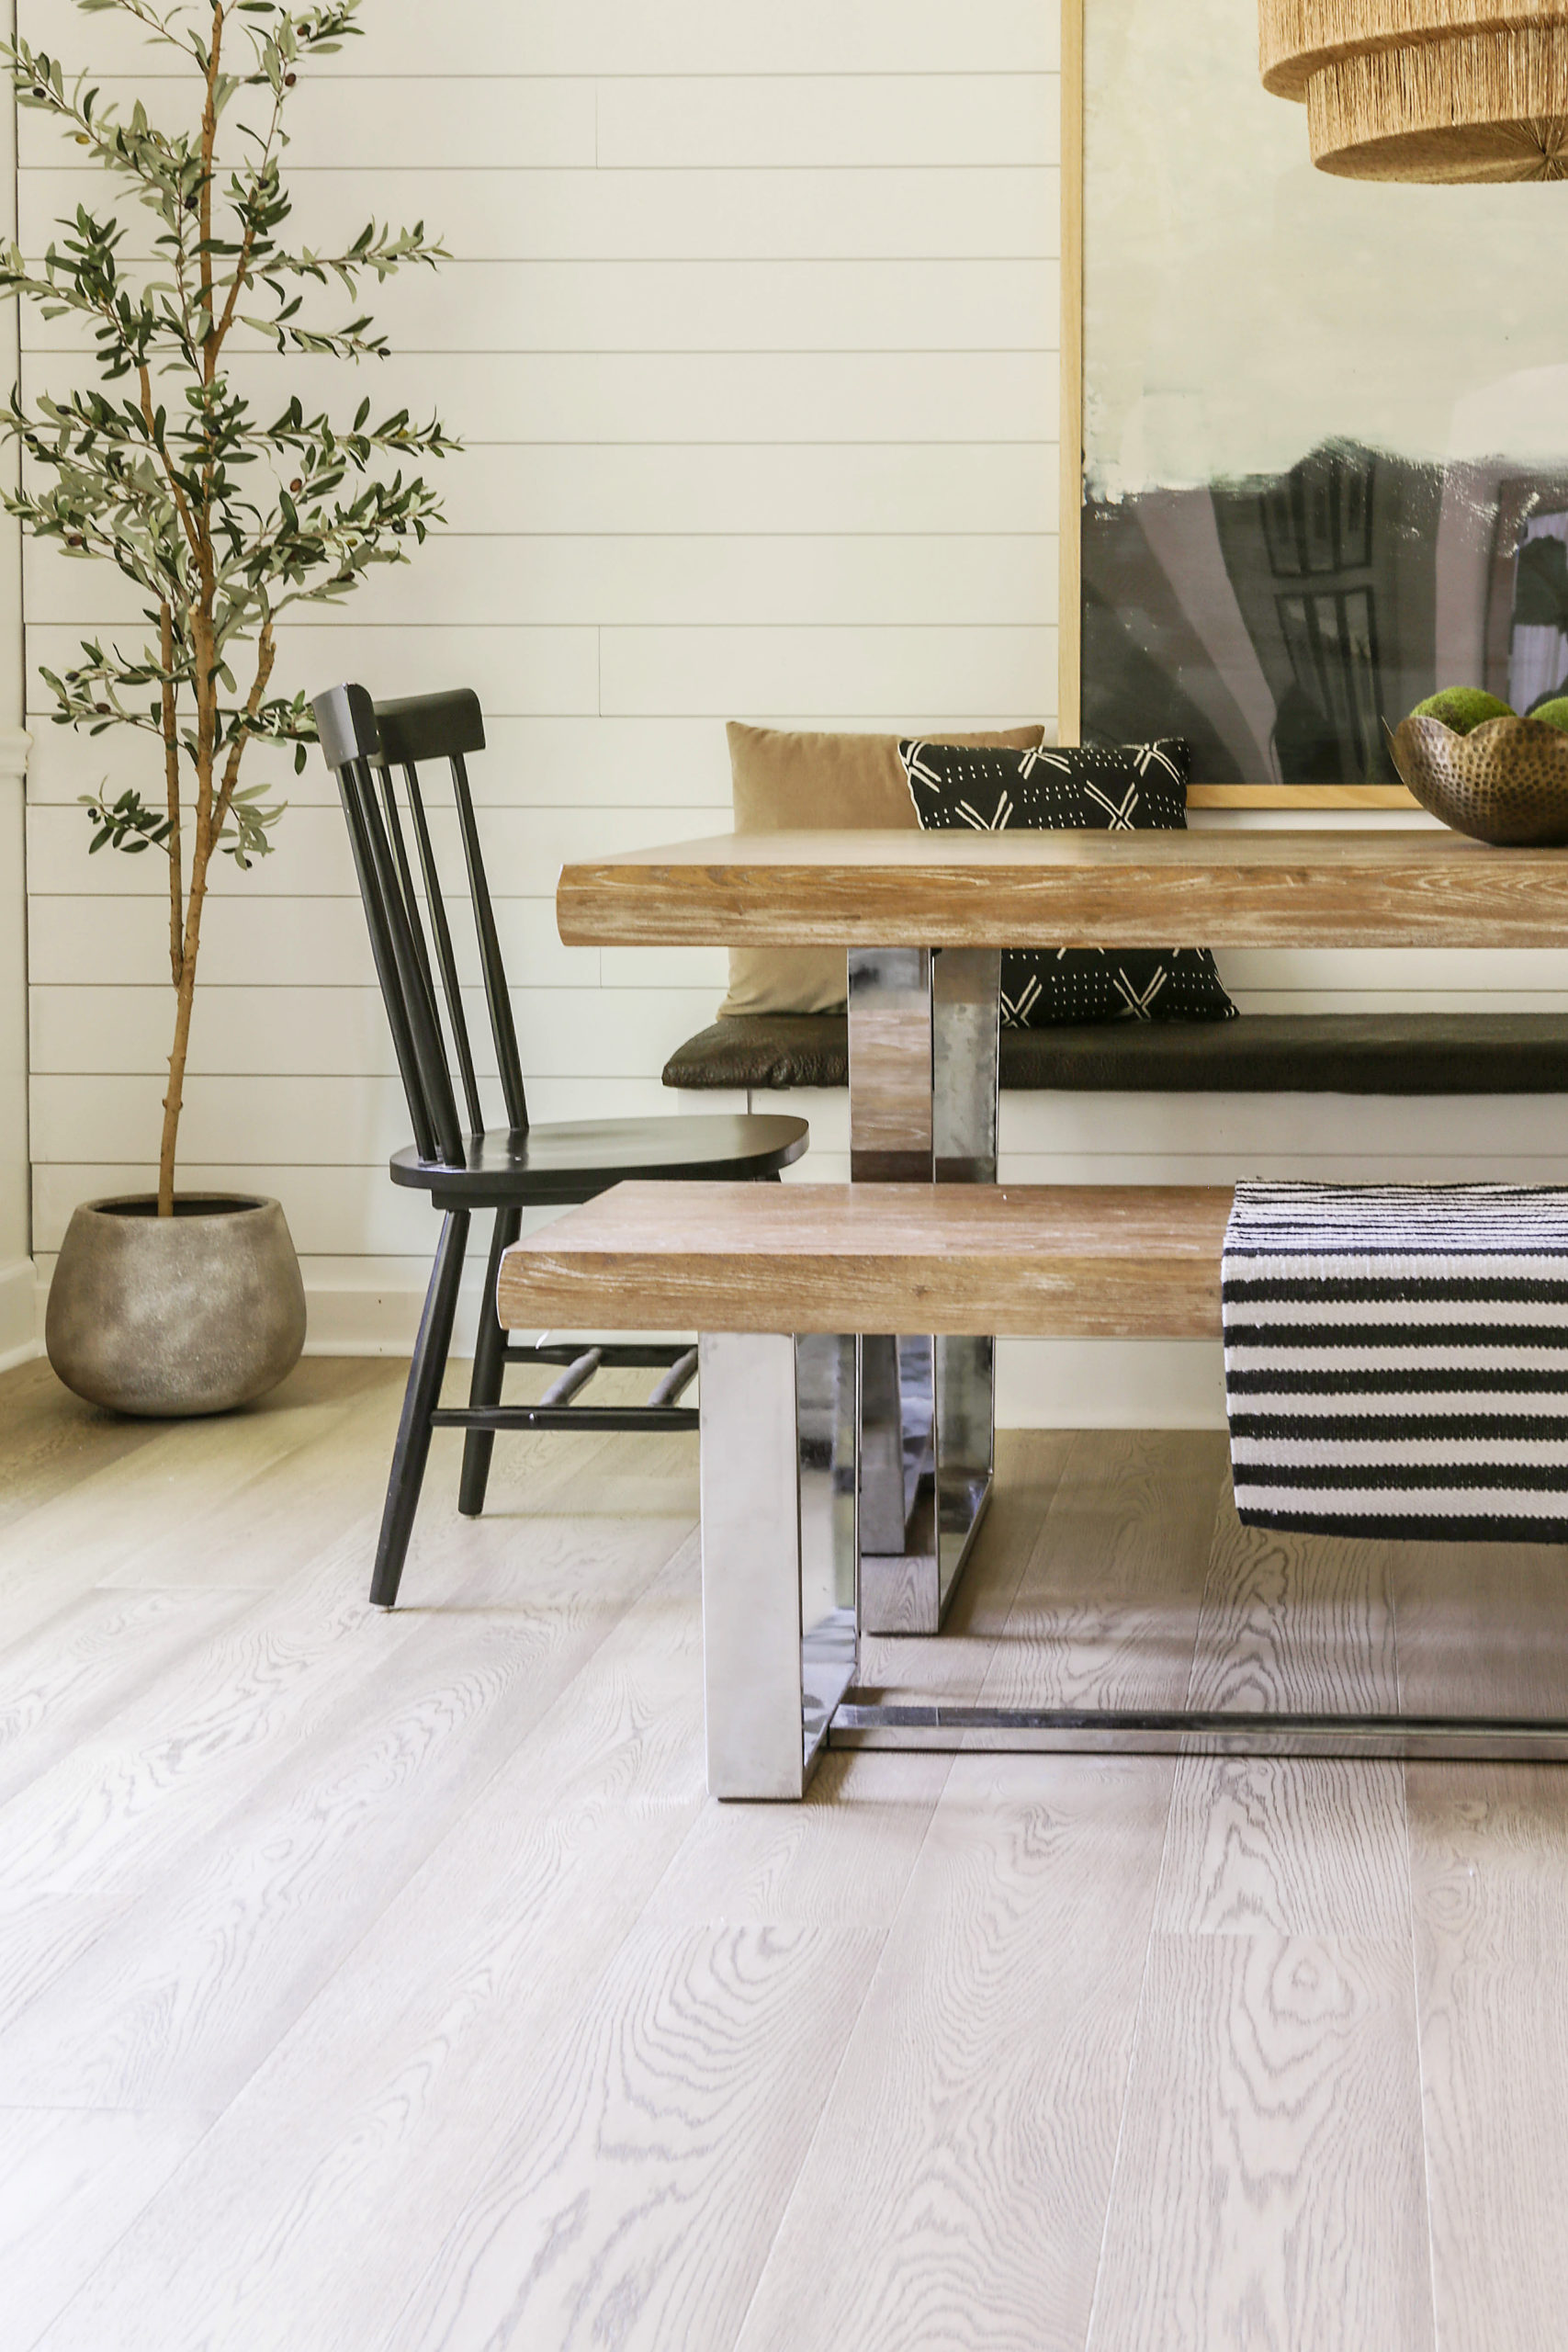
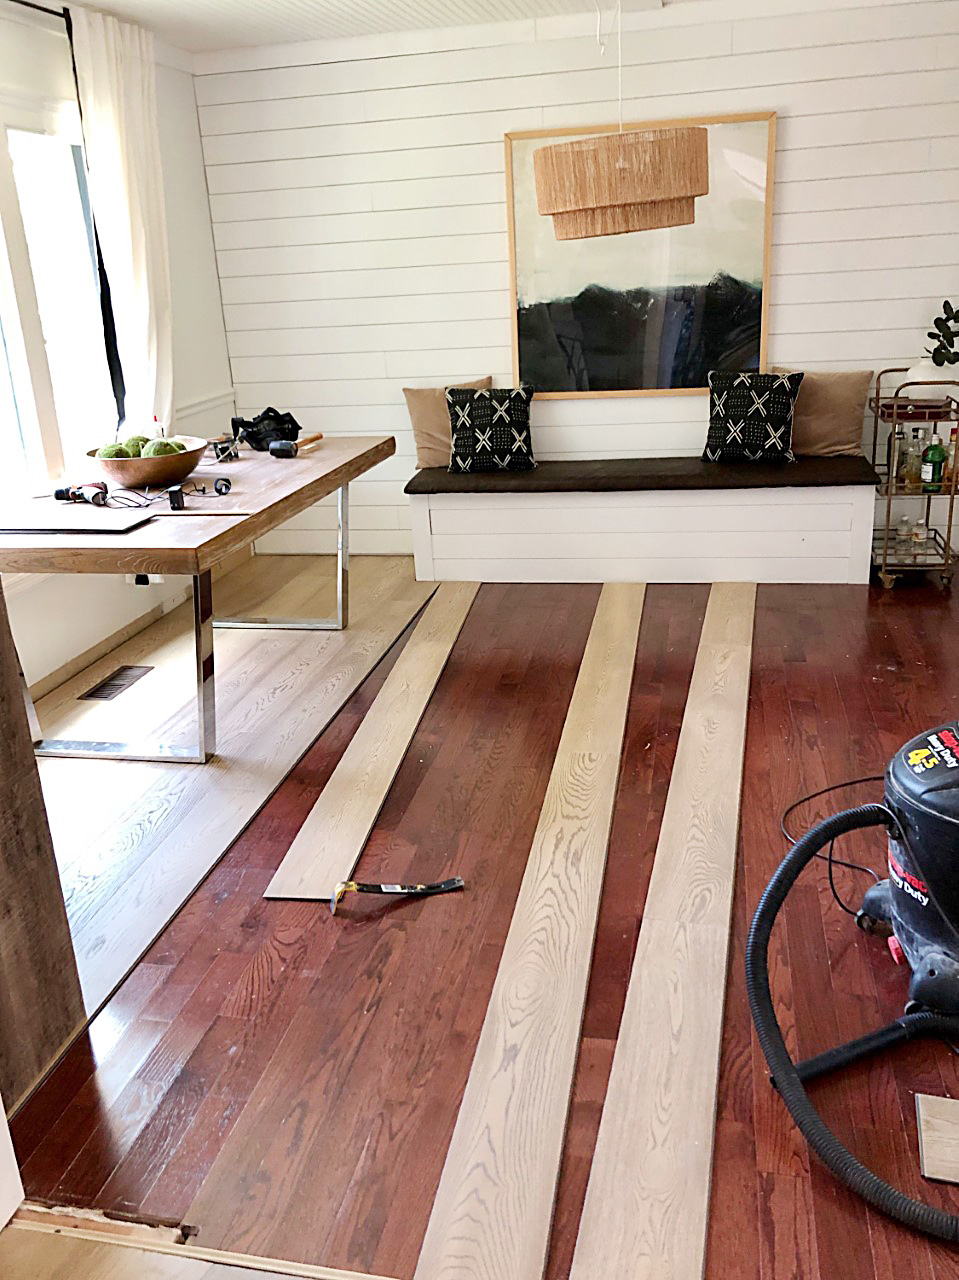
I have finally covered my outdated, glossy red hardwood floors with beautiful new wide-planked, engineered oak hardwood …
Yes…you heard me.
With Shaw Floors’ new line of Floorté Waterproof Hardwood, I was able to install real hardwood flooring directly over my existing floors without any demo or prep work.
So before I get into the step-by-step DIY installation tutorial, I wanted to give you a little more of the juicy deets regarding this cutting-edge flooring technology.
Why I Chose Floorté Hardwood Series Flooring
From the moment I moved into my fixer upper home, I absolutely detested our hardwood flooring.
Not only was the flooring buckled in many areas due to moisture issues, it reminded me of something you would see in the house from the movie Home Alone. Nothing wrong with the McCallisters’ McMansion, but let’s face it- that movie is decades old, and I am more of a modern gal.
Of course I would have loved to have the floors refinished before ever moving into our eighties rancher, but it was simply not in our budget at the moment.
So for five years, I did everything I could to distract myself from the glossy, red-hued design atrocity that is 1980’s flooring.
Just the very thought of refinishing our floors completely overwhelmed me.
Not only would the incessant sanding and staining be too much of a mess for this neat-freak to bear, I didn’t want my life to be completely disrupted for weeks at a time. What would I do with my kids and pets?!
While I have had great success using floating LVT products in my kitchen, mudroom and bathroom, I hated the thought of covering solid wood floors with a vinyl product. I had my heart set on real hardwood, but I needed a product that could withstand my messy life with my messy kids and pets. Waterproof is also something that was really important to me when considering new flooring because we spend most of our days out at the pool with the kids running in and out of the house.
Well…My dreams finally came true when Shaw Floors approached me about a promising new product they were launching.
Floorté Hardwood Series is a 100% waterproof hybrid flooring- combining all of the benefits of a luxury vinyl tile (waterproof, dent resistant, plus floating installation ) with the beauty and value of real hardwood. In fact, Floorté Hardwood Series actually has the same wood veneer thickness as traditional engineered hardwood, but with the same SPC core and attached pad as an LVT product.
While I rarely ever do brand partnerships, I knew this would be a match made in heaven. So now let me show you just how DIY-friendly the actual install is.
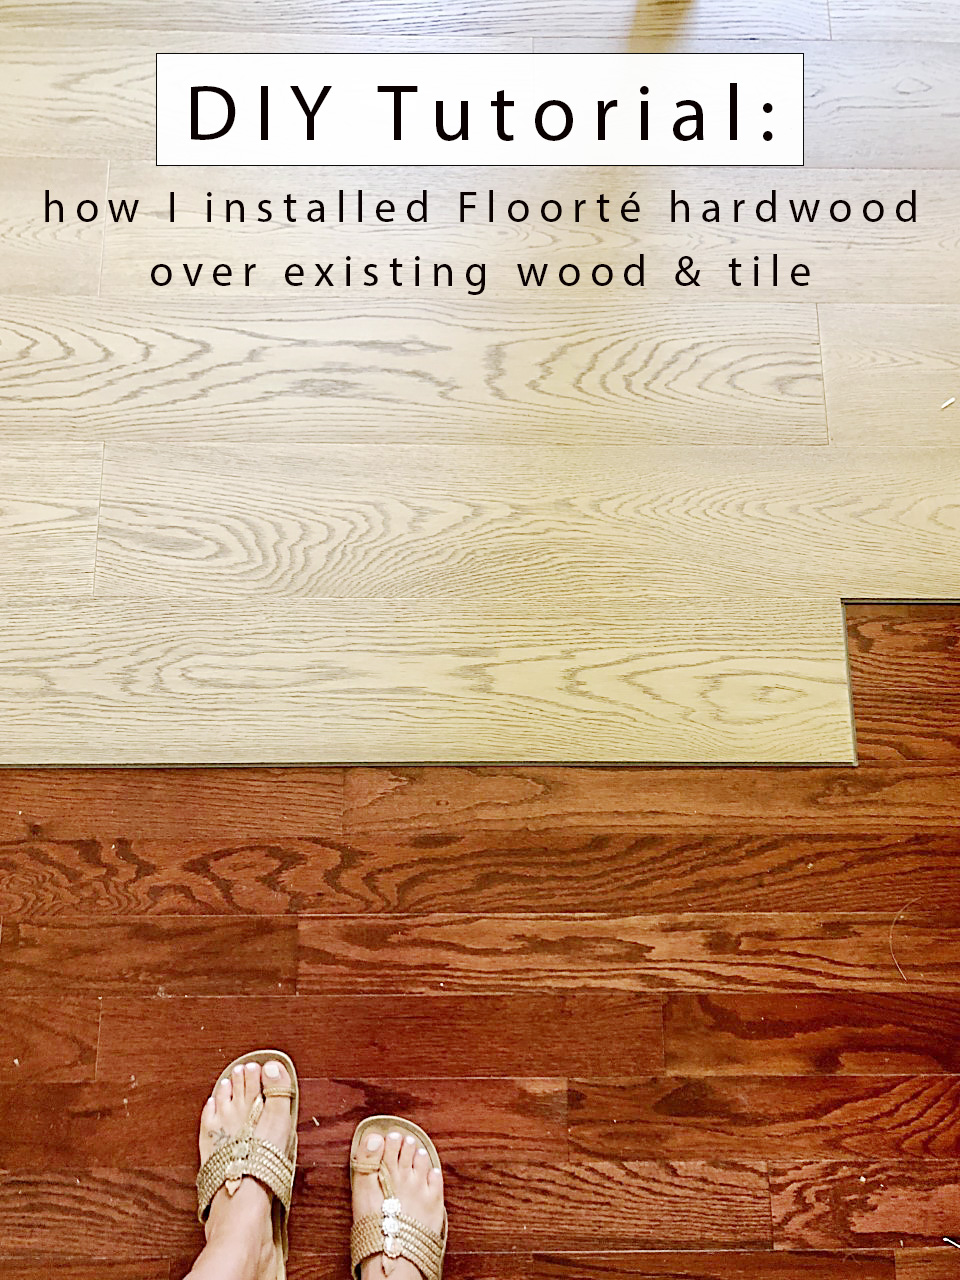
HOW TO INSTALL FLOORTÉ HARDWOOD OVER EXISTING WOOD Or Tile Flooring
Before beginning the install, my husband and I decided to remove our original baseboards. While this is not required, please note that if you choose to keep your existing baseboards, you will lose some height. At any rate, you will need to use quarter round along the bottom of your baseboards to cover the expansion gap.
While acclimation with this product is not required, we decided to err on the side of caution and allow 48 hours for acclimation before installing.
Please keep in mind that while this product can be installed over existing tile or hardwood, for best results, the sub floor must be level/even. You also want to make sure there are no moisture issues with your subfloor or crawl space before beginning.
*Updated 3-15-22:* Before installing your floating floor system, be sure to read my most recent checklist- Five Things to Consider Before Installing Floating Floors Over Existing Flooring.
Materials Needed:
- Rubber Mallet
- Tapping block (I cut a block out of 1” stock)
- Oscillating saw
- Oscillating saw blade (for wood)
- Jigsaw
- Jigsaw blade (fine tooth for clean cuts)
- Miter saw
- Miter saw blade for wood (clean cut)
- 1/4” spacer blocks (I cut blocks out of 1/4” MDF)
- Table saw with fine tooth blade
- Floorté Waterproof Hardwood (I went with Brightened Oak color in Exquisite Style)
- Quarter Round (to account for required expansion spacing gap which baseboard may not evenly cover)

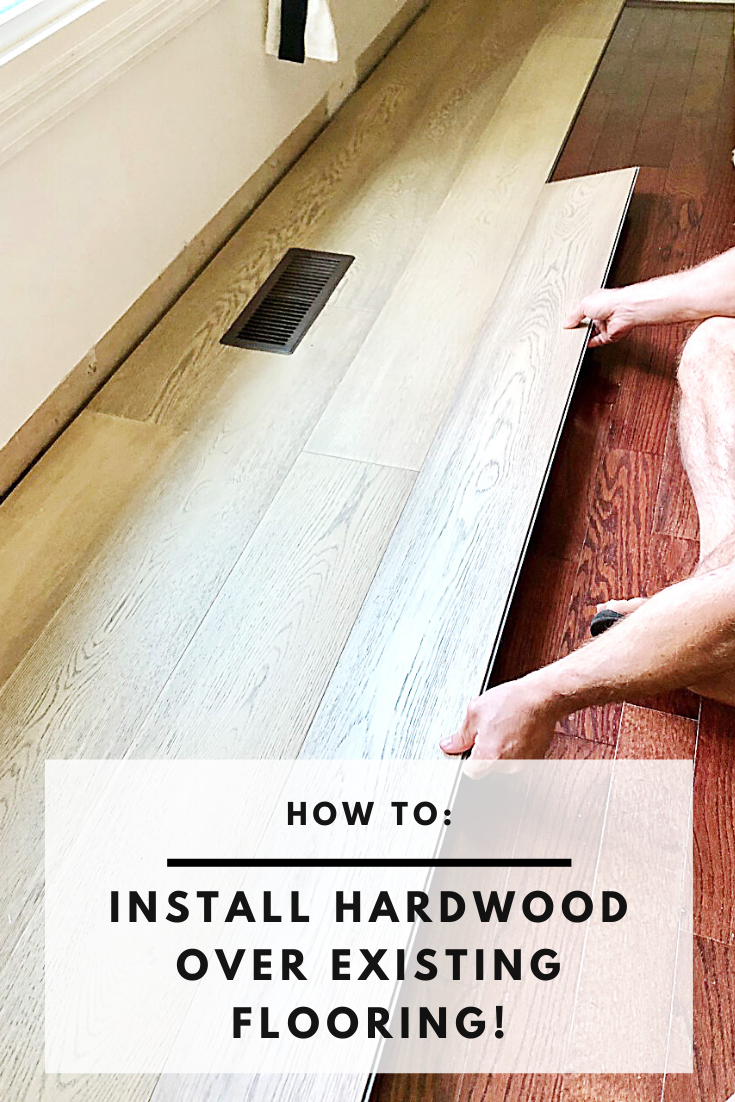
(Step 1). Lay first plank in a corner making sure it is positioned against 1/4” spacer blocks.
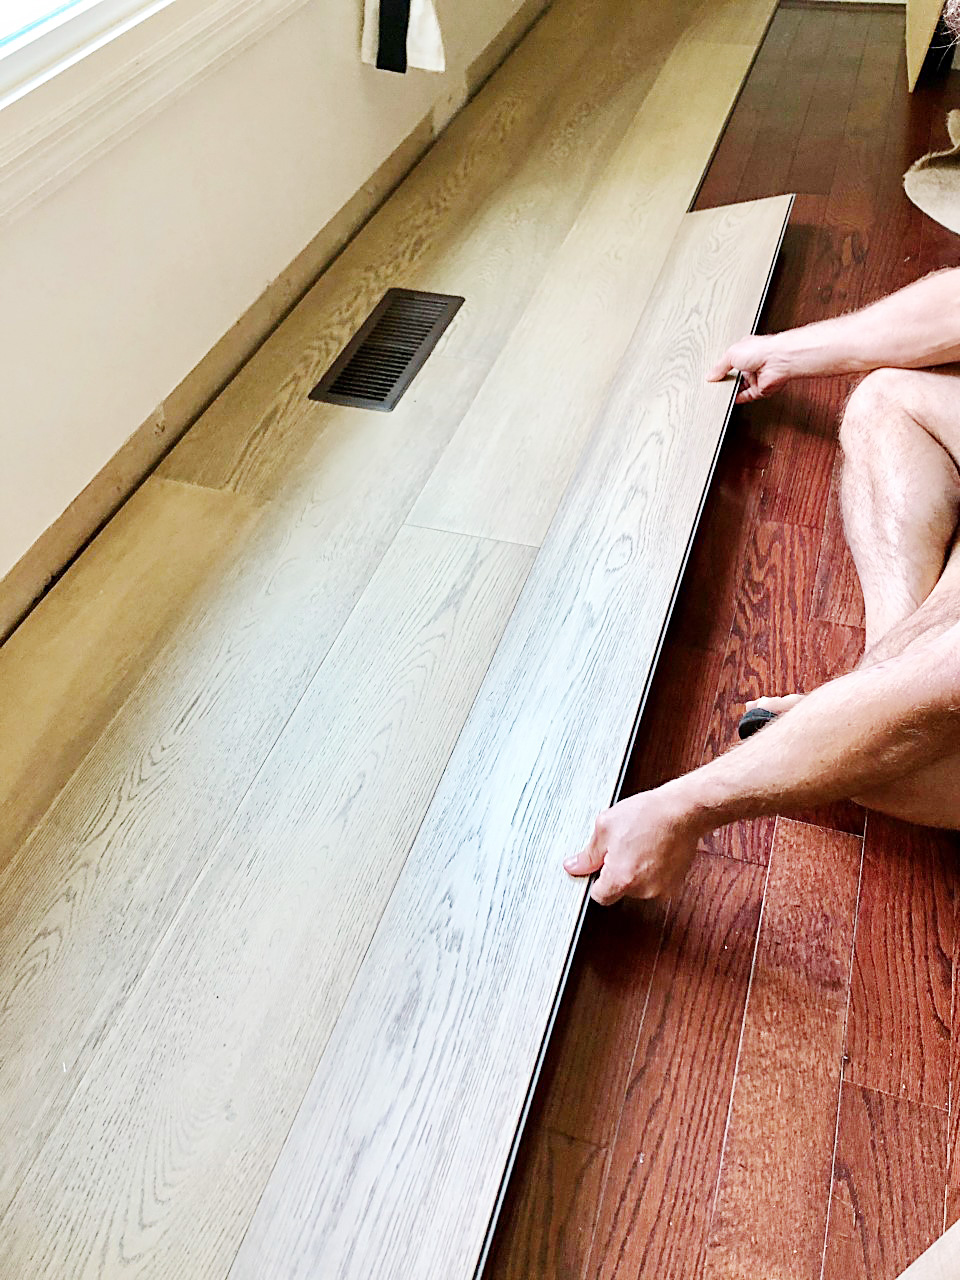
(Step 2). Attach second plank to butt end of first plank by overlapping exposed locking edge of first plank with the second plank edge.
(Step 3). Gently tap butt seam with a mallet to lock the planks together.
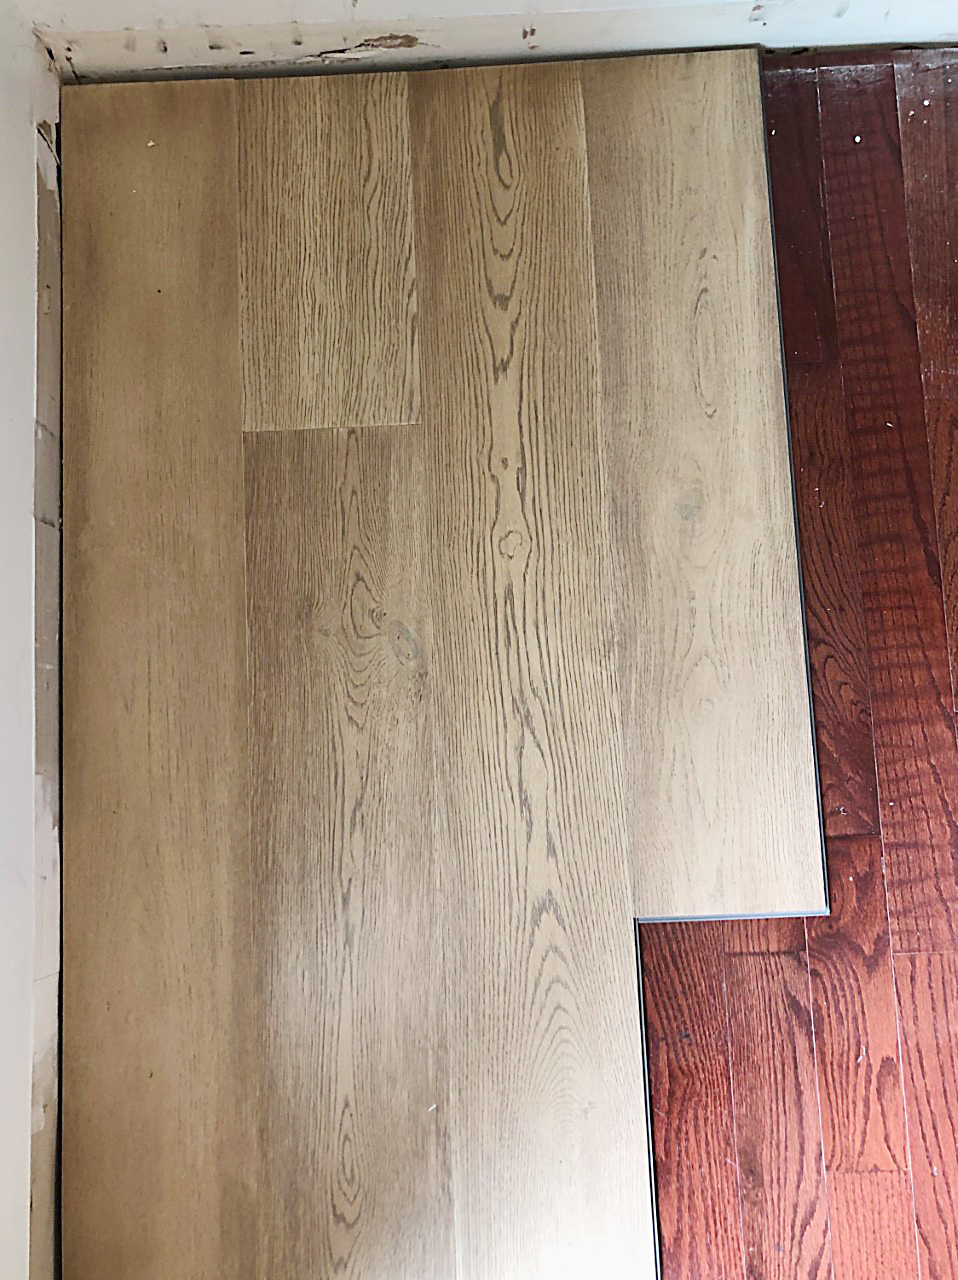
(Step 4). Continue until full length plank must be trimmed to fit at the end of the first row.
(Step 5). Cut last plank to length with a miter saw making sure to calculate in the 1/4” gap.
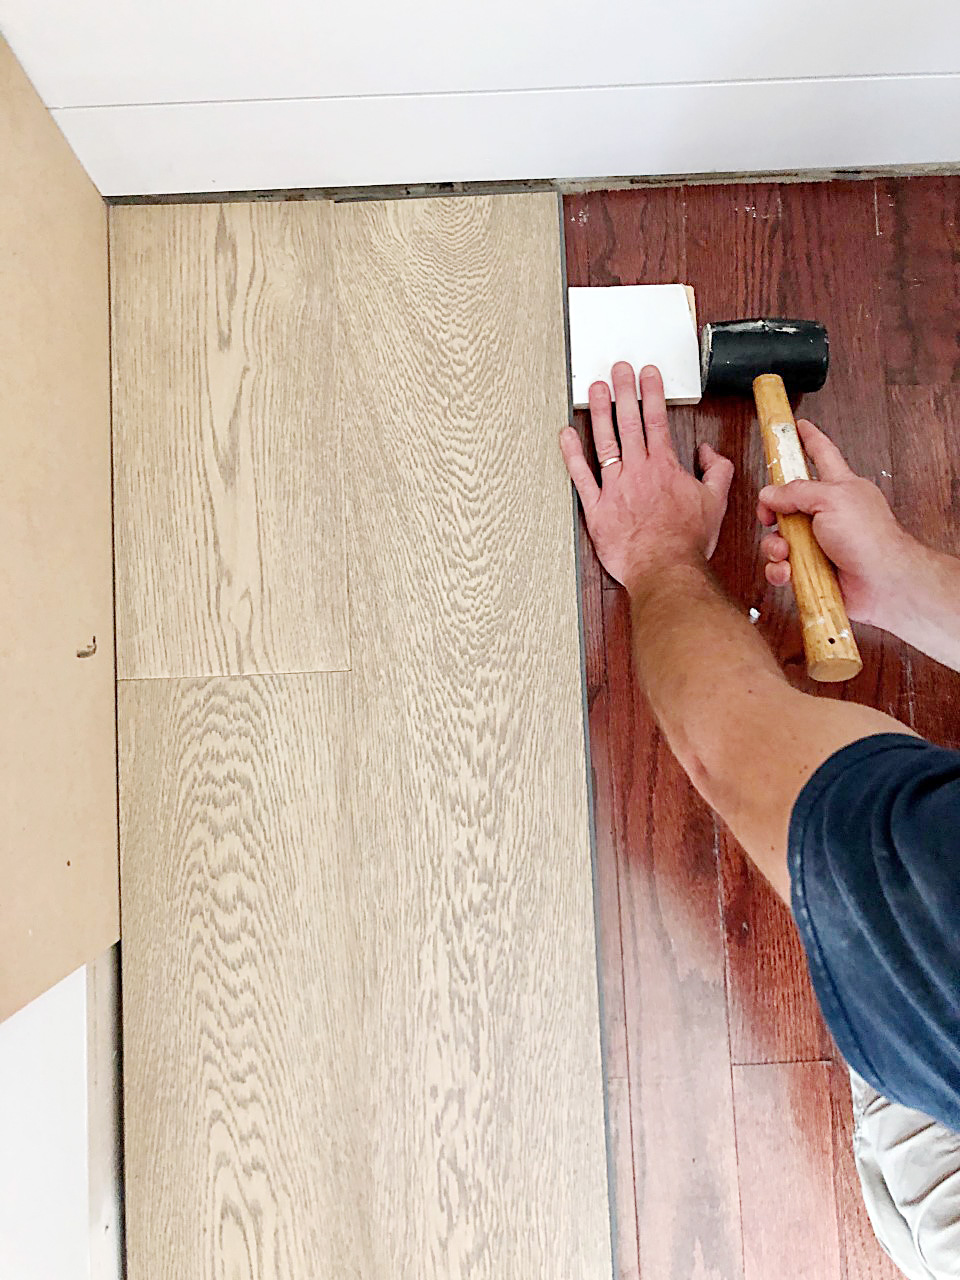
(Step 6). Use the excess length cut from last plank as the first plank in the second row, starting from same wall as the first row. (Rows always will start from left to right).Slightly angle piece so the long edge locks into long edge of plank from first row. Seams should always stagger from previous row. Attach next plank in same fashion. Lay plank down flat and use tapping block and mallet to engage locking edge into butt end of previous plank.
* Helpful Tip: The floor may slide slightly during the first few rows so go back and check that no deviation has occurred from spacing blocks. If it has, gently tap row against spacing blocks with tapping block and mallet.*
How to make Special Cuts on Your Floating Hardwood:
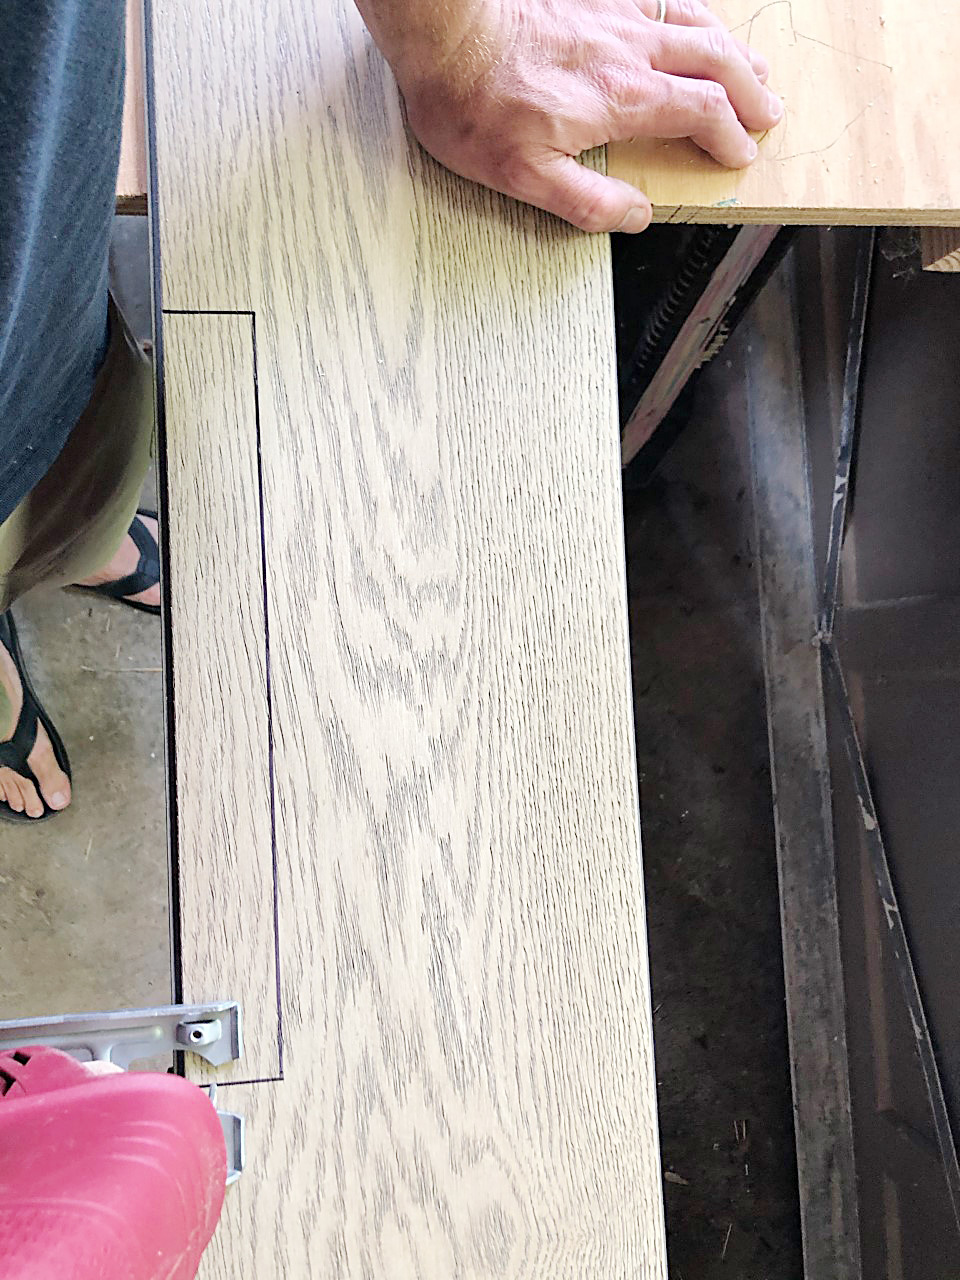
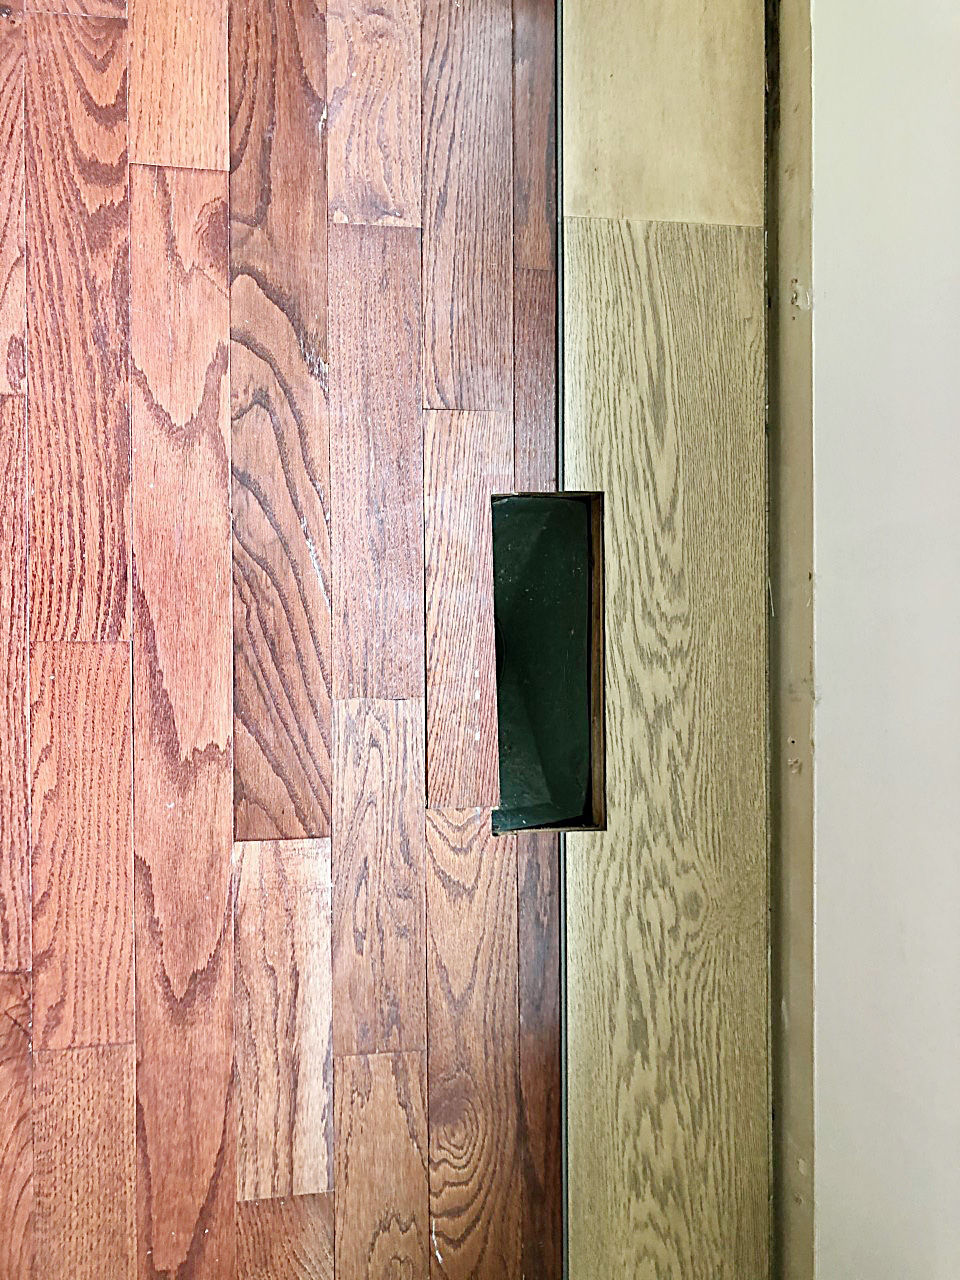
(Step 7). If any trimming is needed (around AC vents or cabinet angles for instance) use a jigsaw to make cuts.
What to Do When Your Hardwood Install Approaches Doorways:
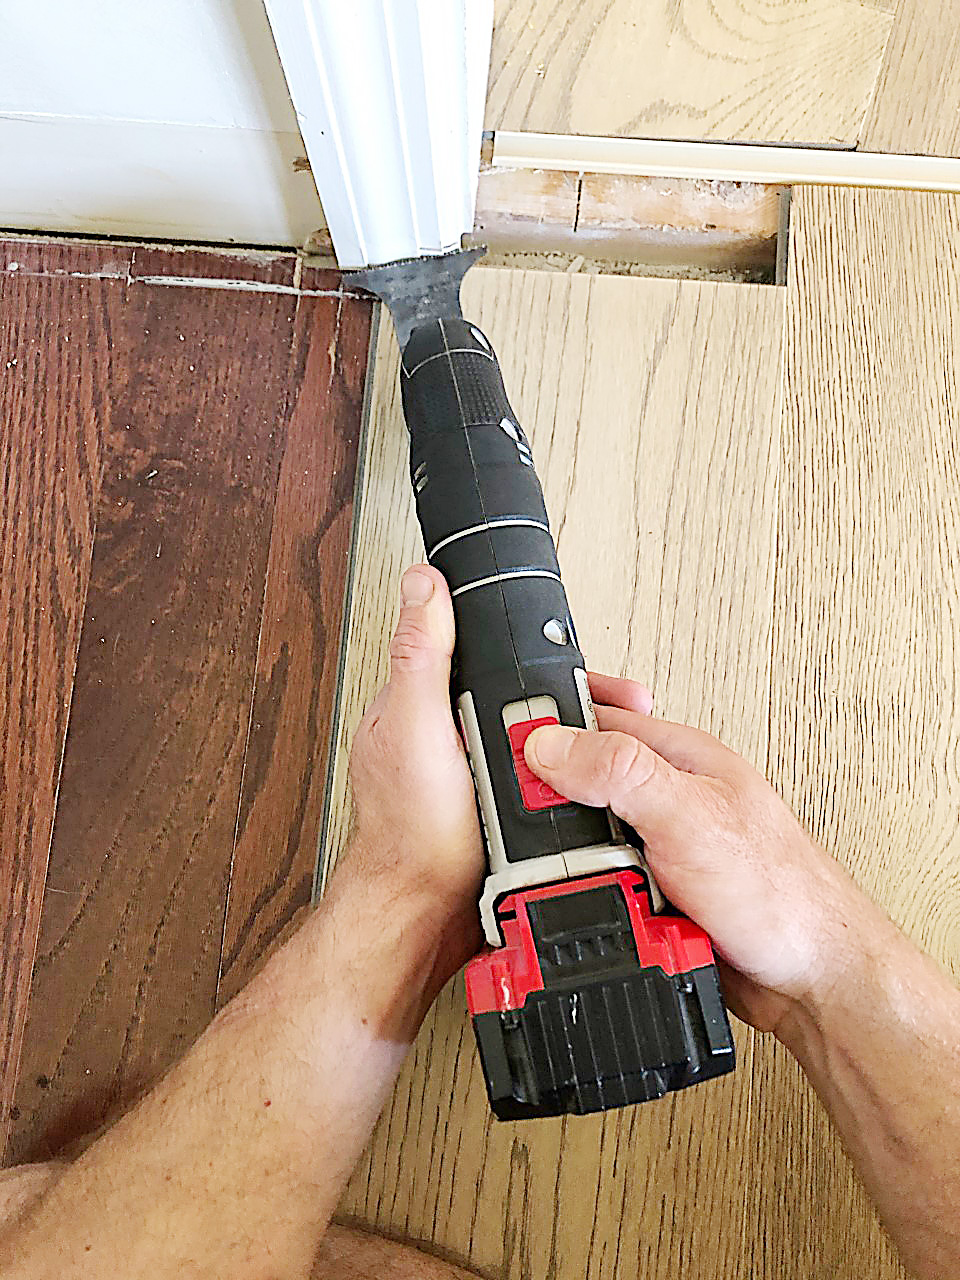
(Step 8). Once a doorway is approached, the door casing will have to be cut to the thickness of the plank so the plank may slide under it. Position a waste piece of plank against the door casing. Rest the oscillating saw blade on the plank and cut away door casing. Now the section of flooring will be able to slide under casing.

(Step 9). If a transition piece is needed at a doorway (if two different types of flooring will meet or if flooring changes direction as in our case), you will need to leave a gap for the transition track. Attach transition track using manufacturer’s instruction.
**Final Tip: If the last row in the room is more narrow than a full width of a plank, use a table saw to “rip” the flooring to needed width. Remember to account for 1/4” gap. 1/4” gap will be covered by baseboard and quarter round. **
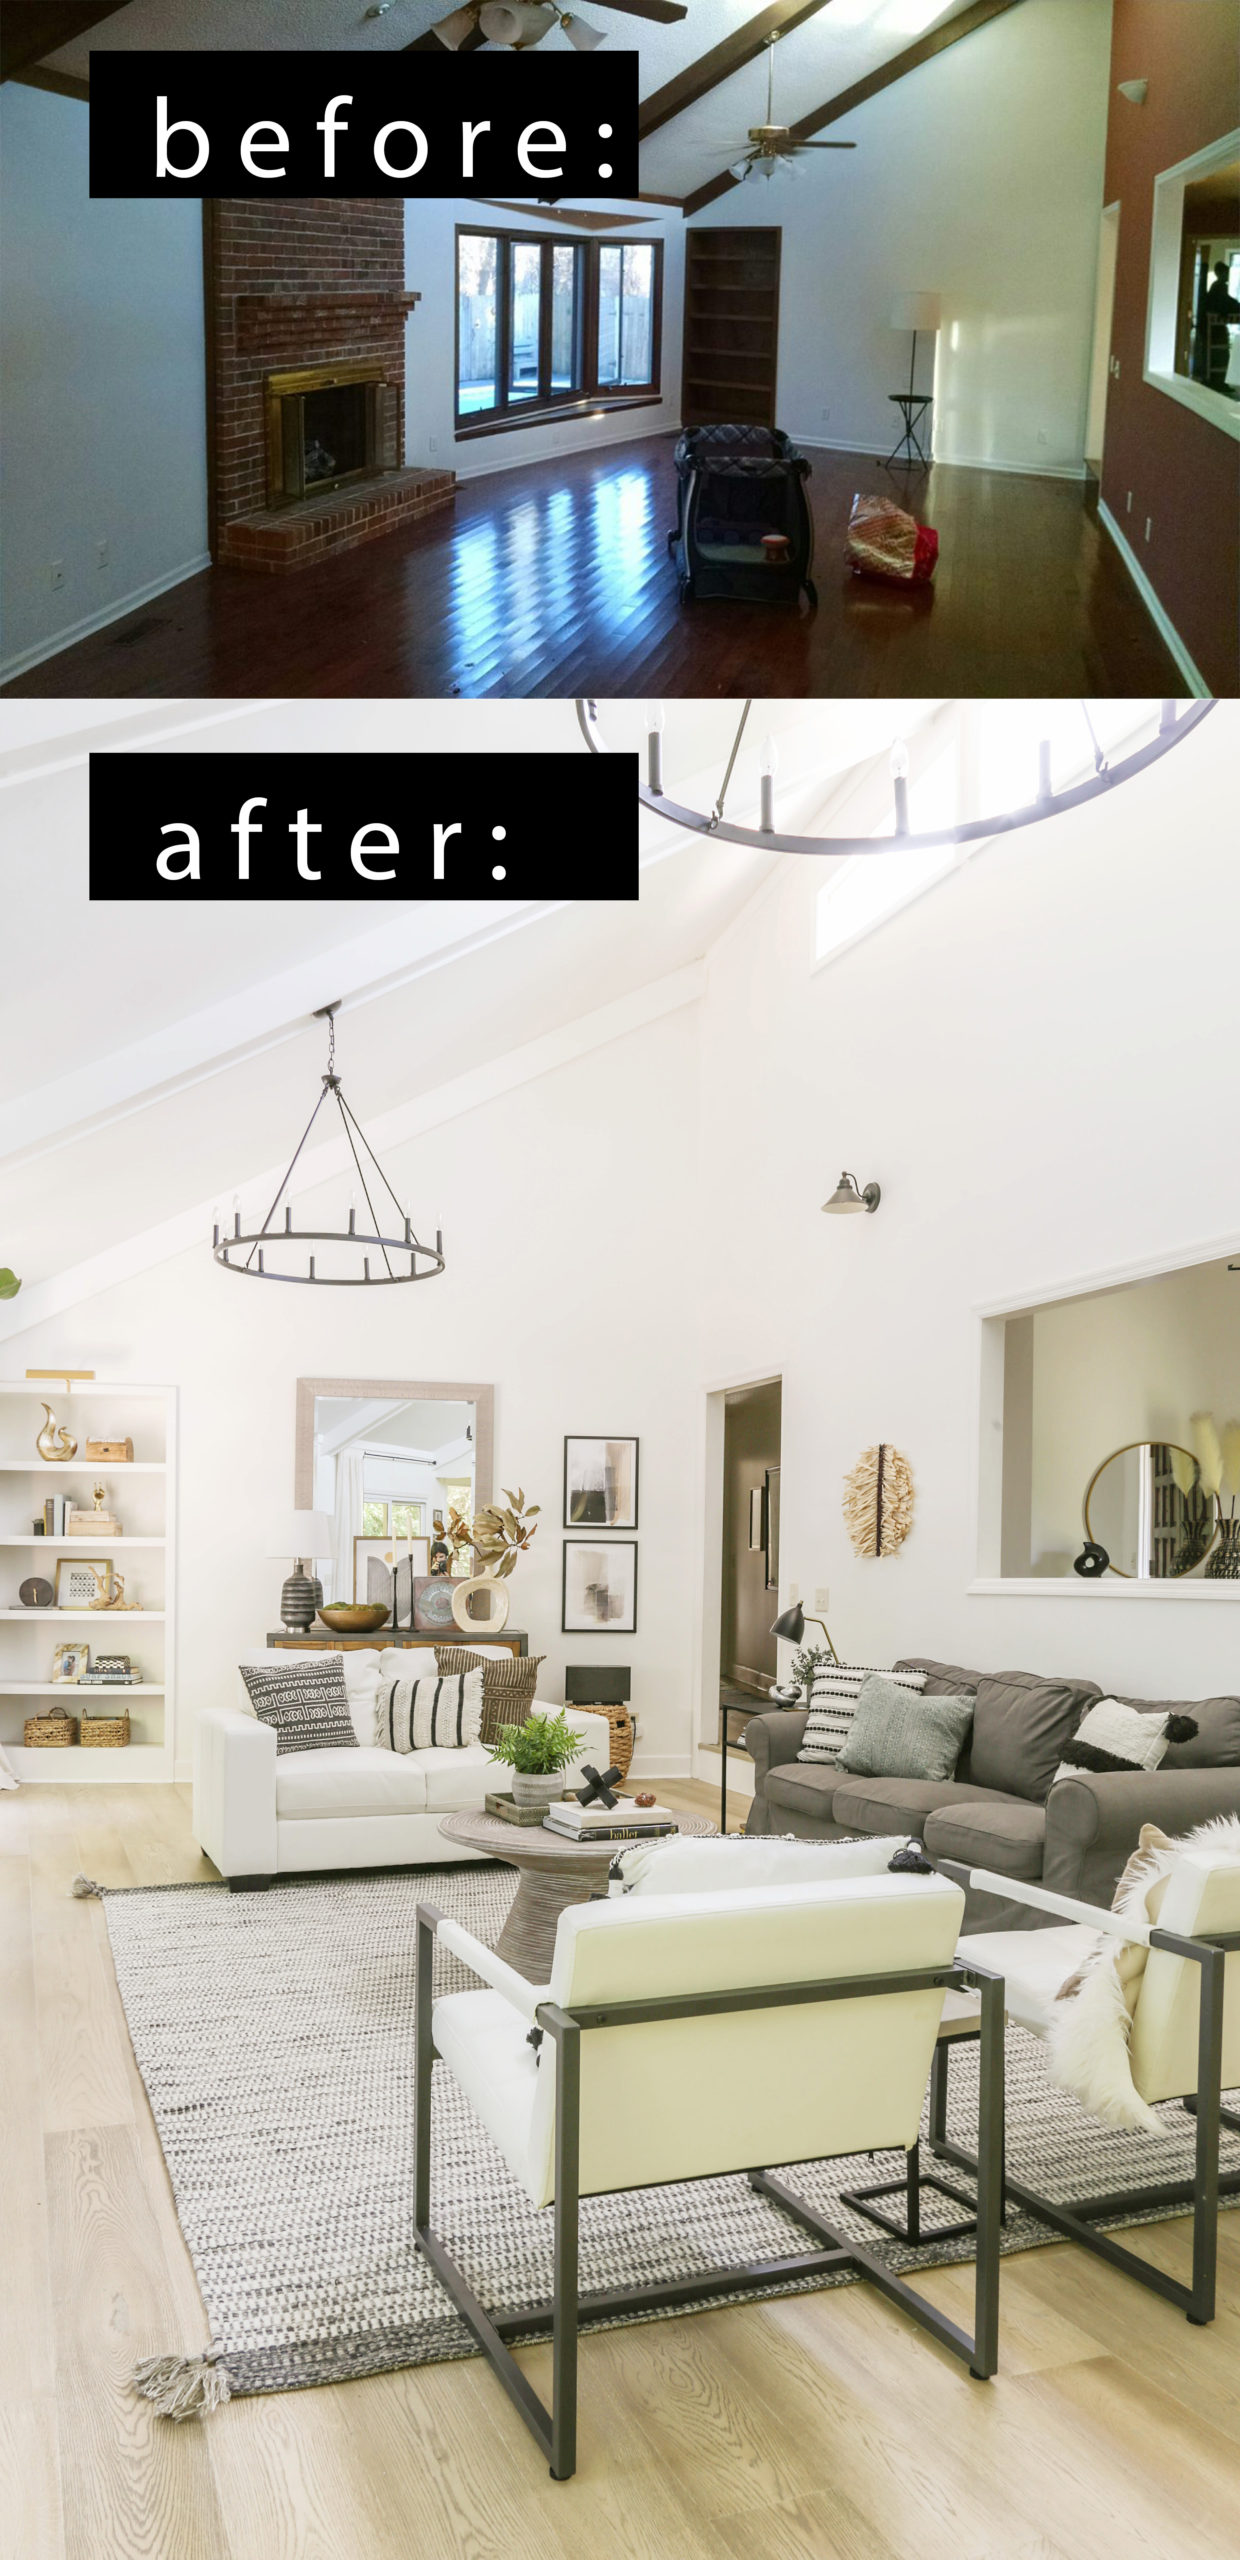
After a dedicated 5 days of installation (this was the total labor time required for my living room, foyer, hallway, dining room and two bedrooms), I am absolutely thrilled with the transformation…
Bye bye, outdated flooring! Hello dreamy, wide-plank Oak!
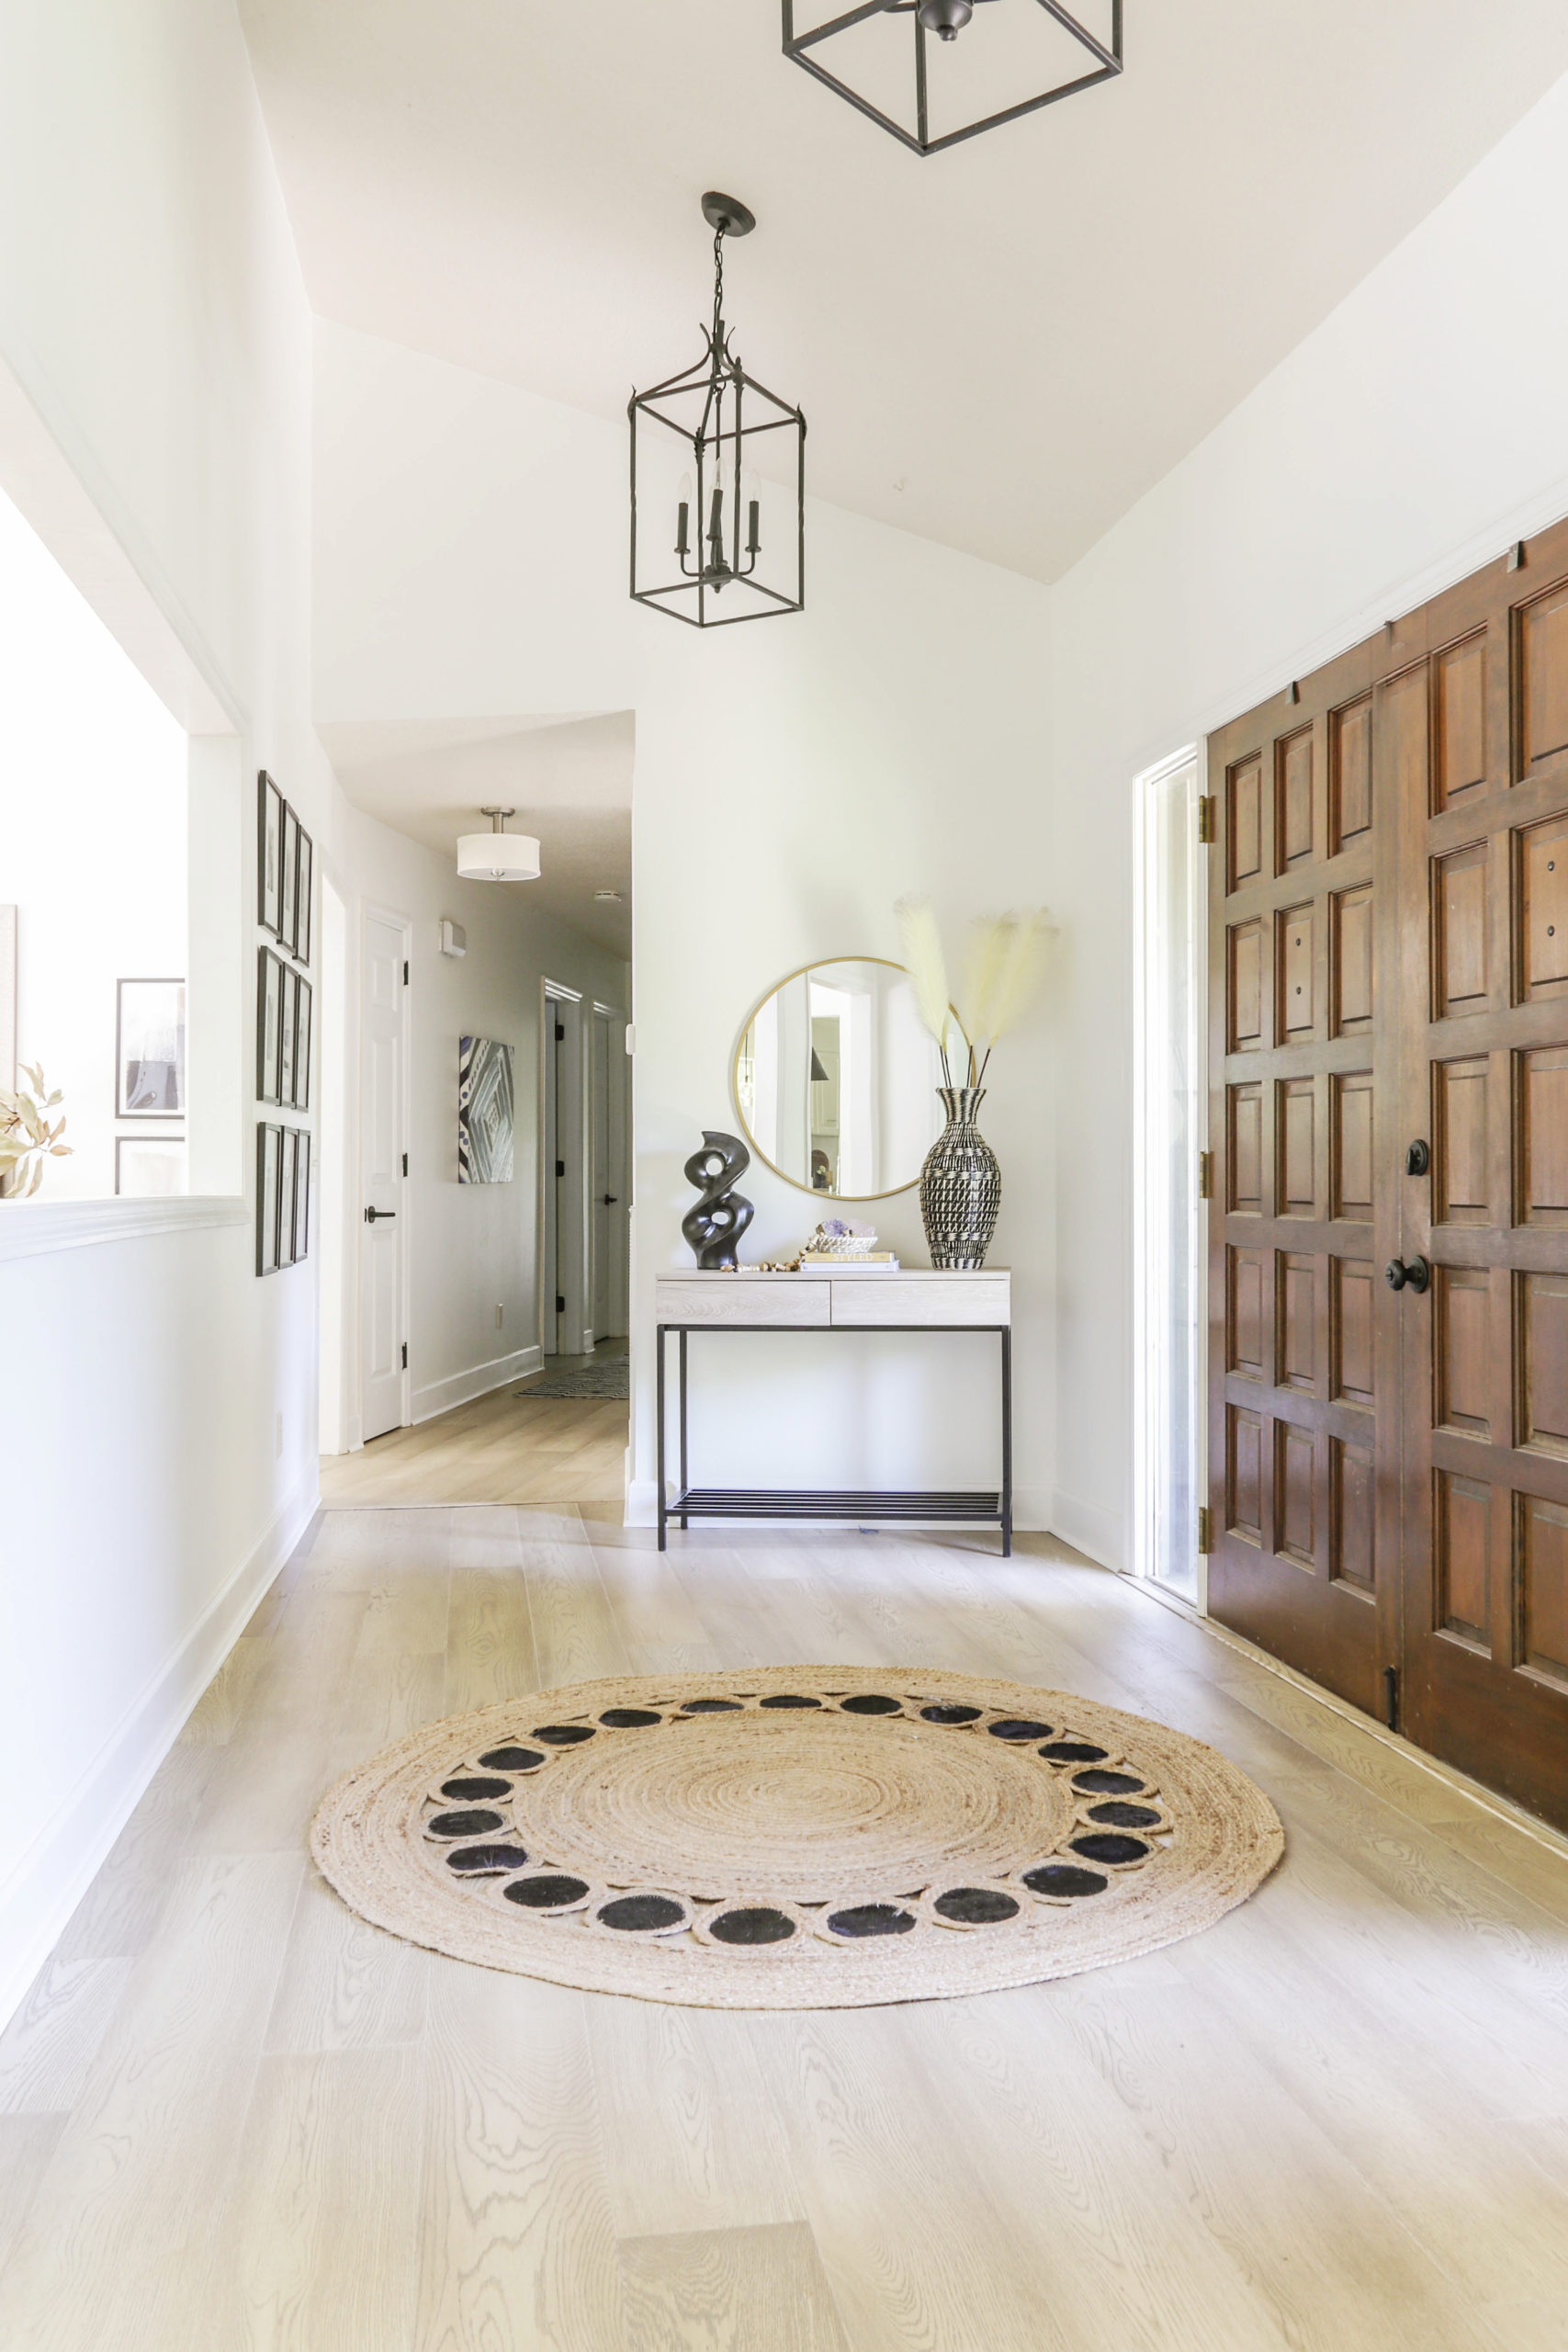
In my foyer (pictured above), the Floorté Hardwood was actually installed directly over ceramic tile. When walking over the new flooring, you would never guess!
Here is my living room with the newly installed floors…
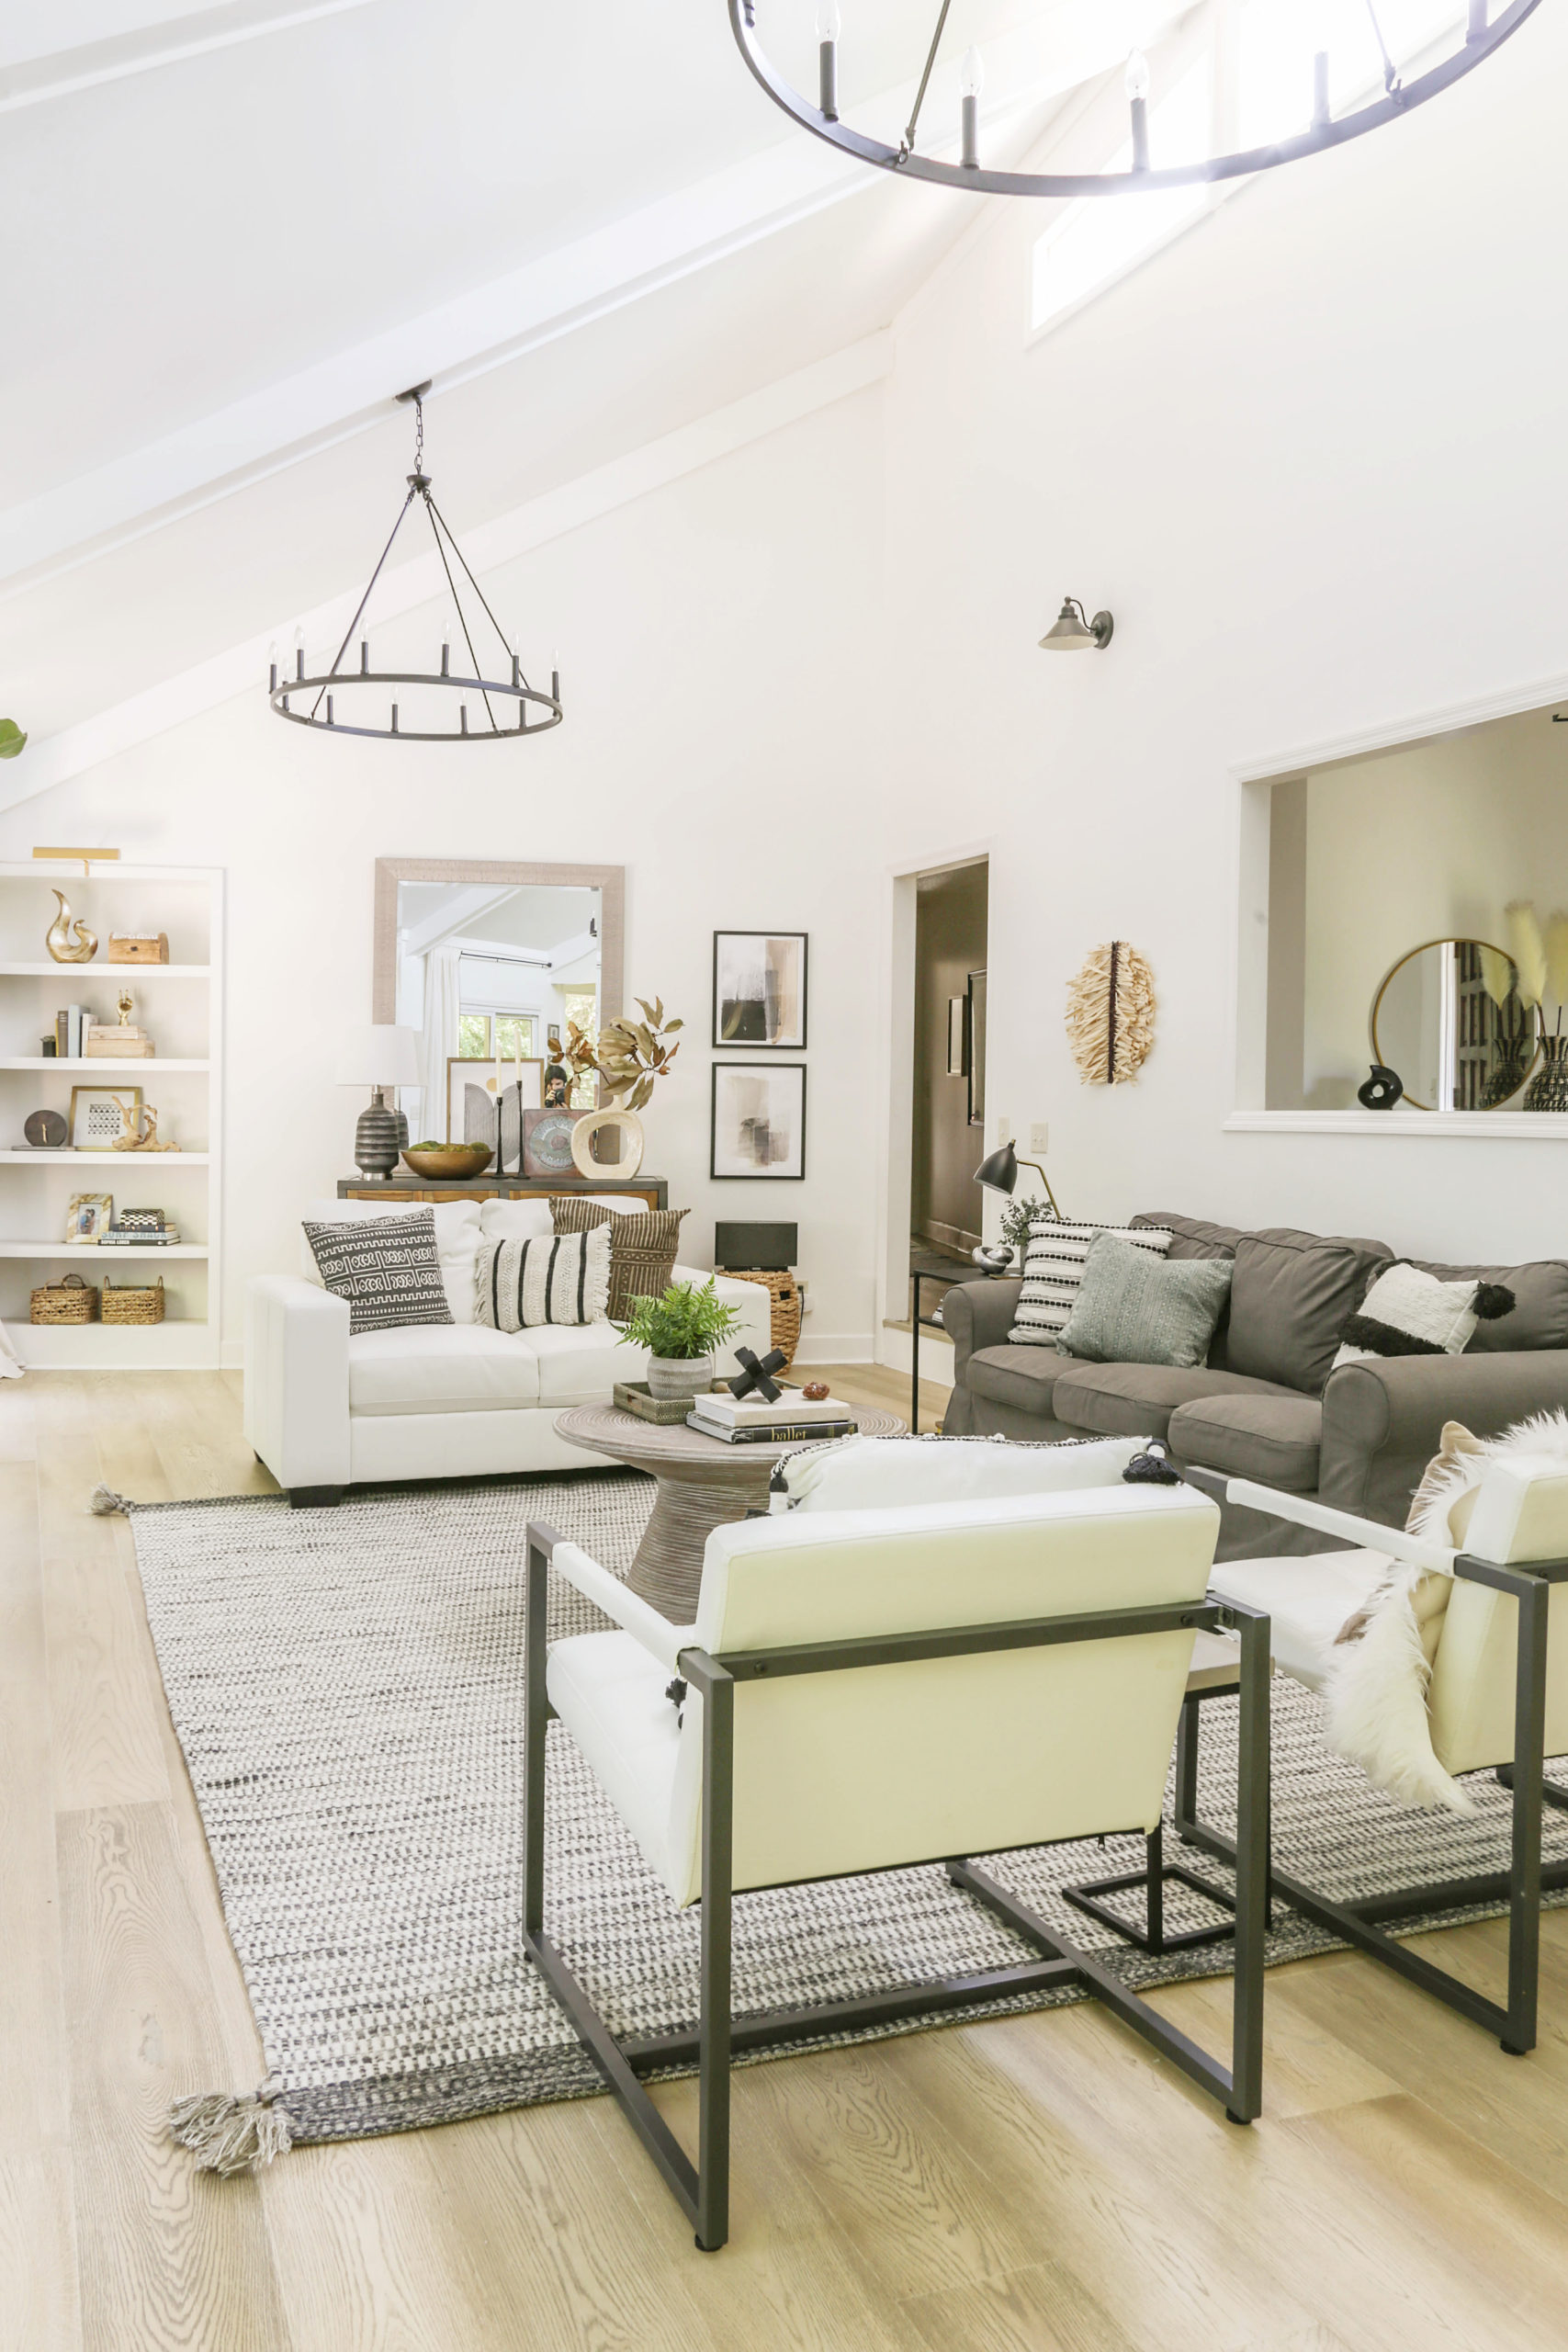
In a separate post, you can read all of the details about my living room transformation by clicking here.
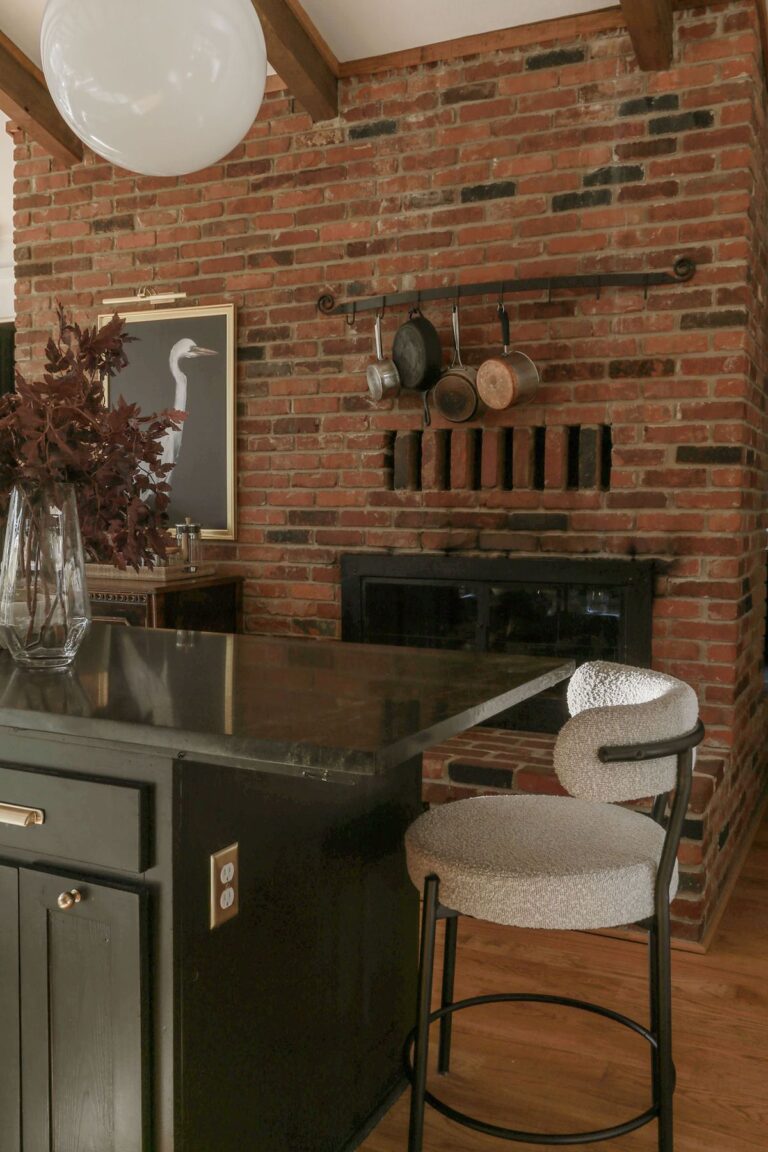
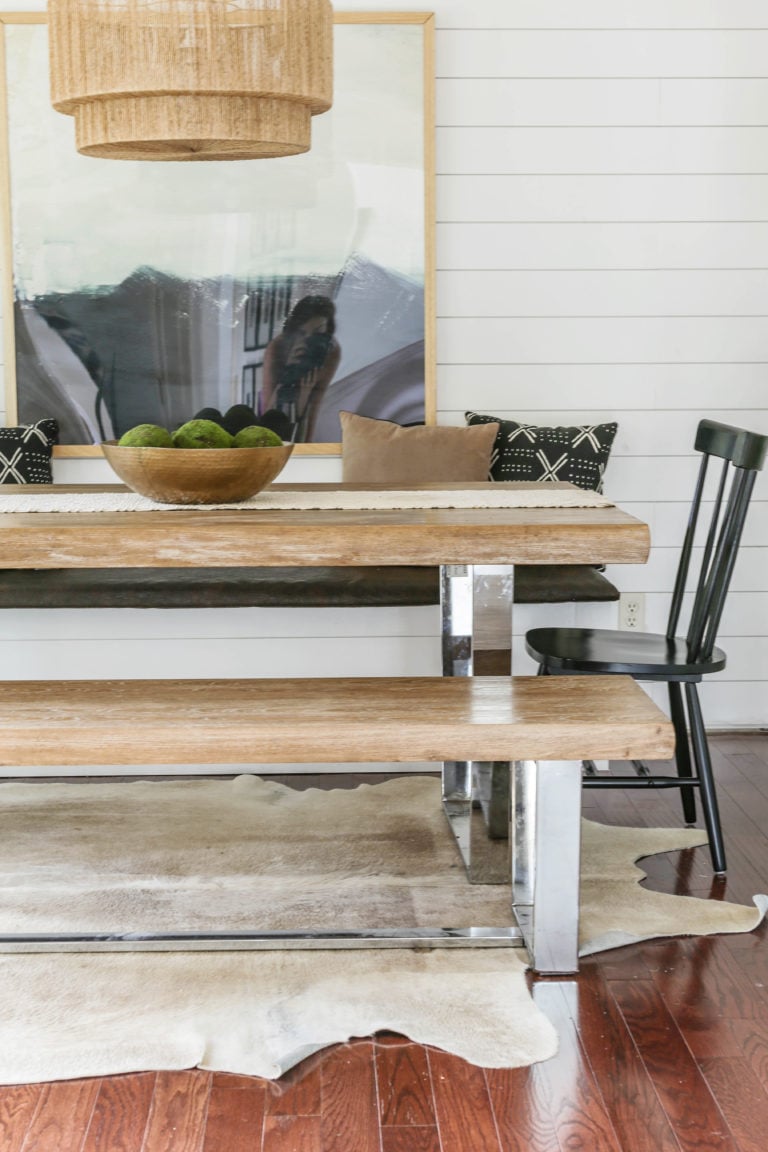
Here is my dining room…
All I have to say is thank God for technological advances and thanks to Shaw Floors for such an awesome product.
If you are looking for a DIY-friendly (not to mention cost-effective) way of updating your existing flooring without the need for demo or unnecessary hassle, I highly suggest considering Floorté Waterproof Hardwood.
You can also see what Floorté Hardwood Series would look like in your own home with Shaw Floors’ new visualization tool, Floorvana Plus.
Over the next few months I will be sure to provide follow-up posts reviewing the durability of this product.
**Update 10-6-2020** Curious to see how I am liking my floating hardwoods? Be sure to check out this three month follow-up review by clicking here. You can also watch the video review.
**Update 6-28-21** See how my engineered wood planks have held up for one full year in this separate review post (click here).
Now get out there and design some good vibes along with a fabulous life!
If you found this post helpful, please support this small business with a share…


Welcome!
My journey in interior design and home improvement began with transforming my first fixer-upper home, all while managing a budget and raising two young boys. My work, a reflection of my passion for creating beautiful, uplifting spaces, has been recognized by top publications like Better Homes and Gardens Magazine, HGTV, and more. I invite you to explore my site and witness the transformation of my home and the vibes we've designed. Read more...


Wow, your new floors look amazing. I love the light color too. So pretty
Thank you so much, Marty. The light color has really brightened up my house. I hope you had a great 4th.
Omg I’m so jelly. These are gorgeous!!!!! I want them right now. Do you have a designing vibes promo code?
Thank you so much, Angie. The flooring really makes this house feel like a brand new home. I do not have a promo code, but thank you for asking. 🙂
Gorgeous floors! Thank you for the tutorial. This flooring just made it to first place on my choice list and I feel like I’ve been searching forever for this exact product! Your post today took care of all my angst…you’re great!
Thank you so much, Suzi. I can totally relate…I was ecstatic when I heard about this product, because it seems to be the only one currently on the market that met all of my criteria. Good luck with everything and have a great rest of your week.
Oh my!!!! What a difference the floor makes. The lighter more modern floor completely transforms the look and feel of the spaces. And to be able to lay this over existing flooring makes this so much more do-able. I look forward to seeing the living room;)
Thank you so much, Maria. It really makes my eighties fixer upper feel like a brand new home. I hope you have an awesome weekend.