
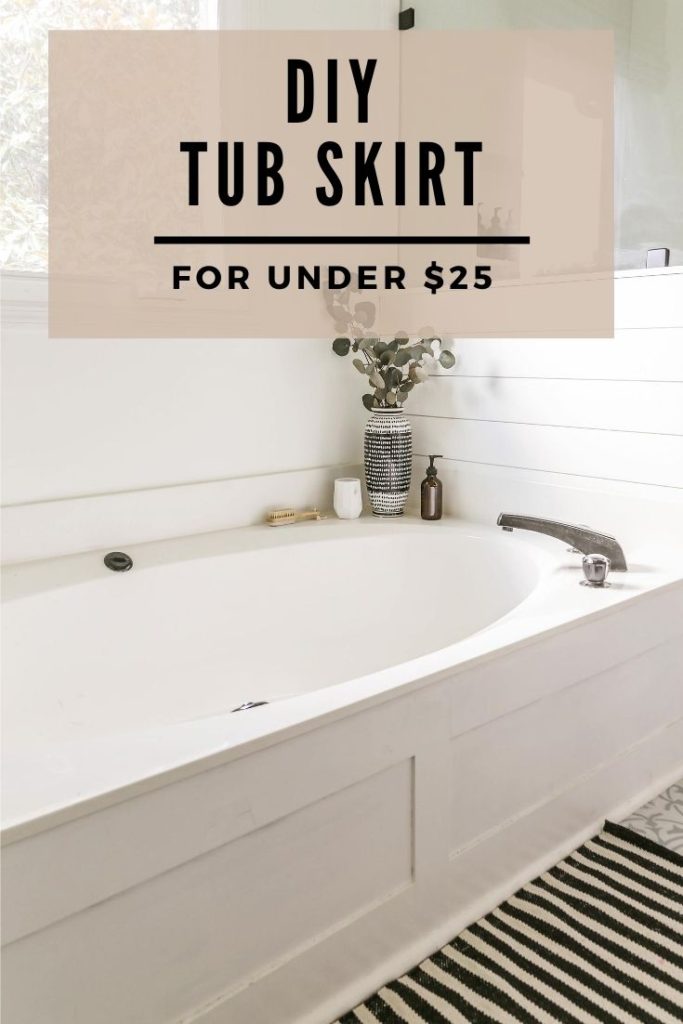
DIY Bath Tub Skirt for Under $25

So right before the world went to hell in a handbasket, I proudly revealed to you the dramatic transformation of my 1980’s bathroom remodel (you can read that post here).
In the room reveal post, I promised you the tutorial for my DIY Jacuzzi tub side- panel transformation.
While my intentions were entirely pure at the time, only a few weeks later the unthinkable happened, and I sort of forgot all about my promise.
Well…today I am going to finally deliver on my word (sorry…it only took 6 freakin’ months).
In this post, I am going to show you how my husband and I built a bath tub skirt for under $25.
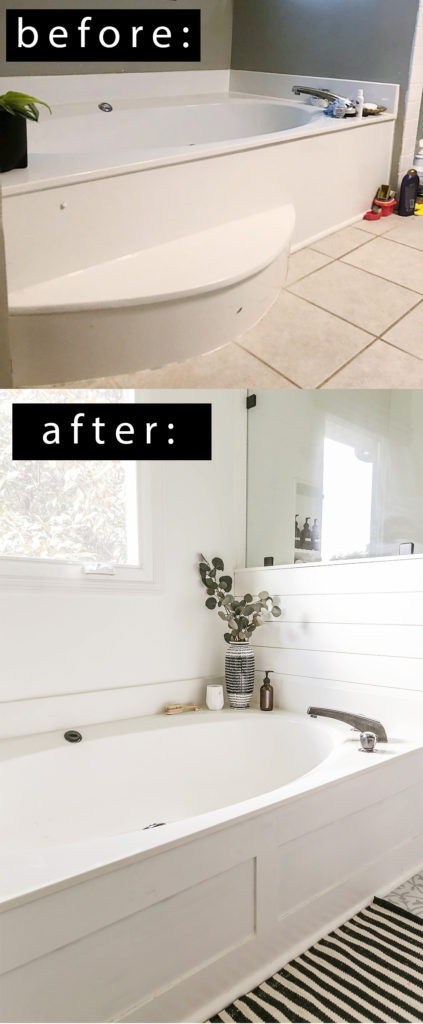
So here is what my tub looked like originally…
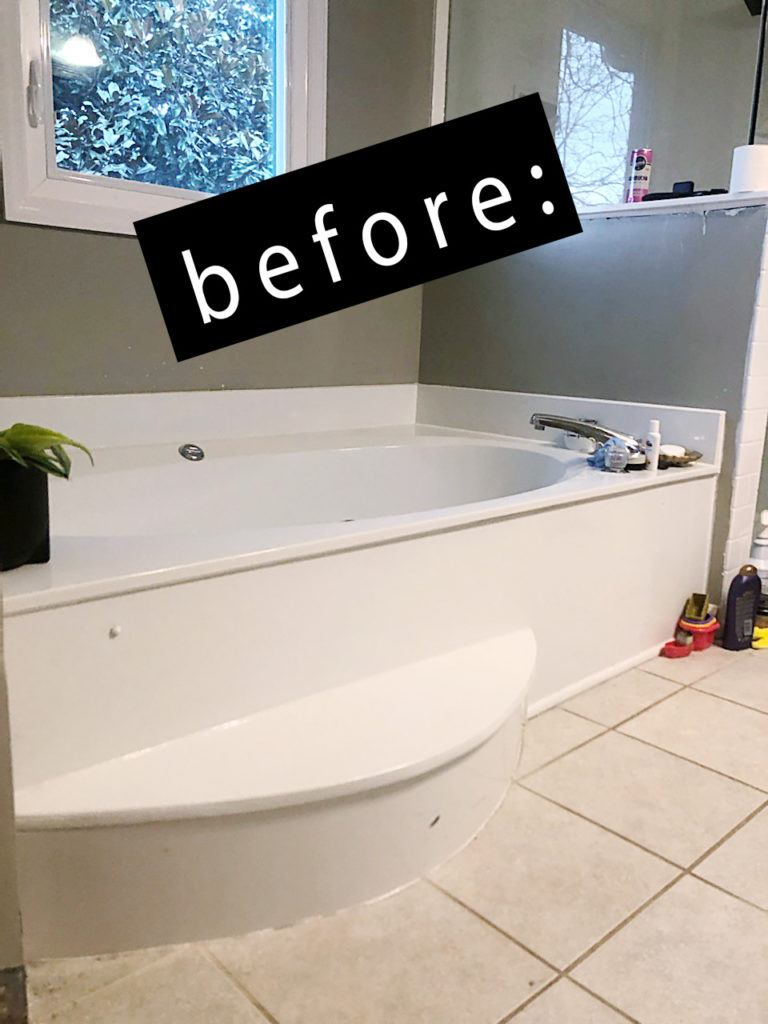
Having very little square footage to work with in our master bathroom, only 8′ deep x 12′ long to be exact, we had to maximize every single inch of space available. Not only did the Jacuzzi tub stair scream 1980’s cheese, it encroached on what little depth of foot space we had. Before installing the new flooring, I knew this eye sore had to go.
Using just 3 mdf panels at $8 each, we were able to replace the eighties style offense while also adding a few inches of depth to our tiny en suite…
Let me show you how we did it.
*For your online shopping convenience, I have included affiliate links in this post. That means if you click on one of those links and buy something, I may receive a small commission, but you won’t pay a dime more. As an Amazon Associate I earn from qualifying purchases*
DIY Bath Tub Skirt Materials:
- 1/4” MDF board
- Wood screws
- Wood Glue-NON EXPANDING (we used this)
- Driver
- Table saw
- Reciprocating saw
- Painter’s Project Caulk
- Primer (I used this)
- Paint (I used this paint in White)
How To Build a Jacuzzi Tub Side Panel:
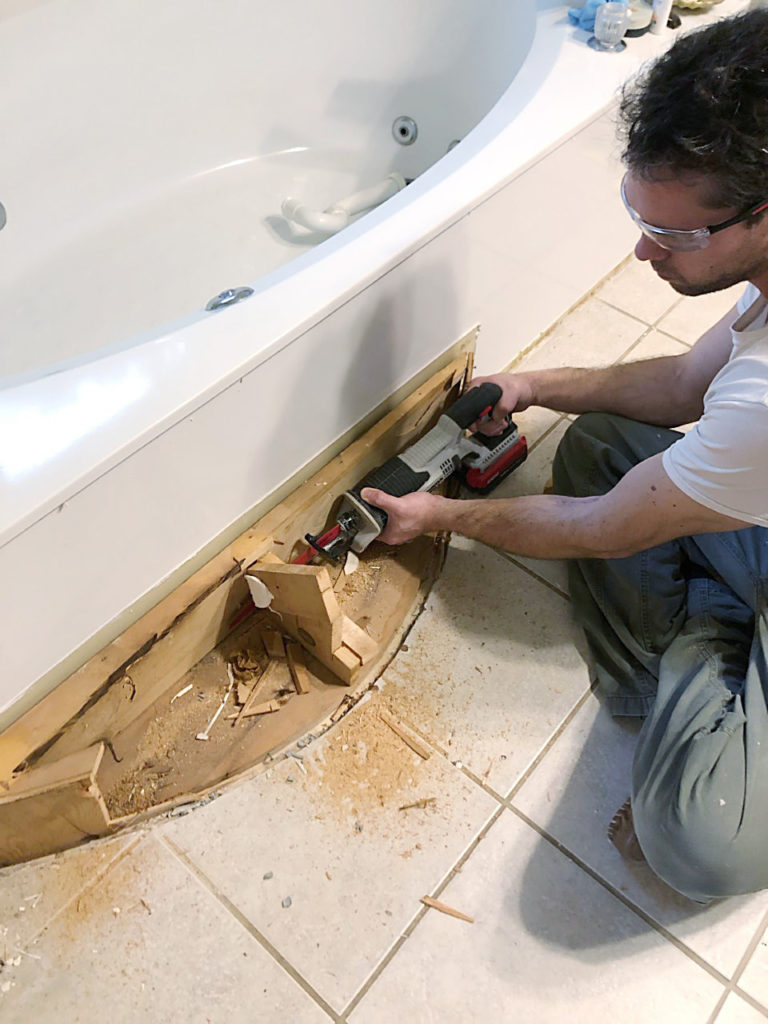
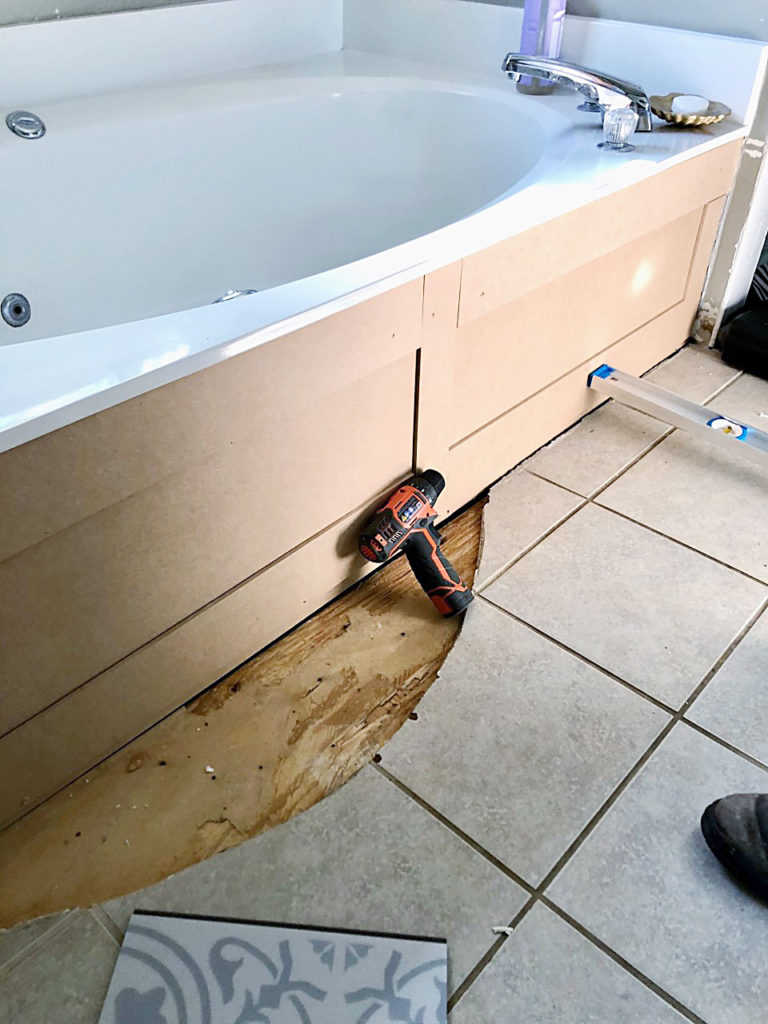
(Step 1). Demo original step and Jacuzzi side panel. Using a reciprocating saw, cut wood framework of step out in sections. Remove side of tub by removing screws first. You will need to cut away all caulk around the border. The section was a ceramic type material and heavy. Use caution.
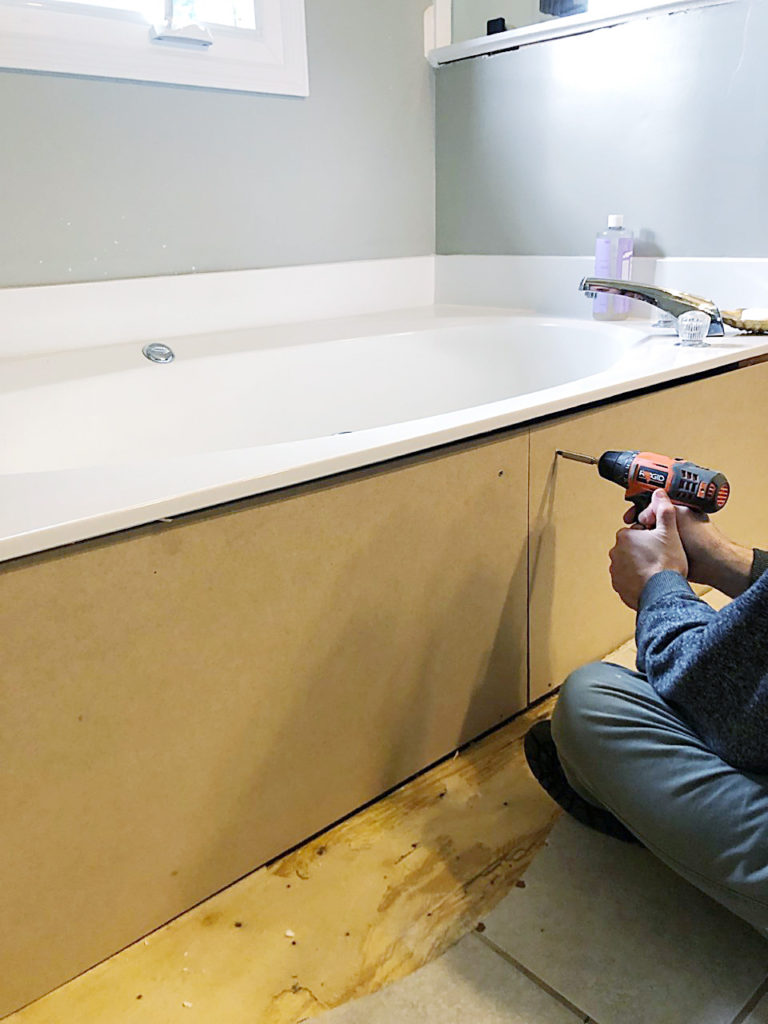
(Step 2). Measure area to be covered and cut MDF into two equal sections using a table saw. The seam in the middle will be covered by a smaller piece of MDF as pictured below. Attach two sections of MDF to tub framework using wood screws making sure to locate them where the border sections will cover the screw heads.
(Step 3). Decide on width for boarder and center piece (that will cover center seam). Using table saw, cut MDF to into four equal sections for the upper and lower horizontal boarder. The center vertical piece will be the height of the side wall with the horizontal parts butting up to the vertical piece. The same goes for the vertical parts at each end.
When calculating the length of the four horizontal parts, remember to deduct the width of the three vertical pieces.
(Step 4). The border pieces will be glued to the MDF side so no fasteners will be visible. Make sure the glue is a standard non-expanding wood glue before gluing your pieces to the side panel.
(Step 5). Using paint-able caulk, conceal any unsightly seams and allow to dry before priming and painting your new tub skirt.
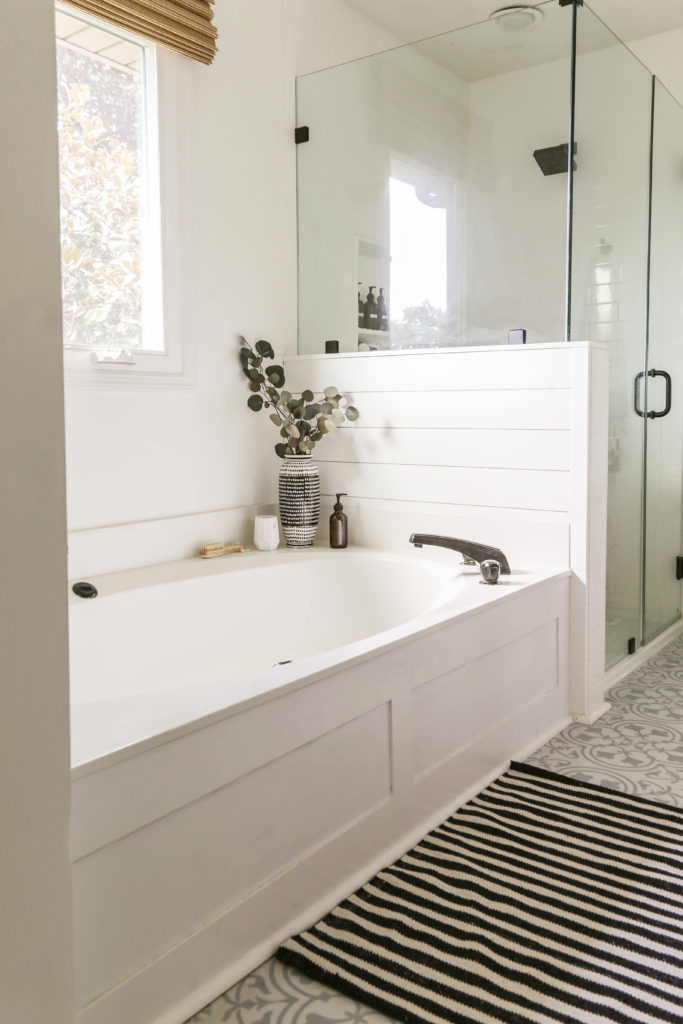
Who knew that such cheap materials could allow for such a custom look?
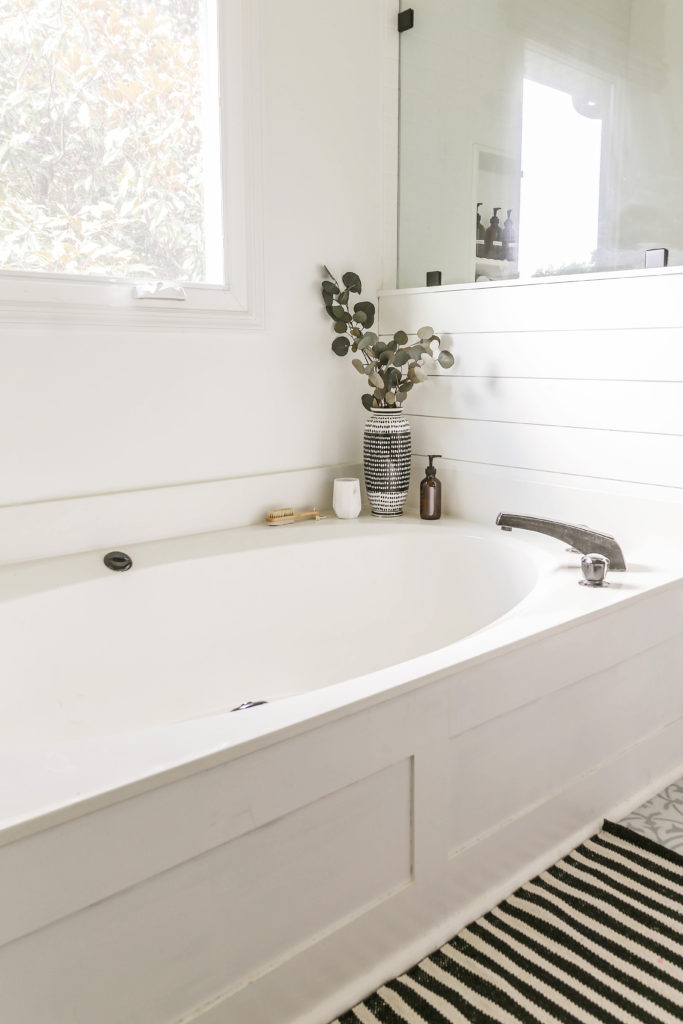
Here is a little before/after….
We have been using this tub for seven months now, and it has held up beautifully- no issues whatsoever!
Not only has the new skirt established more of an elevated, contemporary vibe, removing the stair gave us several more inches of space to work with.
Why pay thousands for a new Jacuzzi tub when you can tweak the one you have?
If you are in the process of a bathroom remodel, you may also find these posts helpful:
- How to Paint Countertops with Epoxy
- DIY Faucet Transformation for under $15
- Master Bathroom Remodel on a Budget Reveal
- My Painted Bathtub 5 Years Later
Thank you so much for stopping by! Sending all of you my love.
Now get out there and design some good vibes along with a fabulous life.
It would mean the world to this small business if you could please share this post with a friend or on social media…


Welcome!
My journey in interior design and home improvement began with transforming my first fixer-upper home, all while managing a budget and raising two young boys. My work, a reflection of my passion for creating beautiful, uplifting spaces, has been recognized by top publications like Better Homes and Gardens Magazine, HGTV, and more. I invite you to explore my site and witness the transformation of my home and the vibes we've designed. Read more...


Hi there, I am one of your quieter subscribers, however, I just wanted to pop in and say thank you for sharing your beautiful ideas with me (us really but I’m pretending you are doing it all just for my eyes). You are very gifted.
Rozanna…I could just give you a huge bear hug. Thank you so much for the kind words. I really needed to hear something uplifting today. I hope you have an awesome rest of your week, friend. xoxo
Love, love, love your bathroom!!!! I think getting rid of that dumb out made such a huge difference and then the way you finished it off looks so custom. AWESOMENESS!!!
Take care my friend:)
Thank you so much, Maria. It was such a small tweak, but it truly made the space feel much more open. I hope you are doing well, my friend. xoxo
First time ever seeing your work. It’s absolutely stunning. The before and after photos are amazing. You and your husband do great work. Thanks for sharing this. I recently just completed a complete mudroom makeover for a friend. It turned out WAY better than they expected or imagined. Custom made almost everything they wanted. So I’m thinking that my master bathroom and bedroom are next on my list!
Welcome to my blog, Beth. I am so glad you stopped by. I think you should totally go for it. what my husband and I have learned is that you continue to gain confidence the more projects you complete… and everything is “figure-out-able”. Good luck with your projects!
looks great. How did you repair the floor though since you covered the old tile, but tiles from the step were missing?
Thanks, Trish. We actually just used a piece of 3/4” plywood and it was flush to the ceramic tile. Then we covered all of it up with the floating LVT. Hope this helps!
Looking to doing something like this to replace a panel we cracked trying to pry off for jetted tub repair.. but now this is my question. You didn’t provide yourself easy access for the same thing- how do you get it off to access for repair/maintenance?
Hi Jen. Yes…unfortunately you would have to remove the skirt panel as there is no easy access. Luckily we never had to, but that was something I did not think about until after the fact.
Good instructions! How did you fix the tile floor by the tub? We’re in the same situation and contractors tell us we need a whole new floor.
So happy to hear you found it helpful, Andrea! So before we did that project, we knew we were going to install floating LVT over it all. So my hubby just cut out some plywood so that the floors would be even in that area and we then laid LVT right over it all. 🙂