
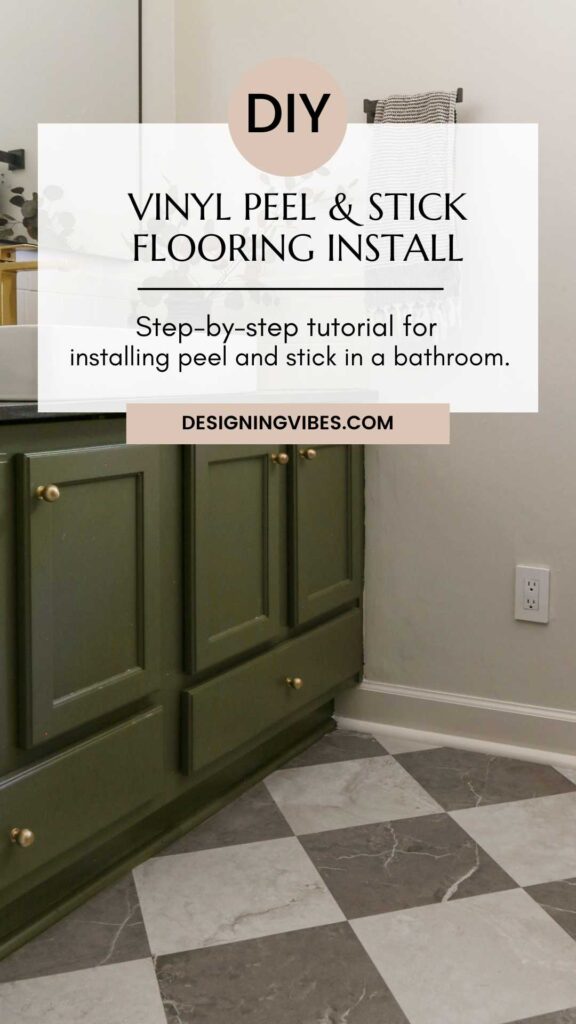
How To Install Vinyl Peel and Stick Tiles on Bathroom Floors

Looking to give your bathroom a dramatic refresh without the hassle of an expensive renovation? For under $100, I utilized luxury vinyl peel and stick tiles to completely transform a once outdated space. Today, I am sharing a step-by-step tutorial for installing this flooring DIY style…
Several weeks ago, I was approached by Lowe’s to partner with them on a social media campaign. The assignment? I was tasked to completely refresh an interior space for under $200 using only their products…
As soon as I accepted the challenge and received the pre-paid Lowe’s Gift Card (full disclosure: while this particular blog post is not sponsored, I did receive free product and pay in exchange for sponsored Instagram posts not included in this post), I immediately knew the space I wanted to transform…
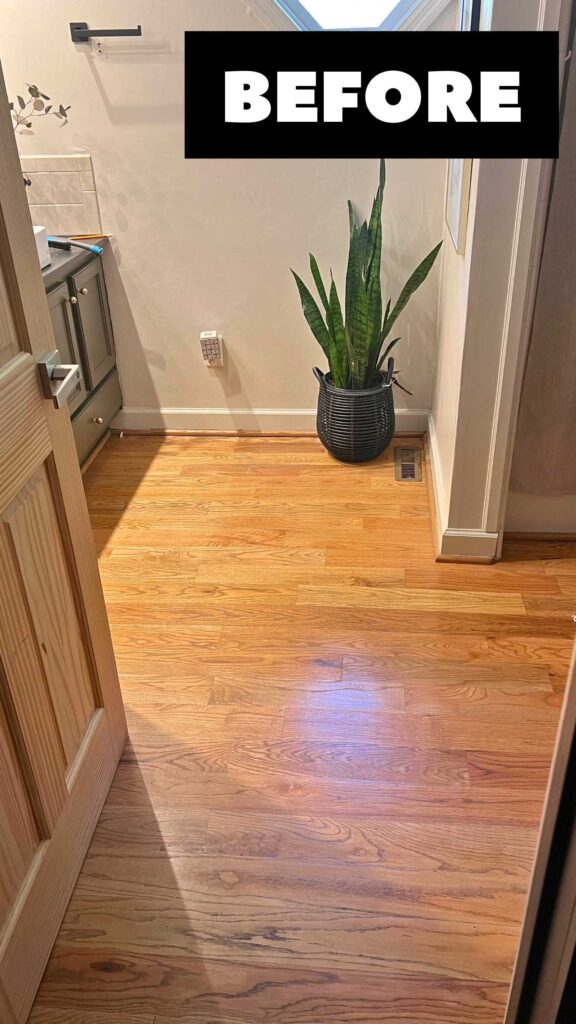
Pictured above, the “before” is a hallway bathroom mainly used by my two young boys and the occasional guest. While I had already made a few cost-effective updates to it last year (which you can read about in this Cheap Bathroom Makeover post), I had always intended on changing the original wood flooring as it just wasn’t working in this particular room.
Not only did I find the orange-hued wood stain reminiscent of a basketball court (which isn’t exactly my vibe), it was not serving my family from a utilitarian perspective either.
Simply put: my boys were inflicting some major trauma to the floors not just with copious amounts of bath water, but with urine(resulting from their utter inability to successfully aim into the toilet).
So… not only did every bath time give me anxiety concerning potential water damage, the room itself constantly reeked of urine. To my fellow boy moms..if you think wooden baseboards are bad, wood floors around the toilet are simply unbearable!
*For your shopping convenience, I have included affiliate links. As an Amazon and and LTK Associate I earn from qualifying purchases. *
So when I came across this gorgeous, checkered peel and stick tile flooring on Lowe’s website and confirmed plenty of glowing reviews, I knew this was going to be my secret weapon for upgrading this space while staying within a super tight budget. Let me show you exactly how I installed it…
DIY Peel and Stick Tile Flooring Installation Steps:
Materials Needed:
- Surface Prep Primer
- Utility Knife
- Straight Edge
- Mop and Vacuum
- Trim Puller
- Grey Peel and Stick Flooring Tile
- Off-White Peel and Stick Flooring Tile (for checkered effect I ordered half grey, half off-white)
- New Quarter Round
- Caulk
(Step 1). Ensure your existing floors are structurally sound. If you are installing over existing flooring like I did, for this particular tile that I used, be sure your sub-flooring is a smooth surface. In the manufacturer specs, this peel and stick can be installed over wood, concrete or vinyl.

(Step 2). Remove the toilet by first turning off the water supply. Then, flush the toilet to drain water out of the bowl. Using a wet/dry vac, vacuum remaining water out of the upper tank.
Disconnect water supply line. Remove nuts from the two anchor bolts located at the base of the toilet. Remove toilet from the bathroom.
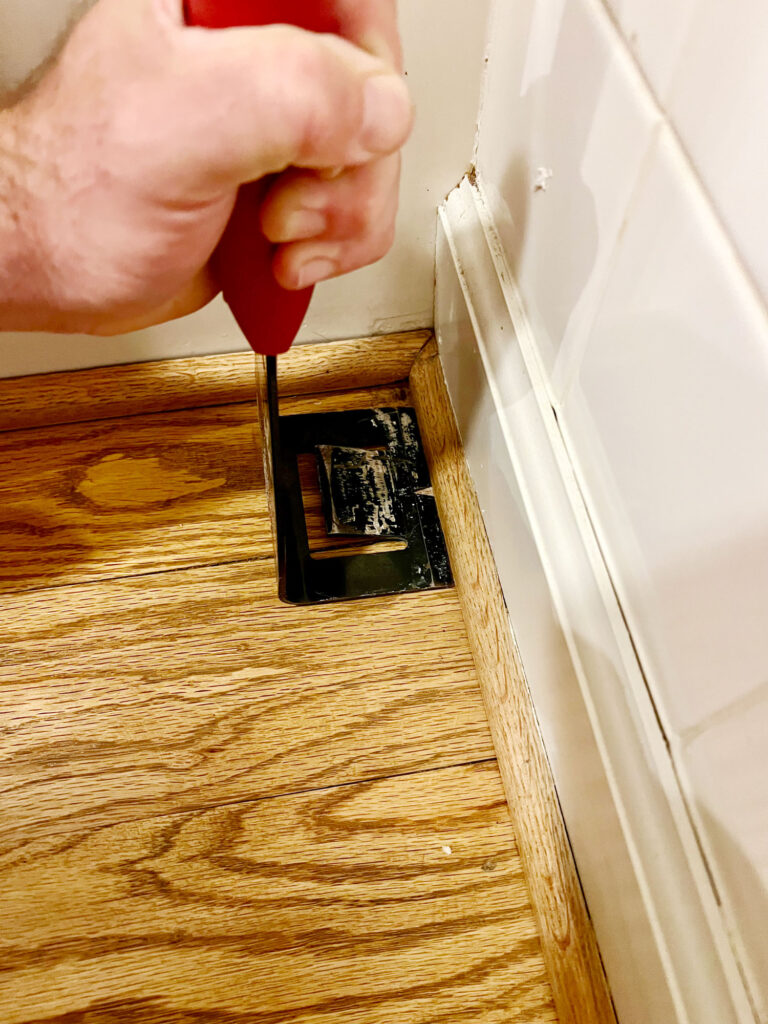
(Step 3). Using a trim puller, remove quarter round from perimeter of the bathroom taking care to keep in good condition so it can be reused if desired.
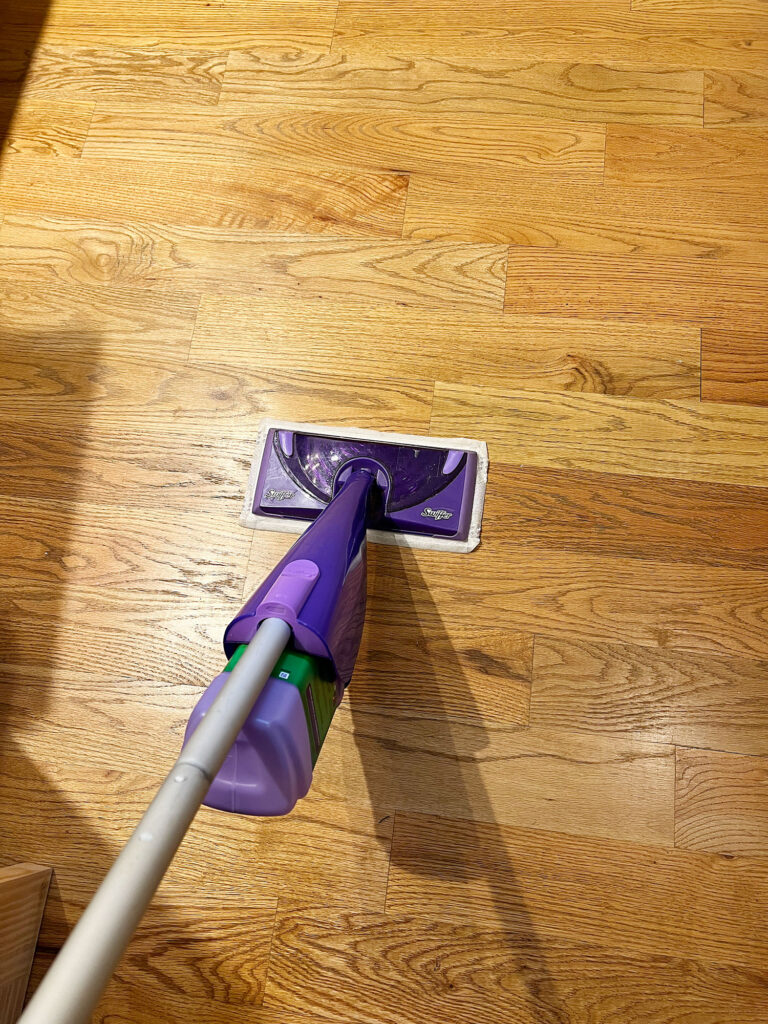
(Step 4). Thoroughly clean your bathroom flooring to ensure the peel and stick tiles adhere. I used a Swiffer mop along with a vacuum.
(Step 5). Apply this surface prep primer to ensure a strong bond. Not going to lie..I kind of got ahead of myself and omitted this step by accident. Lucky for me, everything seems to have adhered just fine without it! Nonetheless, this step is recommended by the manufacturer.

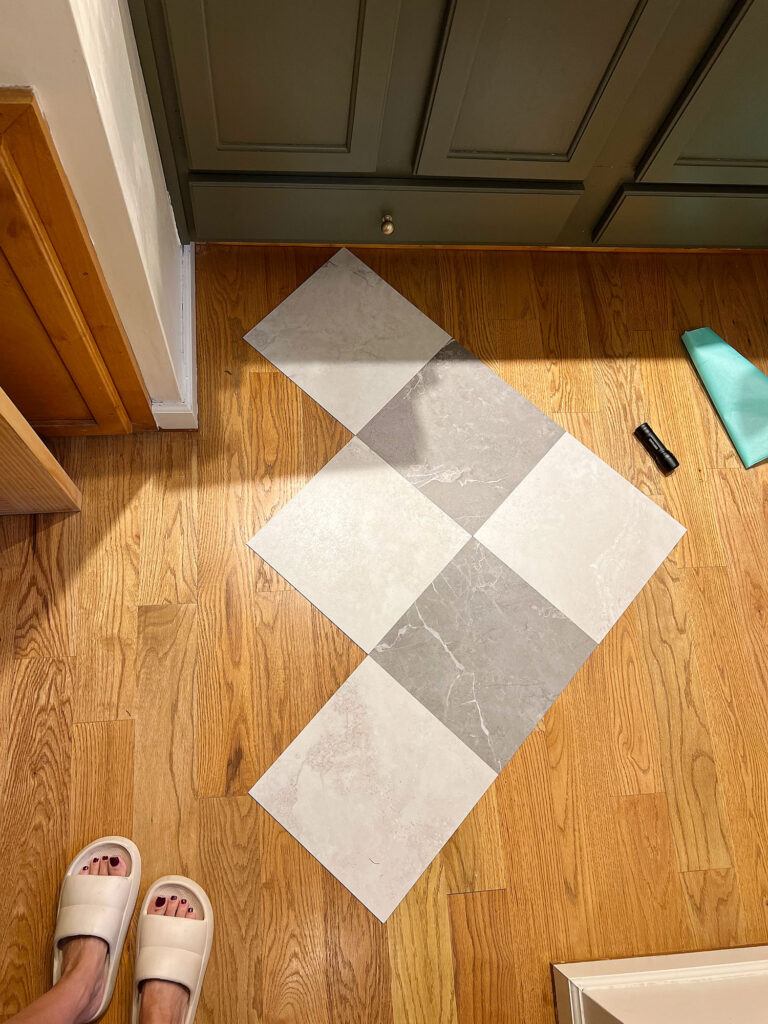
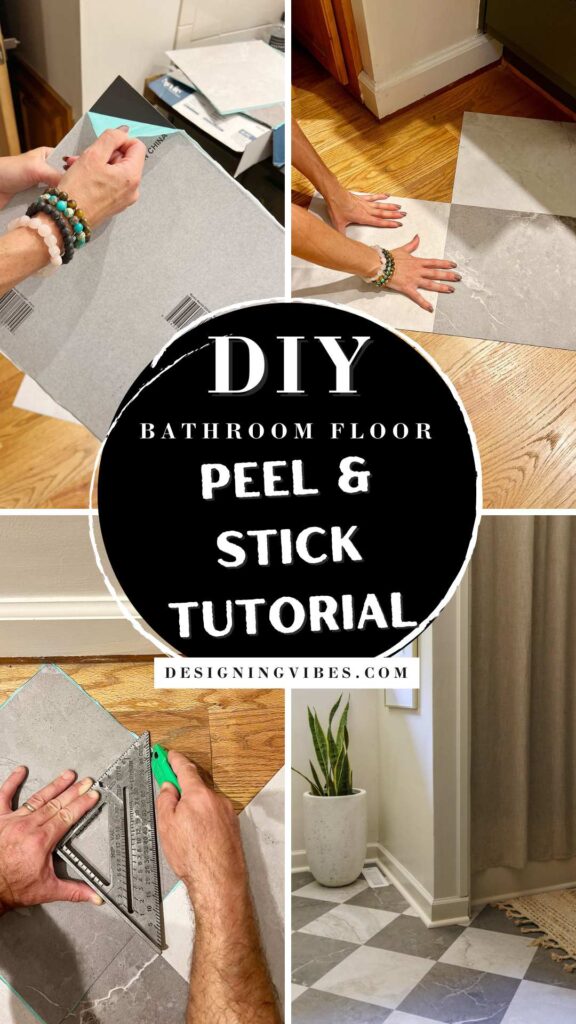
(Step 6). If working with a checkerboard pattern design like I did, layout the tiles first as a preview to get a game plan of your pattern and placement (without removing the backing just yet).
(Step 7). Once you know how you want to place your tiles, you can peel the backing off of your first tile. I did this one tile at a time.
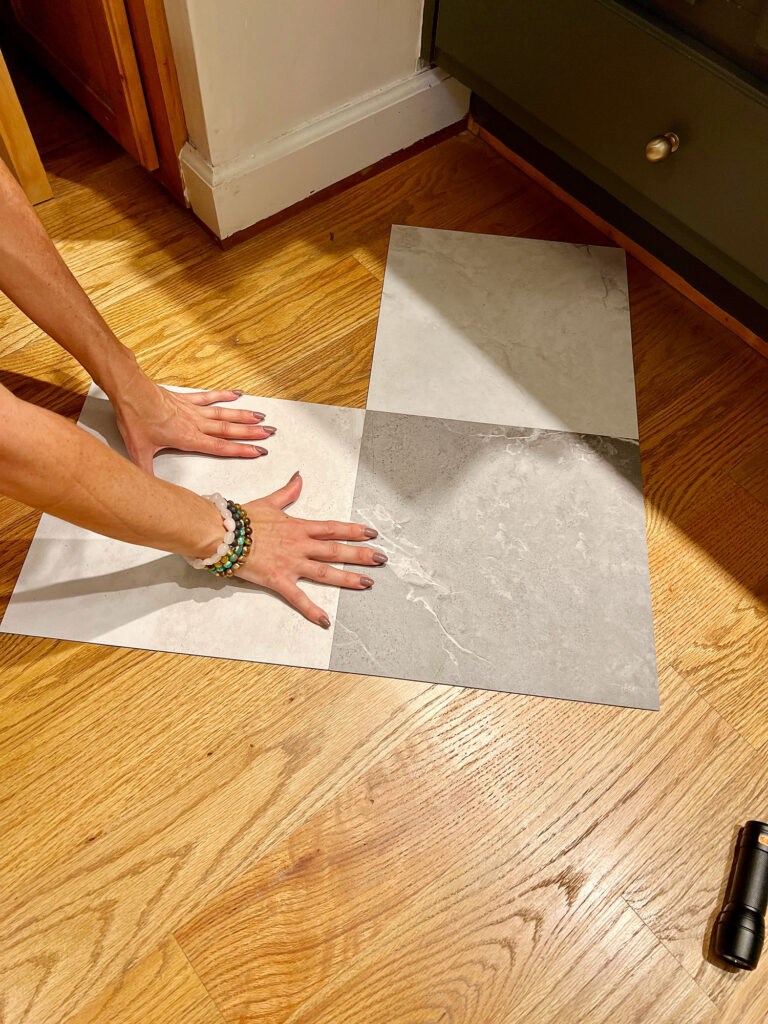
(Step 8). Beginning in the center of the room, apply firm pressure to the tiles once you have placed them where you want them. While you can use a vinyl floor roller, I simply used my hands .
I used the seam of the wood floor closest to the centerline of the bathroom as a reference point to lay down the tiles. I worked row by row to make sure the pattern was correct. While I was laying down the straightforward tiles, my husband began working on the ones that needed special cuts…
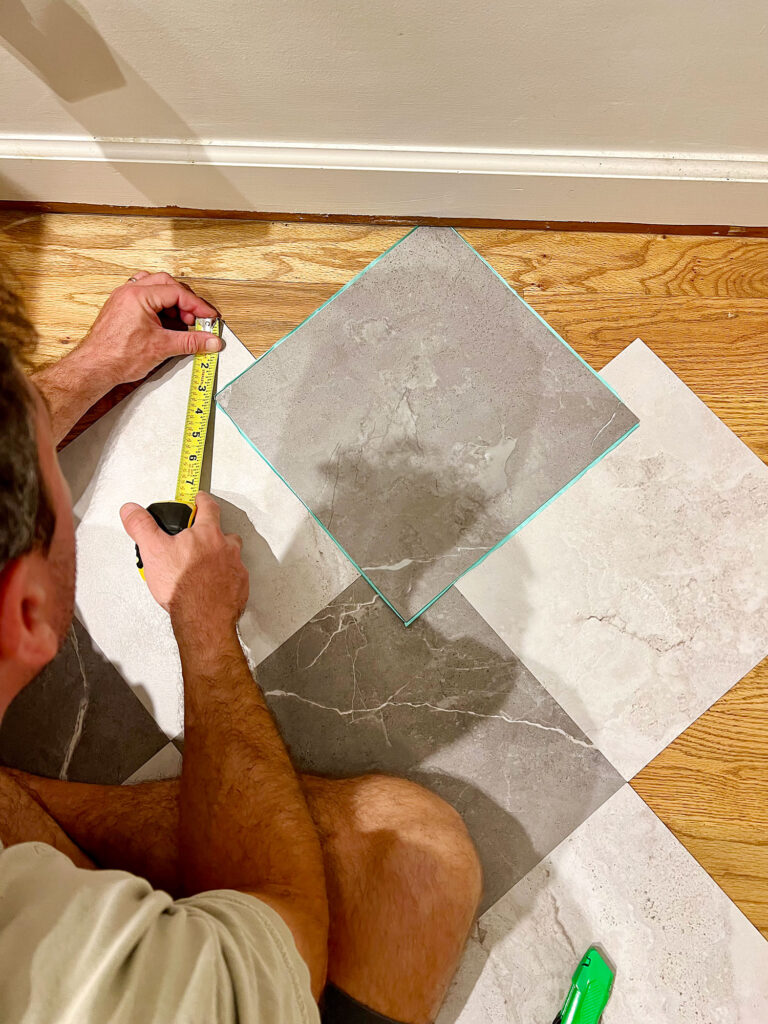
(Step 9). To make proper cuts, first take measurements. Using a tape measure, measure the distance from the corner of tile to the wall and mark tile accordingly.
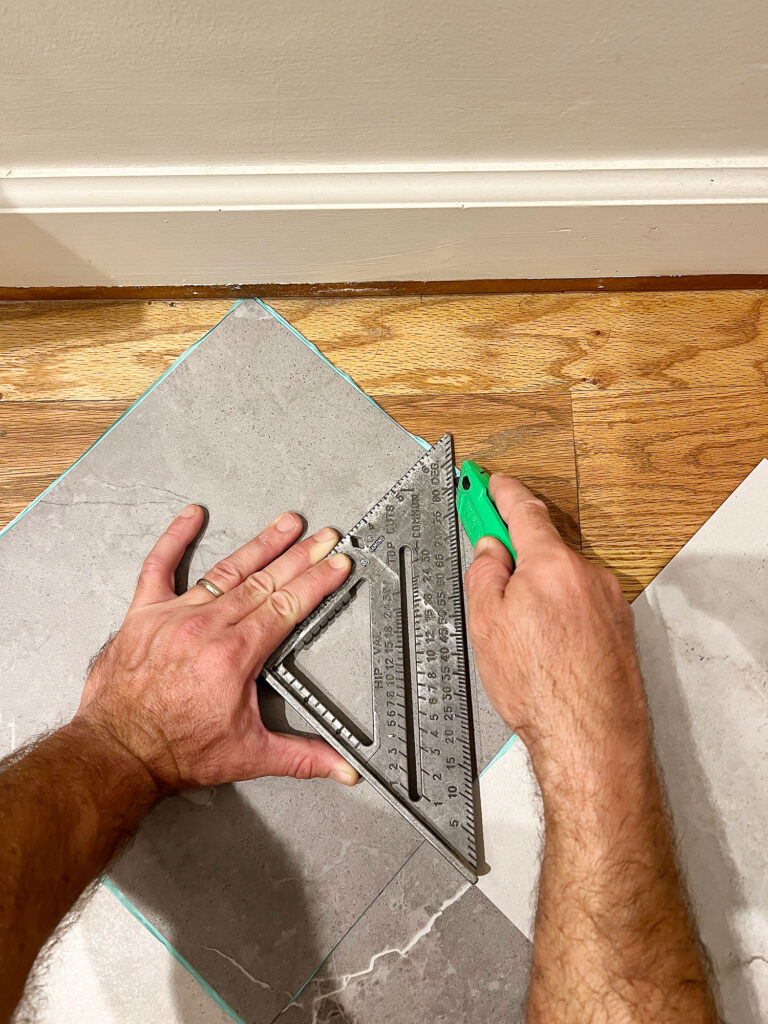
(Step 10). When it’s time to cut the tile, use a straight edge (my husband used a speed square) and a box cutter to score the tile.
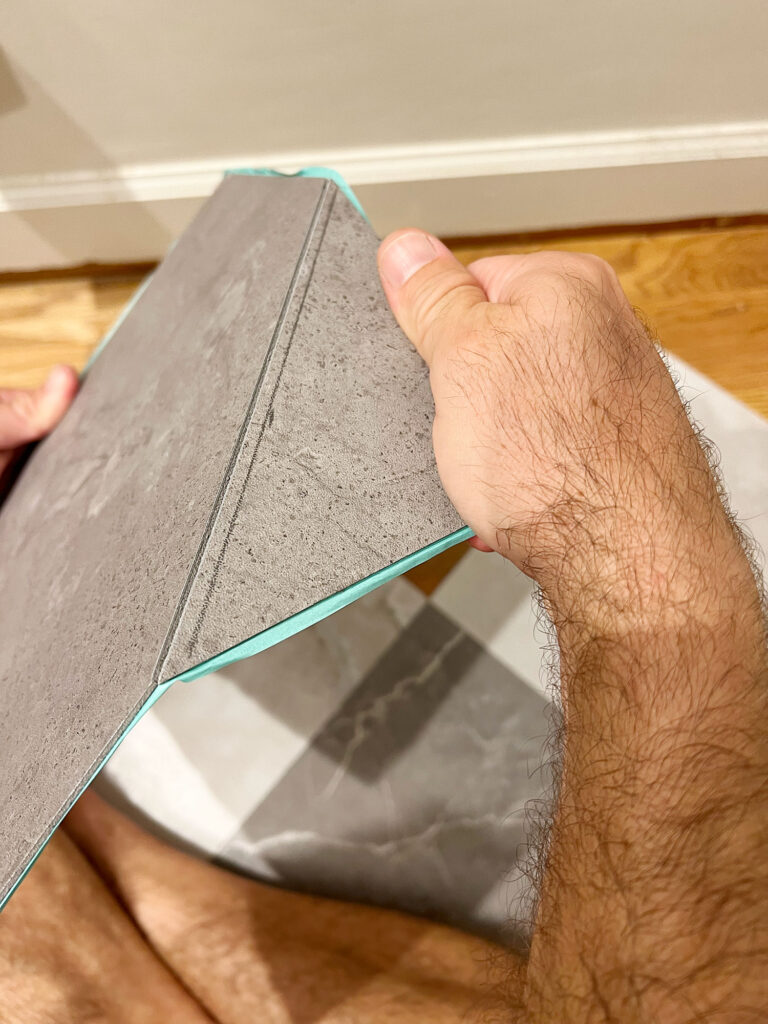
(Step 11). Next, snap the tile at the score line. Continue installing tiles making necessary cuts for corners. This can be a tricky process at times so make sure to account for 10% extra in tiles when calculating amount needed.
(Step 12). Once all of your flooring has been installed, you will need to reinstall the quarter round (I used a 16 ga brad nailer and pancake compressor). Finally, you will need to caulk the quarter round.

With all of the cuts needed in this small bathroom, I must admit that the project did take a little longer than expected (about a full weekend).
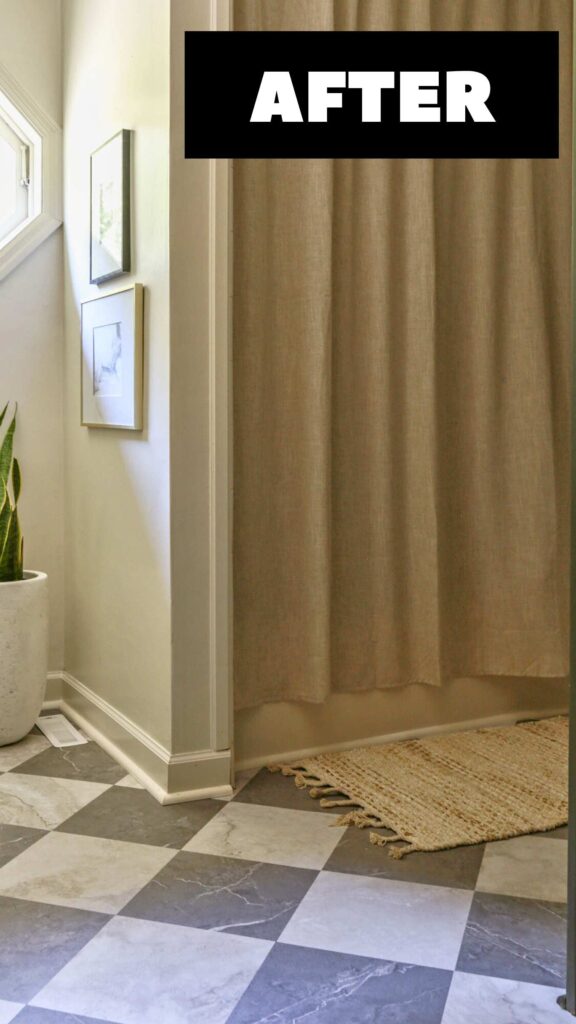
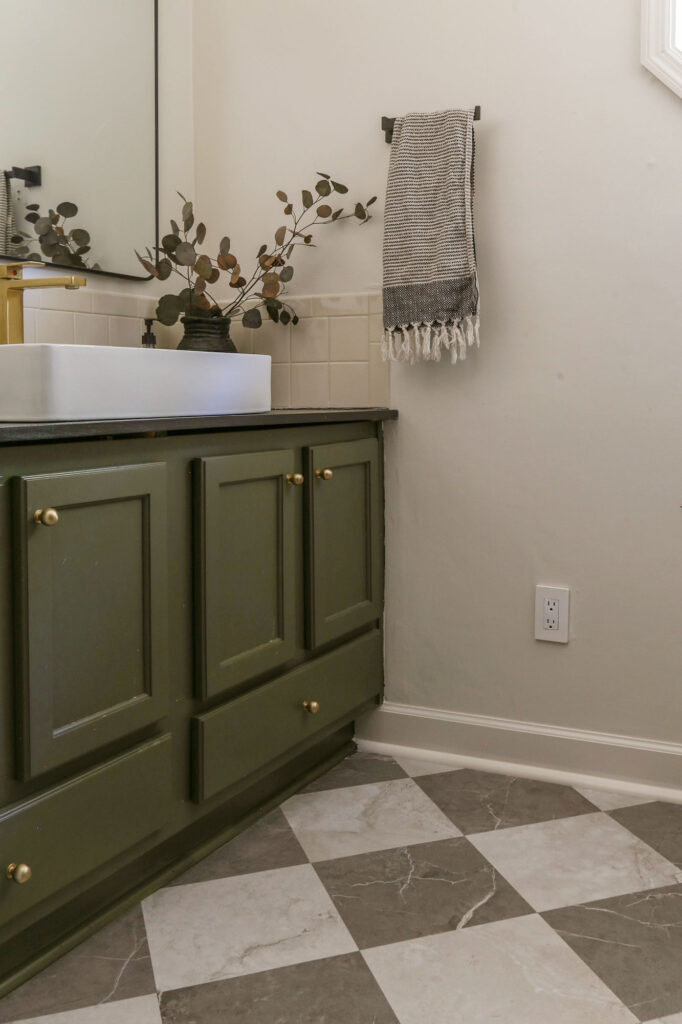
Nonetheless, I am so thrilled with just how much these new floors modernized the space- all for under $100 freakin’ bucks. It’s truly incredible what a patterned floor moment can do for a bland space!
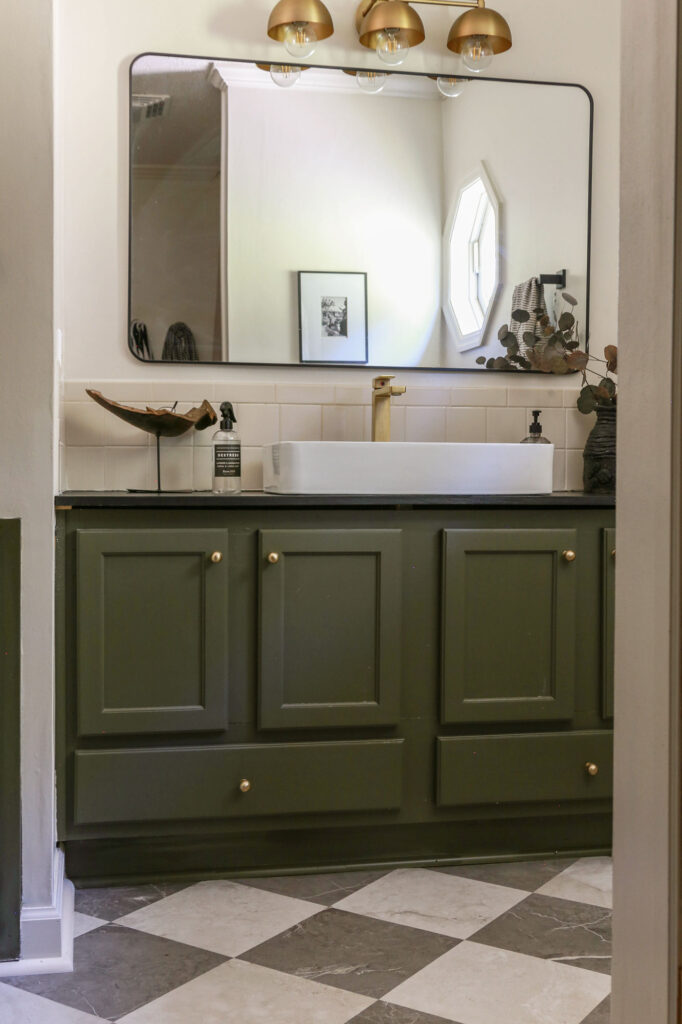
And more than just an aesthetic improvement, I can now rest assured knowing that my new luxury vinyl tile is water resistant (no more panic attacks at bath time or urine-soaked wood to stink up the vibe).
I hope this tutorial proved to you that you don’t have to dish out thousands upon thousands of dollars for a full-blown bathroom renovation! Small tweaks truly make a world of difference.
**UPDATED 10-28-25: Curious how these floors are holding up a year later? Check out my peel and stick floor tiles review for the full update.
Thank you so much for stopping by and spending some time with me this week! It would mean so much to this small business of mine if you could share this post with a friend or on social media…


Now get out there and design some good vibes along with a fabulous life!


Welcome!
My journey in interior design and home improvement began with transforming my first fixer-upper home, all while managing a budget and raising two young boys. My work, a reflection of my passion for creating beautiful, uplifting spaces, has been recognized by top publications like Better Homes and Gardens Magazine, HGTV, and more. I invite you to explore my site and witness the transformation of my home and the vibes we've designed. Read more...


Erica-
That looks amazing! Such an economical way to change a room. Thanks for sharing, enjoy the rest of your week.
Thank you for the kind words, Donna! Hope you are enjoying your fall. 🙂
Thank you for this post! The flooring looks so smart with all of the smart design choices for the bathrooms.Kudos!
Thank you so much, Cathy! Have a great rest of your week. 🙂