
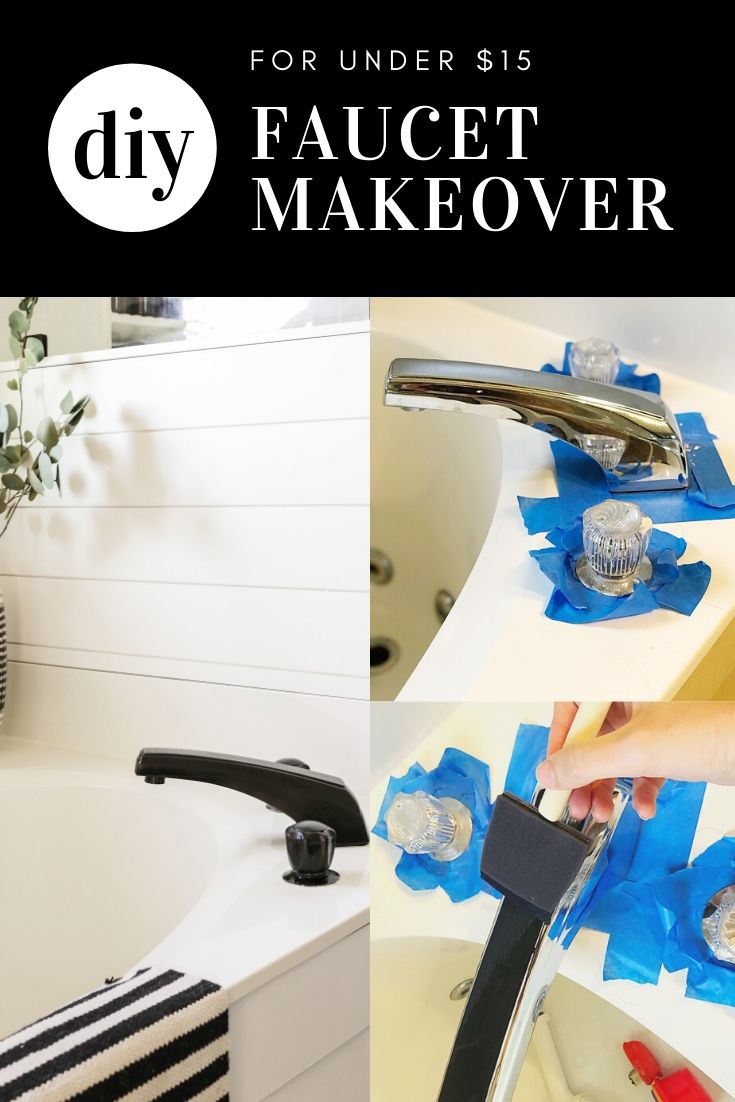
DIY Faucet Transformation for Under $15
Can you paint a faucet? Find out in this week’s DIY post!
Here at the Van Slyke residence, our master bathroom remodel is coming along beautifully (we are so close to completion!).
Given my husband and I have been doing a “dry January”, our productivity is thru the freakin’ roof.
Entire weekends and evenings have been dedicated solely to finishing this space so that we can move on to the next major project of 2020- brand spankin’ new hardwood oak flooring!
In today’s post, I am sharing a DIY hack that saved us hundreds of dollars in potential plumbing costs.
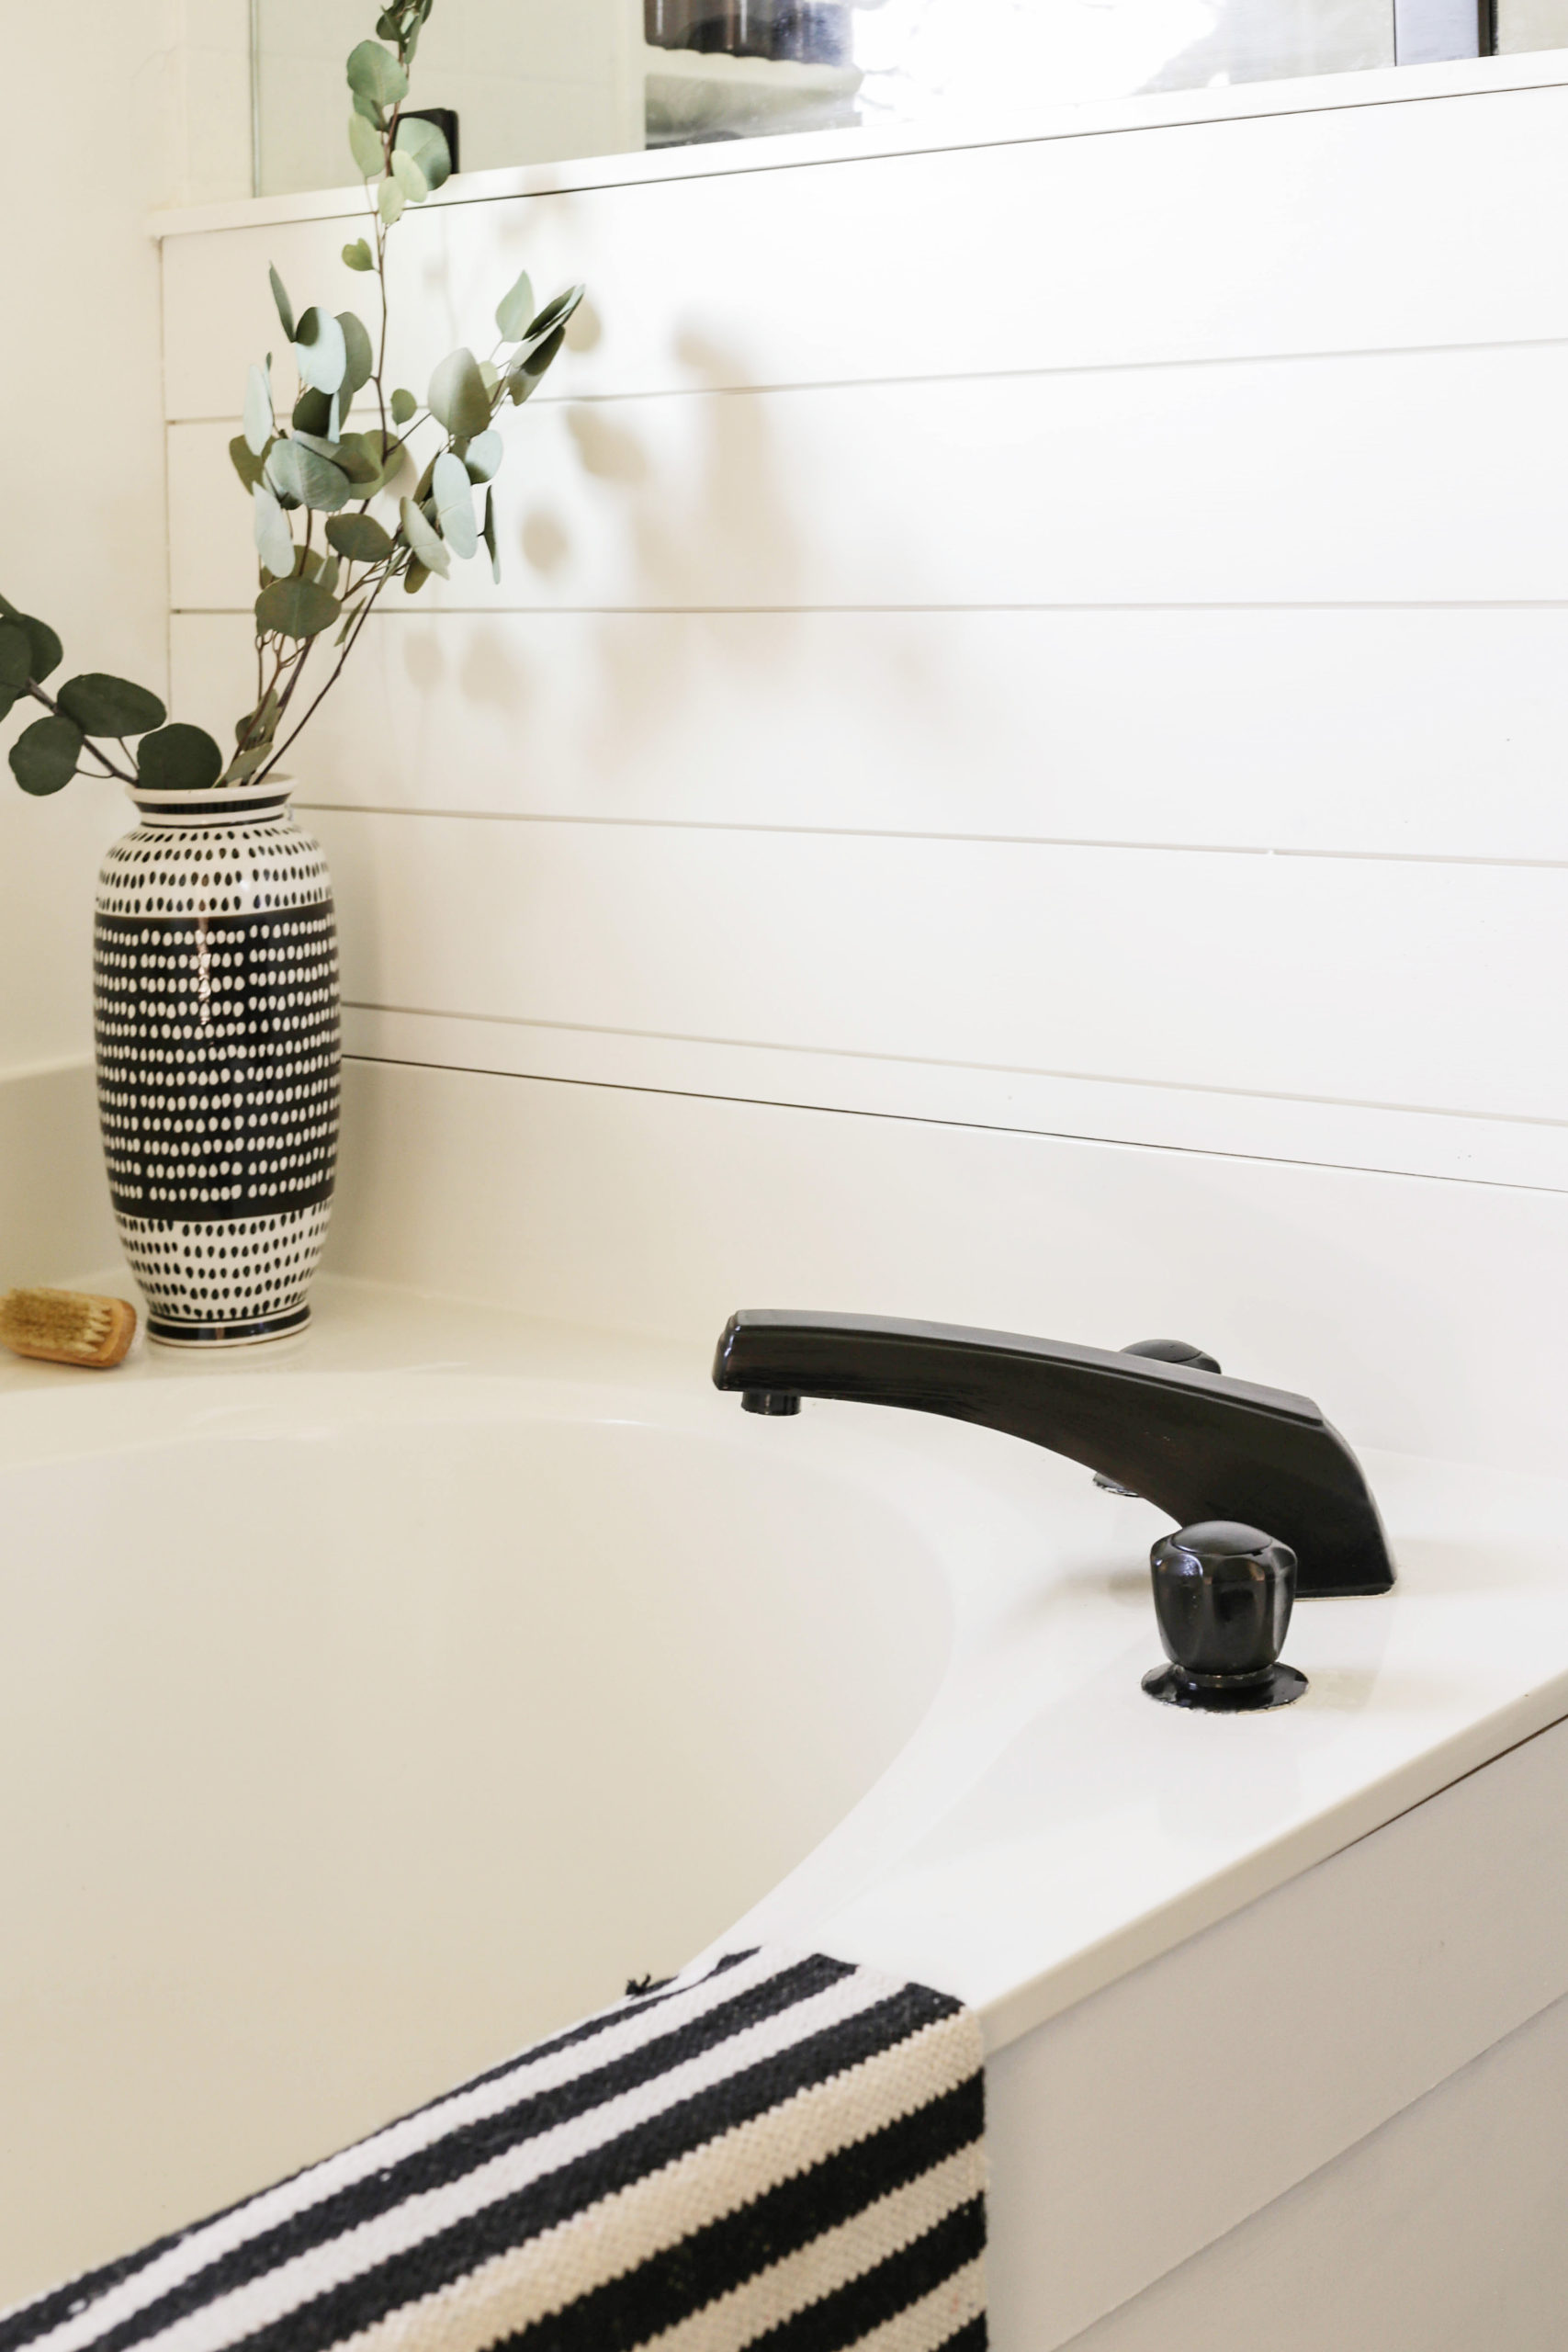
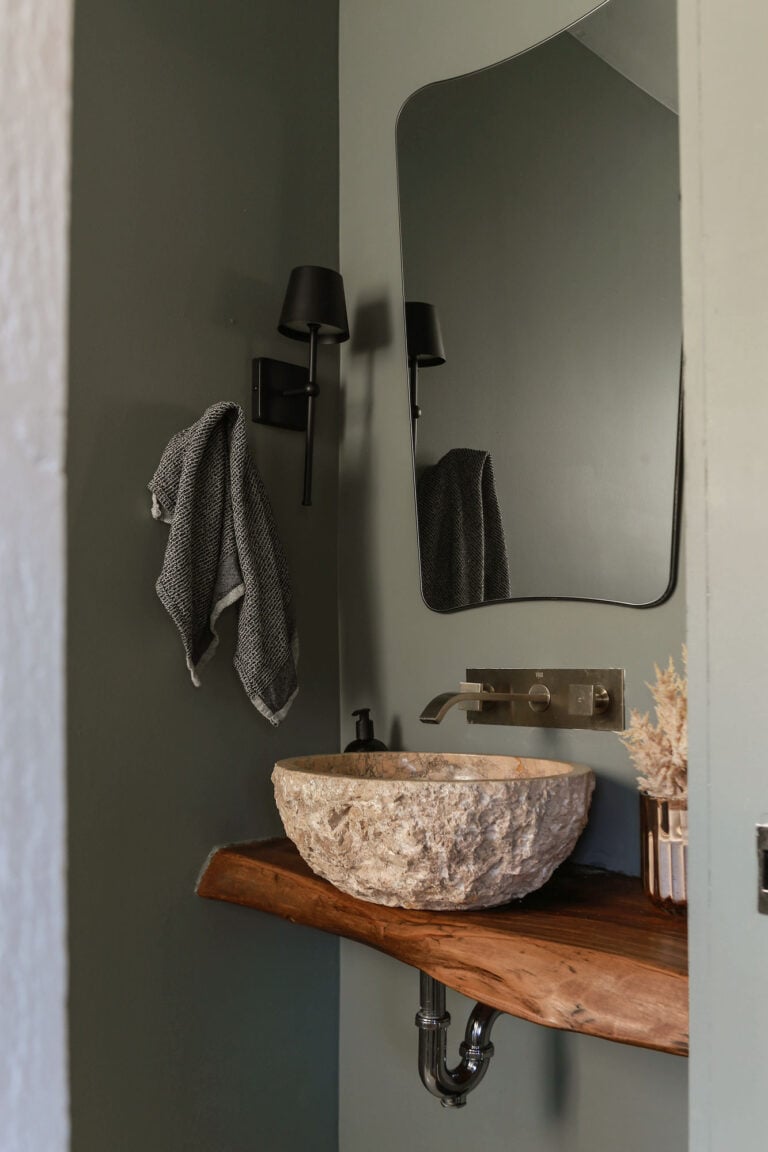
For under $15, I was able to transform an ugly, 1980’s faucet- into a sleek, modern farmhouse bathroom fixture(no plumbing skills required).
*For your shopping convenience, I have included affiliate links. As an Amazon and RewardStyle Associate I earn from qualifying purchases. *
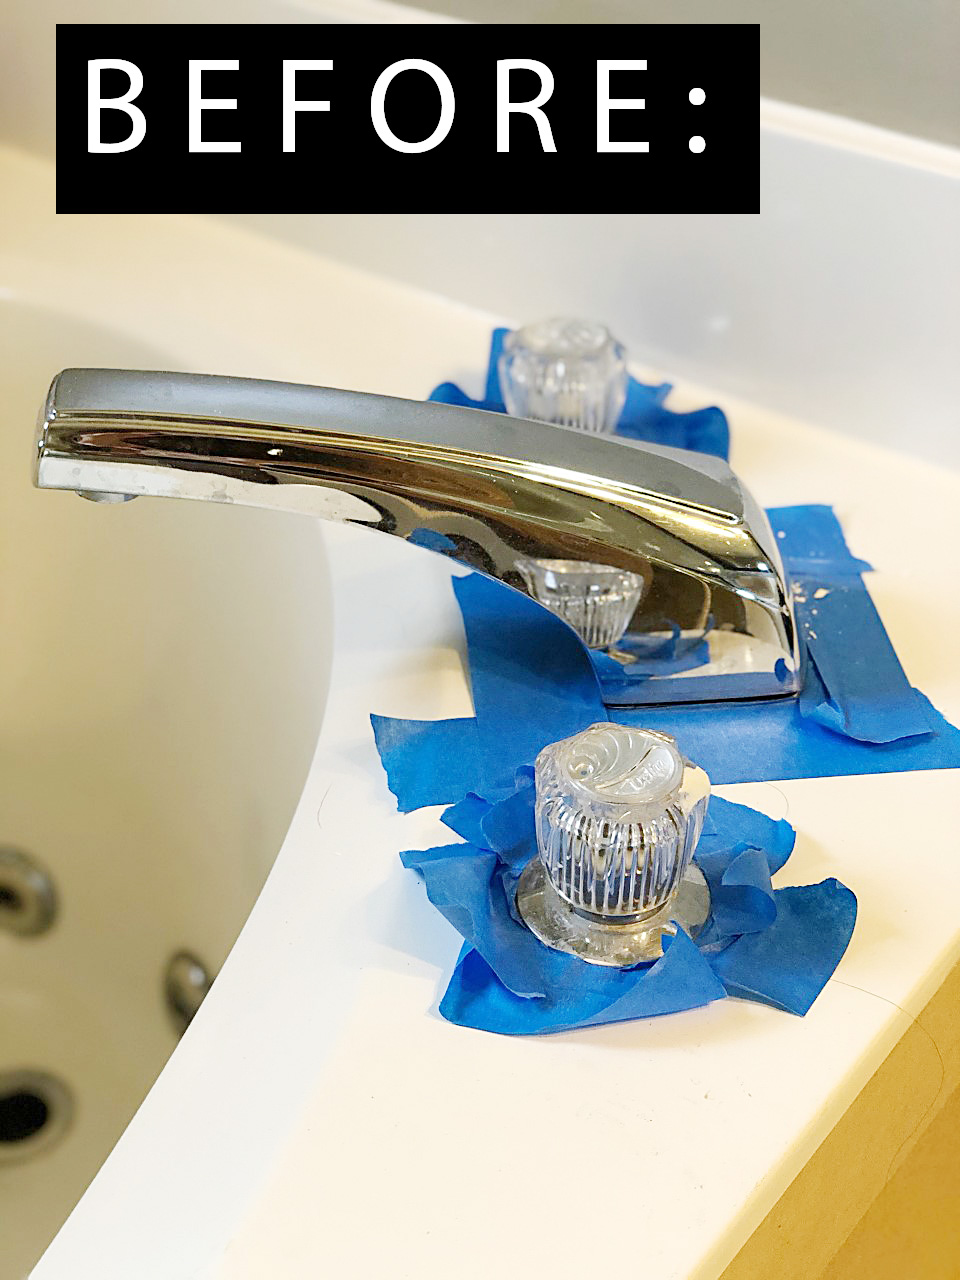
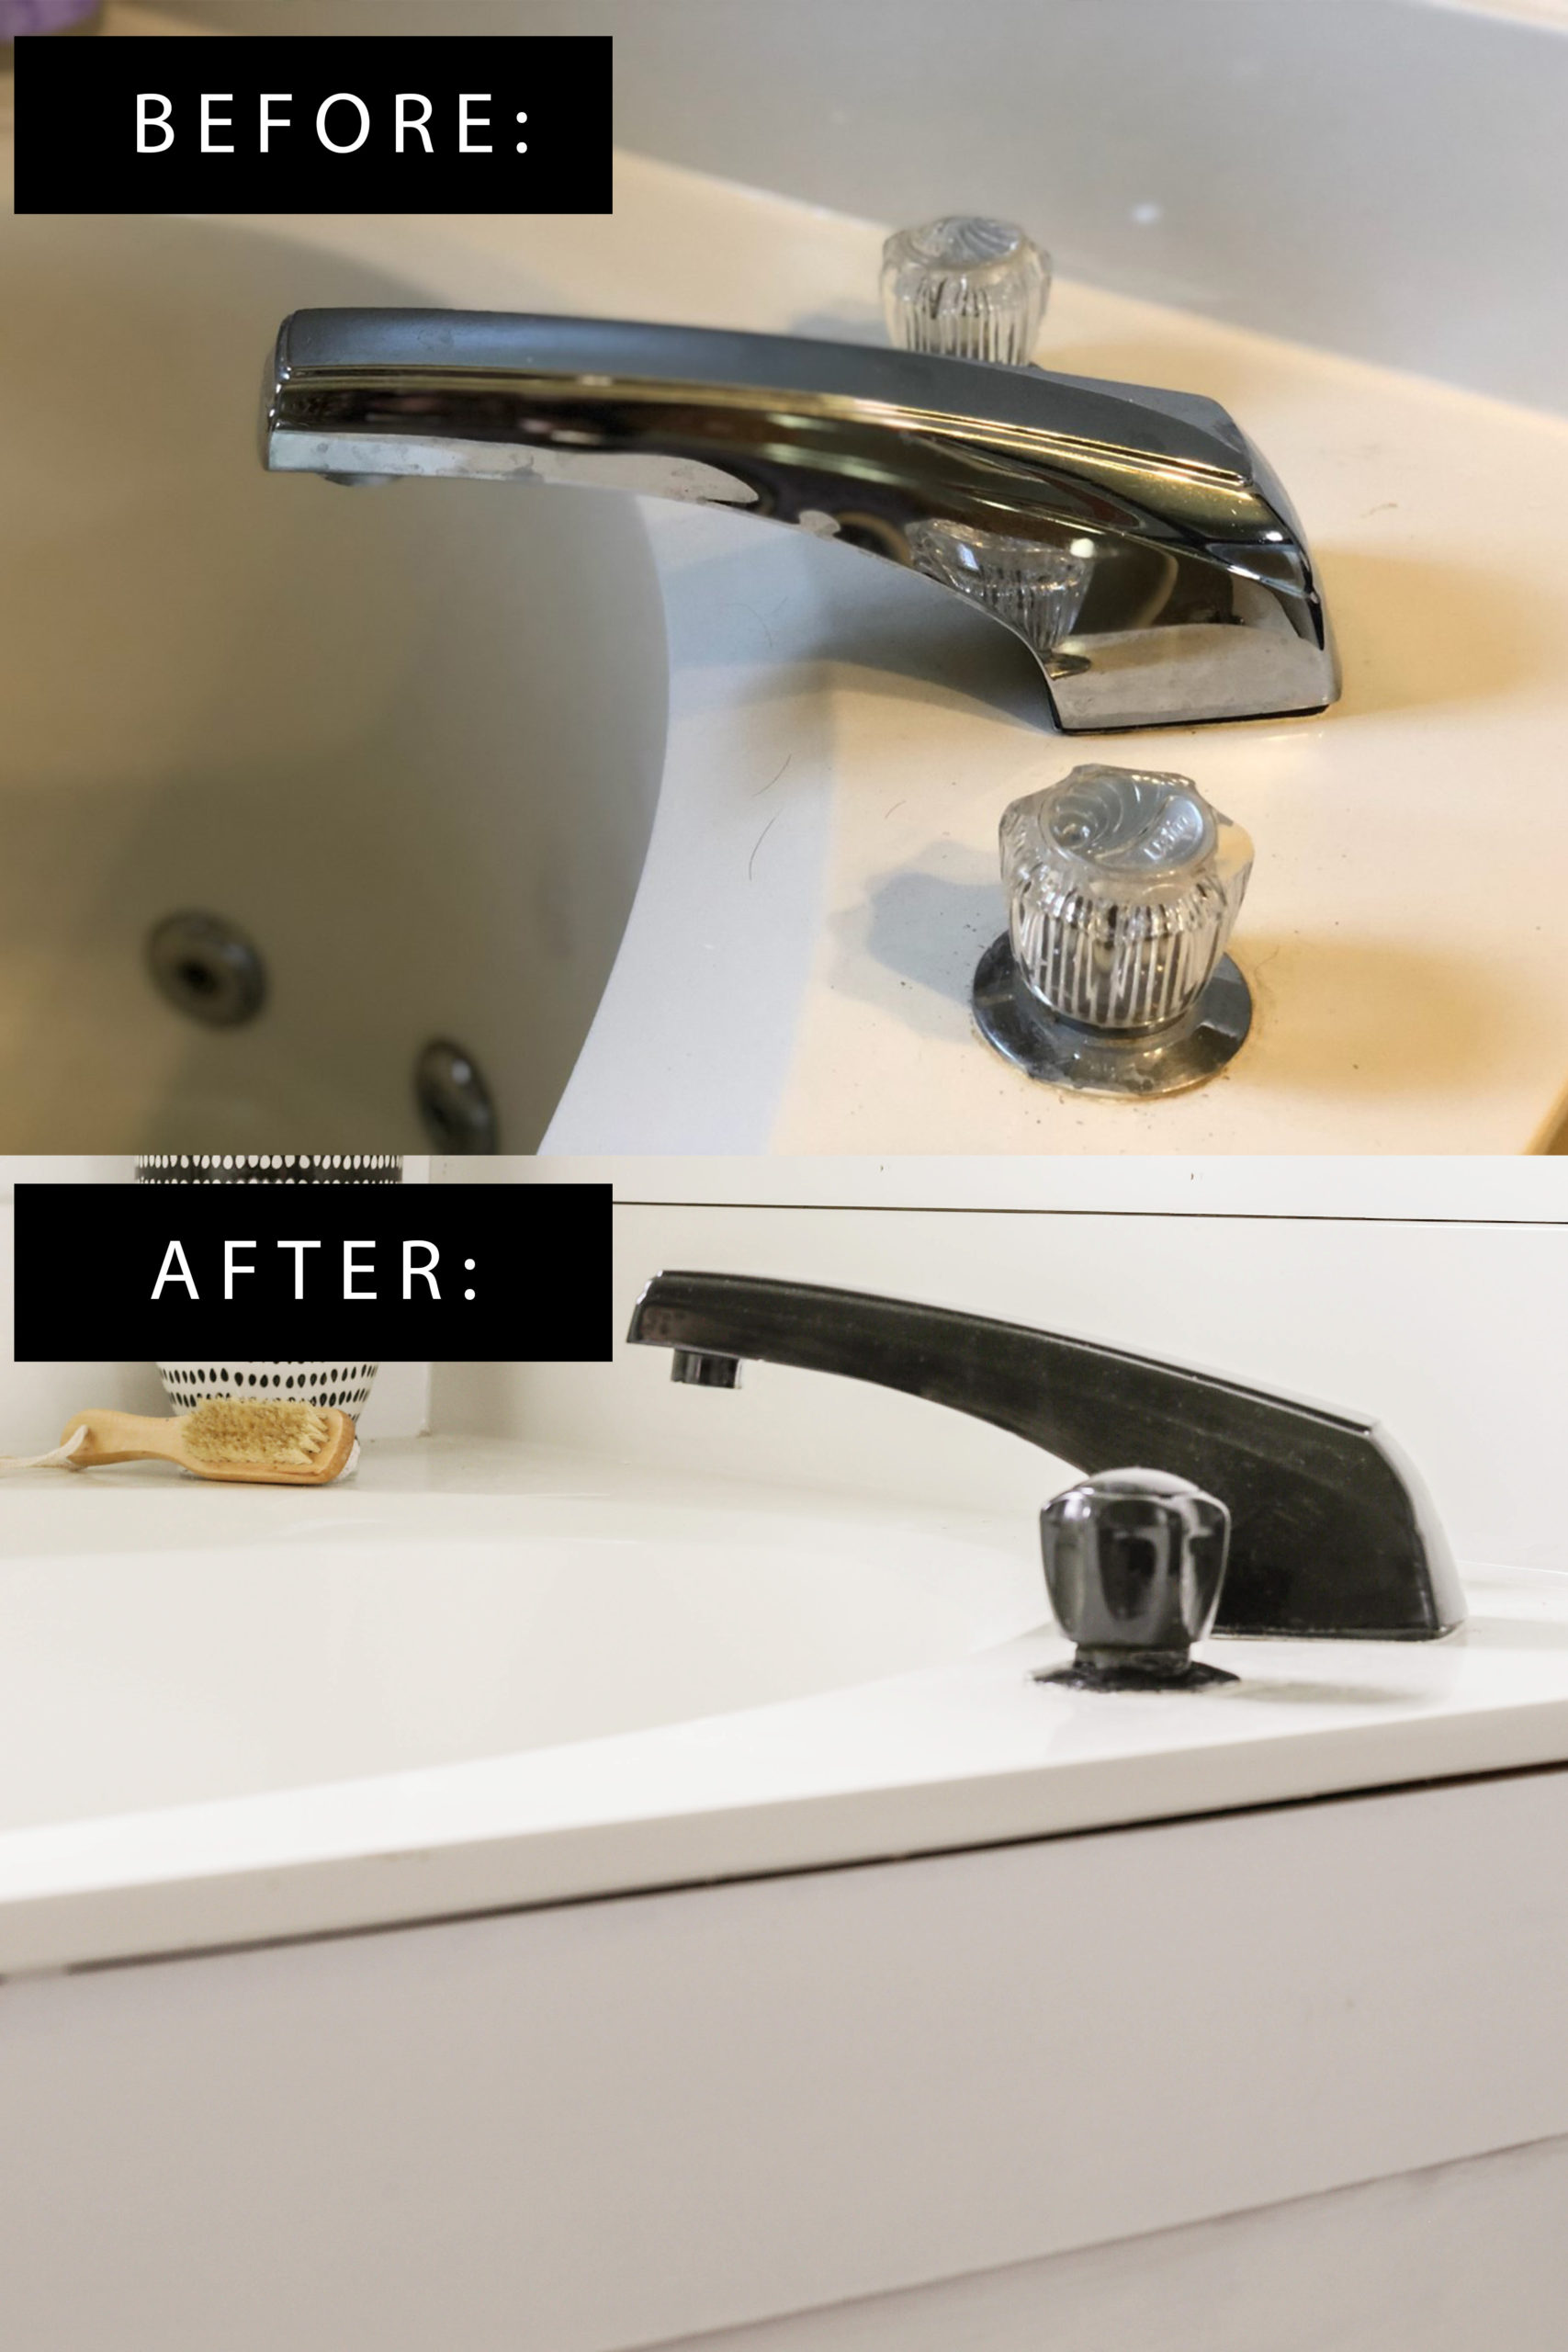
As you can see from the image above, my Jacuzzi tub had been frozen in its 1980’s glory days.
When approaching our bathroom remodel, I had originally intended on simply purchasing a new tub filler altogether. That is…until my husband investigated the plumbing and discovered that the fixture was attached directly to our home’s main supply line (we can only assume this was standard practice back in the day).
Given faucets are no longer designed to be directly installed to the hard-line, if I wanted a brand new faucet, we would also need to hire a plumber to install flex-lines. The miser in me gave a resounding “hell no!” to the thought of any additional plumbing investments as we have already dropped a pretty penny on our shower remodel.
Having already had some experience using a weather resistant, oil-based paint for outdoor fixtures, I thought I would use the same product for my outdated tub filler and knobs. Over a year since I applied this technique to my outdoor lighting sconces, they are holding up perfectly to all of the elements (rain, heat and humidity). So, I am confident the paint will also prove durable for this application (so far, so good!). ** UPDATE January 2021:Click here for the one year review of my painted faucet! **
Here is what I did…
How to Paint a Faucet without having to remove it:
(Step 1). Wipe your faucet and knobs clean. Allow to dry.
(Step 2). Using painter’s tape, tape off all of the hardware you will be painting.
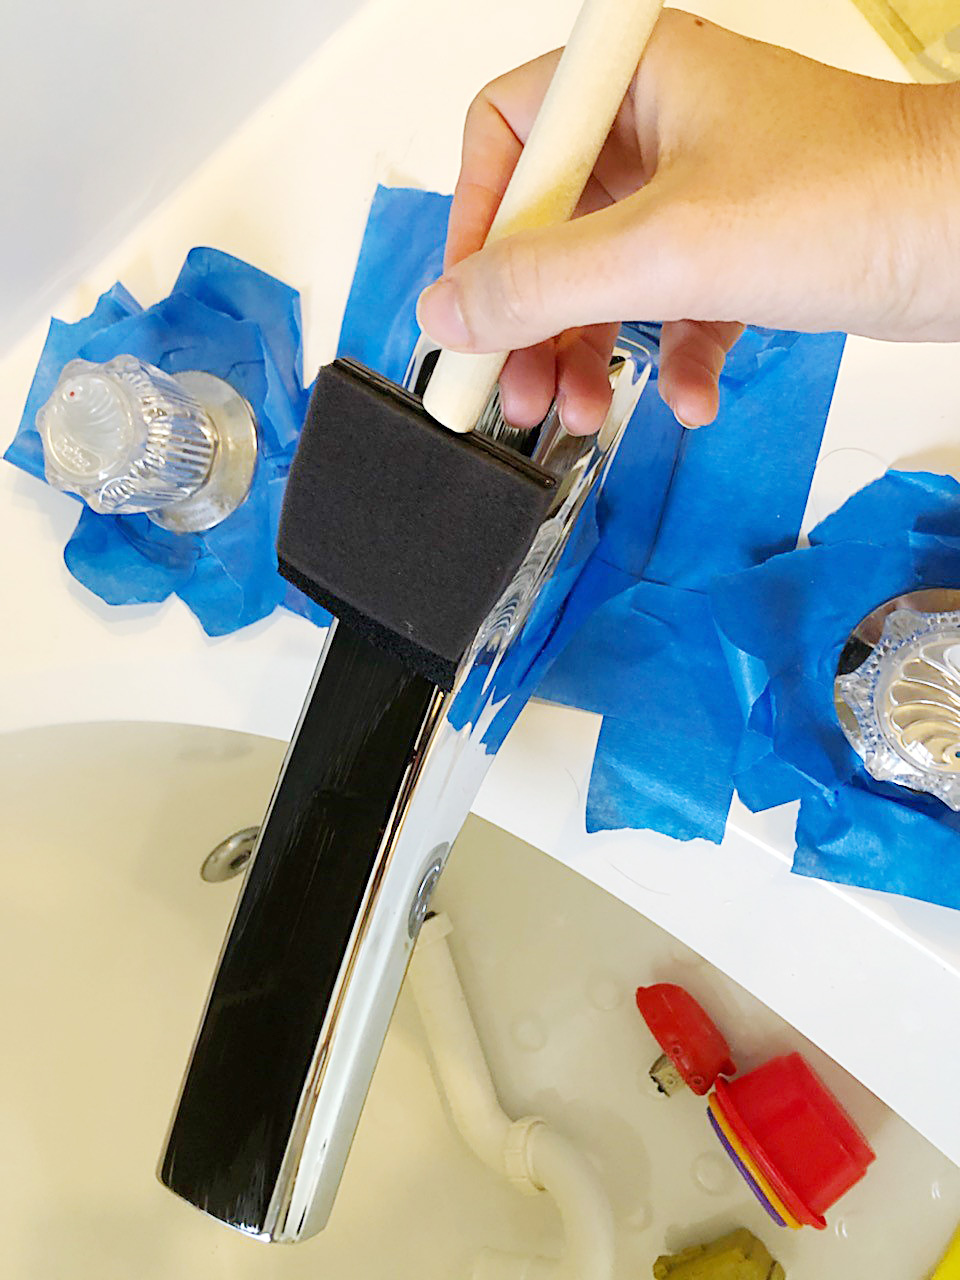
(Step 3). With a foam brush, apply this special paint product. (here is the paint that I used). I went with “Flat Black”. Because this product has a built-in primer, I only had to apply two coats.
(Step 4). Allow paint to cure for 3-5 days before using your faucet/knobs.
***Here is the exact paint that I used for this project. ***

Once the paint had dried and fully cured, I realized that the “flat black” finish was still a bit too shiny against the rest of my matte black hardware.
Searching for a “matte” version of this extremely durable paint, I came up empty handed.

That is when I decided to take a walk on the wild side, and do something incredibly risky.
Achieving the matte black finish:
While Rustoleum didn’t make a matte version of this brush-on paint, they did carry a black matte spray paint. Not wanting to fool with a rigorous prep regimen to actually spray the paint on, I decided to spray the paint into a disposable cup, and then apply the matte finish with a foam brush (over the existing paint)…
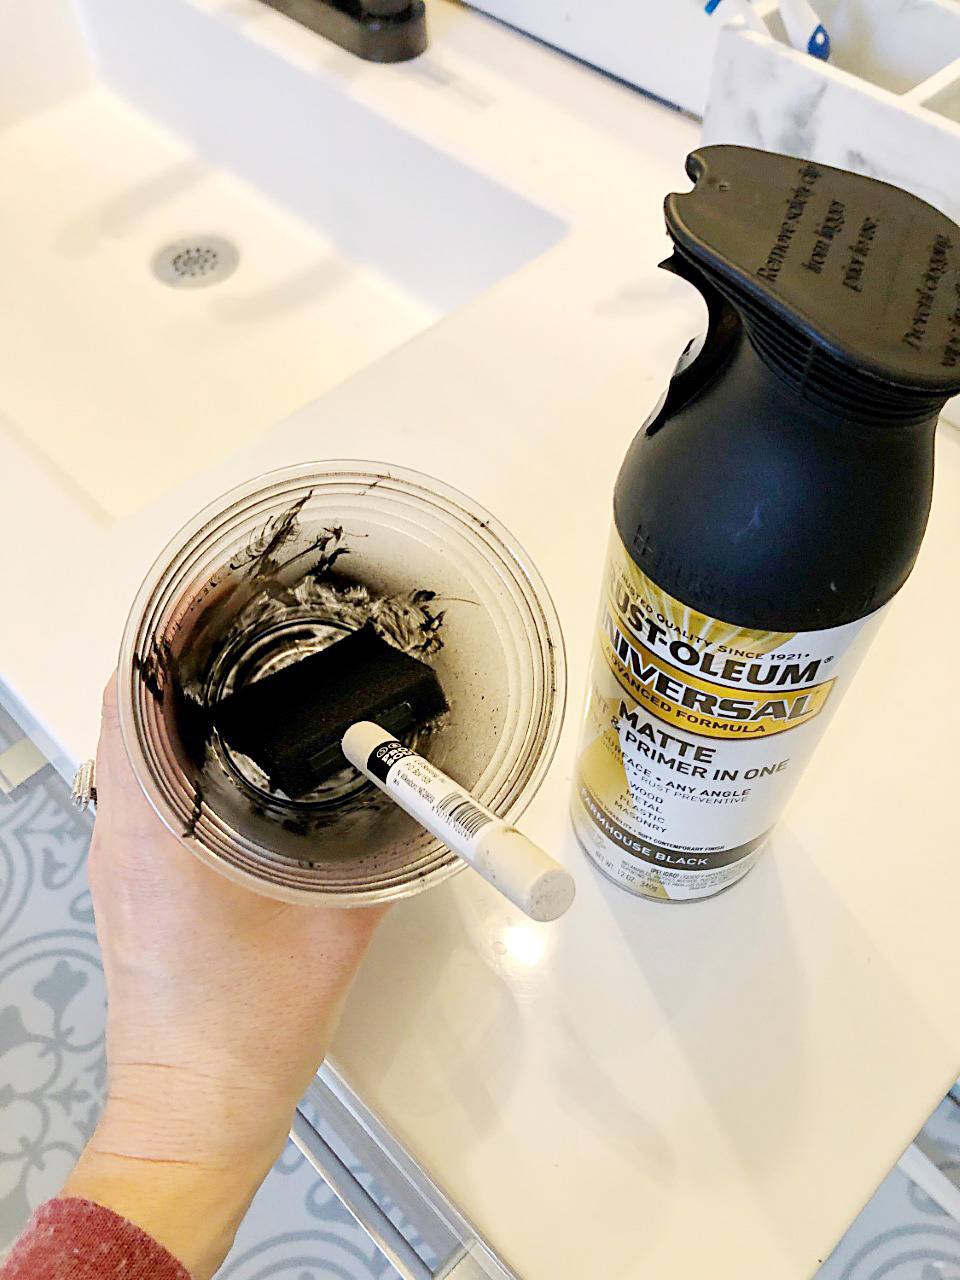
Because I was only attempting to alter the sheen (and not the actual color), this process was super quick. It was so simple, that I didn’t even bother to do any prep work…
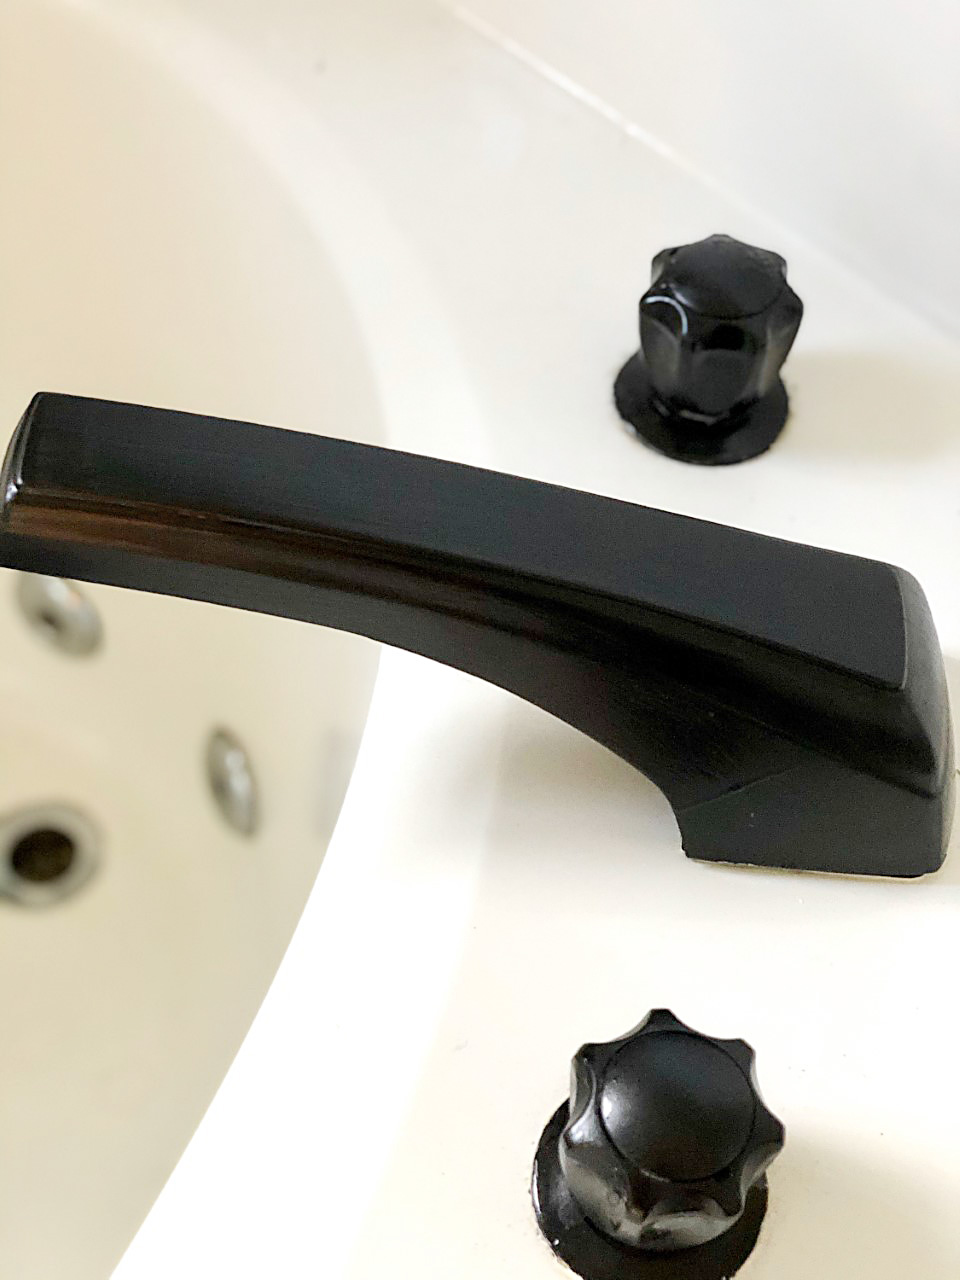
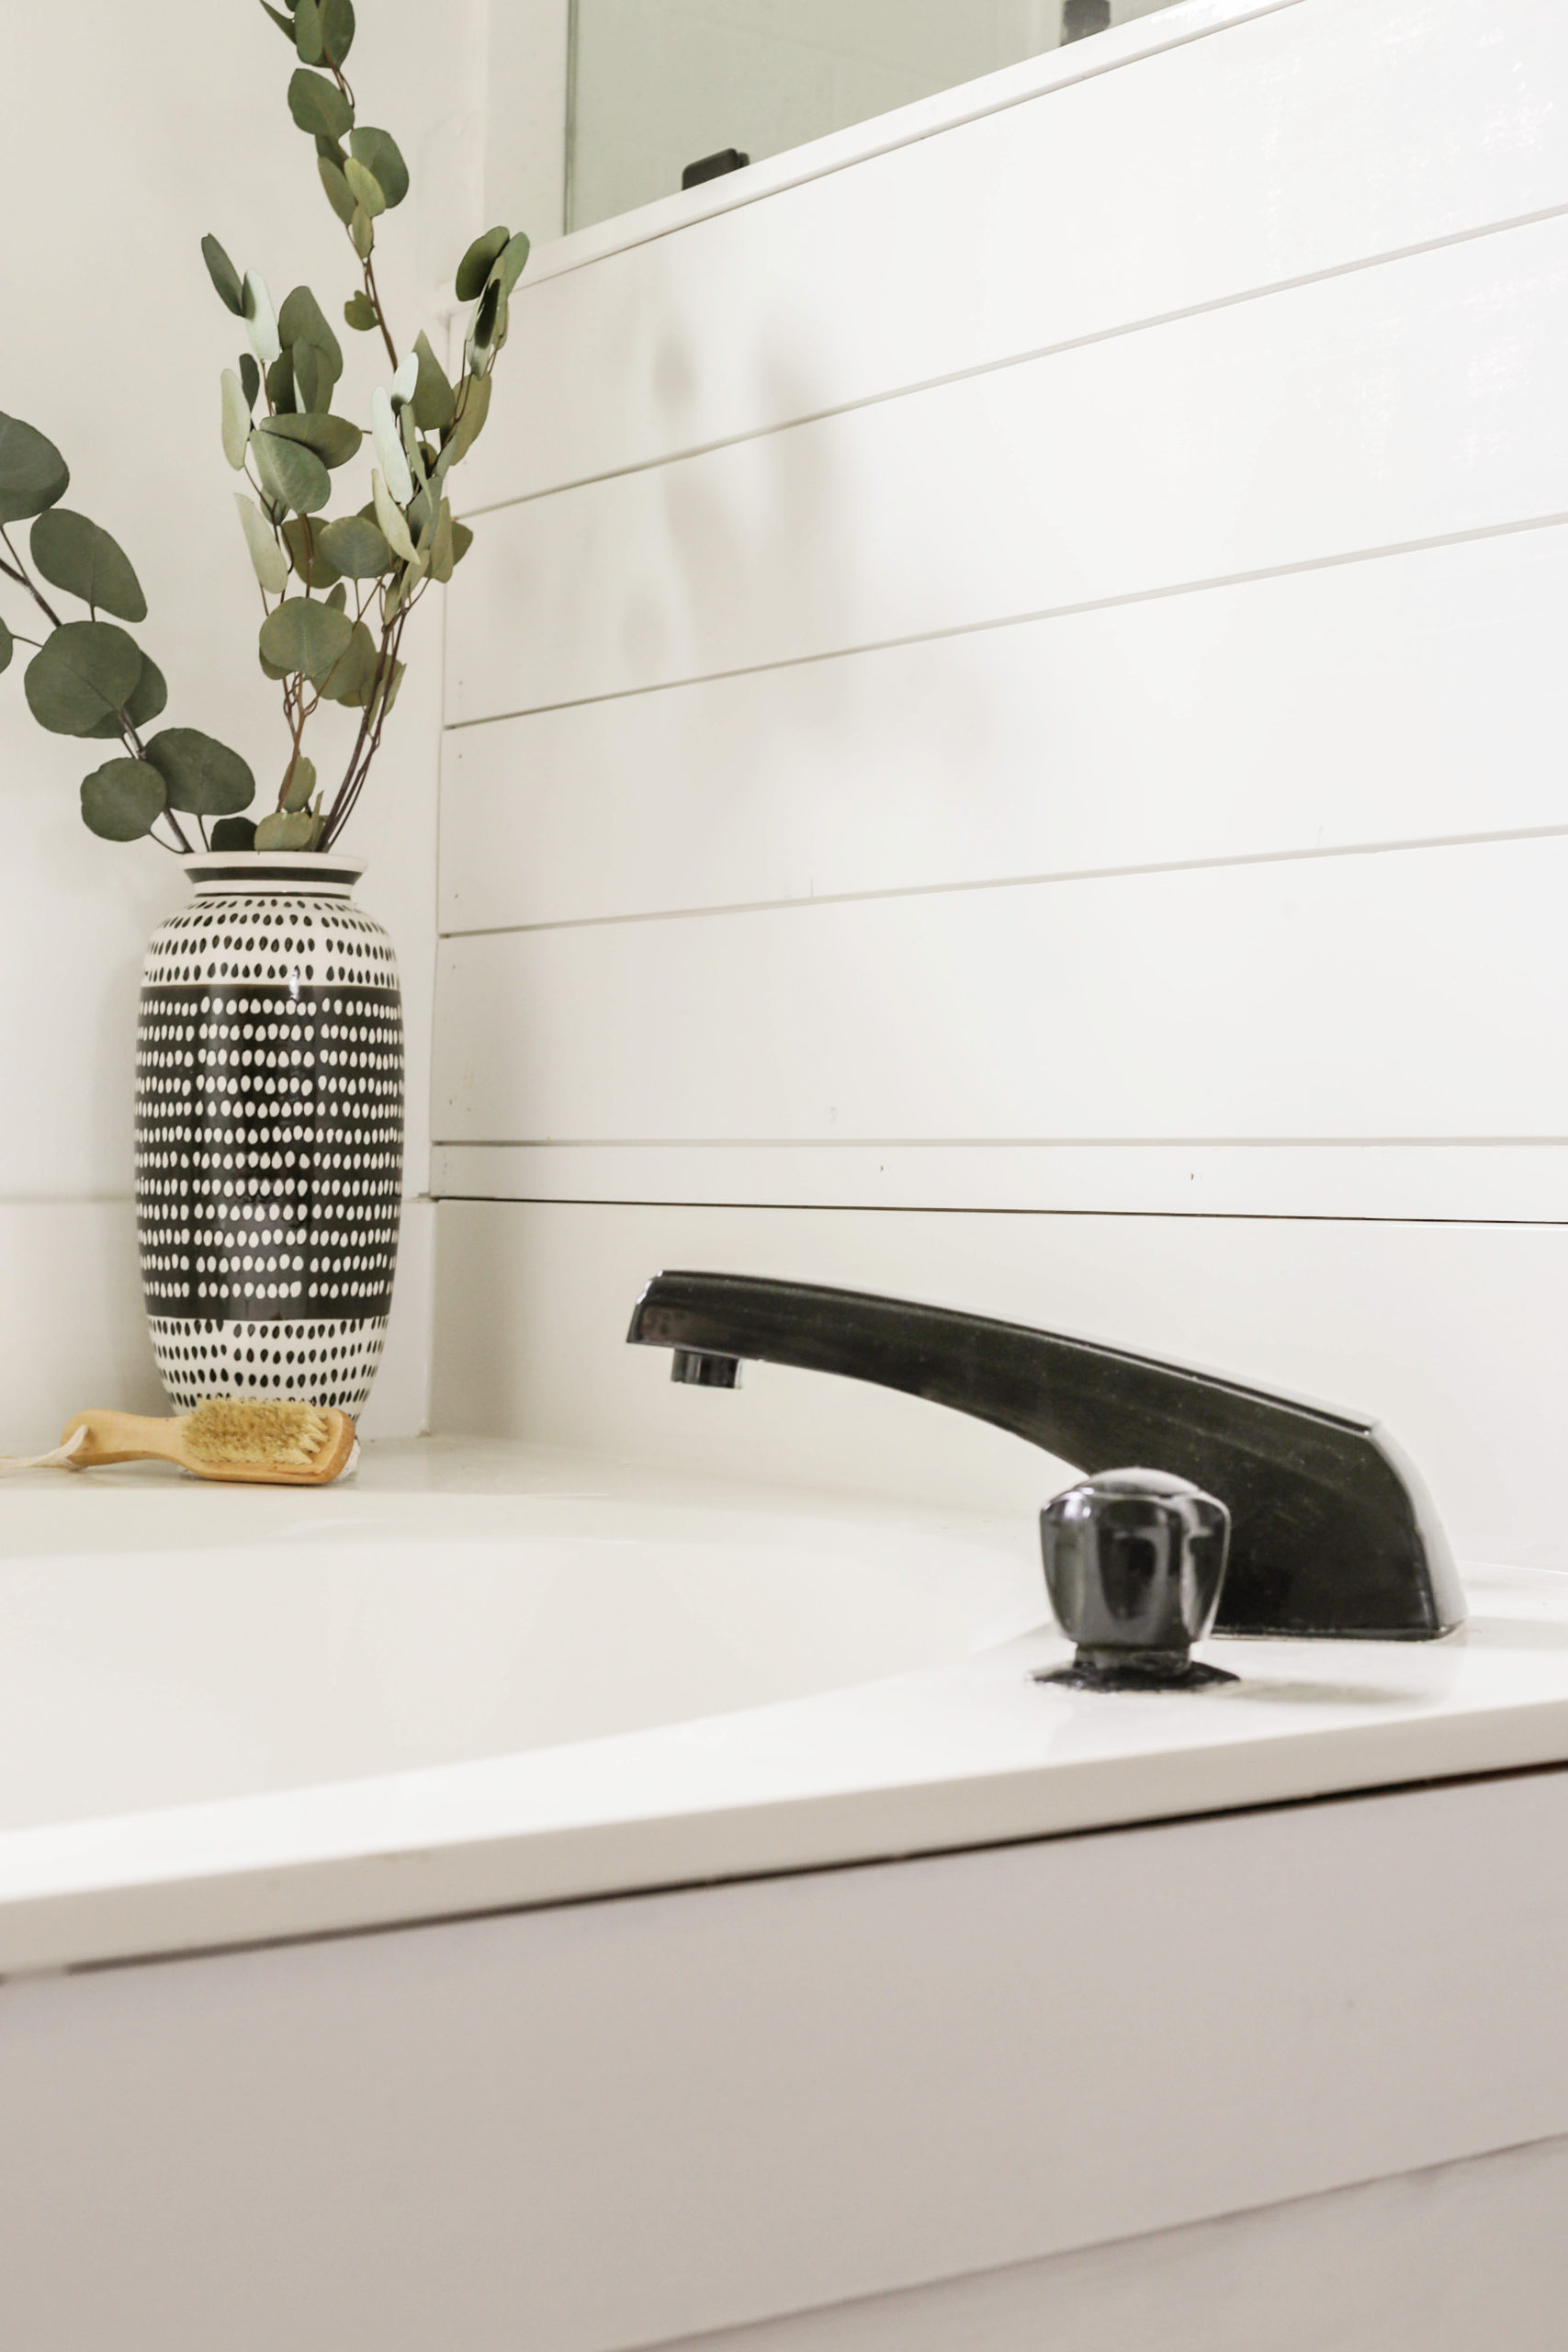
By lightly applying the matte finish with a brush, I was finally able to get the look that I originally had in mind – the matte black, modern farmhouse vibe.
Not too shabby for thirty minutes of my time and less than $15 of my cash.
If you are interested in seeing how this project has held up after a year, click here!
Thank you guys so much for tuning in! If you found this post helpful, please share it with a friend or on social media (it makes all of the difference). Thanks for supporting this small business of mine.
If you are in the process of a bathroom remodel, you may also find these posts helpful:
- How to Paint Countertops with Epoxy
- My Painted Bathtub 5 years Later
- Master Bathroom Remodel on a Budget Reveal
Now get out there and design some good vibes along with a fabulous life.


Welcome!
My journey in interior design and home improvement began with transforming my first fixer-upper home, all while managing a budget and raising two young boys. My work, a reflection of my passion for creating beautiful, uplifting spaces, has been recognized by top publications like Better Homes and Gardens Magazine, HGTV, and more. I invite you to explore my site and witness the transformation of my home and the vibes we've designed. Read more...


This looks amazing. What a great idea.
Thank you for always being such a sweetheart, Marty! I am glad I took the risk in painting these. 🙂
Yay for easy & cheap! The faucets:) I would never have thought of doing this, never. So glad you did and it turned out beautifully.
Thank you, Maria! I am pretty thrilled with the money I saved with this hack. Happy hump day!
Great job !! I love your creativity.
Thank you so much, Tammy! My budget forces my creativity. haha!
I’M GONNA DO THAT TOO! BRILLIANT! Did you also paint the drain fitting? What about the shower fixtures? Thanks for the great idea!
Thank you so much, friend. I did not paint the drain (I was feeling lazy, and figured I am probably the only one who will see it). As for the shower fixtures, we got all new plumbing for it, but I don’t see why you couldnt do the same thing for the shower. I would just wait about a week to take a shower (so that the paint fully cures). Hope this helps!
Get upscale redo! I still have these same fixtures from the 1970s in each of my 3 bathrooms showers and bath tub/shower combo. I’ve always hated them.
Thank you so much, Jeanie! You should give this paint a try. 🙂
This is great! Do you think that this would hold up in a shower?
Thank you, Robin! Yes, I think this would totally work for the shower as well. I think the key is to make sure you let it cure for a good week (not using the shower until it is fully dried and cured).