
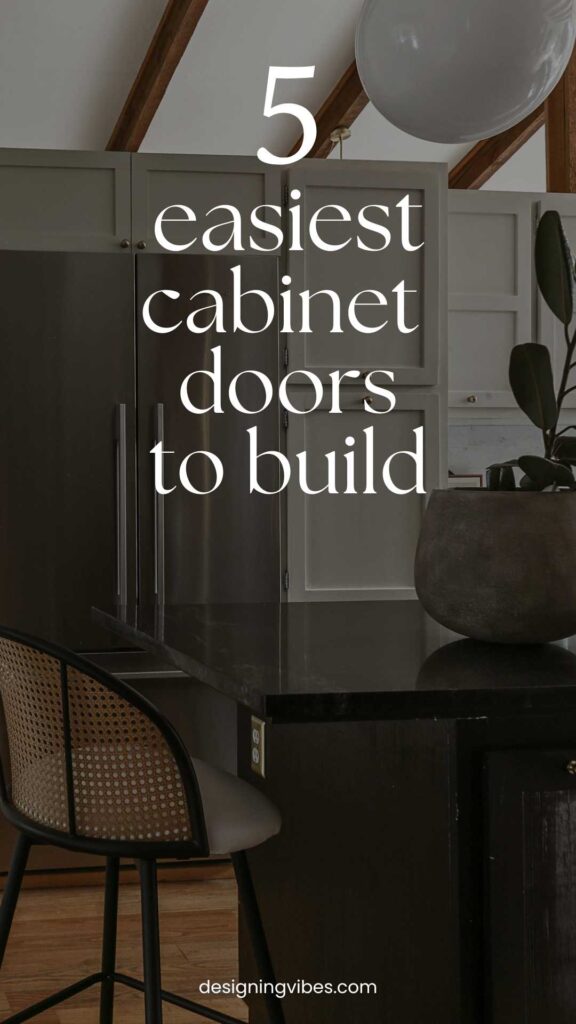
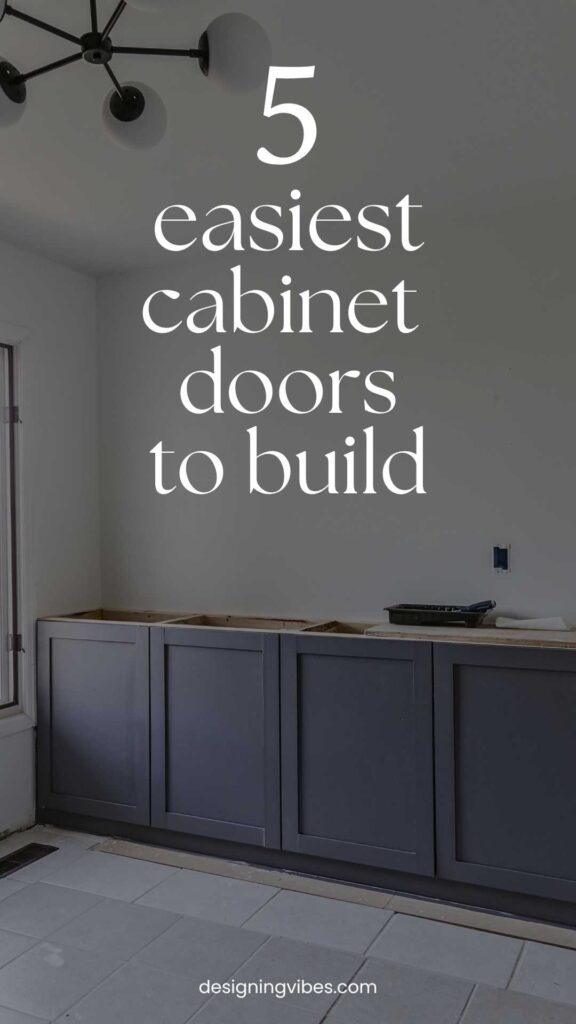
The 5 Easiest DIY Cabinet Doors to Build (No Fancy Tools Required)
Looking for easy DIY cabinet doors you can build yourself? These beginner-friendly cabinet door ideas are simple, budget-friendly, and don’t require any fancy tools...
If you’ve ever priced out new cabinetry, you already know…things get expensive real damn fast.
But as a DIY blogger who’s basically made a career out of finding the cheaper way to do things, I’m here to tell you…some of the most popular cabinet door styles are actually (relatively) simple to build yourself.
Yes…I am aware that most professionally built cabinet doors do require a router, a full-blown workshop, and some serious carpentry skills. But having used these DIY methods I am about to share with you in my own home, I can tell you… you really just need a few basic tools and a little freakin’ common sense.
So if you’re looking to upgrade your cabinets without blowing your budget, here are the easiest DIY cabinet doors you can build (no fancy tools required)…
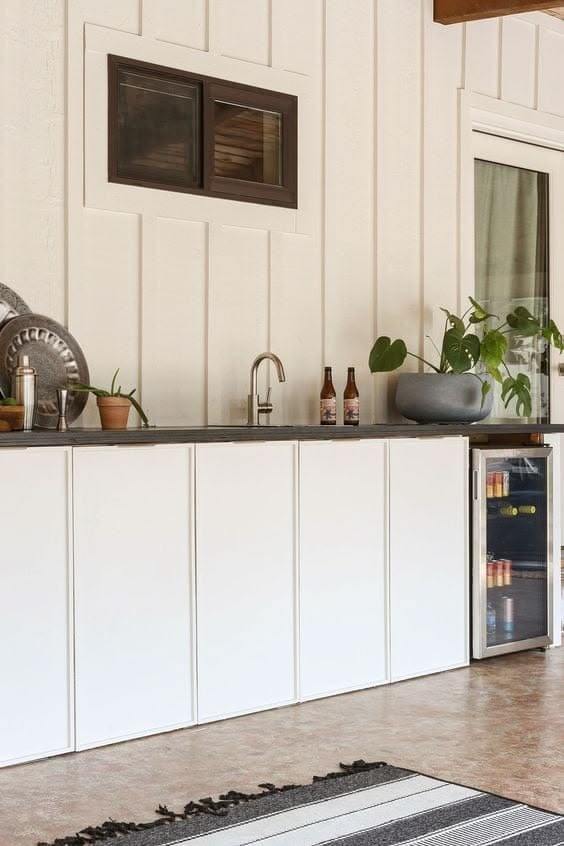
1. Slab Cabinet Doors (The Absolute Easiest Option)-
If you want something as simple as it gets (because honestly, there’s no shame in taking the easy route here), slab cabinet doors are about as straightforward as it comes.
No frames …no complicated cuts.. just a flat plywood panel cut to size!
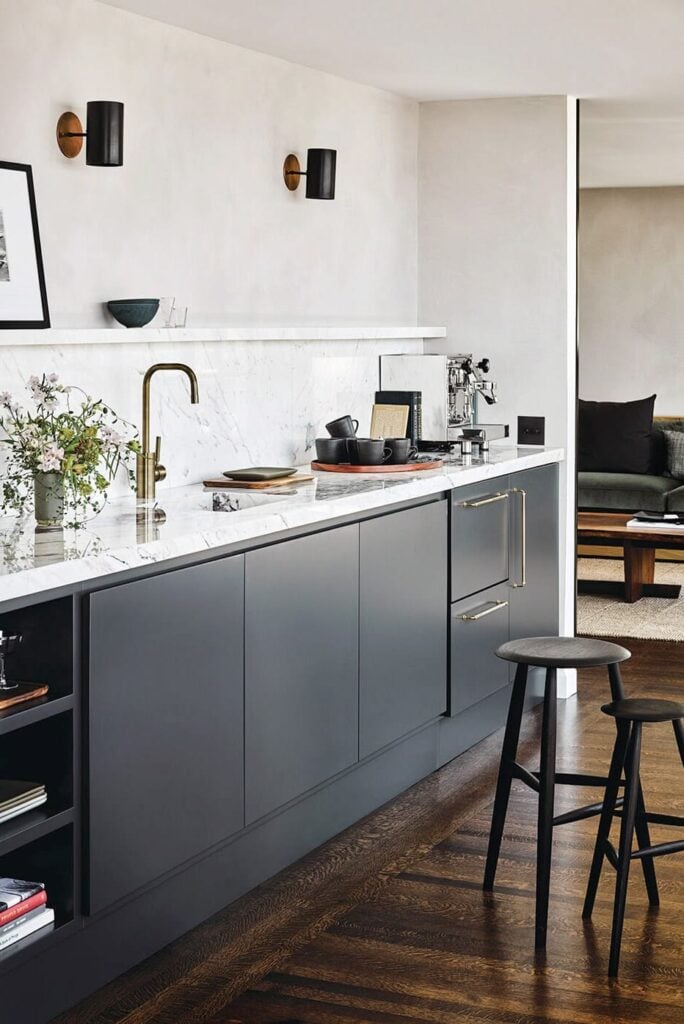
And while flat panel cabinet doors may not work for every aesthetic, this gorgeous kitchen by Catherine Kwong proves that easy does not mean any less fabulous. In fact, when styled thoughtfully with accents and paint colors, slab doors work beautifully in modern and transitional spaces.
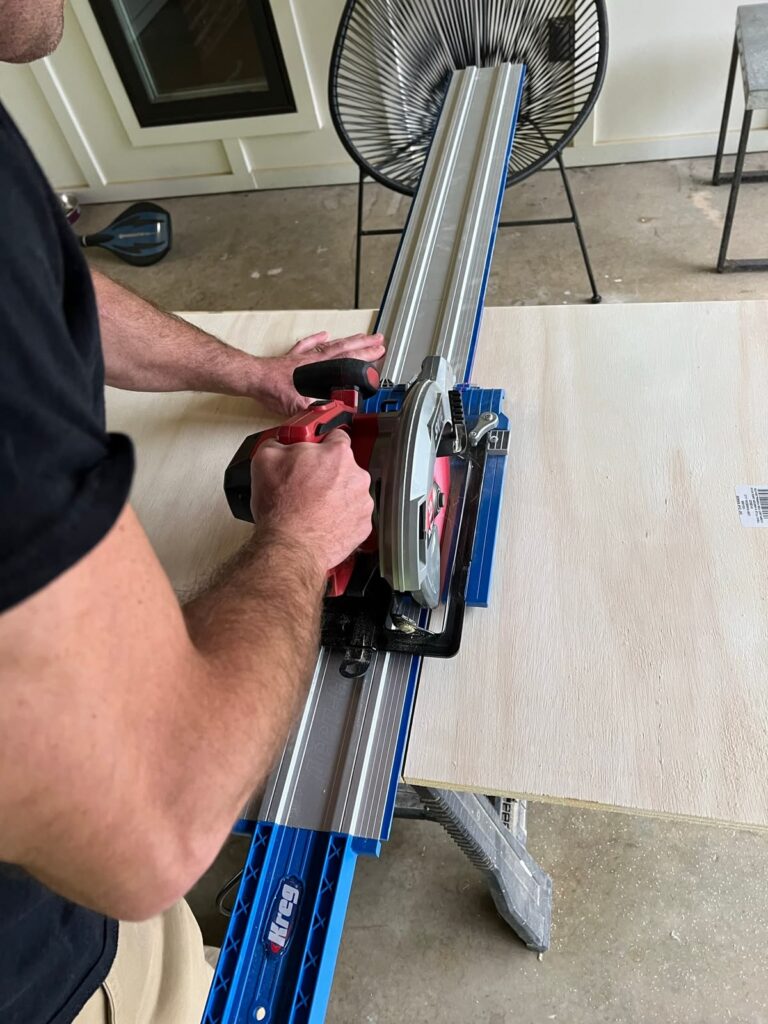
Using a circular saw on a Kreg track system (a $90 tool compared to a $600 router table), my husband quickly cut the slabs for our outdoor kitchen cabinets from plywood. We then used a Kreg concealed hinge jig to install the hinges to the box and voila! Simple as that!
2. Slim Shaker Cabinet Doors Using Trim-
After we cut the plywood panel doors and attached them to the frame of our outdoor kitchen, a lightening bolt of inspiration hit me…

Craving just a tad bit of detail (while keeping the overall design modern), I decided to play with the slim shaker cabinetry trend by adding wooden dowel rods (although you could use any trim you like) to the plywood panels.
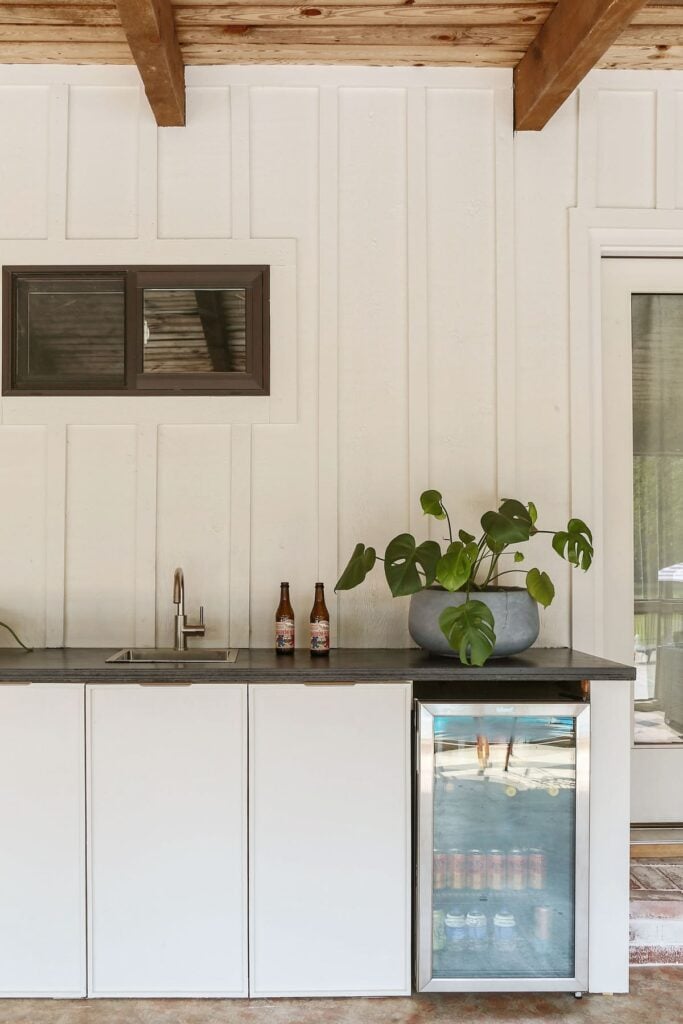
And not to toot my own horn, but I think this simple little detail elevated the feel of my DIY Outdoor Kitchen– making it truly feel custom.
Tip: While you can use wood glue and clamps to add the trim detail, I decided it would be way faster to simply use a nail gun and nail the dowel rods (from behind) right to the plywood panels (the plywood was actually thick enough to conceal any nail heads).
3. Grooved Cabinet Doors (Rustic + Budget-Friendly)-
If your aesthetic leans a little more rustic or cottage, this is where we shift gears a bit. These plank-style (v-groove) cabinet doors by Jenna Sue Design bring in warmth and texture but are still surprisingly simple to DIY.
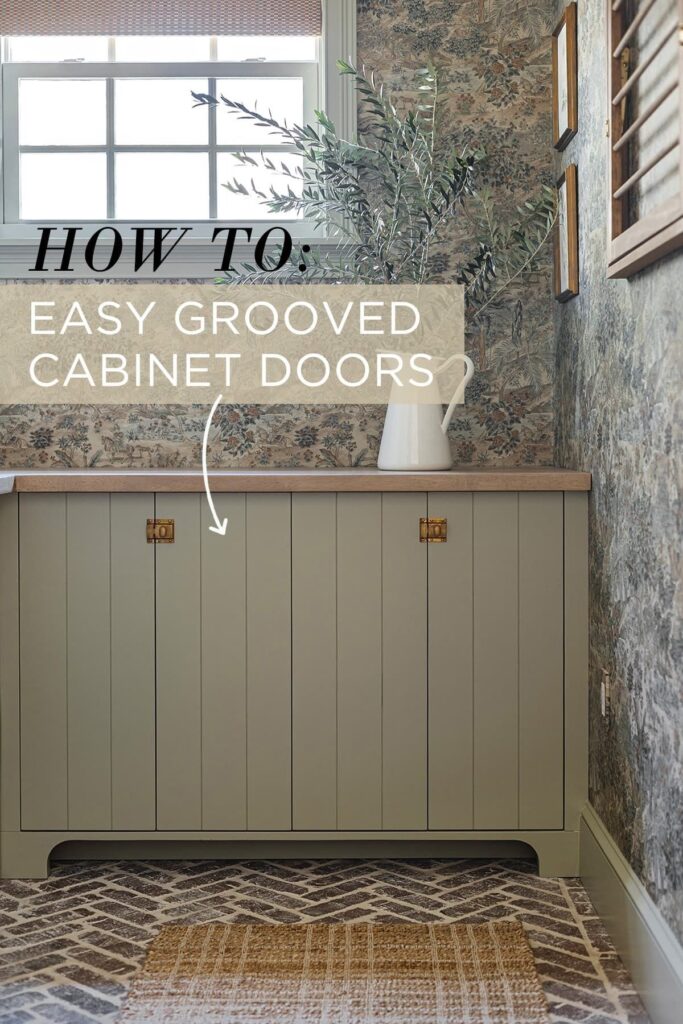
Jenna’s step-by-step tutorial (click caption) shows just how simple and cost-effective it can be to create a grooved cabinet face using nothing more than a table saw (no router needed!).
It’s one of those projects that looks way more custom (not to mention fabulous) than the effort it actually takes.
Tip: She recommends using 3/4″ MDF for this technique since it’s budget-friendly, easy to cut, and ideal for painting.
4. Traditional Shaker Cabinet Doors (Simplified Version)-
If you love that classic shaker look but don’t want to get into complicated joinery, my hubby came up with a really straightforward approach…

When it came time to frame in our refrigerator with cabinetry, we needed to match our DIY cabinets to the existing shaker style already in our kitchen. While he was looking for any excuse to buy an expensive a$$ router, I pushed for a budget-friendly solution (because I know that’s what you guys appreciate around here).
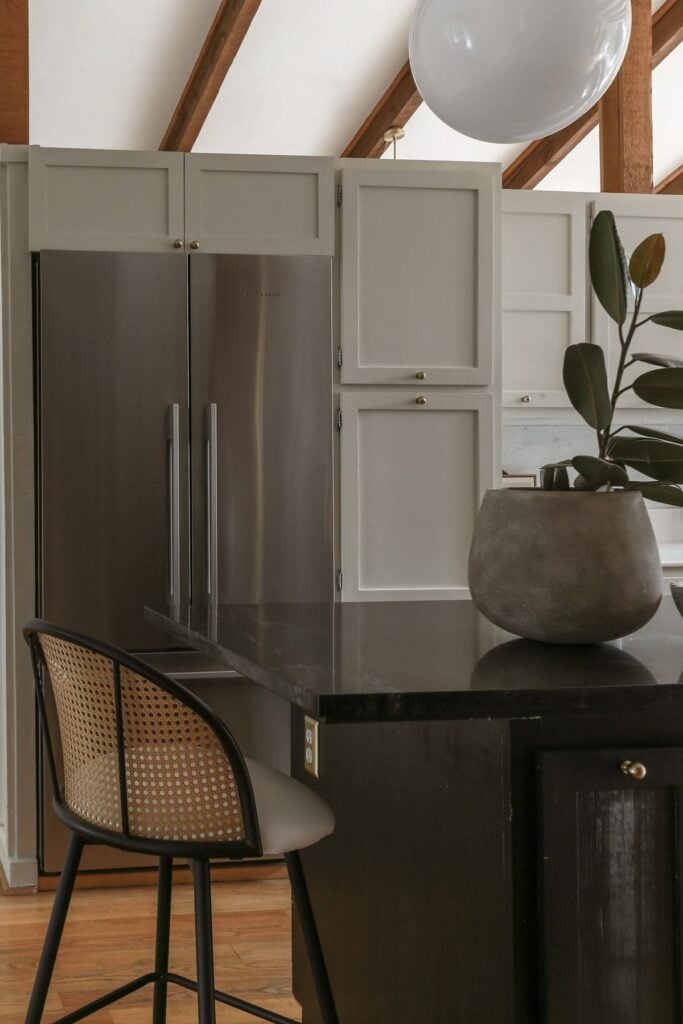
Instead of building traditional shaker doors from scratch, we used veneered plywood for the base and, with wood glue and clamps, added 1/4″ MDF to create the shaker detail (the stiles and rails).
There are no special or sophisticated cuts here, everything is very straightforward, which makes this a great option if you want that classic look without overcomplicating the process.
5. Fluted Cabinet Doors (High-End Look, Surprisingly Easy)-
If you want something that feels a little more custom or designer, fluted cabinet doors are such a fabulous option.
I’m absolutely loving this version from Jenna Sue Design. While she used Semihandmade doors on Ikea cabinets as her base, this same technique can easily be applied to a simple plywood panel or even a shaker-style door….
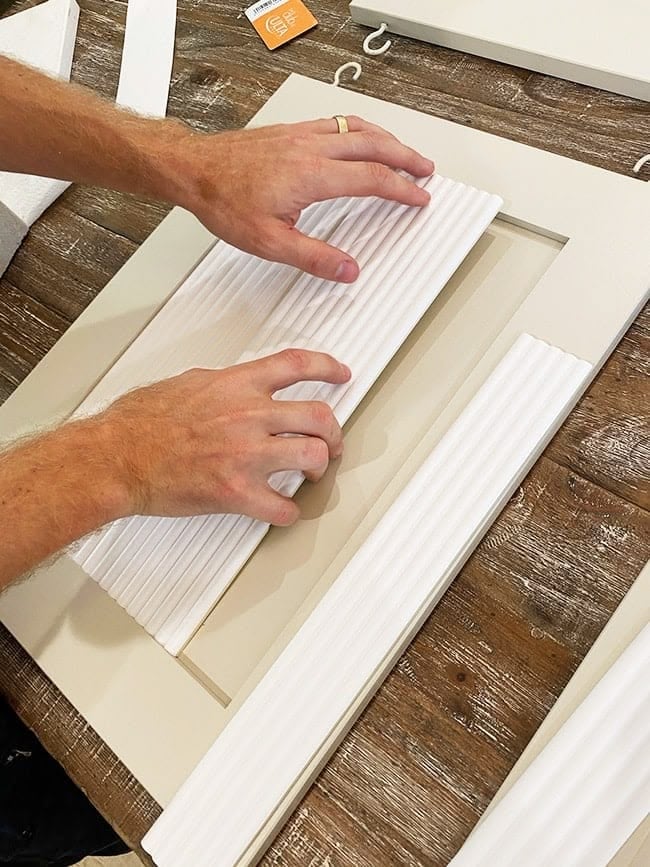
The magic is in the fluted trim. Once cut to size and dry fit inside the center panel, she used liquid nails to attach each piece. The trim is super lightweight, which makes the whole process way easier than it looks.
While this technique is probably the priciest on the list, that detail is freakin’ everything. I cannot wait to find the right place in my home to give this technique a go .
At the end of the day, you don’t need a full workshop or a huge budget to upgrade your cabinetry situation. A little creativity and a few basic tools can go a looong way.
Thank you so much for stopping by this week and spending some time with me! I hope this post inspires you to try building cabinet doors of your own. 🙂
If you found this post helpful, it would mean the world to this small business of mine if you could share with a friend or “Pin” on Pinterest…
Until next time, keep on designing a life that feels as good as it looks!


Welcome!
My journey in interior design and home improvement began with transforming my first fixer-upper home, all while managing a budget and raising two young boys. My work, a reflection of my passion for creating beautiful, uplifting spaces, has been recognized by top publications like Better Homes and Gardens Magazine, HGTV, and more. I invite you to explore my site and witness the transformation of my home and the vibes we've designed. Read more...


All of your cabinet doors are gorgeous and look professionally built. Most of us (the couple who live at this home), are looking for budget options and appreciate your help and suggestions.
Have a wonderful Easter weekend with your family!
Thank you so much for always being a ray of sunshine with your kind words, Donna! Wishing you and yours a fabulous Easter weekend as well. 🙂