
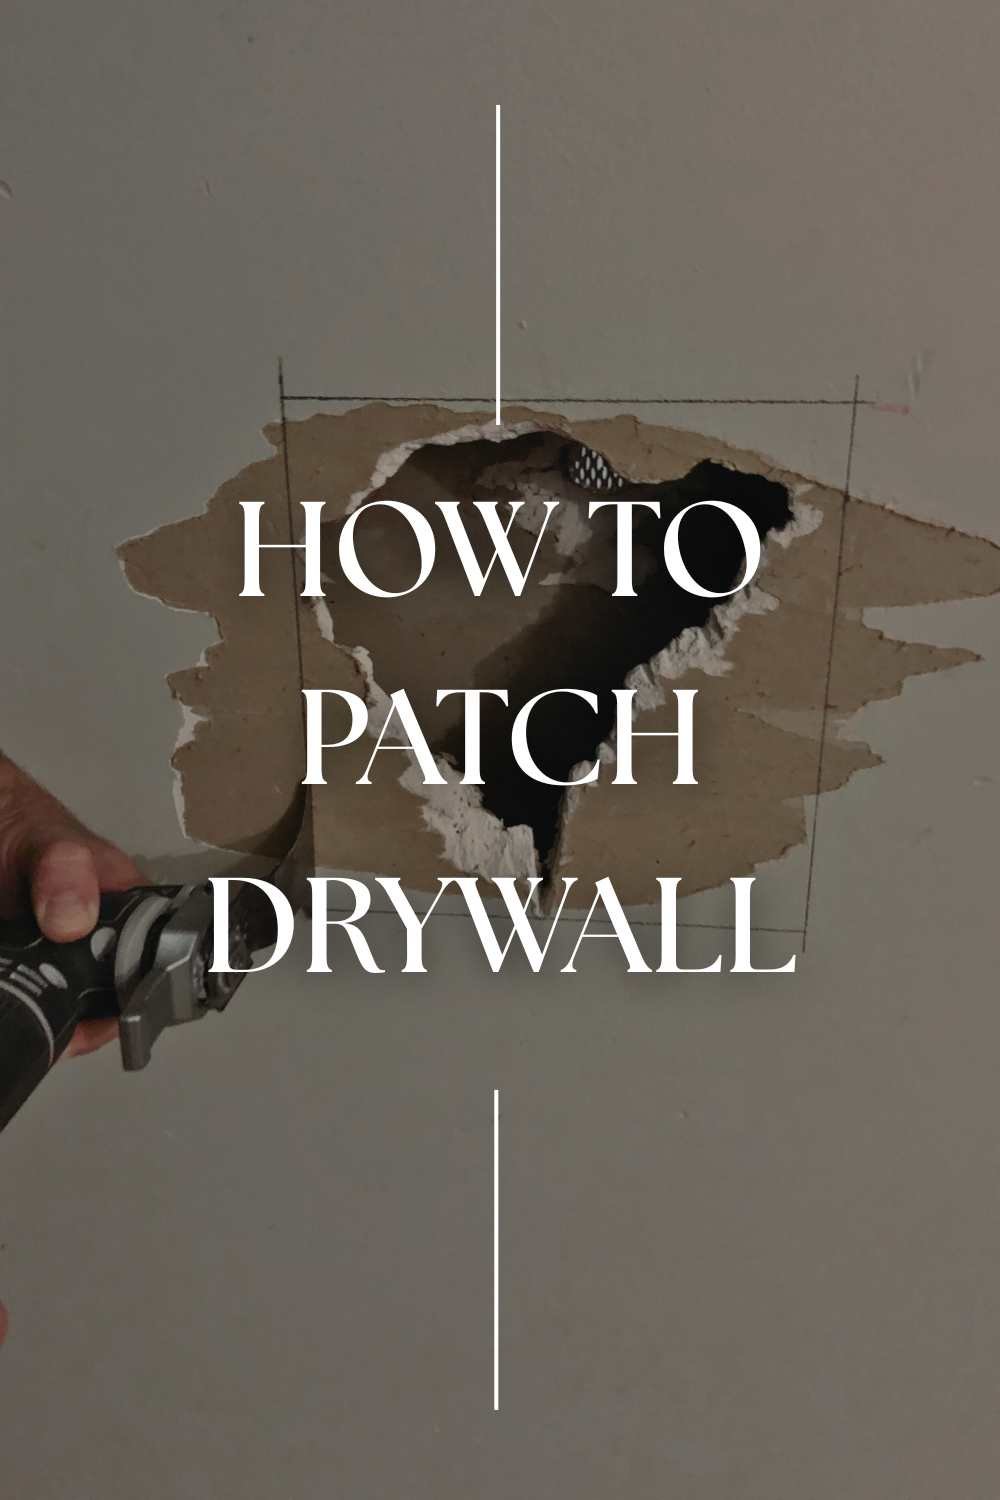
How to Patch a Sheetrock Hole Like a Pro (Fast, Easy DIY)
Sick of staring at that ugly a$$ hole in your wall? Learn how to patch drywall like a pro with this fast and easy DIY tutorial.
While I can’t wait for the day I have the budget to bring you more sexy, jaw-dropping projects again, this leaner season of home ownership (and life in general) is actually giving me the chance to finally share some of the more mundane (yet helpful AF) tutorials I totally skipped back when the renovation money was flowing a little more freely.
Today’s tutorial was actually inspired by a reader who reached out to me a few days ago asking how to finish a drywall patch job. I swore I had already published this one, but turns out, it never actually made it to the blog. Luckily, I still had the photos from years ago when I was prepping my old fixer-upper to sell.
So…fair warning: the pics aren’t quite up to my usual standards (this was back in the days of old-school tech and questionable lighting setups), but they will still serve their purpose as a helpful visual for you to follow along with…
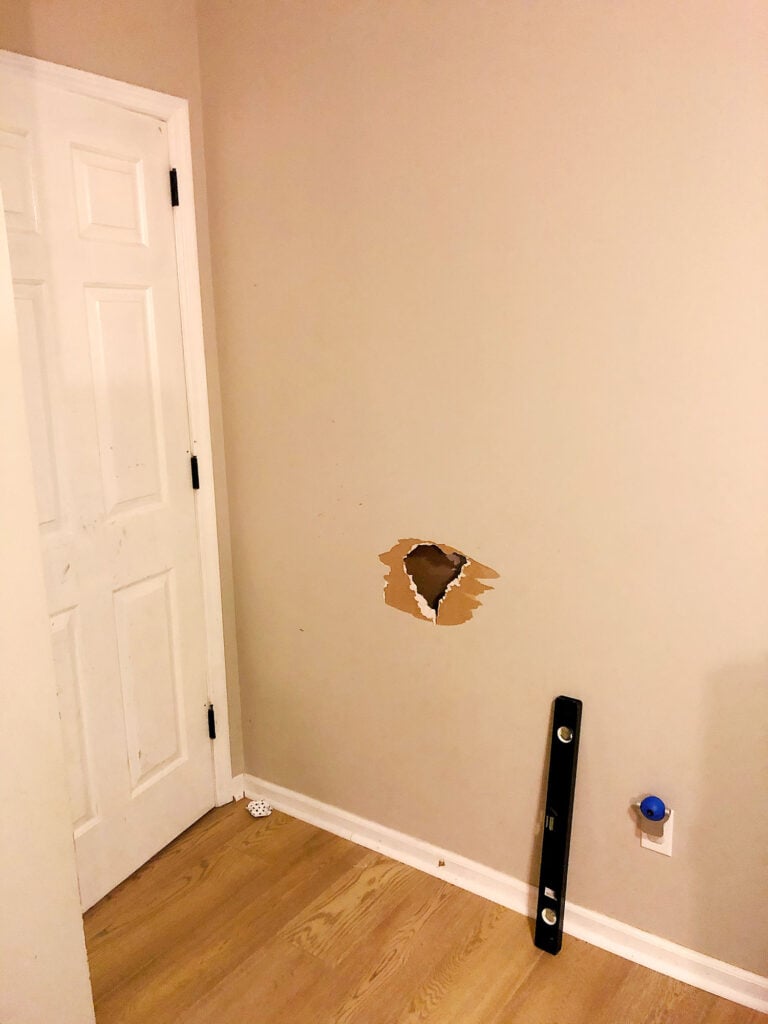
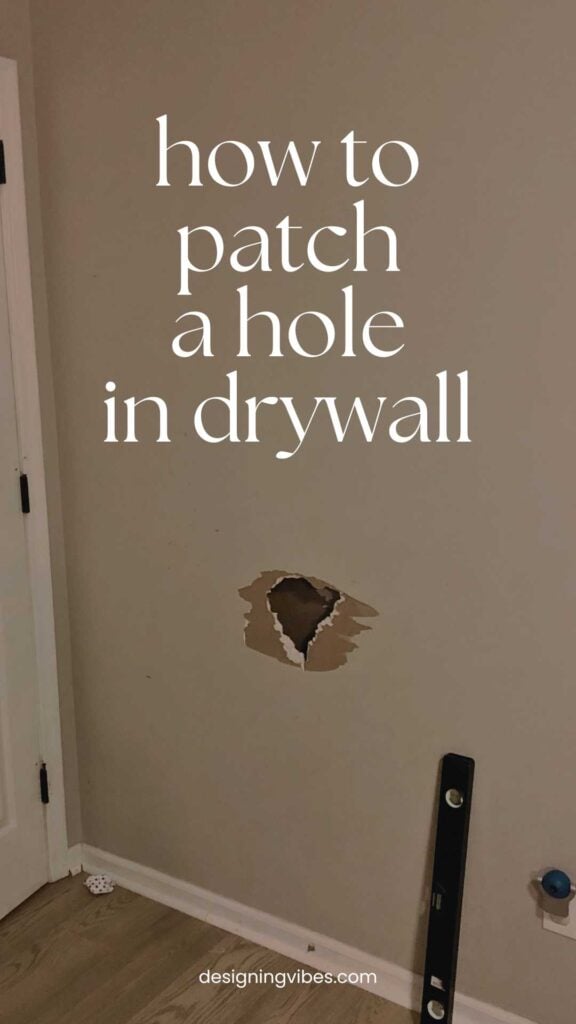
This particular hole happened in my son’s room- one of those annoying drywall injuries that came from not having a door stopper (wish I could say it was something more rock and roll than that). Nonetheless, over time, the door handle just beat the ever-loving sh*t out of the sheetrock. And when we decided to list the house, patching it finally made its way to the top of our to-do list. Let me show you how my husband fixed it…
How to Patch a Hole in Drywall: Step-by-Step Instructions
Materials Needed:
- Level
- Utility knife
- Drywall panel (2’x2′)
- Drywall screws
- Oscillating saw & blade
- Driver (for screwing in drywall screws)
- Drywall joint compound
- Sanding screen
- 1×2 stock or furring strips
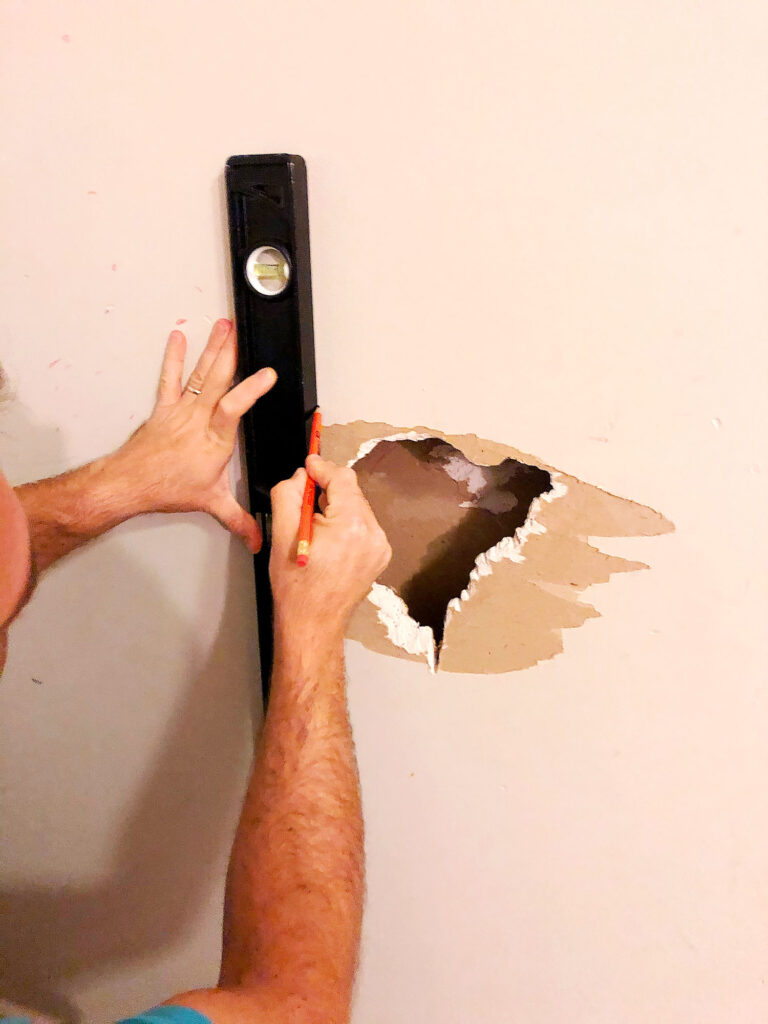
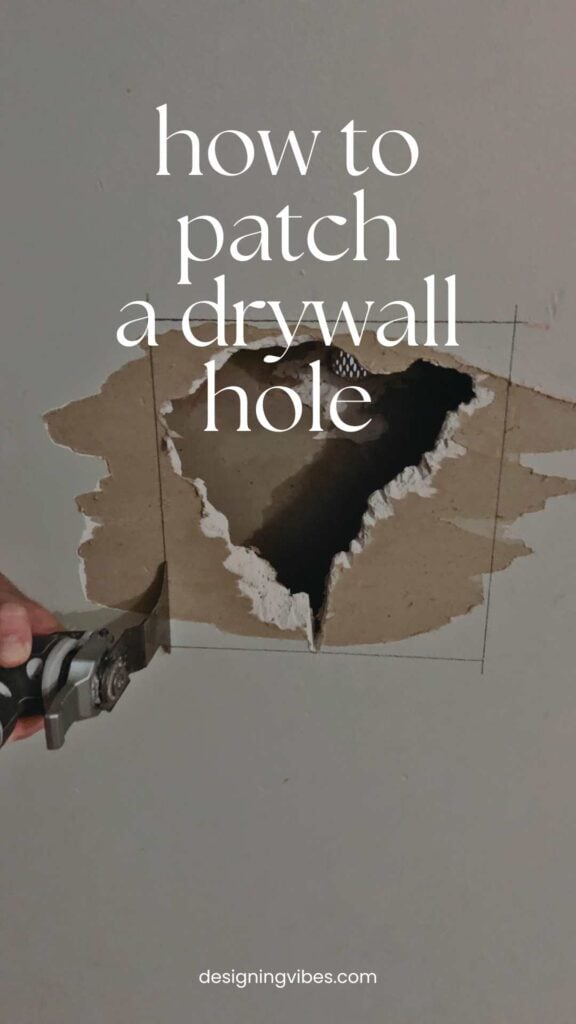
(Step 1). Using a level, trace a square or rectangle around the hole. This allows for a perfect fit patch to be cut from the drywall stock.
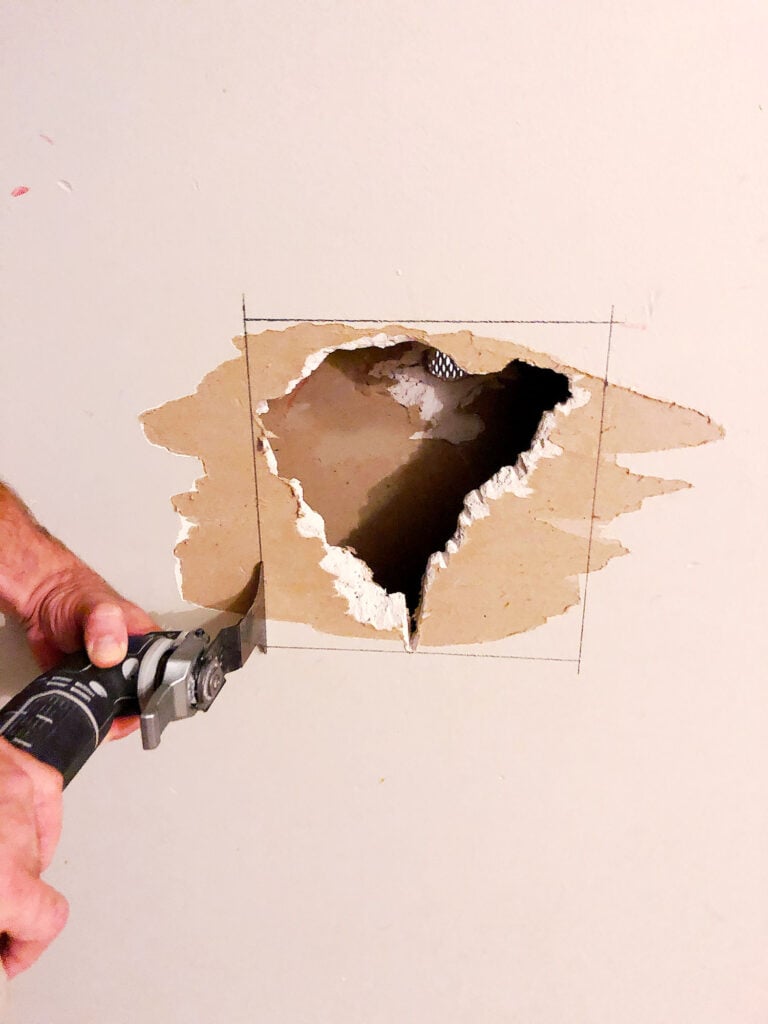
(Step 2). Using an oscillating saw, cut on traced line.

(Step 3). Using 1×2 stock (you can use furring strips), cut the stock about 4” taller than the trimmed out hole.
(Step 4). Insert 1×2 behind the drywall (smaller patches will need one and larger holes will need two). Then, attach 1×2 with drywall screws (one at each end).
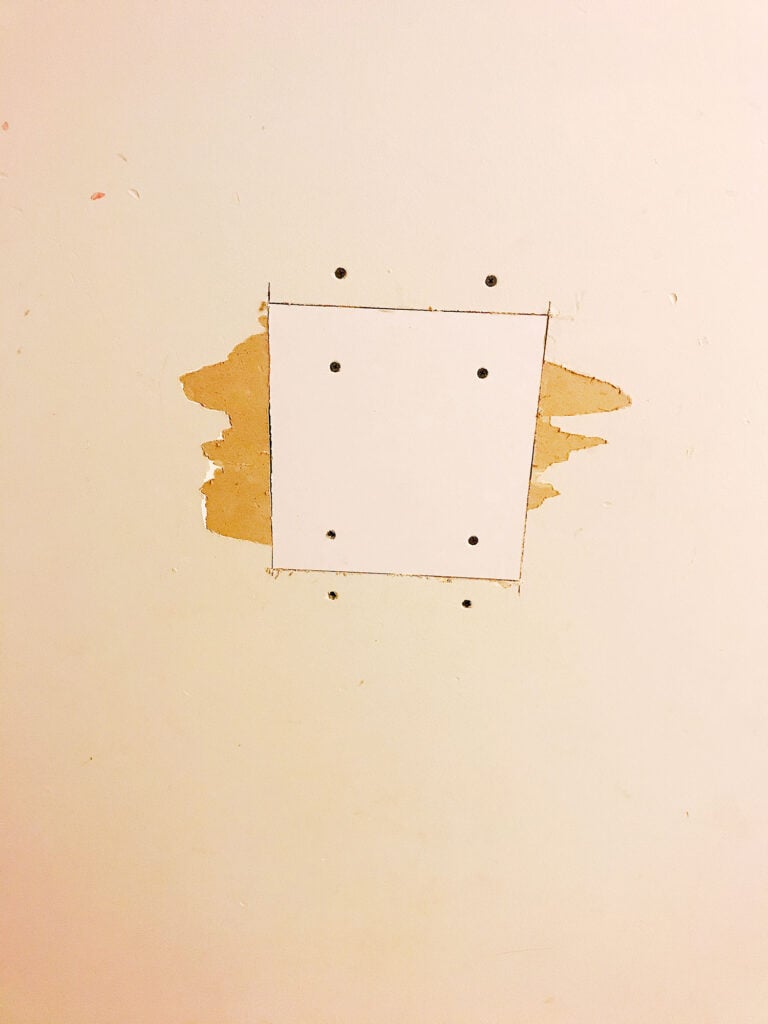
(Step 5). Cut drywall patch the same dimensions as the hole by scoring the drywall backside first (using a utility knife) then “break” the drywall at the score line so it makes a 90 degree angle. Now score the inside of the 90 degree angle and that will give a clean edge on the patch.
(Step 6). Attach the patch using drywall screws to the 1×2(s).
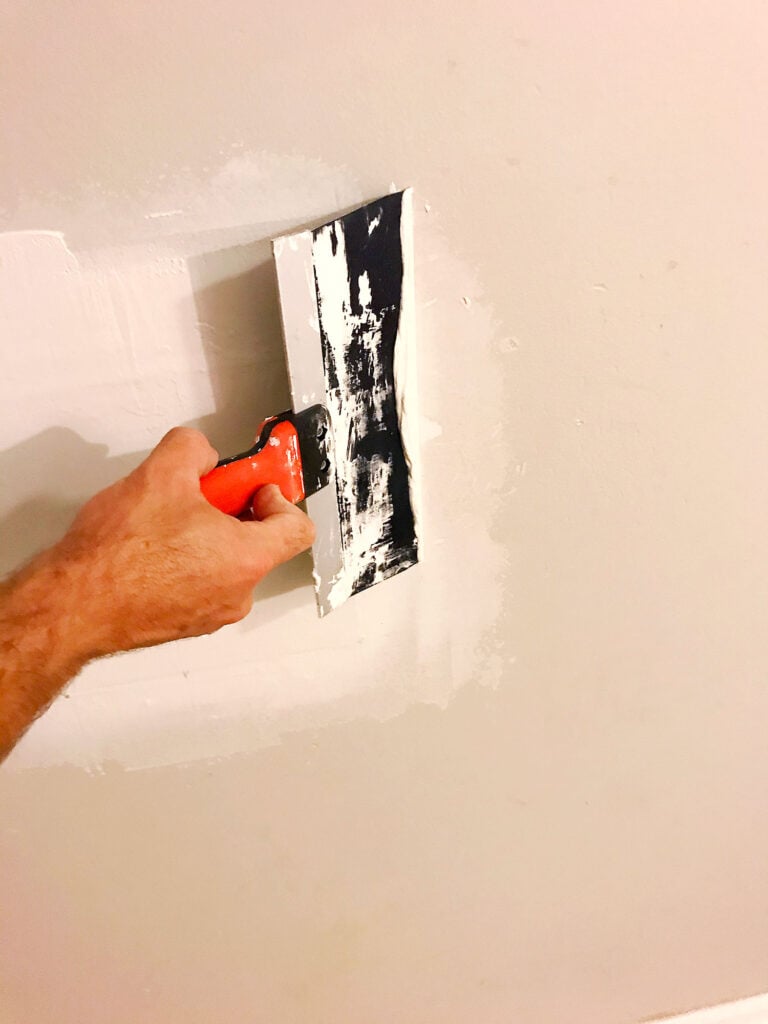
(Step 7). Apply drywall joint compound to the seams around the patch and allow to dry.
(Step 8). Sand joint compound using a sanding screen or block. Start with 120 grit and progressively sand with a finer grit usually finishing with 220 grit.
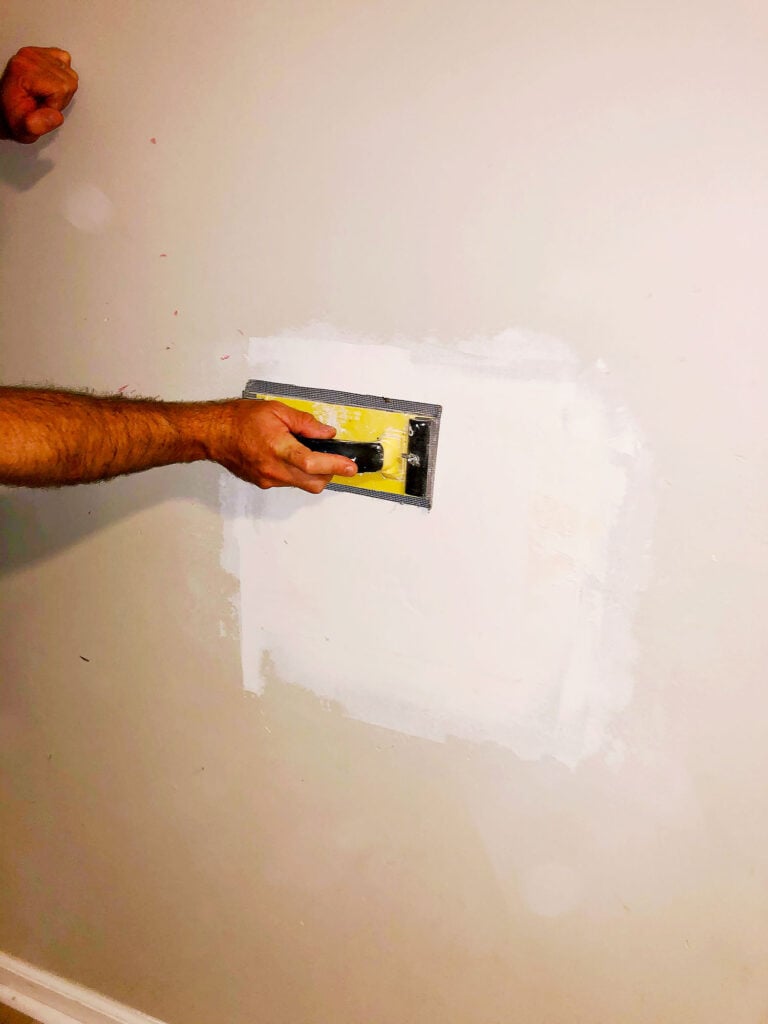
(Step 9). Once you have reached your desired smoothness, apply touch-up paint to blend with your walls.
Unfortunately I never got around to taking a picture of the painted/finished wall, so you are just going to have to take my word that it all eventually blended…sorry about that!
At the very least, I hope this tutorial was proof that even the boring DIYs can be not only transformative but empowering. No need to call a handyman- you freakin’ got this, sis!
Thank you so much for stopping by and spending some time with me this week! If there is a topic you would like me to cover here on the blog, please let me know! Also, if you found this post helpful, it would mean the world to me if you could share it with a friend or “pin it” on Pinterest. Thank you so much for your support. 🙂
Until next time, keep on designing a life that feels as good as it looks!


Welcome!
My journey in interior design and home improvement began with transforming my first fixer-upper home, all while managing a budget and raising two young boys. My work, a reflection of my passion for creating beautiful, uplifting spaces, has been recognized by top publications like Better Homes and Gardens Magazine, HGTV, and more. I invite you to explore my site and witness the transformation of my home and the vibes we've designed. Read more...


Erica- that is a skill we all need, thanks for sharing a basic how-to. Who knew how valuable a $5 door stop was? Usually moms, that’s who!! Enjoy the rest of your week!!
Now that is the truth. haha! Have a wonderful rest of your week, friend. 🙂