
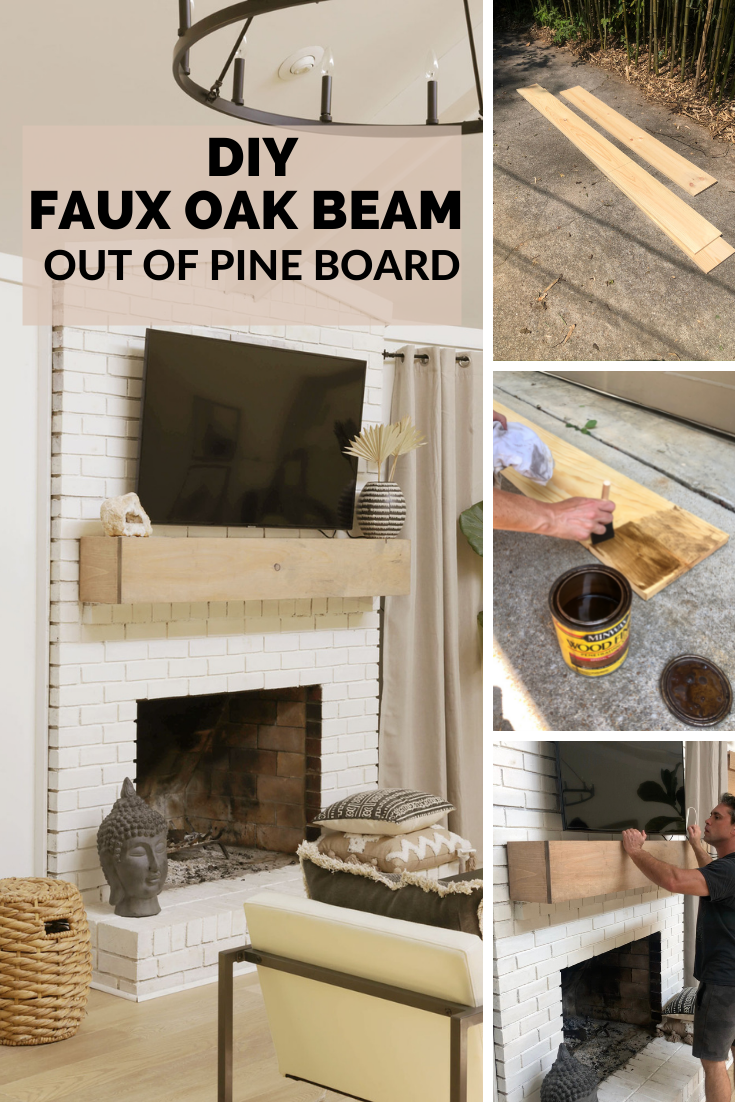
DIY Faux Oak Beams on the Cheap

Love the look of weathered oak beams, but don’t have an arm and a leg to spend? Today, I am sharing how to make a cheaper alternative (pine) look like oak in just a few simple steps.
Years and years ago, my husband and I built a wood beam mantel for our dated, brick fireplace. (You can read that tutorial here).
Requiring less than two hours of our time and only about $40 (pre- inflation era), we were able to make cheap pine board look like reclaimed wood.
To give some perspective, here is what our fireplace looked like when we moved in…

As noted in the photo above, you can see that at this time, our flooring was different. As a result, I had originally went with a darker stain for the wood mantel.
However, once we installed our engineered oak flooring last summer, our darker mantel began to drive me crazy…

Nothing wrong with dark walnut, but the brighter, weathered oak is simply more my vibe.
While the look of true reclaimed oak beams make my heart skip a beat, given we don’t plan on staying here much longer, I simply refuse to make such an investment. And so…
I begrudgingly lived with the walnut stain until I could no longer effing take it!
And guess what? …
This Labor Day weekend was finally my breaking point, friends!
Given the mantel was such a cheap and simple project to complete, we decided to just rebuild the mantel in the same fashion (and the same material), but stain the budget-friendly pine to look like oak (instead of walnut).
After much experimentation with the stain (I was sure to practice on test boards using various combinations of stains), I am pretty satisfied with how this particular oak stain combo turned out..
So let me show you how I stained the pine boards to look like oak.
If you would like to see how to actually build a faux beam out of pine, be sure to click here for that separate tutorial.
*For your shopping convenience, I have included affiliate links. As an Amazon and RewardStyle Associate I earn from qualifying purchases. *
How To Stain Pine to Look Like Oak:
Faux Oak Beams Materials Needed:
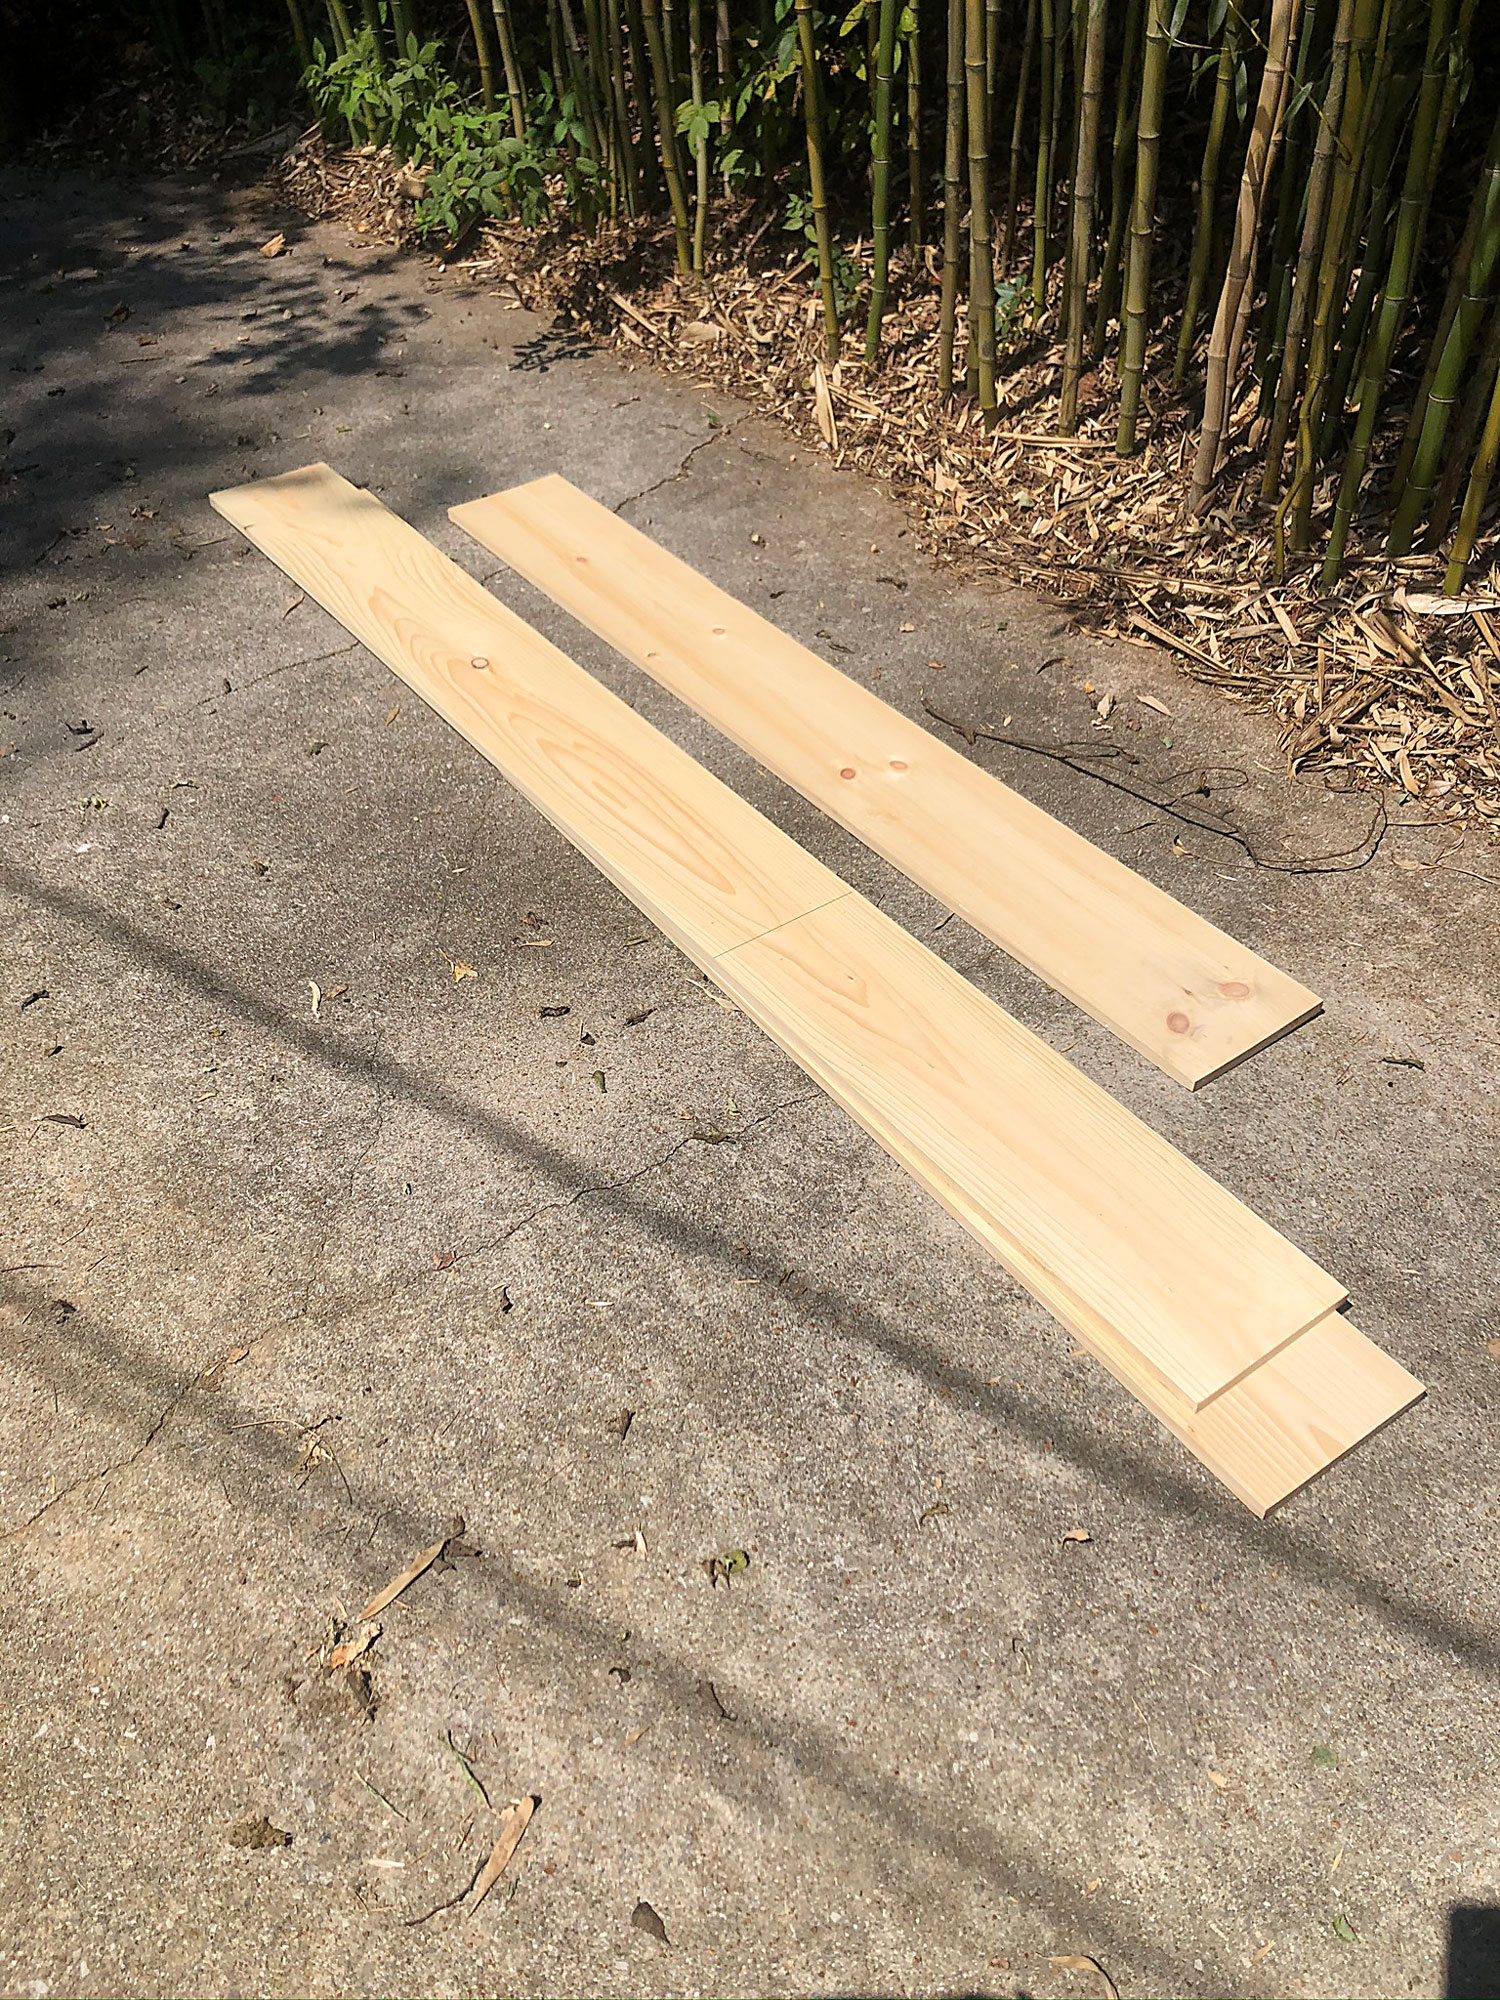
- pine board (be sure to have some scrap pieces for testing)
- pre-stain wood conditioner (I used this one)
- rags
- foam paint brushes
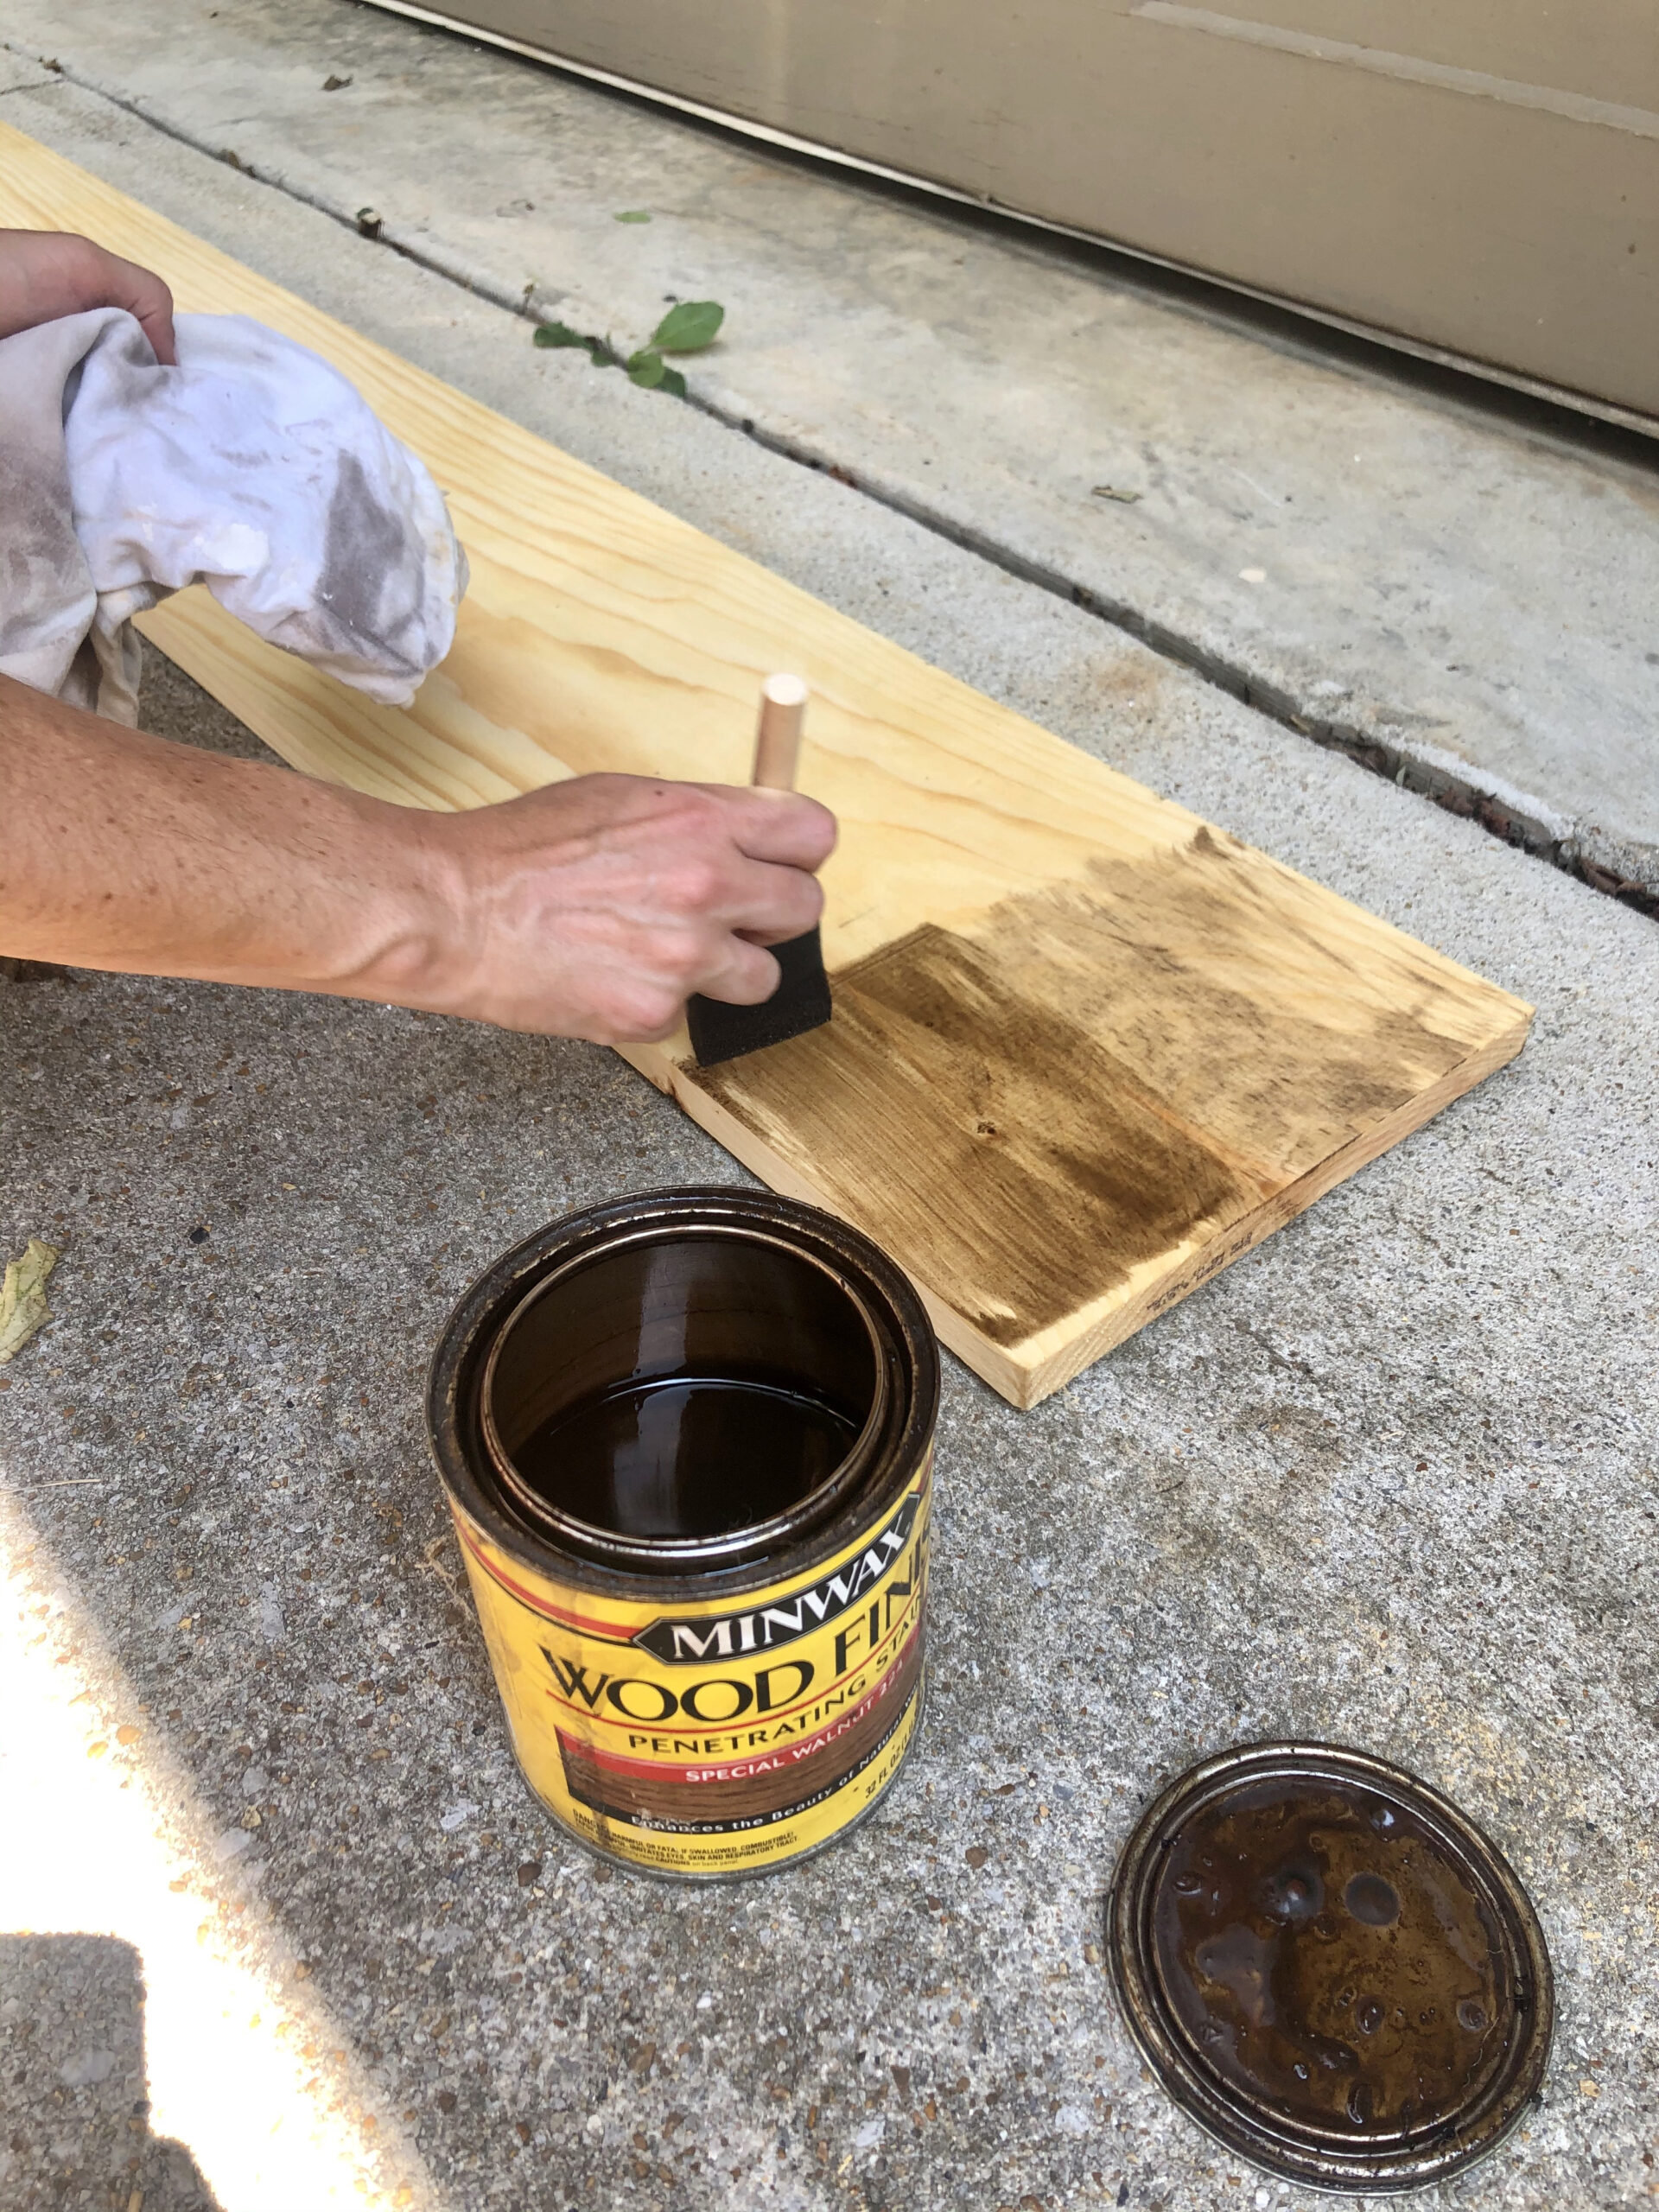
- Special Walnut Stain (click here for the exact stain I used)
- Weathered Oak Stain (optional)
- a sample of light grey paint ( I used SW Argos)
- water
- mixing cup
(Step 1). Lightly sand your pine board and wipe off any dust. Also, if you would like to distress your boards, now would be the time to do so. I decided not to f**k with it.
(Step 2). Apply pre-stain wood conditioner on boards and allow to dry for at least 20 minutes. The pre-stain prevents the stain from looking blotchy, so I would not skip this step!
(Step 3). Once wood conditioner has dried, using your foam brush and a very light touch, apply Special Walnut stain. Then, quickly come back through with your rag and wipe off the stain.
Note: So that you don’t get too dark of a finish, be sure to work in small sections. Work fast and only apply a very light coat.
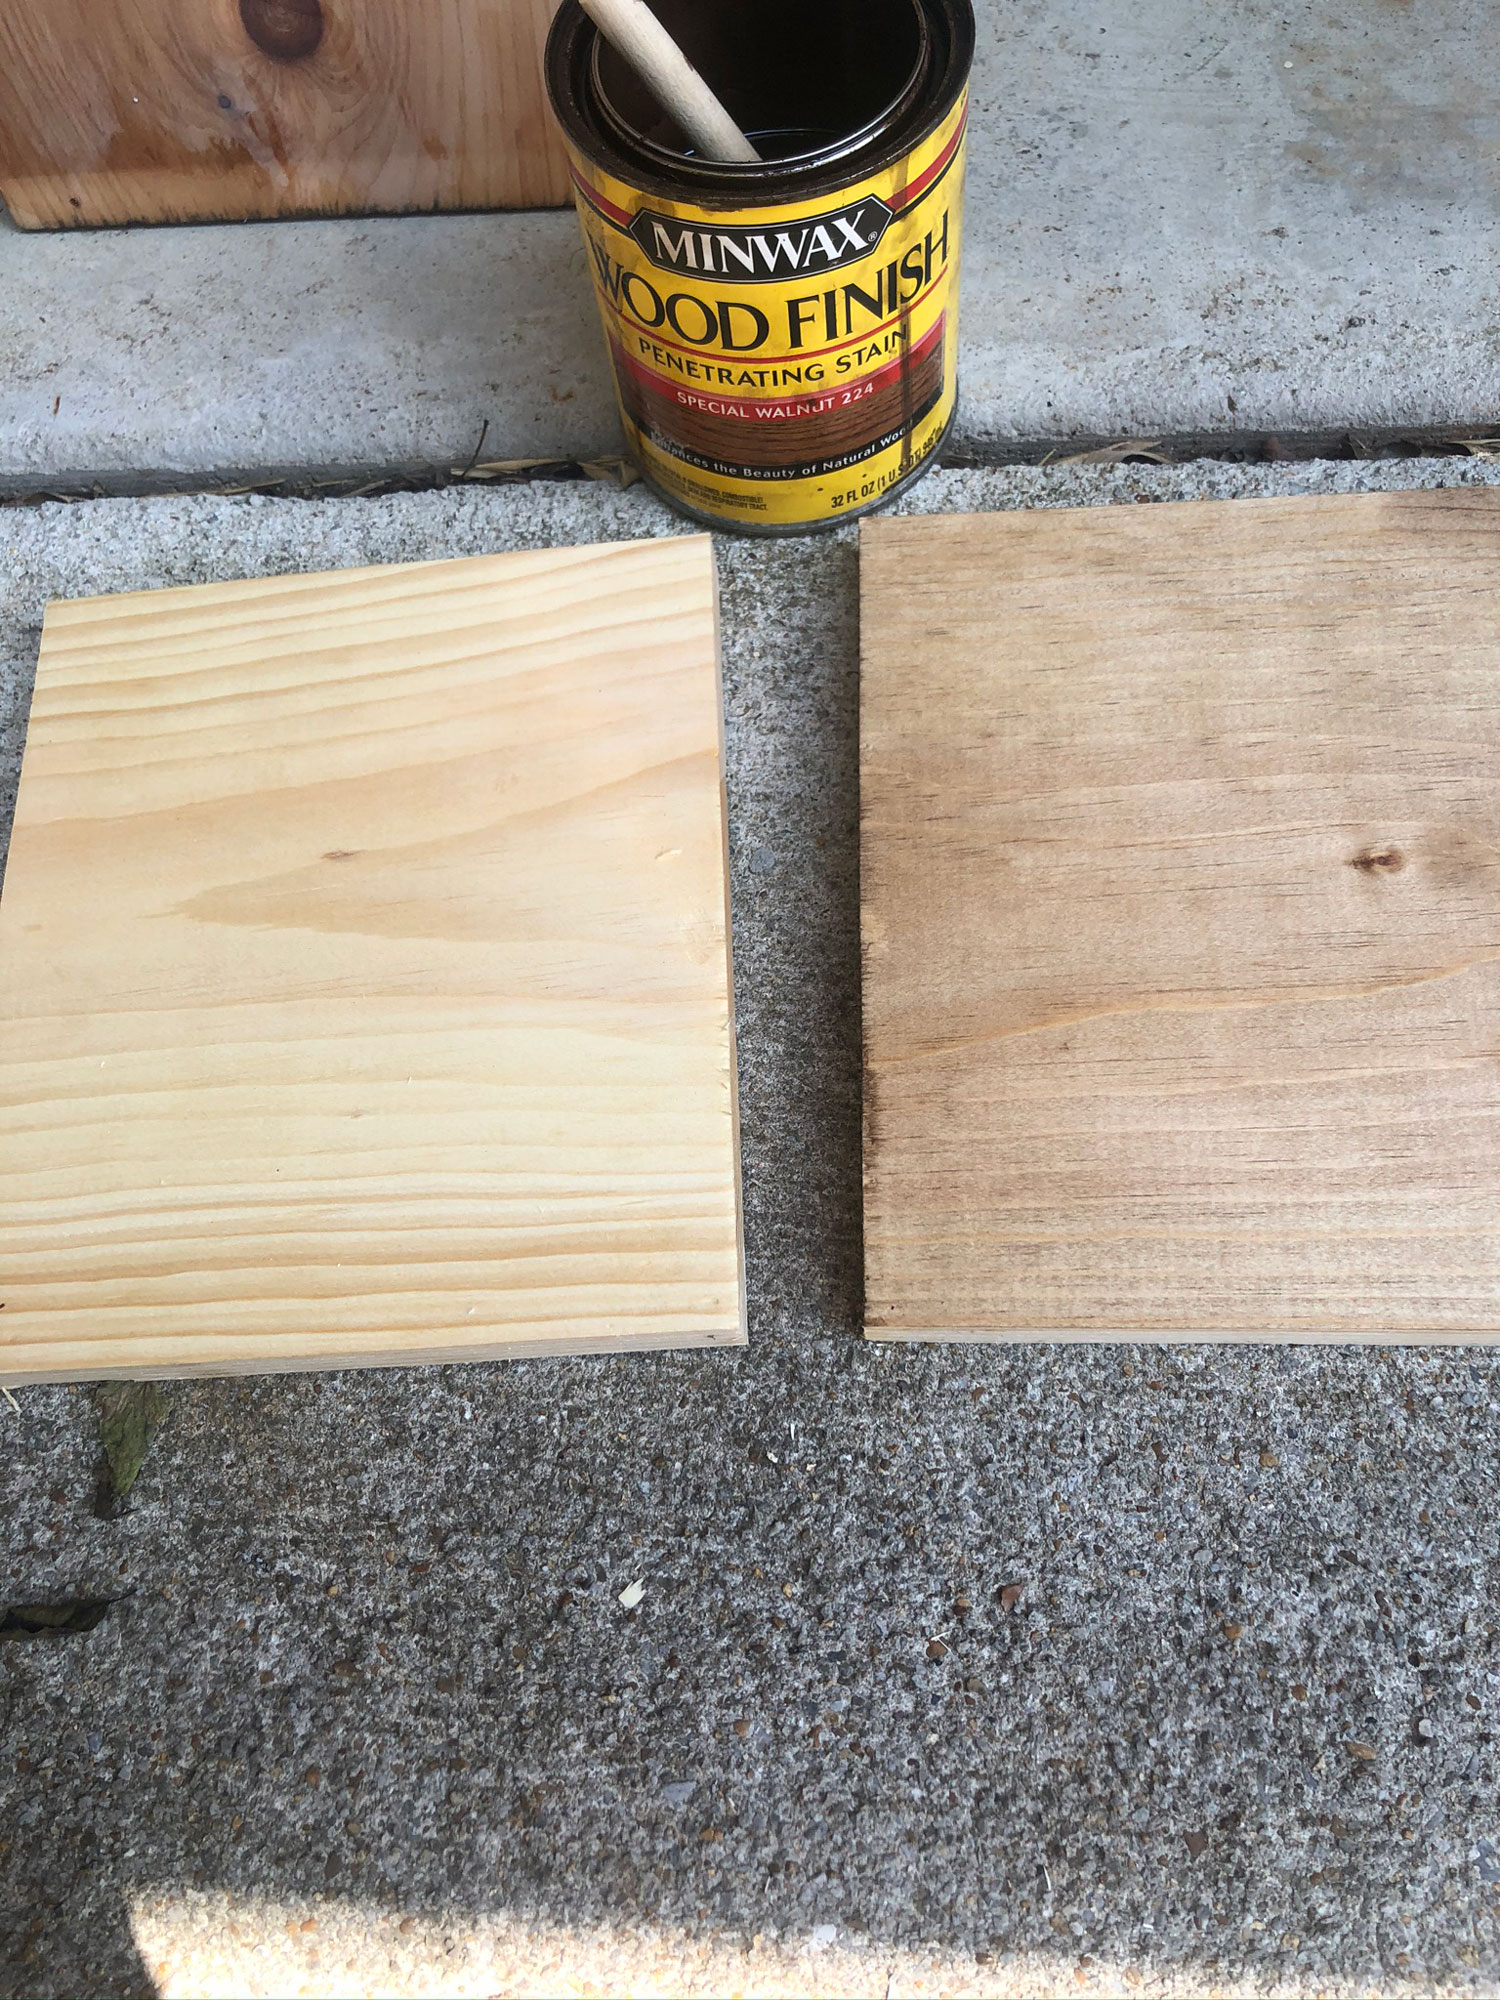
(Step 4 optional). As documented in the photo above, the left board is completely untouched pine while the right board has been conditioned and then only treated with one light coat of Special Walnut Stain.
If you desire a little more depth/dimension to your color, you can now apply a more generous coat of Weathered Oak stain. While this is the method I used for my DIY bathroom vanity (which was built from polished plywood), I am not really sure it made much of a difference on this particular pine board project.
Nonetheless, I already owned the stain so I applied it anyway.

(Step 5). Now to apply the grey wash mixture. For the mixture, I used one part light grey paint (I used what I had in my garage which was SW Argos, but any light grey paint will do) and three parts water.
I generously applied the grey wash with a foam brush and then quickly rubbed it in with a rag. As with how I applied the wood stain, I recommend doing this in small sections so that the grey wash doesn’t dry before you can wipe it evenly into the wood.

If you want to apply a top coat, you can do so once the grey wash has dried.
As for now, I omitted this step, but I may chose to apply some poly later. Just keep in mind that some top coats may change the color of your wood, so you may want to test whichever wood protectant you go with in an inconspicuous area.
Speaking of testing, I would practice this technique on some scrap boards before ever beginning your project.
I have learned the hard way that there truly is an art to staining raw wood and results can vary dramatically.
In fact, I know it probably sounds counterintuitive to use a walnut stain for an oak look, but before deciding on this formula, I had actually tried several other stains (including just the Weathered Oak stain).
Through experimentation, I found that the oak stains alone were not tinted enough to truly neutralize the yellow/orange tint of the pine board (it all still reminded me of a damn log cabin).
Essentially, all of the other stain combos I experimented with just looked like white-washed pine.
Refusing to give up, I am glad I finally found the winning mixture.
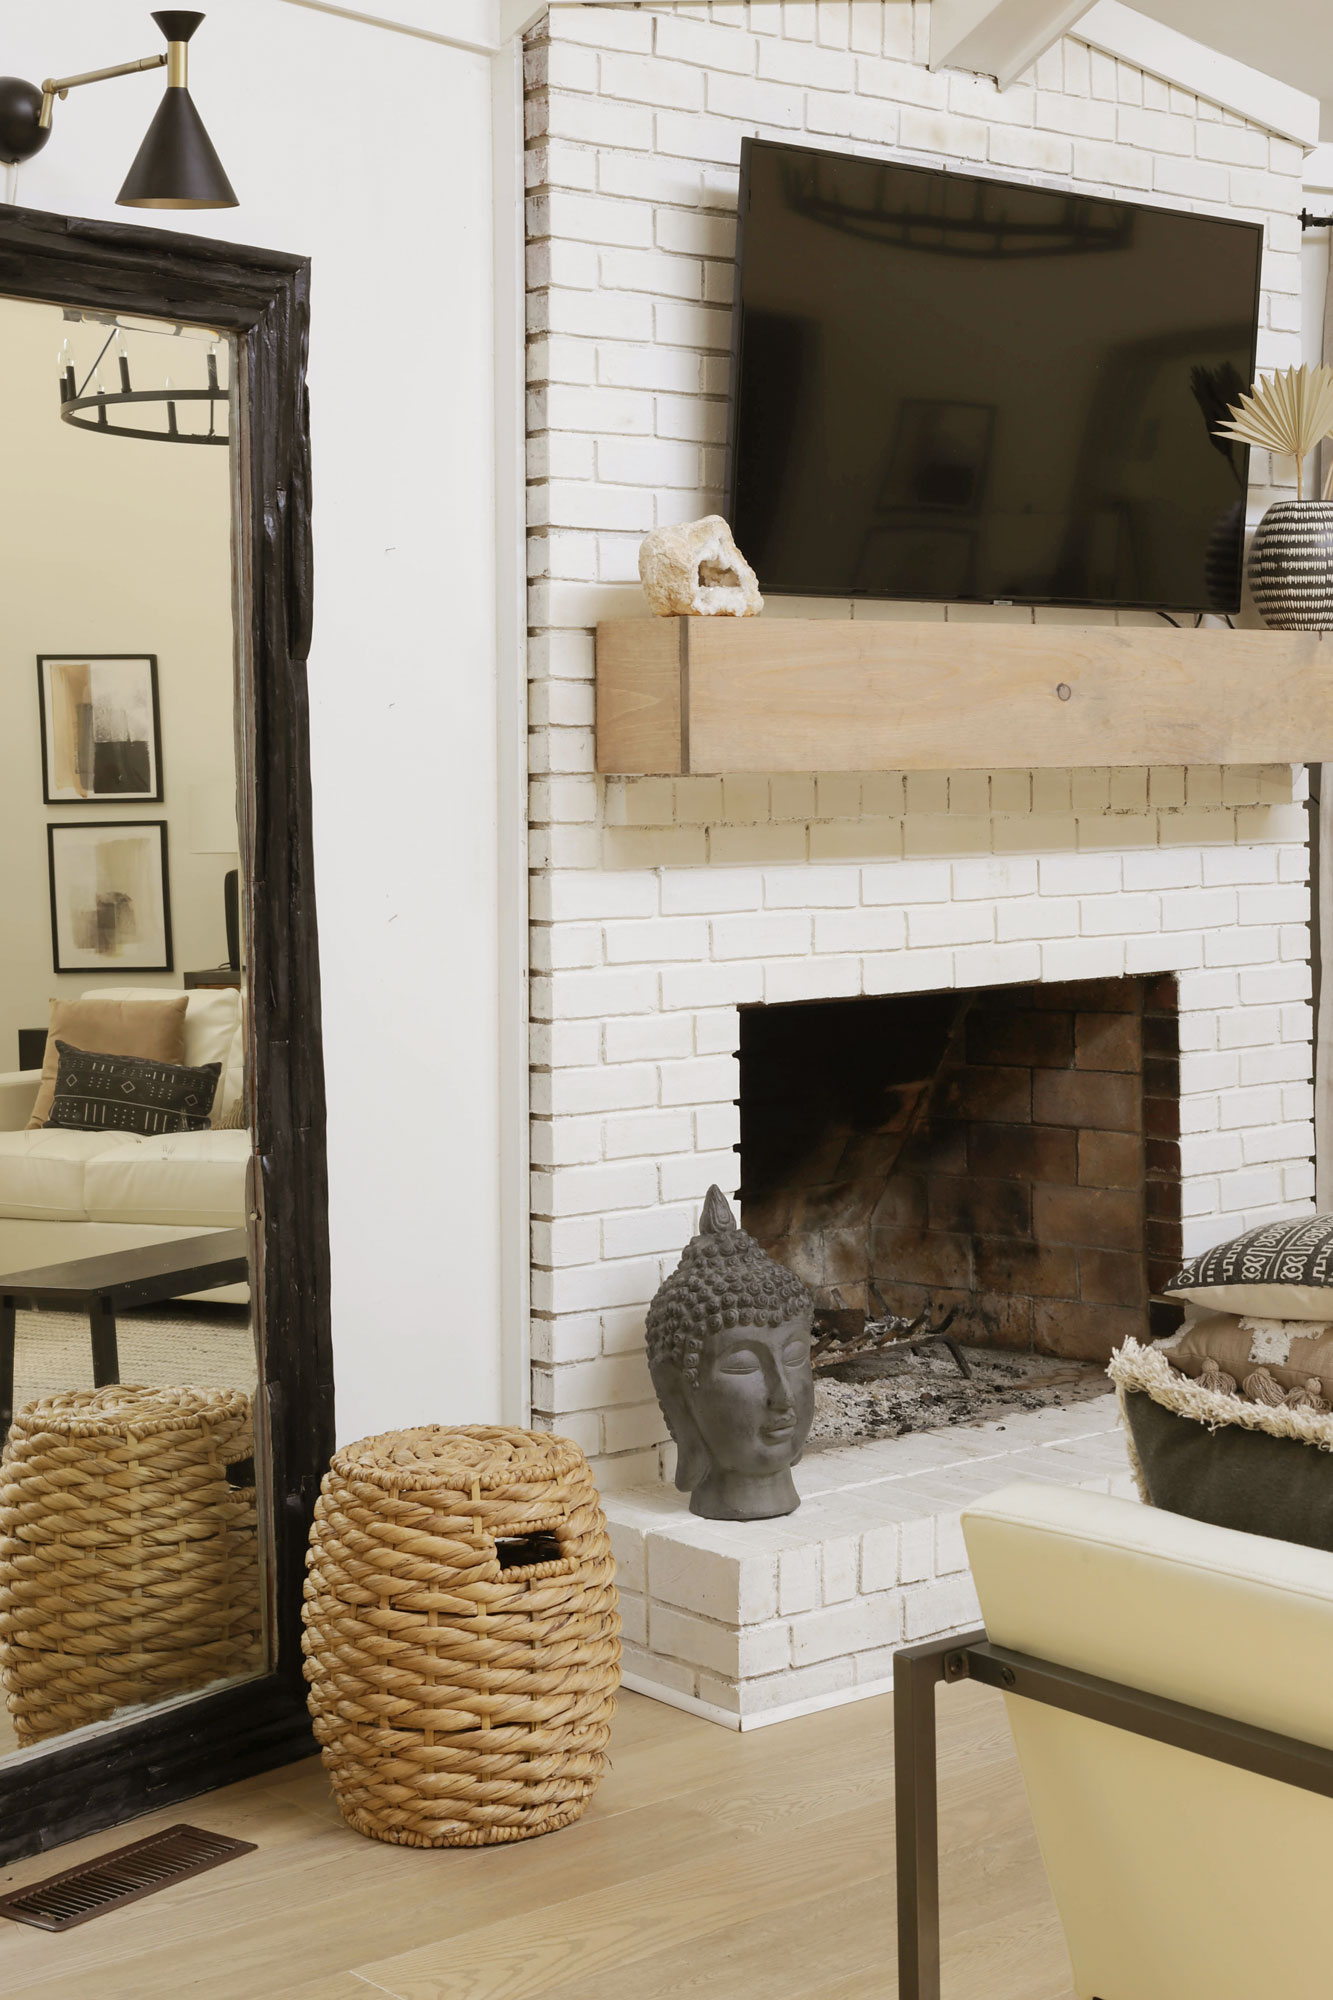
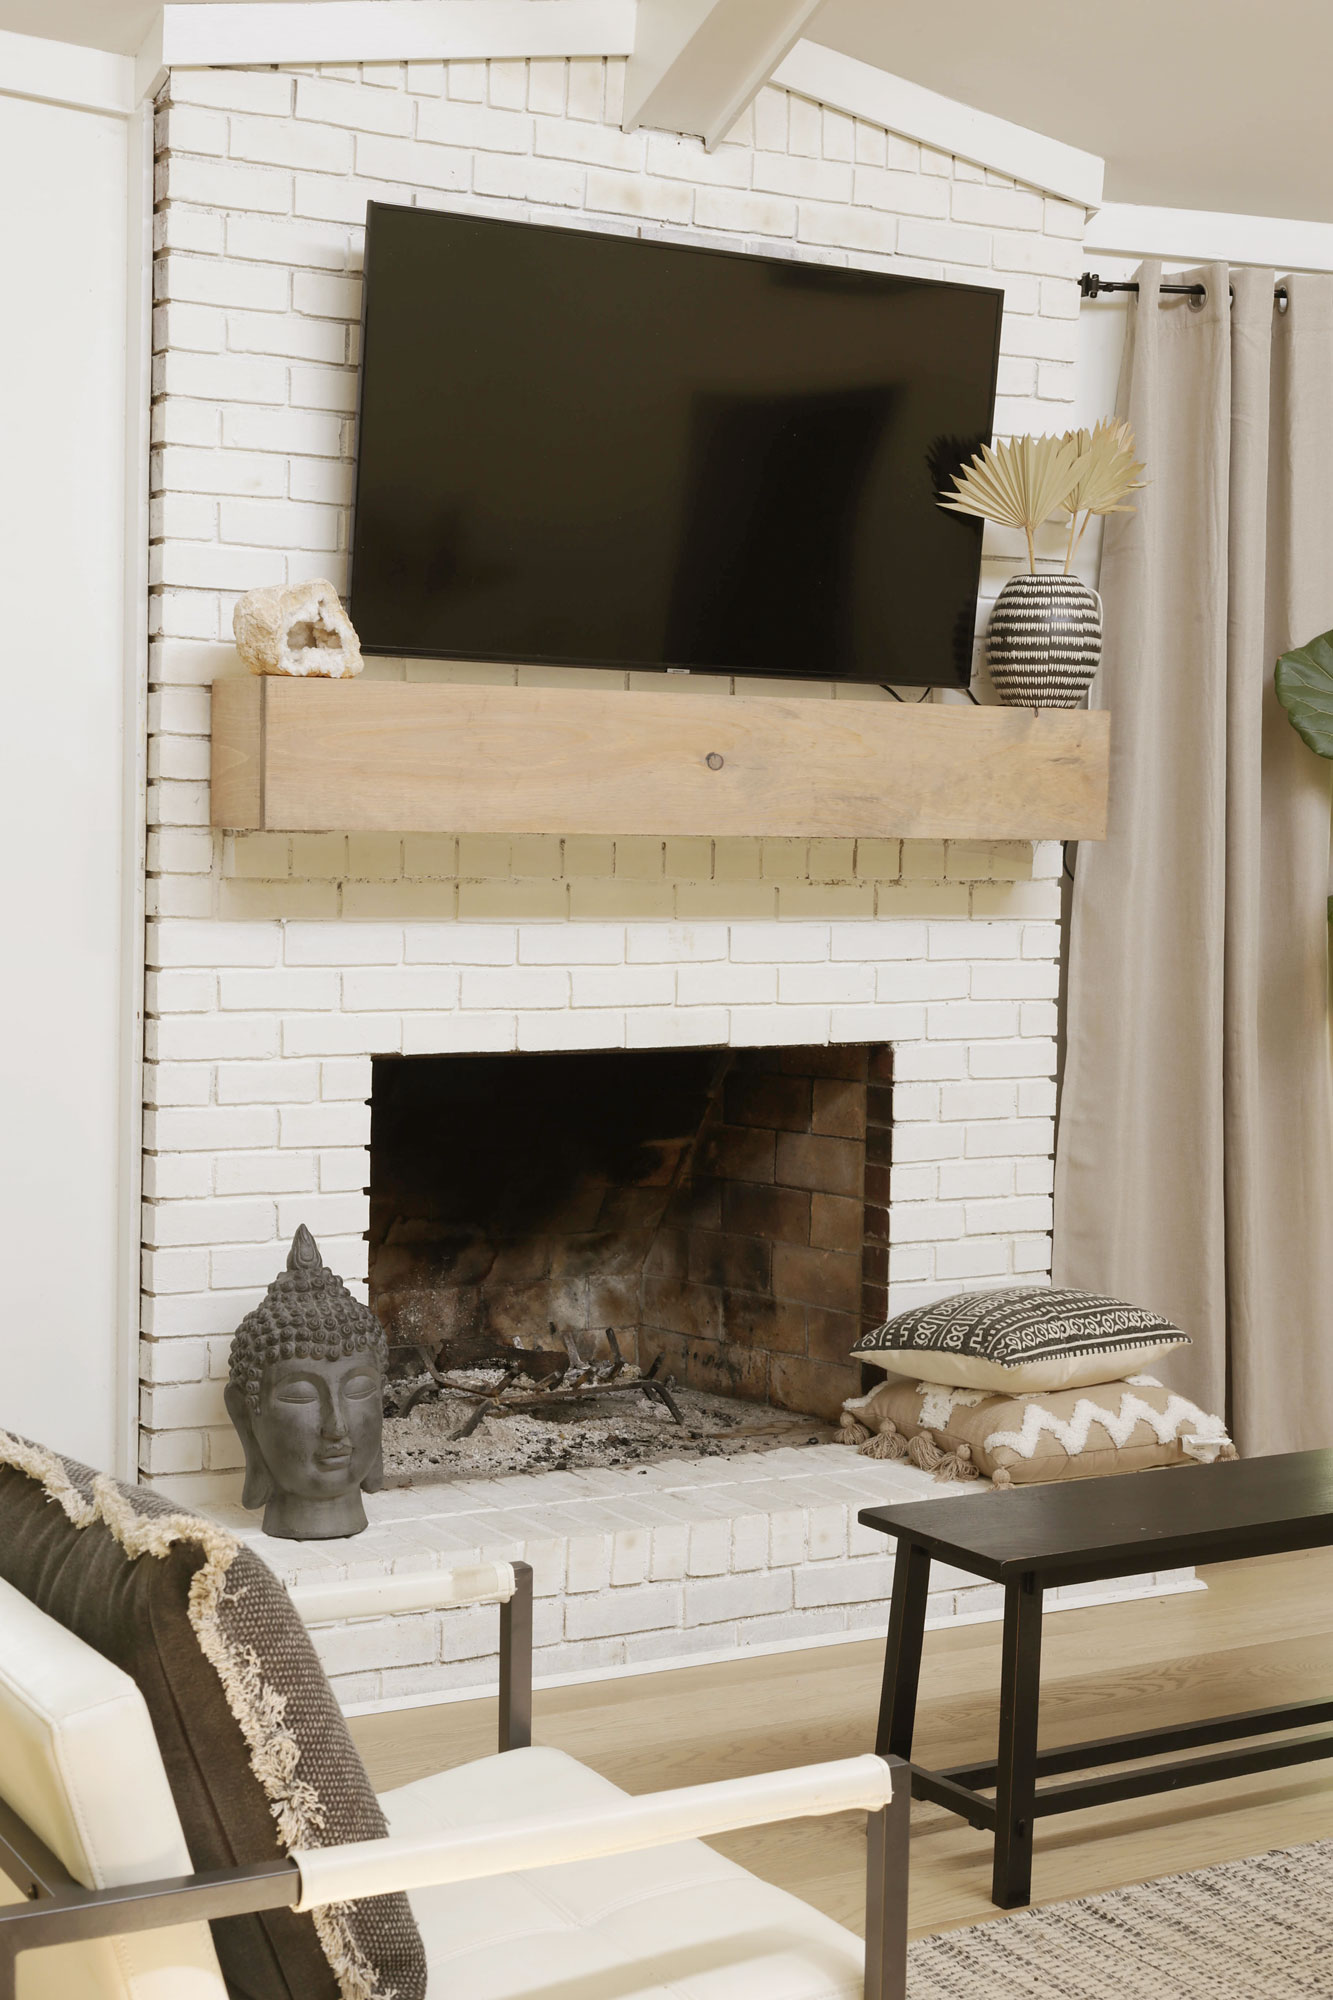
I love how my new”oak beam” mantel modernizes my living room.
Not only that, but it feels so much fresher and airier now!
Thank you so much for stopping by this week!
Now get out there and design some good vibes along with a fabulous life.
If you found this post helpful, it would mean so much to me if you could share it with a friend or on social media. Thank you so very much!


Welcome!
My journey in interior design and home improvement began with transforming my first fixer-upper home, all while managing a budget and raising two young boys. My work, a reflection of my passion for creating beautiful, uplifting spaces, has been recognized by top publications like Better Homes and Gardens Magazine, HGTV, and more. I invite you to explore my site and witness the transformation of my home and the vibes we've designed. Read more...


That looks great. It took my husband and I lots of trial and error before we were able to match our staircase with our new light oak flooring. I wish the manufacturers offered matching stains for sale. That would have eliminated the guess work.
Thanks, Nadine! Yes…that would make life so much easier if you could get matching stain. 🙂