
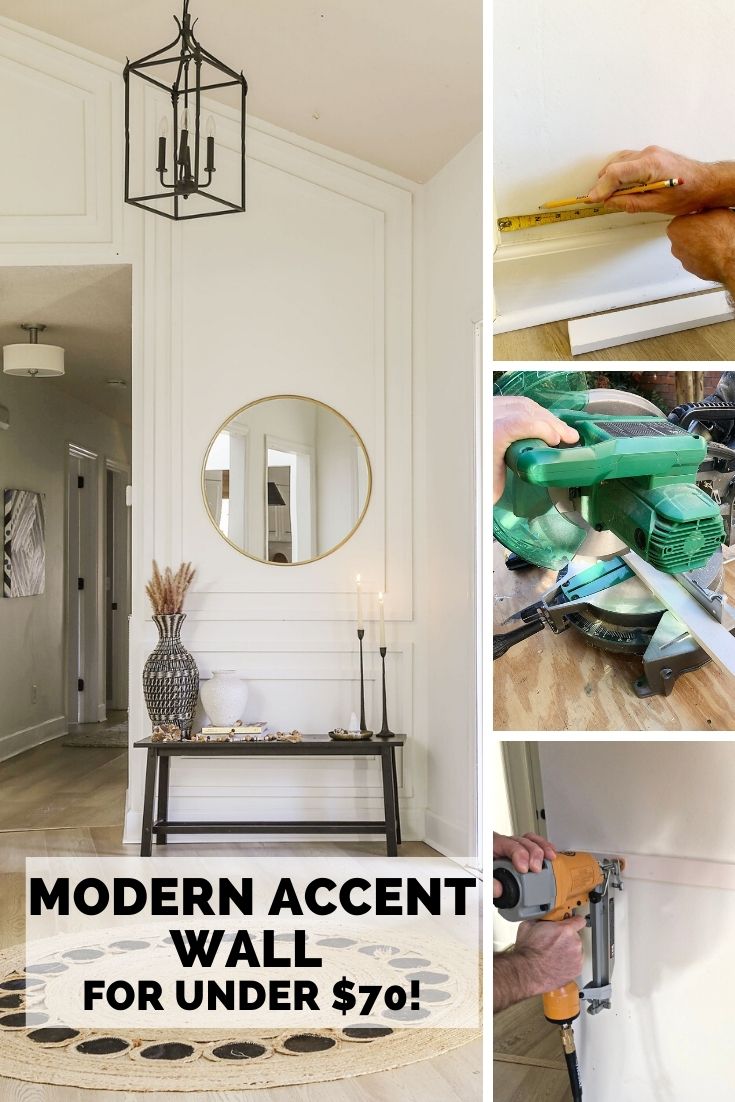
DIY Modern Picture Frame Molding Accent Wall for Under $70
Looking to add elevated, rich AF vibes to your boring walls while staying on a budget? In today’s DIY tutorial, I am sharing how I added picture frame molding (with a modern twist) to create a focal point on a vaulted ceiling/ sloped wall…
I know I have been a little MIA lately, but I do have a pretty damn good excuse. You see…
Not even an entire month in to the new year, I have already checked-off two life-altering endeavors on my “to-do” list:
- Getting past my fear of surgery to revise my 15 year old, jacked up breast implants (something I have been wanting to correct for years now).
- Selling my beloved fixer upper (only 7 days post surgery) without the guarantee of having anywhere else to go.
Yes, both of these matters are both very “first world problem” vibes, but they are still a big effing deal.
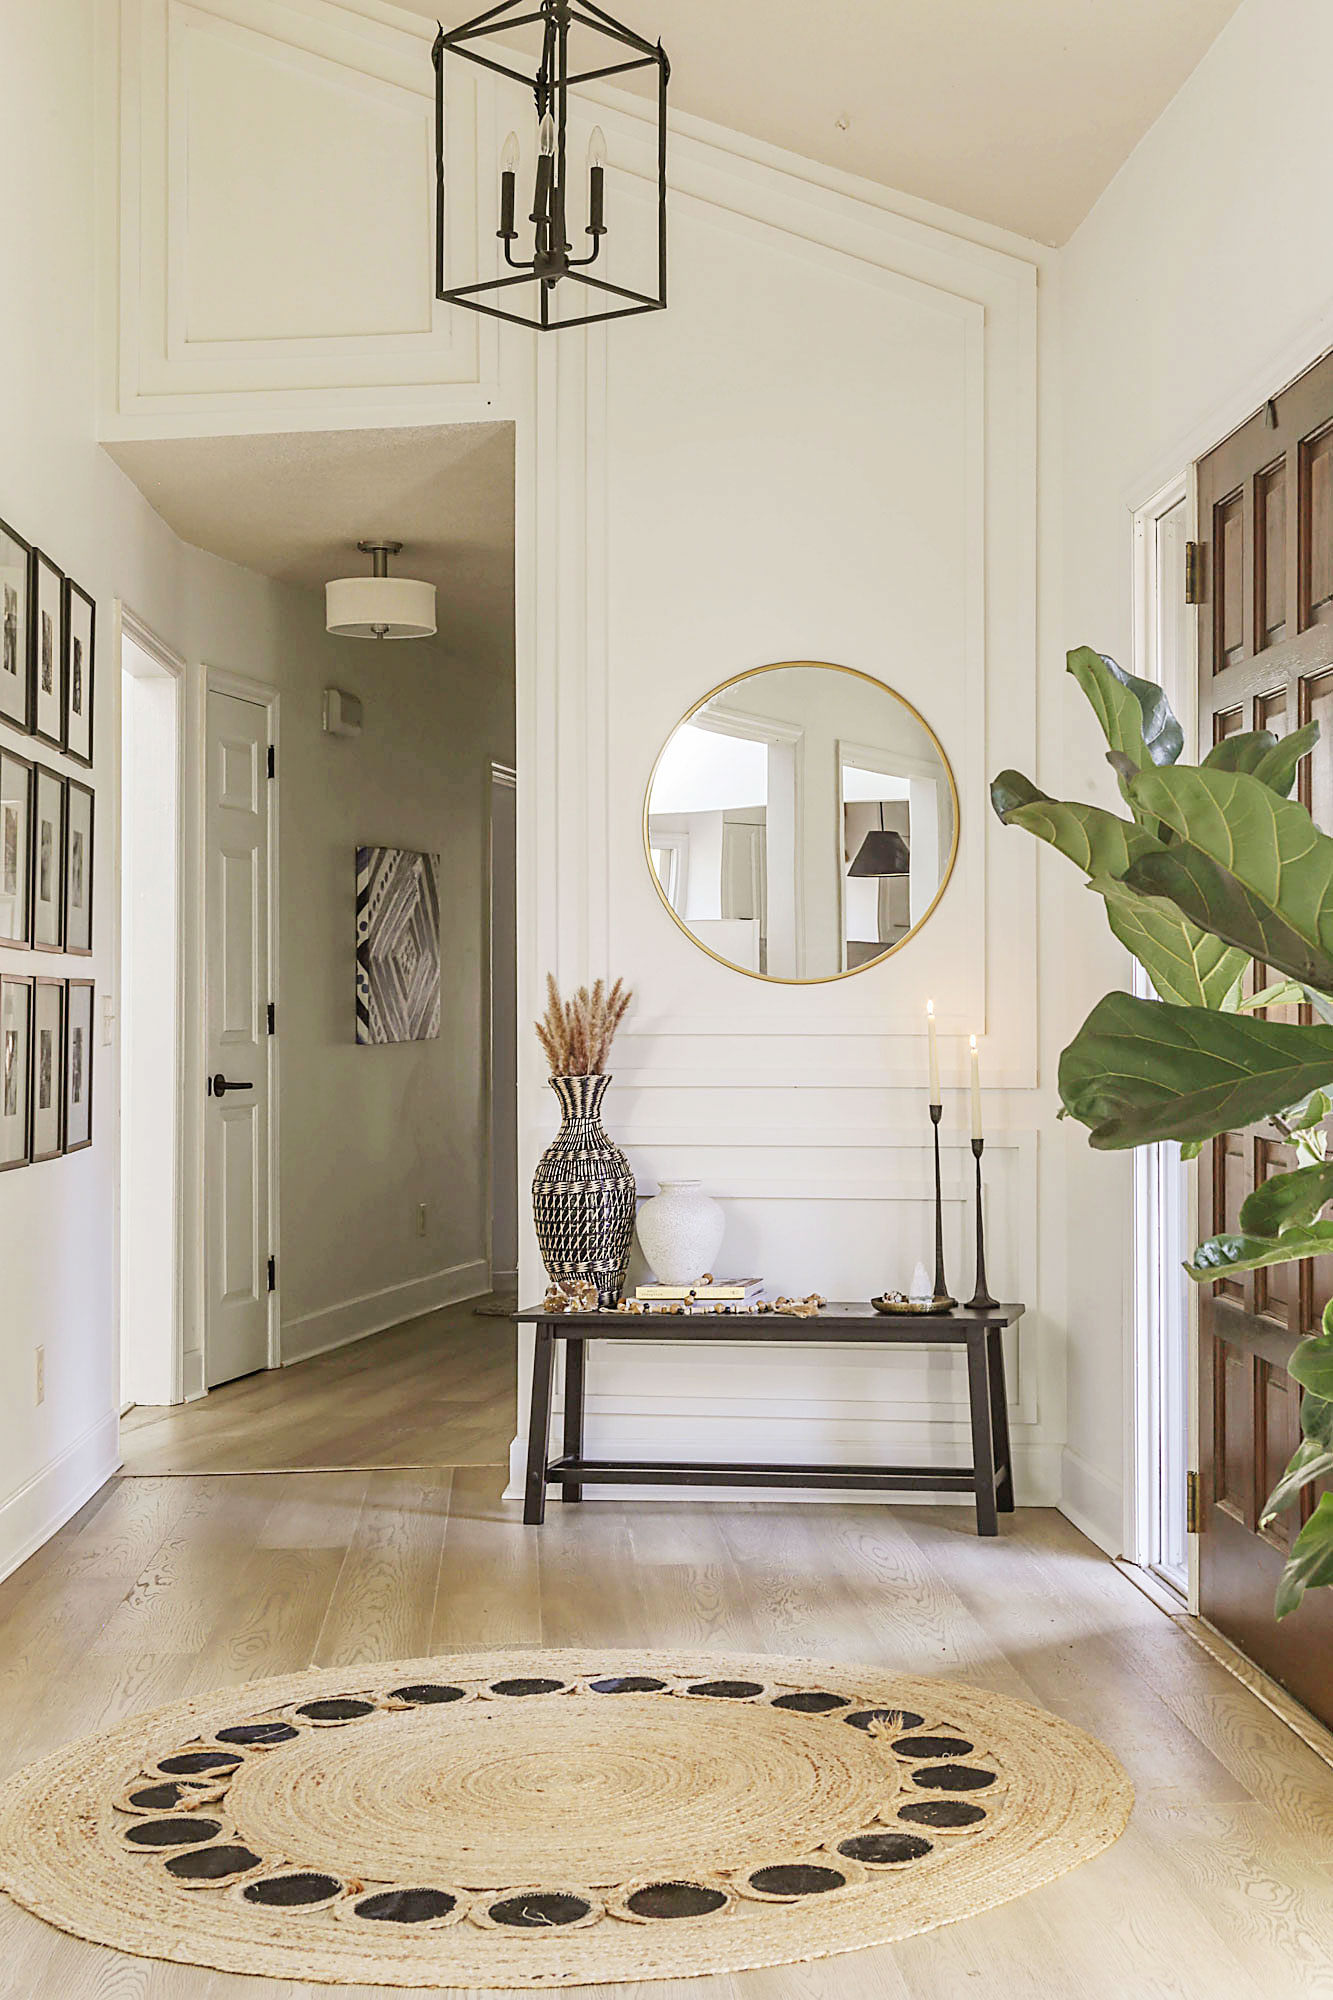
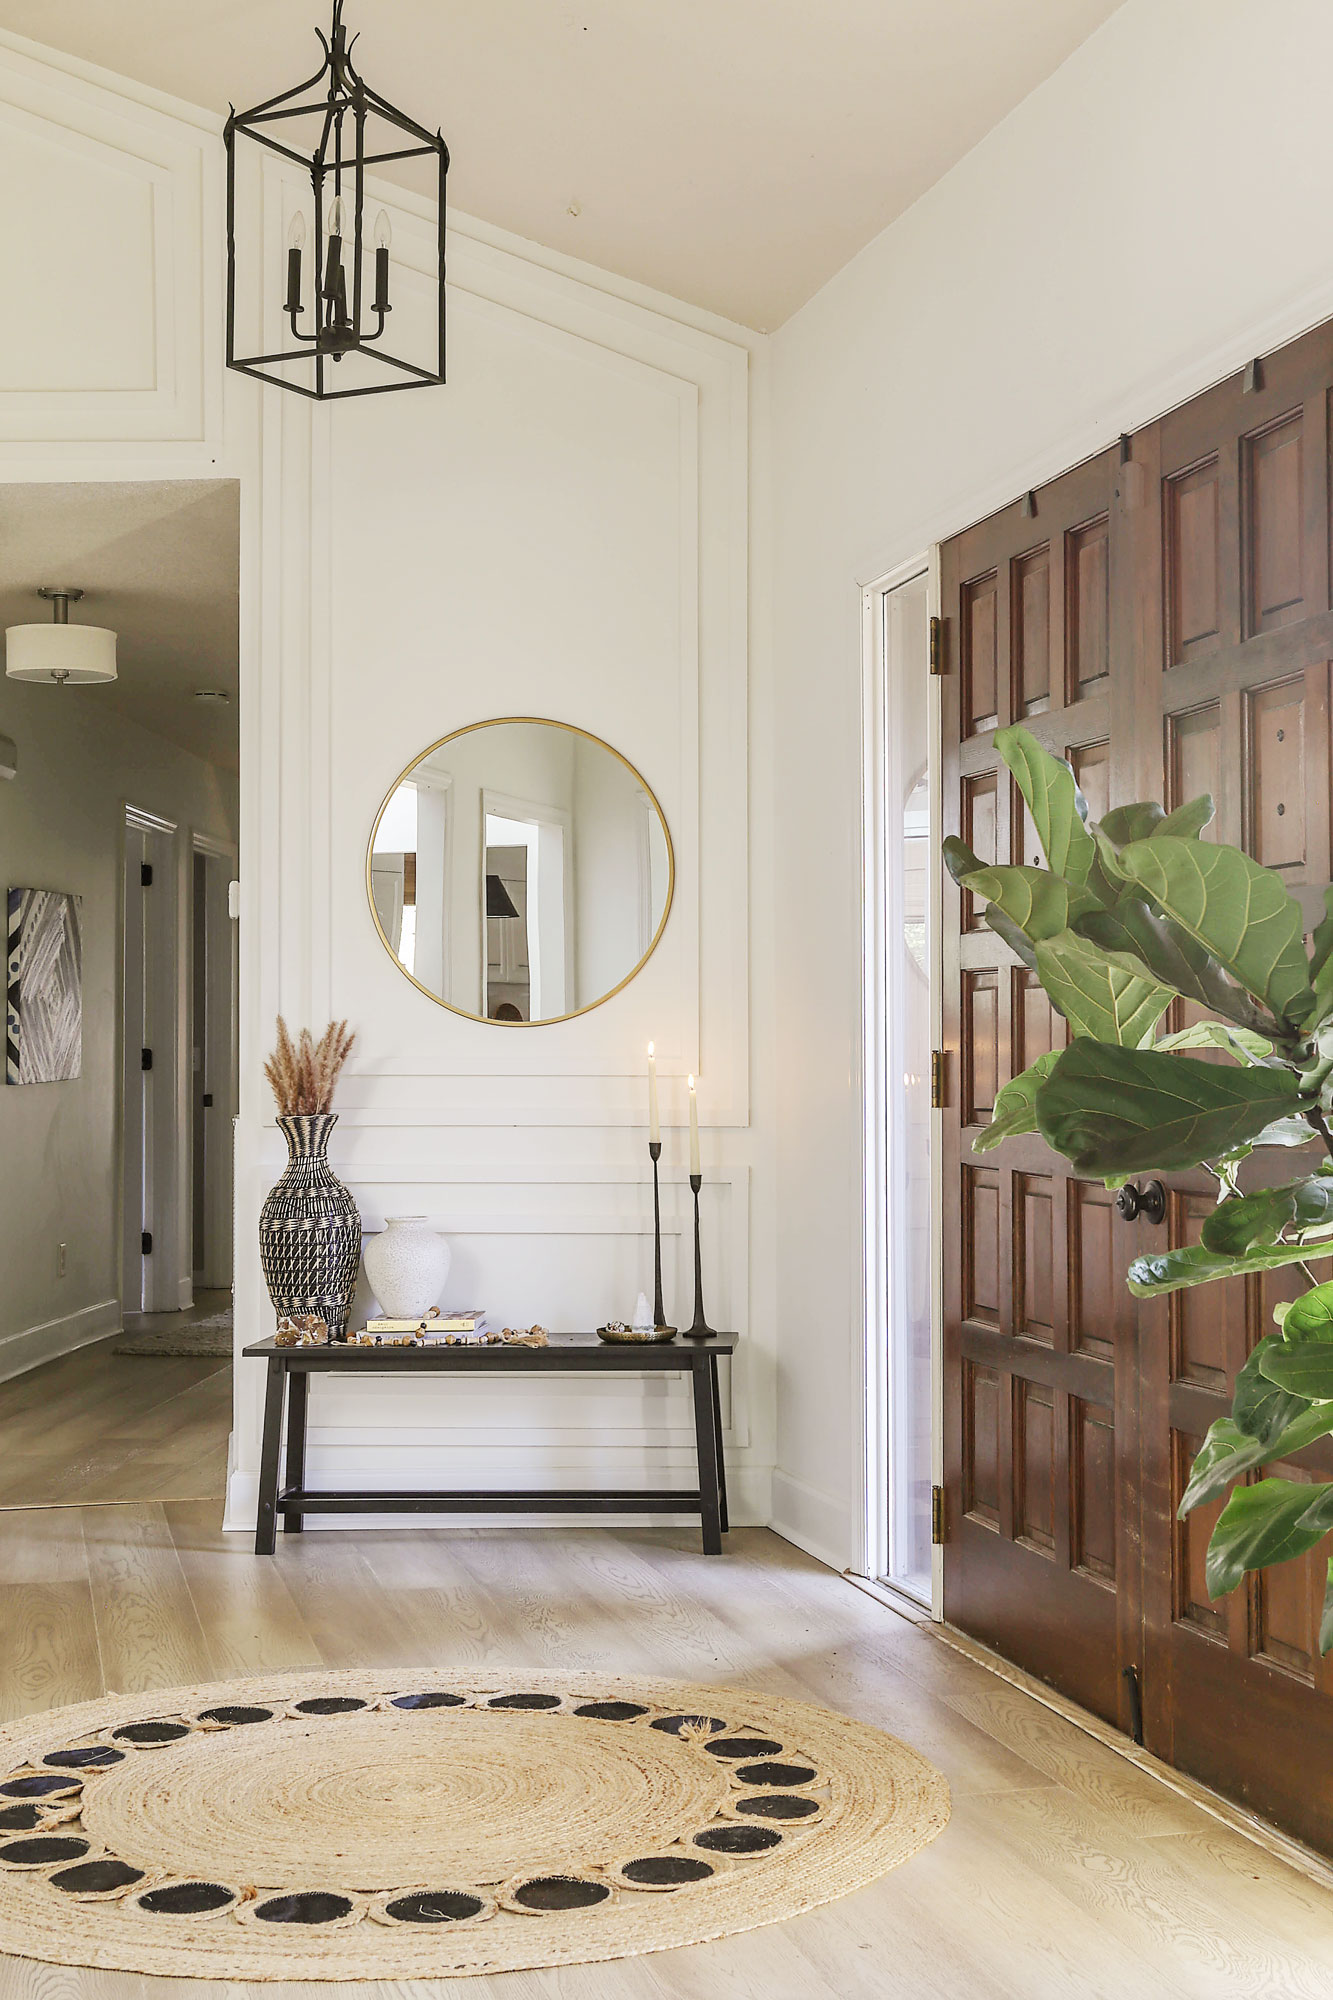
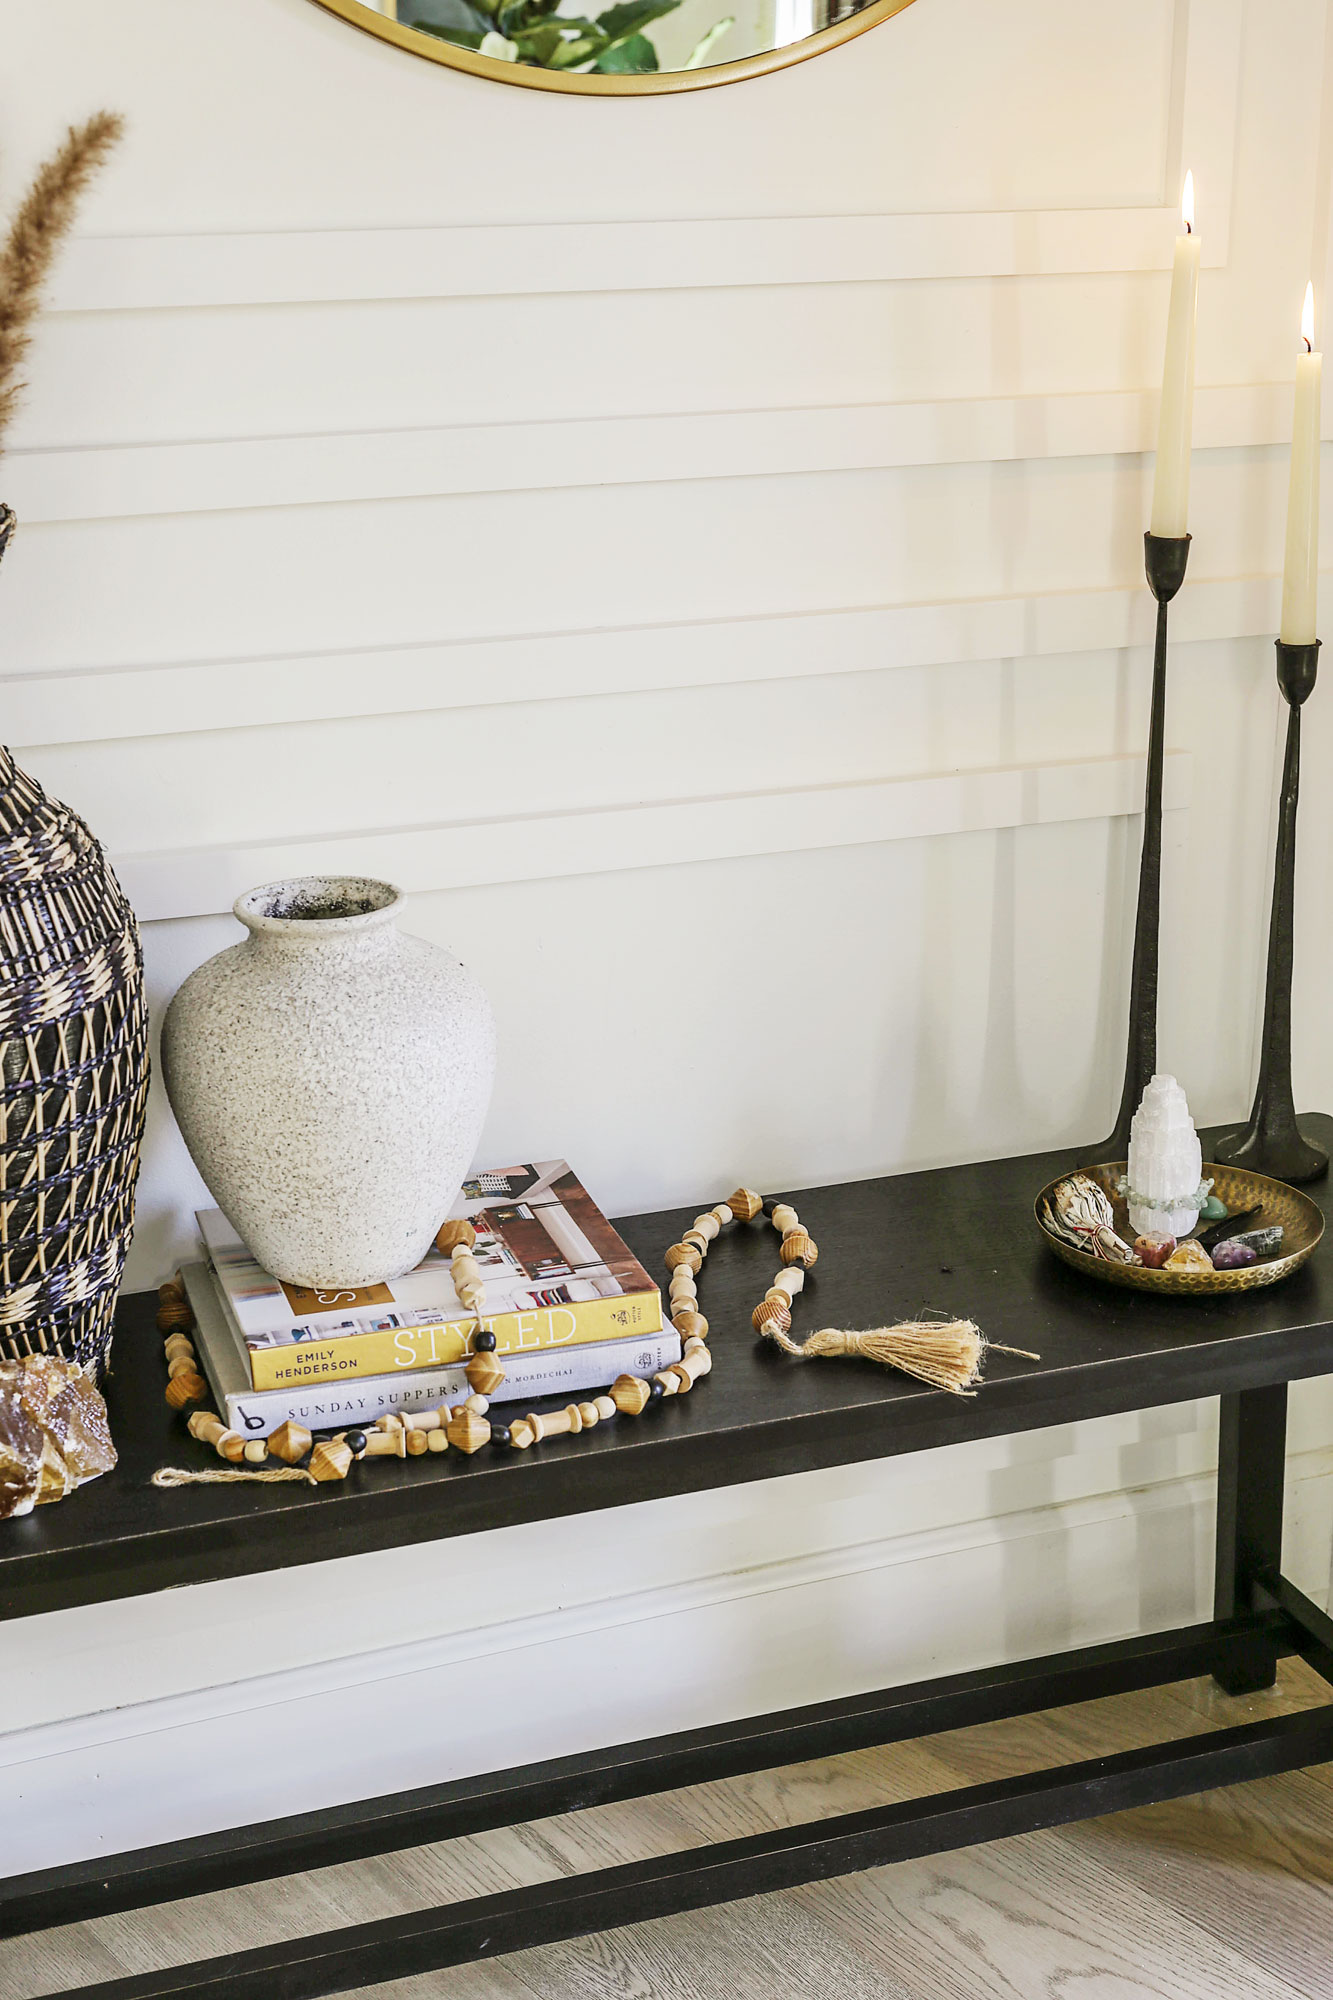
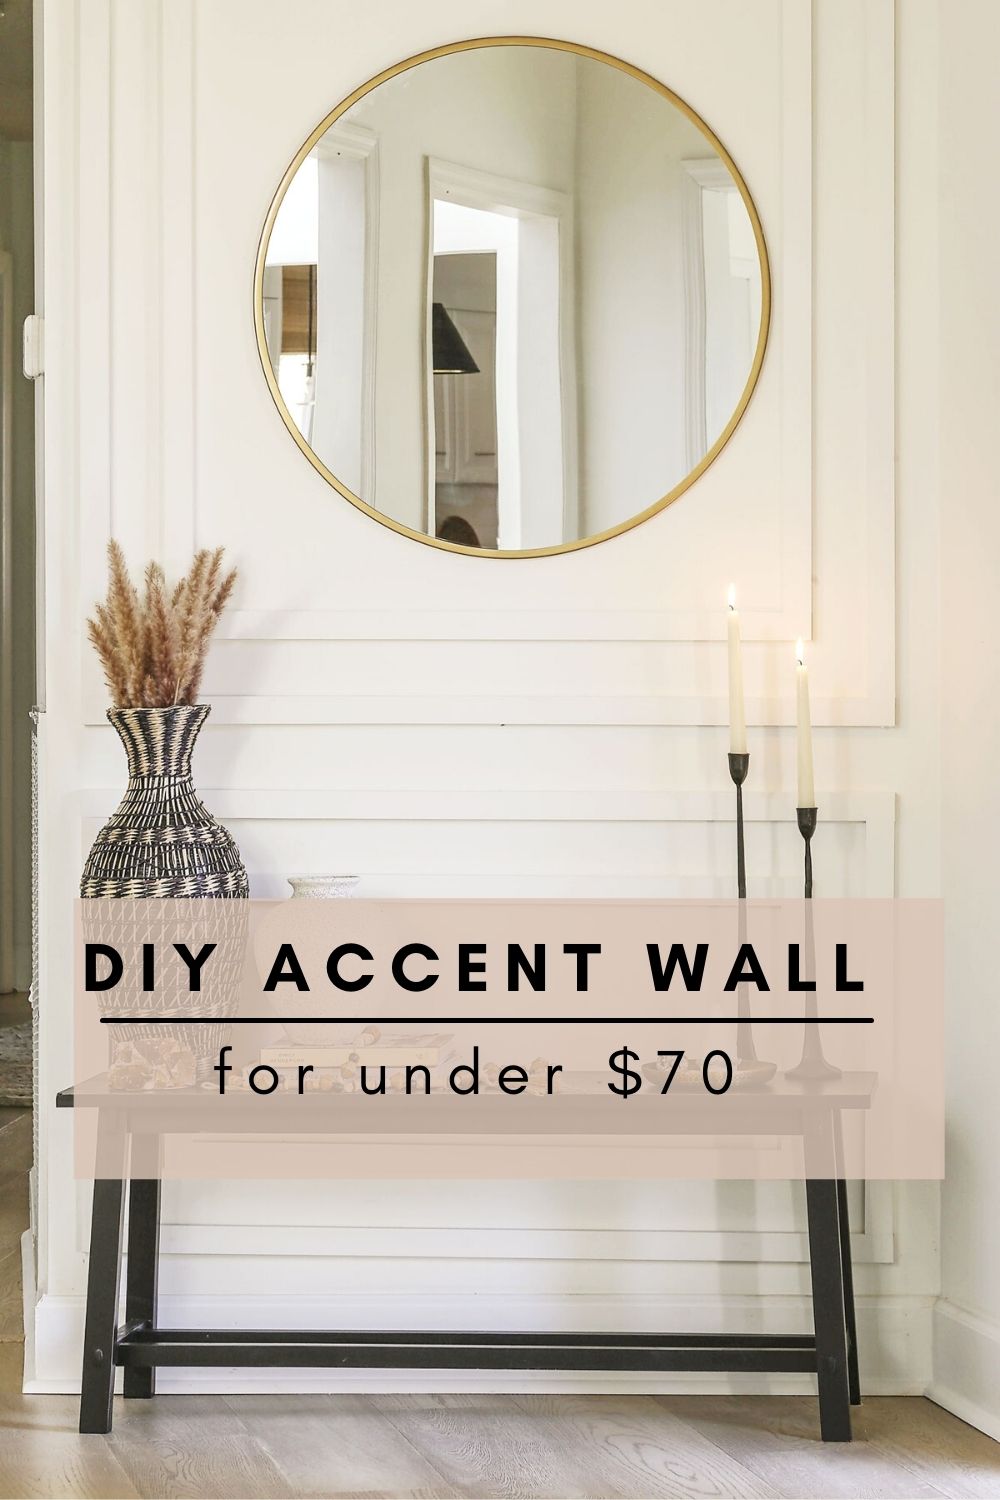
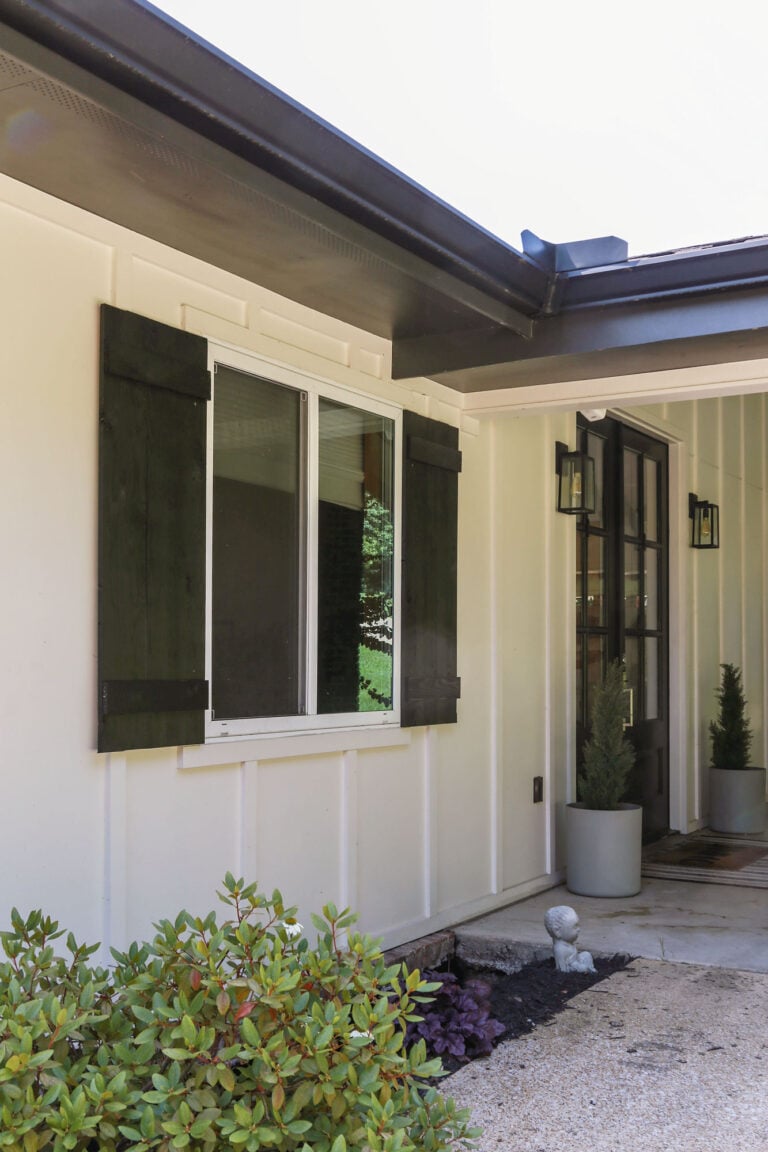
And while I definitely plan to go into more detail about both of these matters in the future, today I am going to show you how my husband built this kick a$$ accent wall in our foyer (which won’t be ours for much longer) for only $70…
So….switching gears from tits to accent walls, let me show you how this space was transformed.
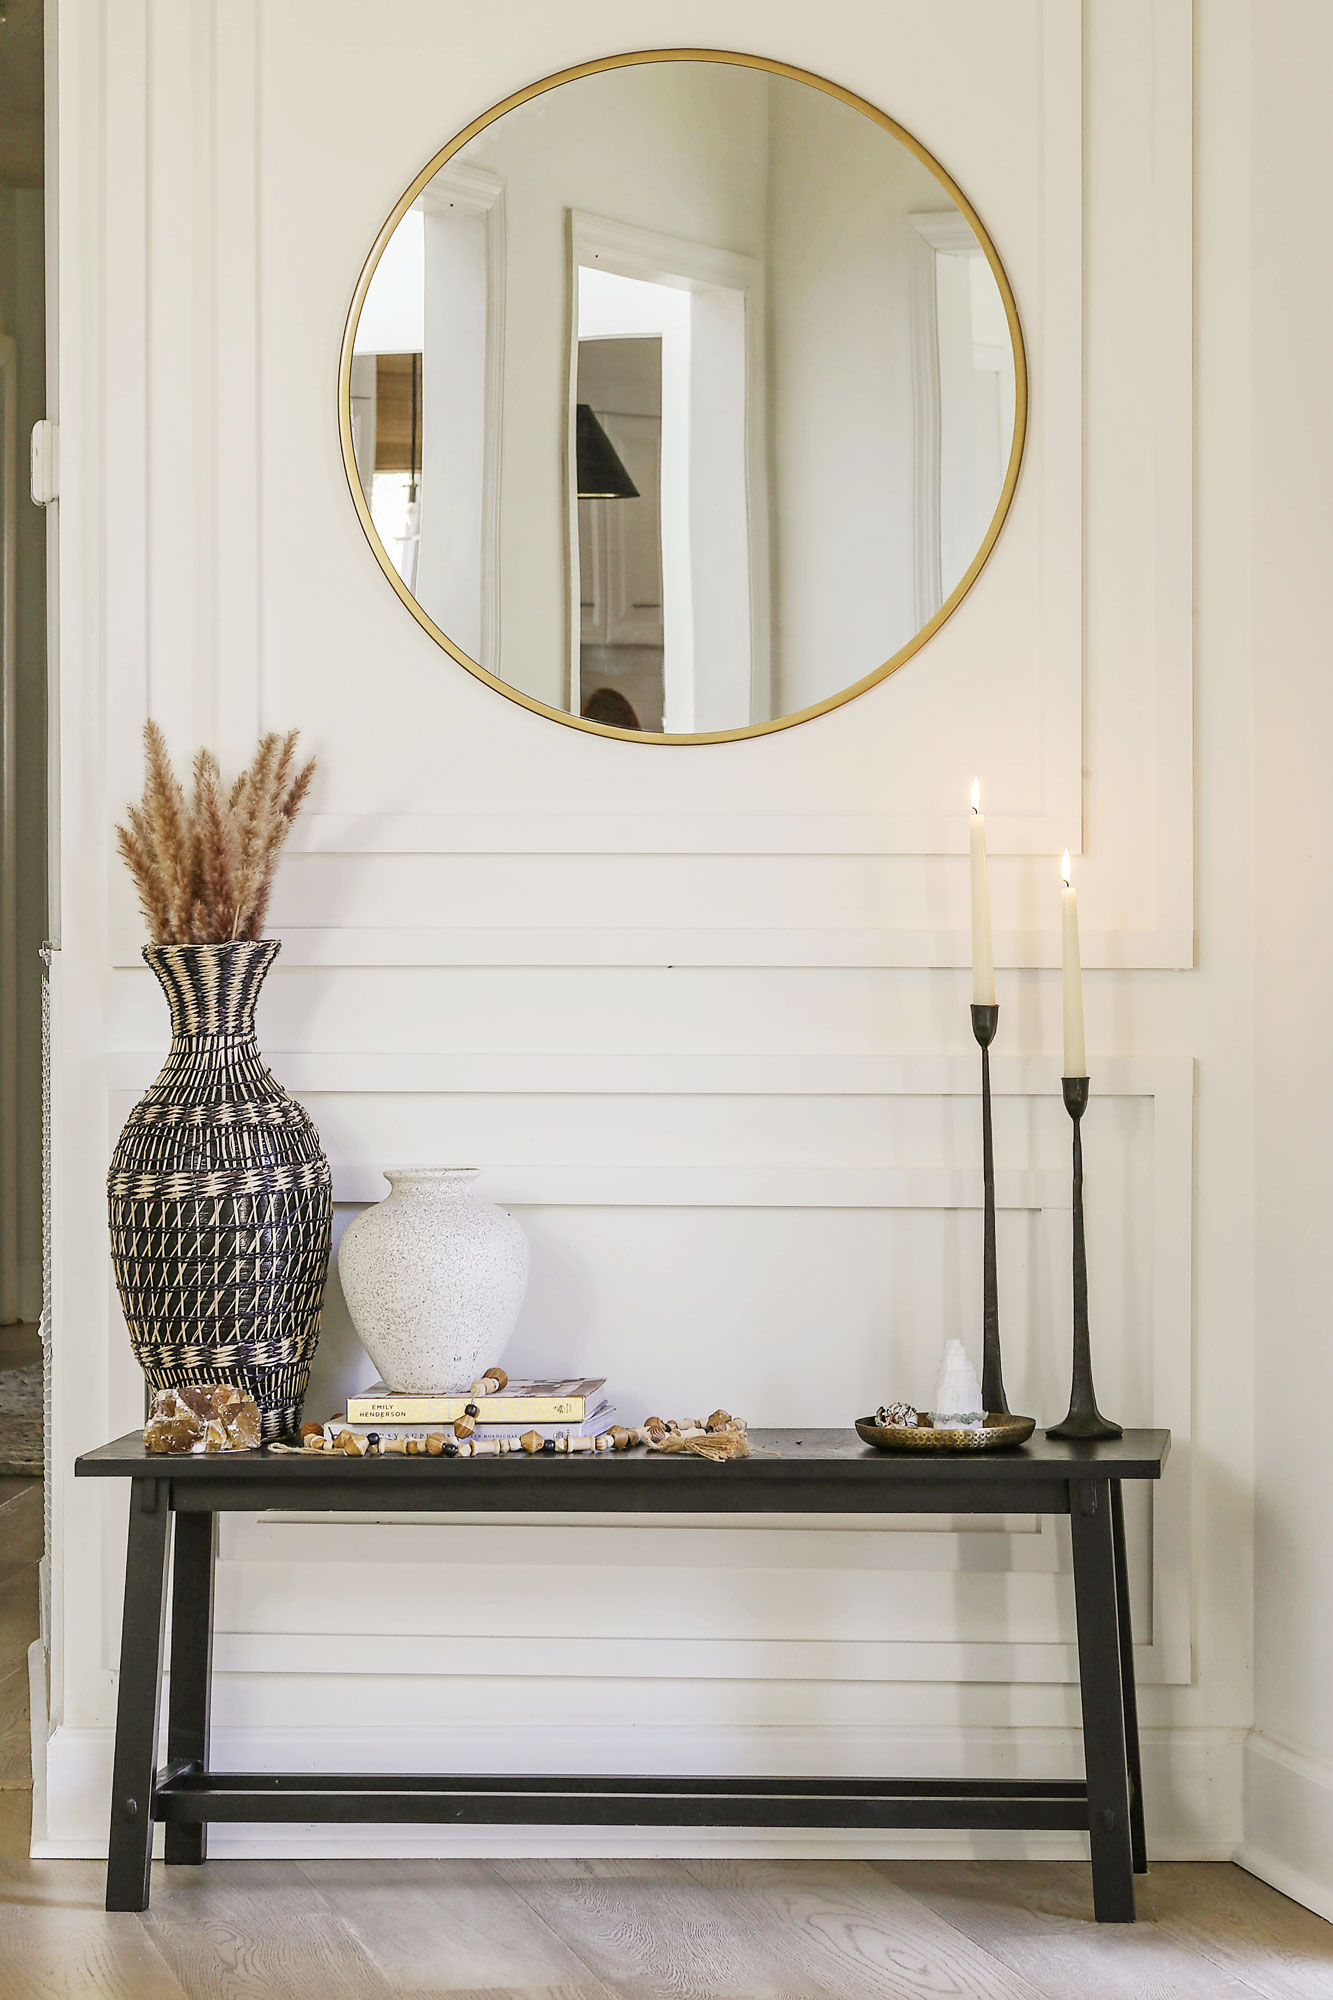
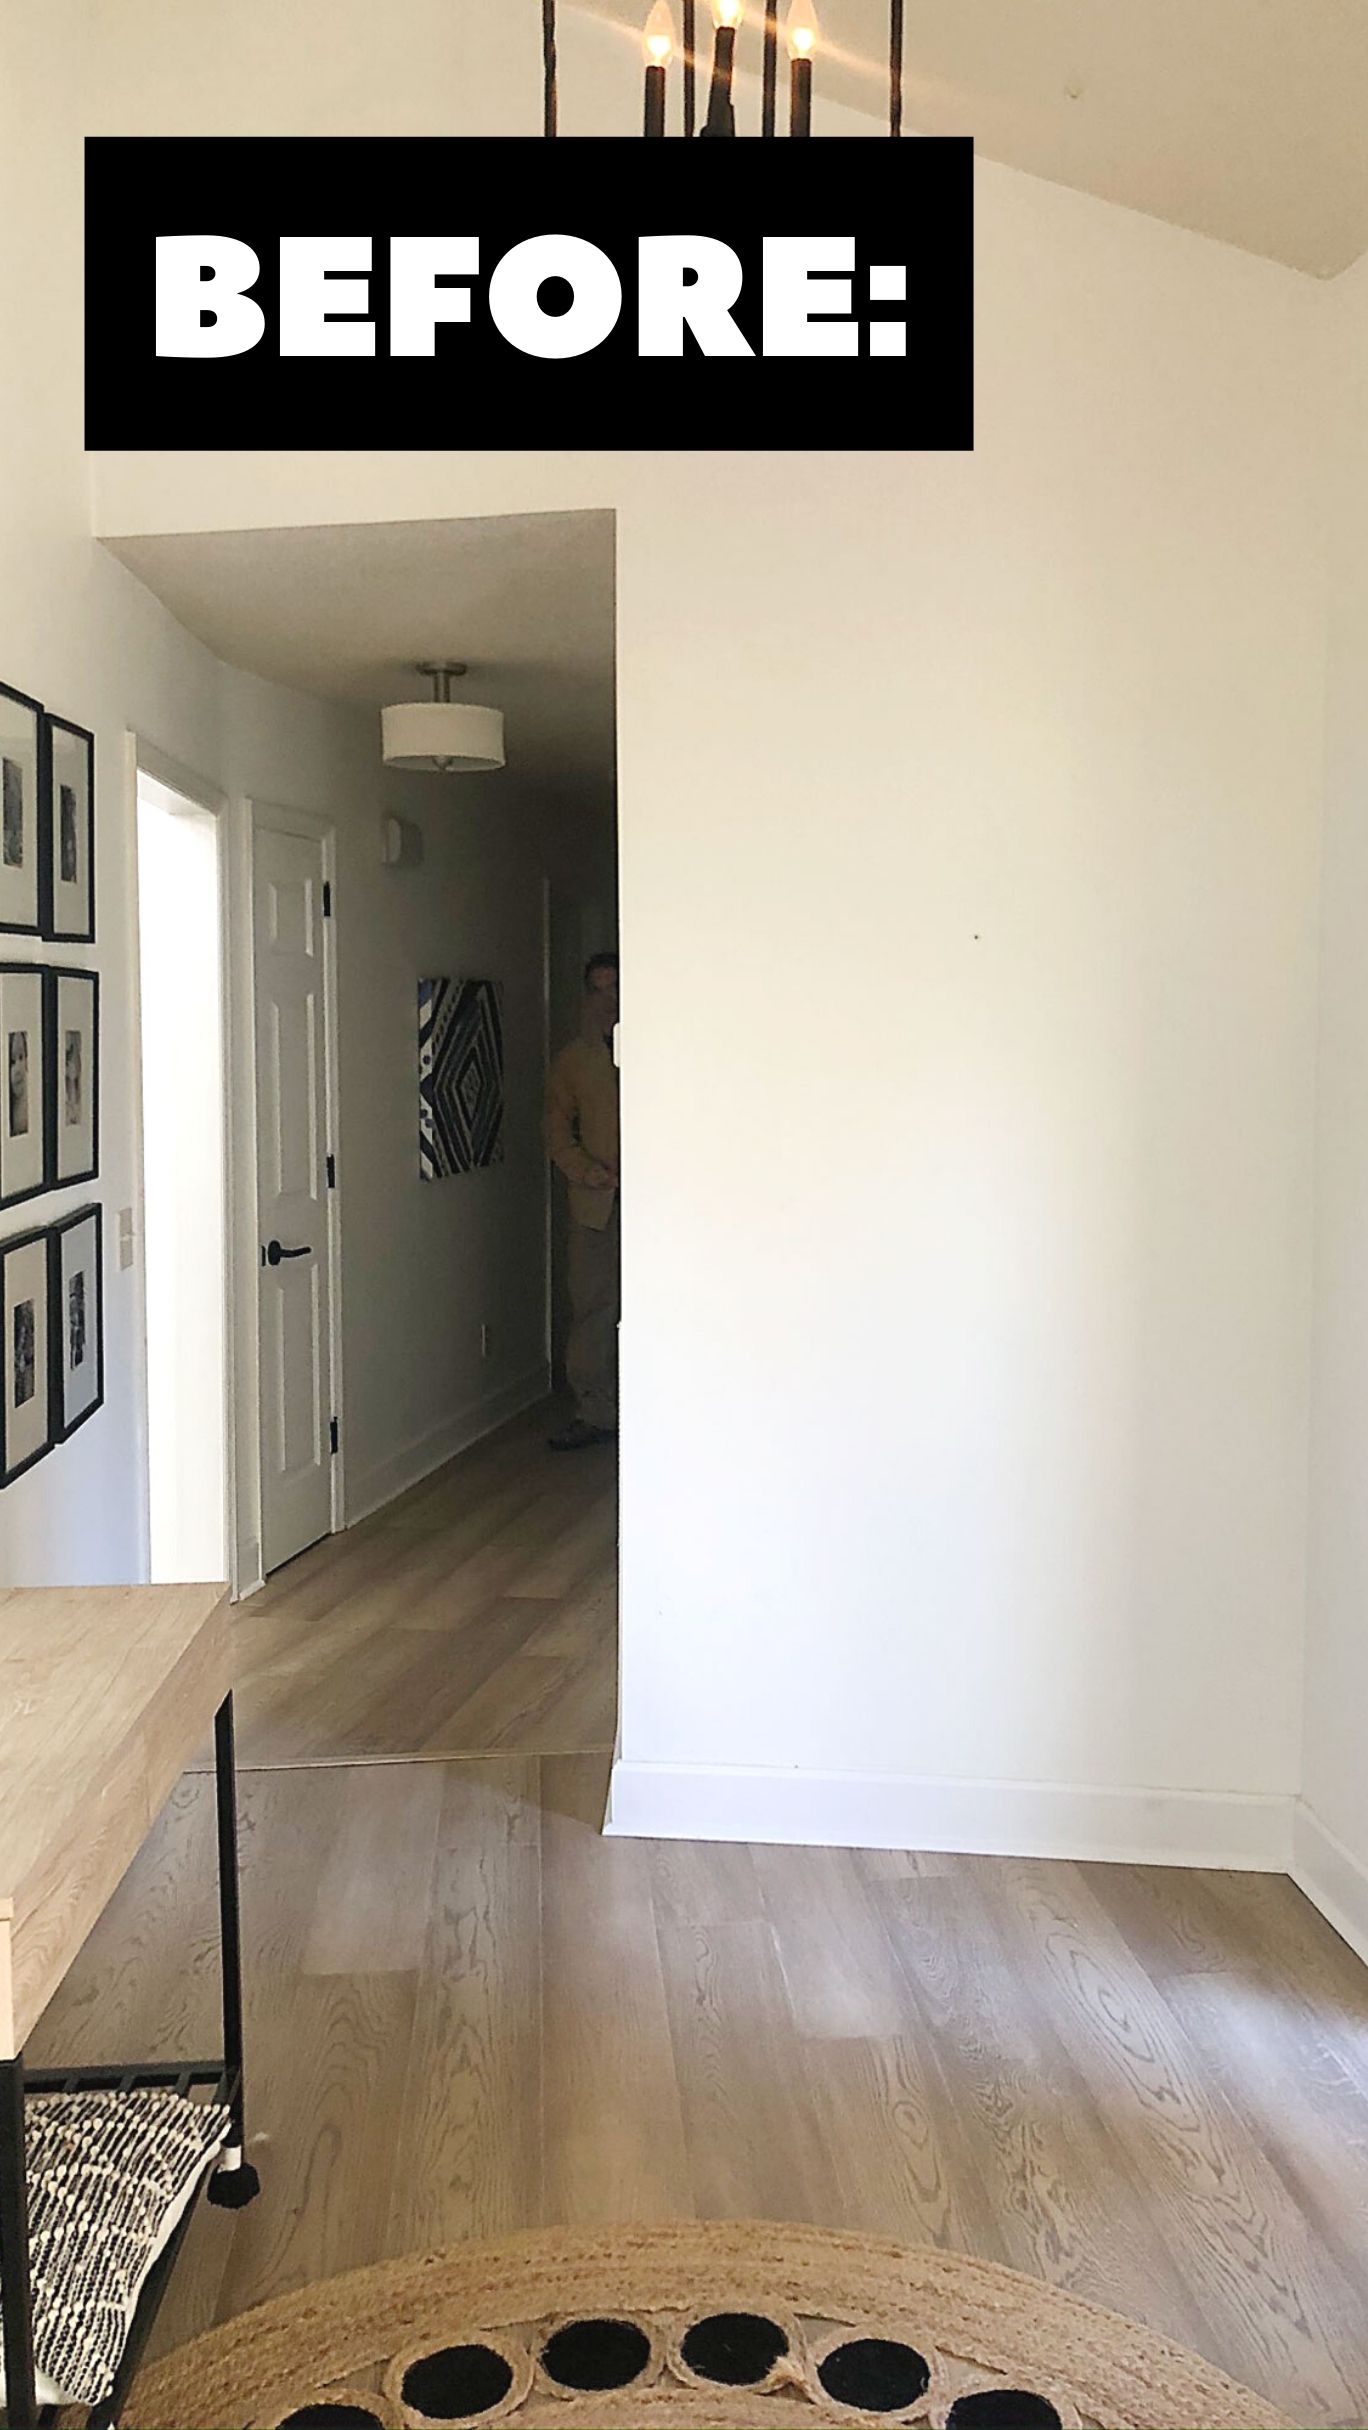
For a few years now, it just felt like something was missing from my foyer….
While I did sense that we would be putting our home on the market at some point in the near future(didn’t know at the time how freaking near), I just couldn’t get past that urge to do something with the space. What can I say? I was craving a creative project.
Leaning towards the idea of an accent wall, with re-sale value in mind, I didn’t want the aesthetic of it to be too overbearing or taste specific.
Then one day as I was stalking one of my favorite interior designers, the answer to my wall woes stopped me dead in my tracks.
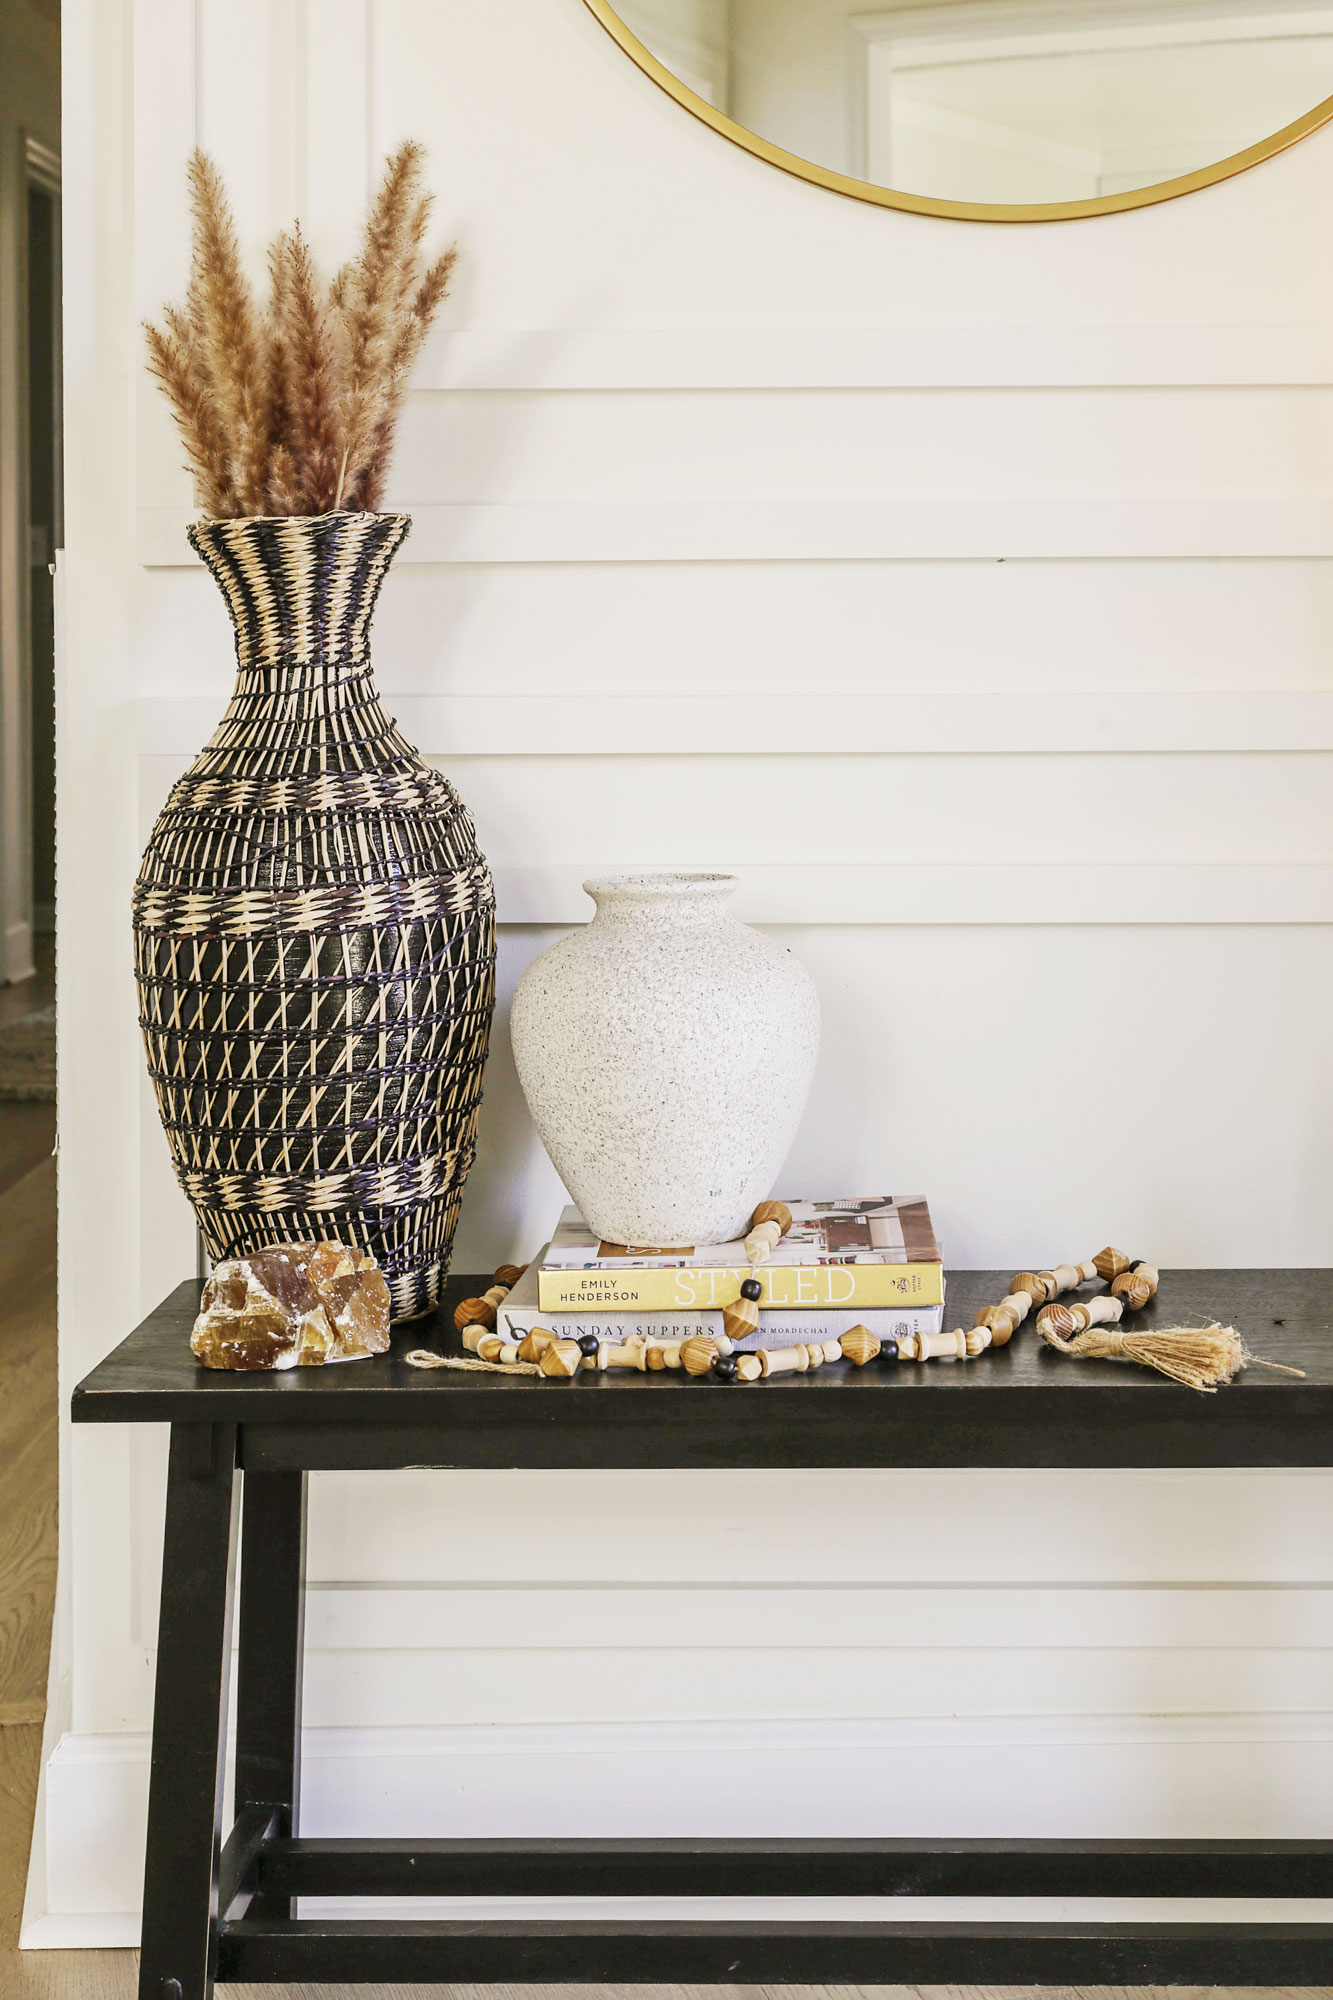
In this high-end foyer (you can see the project I am referring to here), was the most fabulous, modern take on picture frame molding I had ever seen. With my inspiration kicking me into gear, I then told my handyman of a husband to figure out how to replicate the look on a budget.
Given we were working with a narrow, sloped wall, our design did not turn out exactly the same as our aspirational reference photo, but it definitely did wonders for a once “flat” and “lacking” space.
Here is how we did it…
DIY Accent Wall With Molding Tutorial:
Materials Needed:
- 1×2’s (enough for your unique project)
- 16ga nail gun & nails
- wood glue
- level
- miter saw
- tape measure
- pencil
- caulk
- stud finder
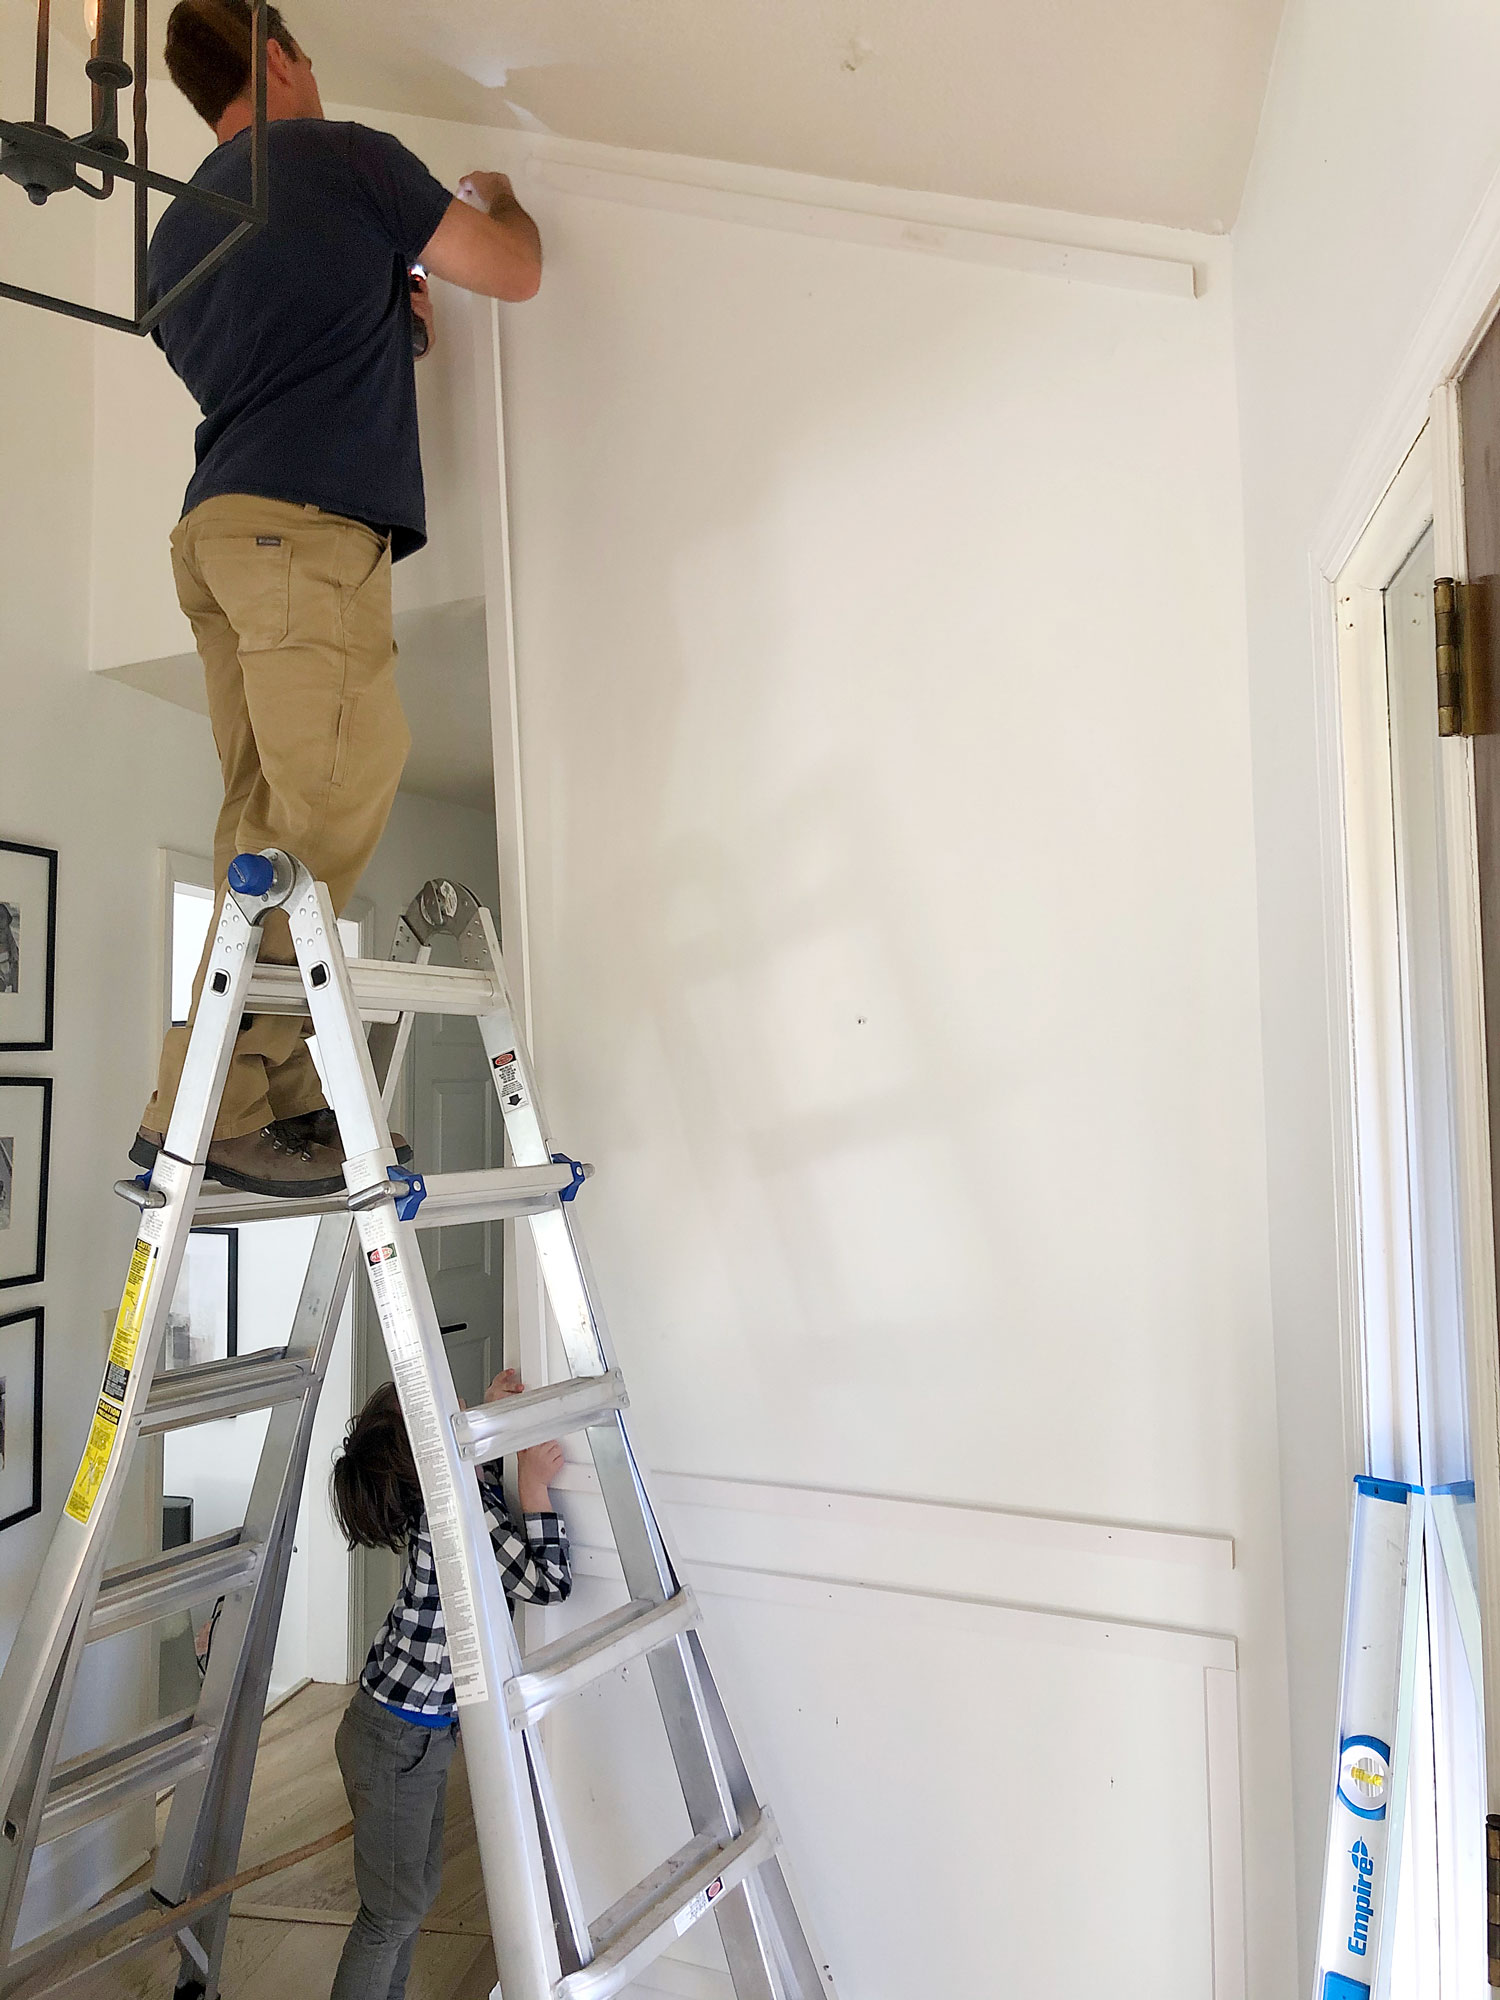
(Step 1). Mark stud locations in wall. This will allow you to know where all your horizontal pieces will anchor to.
(Step 2). Lay out your design.
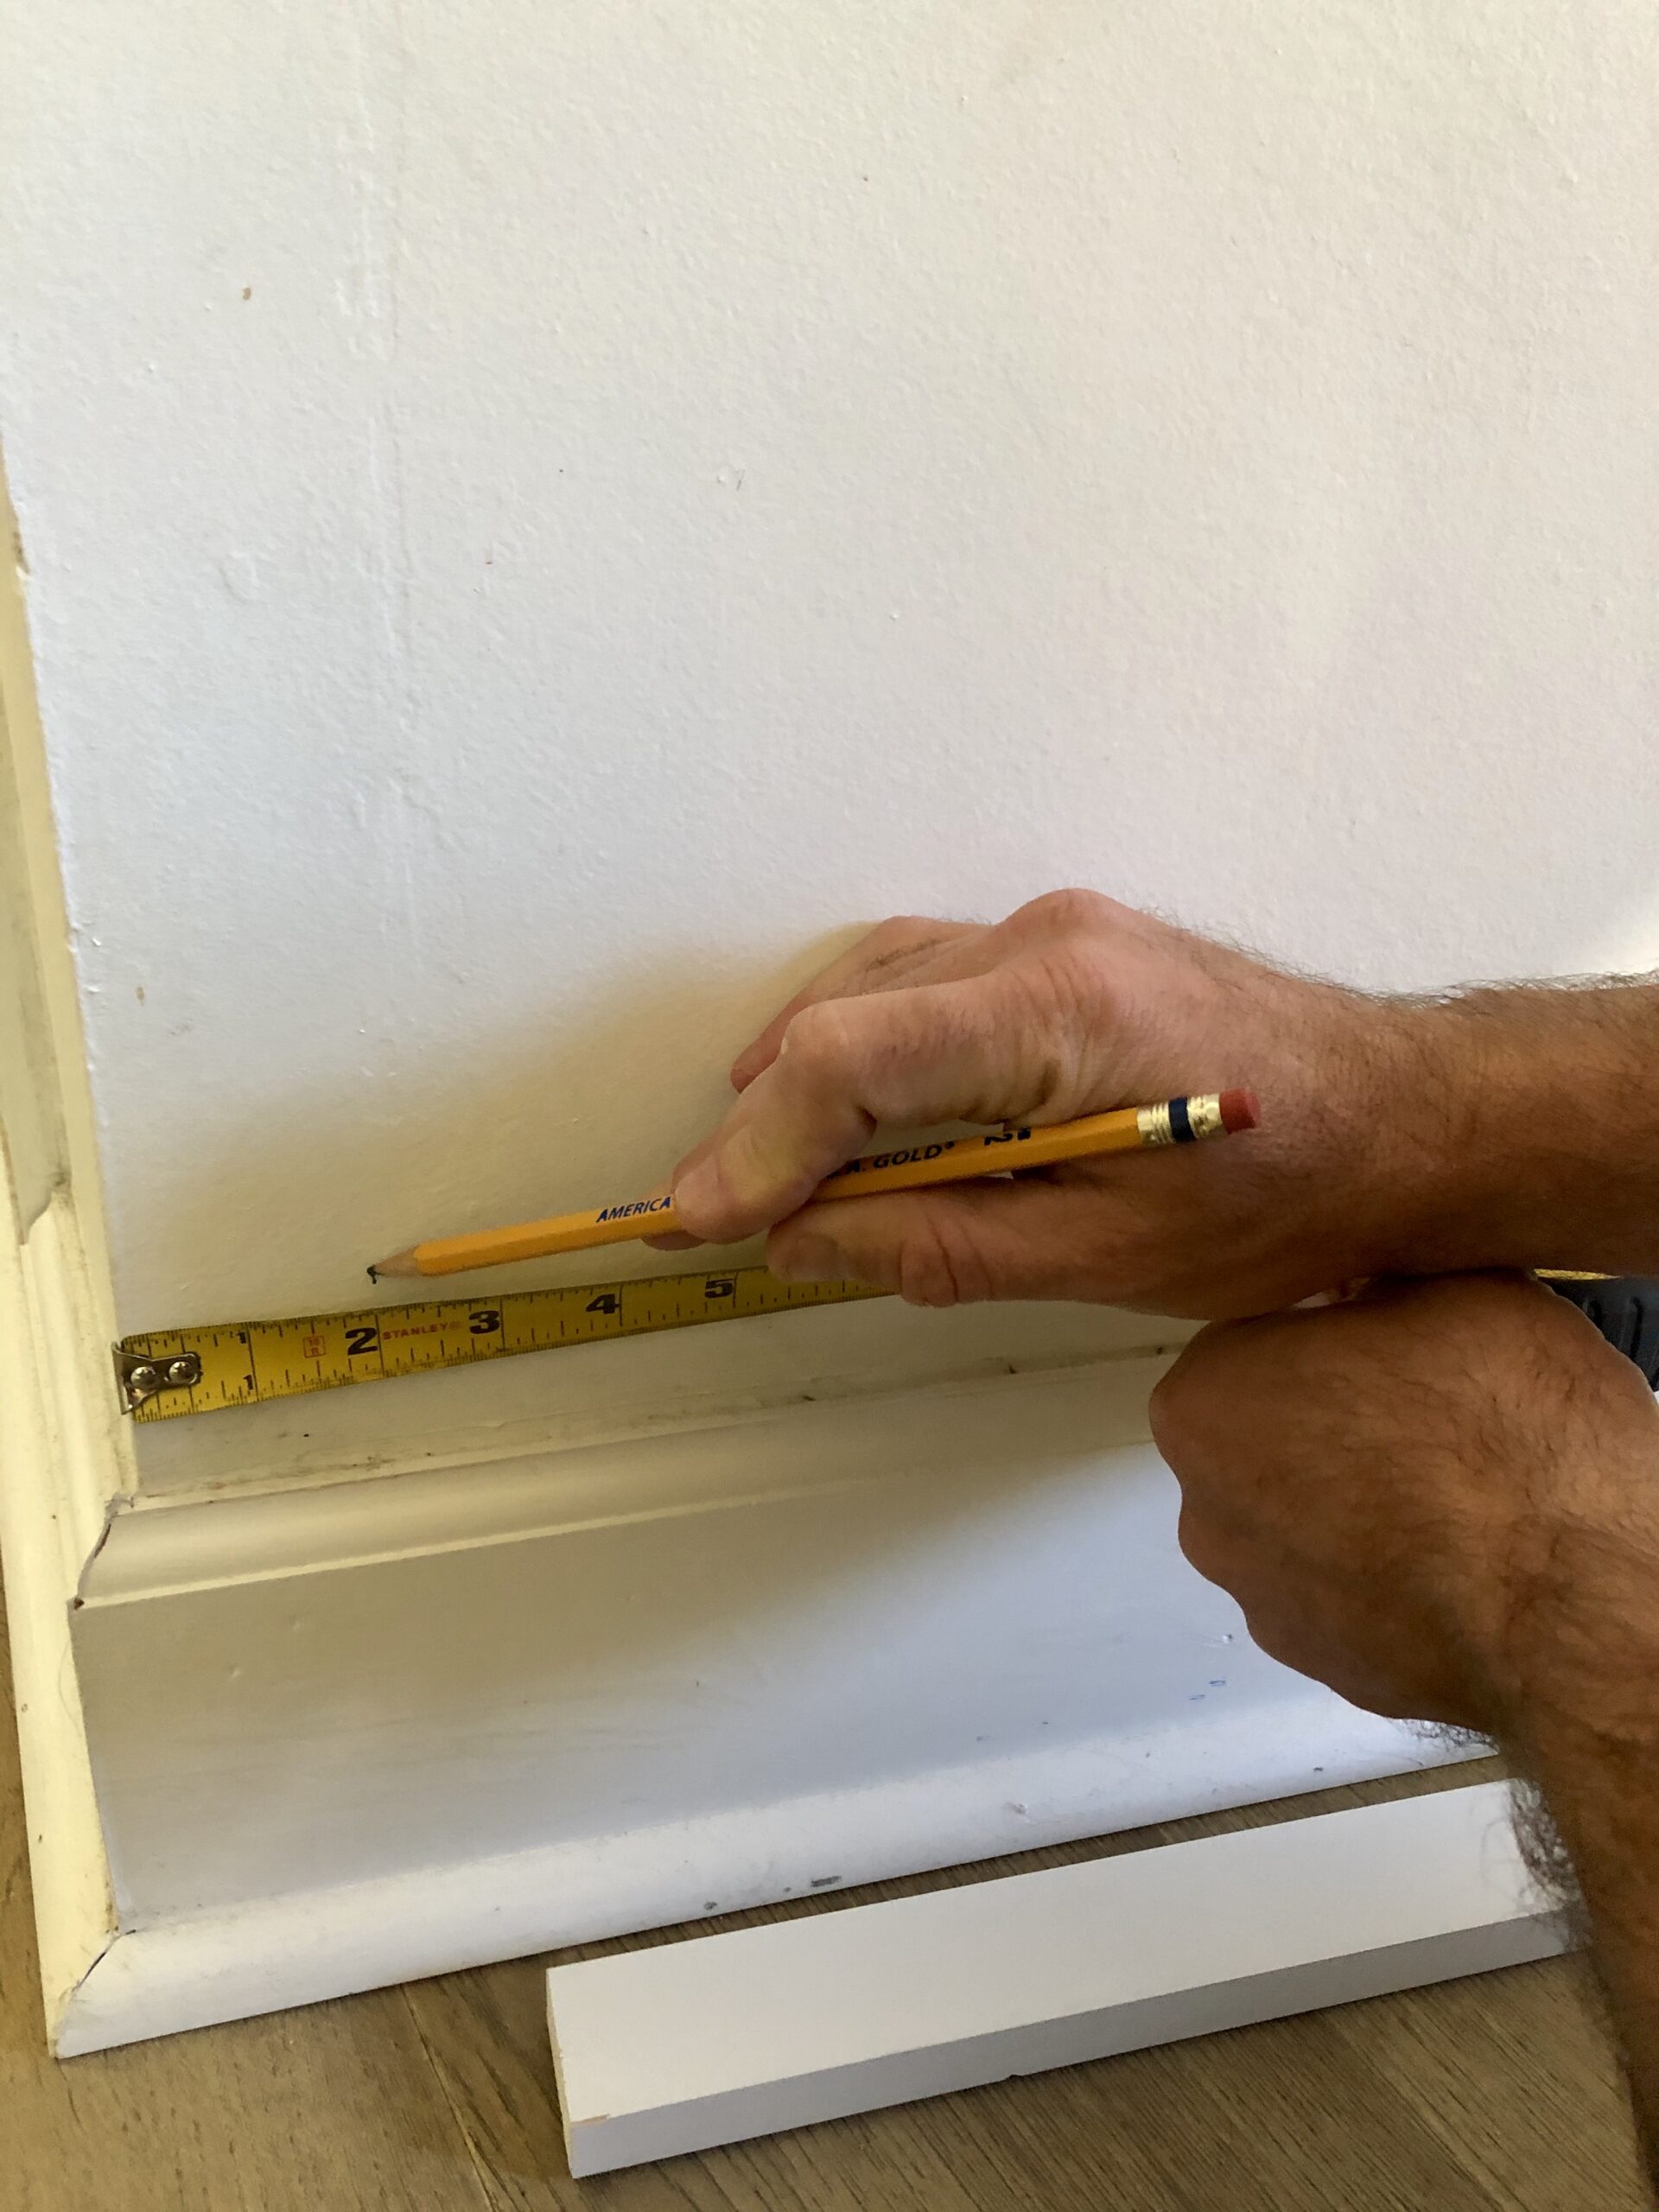
(Step 3). Mark the spacing of the outer pieces from the wall edge that is desired. We started our outer pieces 2.25 inches from the outer corner of the wall.
Note: Before you begin making cuts, note that the horizontal molding will act as a ledge for the vertical pieces.

(Step 4). Cut all pieces to desired lengths. If you have an angled ceiling line to follow, simply hold the molding flush with the ceiling and mark a vertical line using a level. This will allow you to know what angle to set your miter saw to when making all your cuts.
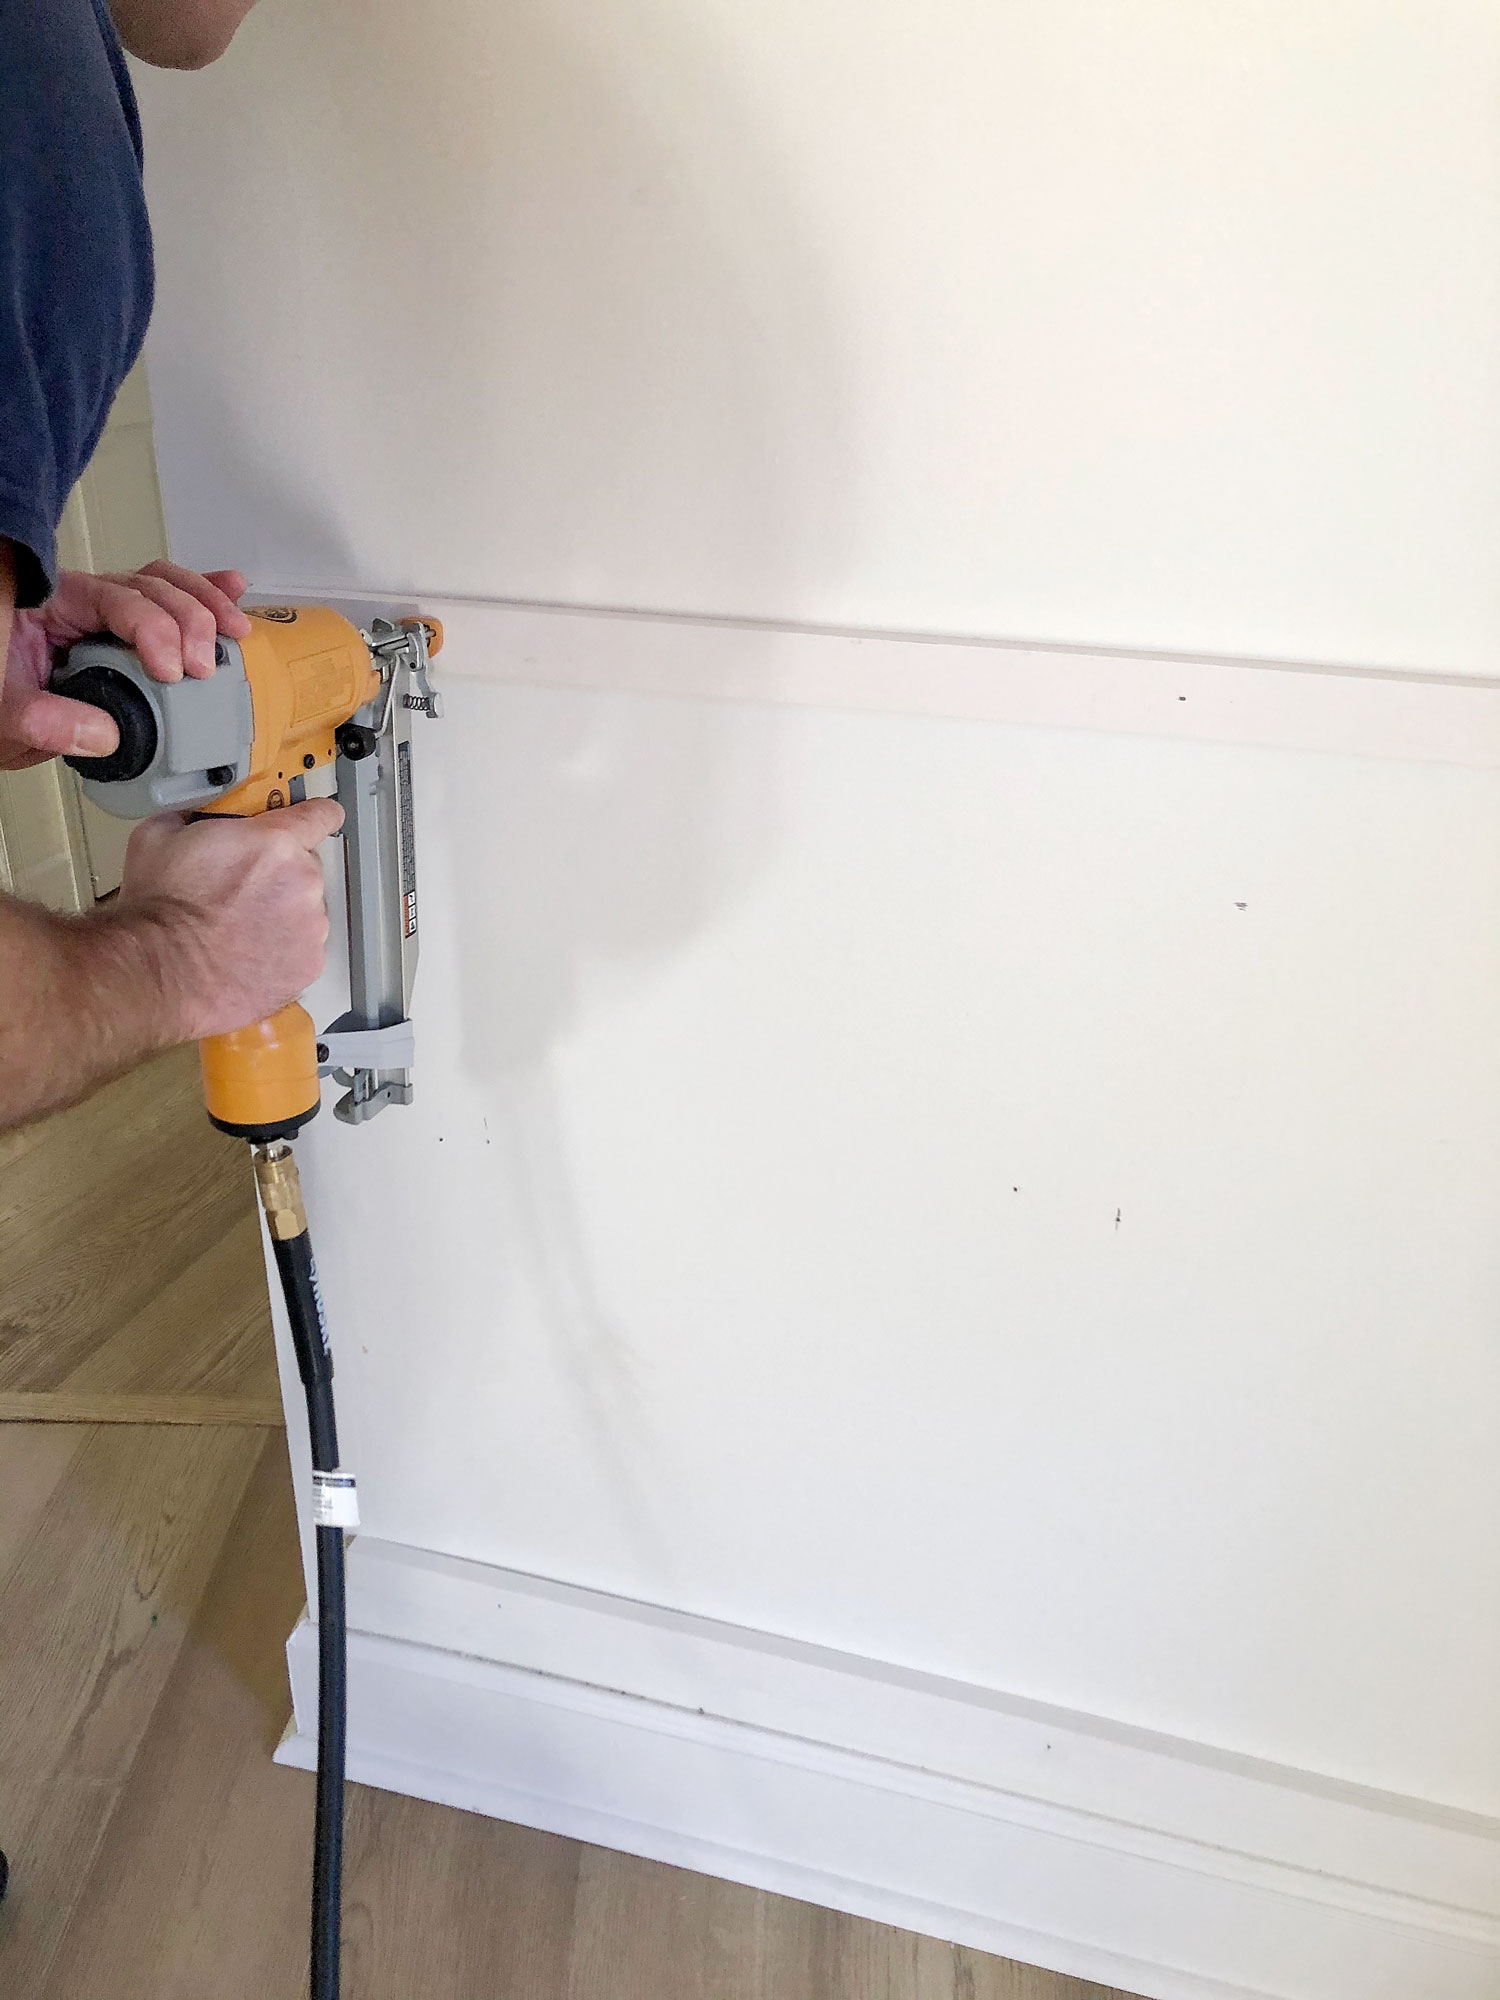
(Step 5). Attach horizontal boards using a 16 gauge nail gun making sure to line up with the stud markings from step 1.
(Step 6). Using a quick set wood glue, apply to ends of vertical boards and set in place. The glue will hold boards once glue has set.
(Step 7). If you want a double layer design as we have, repeat all steps.
(Step 8). Do your finishing work by caulking seams and gaps. While you could probably just paint over nail heads, I chose to do a wood filler on them, sand, and then paint.
For only 4 hours work and $70 in supplies (it wouldve been half that if we had decided to only do 1 layer of picture frame molding), this room got a major upgrade.
I hope the new owners of our fixer upper will love this wall as much as we do!
Now I have got to go and look at our next potential house!
Thank you so much for stopping by this week. It would mean the world to me if you could share this post with a friend or on social media…
Now get out there and design some good vibes along with a fabulous life!


Welcome!
My journey in interior design and home improvement began with transforming my first fixer-upper home, all while managing a budget and raising two young boys. My work, a reflection of my passion for creating beautiful, uplifting spaces, has been recognized by top publications like Better Homes and Gardens Magazine, HGTV, and more. I invite you to explore my site and witness the transformation of my home and the vibes we've designed. Read more...


This is gorgeous. Feature on Friday DIY & Finds.
Well thank you so much, Marty! xoxo
Your accent wall is gorgeous!!! I had to pin this to my accent wall board because it is that good….and I may have to copy it in our new home:)
I wish you well in your next chapter!!!!!!!!!
Thanks for all the love, Maria! Cant wait to see your new place. 🙂
Gorgeous accent wall! What a rich difference it made!
Thank you! xoxo
What a huge difference this made! I am definitely saving this idea and passing it along to friends! Good luck on finding your next home!
Thank you so much, Carmen! I am really happy with how it turned out. Happy new year!
Girl, it looks amazing! I love how y’all did the double moulding. Definitely elevates the look! And congrats on facing your fear!
Thank you, Sarah! I hope your year is off to a good start. 🙂
What a huge difference for such a reasonable price! Best wishes on your home search and your recuperation.
Thank you so much, Donna! I hope your year is off to a good start. 🙂
@Designing Vibes,
Beautiful job!! I did a similar project at my house. However, when I look at the wall, adjacent to the one with mouldings, it looks empty to me. What I mean, is the wall where your door is. Have you thought of putting a horizontal moulding there?
Hey Inna! Thanks for the kind words. 🙂 When I built that accent wall, I was about to put my house on the market, so I did not want to invest that much money into the project. I think the entire foyer done in the moulding would have certainly been more ideal if budget and moving had not been a factor. 🙂
When you did Modern Picture Frame Molding Accent Wall did your wall have texture on it before you added the accents?
I want to do something similar but have textured walls
Hey Katie! Our wall was just sheetrock. That being said, when we bought the home, someone had done some sort of sponge paint texture on the walls before we painted over it. But that was the only texture. 🙂