
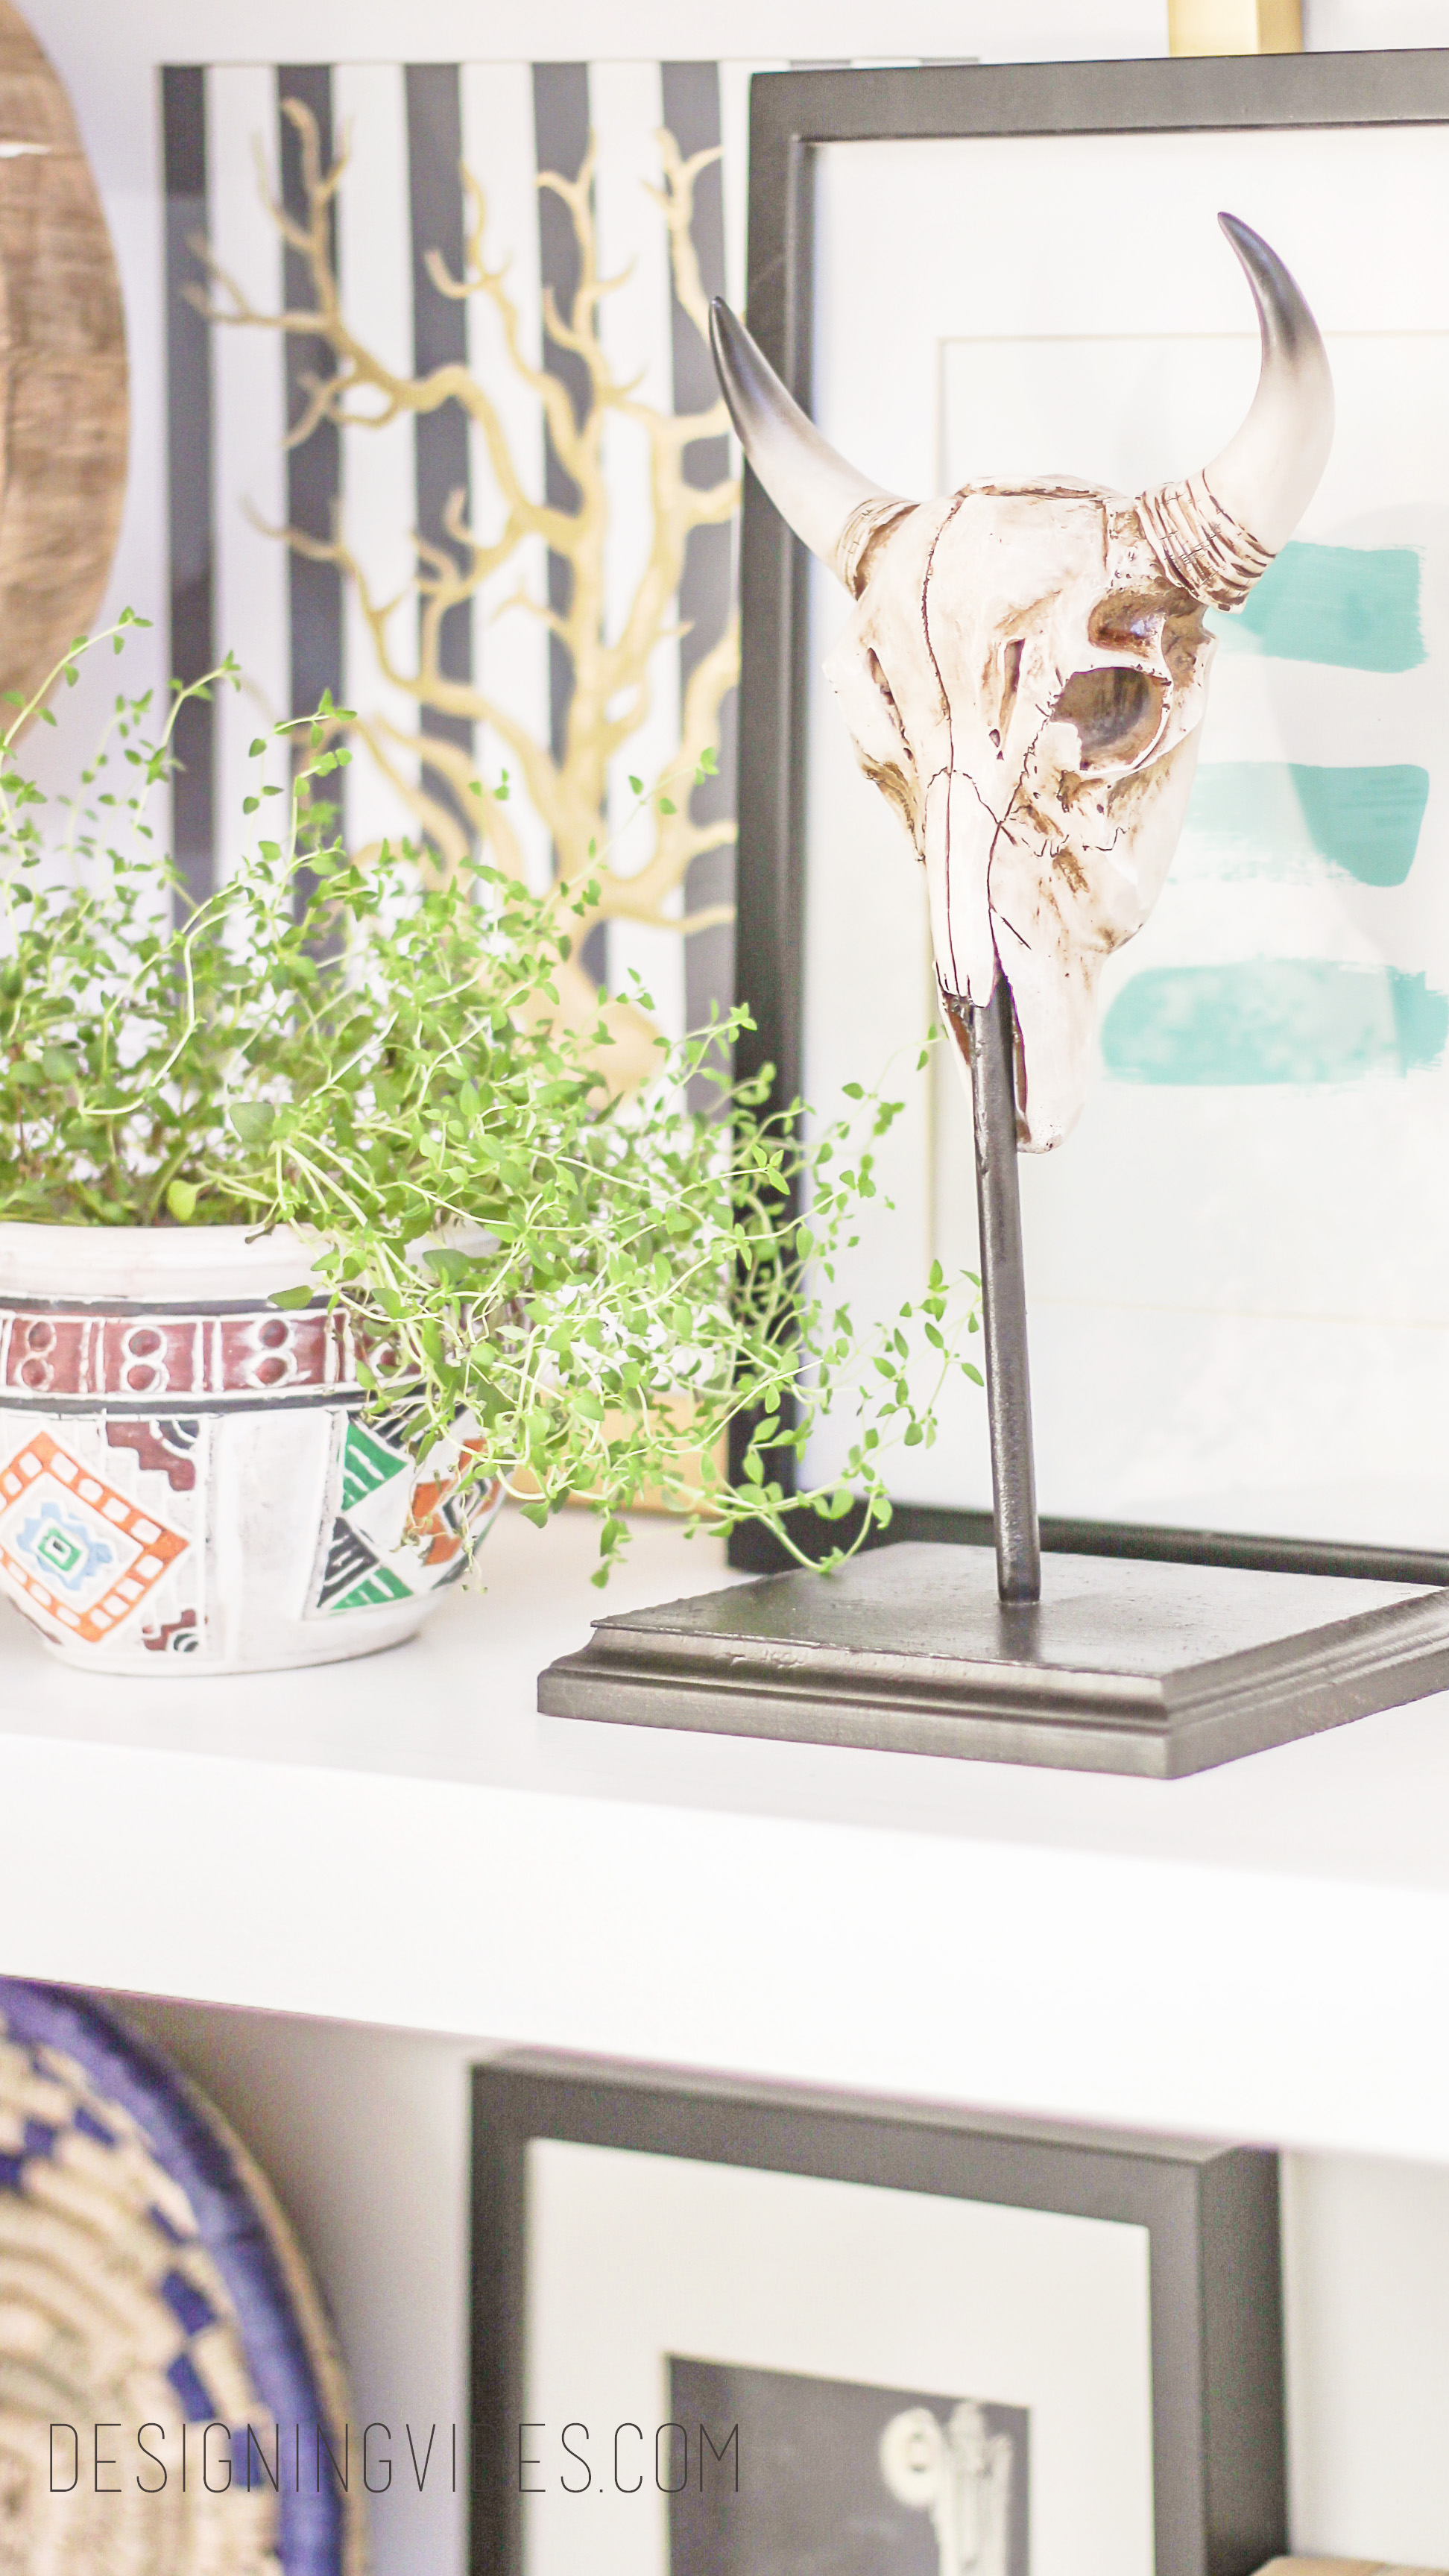
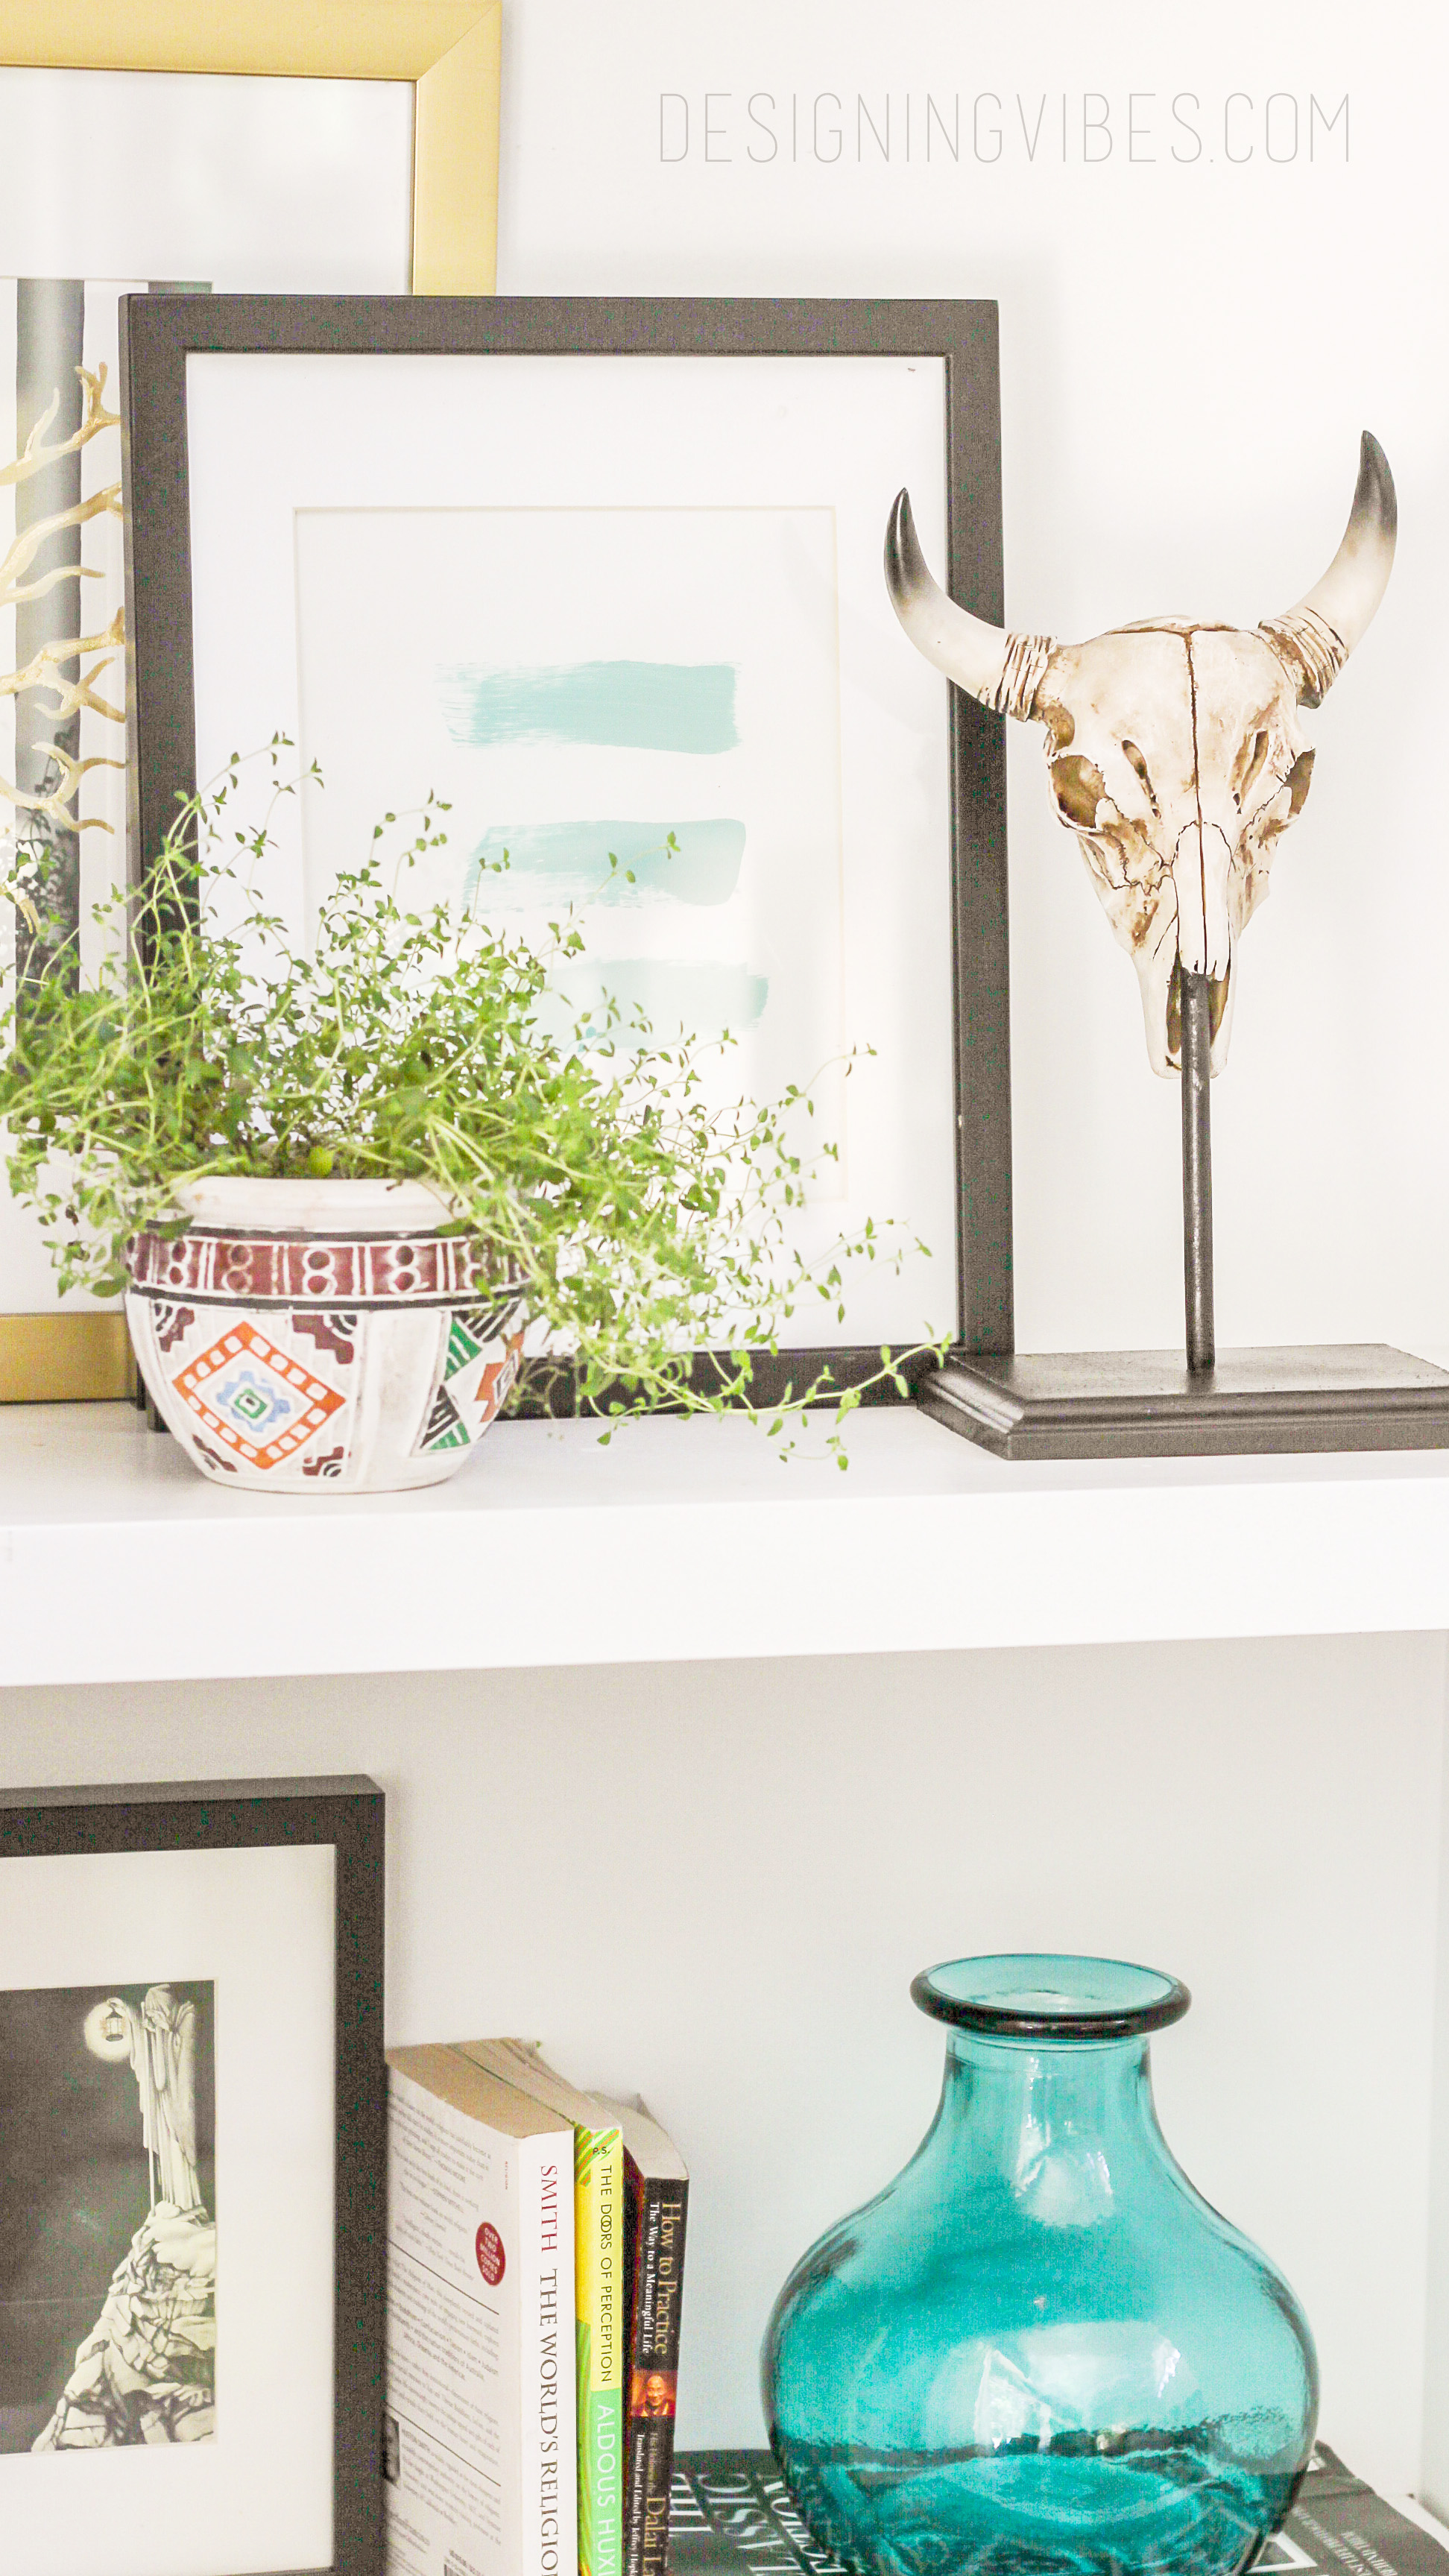
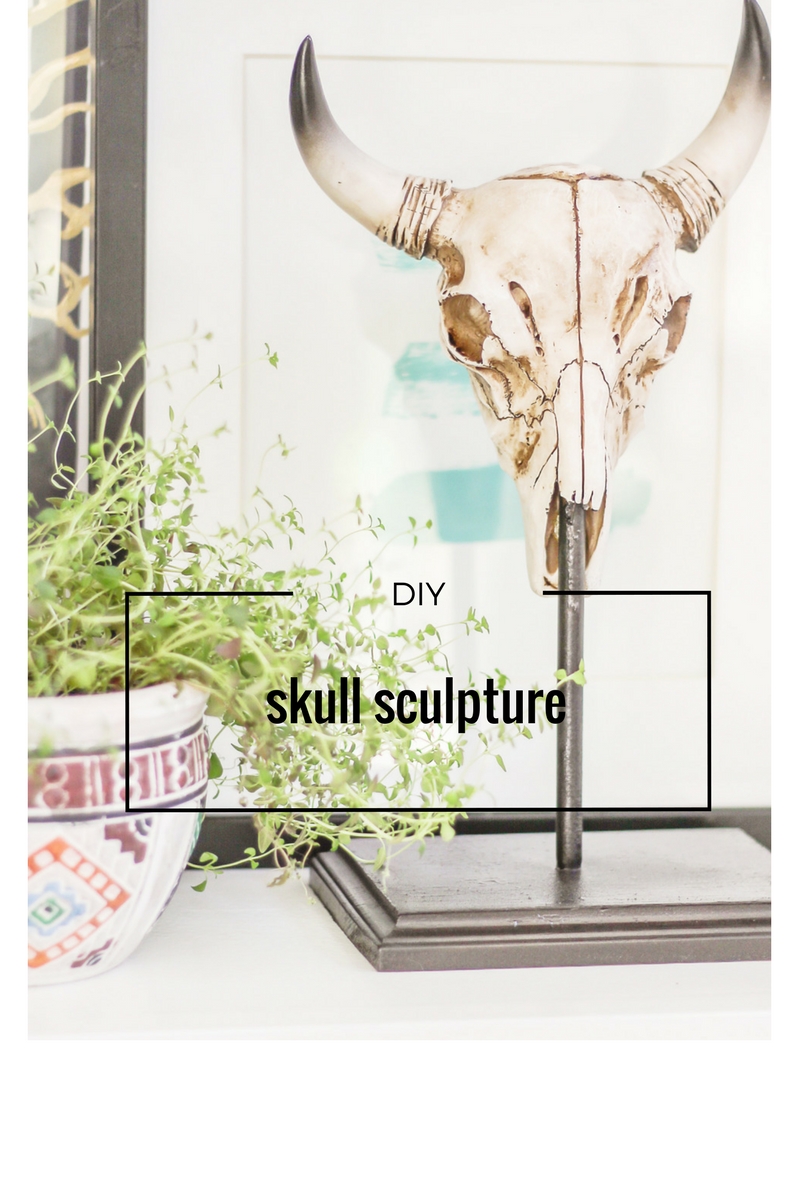
DIY Cow Skull Sculpture for $10
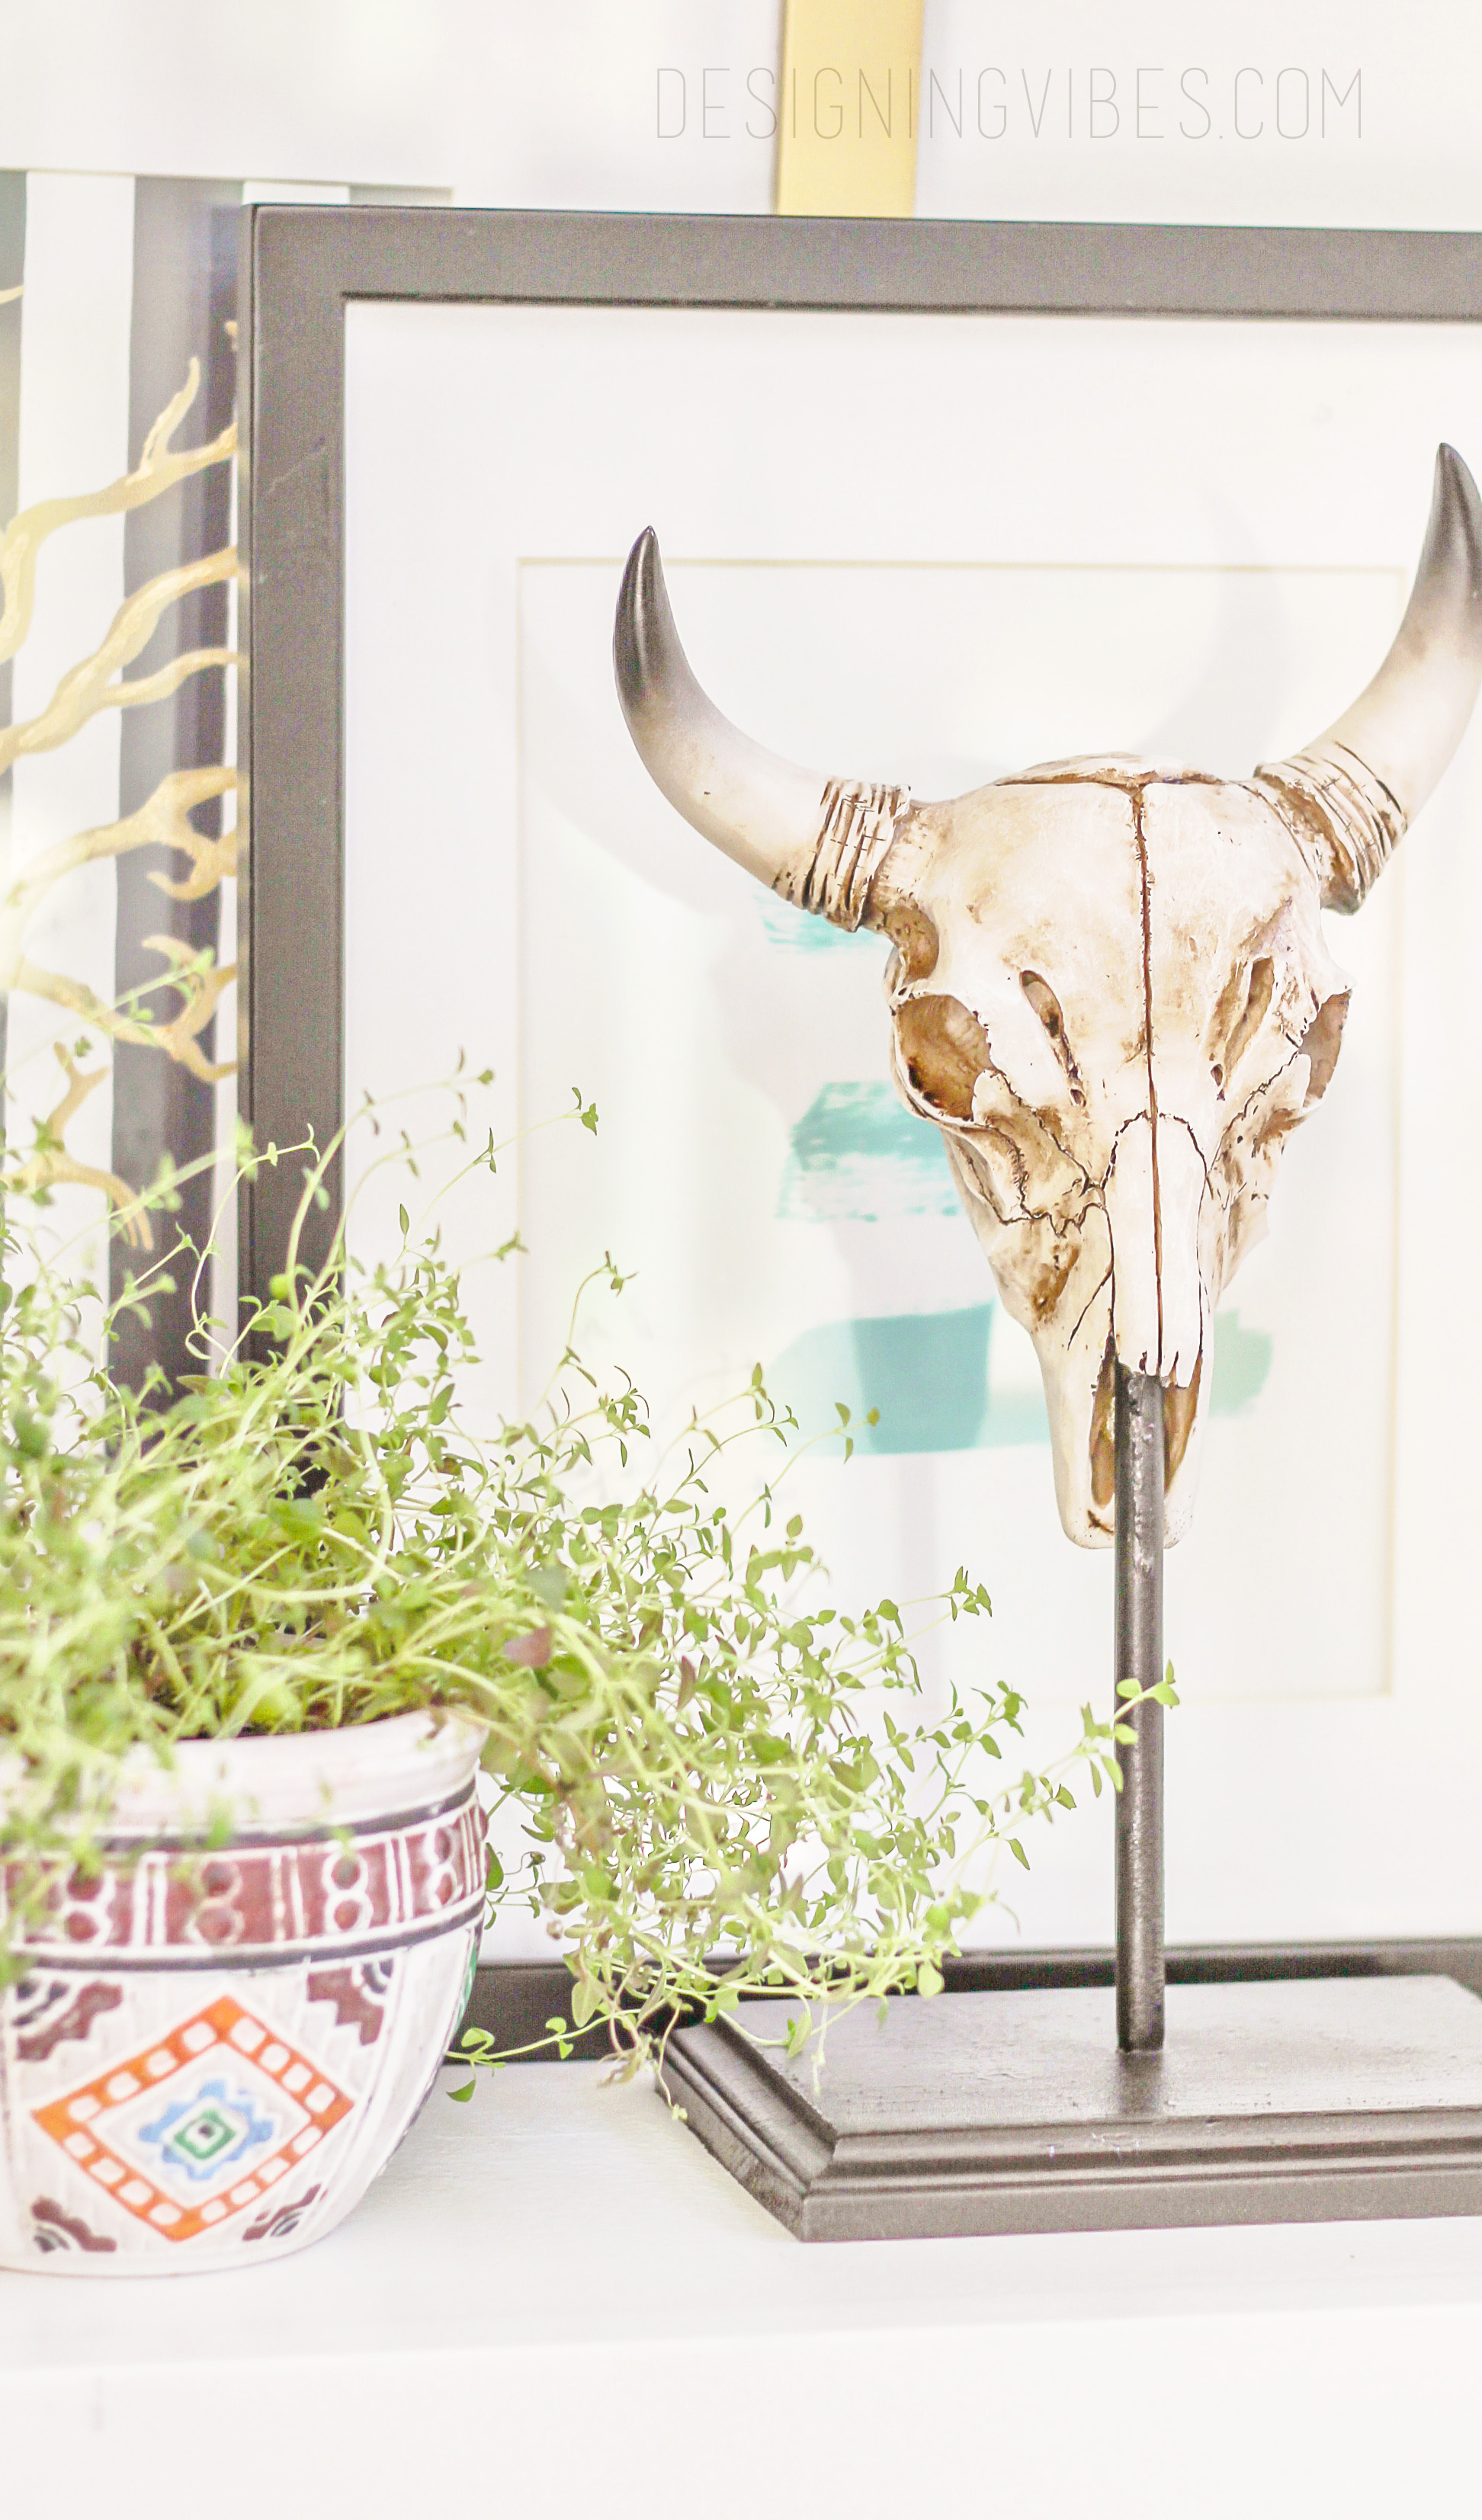
Hope all of you fabulous mamas out there had a wonderful Mother’s Day weekend. Today, I am going to show you how to make a faux cow (or technically steer) skull sculpture for just $10.
For the past few years, it seems taxidermy has been a popular accent in almost every genre of decor : Scandinavian, farmhouse, modern-rustic and bohemian aesthetics alike have all embraced this trend.
As many of my DIY stories begin, I was browsing the isles of Hobby Lobby, and I spotted a gorgeous steer skull on a metal stand. I loved how the stand added an artsy, glam sort of element to the taxidermy…transforming it into a sculpture of sorts. However, the price was a little too steep and I thought I would try making one myself.
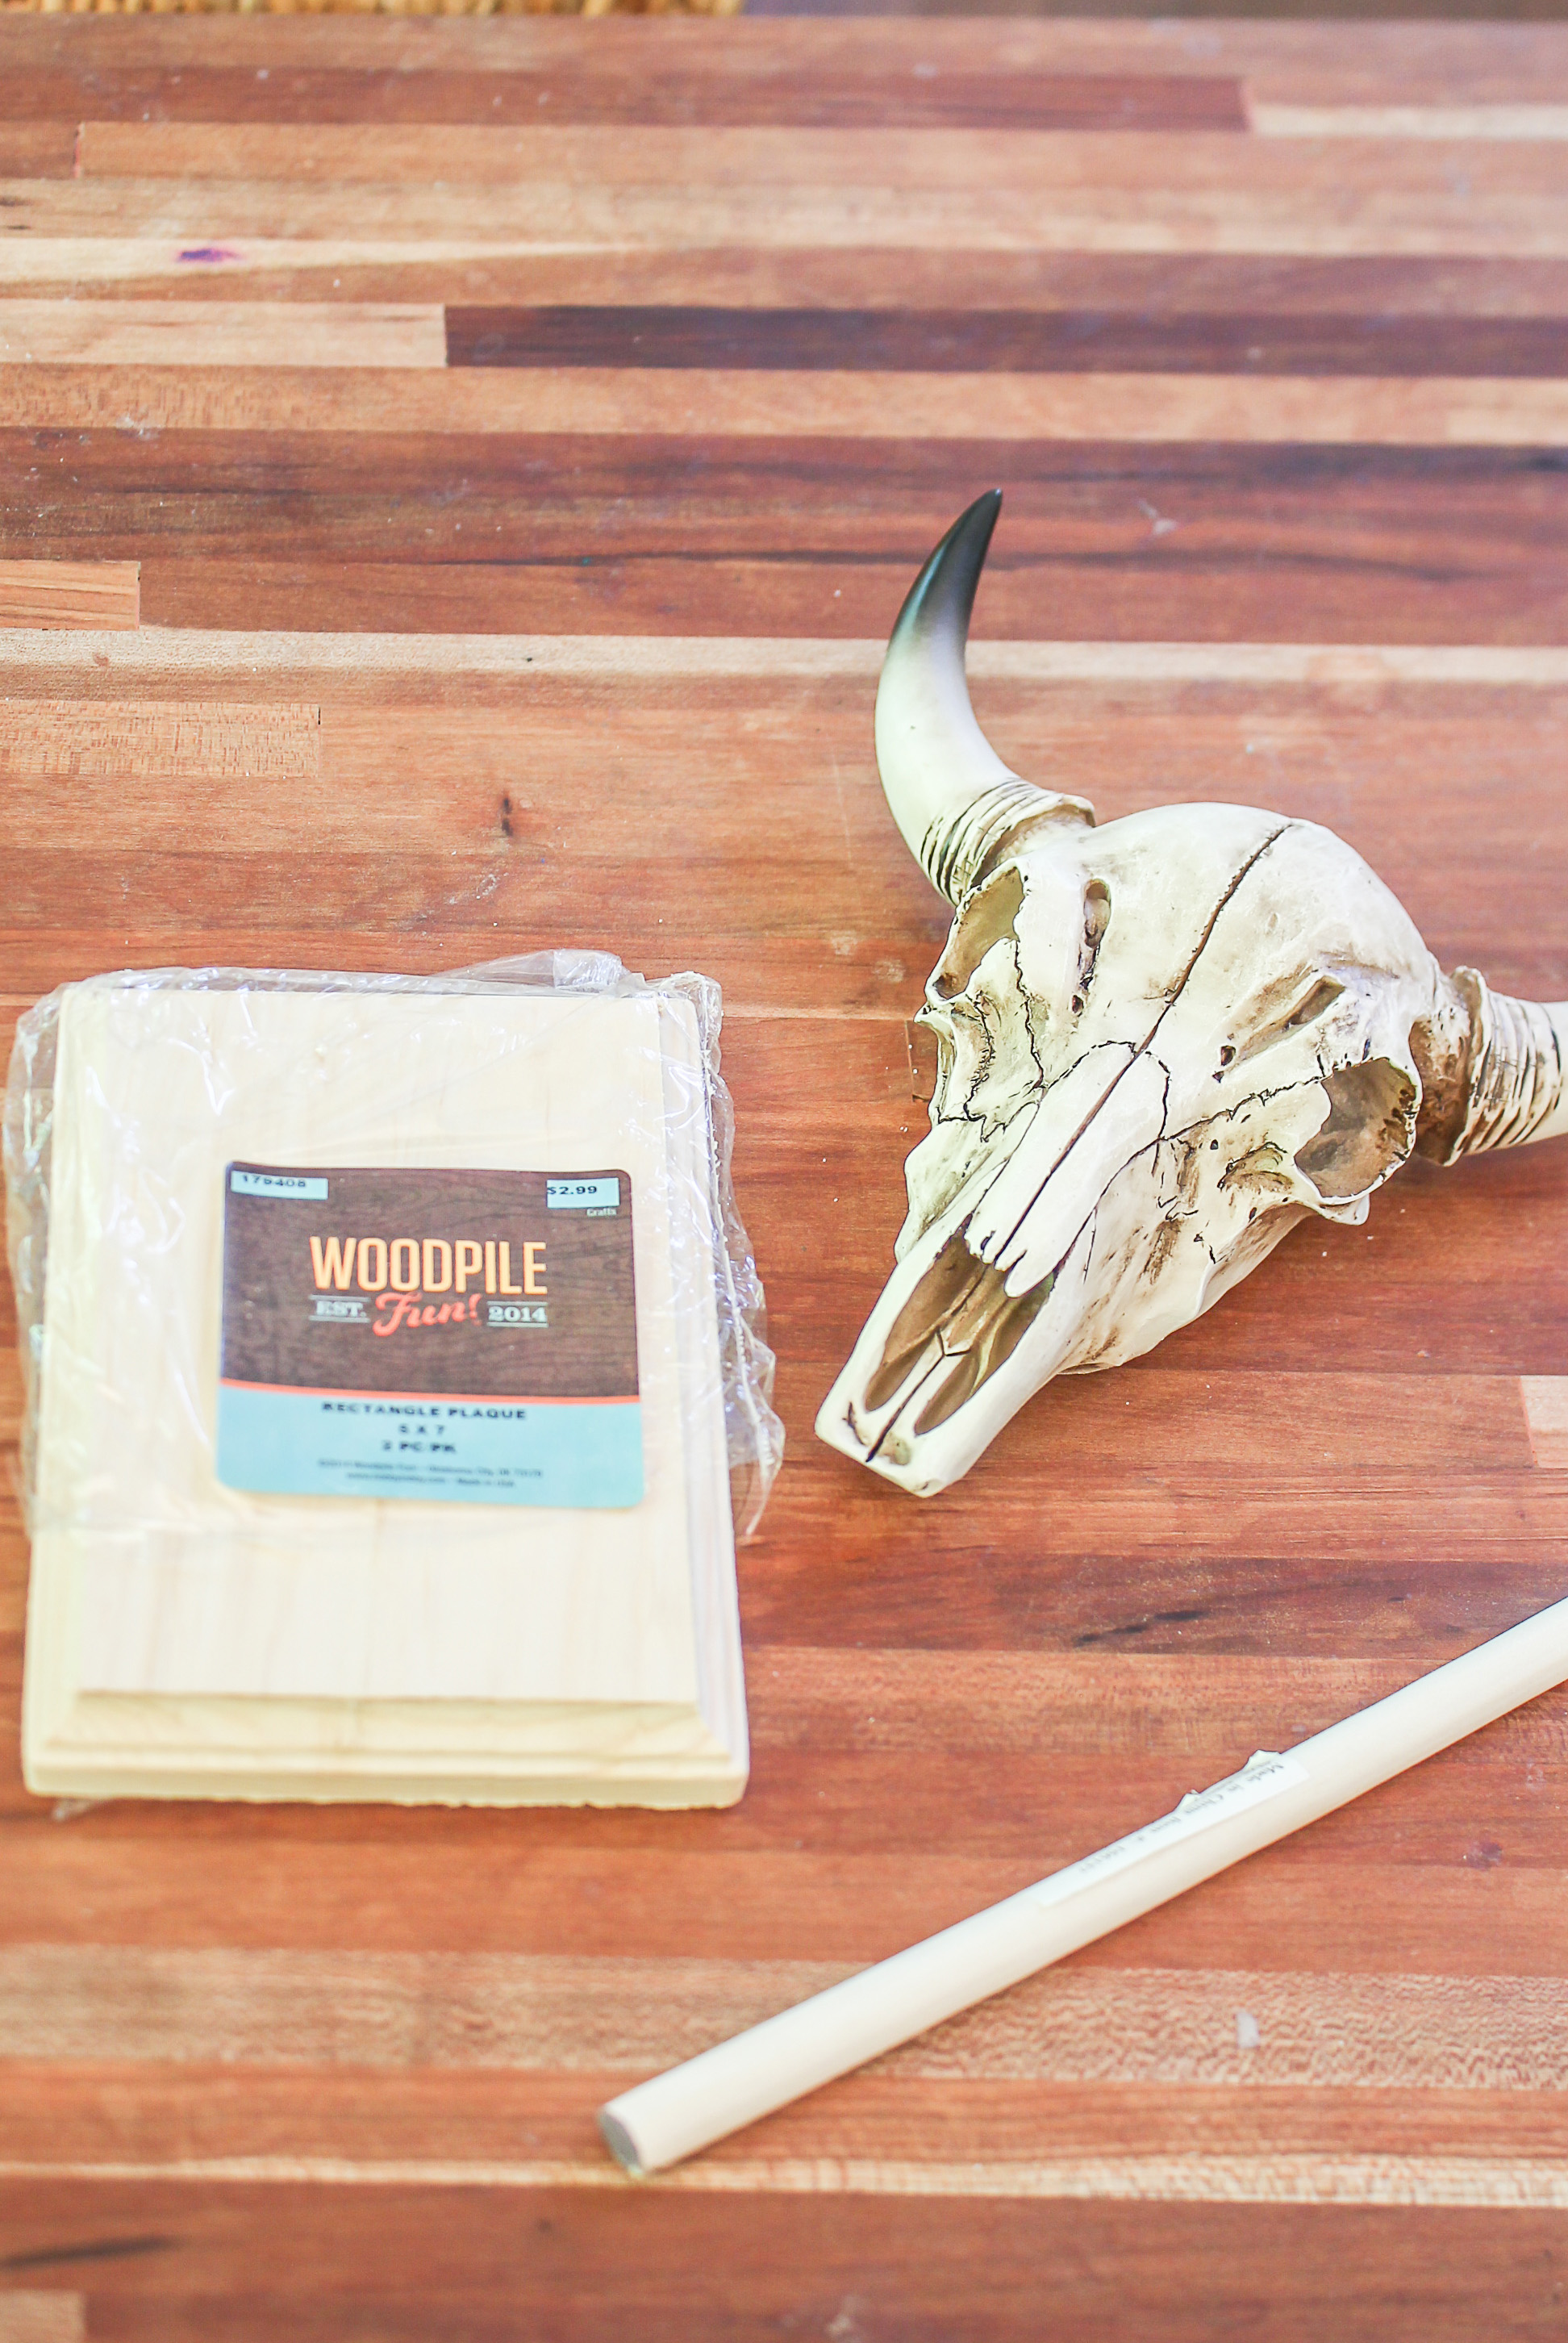
So, bypassing the decor section, I hustled (because at this point my one-year-old had run out of crackers and was starting to get restless) down to the wood working isle and picked up a dowel rod and a wooden plaque….I was determined to do the damn thing.
For your convenience, I have included affiliate links. That simply means if you click on one of the links and buy something, I receive a small commission, but don’t worry… you won’t pay a dime more.
Materials:
- dowel rod
- resin cow/steer skull ( I got mine half-off from Hobby Lobby for $6 in the men’s resin section but here is a similar one)
- wooden plaque
- rubber mallet
- utility knife
- saw
- drill
- Gorilla Super Glue

- spray paint
I made the mistake of first spray painting the dowel rod and wooden plaque, but if I were you, I would wait until you have assembled your base.See above how some of the paint got scraped off in the whole process and saw dust got all over it?
First, determine the desired length of your rod and saw accordingly. Be sure to preview it by holding up your taxidermy and finding the most pleasing height.
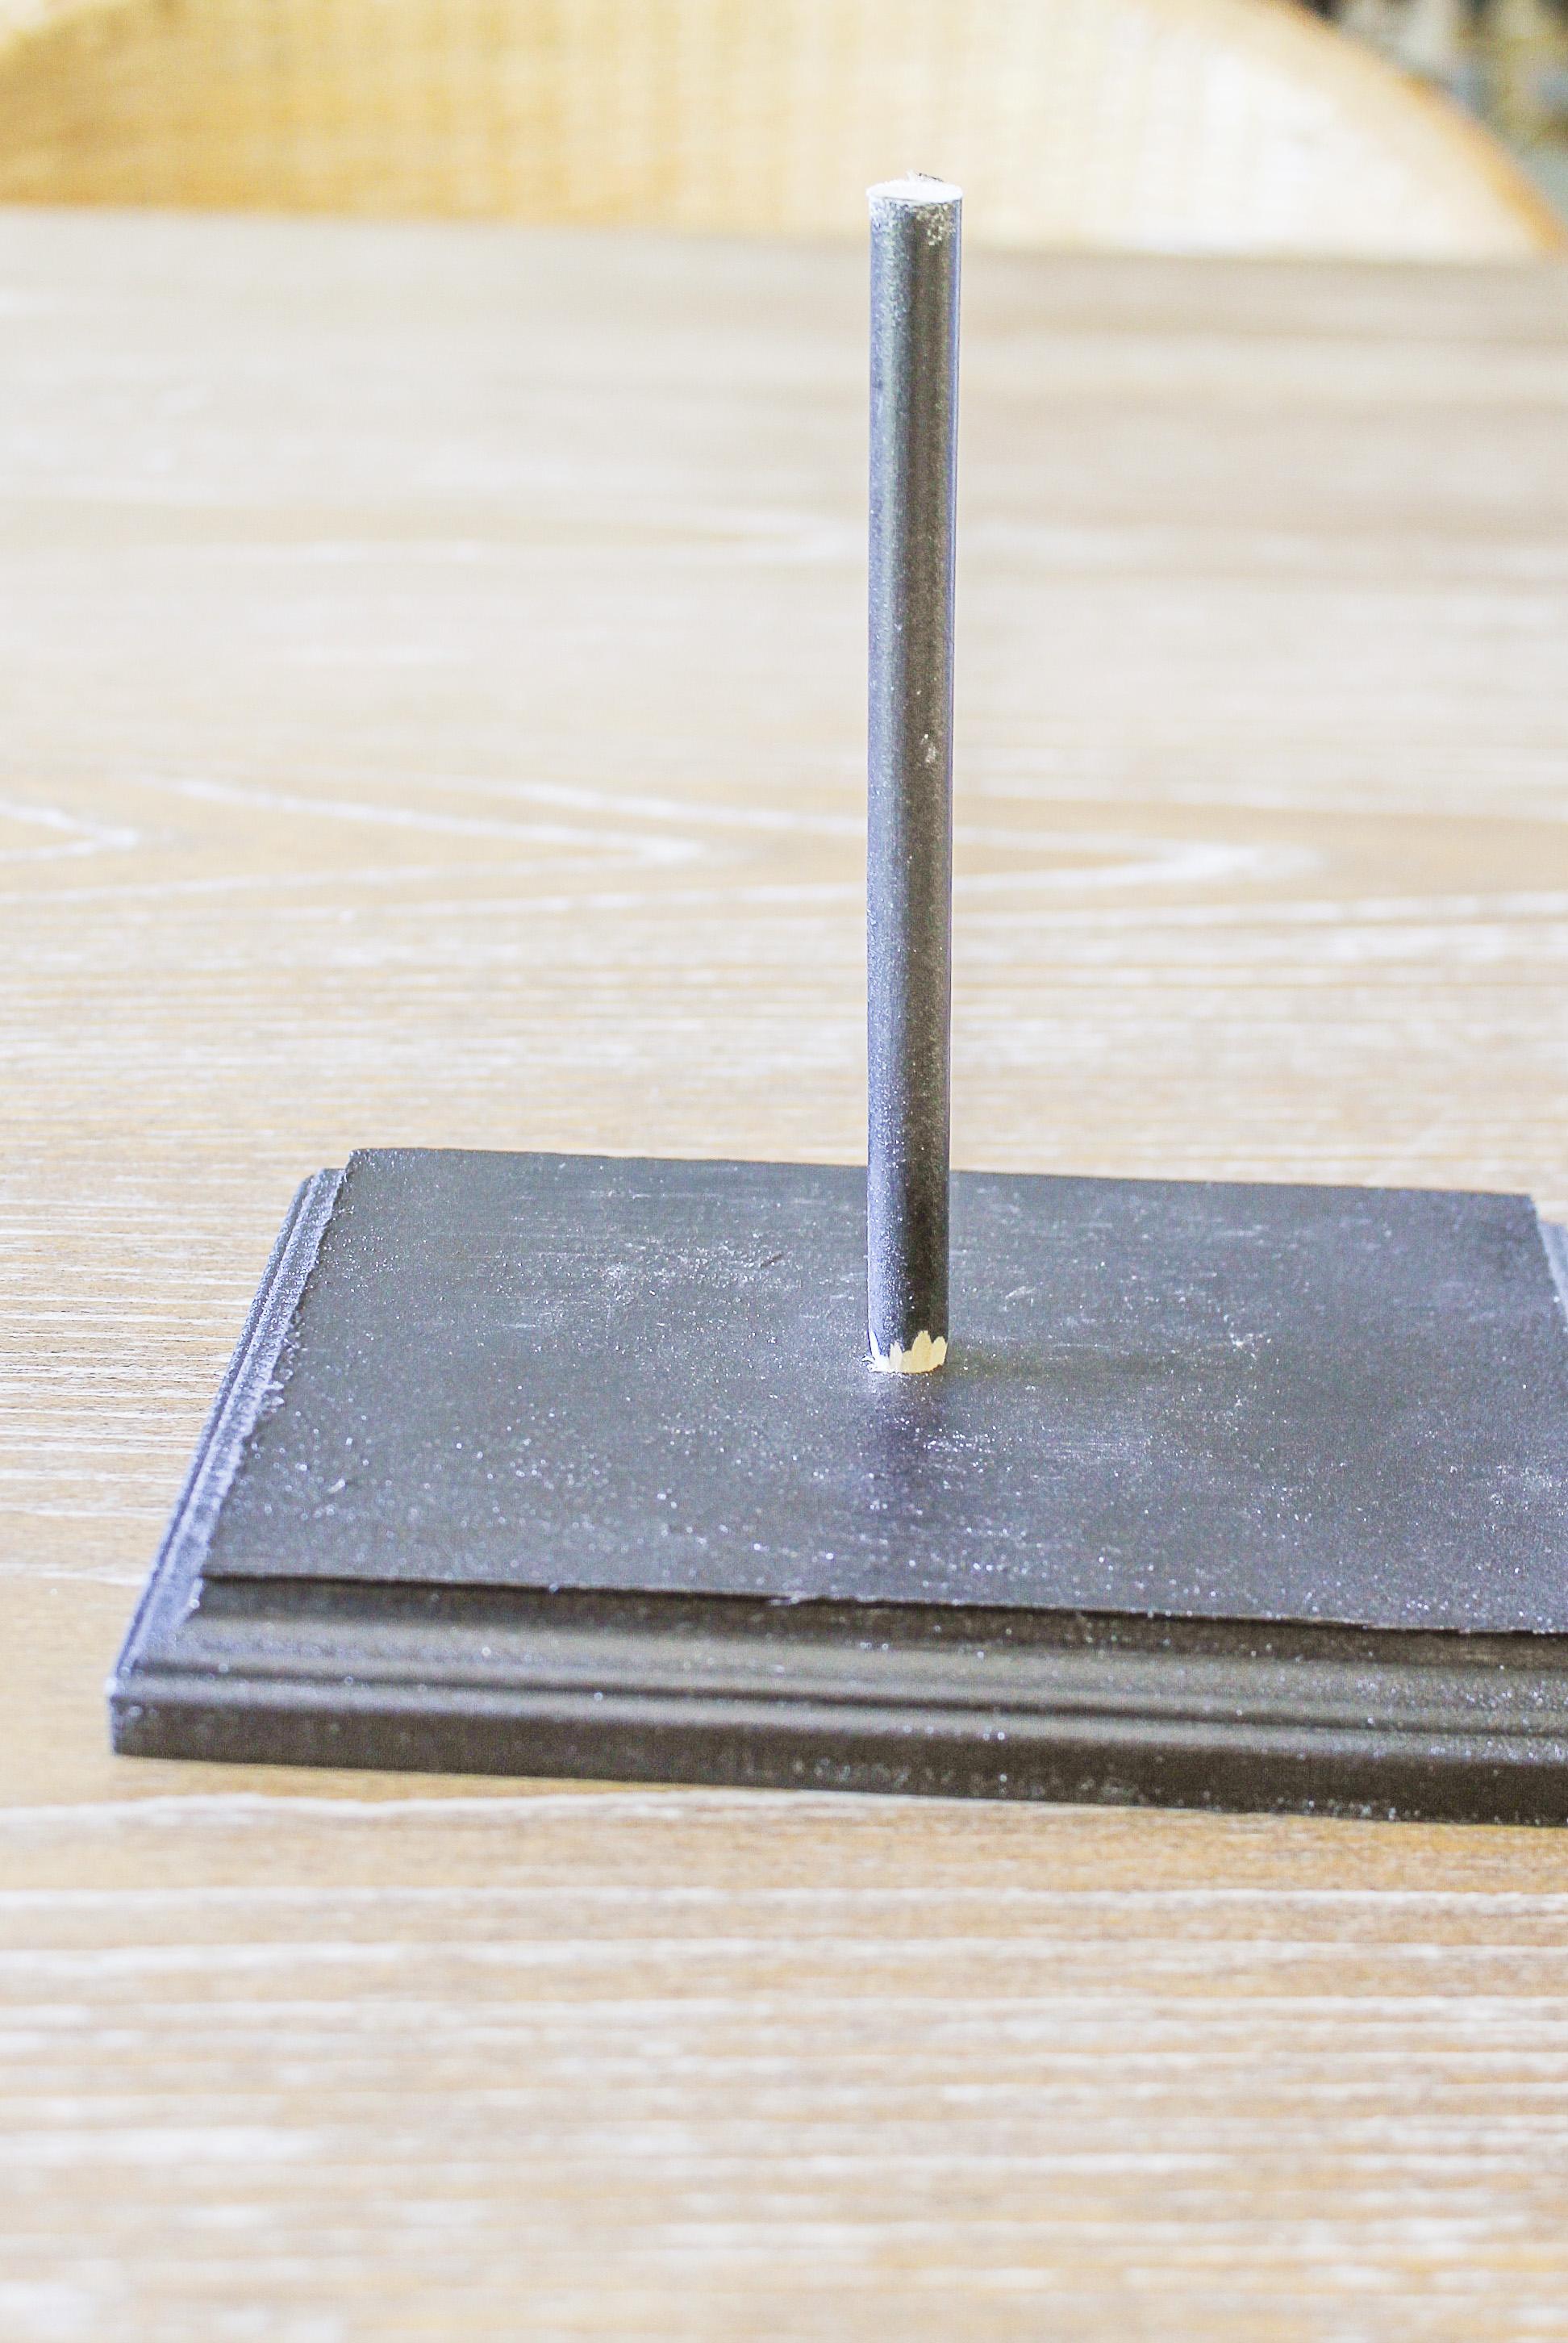
Then, drill a hole in the center of the wood plaque – you want the hole to be smaller than the diameter of the dowel rod (you will see why in a sec).
With a utility knife, you will need to taper one end of the dowel rod….sort of like sharpening a pencil, so that it will fit into the hole you drilled in the plaque. To secure the rod into the plaque, use a rubber mallet and carefully apply pressure to the rod.

Now to secure the actual skull onto the rod, apply a generous amount of gorilla glue on the exposed end of the dowel rod and up into the nose of the skull(don’t be shy with that stuff). Allow the glue to dry for 5-8 hours before handling your new work of art.
If you notice glue dripping down the rod (as it did in my case), chill the f*&k out! Don’t panic like I did. Simply scrape it off, and apply touch-up paint as needed.
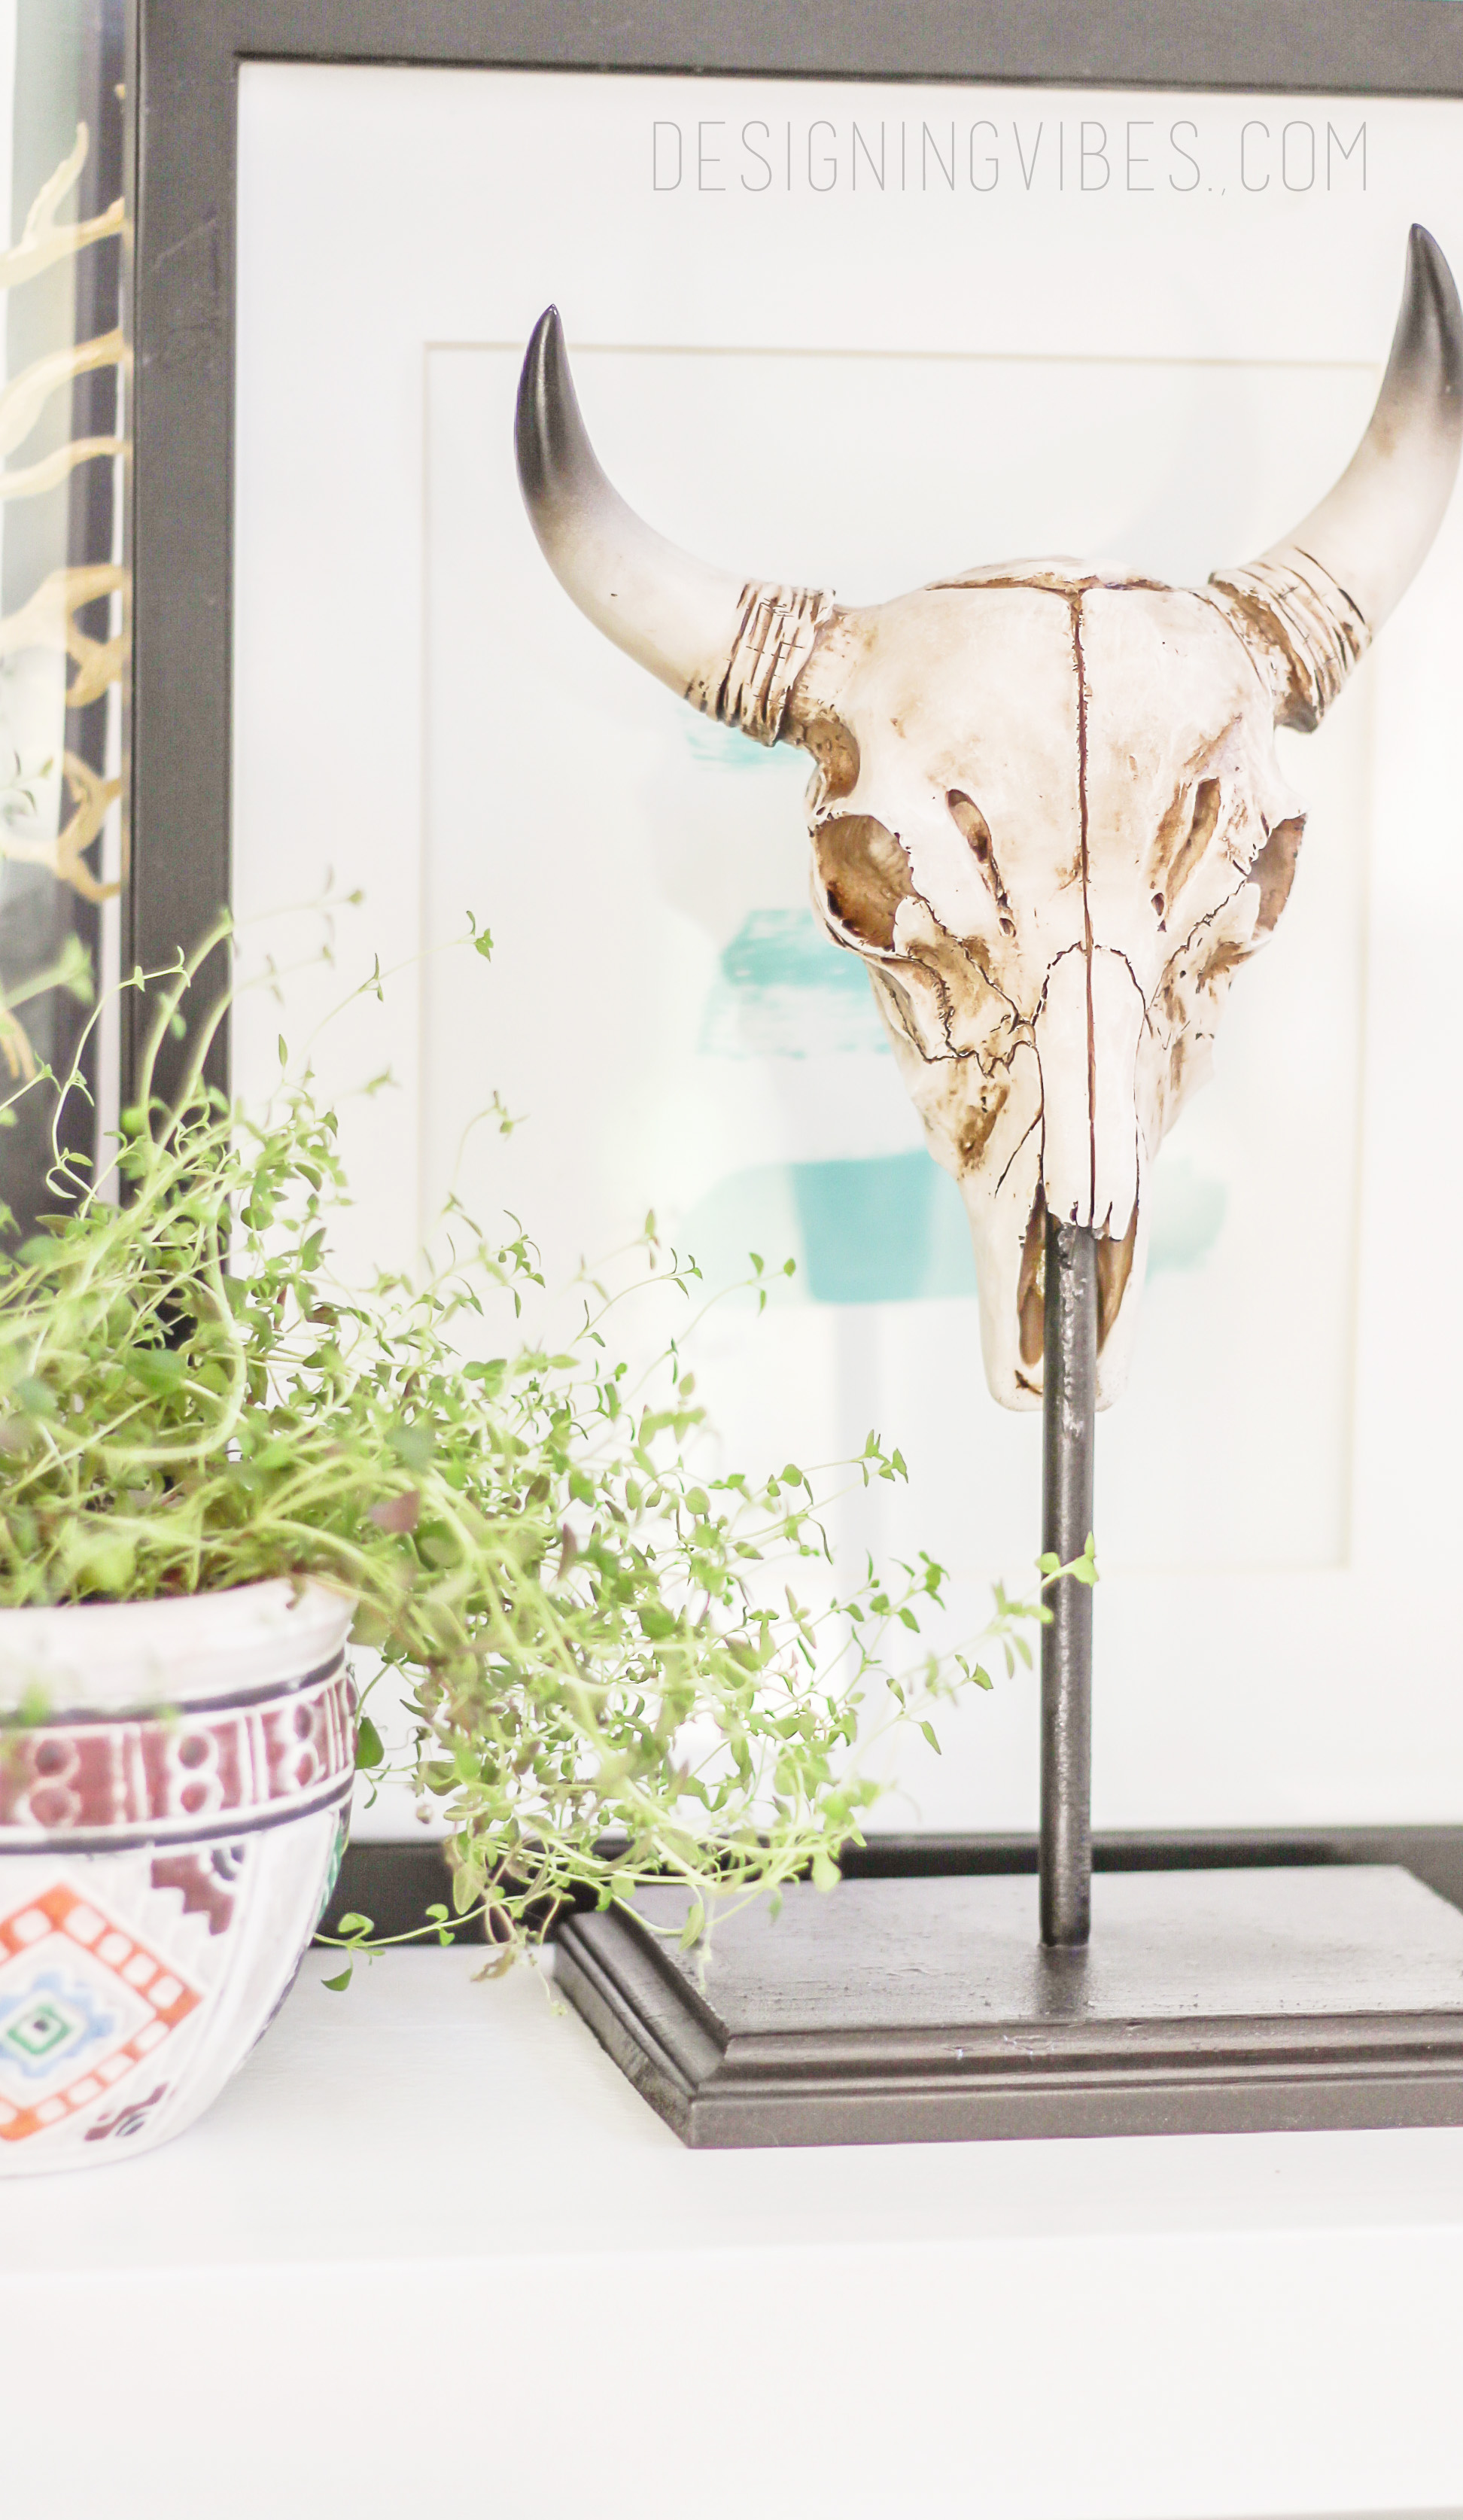
And there you have it, an interesting, artistic take on taxidermy.
And now some really exciting news to share with you guys…..
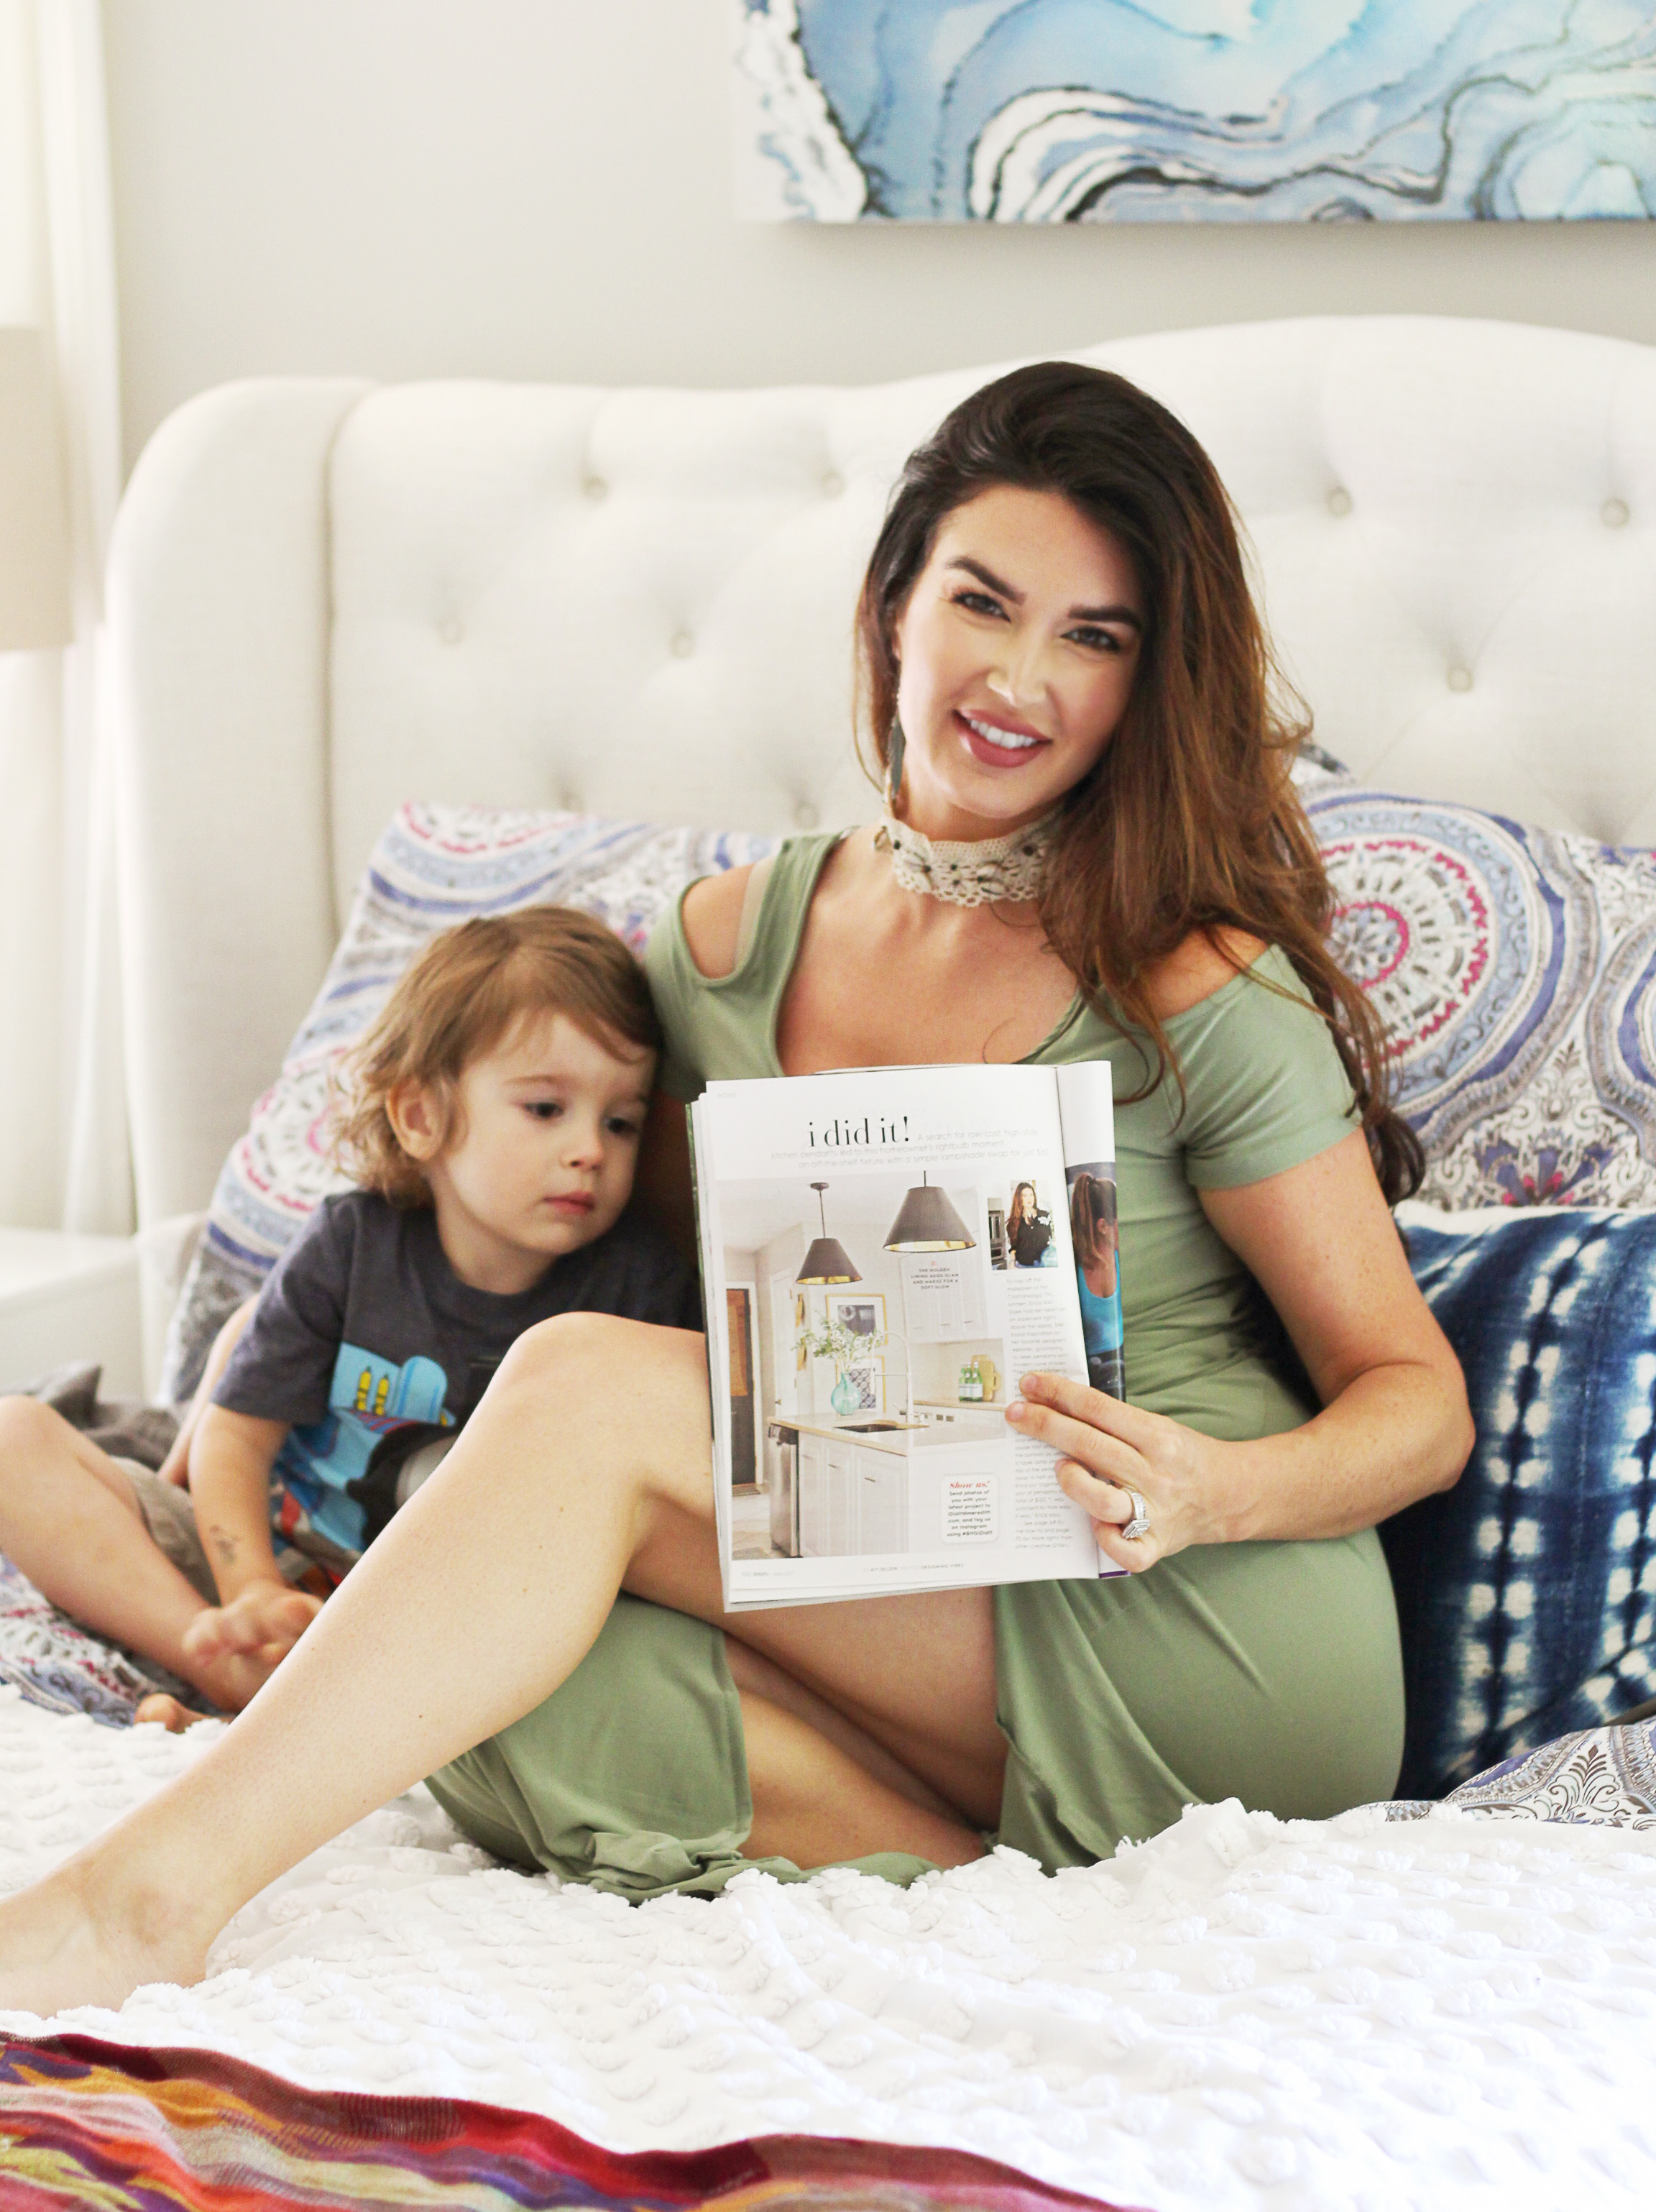
This lucky duck made it into the June issue of Better Homes and Gardens magazine. As you can imagine, I am pretty elated right now. And don’t worry, I will be sure to obnoxiously flaunt this accomplishment and dedicate an entire post with all of the details.
Now get out there and design some good vibes. Please pin if you enjoyed…


Welcome!
My journey in interior design and home improvement began with transforming my first fixer-upper home, all while managing a budget and raising two young boys. My work, a reflection of my passion for creating beautiful, uplifting spaces, has been recognized by top publications like Better Homes and Gardens Magazine, HGTV, and more. I invite you to explore my site and witness the transformation of my home and the vibes we've designed. Read more...


Erica I am totally doing this! Thank you for the great idea, I’m all for saving money anywhere I can and yours turned out so good. Congratulations on your magazine spread, how exciting! That is such a huge accomplishment and you totally deserve it.
Thank you so much, Ashley! Yeah…I saw something similar on Houzz and they wanted over 100 freaking bucks for it. 🙂
Congrats!!! Amazing magazine feature and I love this DIY sculpture!! You are so right that taxidermy is so on trend, so having a DIY version is so much better
Thank you so much, Stephanie. I really appreciate your kind words, friend.
This is awesome! What a creative project. Love the finished product- definitely pinning for later! And loved your magazine feature- what an accomplishment! Congrats! 🙂
Thank you so much, Beth! I really appreciate the kind words. 🙂