
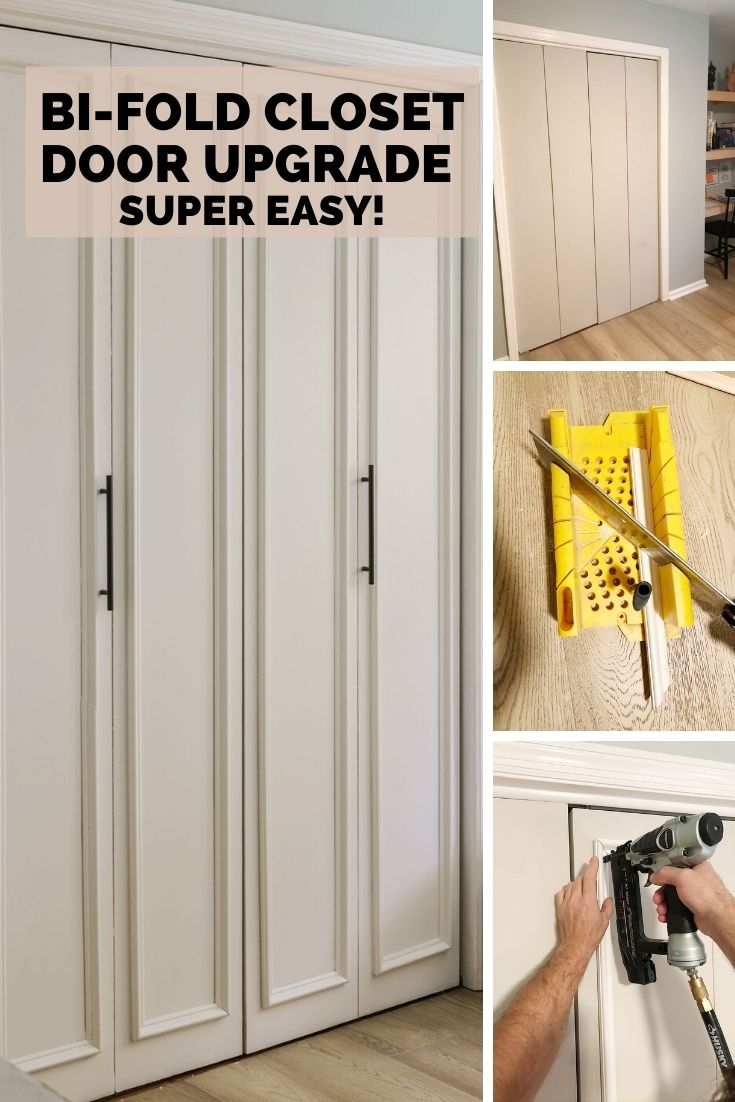
DIY Cheap Bi-Fold Closet Door Makeover
Looking for an easy and budget-friendly means of upgrading a cheap, bi-fold closet door? In this DIY tutorial, I am sharing how to elevate the look of your boring, builder-grade doors for only $50.
Did I ever mention the fact that I live with two Tasmanian devils?
Not only do they ravage my pantry and create never-ending piles of laundry , but they also have a tendency to destroy anything they place their grimey little hands on.
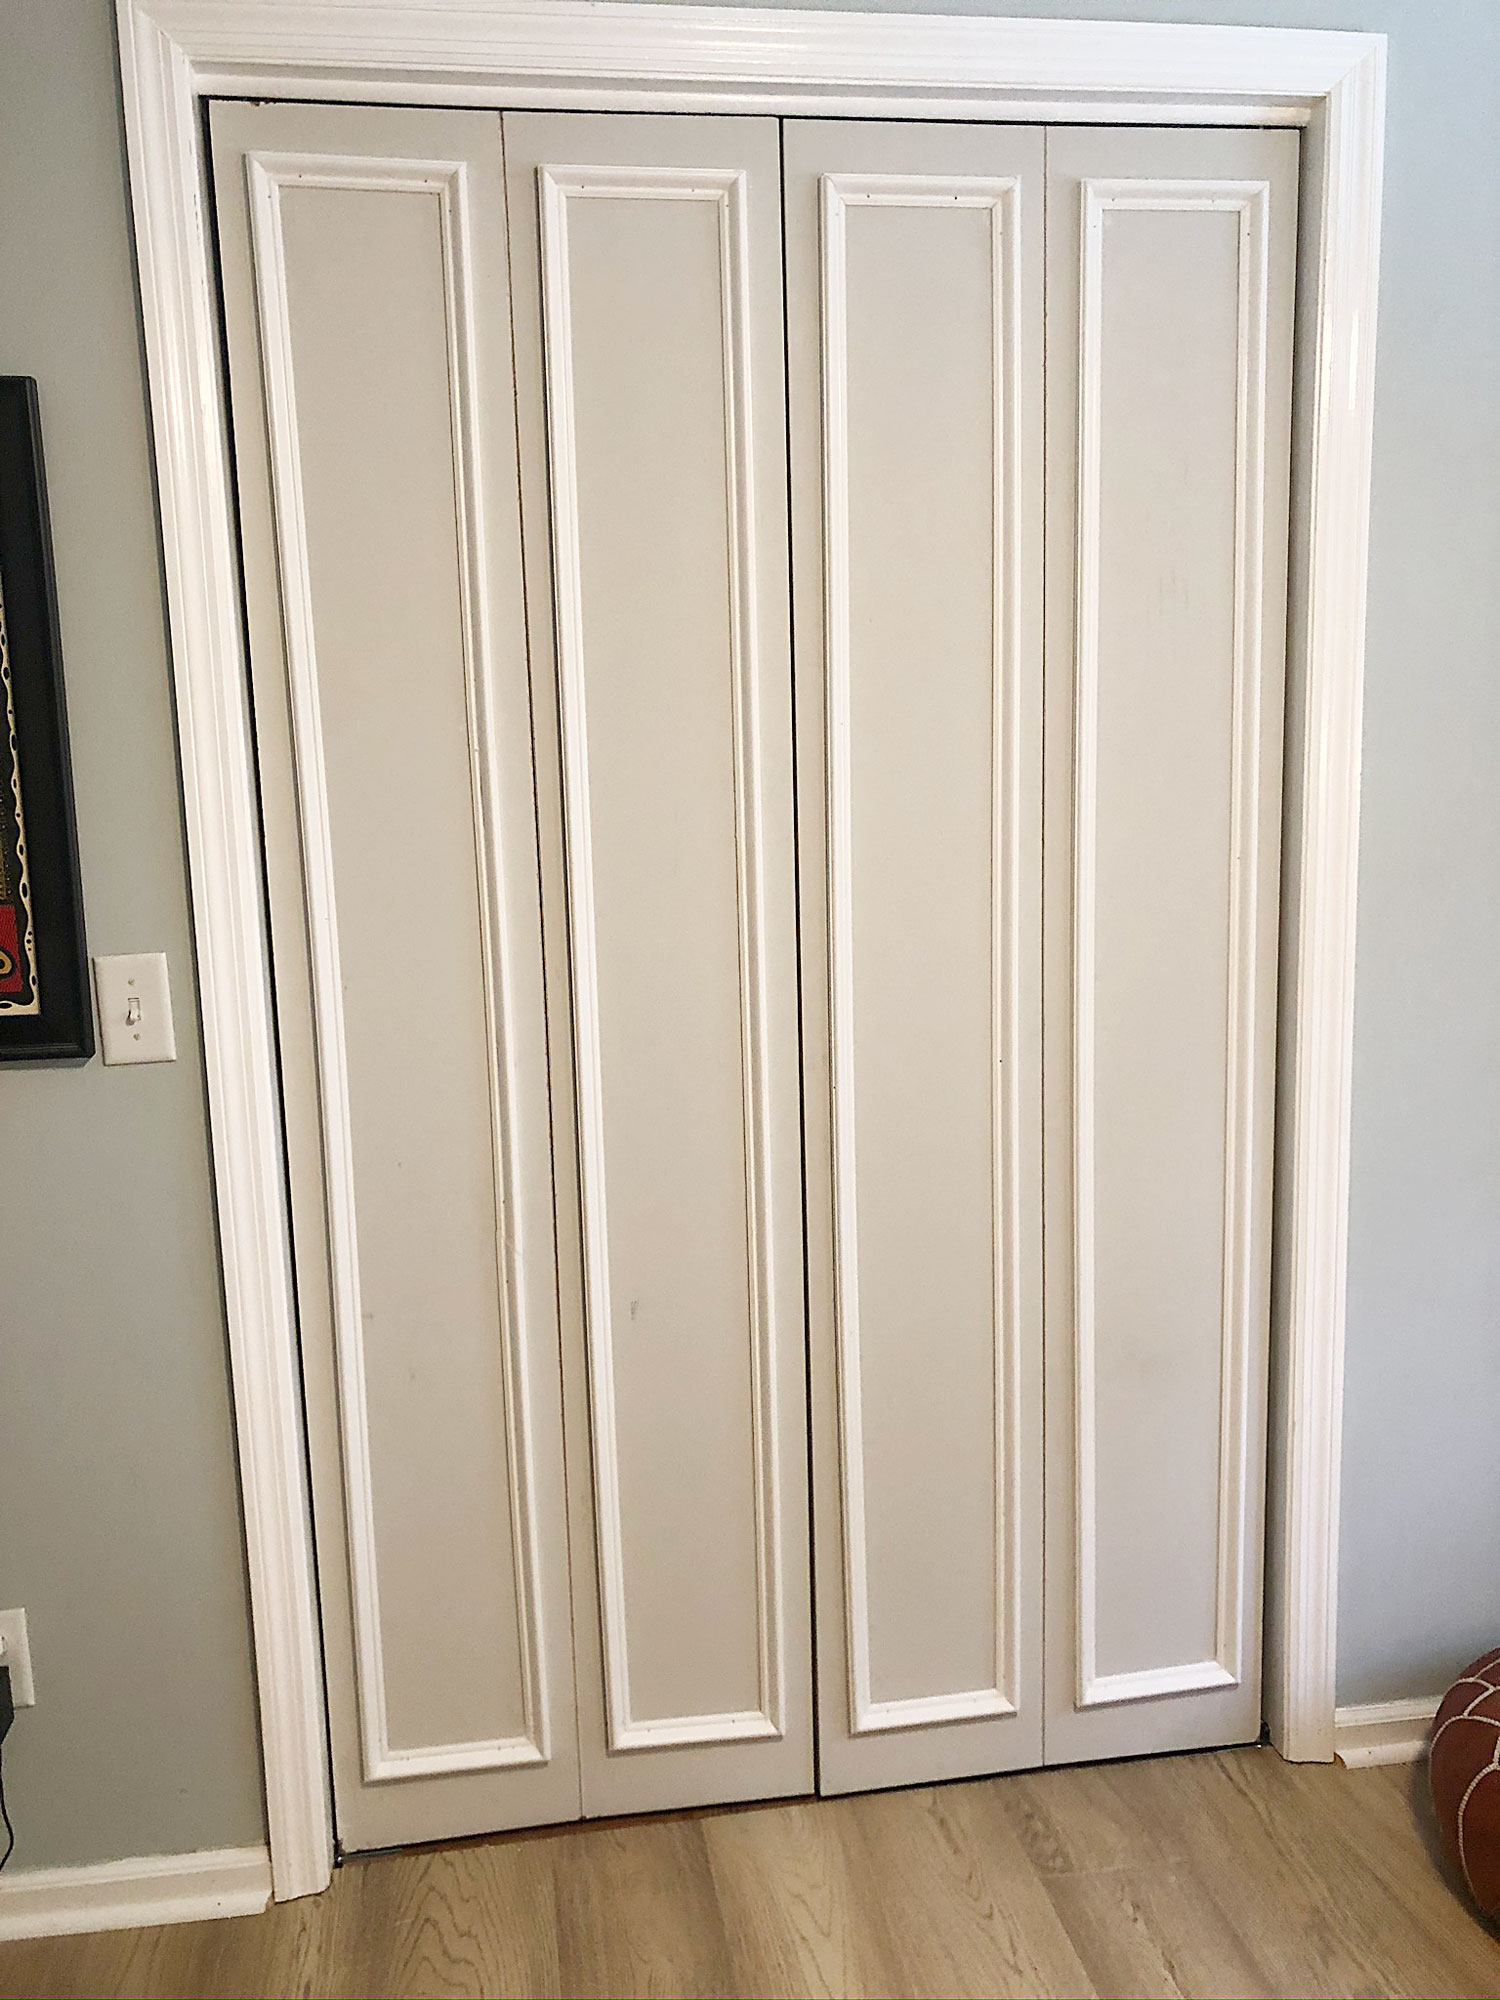
Case in point? The original closet doors in Tasmanian devil #1’s room.
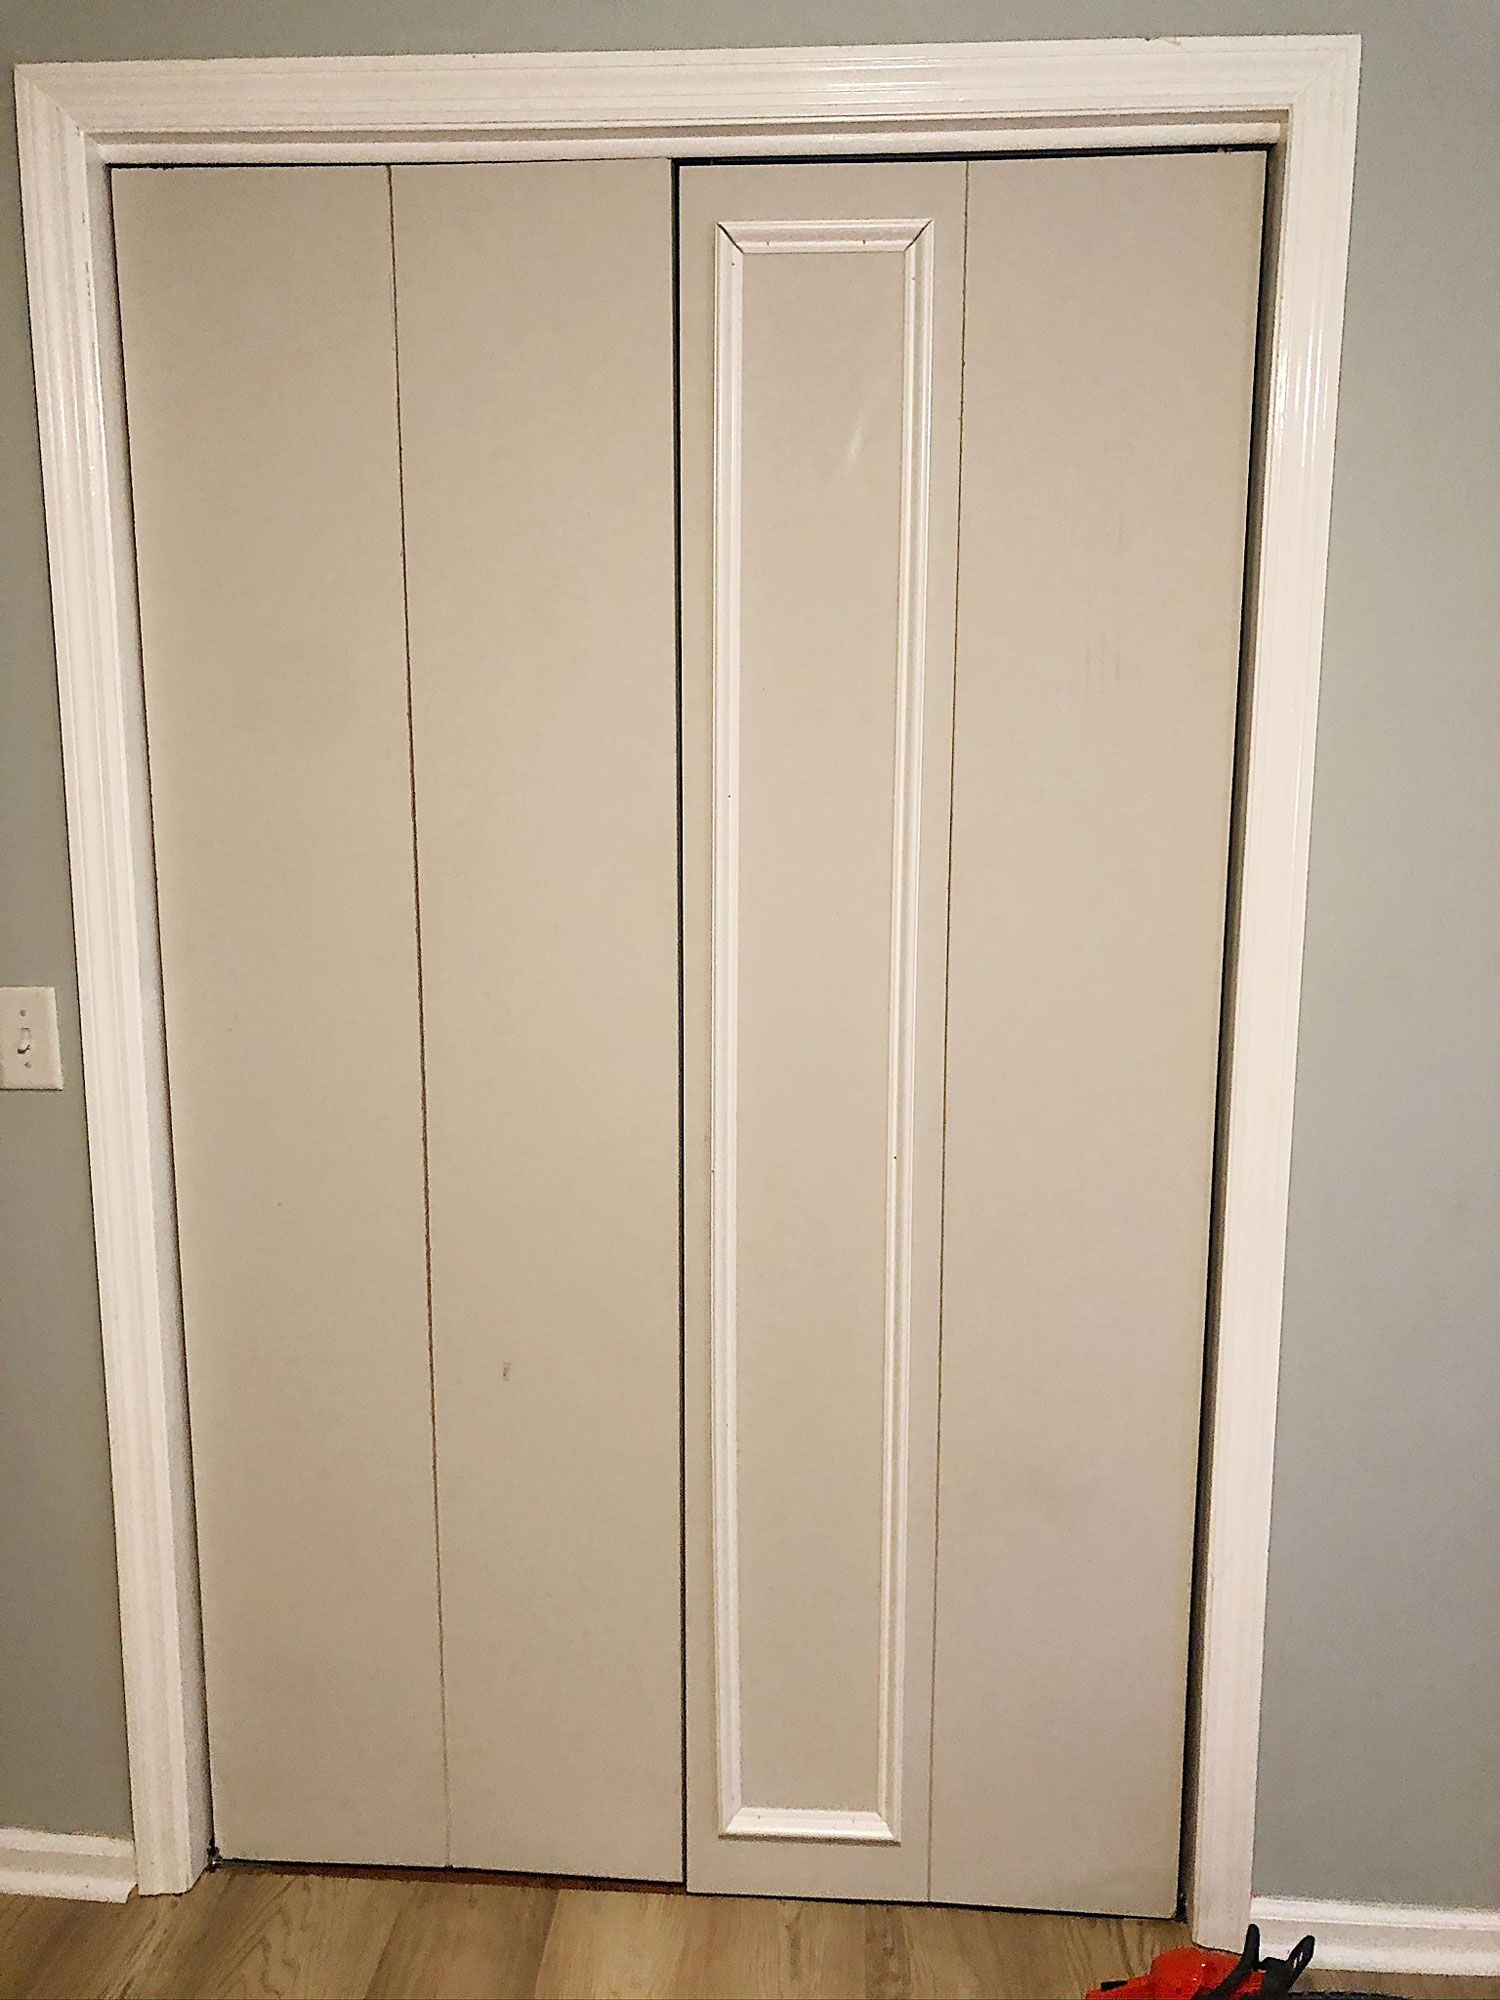
As a matter of fact, the original doors were mirrored panels straight from 1986.
While I was totally fine with the original closet doors (the mirrored doors actually made the room look bigger to me), in typical Tasmanian fashion, as soon as we notify our realtor that we are finished with prepping our home to sell, one of the glass panels shatters.
While I think it was the result of a temper tantrum, I really cannot say for sure.
At any rate, we wanted to address the issue in the easiest, most cost-effective way possible.
*For your shopping convenience, I have included affiliate links. As an Amazon and RewardStyle Associate I earn from qualifying purchases. *
So… first, we ordered the cheapest bi-fold closet doors we could find (click here for the affiliate link to the doors)….
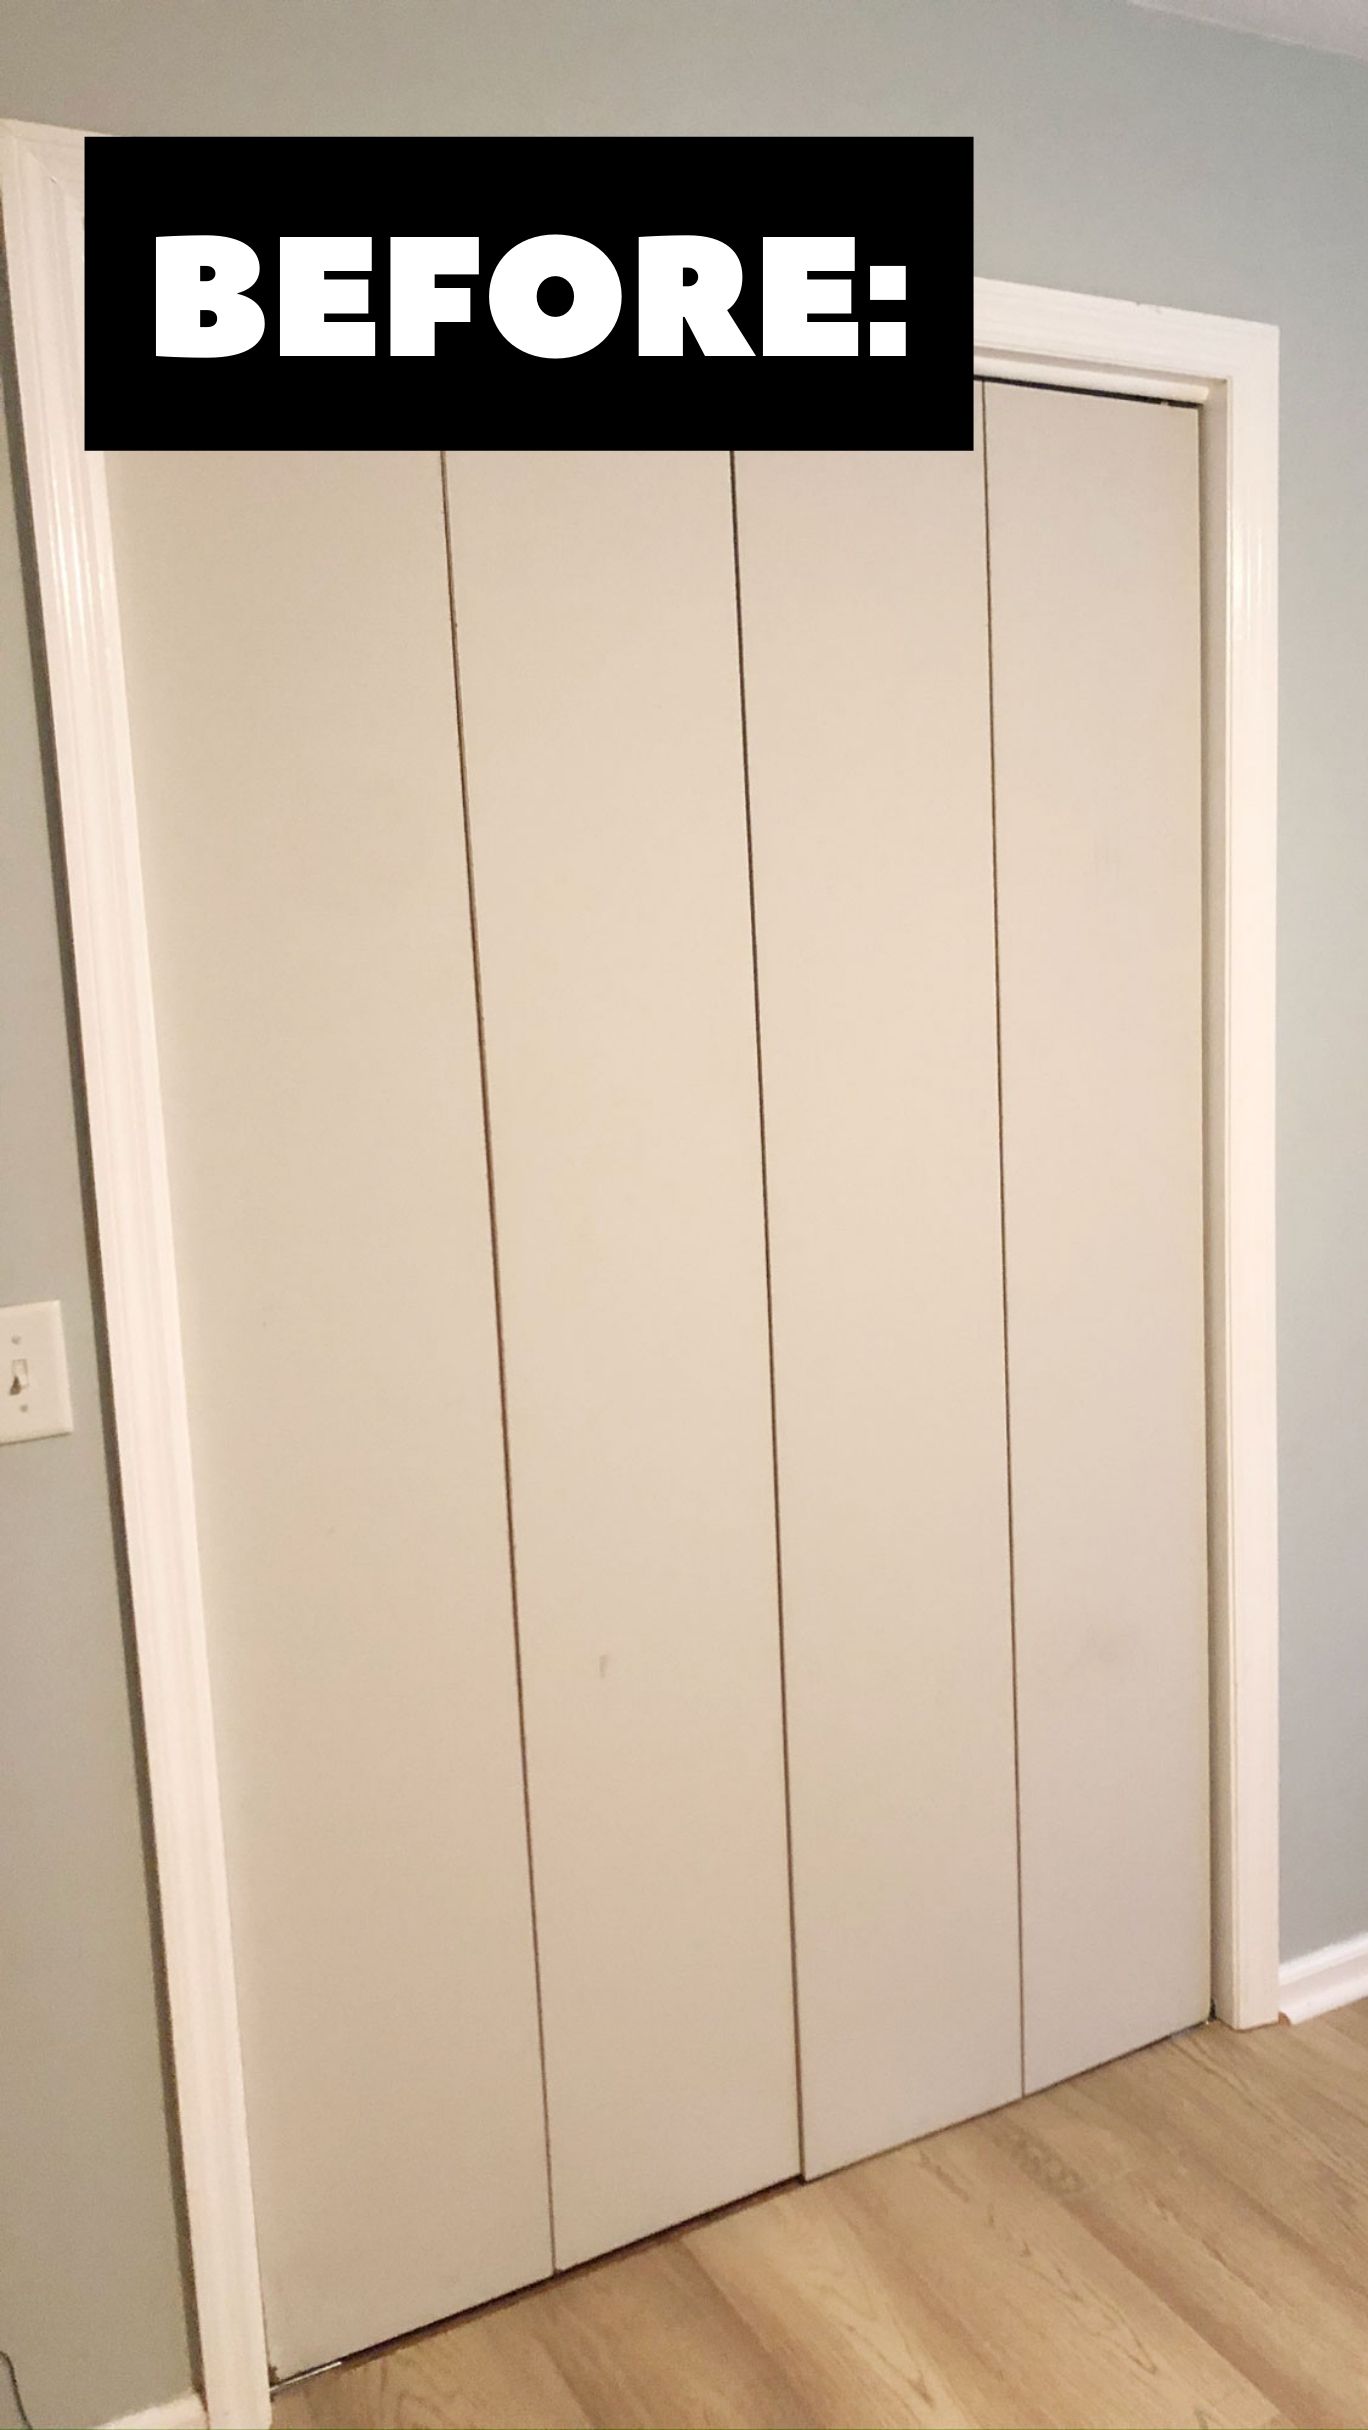
While I certainly could have moved on and left them as is, the “fixer” in me wanted to fancy them up somehow.
So…I decided to take a visit to my local hardware store and browse for trim pieces and moldings.
When I came across some primed Ply Cap for $6.69 per 8 foot piece at Lowe’s, I thought it would be worth a try.

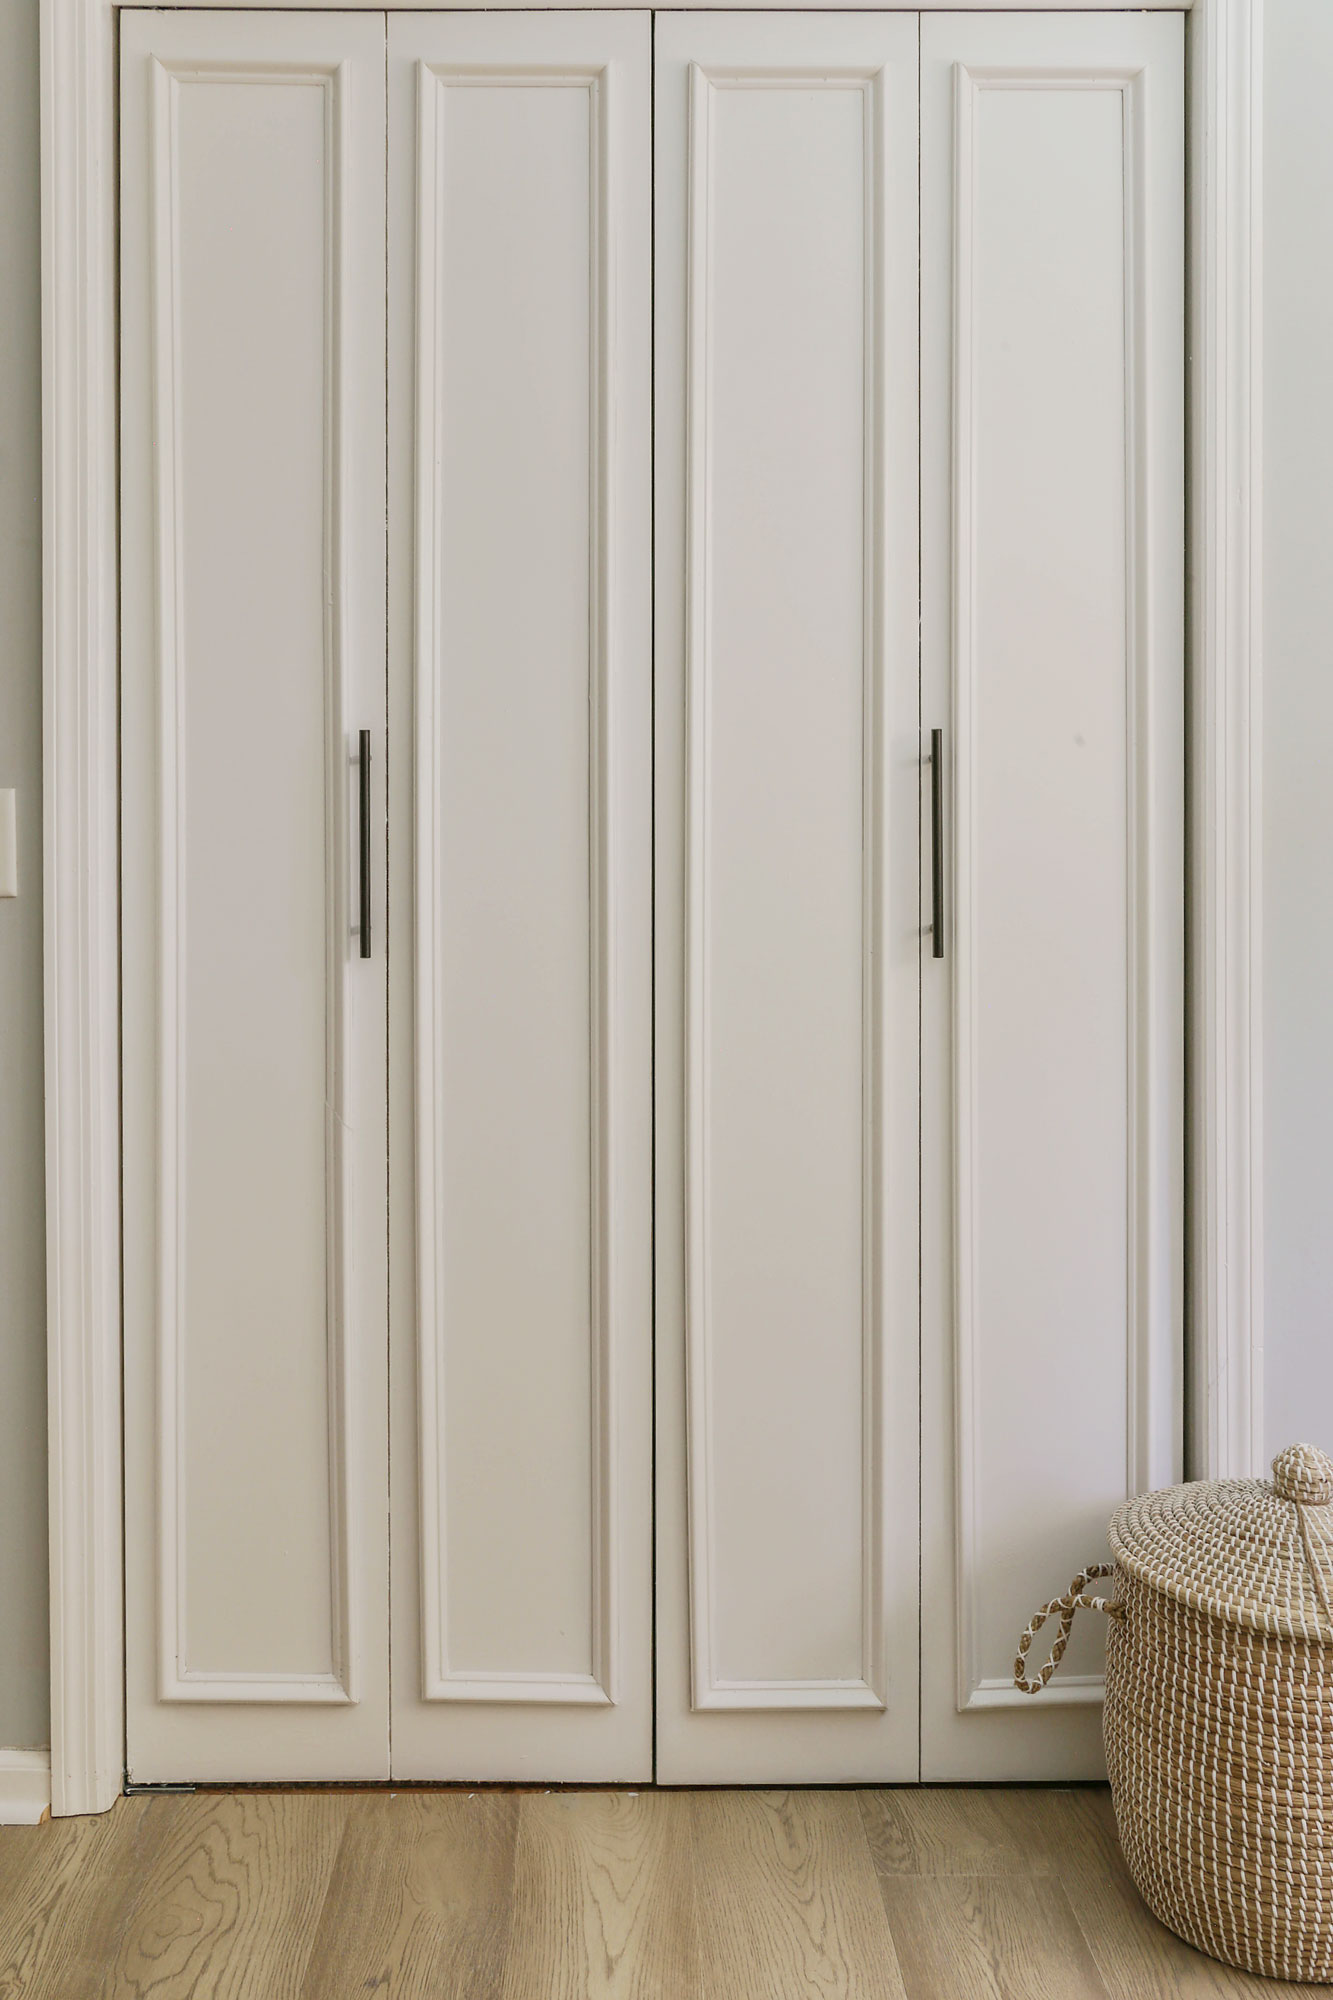
Lucky for me, the Ply Cap successfully transformed the cheap a$$, builder-grade doors .
Even better? It was super simple and easy on the wallet.
Let me show you how we did it…
How To Upgrade Bi-Fold Closet Doors with Molding:
Materials Needed:
- Ply Cap trim pieces
- Miter Box
- 18 gauge brad nailer nail gun
- cheap bi-fold doors (click here for the ones I used)
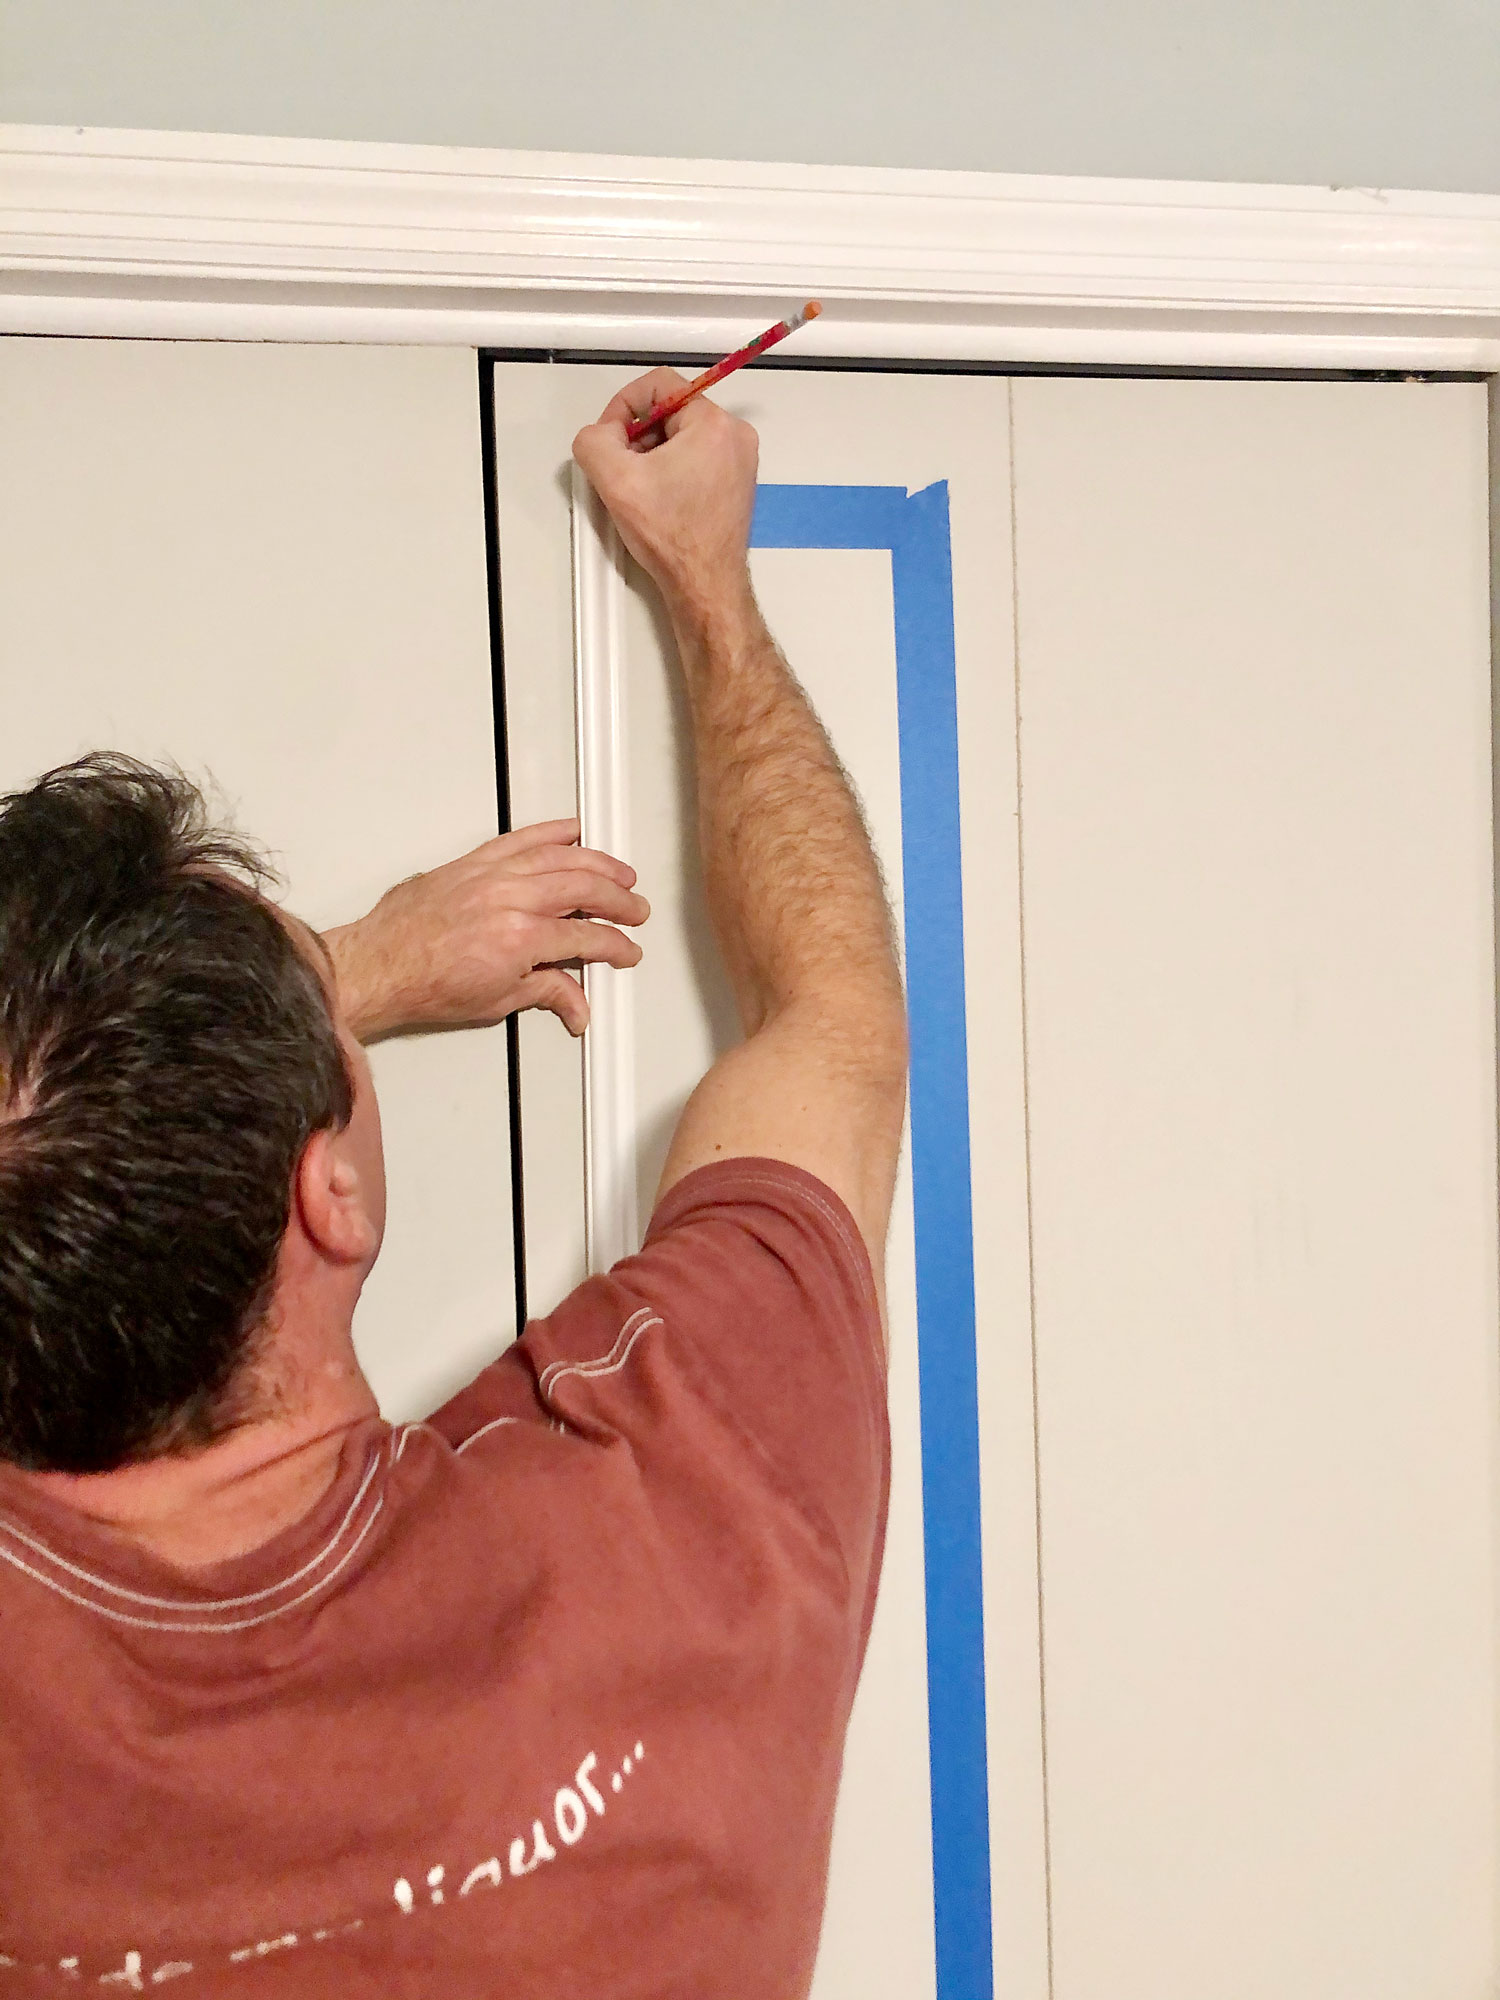
(Step 1). First plot out your molding design. To do this, we used a pencil and some painter’s tape.
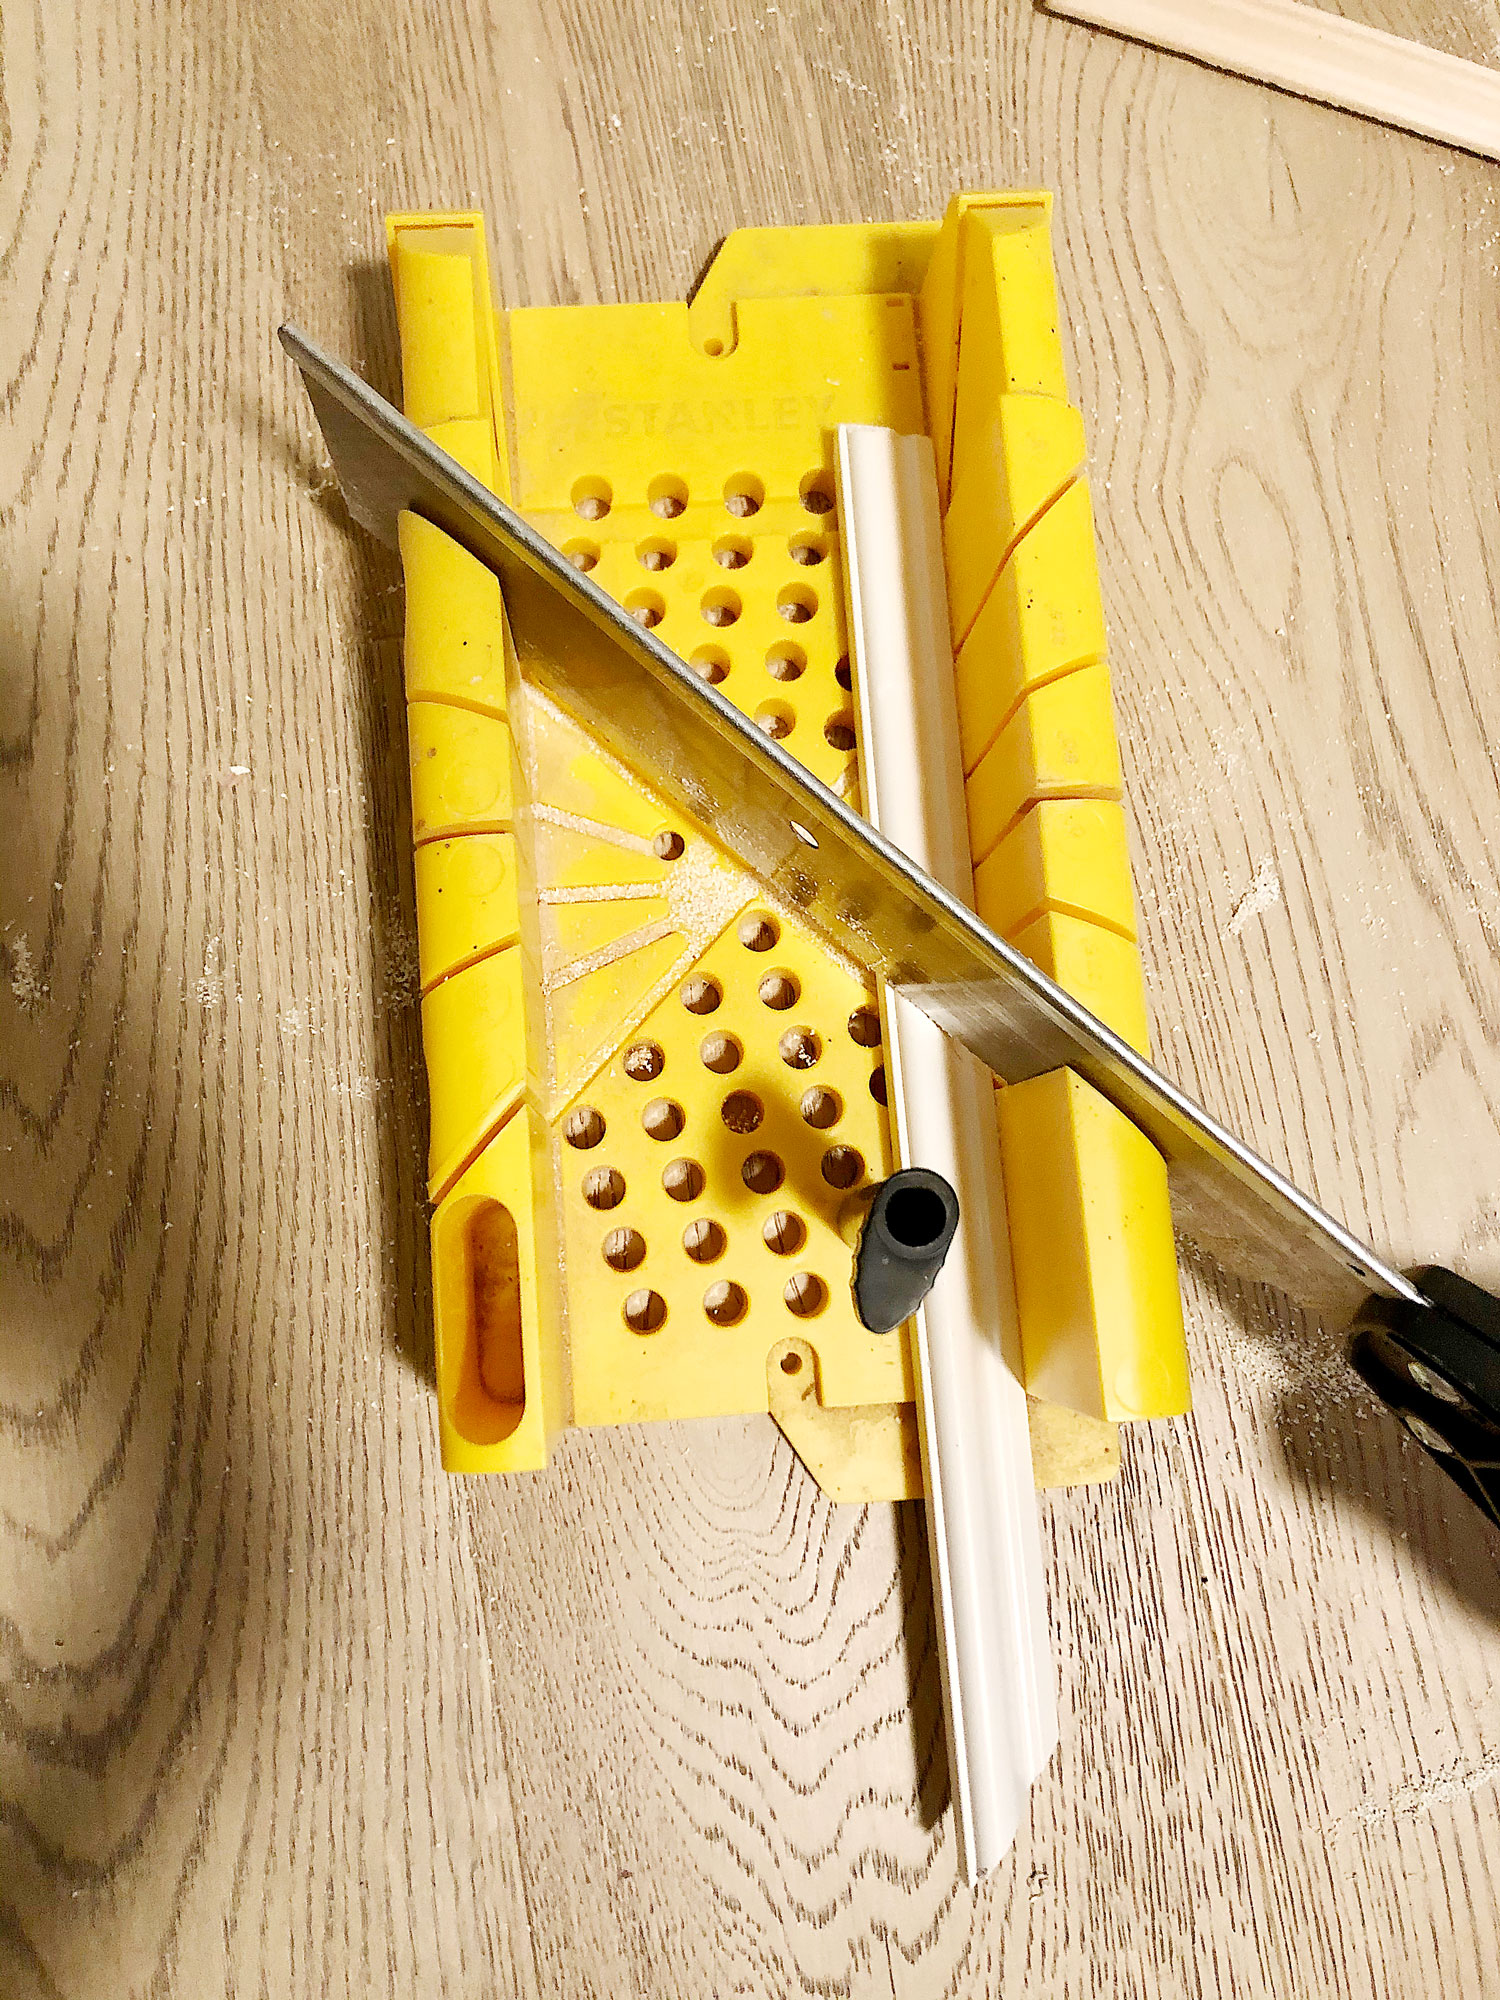
(Step 2). Once you know the dimensions of your molding design, you can begin cutting the pieces of ply cap trim with a miter box. Cut molding to desired lengths using 45 degree cuts at the ends.
Note: While you could also use a miter saw (instead of a box), you need to make sure the blade is fine toothed. If it is not, the blade will not make clean cuts since the molding is thin.
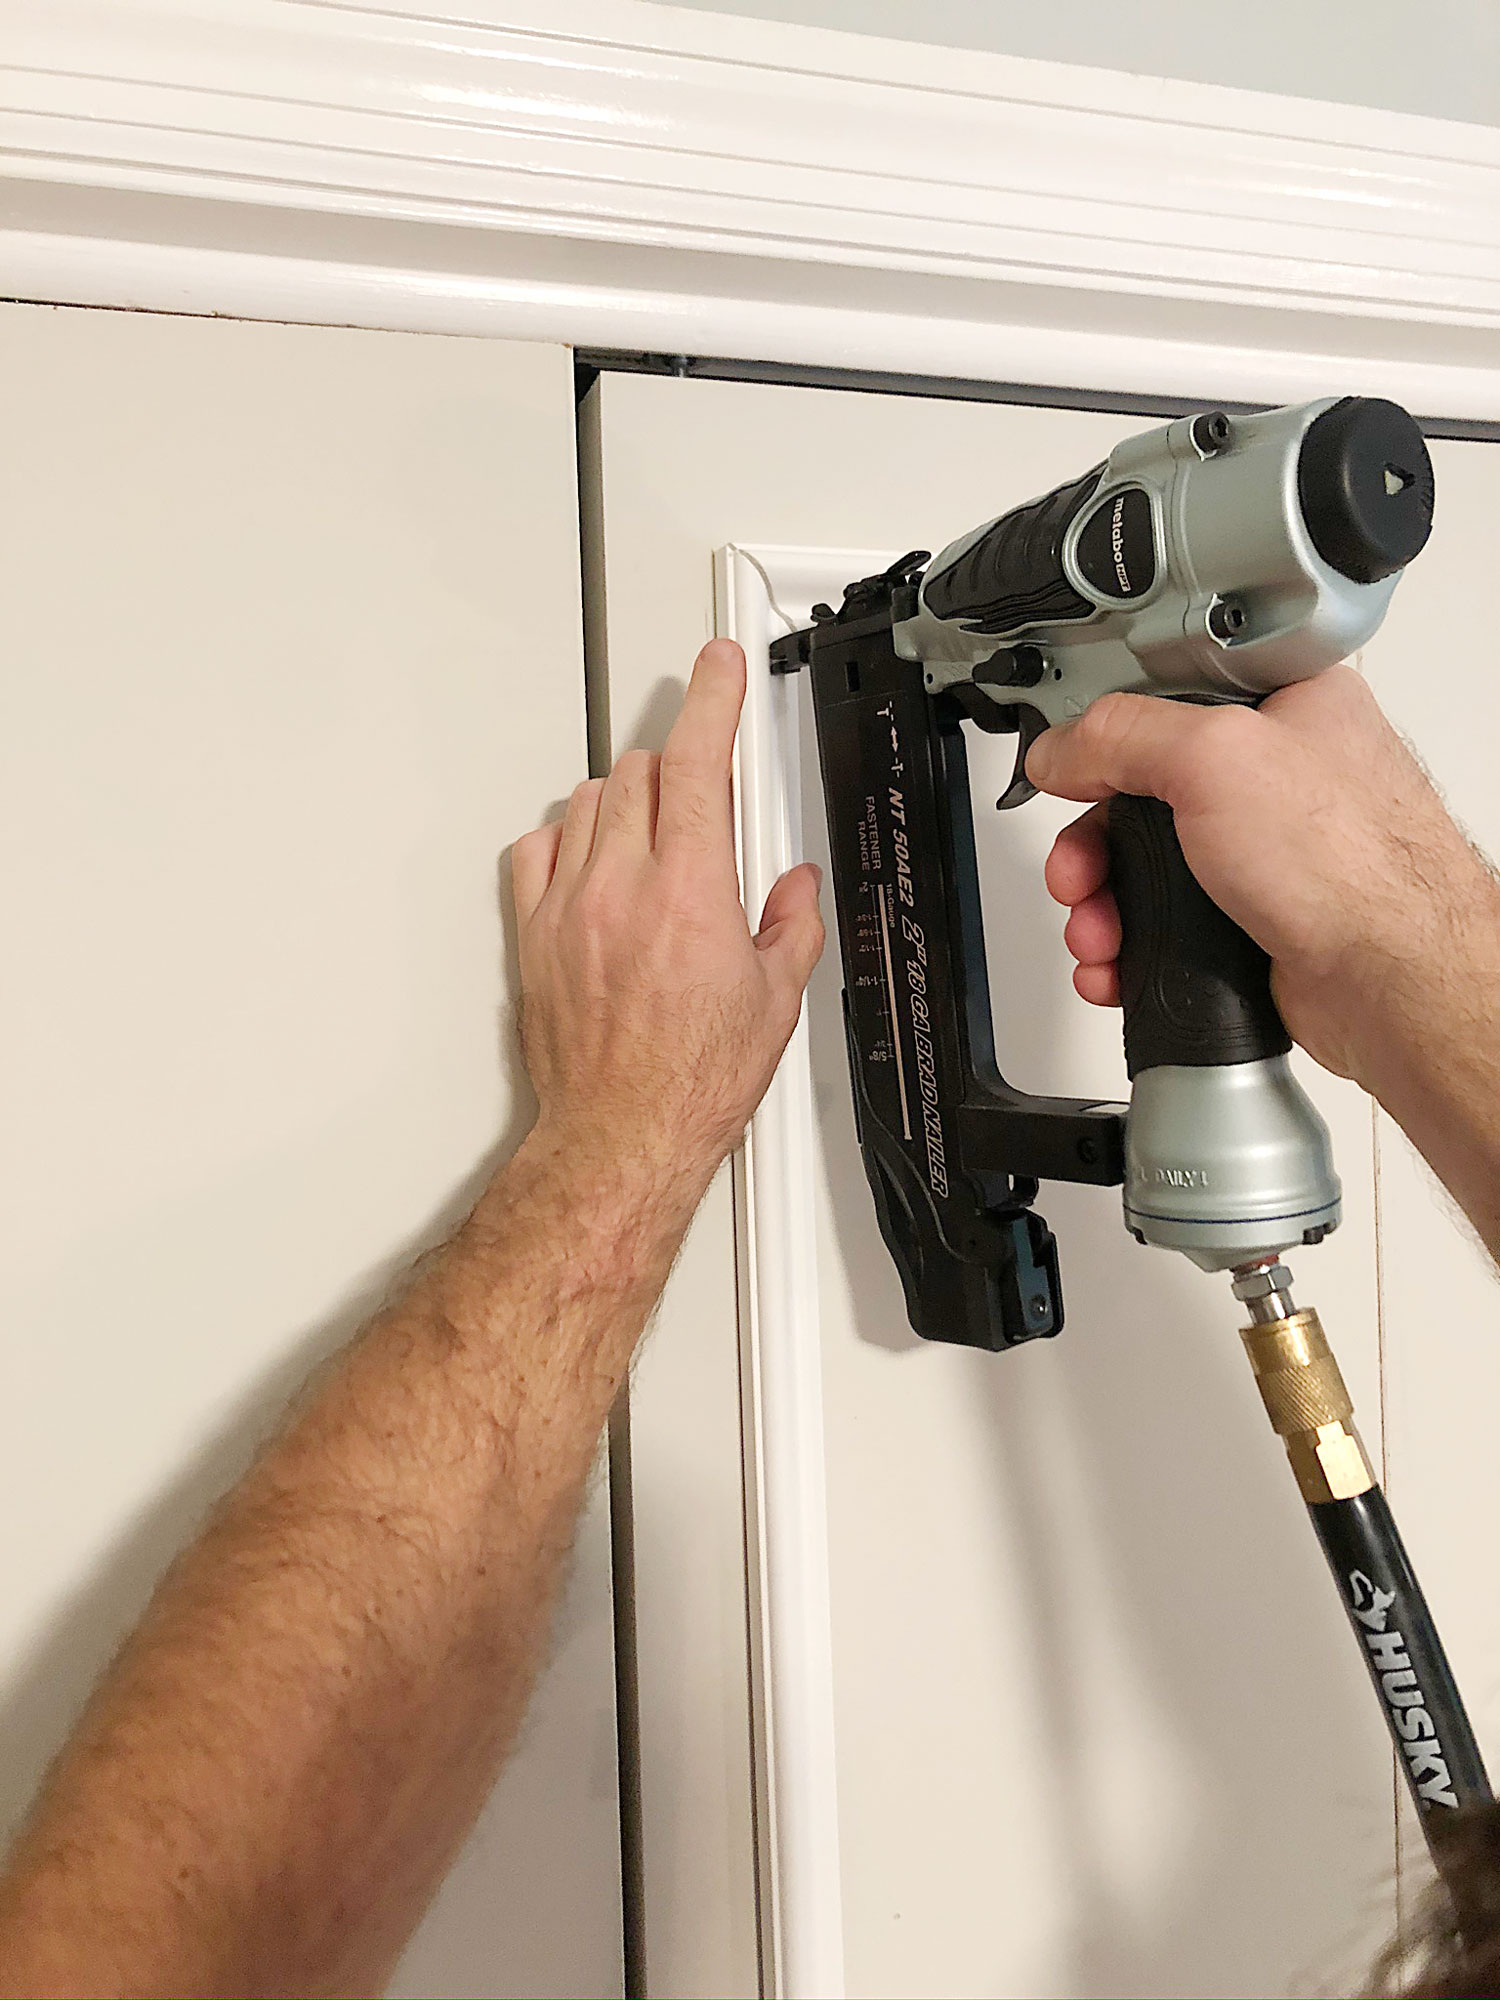
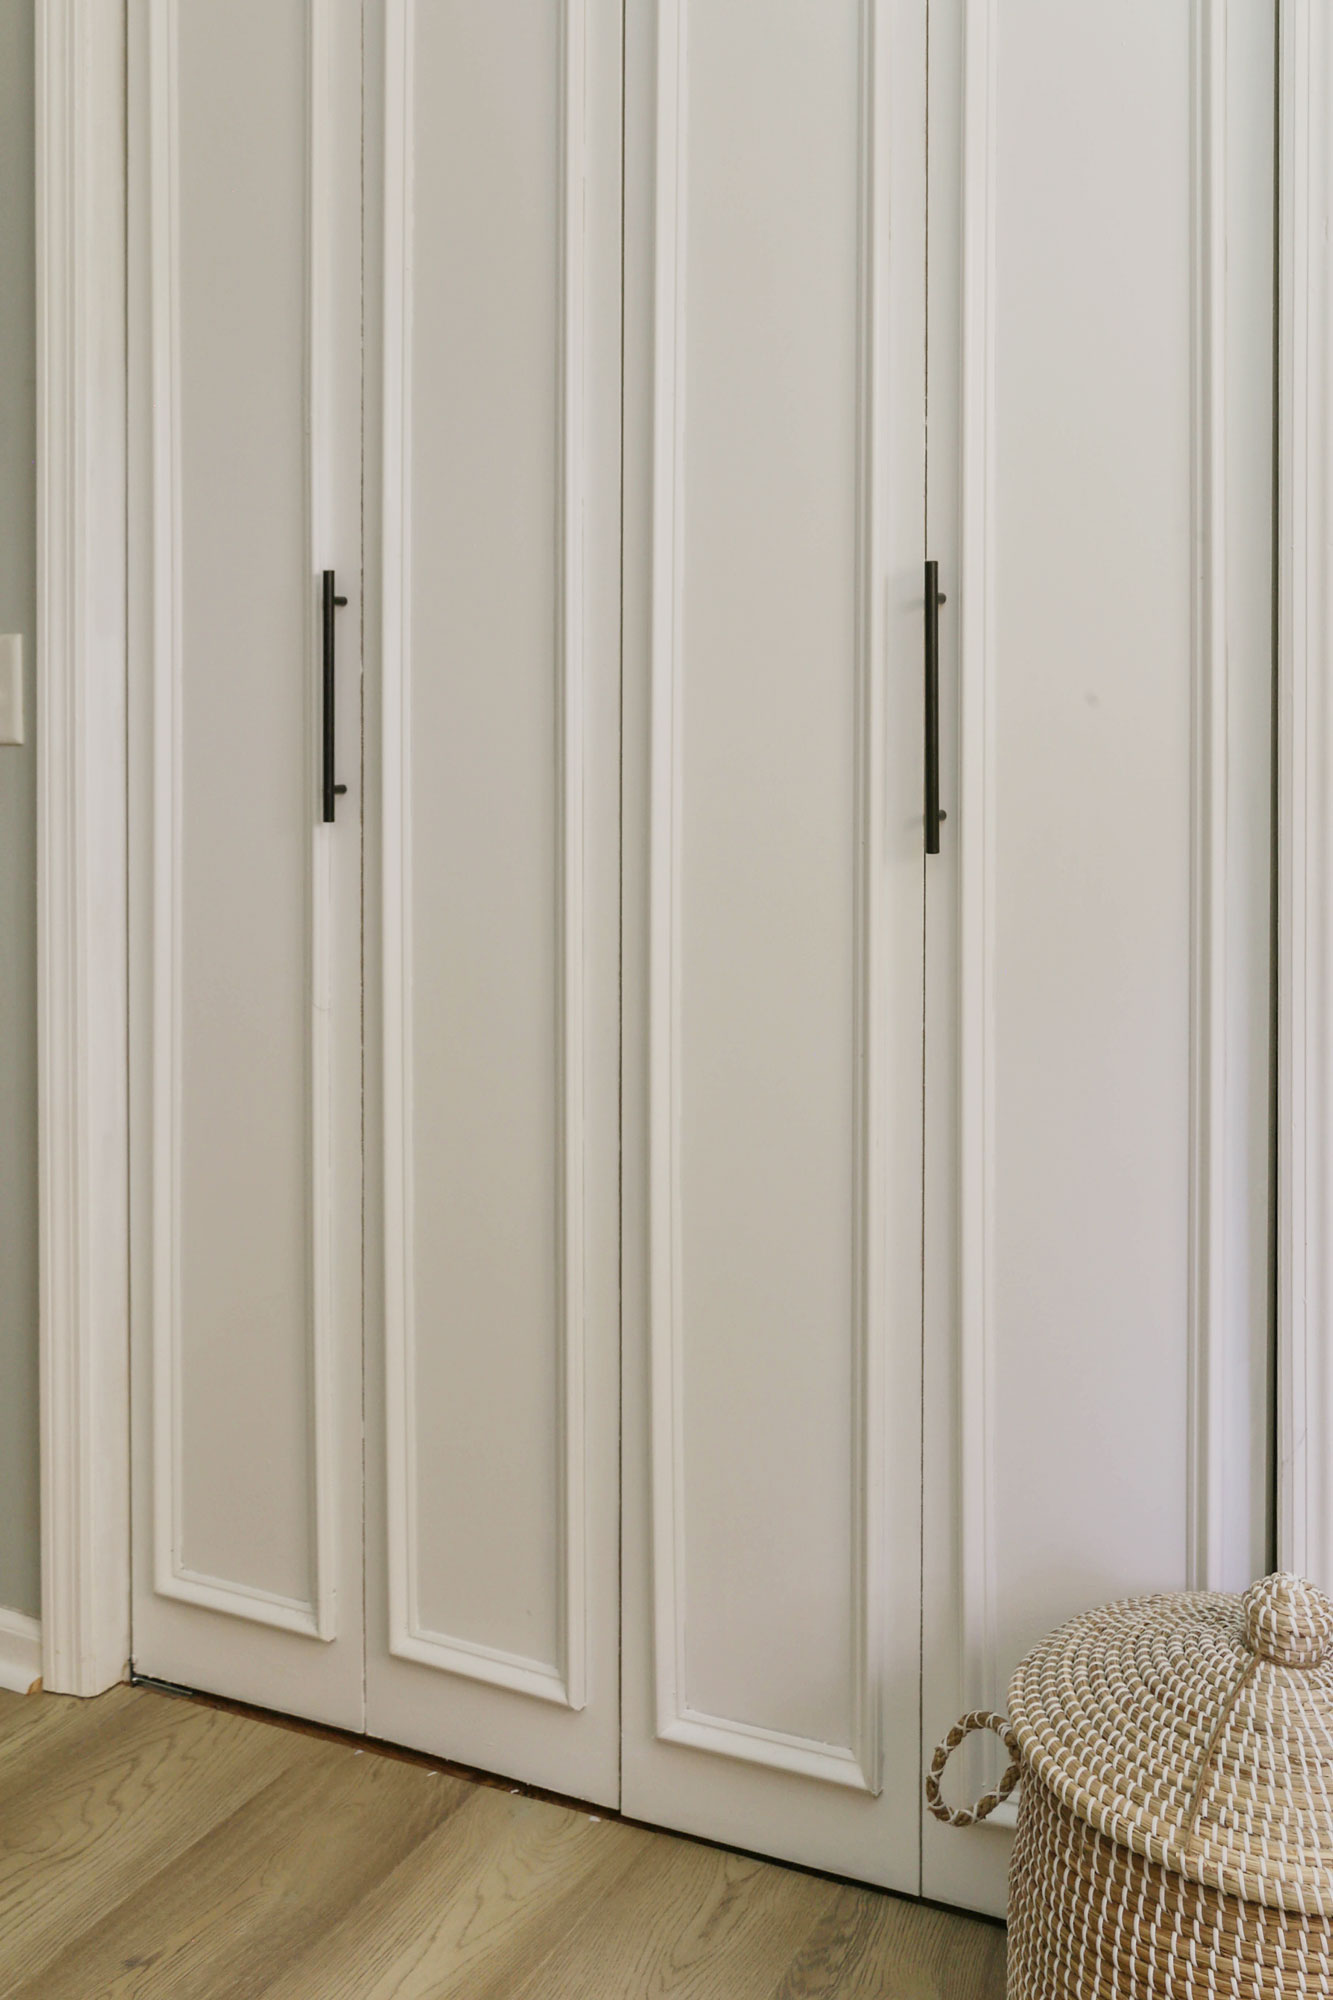
(Step 3). Using an 18 gauge brad nailer, attach the moldings to the doors.
(Step 4). Repeat steps for each door panel. Tip: For a finished look, you will want to caulk around the molding where needed. While you can also cover the nail heads with wood filler, I simply painted over them and the holes were camouflaged just fine.
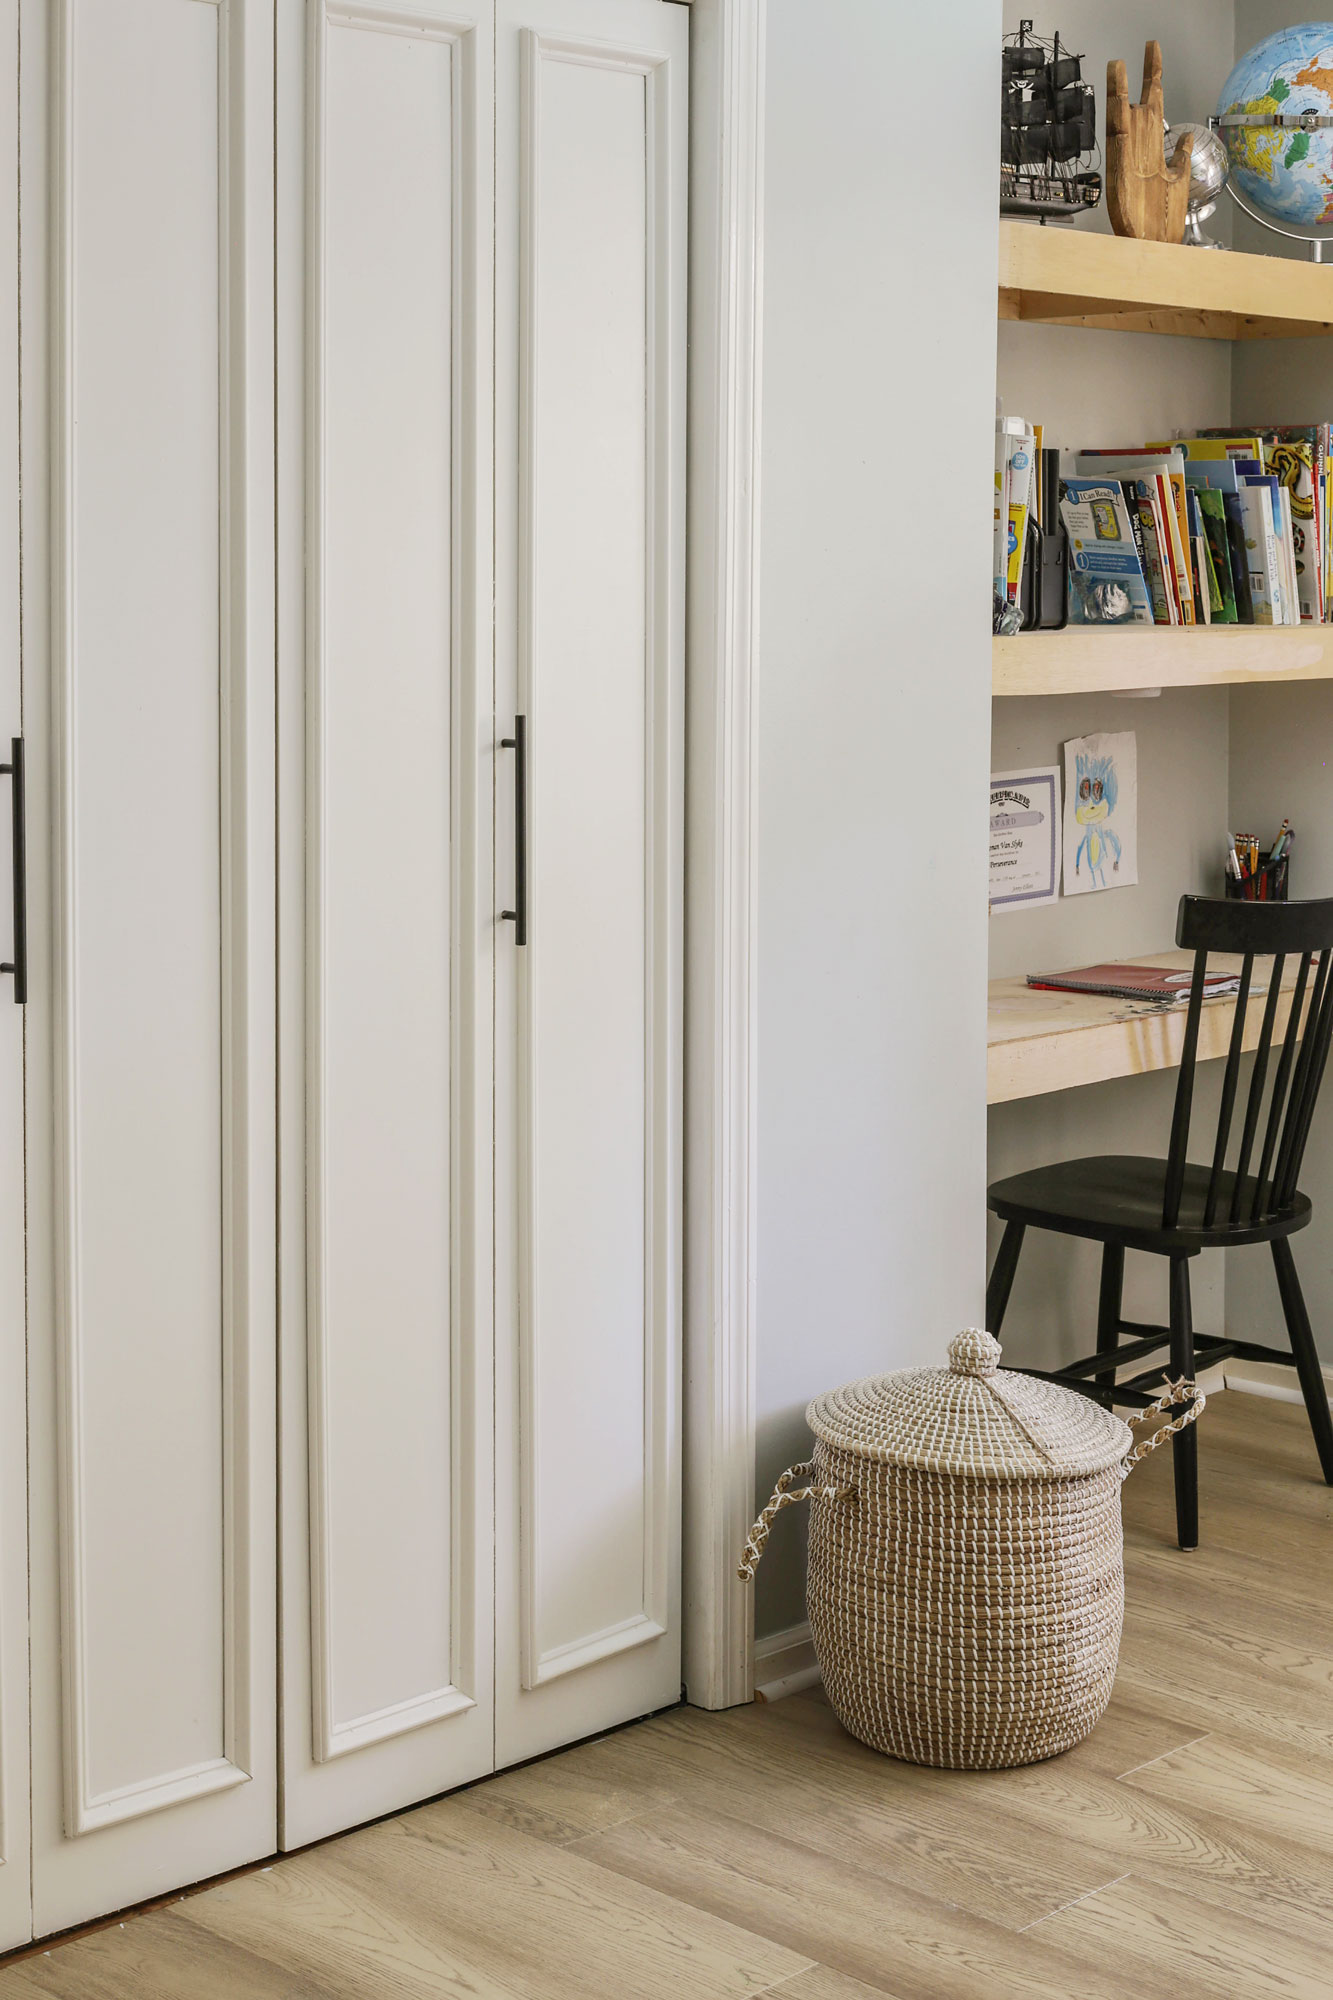
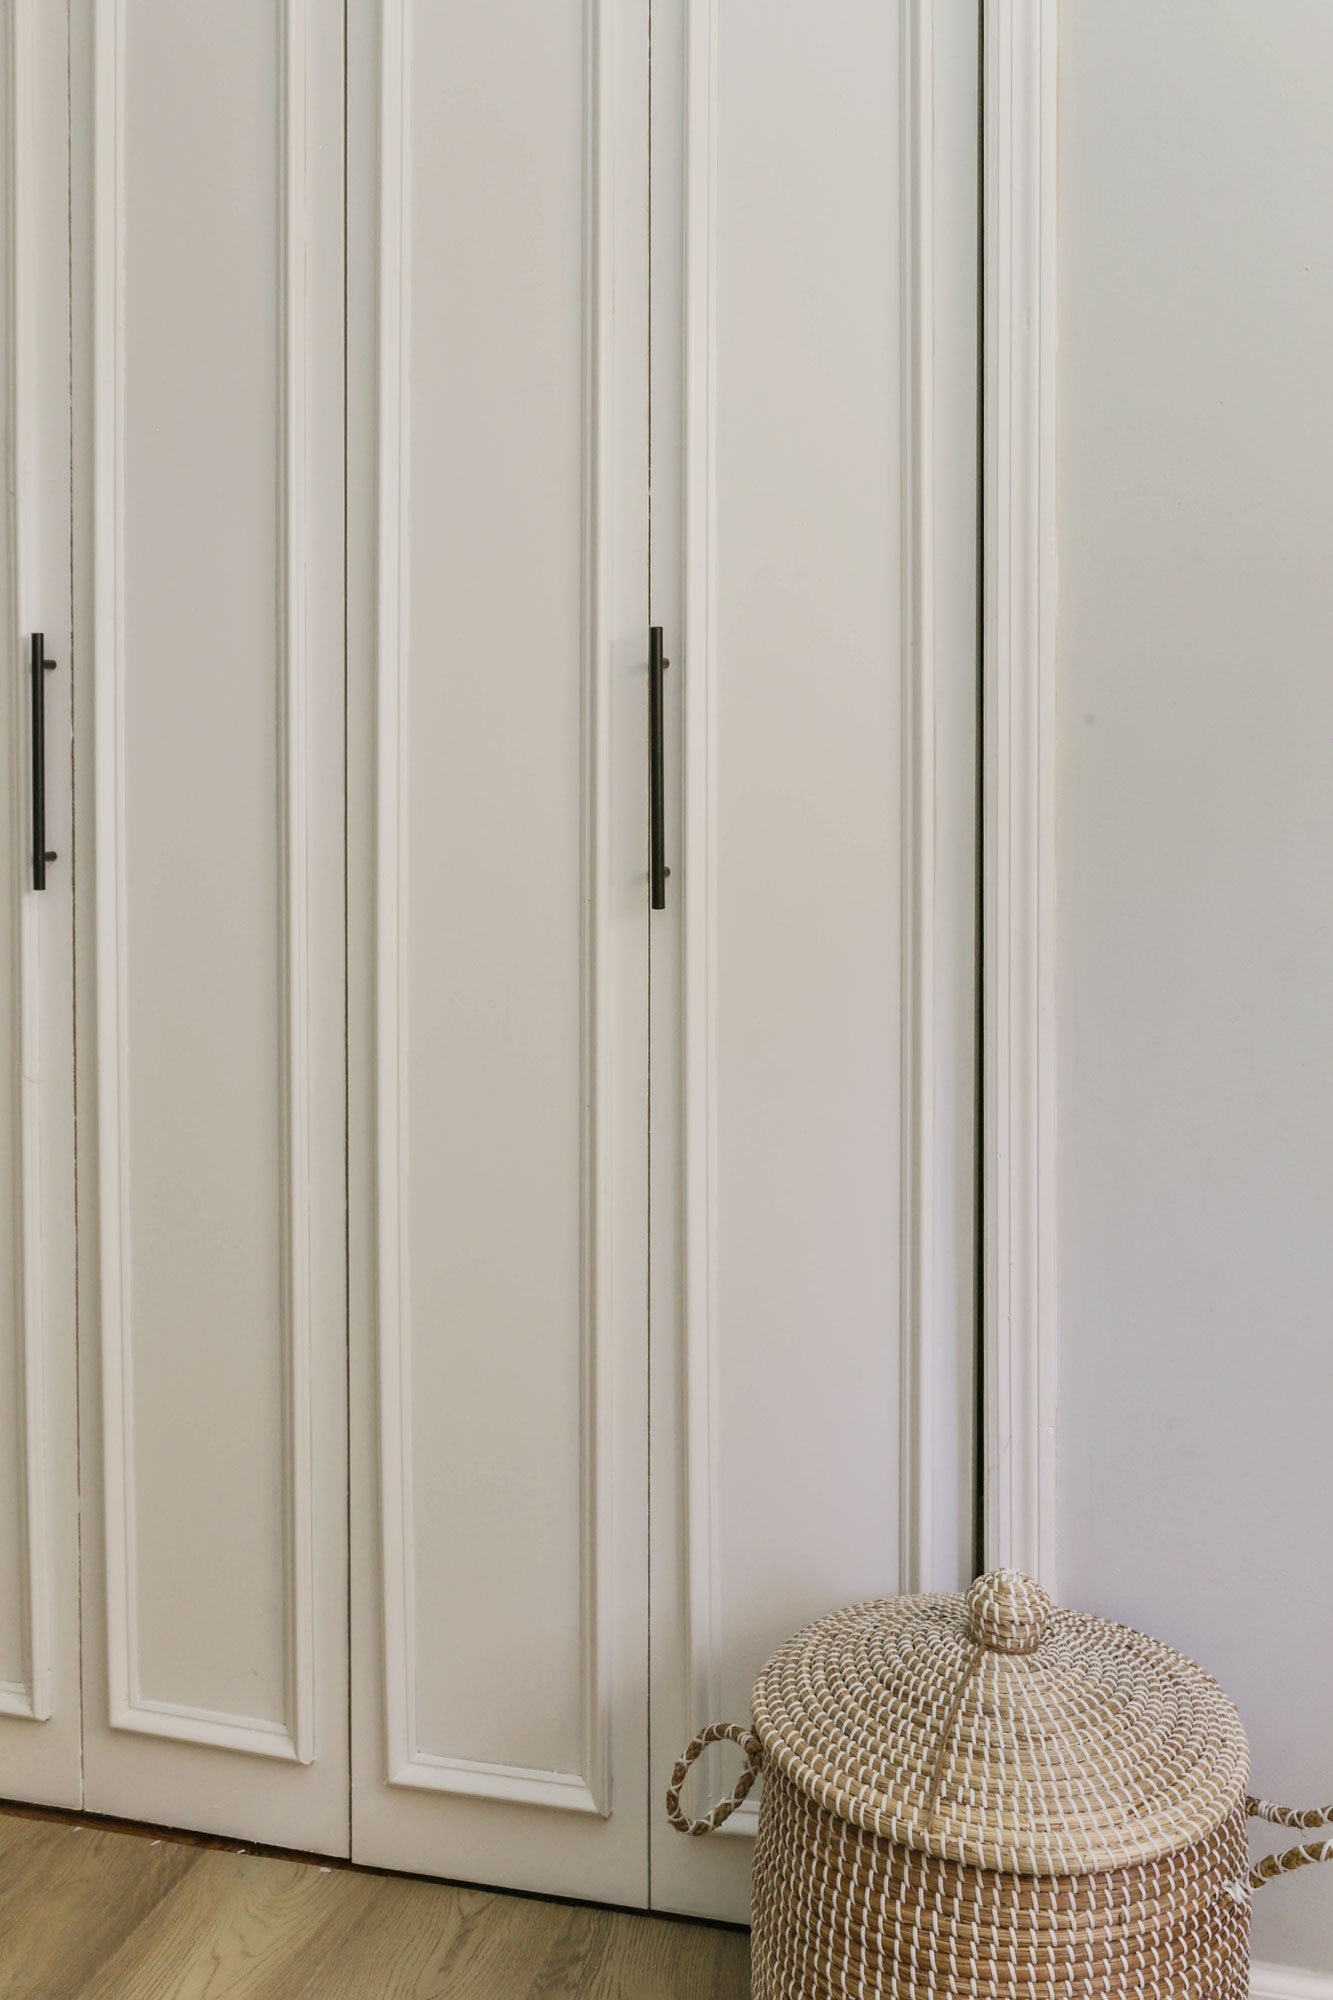
(Step 5). After you have caulked and painted the doors (use a paint specifically designed for door- I like Sherwin Williams’s Emerald line), you can then install the hardware. (Click here for the hardware I used)
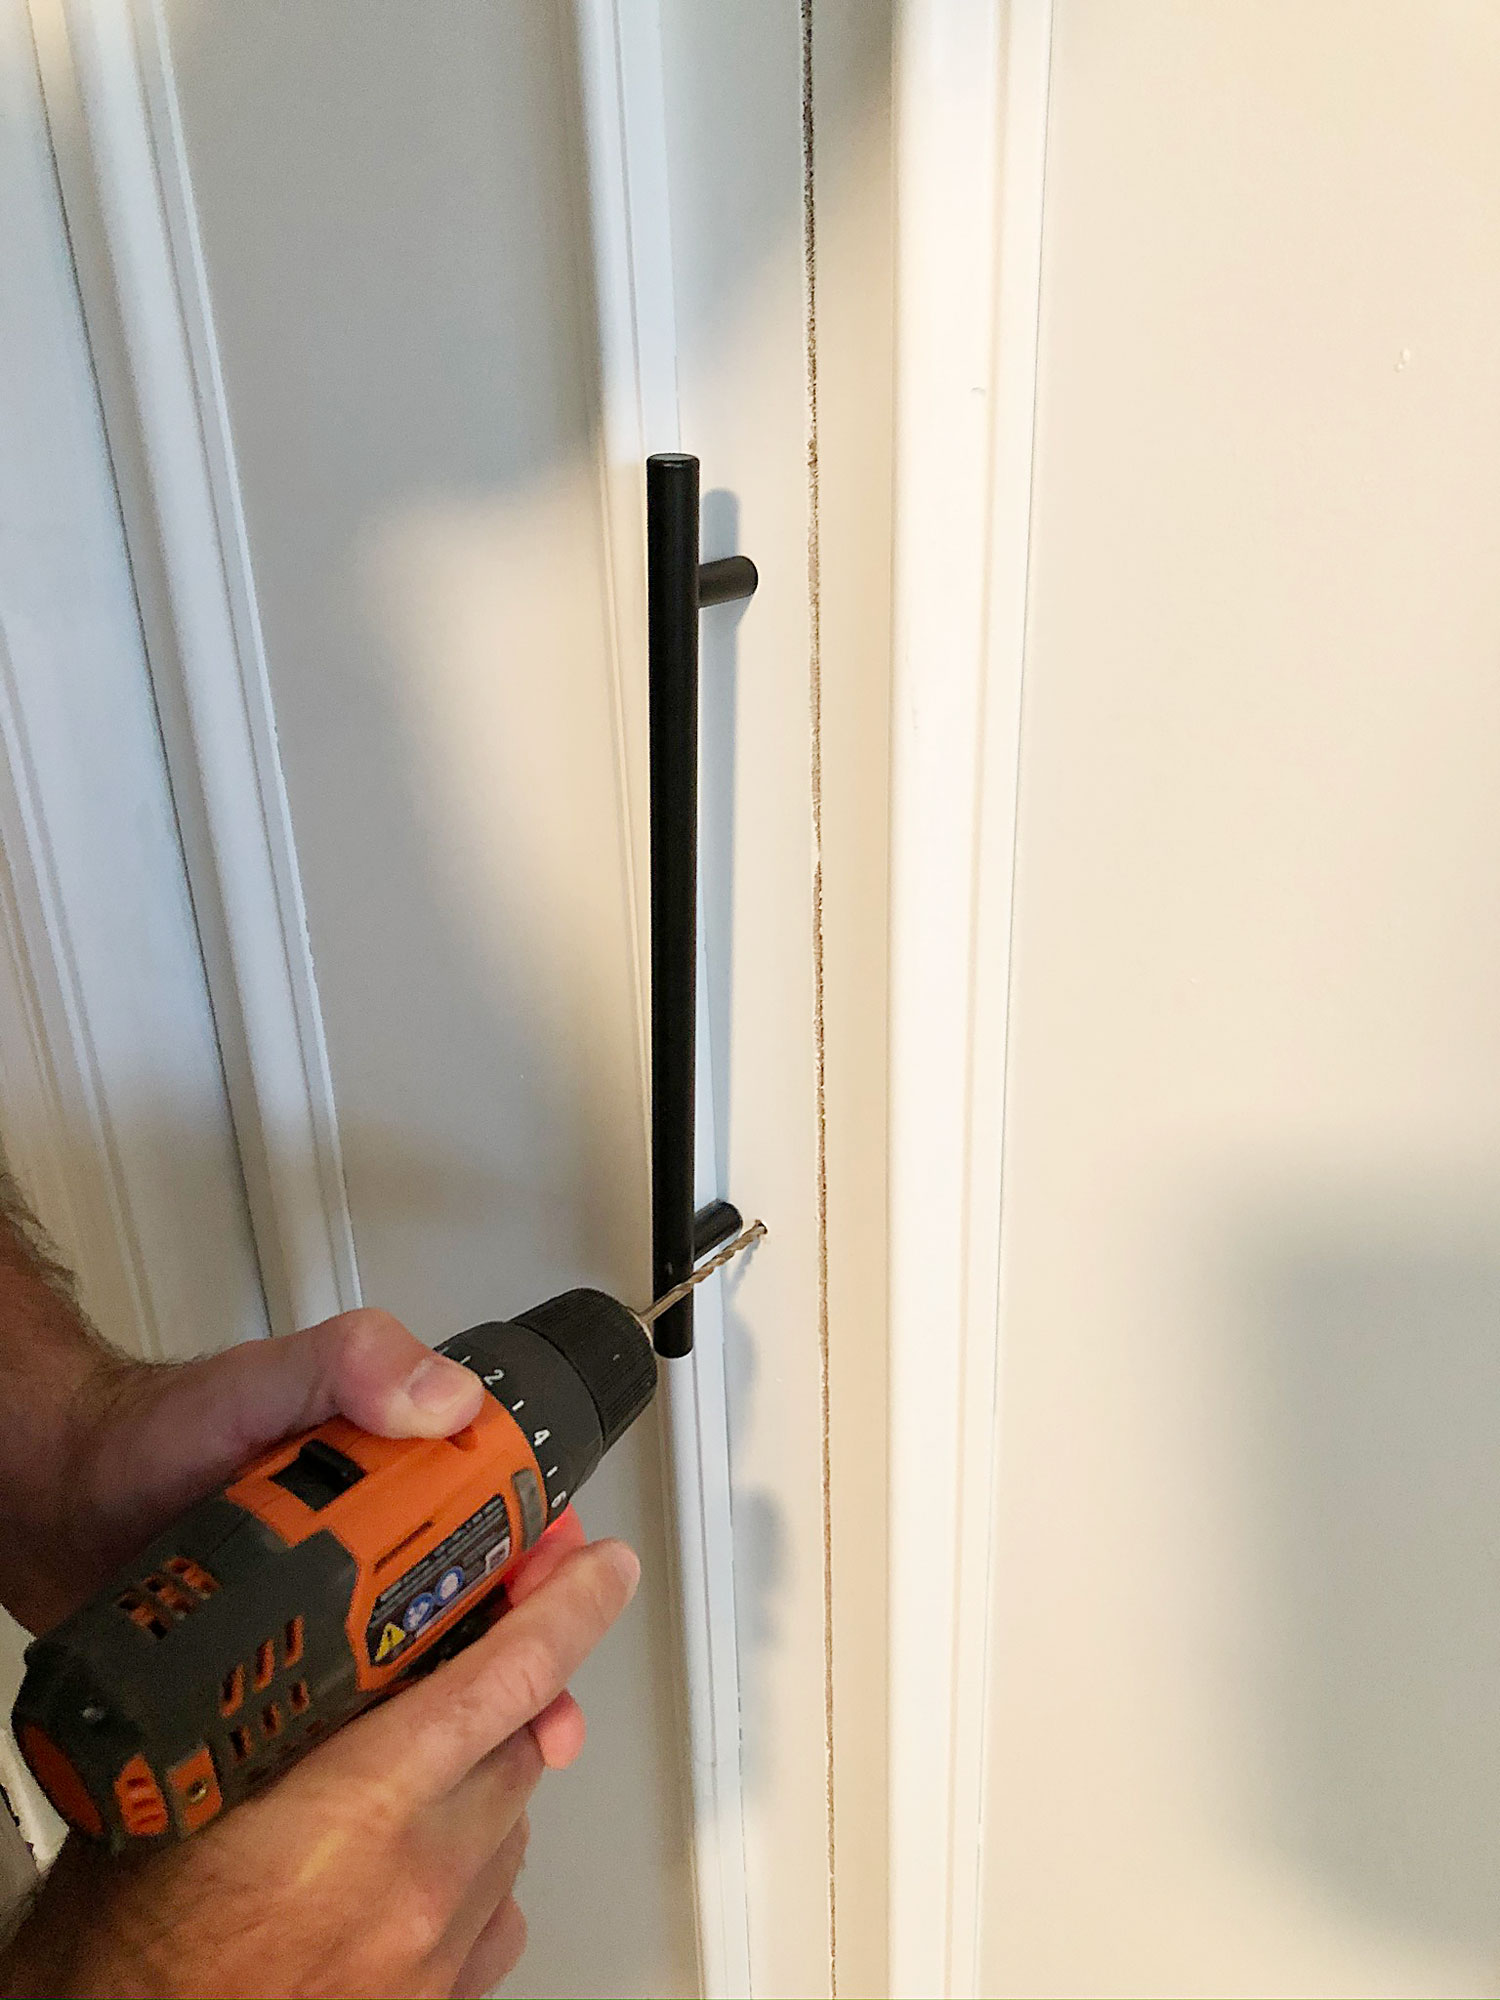
While the cheap closet doors we used did come with hardware (wooden knobs to be exact), I wanted to elevate the look of the doors even more with some sleek, modern hardware. (Click here for the affiliate link to the hardware I used).
Because the bi-fold doors came primed, there was really no need for me to sand anything or apply multiple coats of paint. One heavy coat of white paint was really all that I needed.
Helpful Tip: If the bifold doors are removed to make the project easier, they may become uneven after installation. You can see in some of the photos above where our double doors were initially not level with each other.
In order to correct this, the bottom pivot is adjustable to compensate for the difference in height. Simply twist the pivot clockwise to lower the door and counter clockwise to raise the door. If the gap to the door jamb is uneven, the bottom pivot holder has notches in it and the top track has an adjustable stopper.
Adjust bottom pivot in or out and stopper at the top as necessary.
How to measure your door opening for bifold doors:
Standard bifold doors typically come in three different sizes- 24Wx80H, 30Wx80H and 36WX80H.
For the door to have full pivot functionality, you will need to be sure that there is 1/4” of clearance on each side of the door.
As for the door opening, you will need a door frame in place before you measure and install your doors. You will measure the width of the opening in 3 places, and record the smallest measurement. You will then repeat this for the height measurements as well.
By going with the smallest measurements, you will ensure room for all of the hardware and also allow for an even gap around the edges of the doors.
These particular bifold doors are top-hung so that there is only a track at the top of the door frame, and then pivots at both the top and bottom of the doors. Much to my delight, all of the installation hardware was included with the doors.
For $50 in molding materials costs and only $12 for the modern hardware, I believe our little DIY upgrade accomplished what I was going for.
Now we shall see how long it takes for my Tasmanian devils to destroy it.
If you would like to see more solutions for boring bi-fold closet doors, check out these other DIY tutorials below..
More DIY Bi-Fold Closet Door Tutorials:
- Double Pantry Door DIY
- DIY Sliding Barn Door to Replace Bi-fold Closet Doors
- 15 DIY Bifold Door Makeover Ideas on a Budget
Thank you so much for stopping by this week! If you found this post helpful, it would mean the world if you could share it with a friend or on social media…

Now get out there and design some good vibes along with a fabulous life!


Welcome!
My journey in interior design and home improvement began with transforming my first fixer-upper home, all while managing a budget and raising two young boys. My work, a reflection of my passion for creating beautiful, uplifting spaces, has been recognized by top publications like Better Homes and Gardens Magazine, HGTV, and more. I invite you to explore my site and witness the transformation of my home and the vibes we've designed. Read more...


This looks like a million dollars. Fabulous makeover.
Thank you so much, Marty! 🙂
Erica-
Wow! They look gorgeous and that was a great way to transform budget doors.
Thanks for sharing!
Thank you so much, Donna! It was nice to do a door project again. Those are my favorite. 🙂
My friend you are the queen of taking the boring and making it beautiful!!!!!!!!!!!!!!
Always love your DIY tutorials:)
Well thank you so much, Maria. You are the best! 🙂
I thought they were NEW doors! That looks definitively 1000x better and stylish!!!!!!
Thank you so much, Michel. That means a lot. 🙂
These look great. I did a similar treatment to my bed room door. I meant to do all the doors but we are old so maybe I’ll just hire someone to do them all?
Just for your information: Before the “Tasmanian Devil” there was “The Wild Man of Borneo”. That’s what my mom use to call us as kids. Mom would have been 102 on Nov. 6th. Thank you for letting me remember her again.
I adore this story about your mom, Jeanie. haha! Thank you so much for sharing. Wishing you a great week. 🙂
Can you tell me how wide the molding you used is? An inch or inch and a half?? THANKS!
Hi Mandy! I went back into my photos to try to find out what size I used (I no longer live in that house) and unfortunately I cannot find any info as to what size I went with. But it looks like the standard size of ply cap is an inch. Sorry i could not be of more help!
I am thinking of doing this on a closet that also has hollow doors. How is it holding up with brad nails? I was worried they wouldn’t have any substance to hold onto in the doors so was thinking of using an adhesive instead.
Hi Shannon! I wish I could give you a report on the closet doors, but I no longer live in that house. Good luck with your project, and sorry I couldn’t be of more help. 🙂