

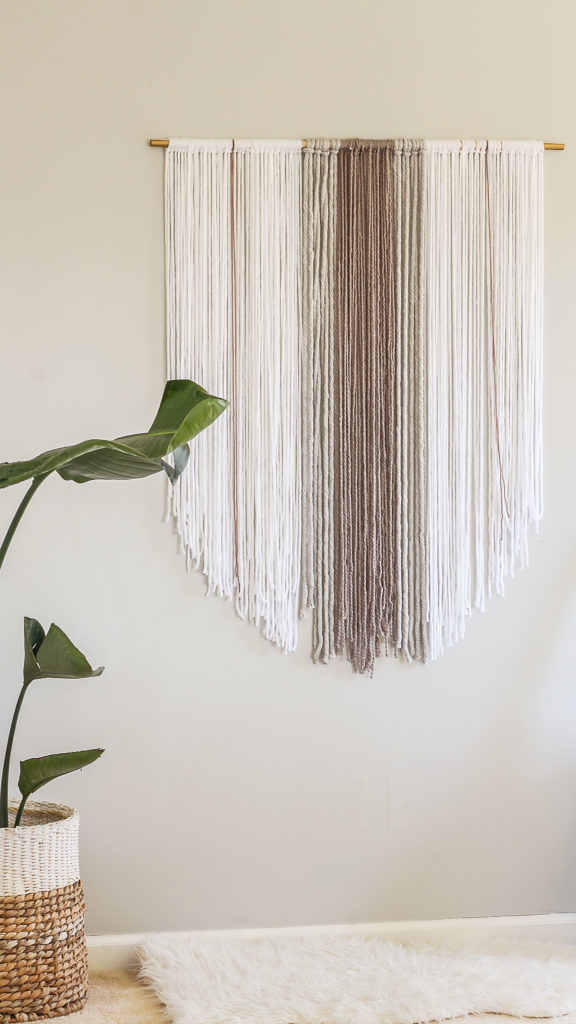
I have been swooning over woven wall hangings for the longest time, but never committed to making one myself because in all honesty, I possess absolutely no sewing skills what-so-freaking-ever, friends.
After prematurely deciding that making a woven tapestry myself would be too time-consuming and difficult, I began browsing Etsy for over-sized varieties, and quickly discovered that if I wanted a substantial piece, it was going to cost me at least $200. With all of the major home improvement projects I have been saving for recently, I thought it would be financially irresponsible not to try my hand at making one myself. After all, I am a DIY blogger.
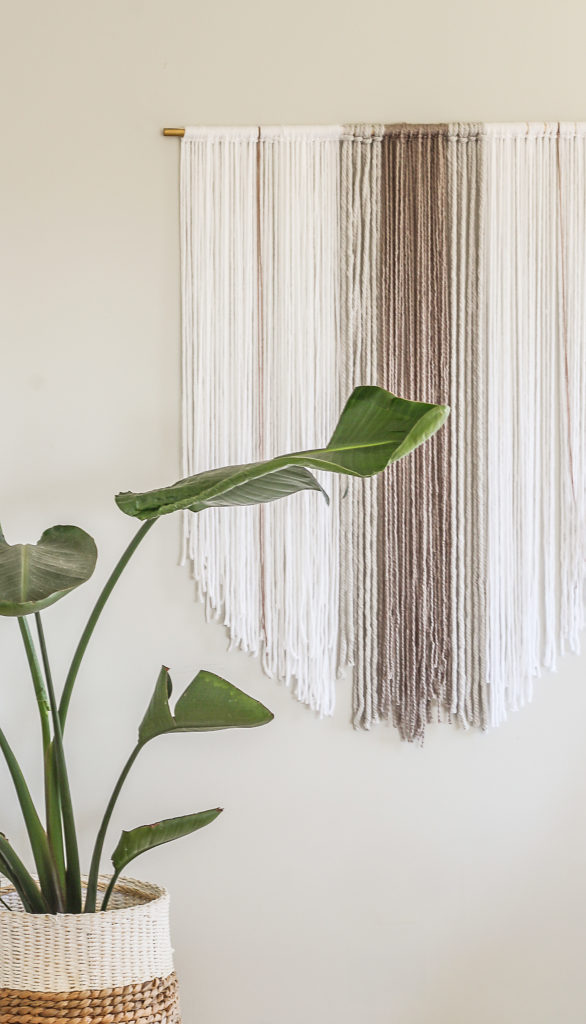
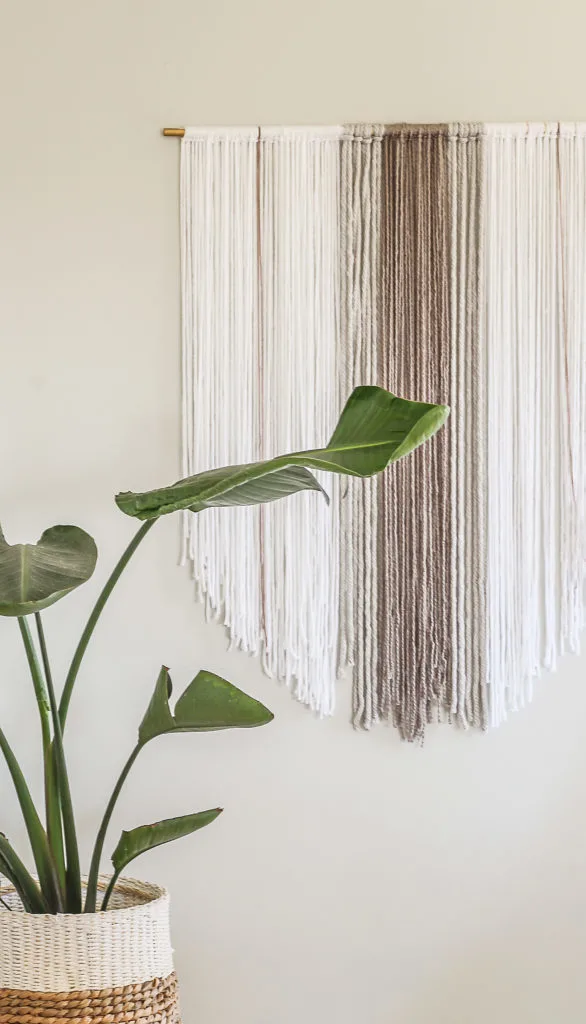
After doing a little research, I decided to forgo the macrame (because it was a little intimidating) and yarn seemed the most user-friendly. To my satisfaction, this project ended up being stupid easy (not to mention therapeutic)! So, let me show you how I made this large wall hanging for around $20.
Woven Tapestry Materials
- a variety of yarn ( I used 5 packs- with 4 different colors and varying thickness.)
- scissors
- 3 ft long dowel rod
- jute (optional)
- gold spray paint (optional)
(Step 1)If you want to add a pop of glam to your wall hanging, you can spray paint your rod gold or copper. Initially I was unsure, but eventually decided to paint mine gold. Just be sure the rod is dry before proceeding. Heck… if you wanted to go a little more rustic,you could use a tree branch.
(Step 2) I already knew exactly where I wanted to hang my tapestry, so I went ahead and tied some jute to the ends of my dowel rod and hung it in the position I knew I wanted it. This gave me a good idea of how to cut the yarn dimensions as well. The jute simply stabilized the rod for me as I worked.
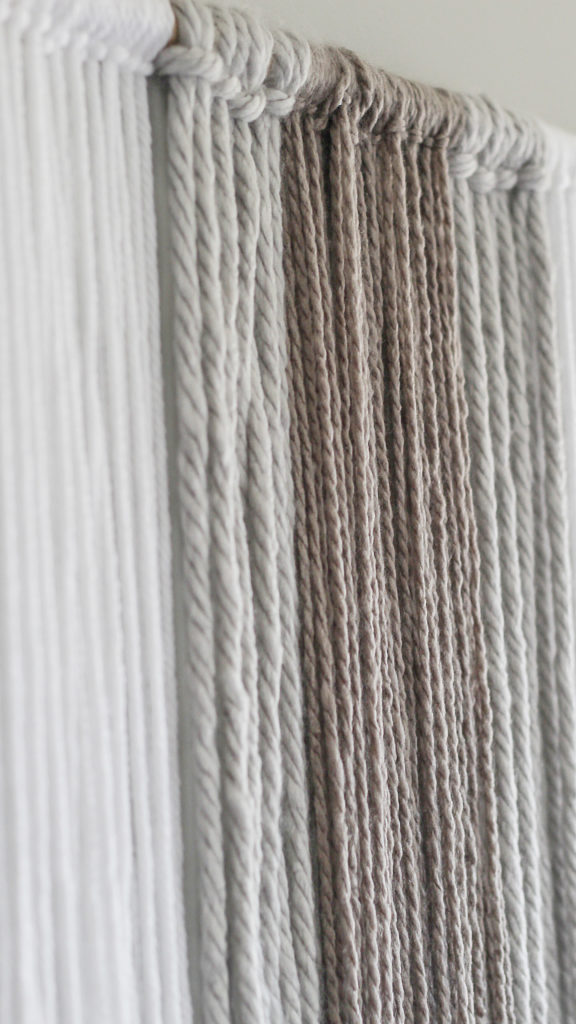
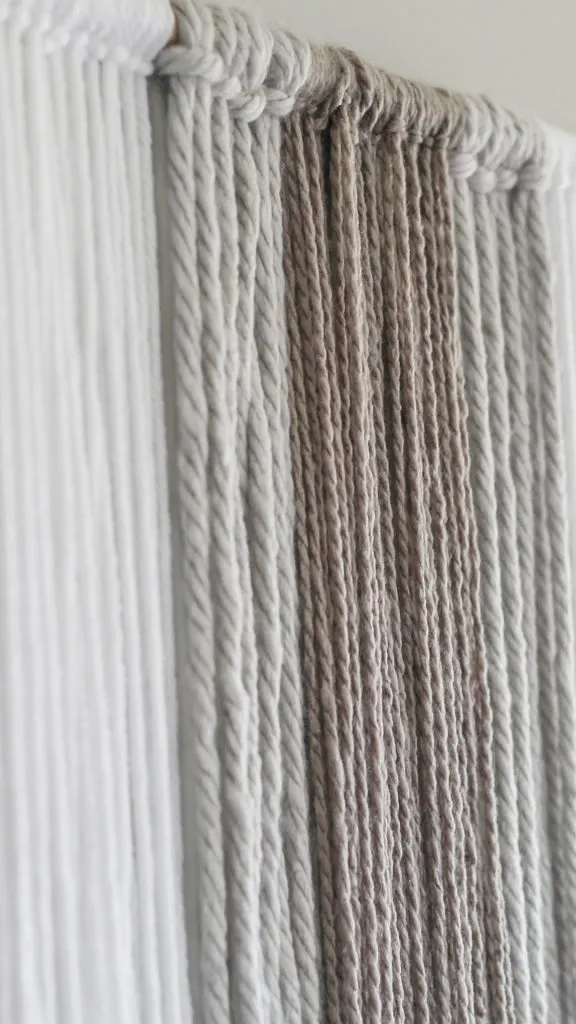
(Step 3) Decide on a color scheme when choosing your yarn. I used four different colors, and purchased yarn in various thickness.
(Step 4) Cut your yarn. I already knew what shape I wanted my tapestry to be, so I decided to make my outside pieces short and gradually extend the length of the yarn as I worked my way to the center. You will need to be sure you cut the pieces double the length you want them to hang. As you can tell, I was not precise about making my cuts….I just eyeballed it and hoped for the best. Just have fun with it! I found it most efficient to cut the yarn in batches.
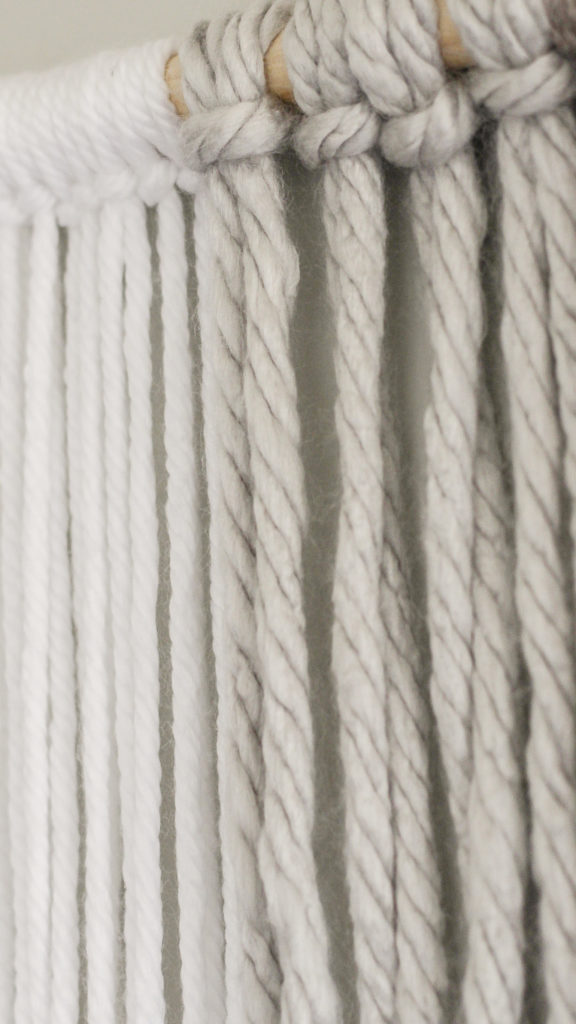
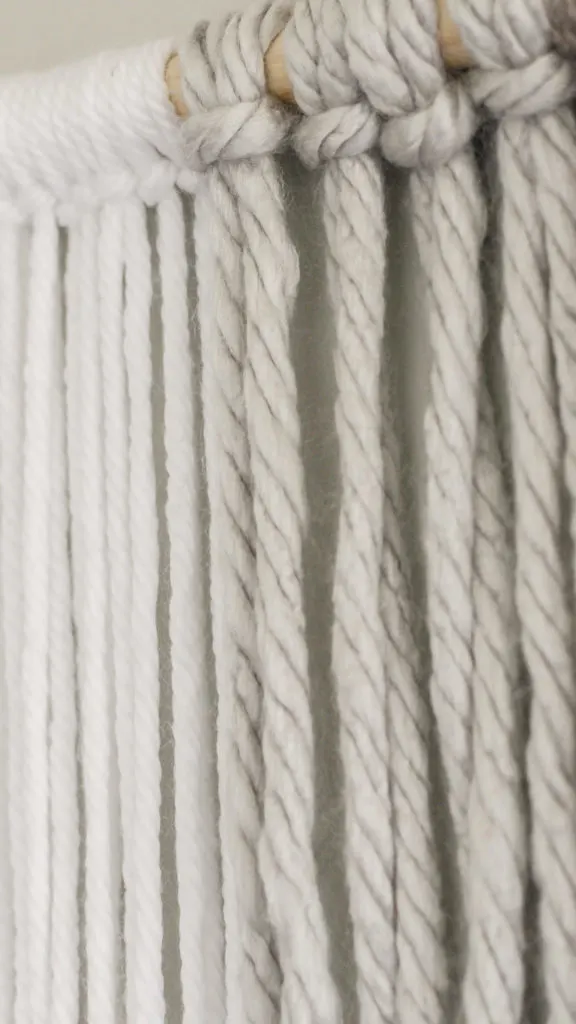
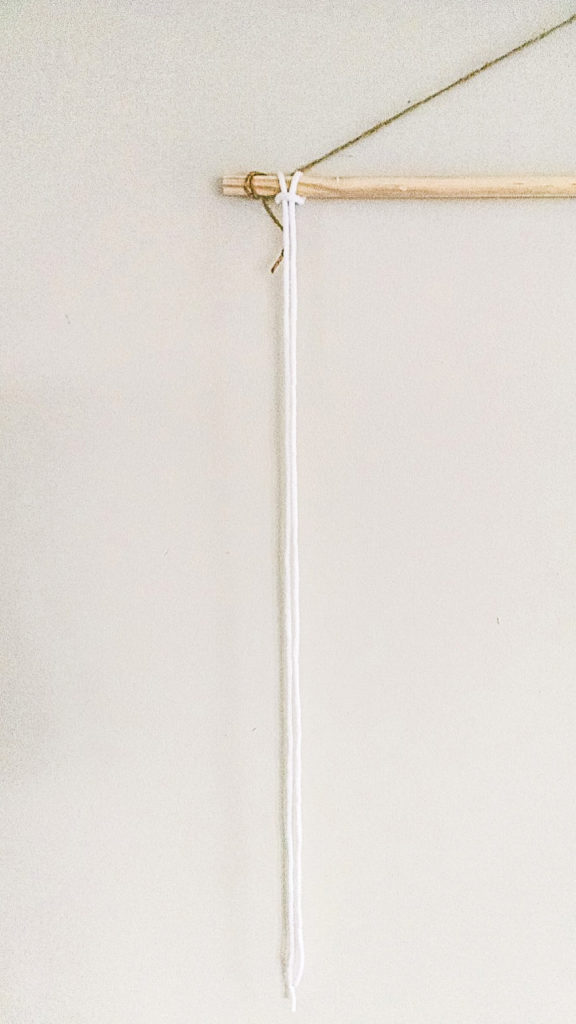
(Step 5) Tie your yarn onto the dowel like you would tie a luggage tag onto a suitcase. Fold the yarn in half, make sure the loop is underneath the dowel and then pull the ends of the yarn through the loop tightly. You will repeat this process until you are satisfied with the width of the wall hanging.
(Step 6) Once I decided that my tapestry was full enough, I decided to cut the jute off of my dowel and hang the rod directly on top of a thick, heavy-duty nail. Essentially, the dowel rod is balancing on top of the nail. If you prefer the look of the jute simply keep it.
(Step 7) Make final adjustments to length, colors or general composition. If you want to add more shape to your wall hanging, simply cut the yarn more distinctly. Not happy with the colors or the composition? You can always untie the pieces you don’t like and start over. No biggie!
(Step 8) Admire the shiznit out of your beautiful creation and pour yourself a cocktail.
Related Wall Art Ideas:
- DIY Hat Gallery Wall
- Easy Faux Selfie Hedge Wall
- Renter Friendly Accent Wall with Temporary Wallpaper
Now get out there and design some good vibes. Be sure to spread the love and pin!…


Welcome!
My journey in interior design and home improvement began with transforming my first fixer-upper home, all while managing a budget and raising two young boys. My work, a reflection of my passion for creating beautiful, uplifting spaces, has been recognized by top publications like Better Homes and Gardens Magazine, HGTV, and more. I invite you to explore my site and witness the transformation of my home and the vibes we've designed.Read more...
Karrrie
Saturday 10th of March 2018
Love it sista! Been wanting to make one myself, too!!! Thanks for the inspiration!
Designing Vibes
Sunday 11th of March 2018
Thank you so much, hun! It was really fun and therapeutic to make.
Judy T Phelps
Wednesday 7th of March 2018
I seriously love this! I simply DROOL over the gorgeous yarns, but I don't crochet or knit. Thank you for giving me a reason to buy some! Also, original art is such a great way to use a specific color combination in a space that needs to be pulled together.
Designing Vibes
Wednesday 7th of March 2018
It was so easy to do, and even better, it was fun! I totally agree with you...when I need to tie in specific colors I frequently have to resort to DIY art. Best wishes, Judy!